Reviews
Armor
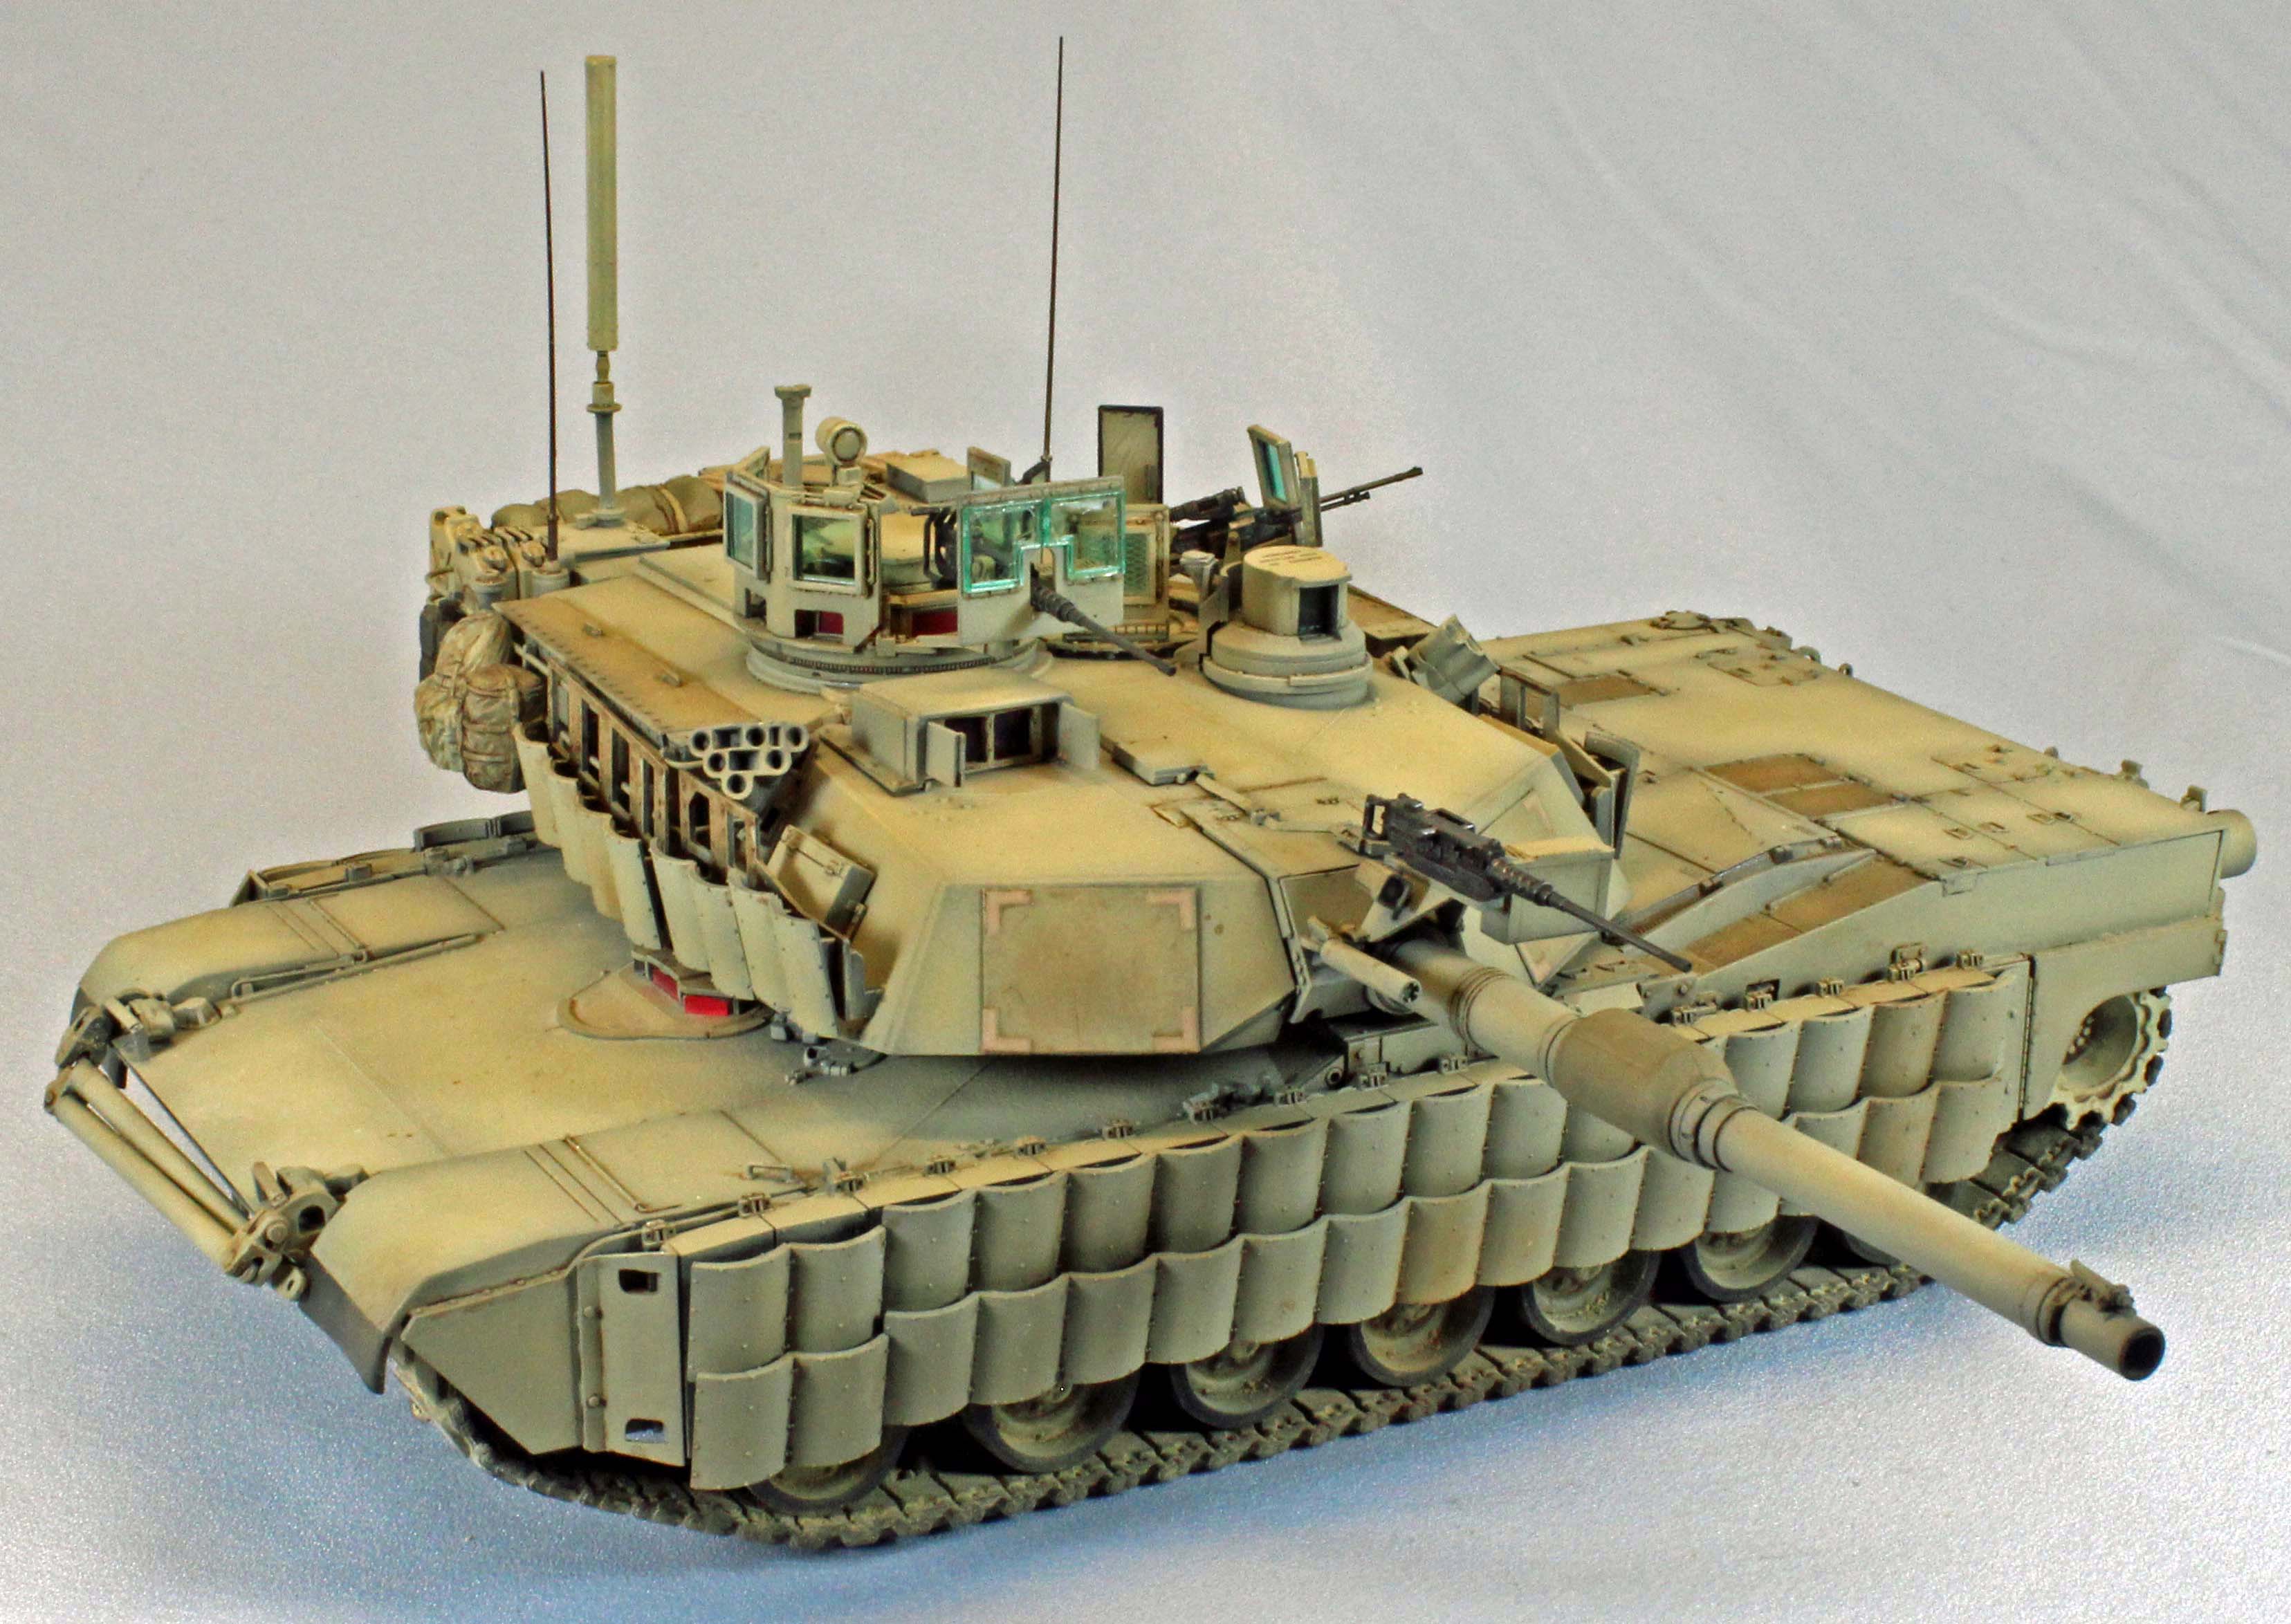
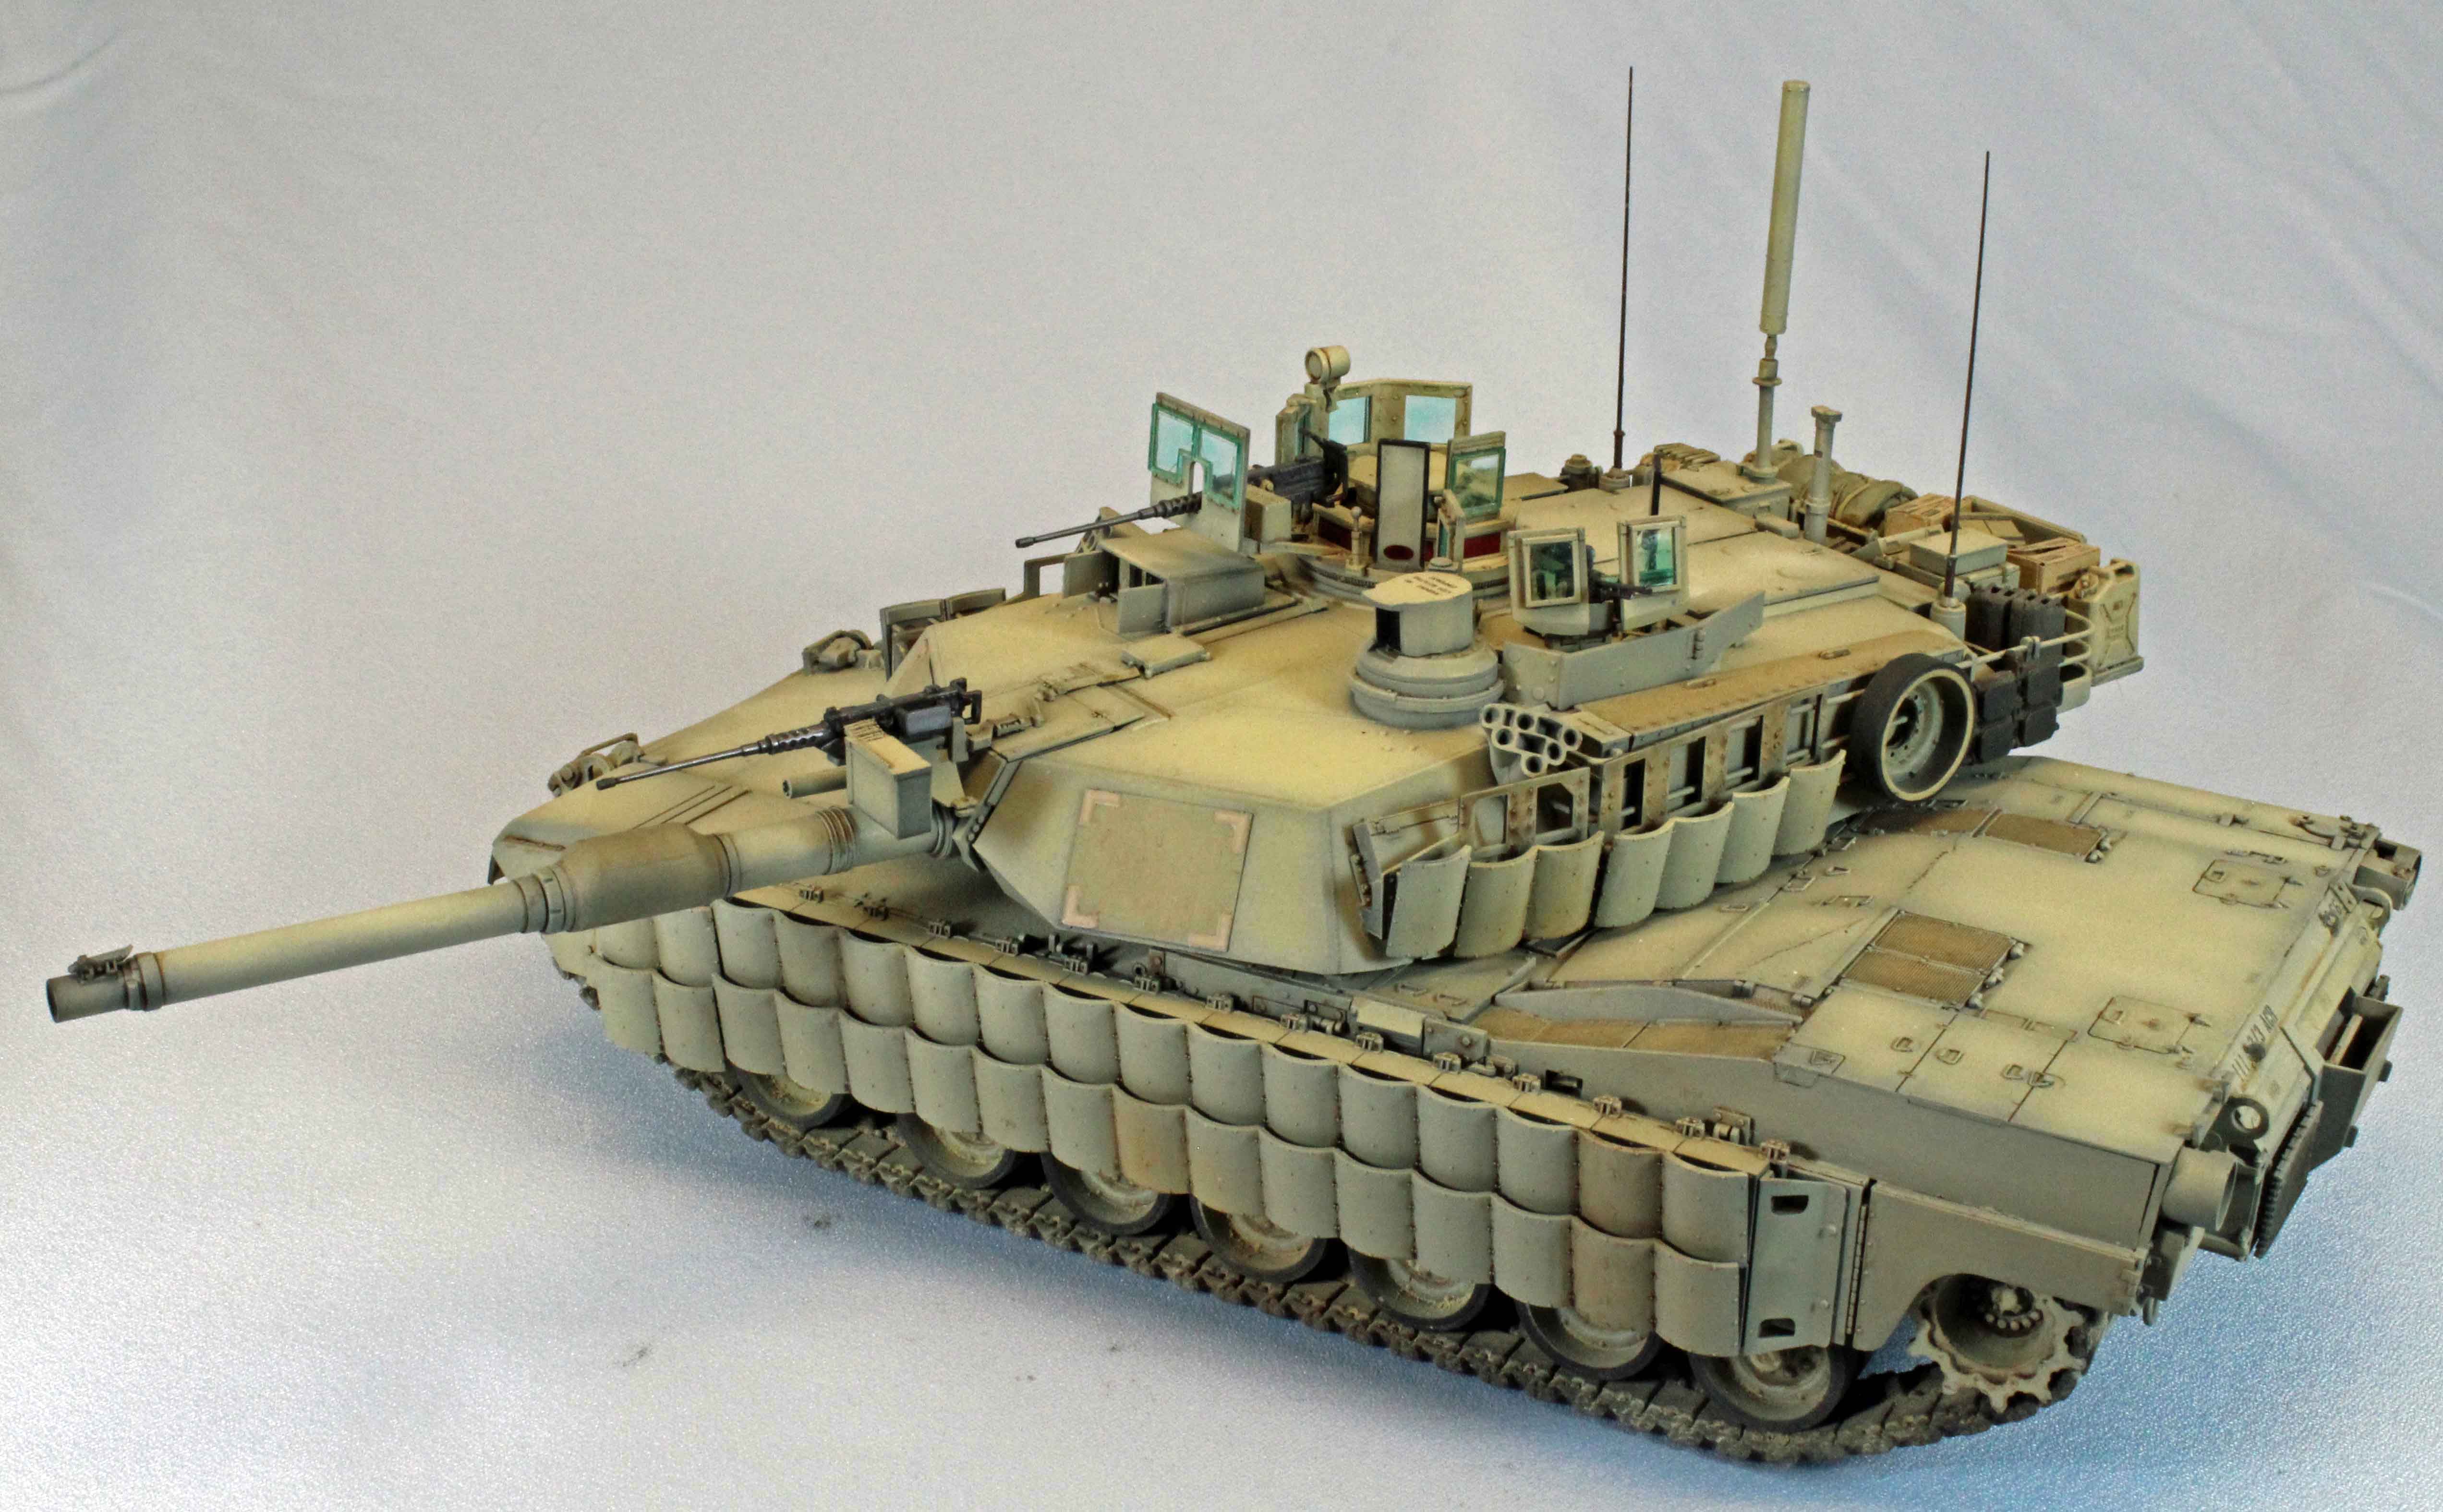
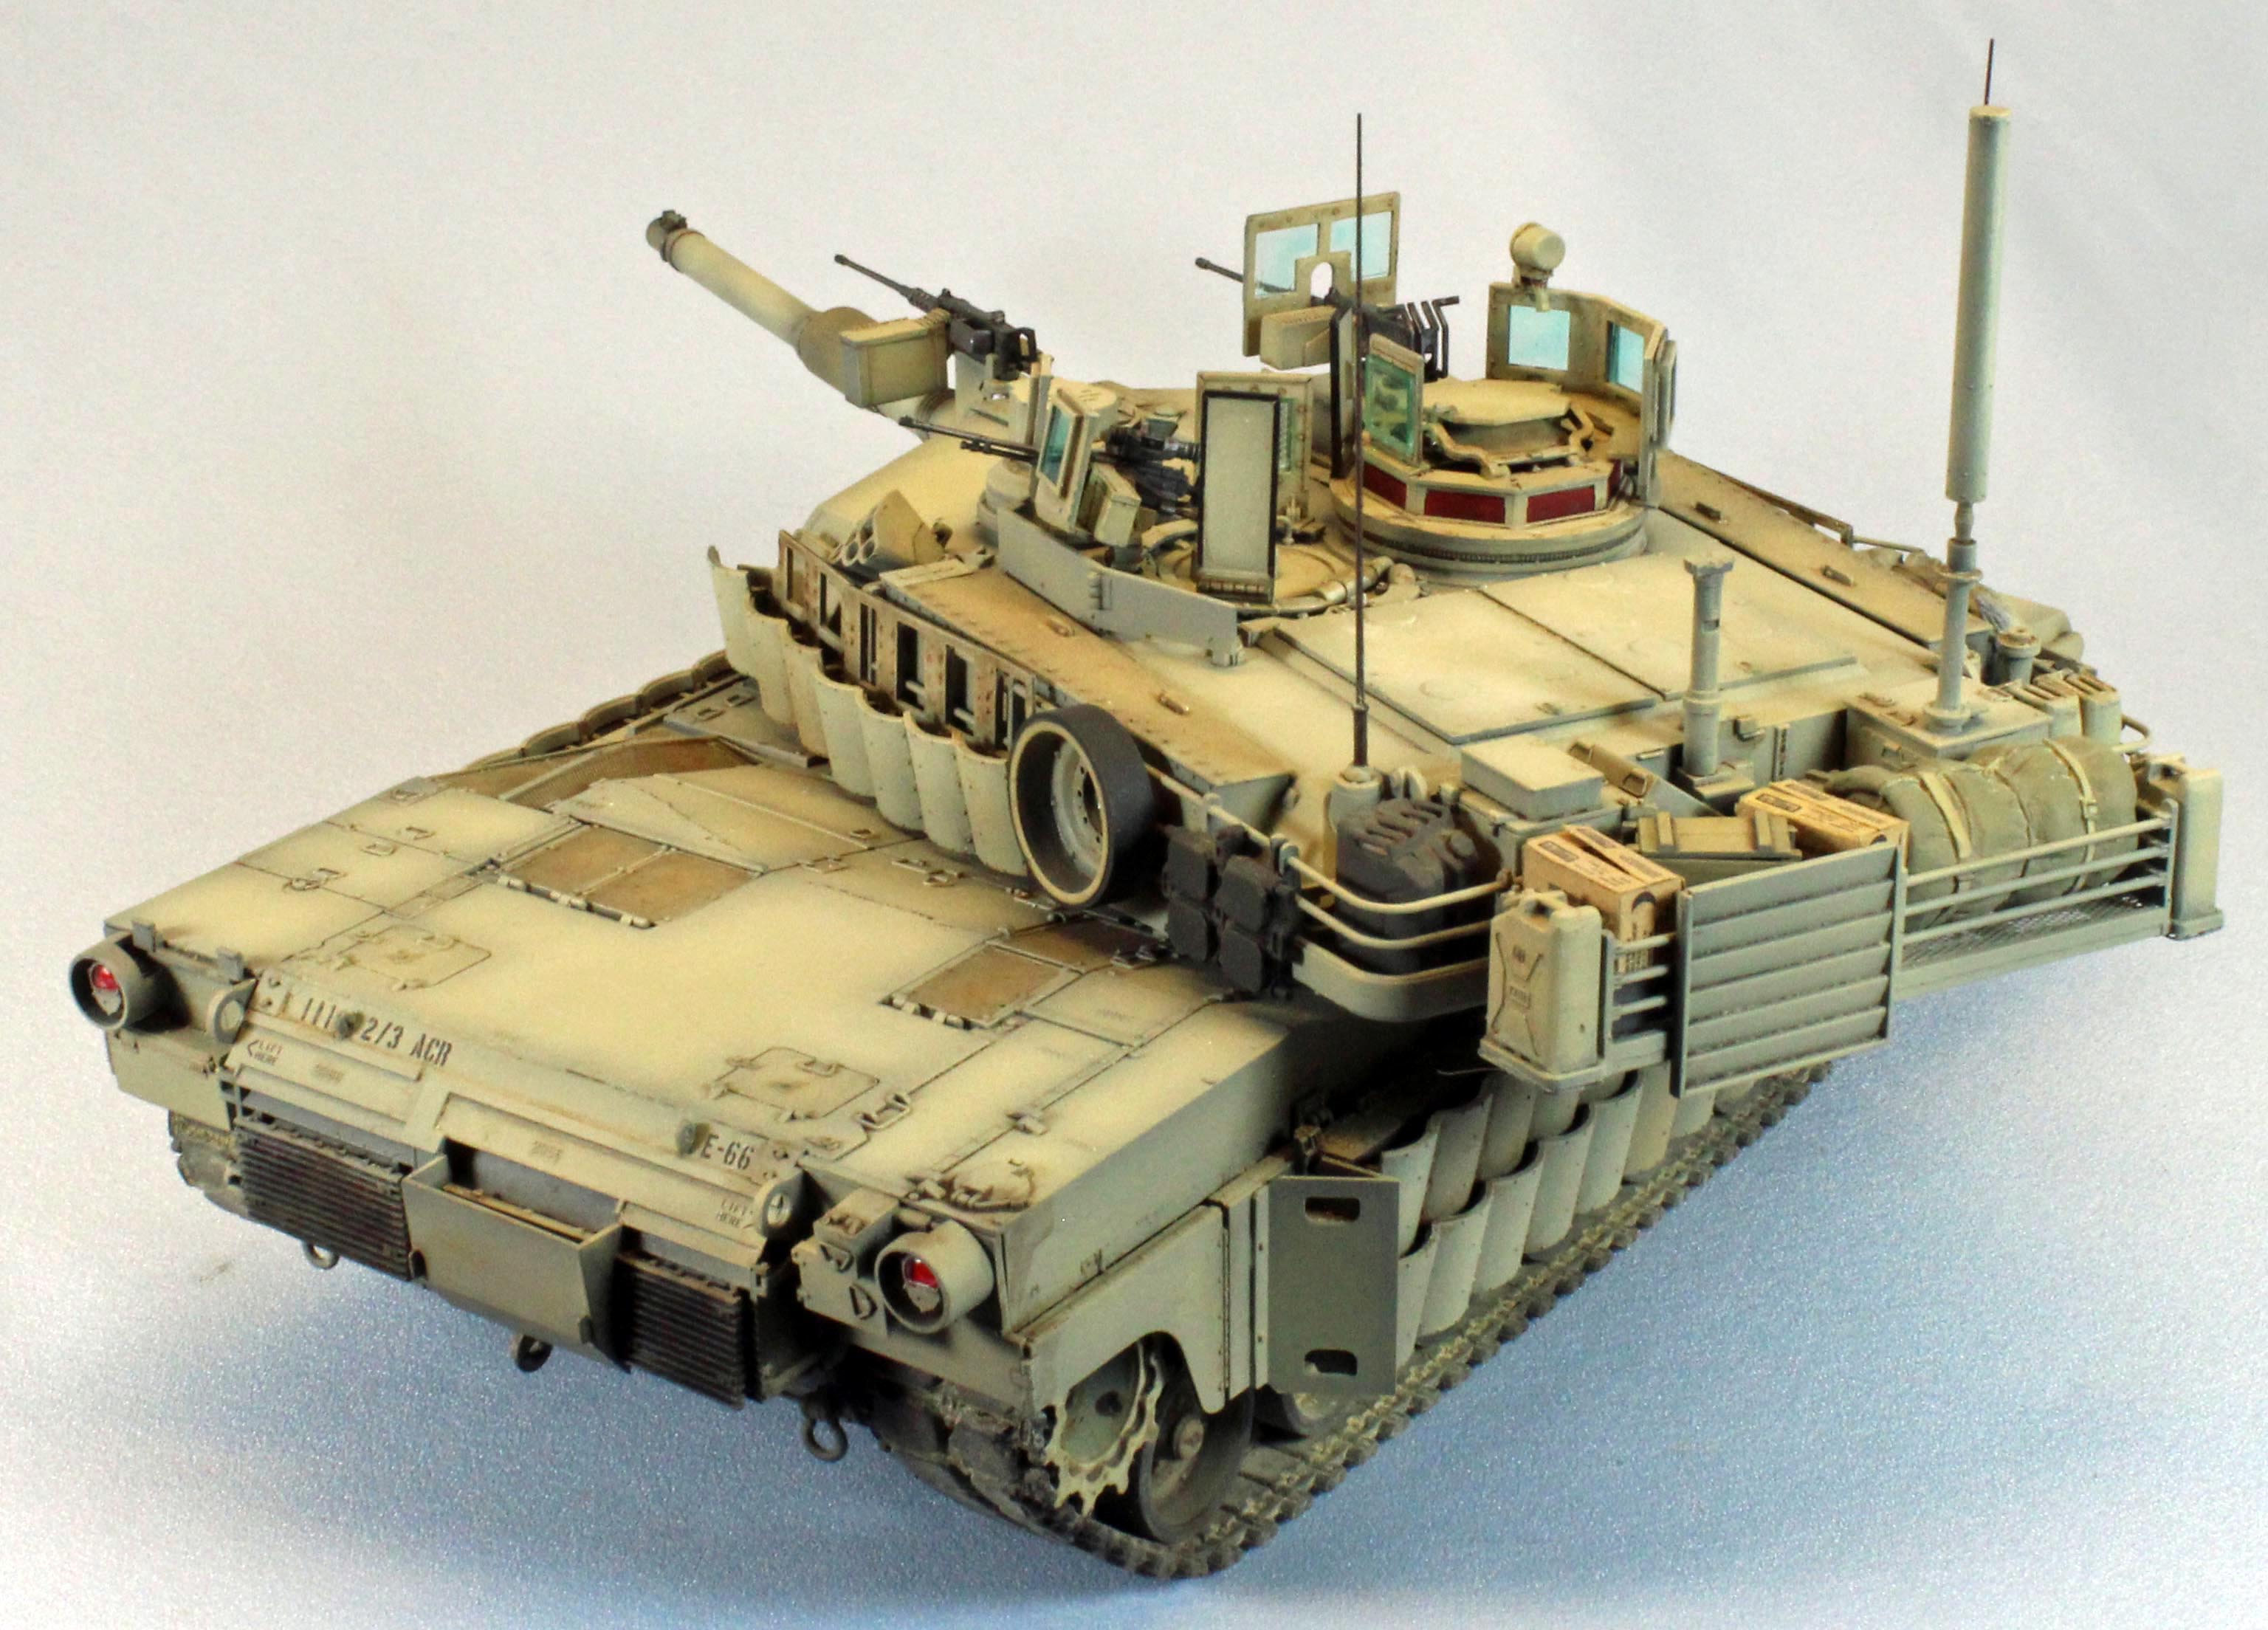
M1A2 Abrams TUSK II
by Eric Christianson
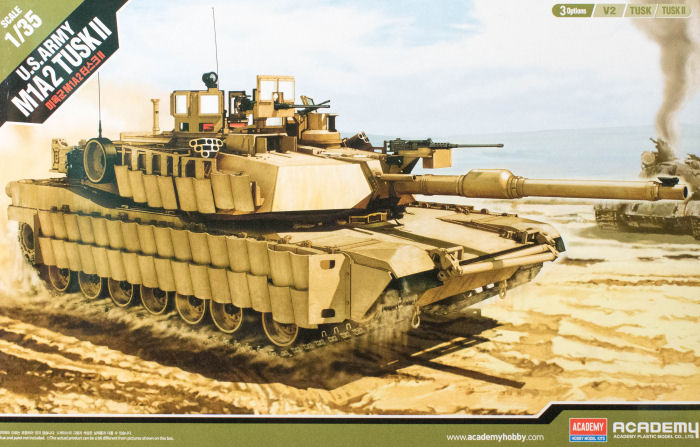 Model: M1A2 Abrams TUSK II
TUSK! (Tank Urban Survivability Kit)
Reviewed by: Eric Christianson, IPMS # 42218
Scale: 1/35
Company: Academy Models
Price: $59.00
Product/Stock #: 13298
Website: Dragon
Product Web Page: View
Product provided by: Academy Models
Summary
The new Academy armor kits area really something to behold. Their superb engineering and design focus on buildability, resulting in effortless assembly and a perfect fit. The company has somehow accomplished this without compromising on accuracy, and they’ve done so at an affordable price.
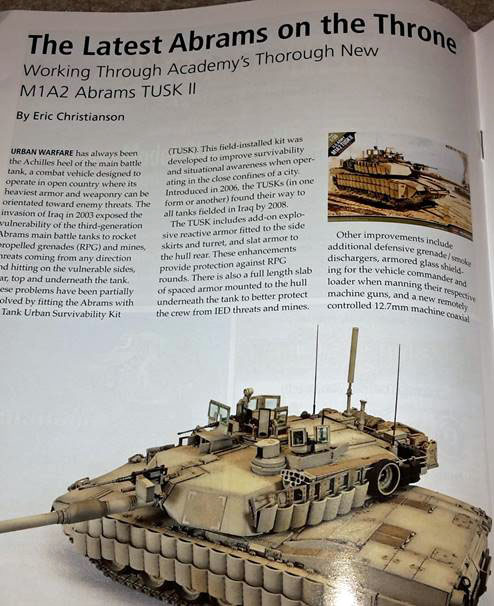
Background
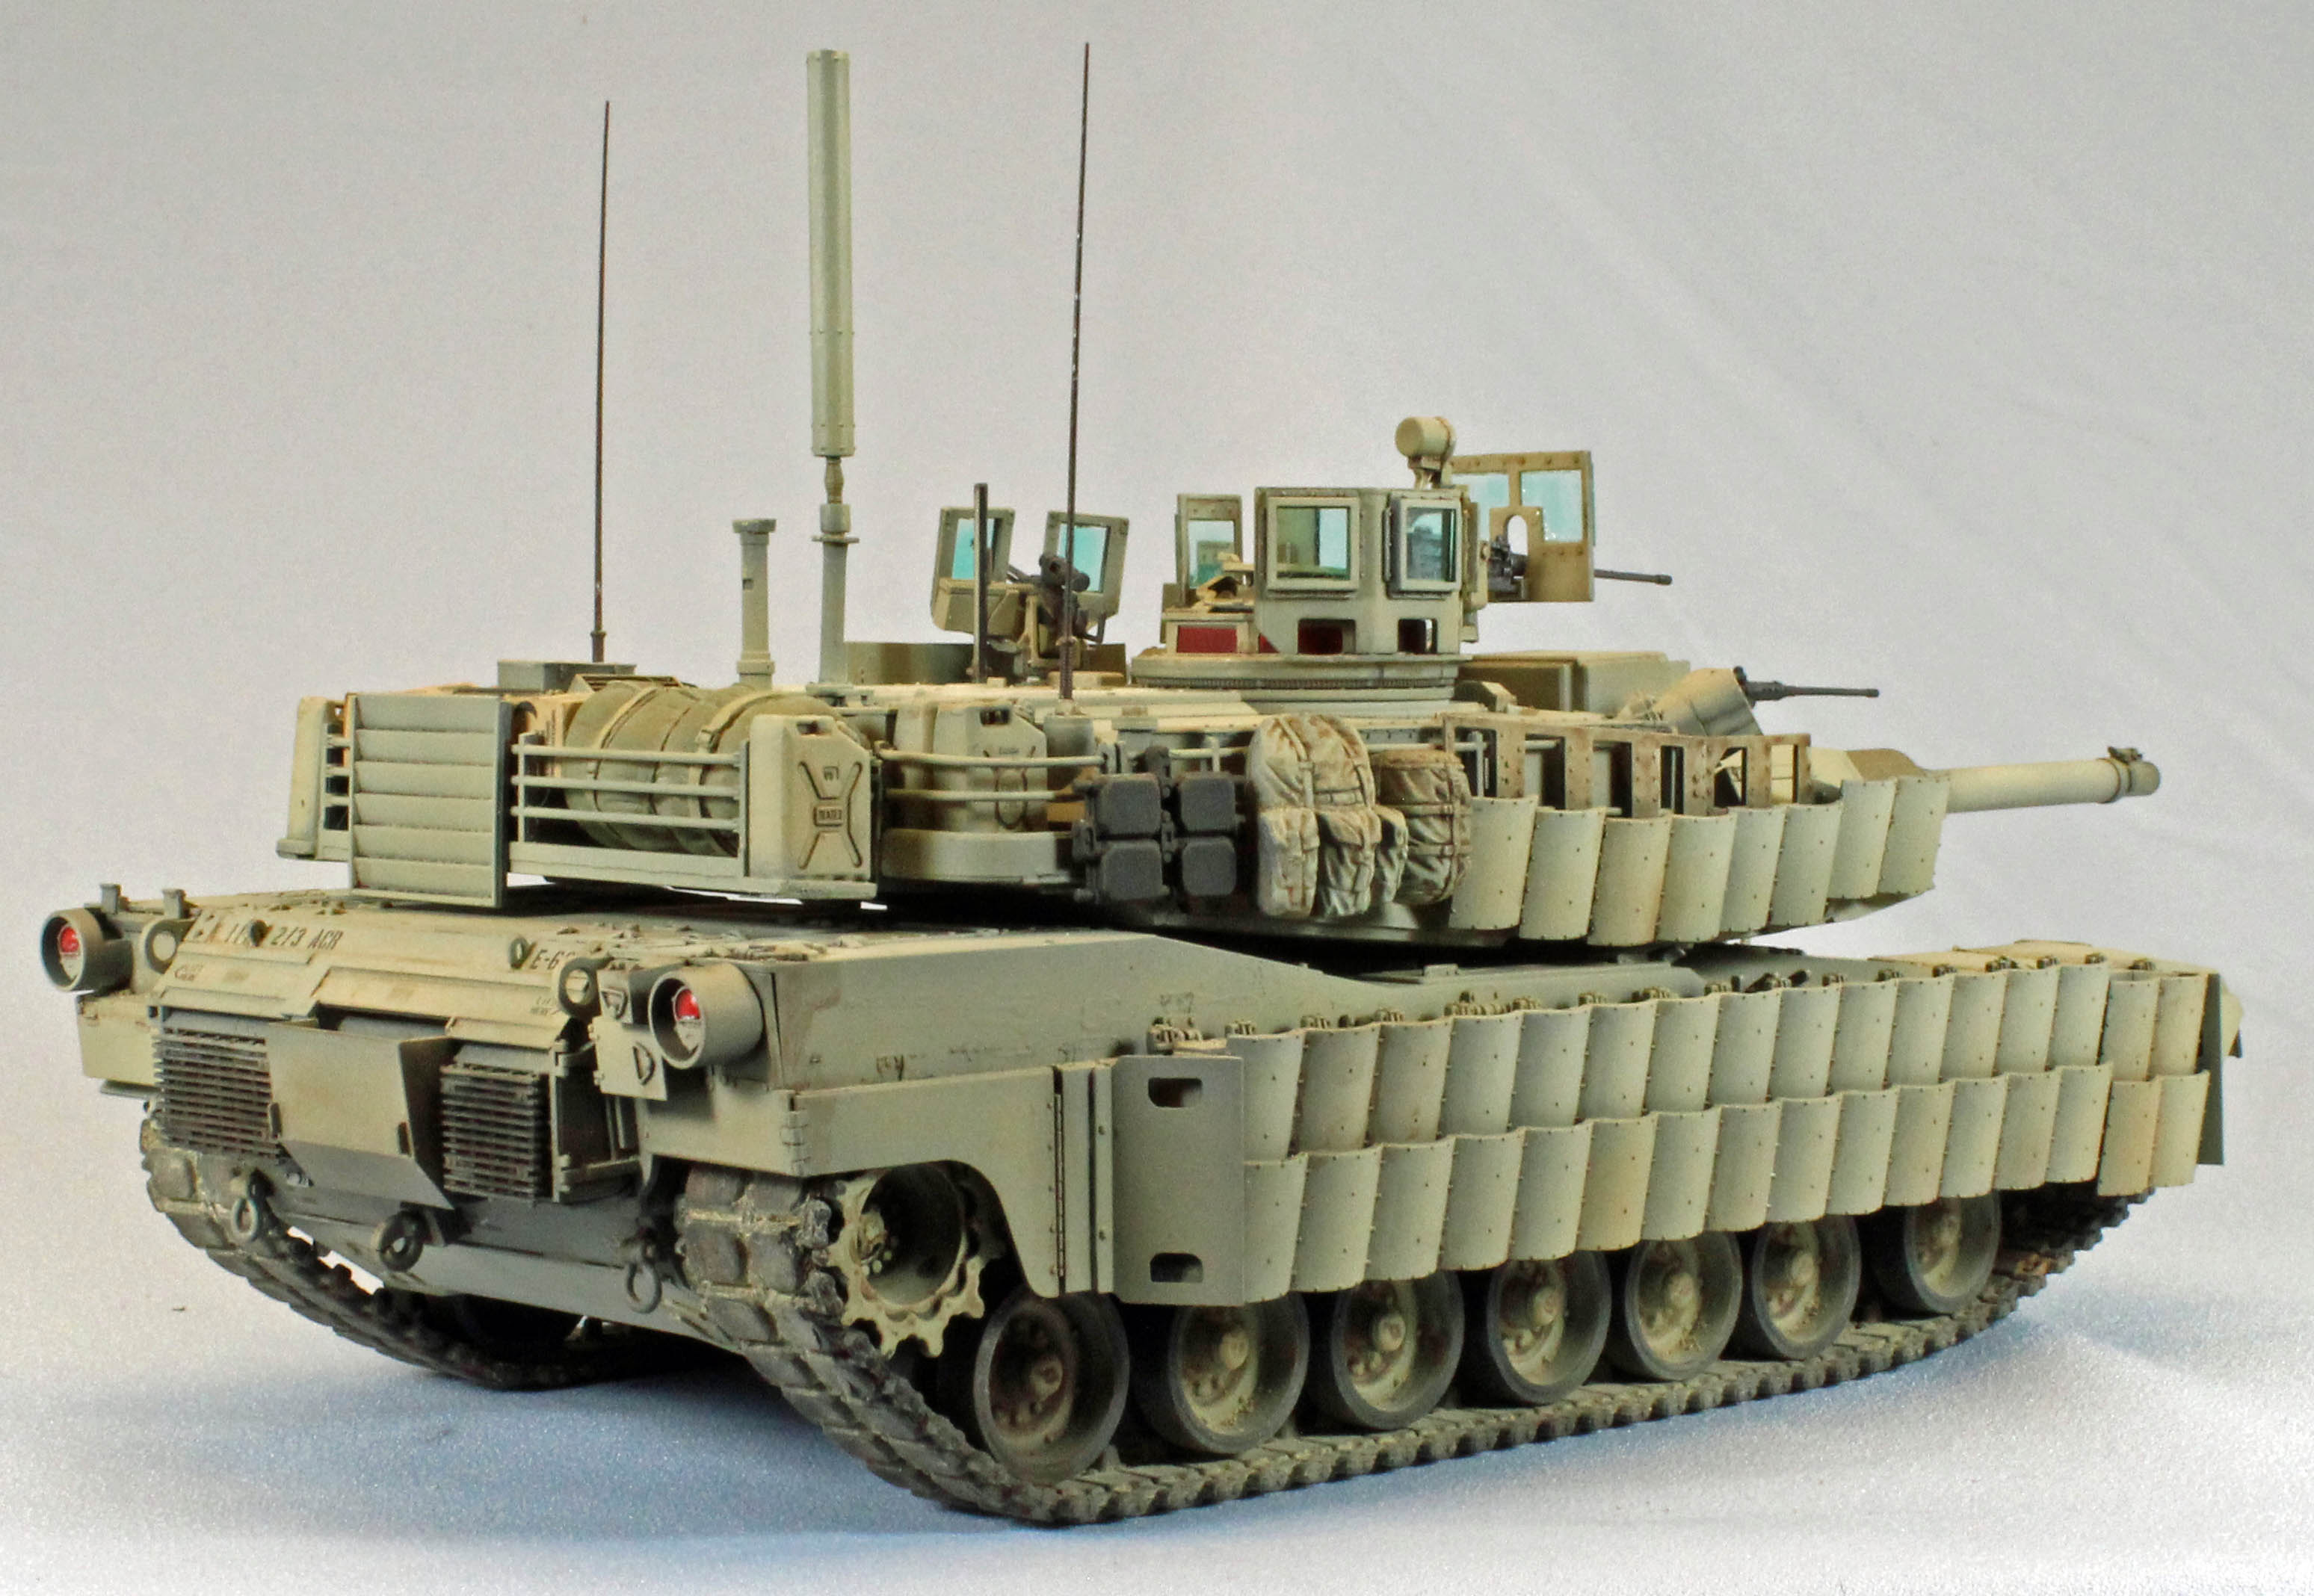
Urban warfare has always been the Achilles heel of the main battle tank; a combat vehicle designed to operate in open country where its heaviest armor and weaponry can be orientated toward enemy threats. The invasion of Iraq in 2003 exposed vulnerability of the third generation Abrams main battle tanks to rocket propelled grenades (RPG) and mines; threats coming from any direction and hitting on the vulnerable sides, rear, top and underneath the tank. These problems have been partially resolved by fitting the Abrams with the Tank Urban Survivability Kit (TUSK). This field-installed kit was developed to improve survivability and situational awareness when operating in the close confines of a city. Introduced in 2006, the TUSK’s (in one form or another) found their way to all tanks fielded in Iraq by 2008.
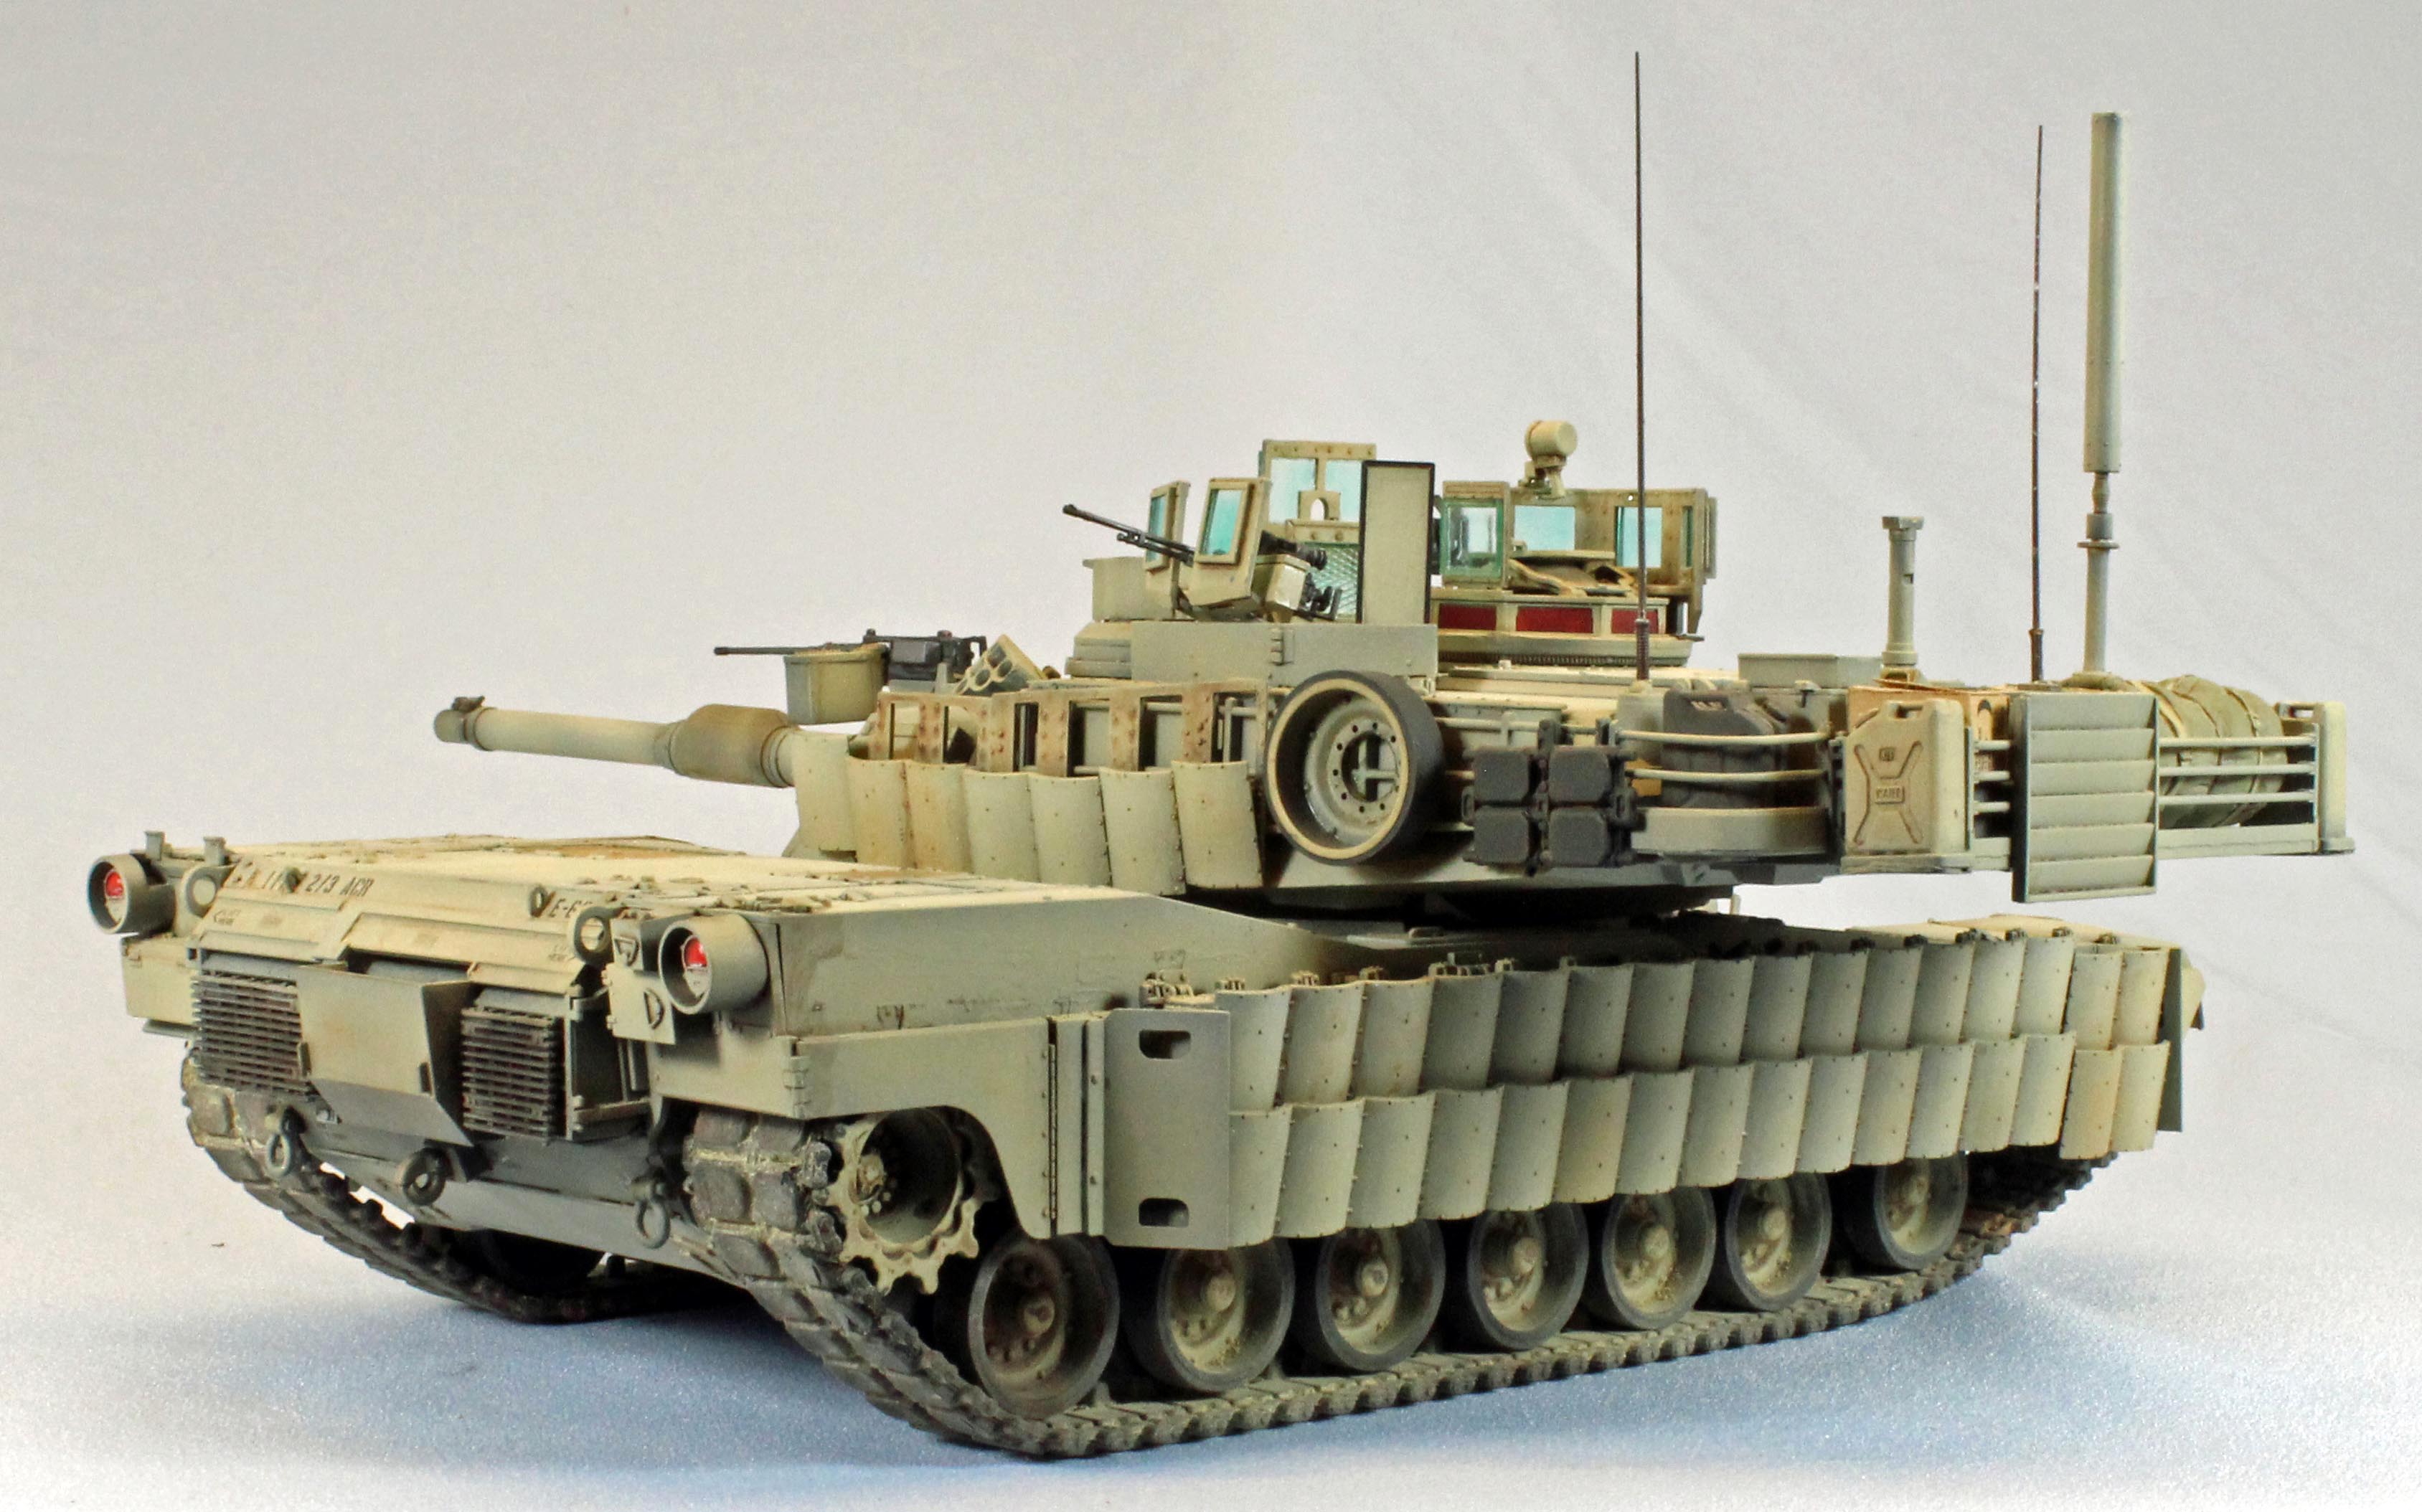
The TUSK includes add-on explosive reactive armor fitted to the side skirts and turret, and slat armor to the hull rear. These enhancements provide protection against RPG rounds. There is also a full length slab of spaced armor mounted to the hull underneath the tank to better protect the crew from IED threats and mines.
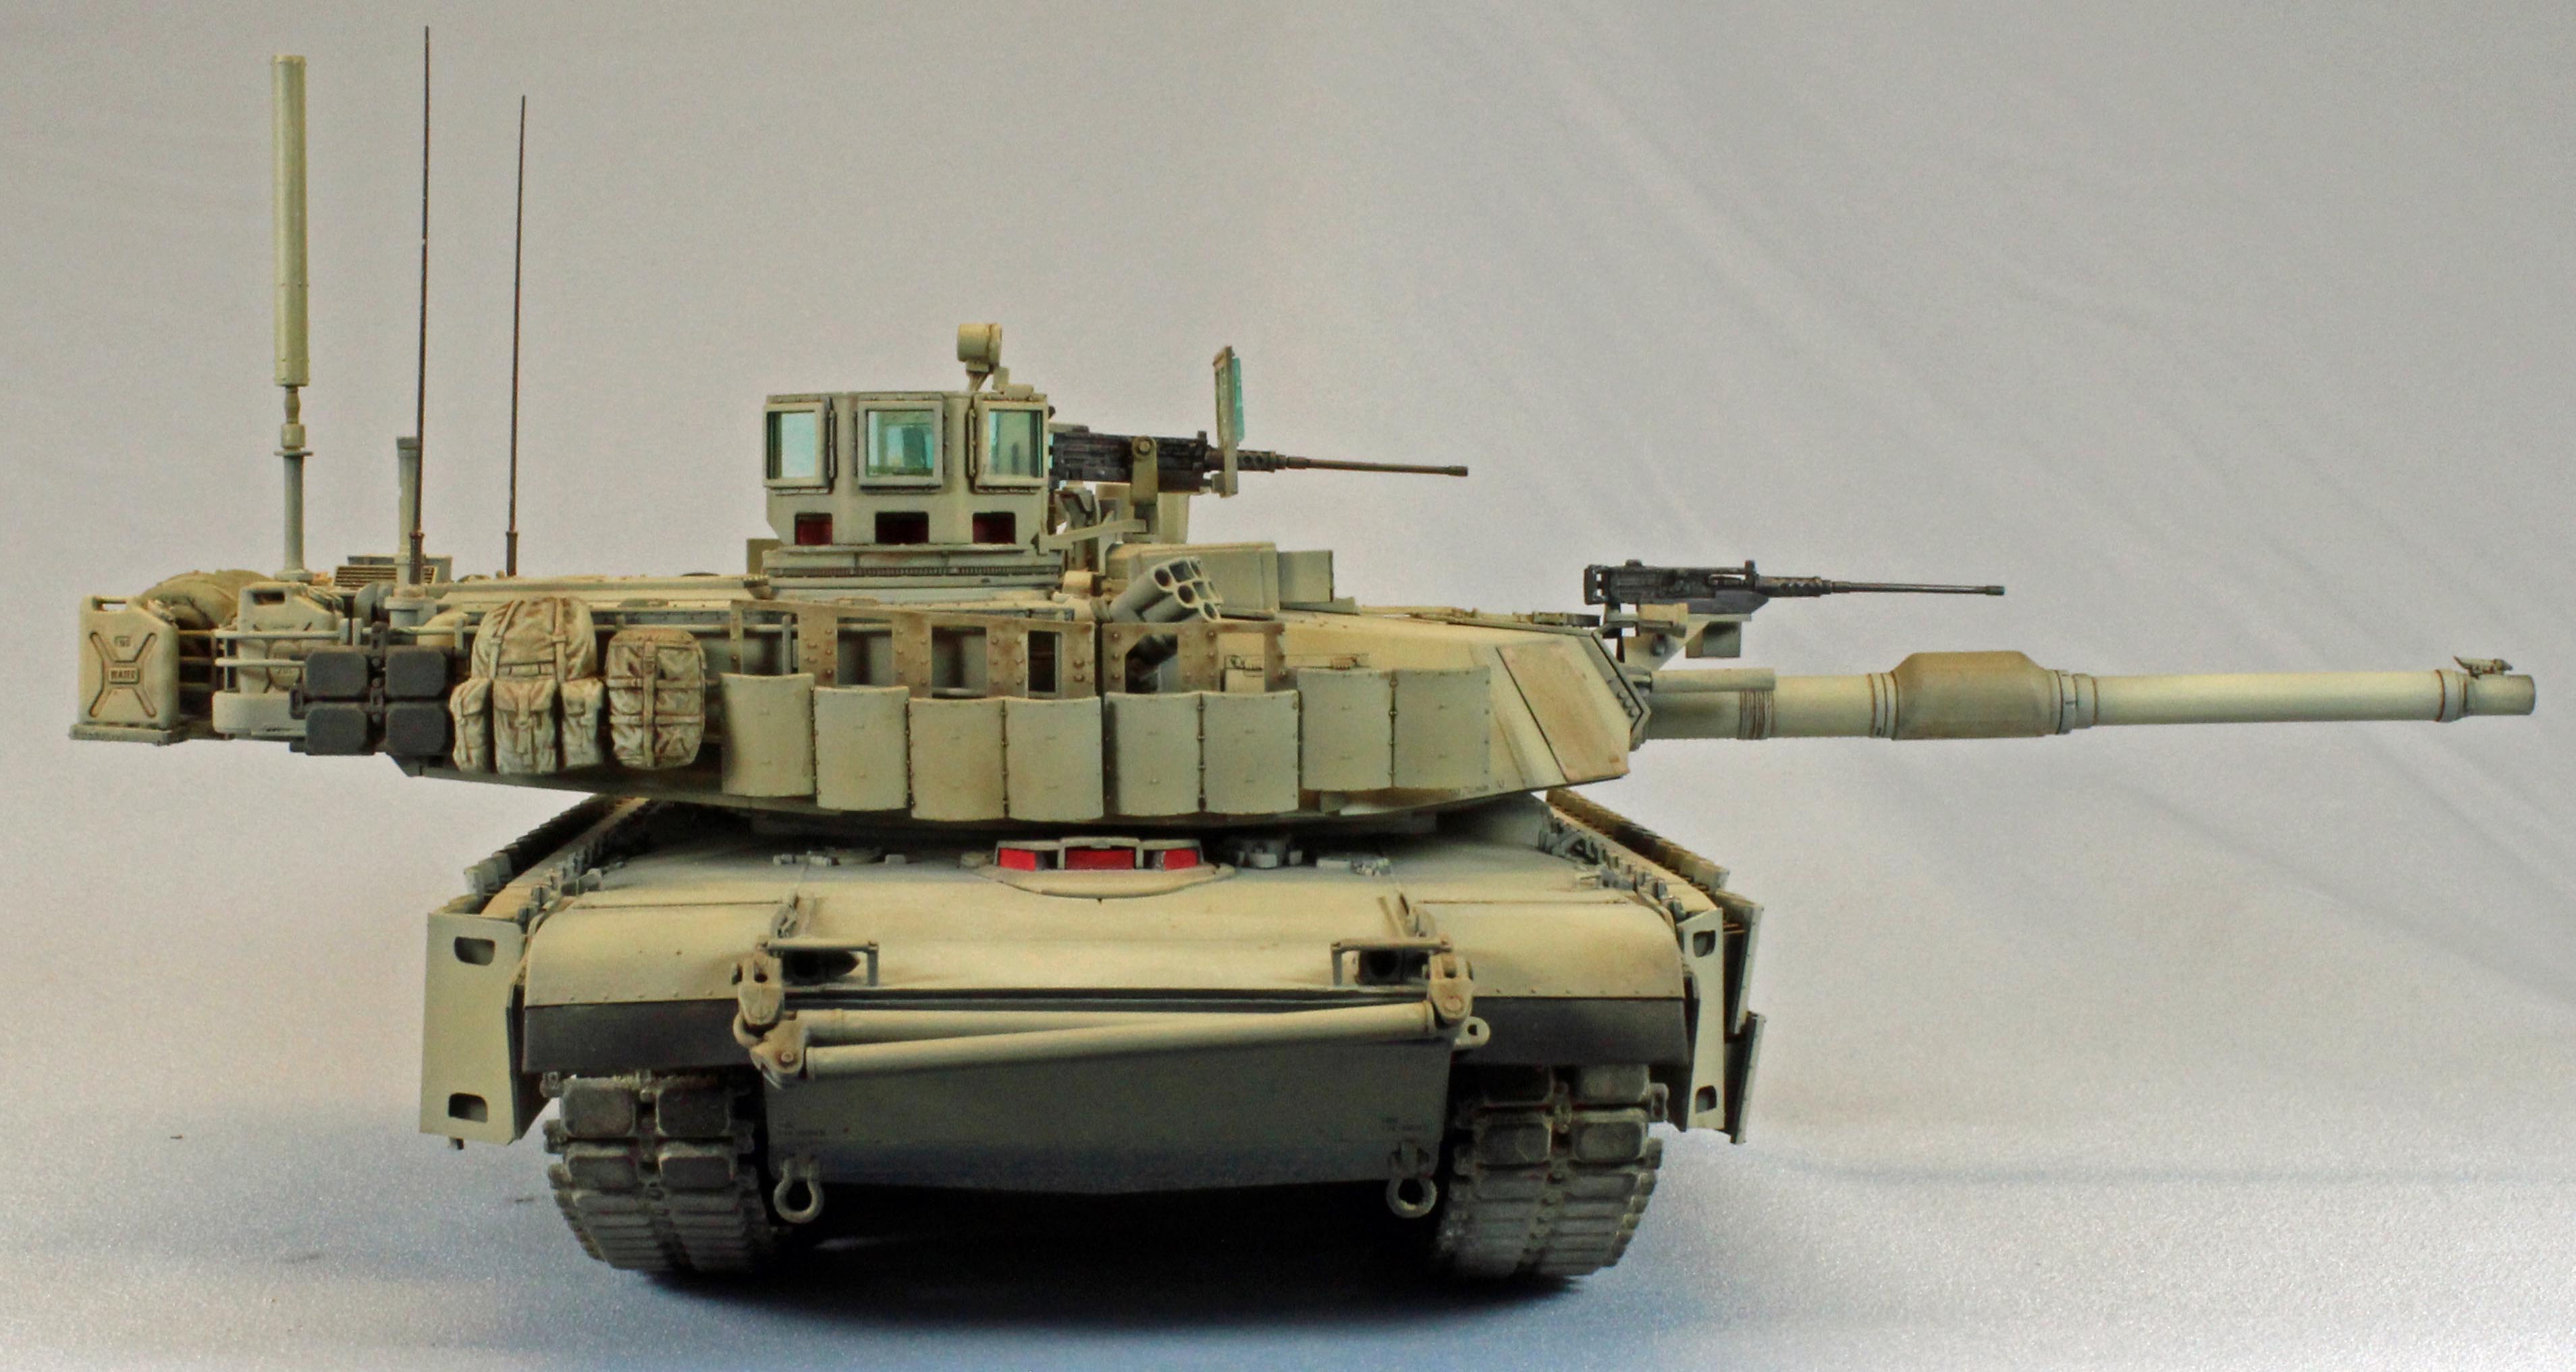
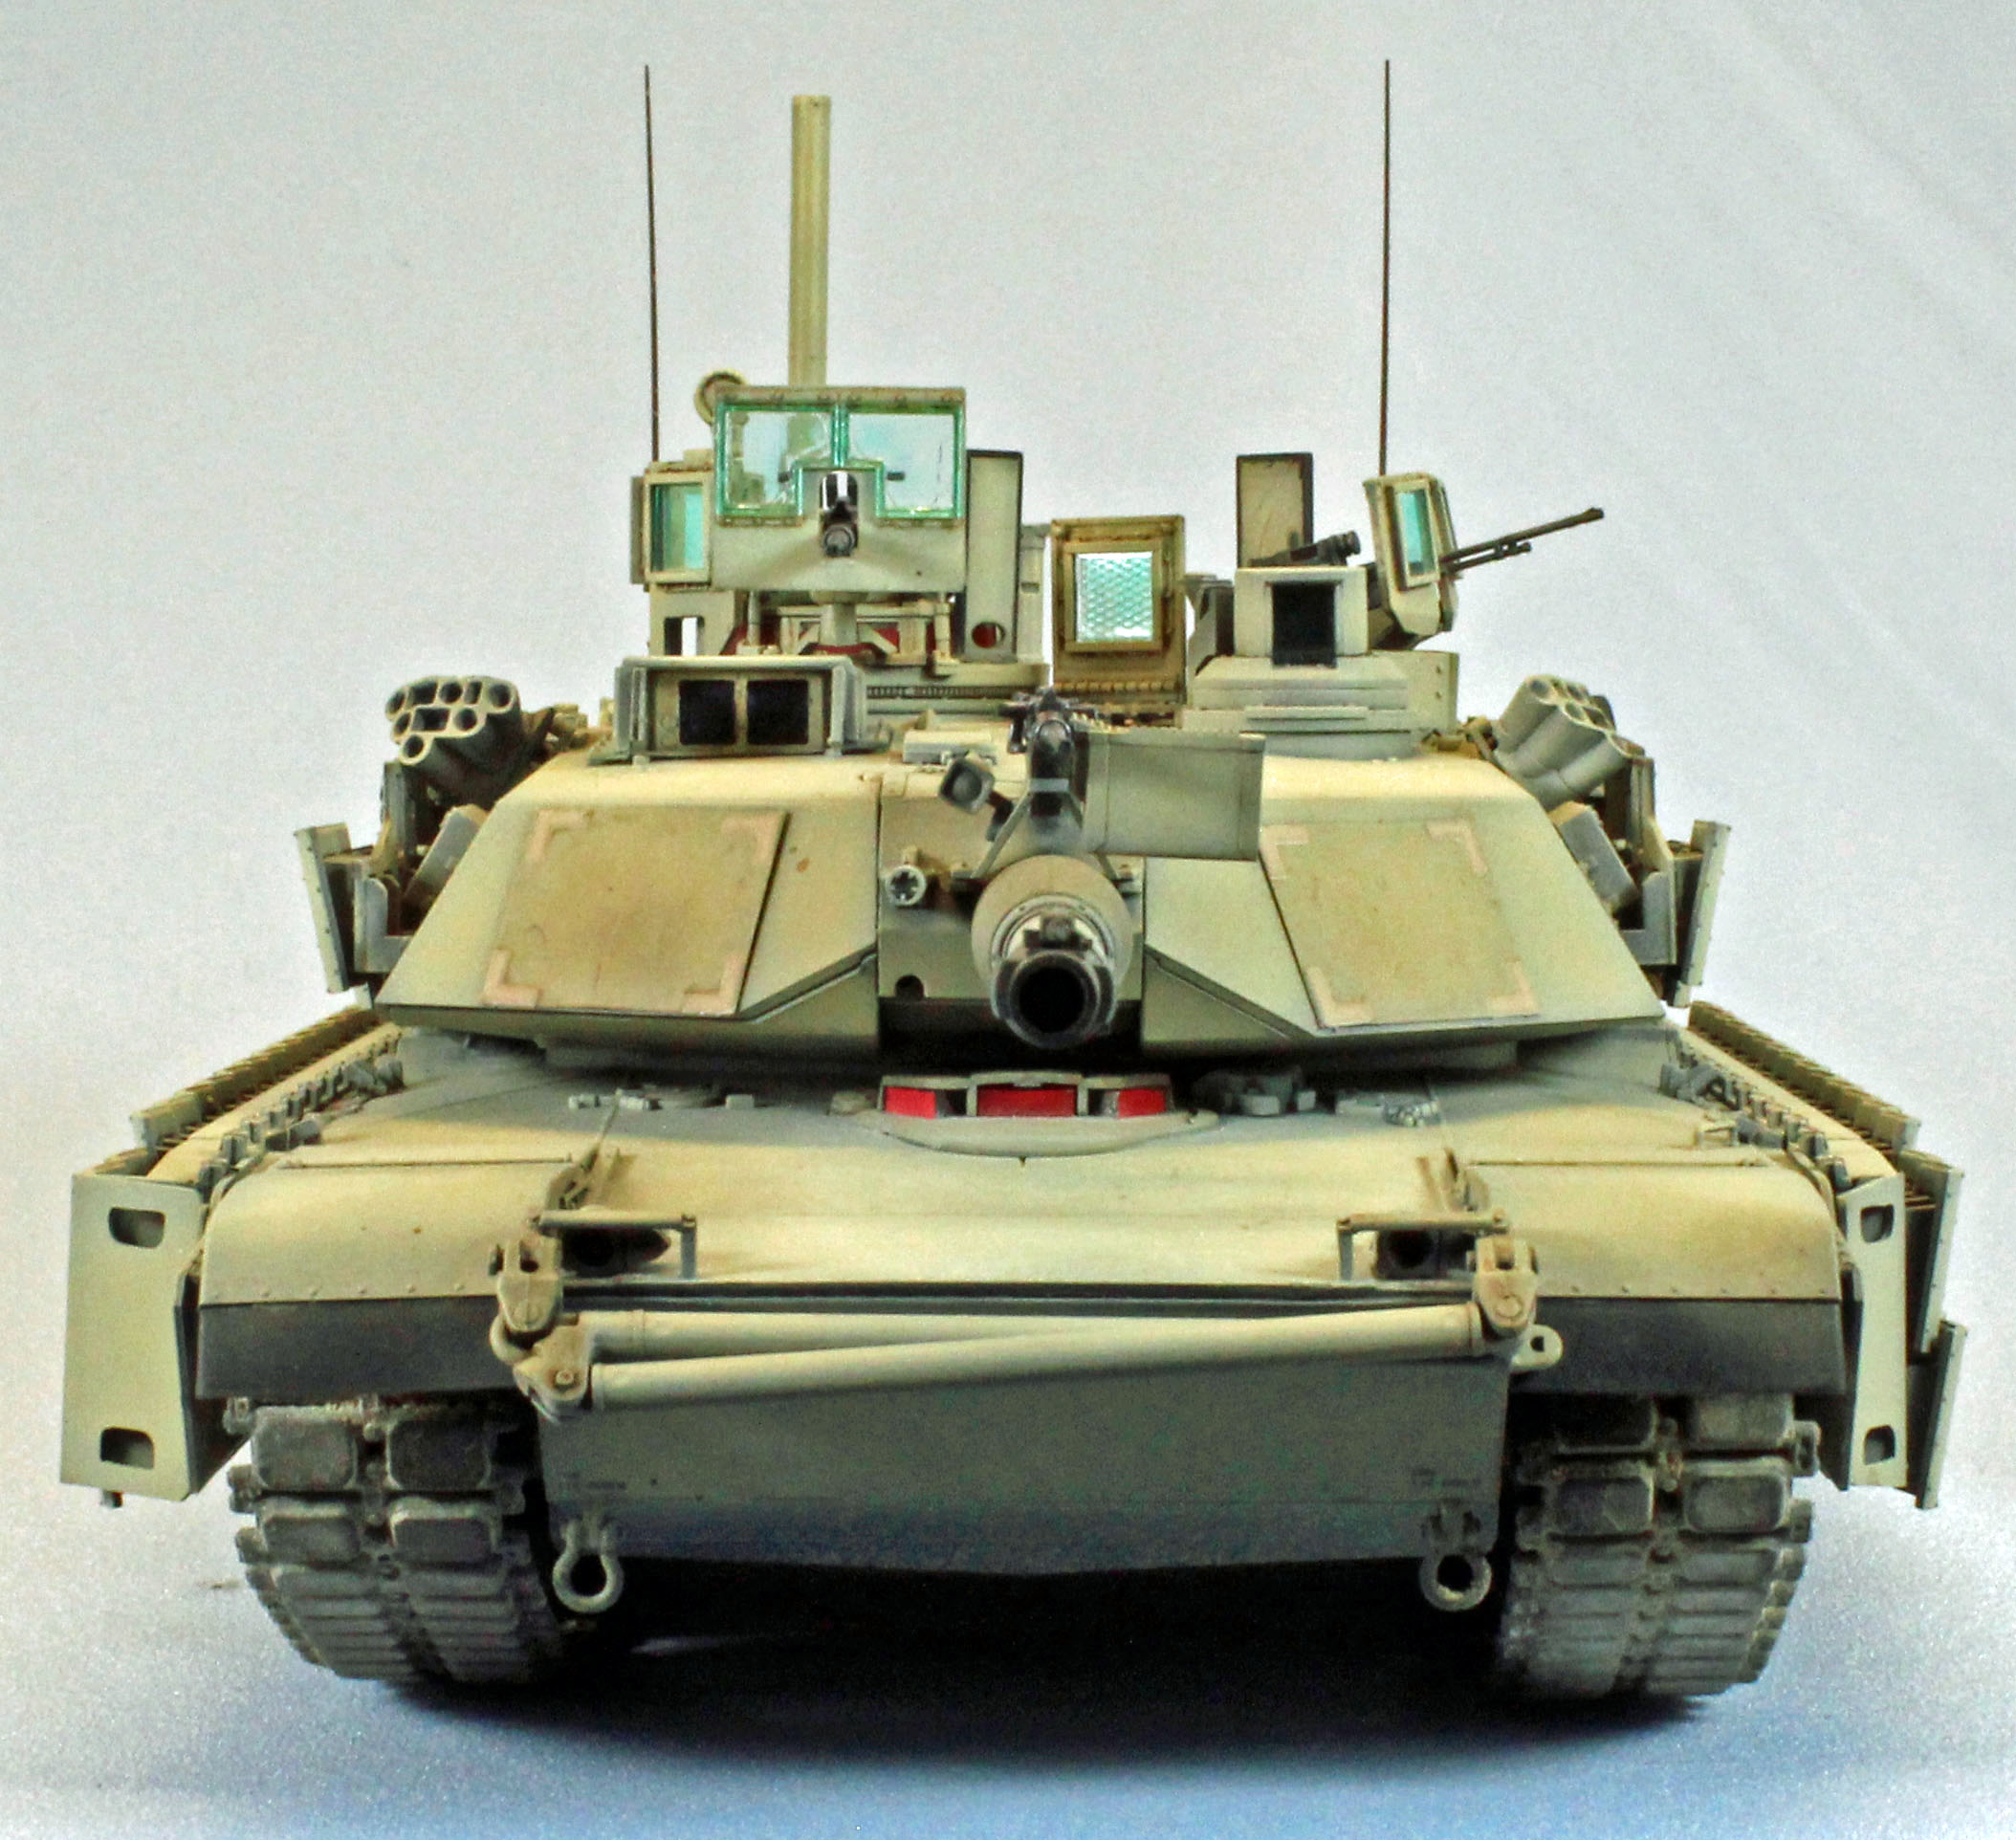
Other improvements include additional defensive grenade/smoke dischargers, armored glass shielding for the vehicle commander and loader when manning their respective machine guns, and a new remotely controlled 12.7-mm machine coaxial gun & accompanying spotlight fitted over the main gun. This machine gun is a counter sniper weapon. It fires single rounds or in full-auto mode and is aimed using the main gun. A third machine gun station sporting a 7.62-mm gun with armored glass and thermal sights has been added to the turret.
To improve situational awareness, the TUSK provides the commander with a 360 degree camera monitor within the turret, and the driver’s station is fitted with a new safety seat and rear vision camera. Nearby infantry can communicate with the tank commander via an infantry phone attached to the rear of the vehicle. Together, all active versions of the Abrams tank (M1A1, M1A2 or M1A2 SEP) equipped with this kit have become even more lethal to the enemy, regardless of where they are encountered.
Academy is not first company to offer the M1A2 Abrams TUSK II in 1/35th scale, but, in my opinion, theirs is by far the easiest to build. Furthermore, Academy has managed to include parts for four different versions of the Abrams in the same box (plain vanilla M1A2, SEP V2, TUSK, and TUSK II). They can do this because they make a real effort to keep the parts count down while still providing stunning detail and engineering. Academy does all of this for a price $10, $20, or even $30 less than their competitors.
What's in the Box
- 8 sprues of soft, tan-yellow plastic packed relatively tightly into four plastic bags. Even though it is in a large, sturdy box, I worried about warping. In the end, however, all parts were true; even the delicate bustle cages fitted around the back of the turret.
- 1 sprue of hard, clear plastic for the armored glass and lenses.
- 2 lengths of black, one-piece ‘rubber-band’ track (my sample’s runs were folded under and bent but straightened out sufficiently by pinning them to a board before painting).
- 1 black, rubber ammunition ‘rope’ for the CROWS II Weapon System (SEP V2).
- 1 medium sheet of decals and stencils.
- 1 small sheet of photo-etch containing engine exhaust/intake screens, more.
- 1 small sheet of painting masks for clear parts made of thin, yellow masking tape.
- Four separate instruction manuals, totaling 32 pages with 48 steps, printed in black and white ink. A parts map and color call out chart are included.
- 1 4-page, full-color section used for painting and decal placement.
The thin decals are printed by Def.Model, and are in perfect register. Three four-view drawings are included, representing two color schemes and the following units:
- SEP – 2nd Squadron E Troop, Iraq 2011
- SEP – 3rd Squadron H Troop, Iraq 2011
- SEP V2 – U.S. Army Task Force 2-7 Infantry NATO Joint Training, Poland, Latvia, Estonia 2015
- SEP V2 – 2nd Infantry Division, U.S. Army, South Korea 2013
- SEP TUSK – 4th Infantry Division 1-68 Armored Regiment, Iraq 2008
- SEP TUSK – 1st Combined Arms Battalion 1-68 Armored Regiment, Iraq 2008
- SEP TUSK – 1st Cavalry Division 2-7 Cavalry Regiment, Iraq 2011
- TUSK II – 1st Battalion, 22nd Infantry Regiment. 1st Brigade, 4th Infantry Division U.S. Army, Iraq 2008
Paint product callouts include Humbrol Enamel, GSI Creos Acrylic, GSI Mr. Color Lacquer, Lifecolor, Testor/Model Master Acrylic and Enamel, Revell Acrylic and Enamel, and Vallejo Model Color and Model Aire.
Things to consider before starting
You will want to decide up front which version you want to build and mark up the instructions accordingly – there are a lot of detours to take depending on the choices you make.
Many of the weapons and hatches come as separate assemblies that can be built, painted, and finished before dropping them on the hull or turret at the end of the build. This is a real advantage since most of these assemblies sport clear parts that would otherwise be affected by the various coats of paint and weathering products you’ll use to finish the tank. To their credit, Academy provides a complete set of masks to use for this purpose, but I found that the delicate parts - and especially the limited access to those parts - once attached, precluded my using the masks.
The Abrams has prominent side skirts that, once installed, limit access to the track. This means that the track will have to be attached early in the build, per the instructions.
There is ample room in the turret bustle and the sides of the turret/hull for personalizing your Abrams with various combat accoutrements. Curiously, Academy, who has a solid reputation for including lots of extra gear in their kits, provides just a few items this time around (jerry cans for fuel and water, wheels, etc.). Maybe they just ran out of room in the box for the extra sprue!
Finally, a nit to pick. Academy provides four separate eight-page booklets of instructions, which is a little aggravating when you need to go back and forth during assembly and painting. Do yourself a favor (like I eventually did) and cut the pages apart so that you can make a single booklet, soup to nuts, before starting. I even made a separate document consisting of copied pages for the parts map, painting and decal work, since these, too, were scattered throughout. Let’s move on!
Construction
Lower Hull and suspension
The first manual begins with the lower hull and suspension. Academy includes two options for the oil caps on the wheels, and both are rendered in clear plastic. These are clear on the real thing, allowing maintenance personal to easily determine the lubricant level on each wheel. A nice touch, but the multiple layers of paint and finish on my build nullified their purpose. Still – if added at the end, with careful painting, they should have a good shot at representing the real thing.
Like just about everything on this model, the fit is perfect. The wheels ‘chunk’ in solidly and don’t wiggle once attached. This also means that they are not designed to articulate.
An array of posts and other odd parts extend from the superstructure out to meet the side skirts when they get attached later. This could lead to a fit problem, but solid engineering prevented that from happening – they only fit one way and end up exactly where they are supposed to be later.
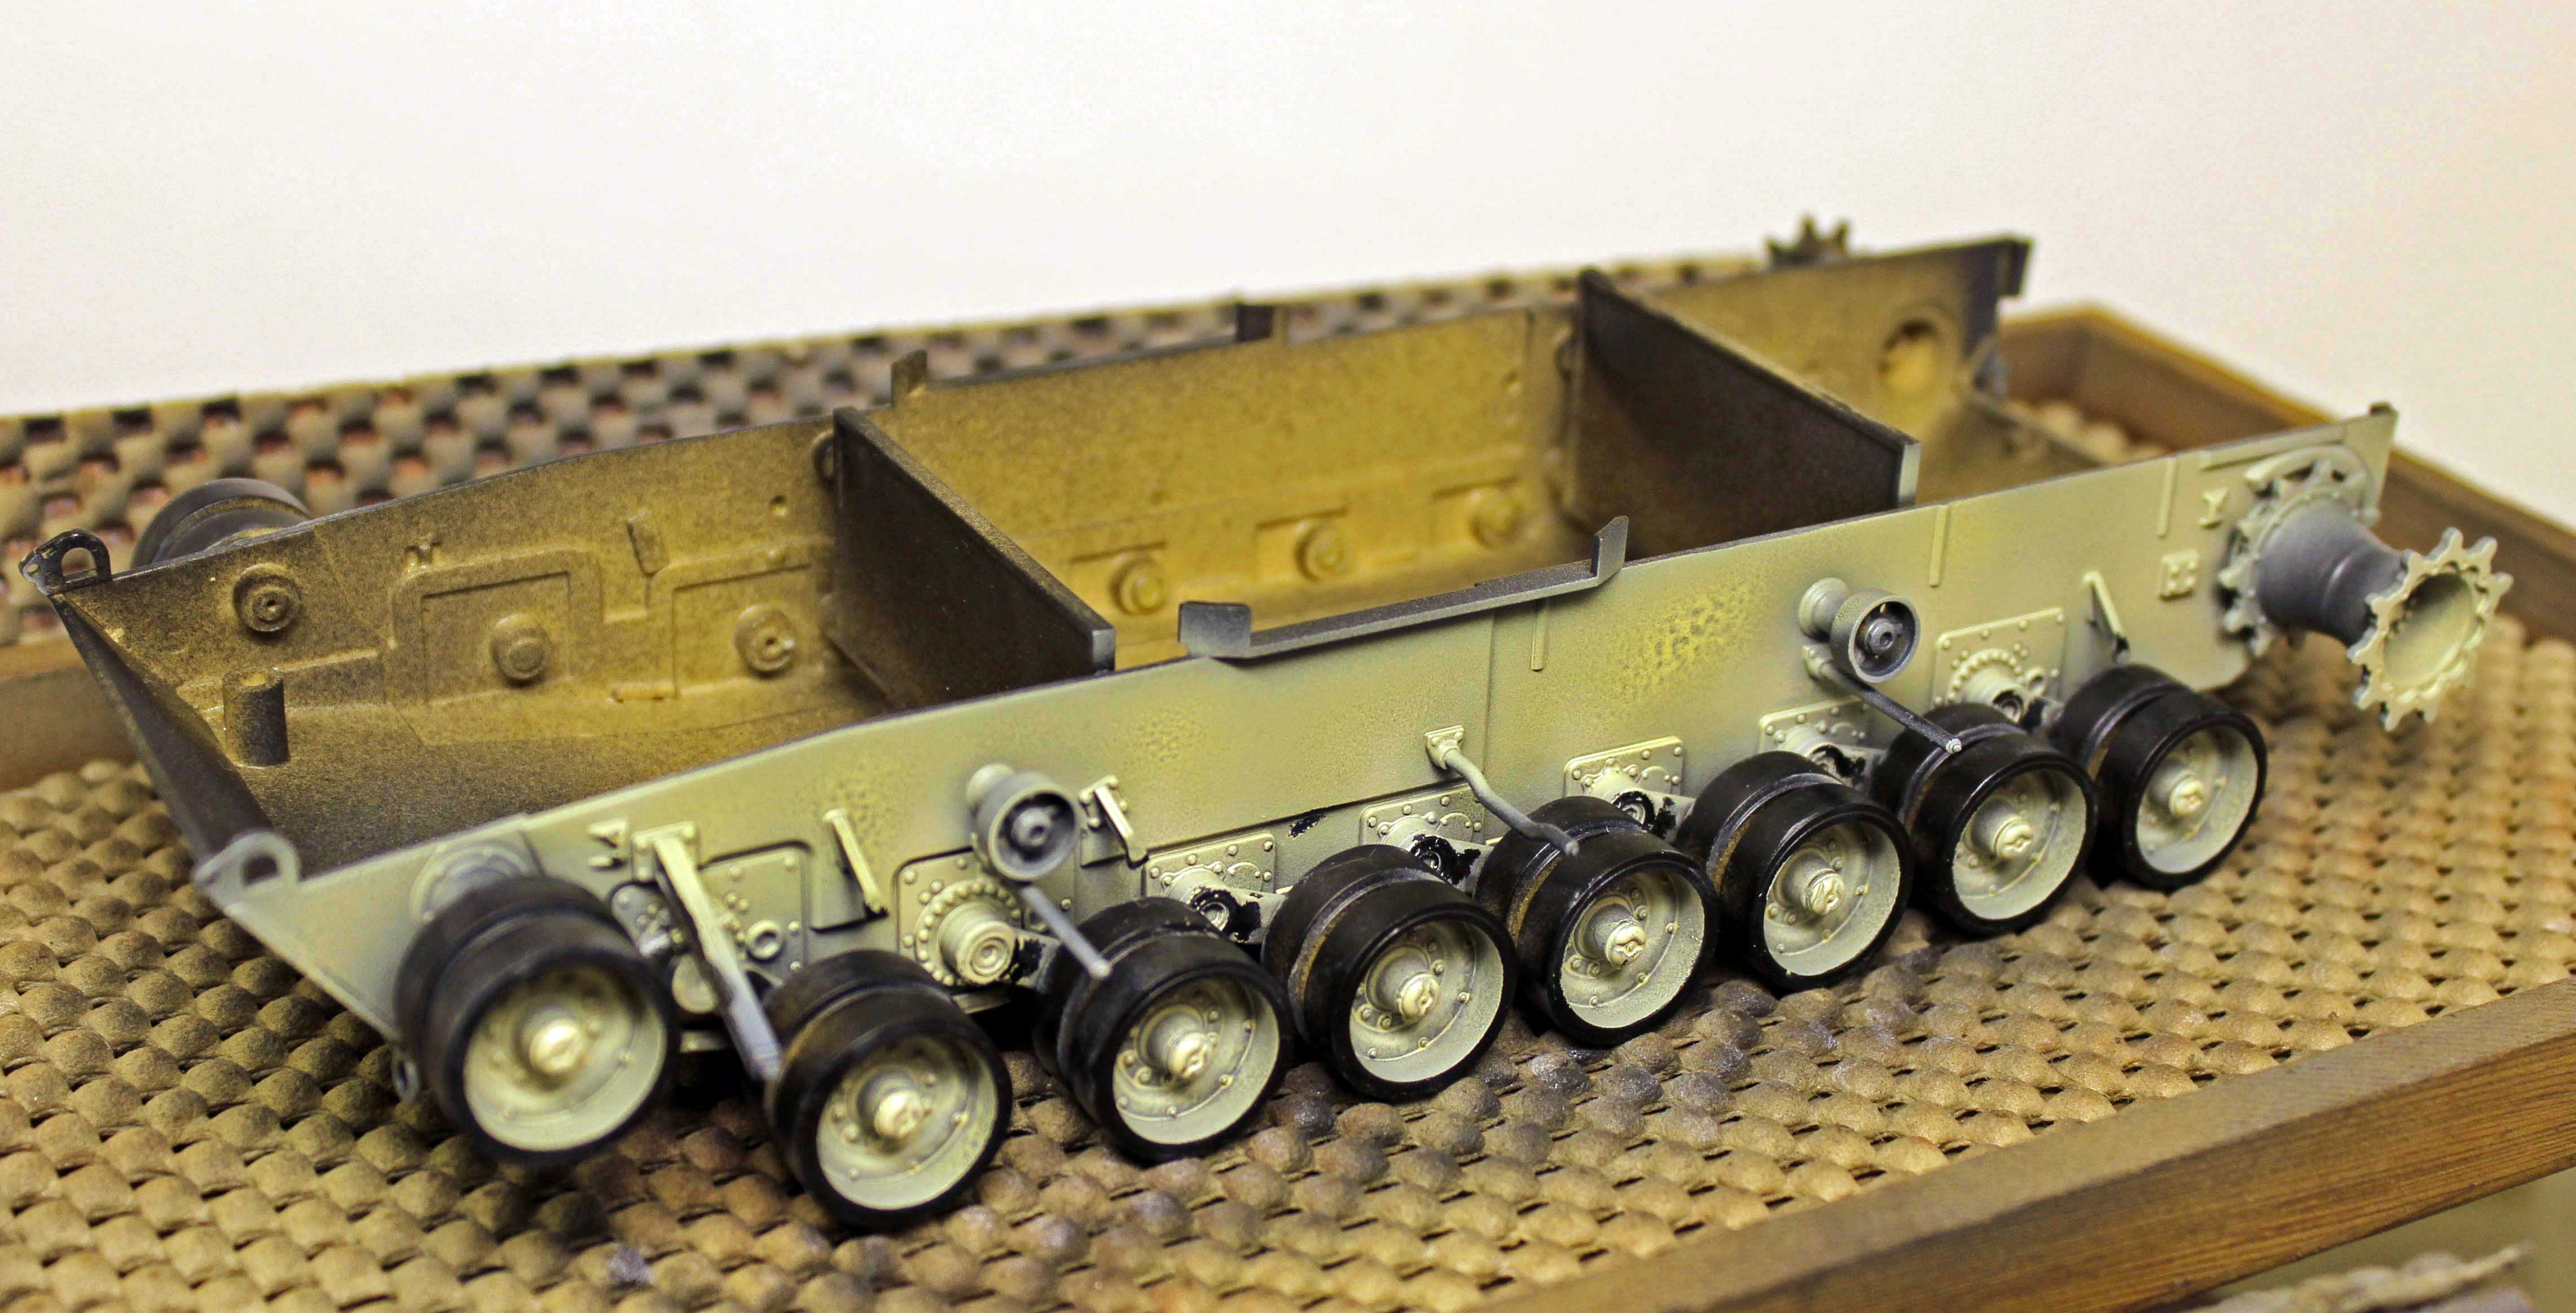
A Faster way to paint Road Wheels
Once the wheels were attached and dry, I stopped to paint the lower hull and attach the track since the side skirts coming next would deny me access to do so later. I employ a novel approach to painting the rubber parts of the wheels, which takes me all of perhaps ten minutes total, and is done without touching a brush. The secret is found in the unusual qualities of using hairspray as a mask.
I start by using rattlecan Krylon Flat Black Lacquer Paint/Primer for a dark, primer/pre-shade coat. Surprisingly, this low-cost solution sprays on easily and dries very thin and level – replacing a 20+ minute task I used to use an airbrush and more expensive paint for. The dark primer coat gives the plastic and photo-etch some grip, and fills the recesses, creating a shadow effect near the flat surface edges, and adding depth for the subsequent coats to come. I allow the strong lacquer paint to sit overnight to de-gas.
Next, instead of painstakingly painting the rubber portions of the wheels by hand, I shake up an aerosol can of TRESemme’ and give the wheels a quick coat of hairspray over the primer. I don’t think it matters what kind of hairspray you use – I just like the cool little black can it comes in. Once dry, I spray the inner wheels my acrylic camouflage colors (see below) without worrying too much about overspray. Once the paint is dry, I use a Q-tip damp with water to rub off the overspray. The hairspray acts as an acrylic mask over whatever color or type of paint lies underneath it. In 5 minutes I have 16 perfectly painted sets of wheels (see image). Bang.
The Track
Once satisfied with the wheels, I moved on to the track. The black, rubber-band type vinyl track in this kit incorporates a novel design; four pieces of normal plastic that, when glued together, connect the ends of each of the two runs. The promise is there, but the execution needs some work: the runs end up being too long. I had to remove the tabs for the plastic parts as well as two full links per side to tighten the tension on the each run. Fortunately, the side skirts cover up the three staples I used to connect the ends!
I was able to use distillate products on this track, but they do take some time to dry. I primed the track using Rustoleum (rattlecan) Flat Black enamel paint, followed by a dusting of Rustoleum (rattlecan) Beige enamel. Once these coats dried, I brushed on a thin layer of AK Interactive Track Wash straight from the bottle. When that (finally) dried, I stapled the ends and stretched them on over the wheels. Later, as a final step to the build, I worked several layers of Mig Pigments into the nooks and crannies using Gulf War Sand, Concrete, Light Dust, Dry Mud, European Dust and Russian Earth. In the end, those floppy, vinyl tracks look, with a little make-up, just fine.
Hull Rear and Main Deck
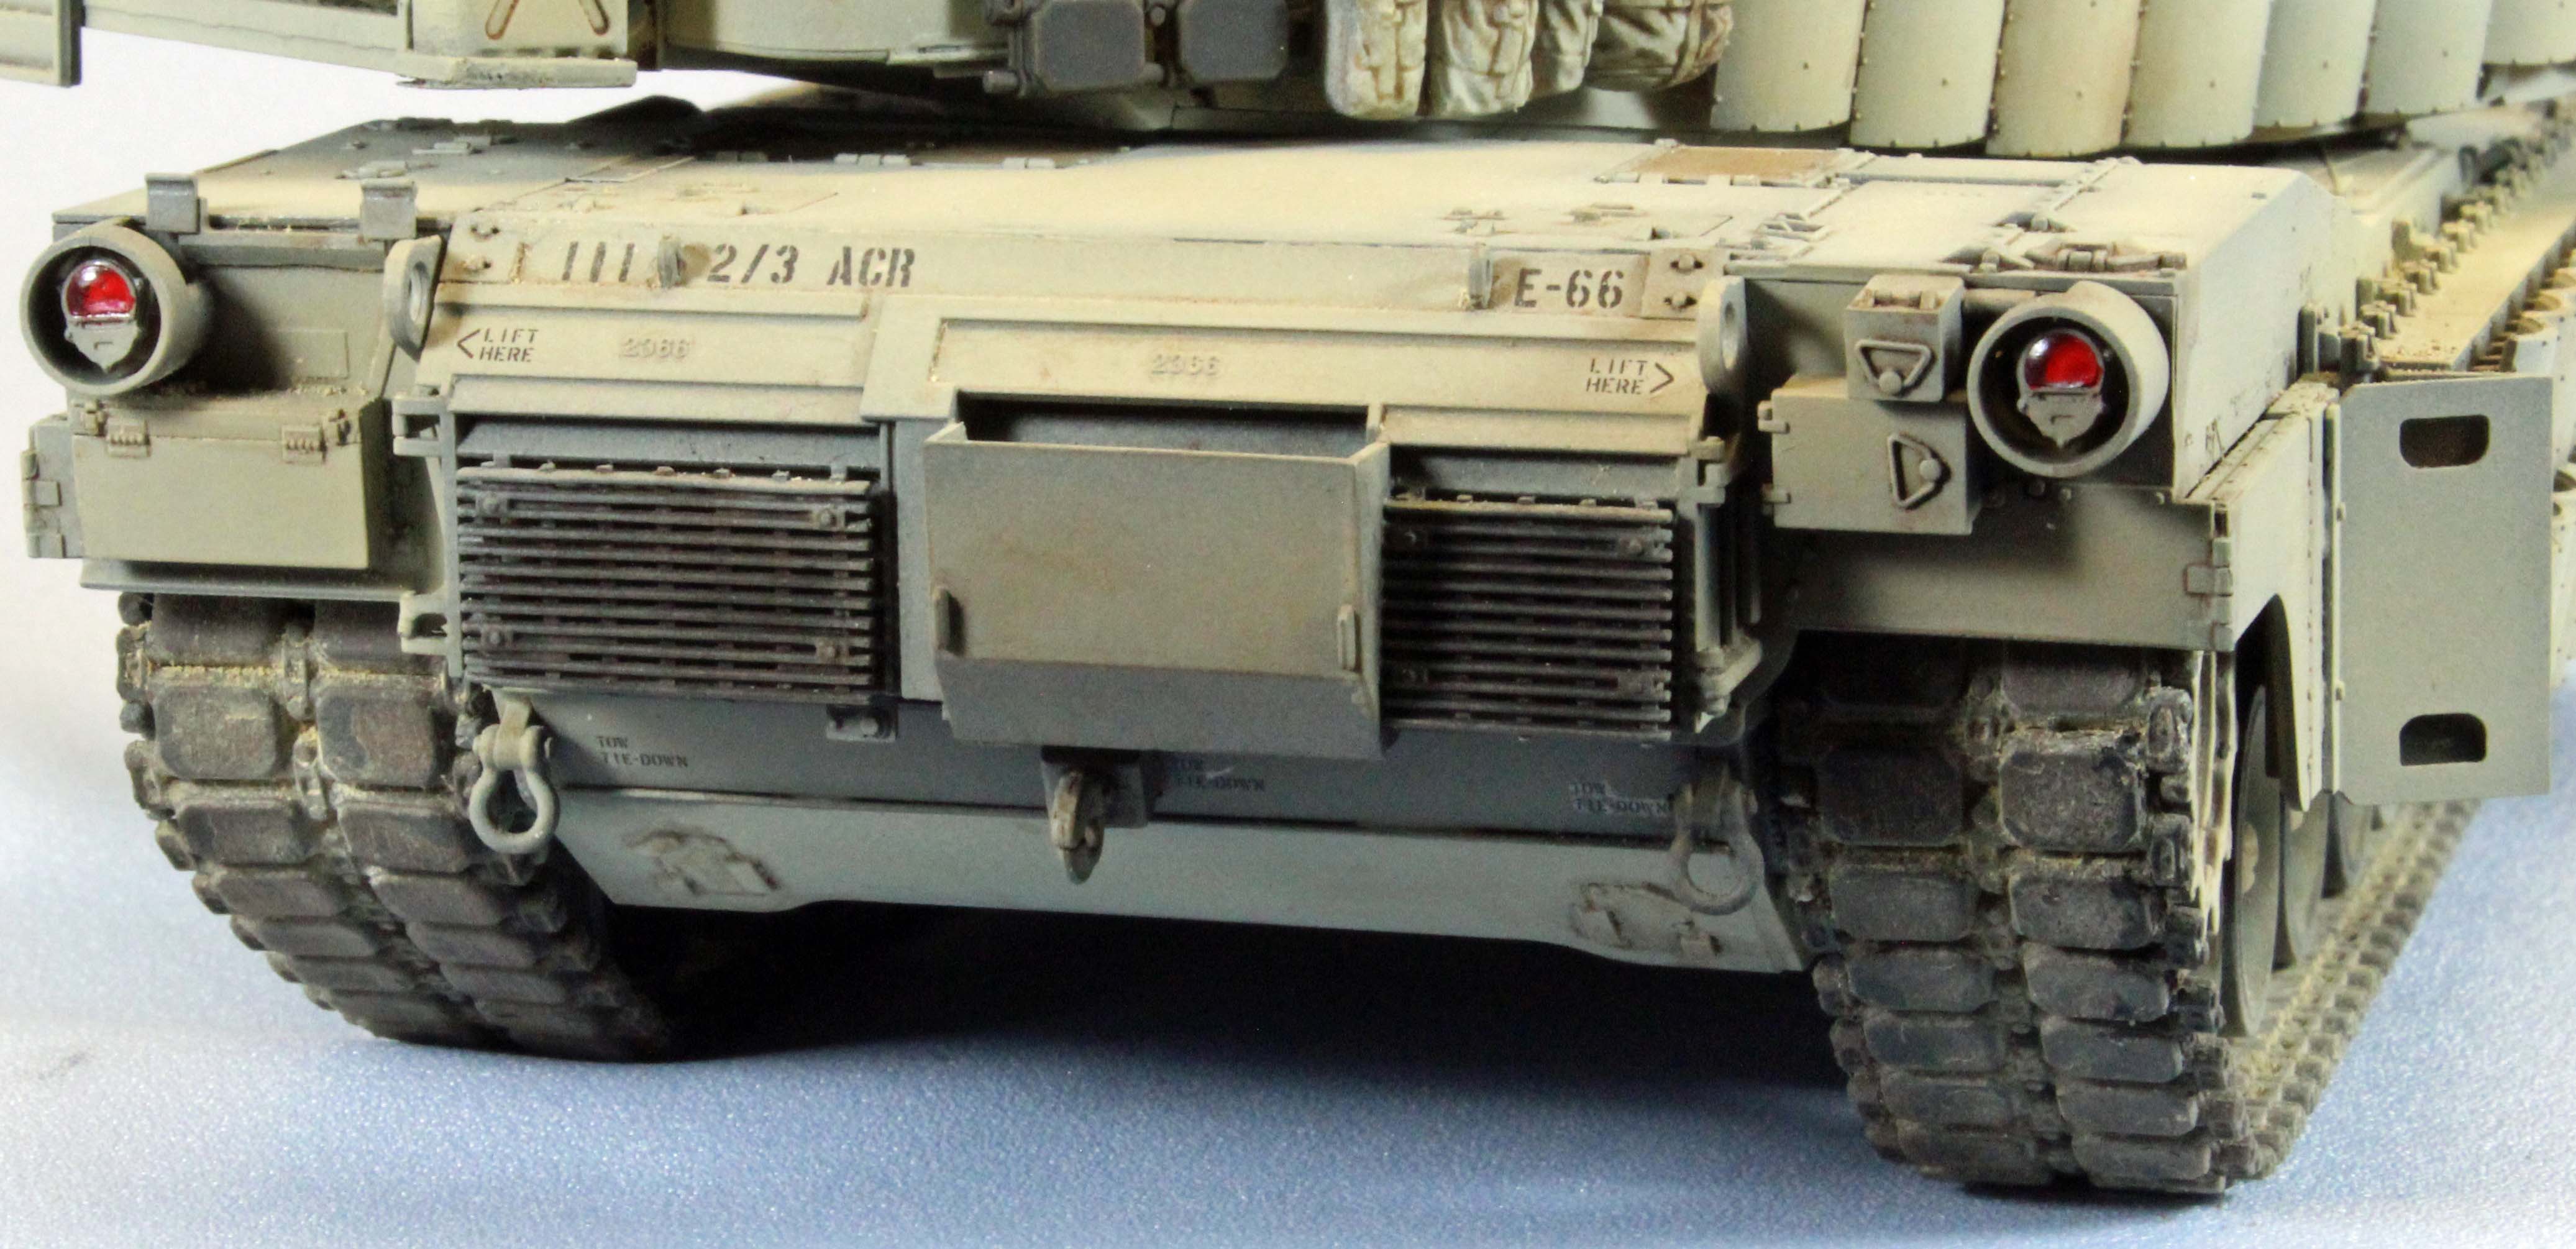
The design of the busy hull rear is brilliant. Reviewing my margin notes, I have the words ‘Snap Tite!’ written in several places, meaning many of the parts fit so well that no glue was required. The two clear glass covers to the taillights are prominent and I left them off, to be attached after painting and finishing.
The first instruction manual closes with attaching a half-dozen parts and the rear hull to the main hull before dropping everything on to the lower hull in the next section. The drivers hatch has three clear, laser-reflective vision blocks that, like all the other various optics and sights, are plainly visible on the finished model. Fortunately, it can be assembled, painted and finished separately since it drops right into place.
One last, nice touch; Academy provides the two front mud flaps as separate pieces so they can be painted (I used Model Master Helo Drab Enamel for this) and attached later, after the desert camouflage is applied.
Side Skirts
The second instruction manual starts with dropping the main hull down onto the lower hull, which uncovered two minor issues. The first is that a hairline gap appeared along the back of the hull, which a quick smear of Perfect Plastic Putty took care of. I like this product because it goes on like caulk, and comes off with a quick wipe of a damp cloth or, in this case, a Q-Tip. The second issue was more perplexing. Something was keeping the front of the upper hull from seating correctly on the lower hull. Closer inspection revealed that a vertical ‘fin’ had to be scraped away from each of the two posts that support the upper hull (see ‘Before’ and ‘After’ images). Once those posts had been cleaned, the hulls came together without a problem.
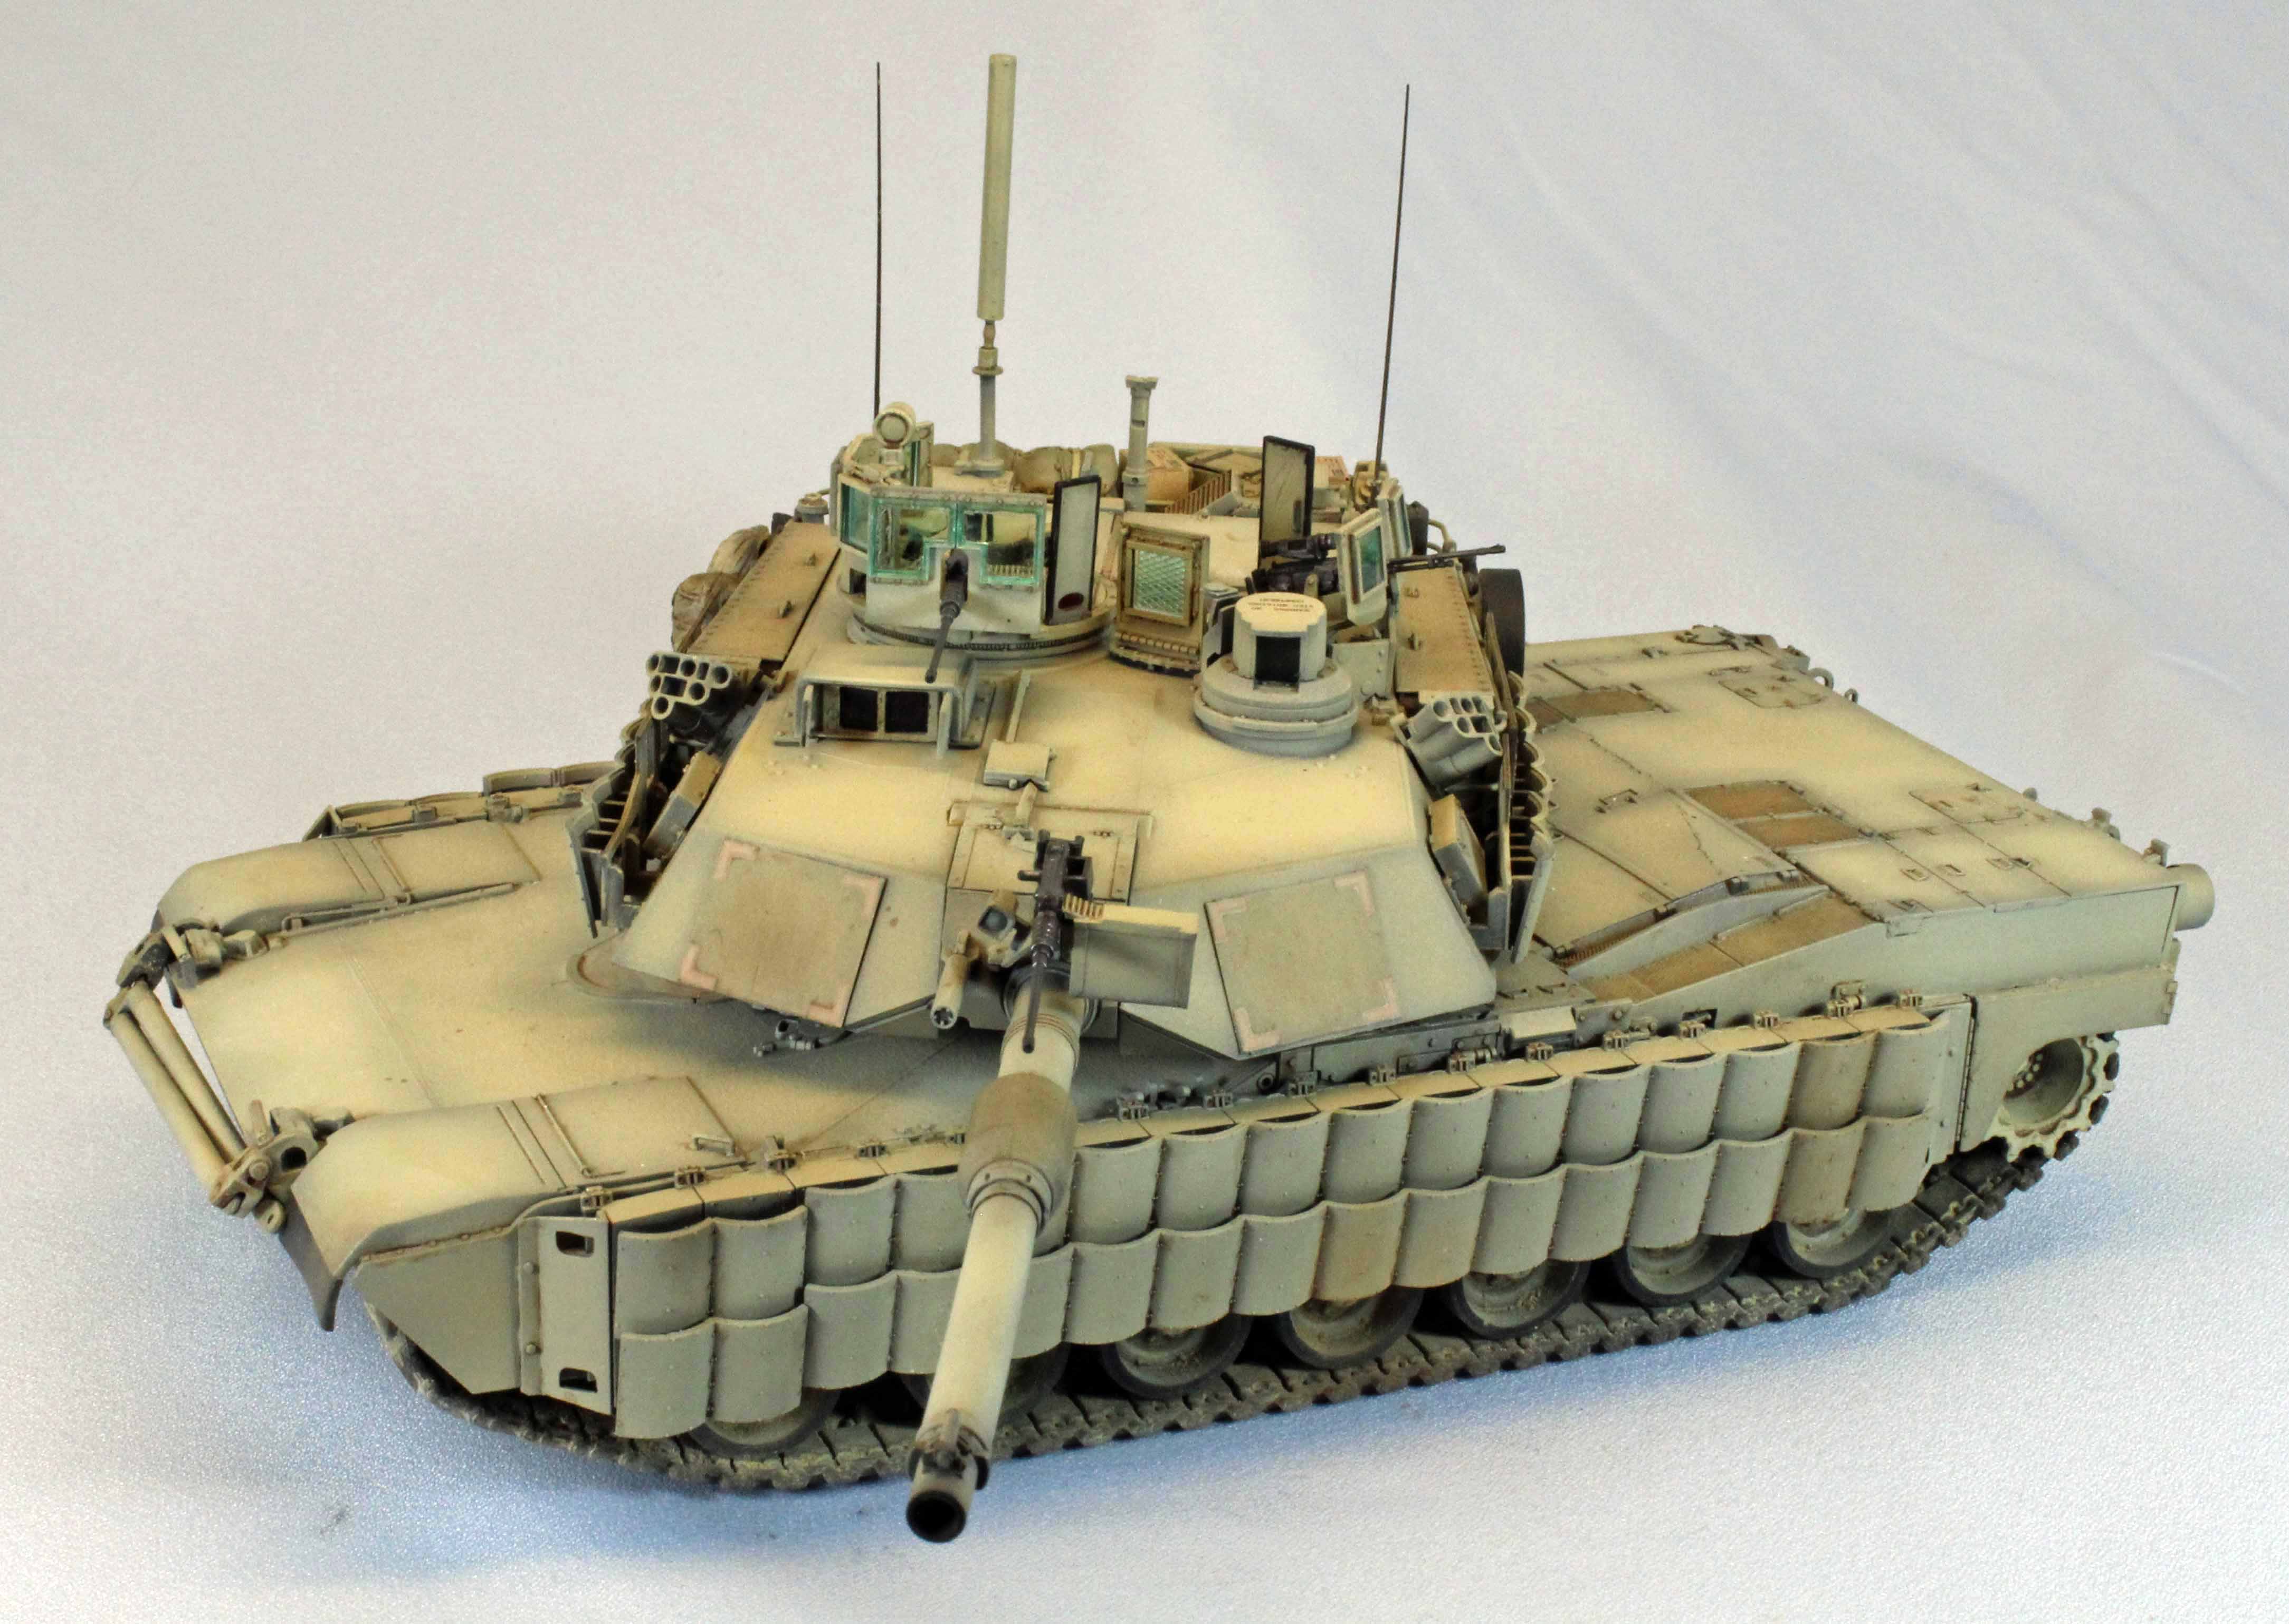
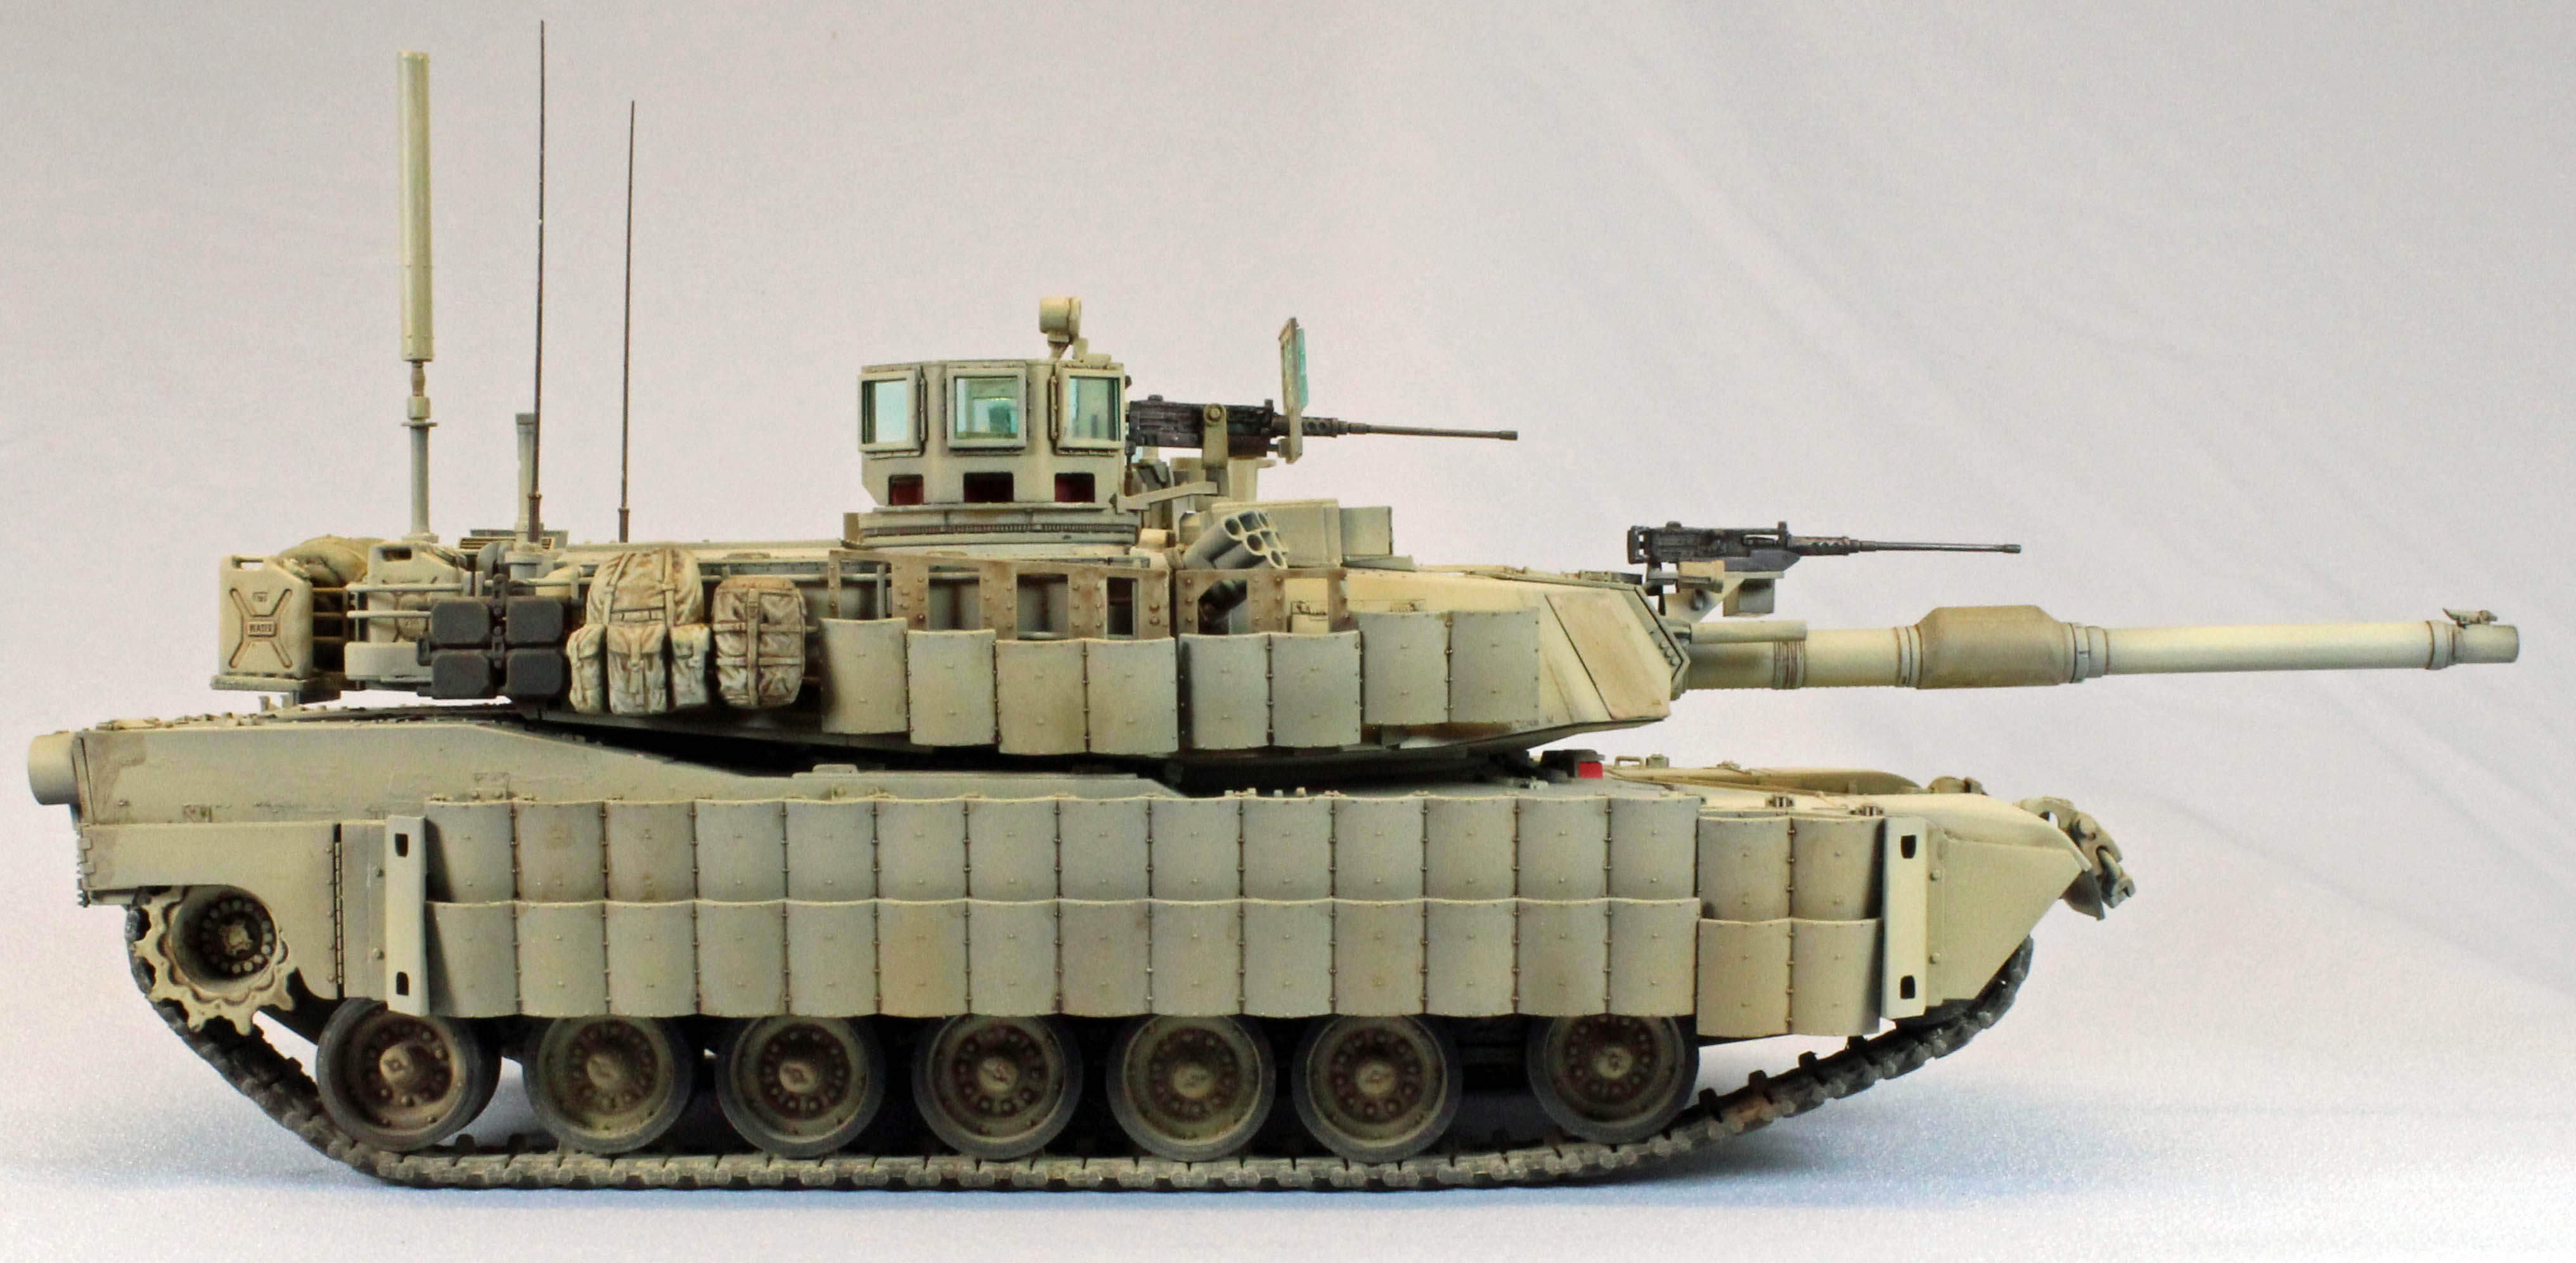
After attaching the tow bar assembly on the front hull, I moved on to perhaps the most noticeable aspect of the TUSK system; the long rows of reactive side armor. Academy provides each of three layers of side armor as four long, single pieces, sporting excellent detail throughout. The first layer is the standard M1A2 side armor which has given the Abrams tank that classic look all these years. On top of that, goes a second layer of the TUSK reactive armor, which resembles long rows of square, flat sections, also presented in four single pieces. Over that, the TUSK II (curved) reactive armor is applied. Since the modeler can create any one of the versions provided in the kit, I needed to drill some holes each step of the way using the pre-drilled ‘soft’ pits provided by Academy on the backside of all the appropriate parts.
Once each side was dry, attaching them to the lower hull, and to all those pokey parts that I discussed in the first section, was a breeze. What could go wrong, didn’t. Assembling these skirts was a lot of fun: everything came in big pieces and fit perfectly. Nice.
The Turret
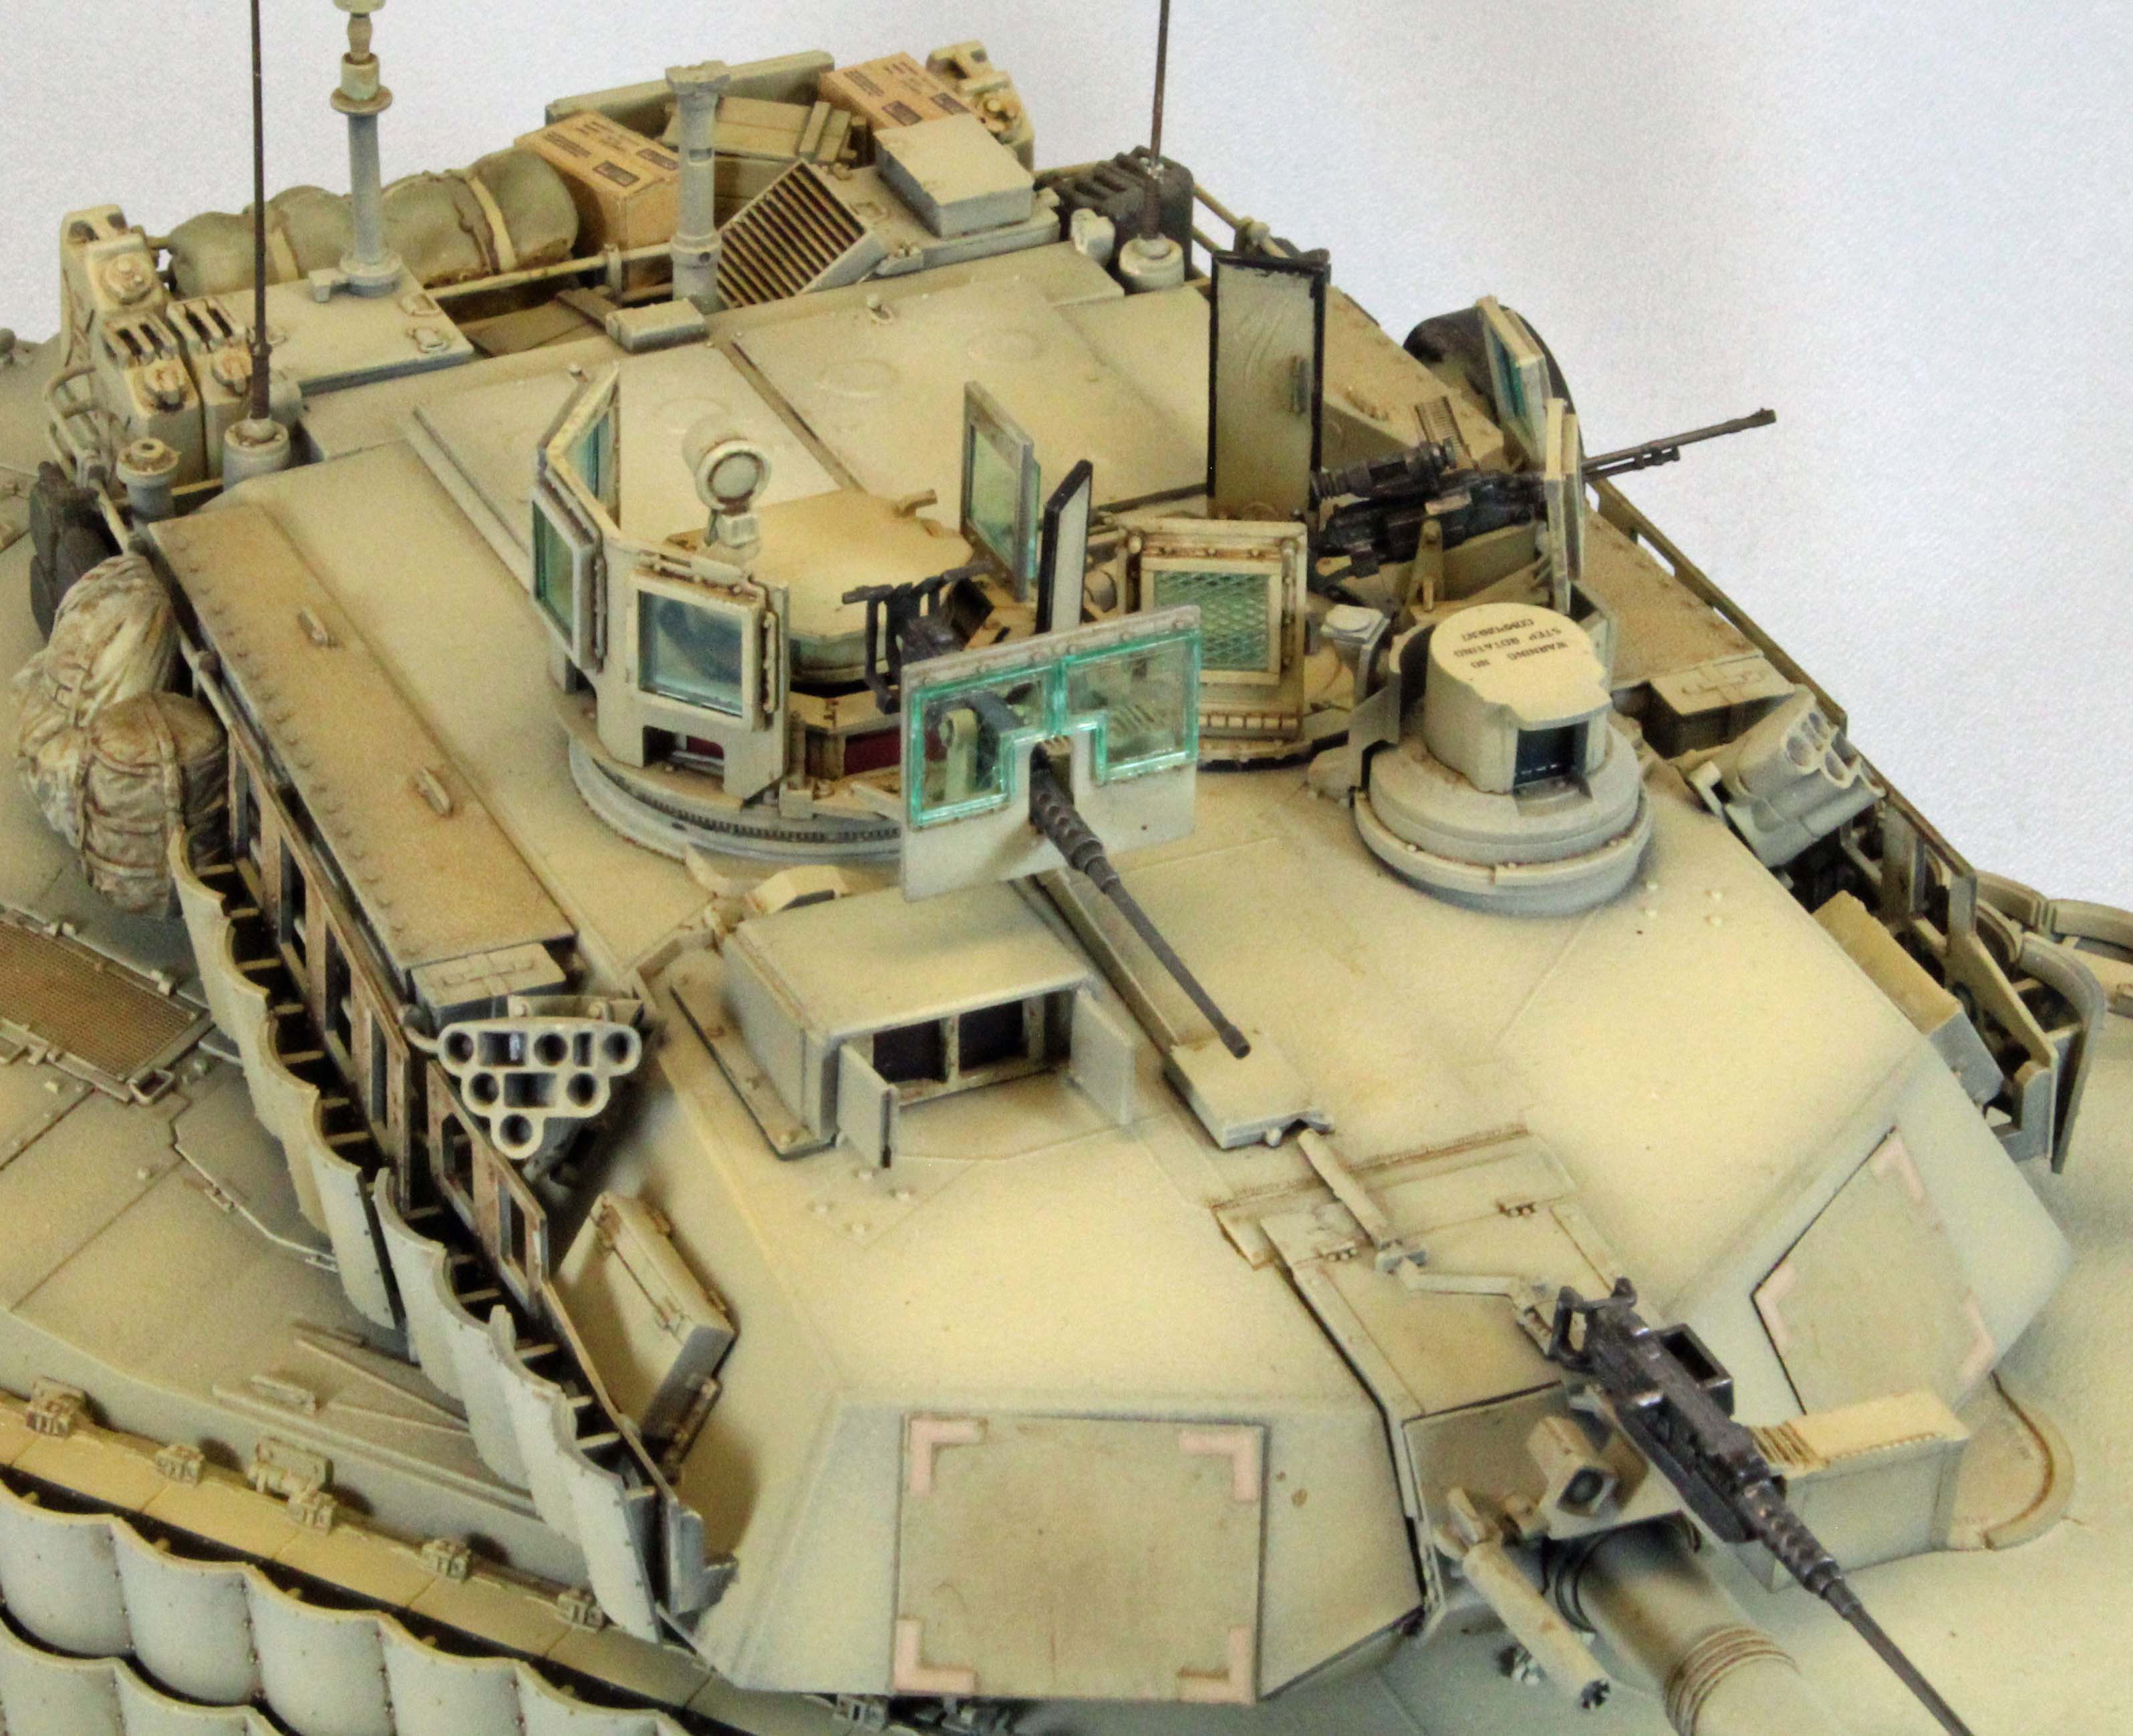
The next eight steps encompass the rest of the second manual, and bring the main weapon and turret together. The Abrams turret has always been a busy affair, but I’ve never seen anything like what the U.S. Army has crammed on top of the M1A2 TUSK II turret. As complicated as it looks, however, in the end the task appears like a lot more work than it really is.
Academy has thoughtfully designed the nine-piece main gun in such a way that there are no seams to fill on any part of it. The weapon assembly also fits in the turret opening so that it can be moved up and down, but will not droop down by itself. In other words, even though I glued the gun in place, I didn’t need to – the fit was that good.
The turret detail is significantly different for each Abrams version (SEP V2/TUSK/TUSK II) so here is where the modeler is directed to different areas in the instruction booklets. I chose to build the TUSK II, so the sprue holding the SEP V2/CROWS II close-in weapon system went directly into my spare parts box.
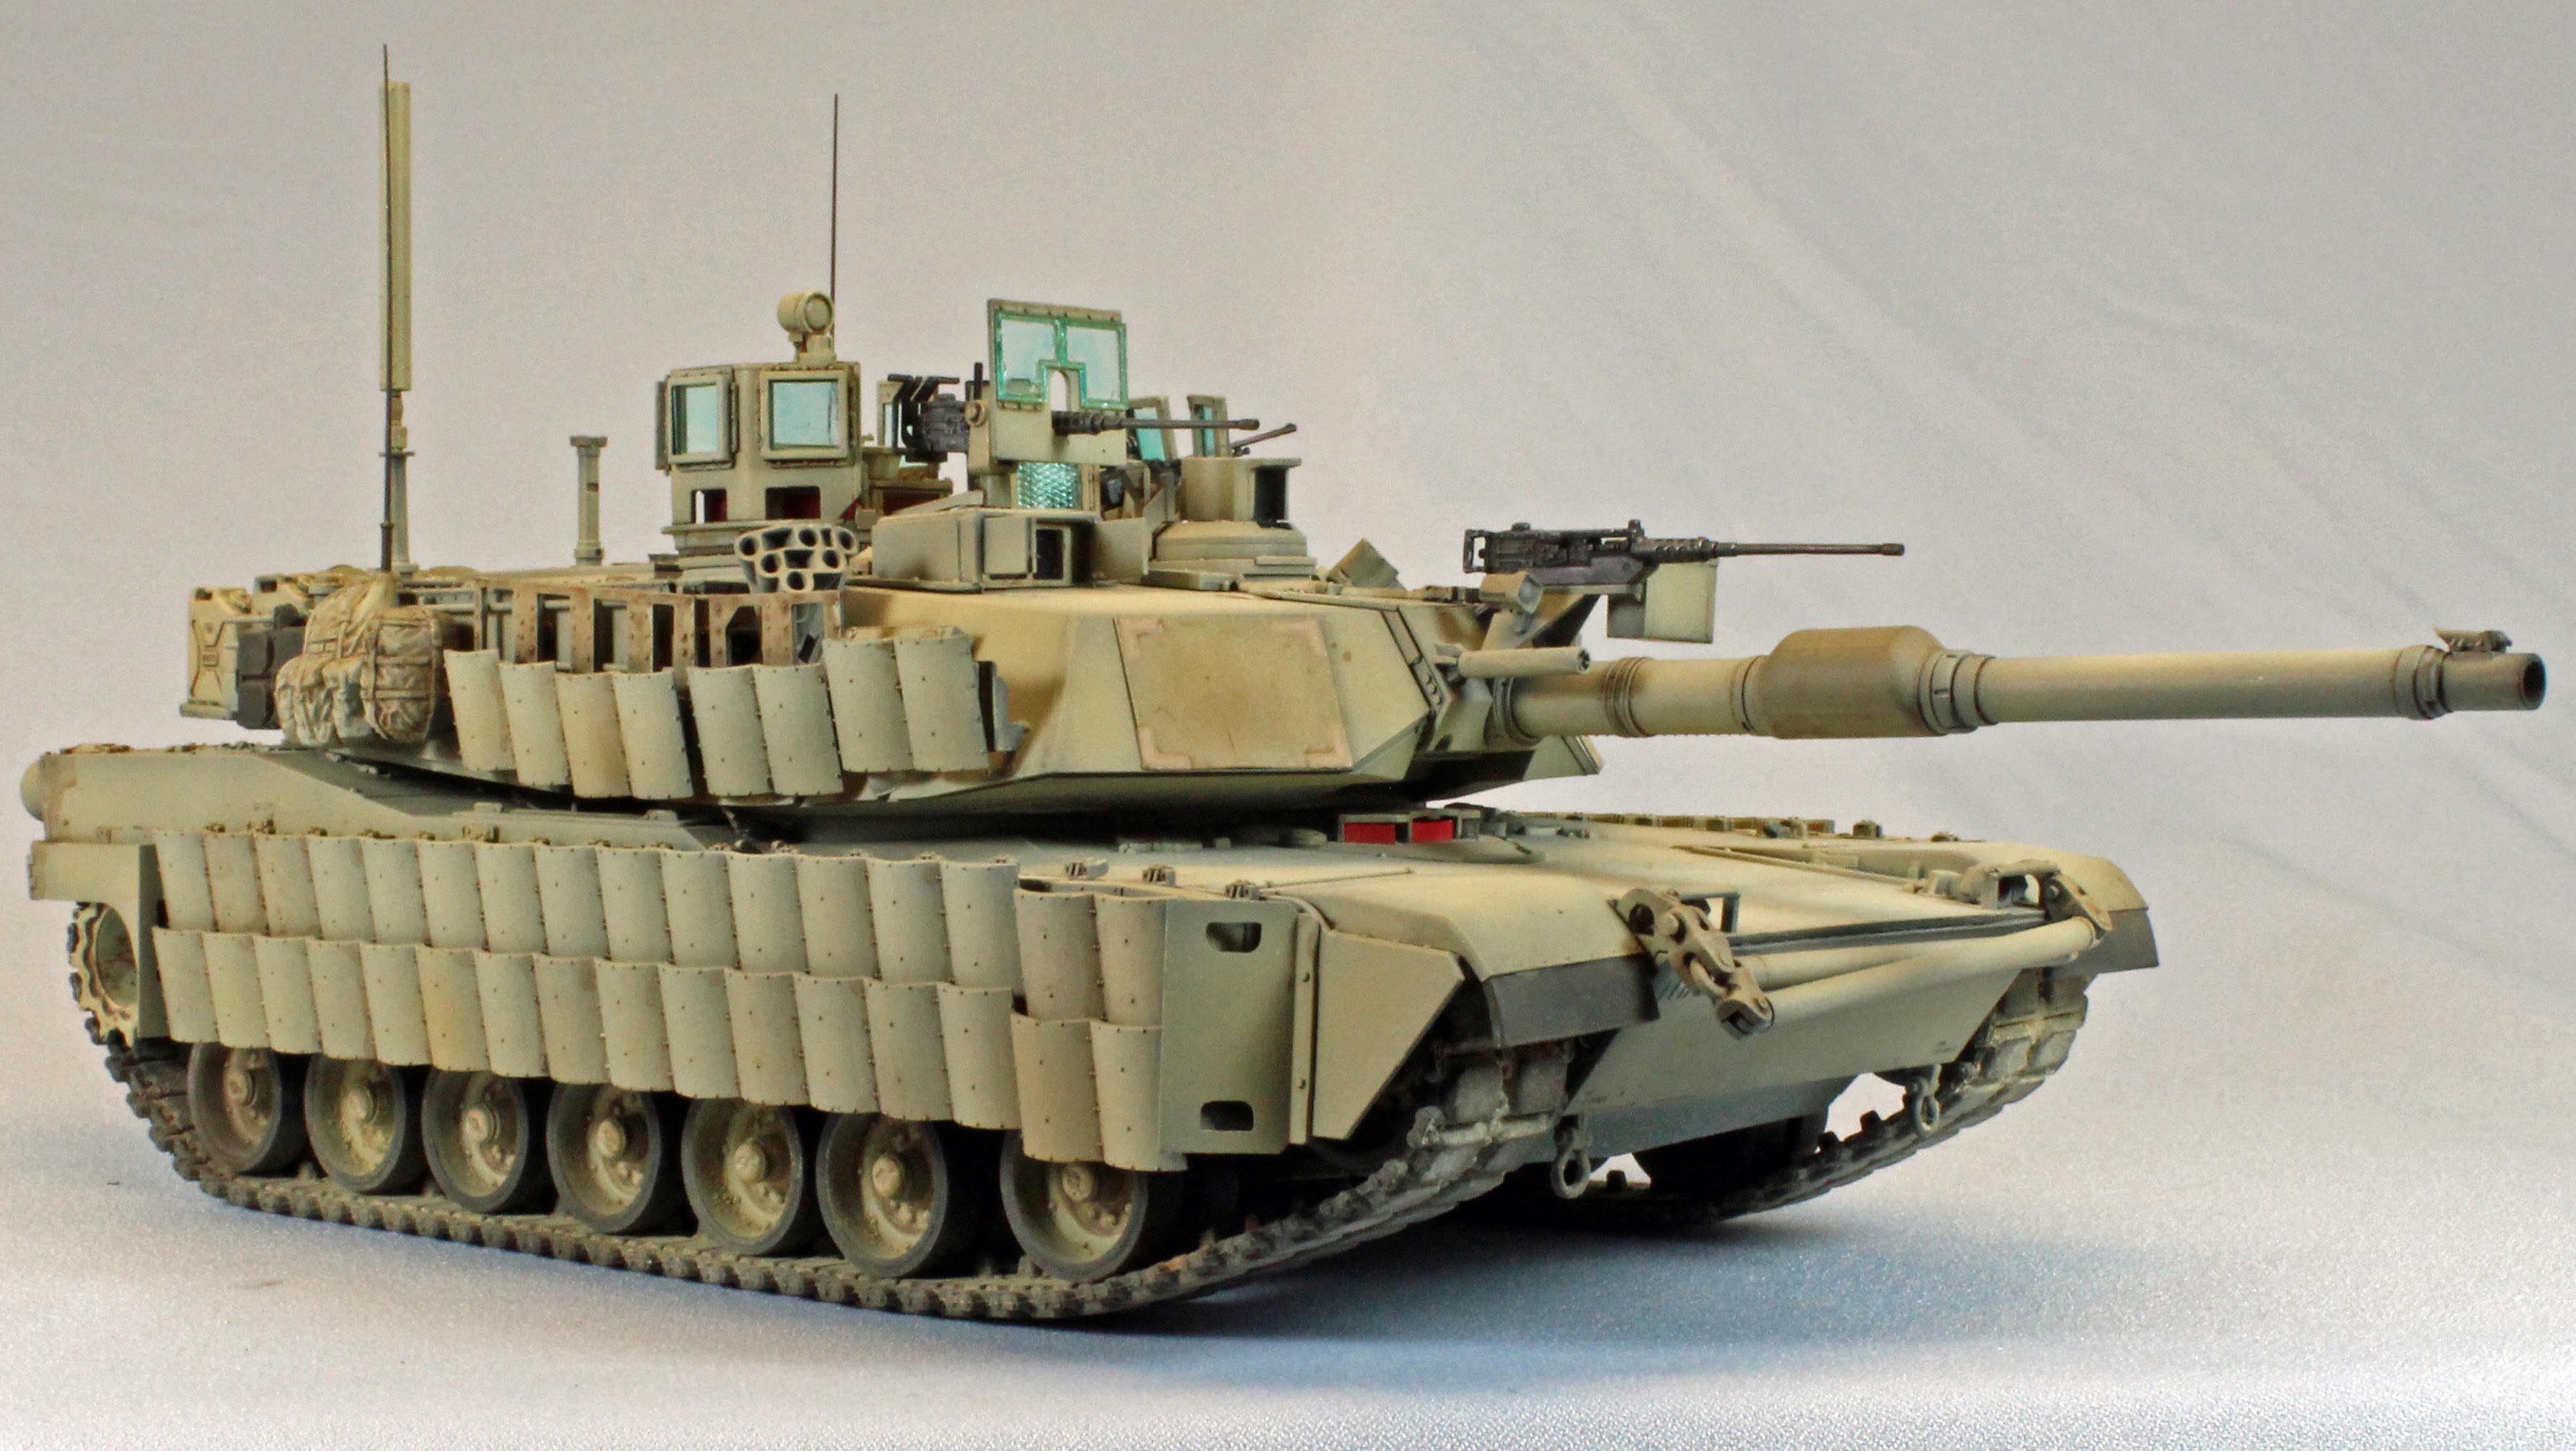
The barrel-mounted coaxial machine gun comes first. I attached everything but the actual gun and ammunition box, which were painted and finished separately. Likewise for the turret-mounted CITV (Commanders Independent Thermal Viewer) and the ICWS (Improved Commanders Weapons Station) assemblies, both containing glass optics that I wanted to treat separately. Any part or assembly that held armored glass also had to be built, painted and weathered separately lest overspray and pigments fog up their clear parts. These included both the commander and loader machine gun shields, as well as the various armored plates that required detailed painting. After a while I felt like I was building a giant airplane cockpit (!) – rare earth for a tank guy. Luckily, Academy designed and engineered all of these assemblies in such a way that they could be dropped into place after everything else was done. Excellent.
The commander’s hatch is surrounded by eight laser-reflective vision blocks molded as one piece (Part H12), and as such, did not want to fit inside the armored case made for them. I cut the vision block ring into three pieces to allow it to drop freely into the case.
Treatment of visor glass, system optics, armored glass panels, etc.
I tried several approaches to achieve a reasonable likeness to the multi-colored hues seen in the various glass and optics within. None were ideal, but it was good practice.
Armored Glass – Alclad makes an excellent lacquer product called ‘Armored Glass’, which dries to a pale green hue that, I think, resembles the color on (at least some of) the photos I have. Other photos show these panels as clear. I like the green so that’s what I used. I dipped the clear plastic into the lacquer paint and wicked off the excess using a paper towel, setting them aside to dry.
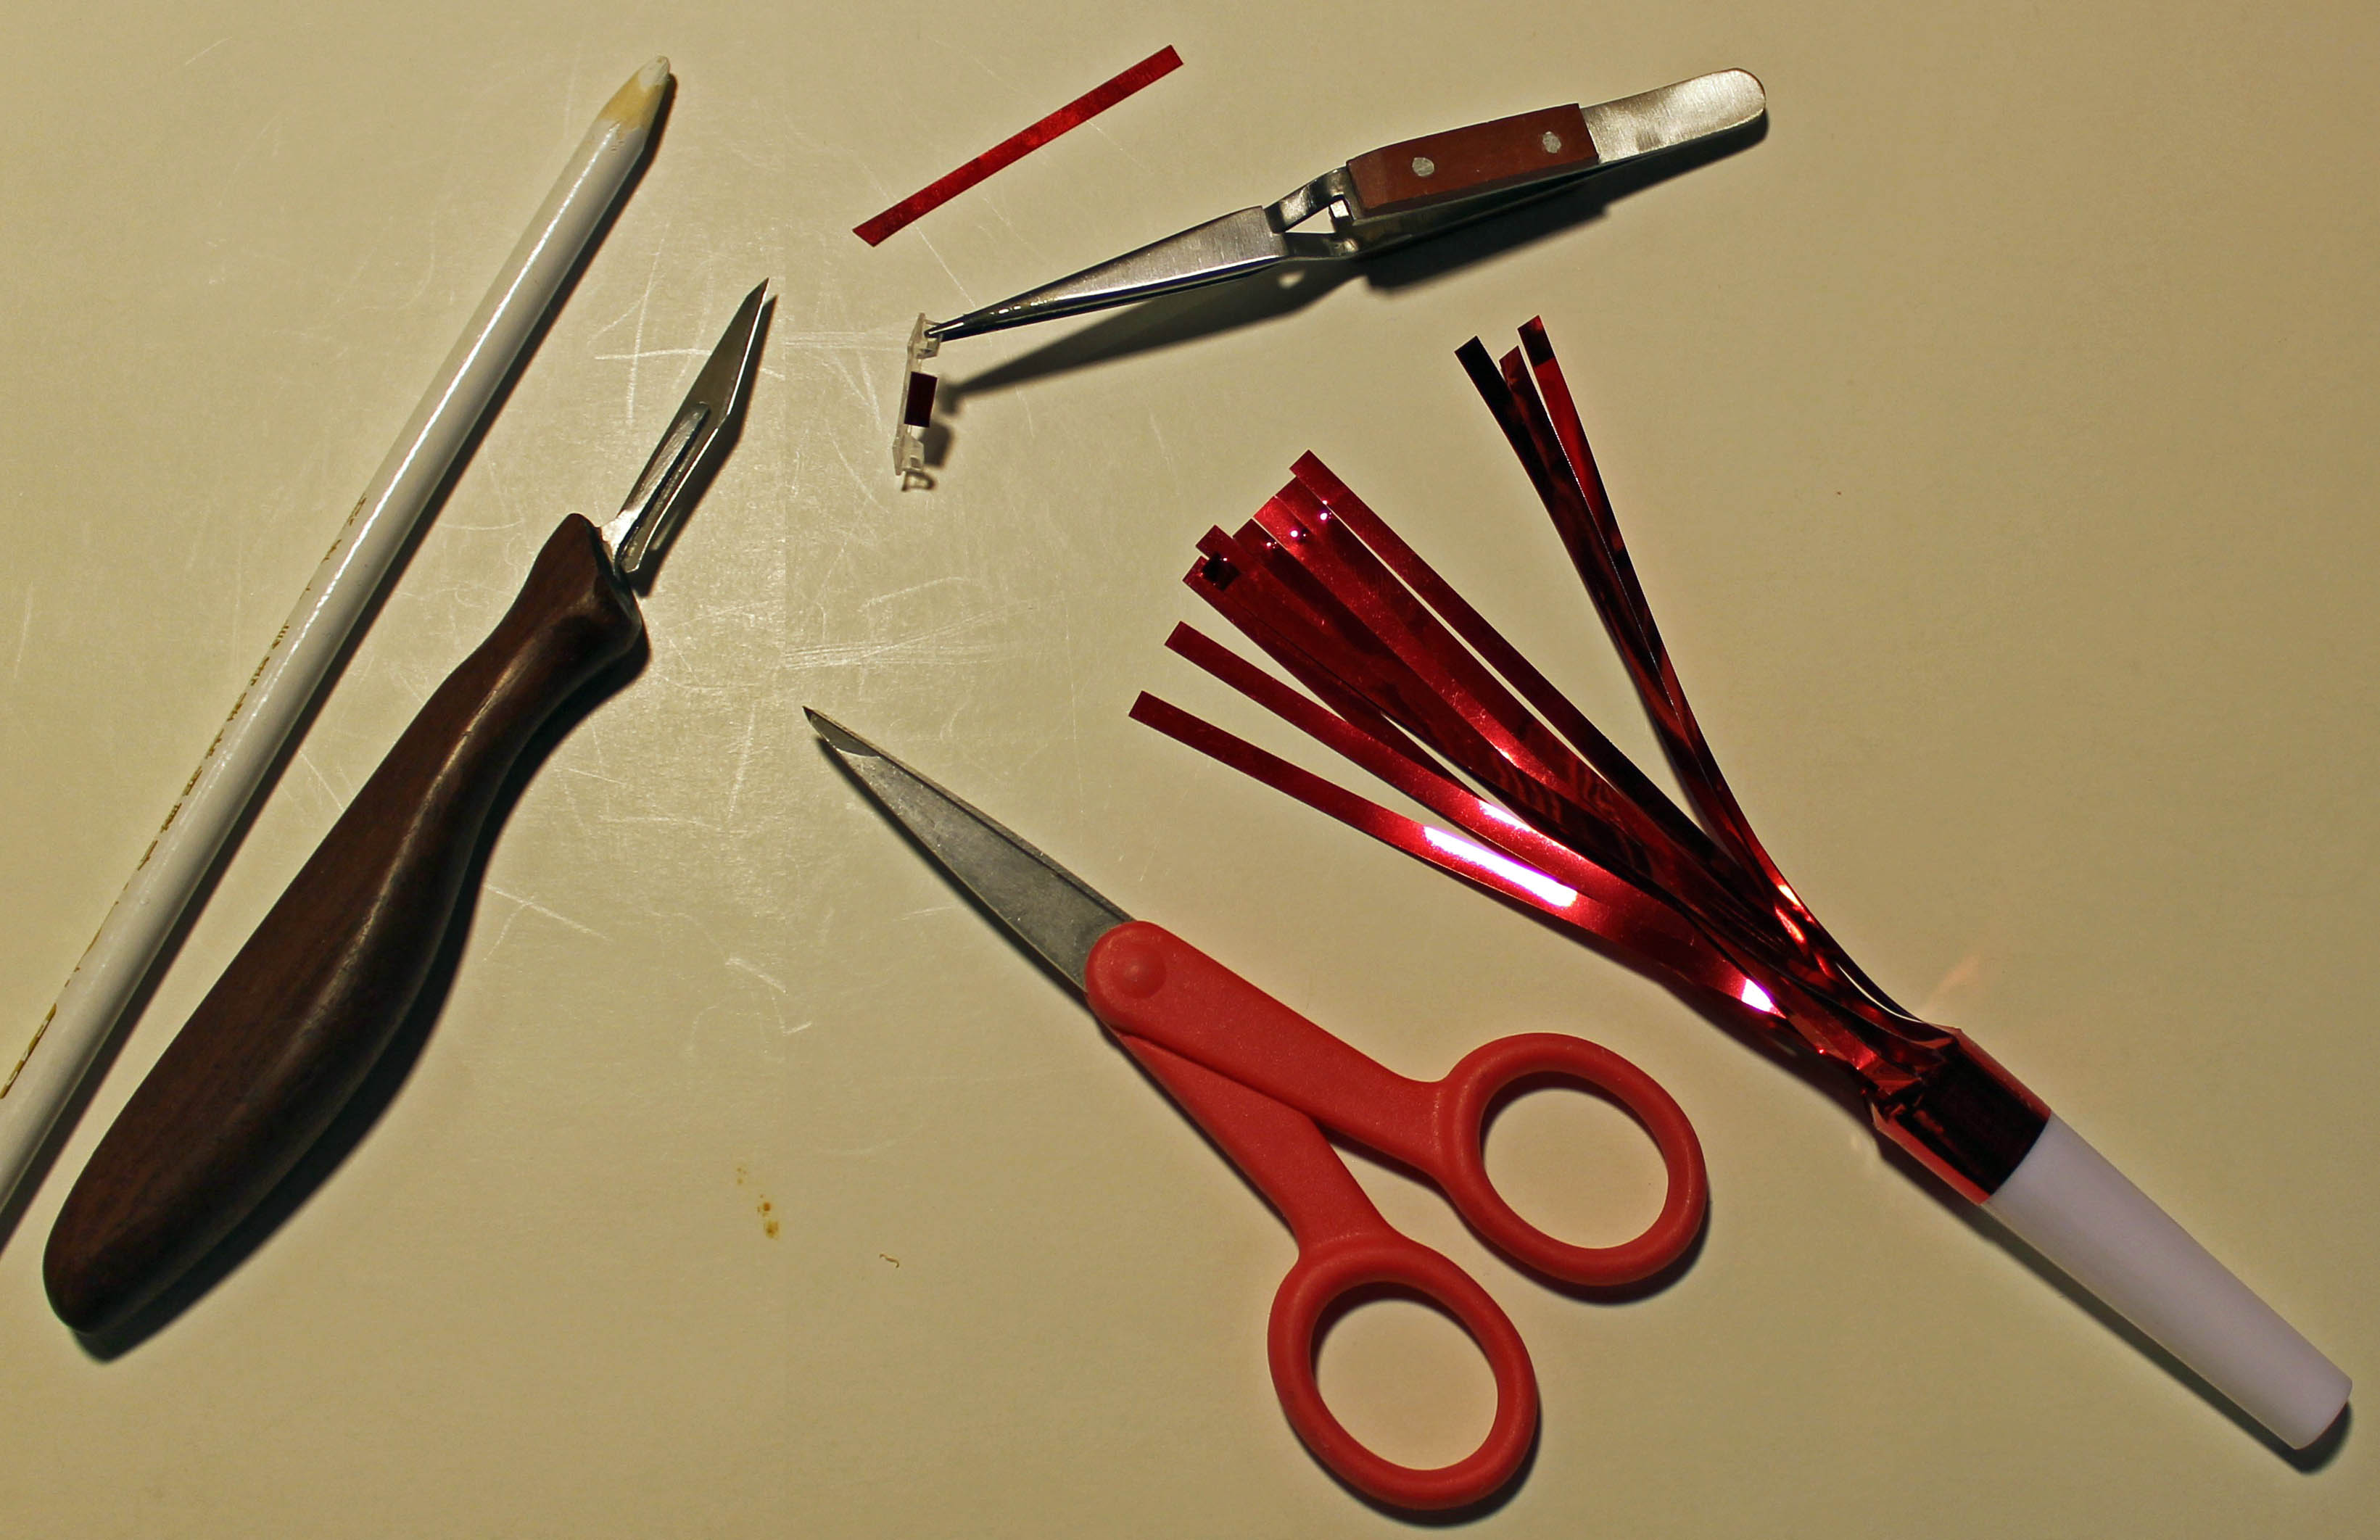
Visor laser-reflective vision blocks – The colors on these vary, depending on what angle they’re viewed from. I represented these colors using Mylar (clear, green, red, purple and blue) found in cheap party whistles (a lifetime supply for a village of modelers can be found at a Party Store for two bucks). I carefully cut our squares of the material and mounted them on the front of the vision blocks using Gator’s Grip, a water-based white glue ‘on steroids’.
CITV and ICWS optics – I mixed up Tamiya Clear Red and Tamiya Clear Blue for Blue and Purple hues used for these parts. I painted the backs of the glass parts with the paint and glued them on into their brackets. Tail lights – I painted the backs of the glass parts with Tamiya Gloss Red and glued them in place.
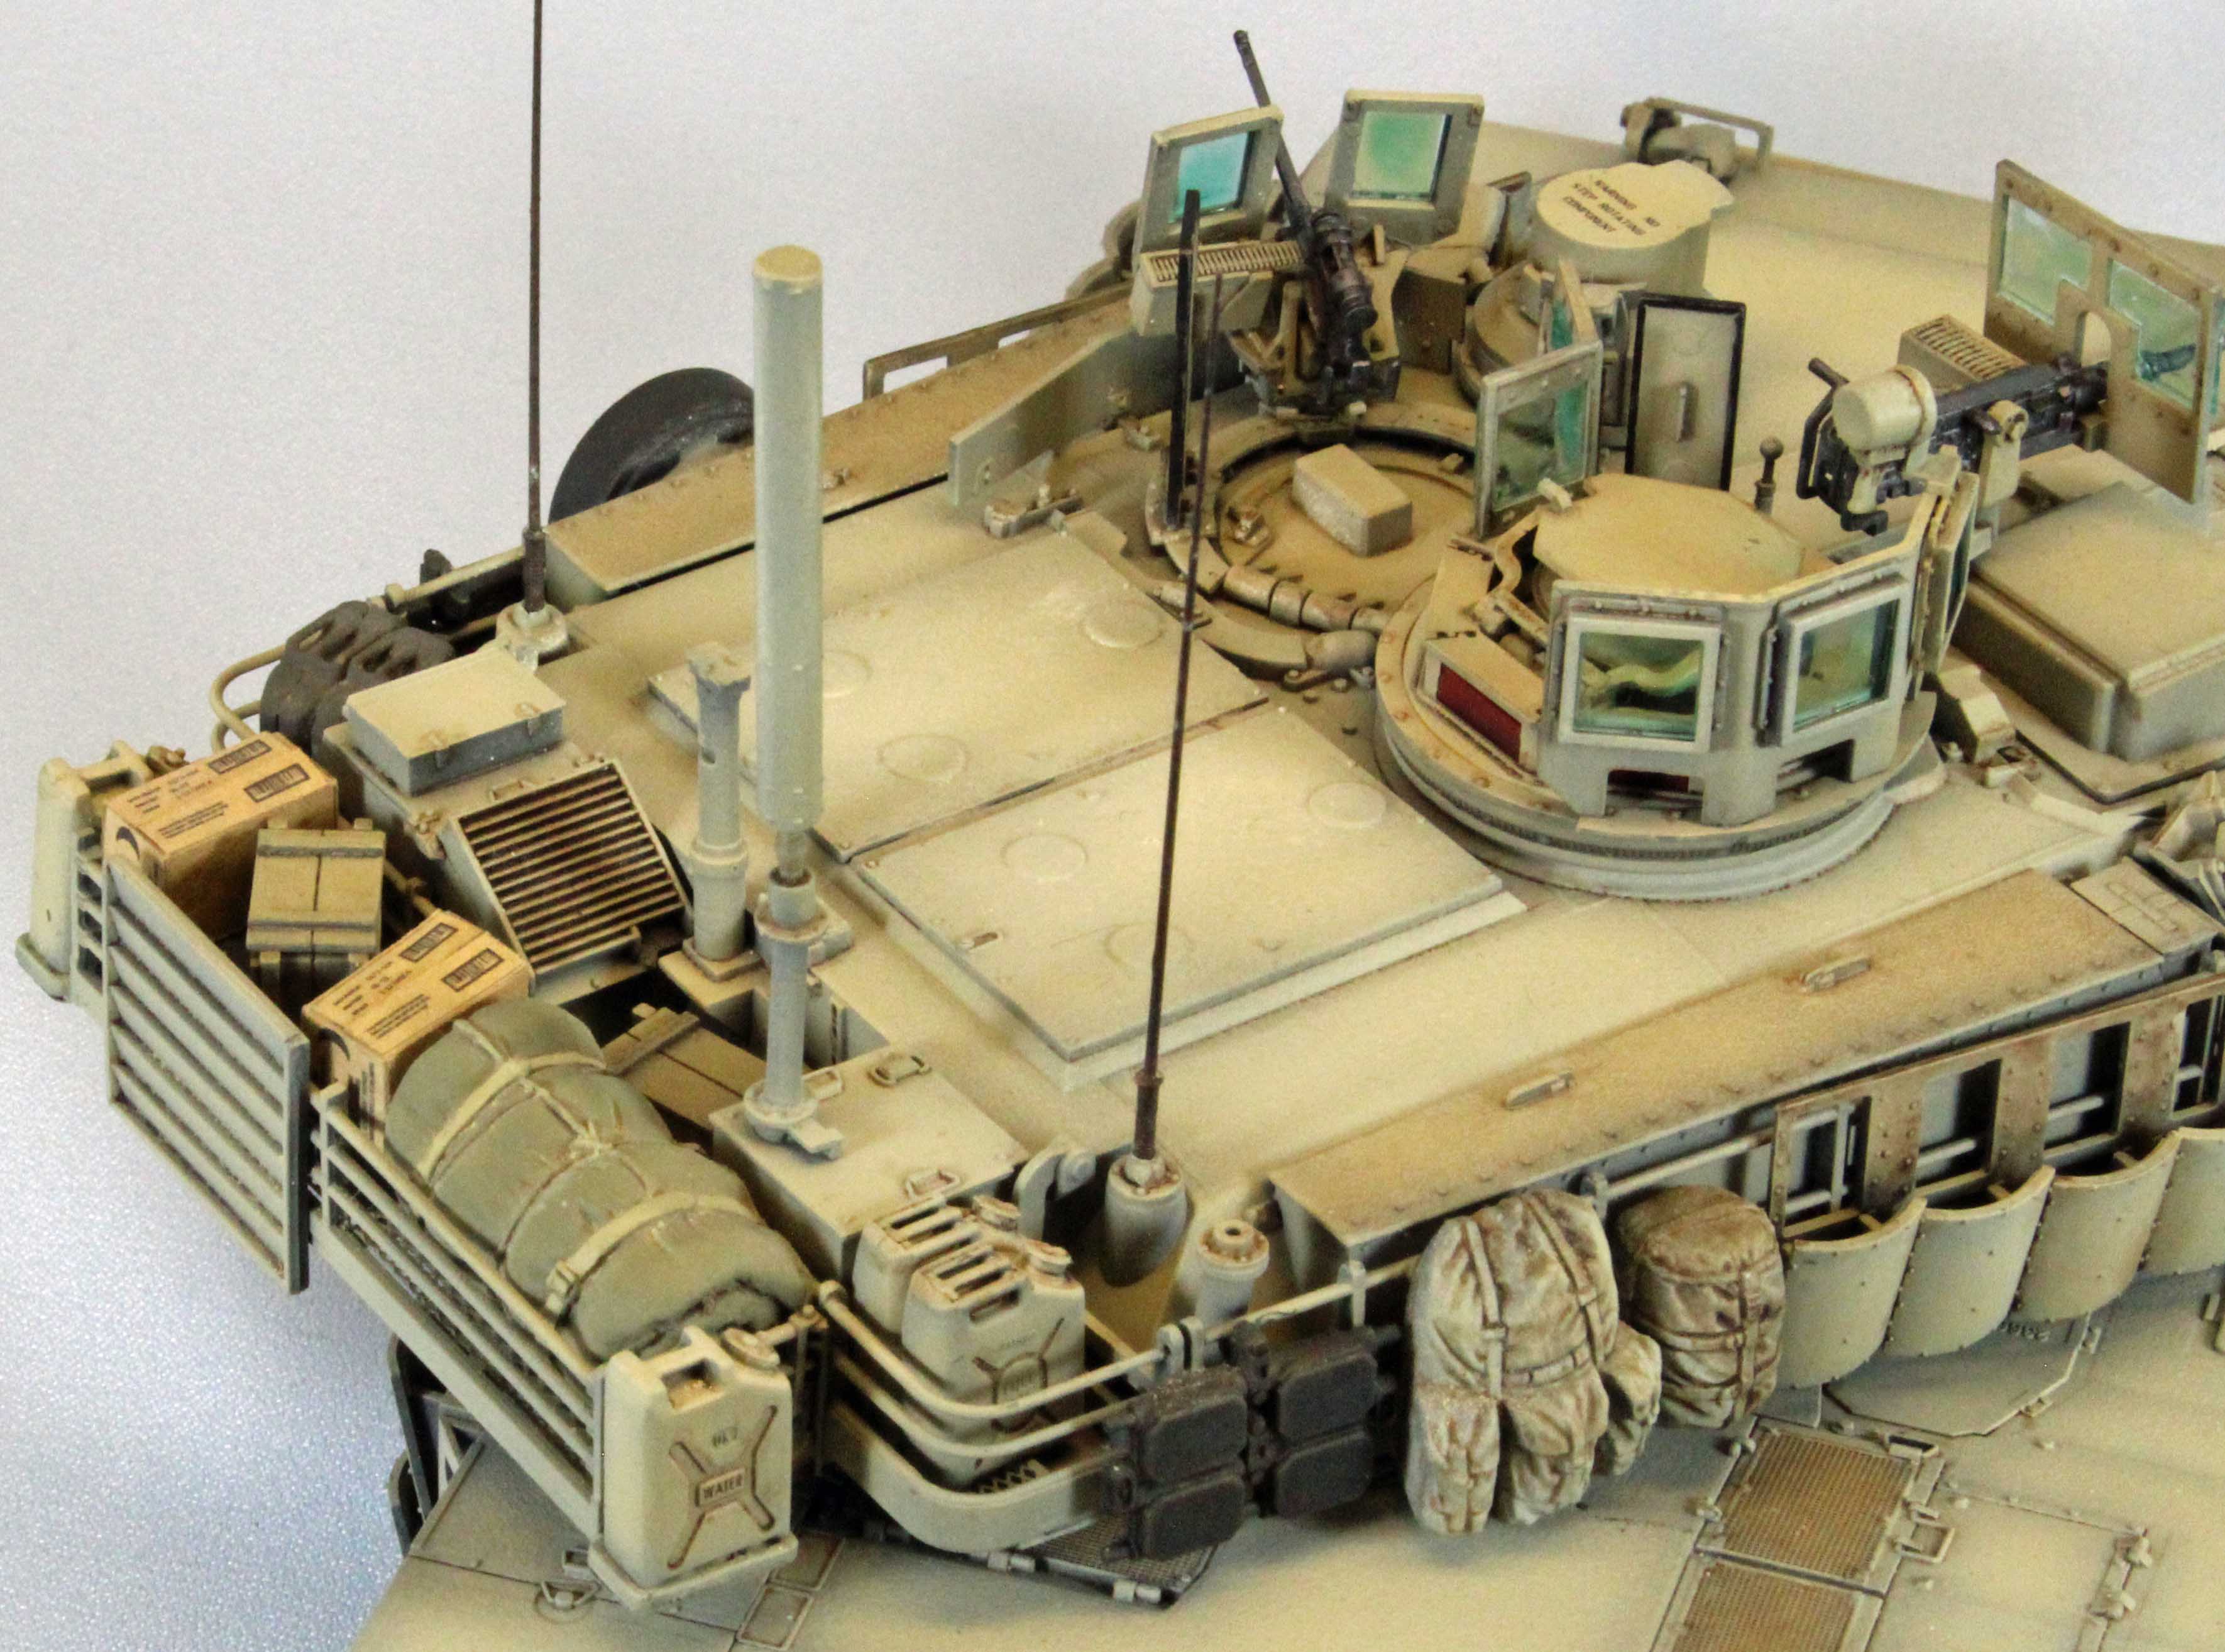
The third instruction manual continues with the turret, starting with the busy turret bustle: this is where most of the few photo-etch (PE) in the kit is used. The PE is delicate and wonderful to behold… but, unfortunately, once the bustle is filled up, very little of it can be seen.
The assembly of the bustle is one those tasks that appears daunting at first, with so mainly plainly visible steps that can go wrong. But once again, the fit and engineering here is superb. The finished assembly literally ‘clicks’ into place in the next step, and the result is eye-catching.
One more pleasantry to observe before moving on: I found myself attaching and removing the turret to and from the hull over and over to check how things were aligned and such. I can’t tell you how many times (on other kits) I’ve found this process a real chore due to poor design and/or fit. Not so on this kit – the turret literally falls into the hull once the tabs are aligned. Good Job Academy.
On to the turret side armor. Once I drilled the appropriate holes, the instructions said to attach the brackets to the storage bins, and then to attach (those assemblies) to the turret sides. I found that doing so could result in poorly aligned brackets – they should stand just proud of the surface of the bins, which is something I may not have realized until the glue had dried. Instead, I glued the bins to the turret sides, followed by the brackets. This is important, since the entire side-armor array is attached to the brackets, and the posts on the back of the armor plates have to extend all the way through the brackets to the turret side. More easily seen than explained!
Once the side armor is installed, access to the brackets and bins is limited so I assembled and painted the four side armor sections separately, leaving them aside to be attached later.
Two small issues: The fuel cans that attach to each side of the bustle are a little big for the bracket they drop into, and had to be shaved down at the bottom to fit. Also, the placement and orientation of the three-piece smoke/grenade dischargers is vague in the instructions. I found that temporarily attaching the armor sections (C10/C11) just below the dischargers helped with this task.
The last instruction manual is mostly directed at the SEP V2 and TUSK versions, and mostly involves different turret accessory options. Indeed, the only step for the TUSK II variant is to drop the turret into place in the last step.
With the main hull and turret together, along with various sticky boards set up for each of the sub-assemblies ready, it was time for paint.
Painting and Finish
The Abrams could be a challenge to paint and finish depending on just how far you’re willing to go; with so much going on up on top it’s hard to say ‘done’. I could have spent weeks on this, but (luckily!) this build has a deadline. As is usual with armor models, I painted 99% of the model after assembly, and 99% of that was done with an airbrush.
Airbrushing Vallejo Acrylics with a (syphon-feed) Pasche Model H - Except for my primer coats, I now exclusively use Vallejo paints in my continuing transformation over to true acrylics. I went through a bit of experimentation up front, but eventually found them to spray beautifully once I dialed in the right setup and thinning ratio. First, I pushed the pressure up to 20lbs - Vallejo recommends 12-15lbs, but I think I need the higher pressure because I use a siphon-style airbrush (Pasche H) as opposed to a gravity-feed airbrush. Once I did that, the spray pattern evened out and I lost the scatter-shot look of the paint on the surface.
Next, regardless of what line of paint I used (Model Air, Model Color, Panzer Color, or their Primers), I found that adding Liquitex Flow-Aid to an equal ratio of (Vallejo Airbrush Thinner and paint) worked well and (almost) never clogged. Not too much Flow-Aid: one drop to every ten drops of thinner. For example: in a typical half-hour session I would put two of drops flow-aid, 20 drops of thinner, and 20 drops of (any Vallejo) paint into a plastic, disposable cup and swish that around until it is mixed, and then pour it into the Pasche cup.
Also, and this is important: I keep the airbrush and the model moving as I spray, holding the model in such a way that I can see the reflection of the (nearly invisible) paint actually hitting the surface of the plastic. If I simply spray thinned acrylic paint until I see the color change on my dark primer, it will be too late - the paint will run. This is one mistake I made for a long time when trying acrylic paint. The color is built up slowly on the surface of the plastic, with consecutive passes.
One final note: cleaning the airbrush after using acrylics has become a must-do chore afterwards, which is a break from using distillate-based paints when I just blew some thinner through the brush and put it away. On the flip side, Vallejo paints come in a huge variety, are odor-free, and allow me swap my heavy, uncomfortable vapor mask I use with distillate-based paints for a simple painters (particulate) mask. I am sold.
On to the model! I finished the Abrams in a basic, one-color desert camouflage scheme, preferring to highlight and accent the monochrome finish using filters and washes. Unlike most armor kits (that can be completely assembled before painting), I had to break the painting into three phases: The first phase was after Step 9, before attaching the track; the second phase included painting all the assemblies that had colored ‘glass’; and the third phase was at the end, once the entire tank (sans the glass assemblies) had come together.
Primer and Pre-Shade
As mentioned previously, I use (rattlecan) Krylon Flat Black Lacquer Paint/Primer for my dark, primer/pre-shade coat. Surprisingly, this low-cost solution sprays on easily and dries very thin and level – replacing a 20+ minute task I normally use an airbrush and more expensive paint for. My only wish is that I could find it in an off-black shade, like NATO Black. I use a dark primer coat to give the plastic and PE some grip, and to fill in the recesses creating a shadow effect near the flat surface edges, and adding depth for the subsequent coats to come. I always let lacquer paint sit overnight to de-gas.
Camouflage
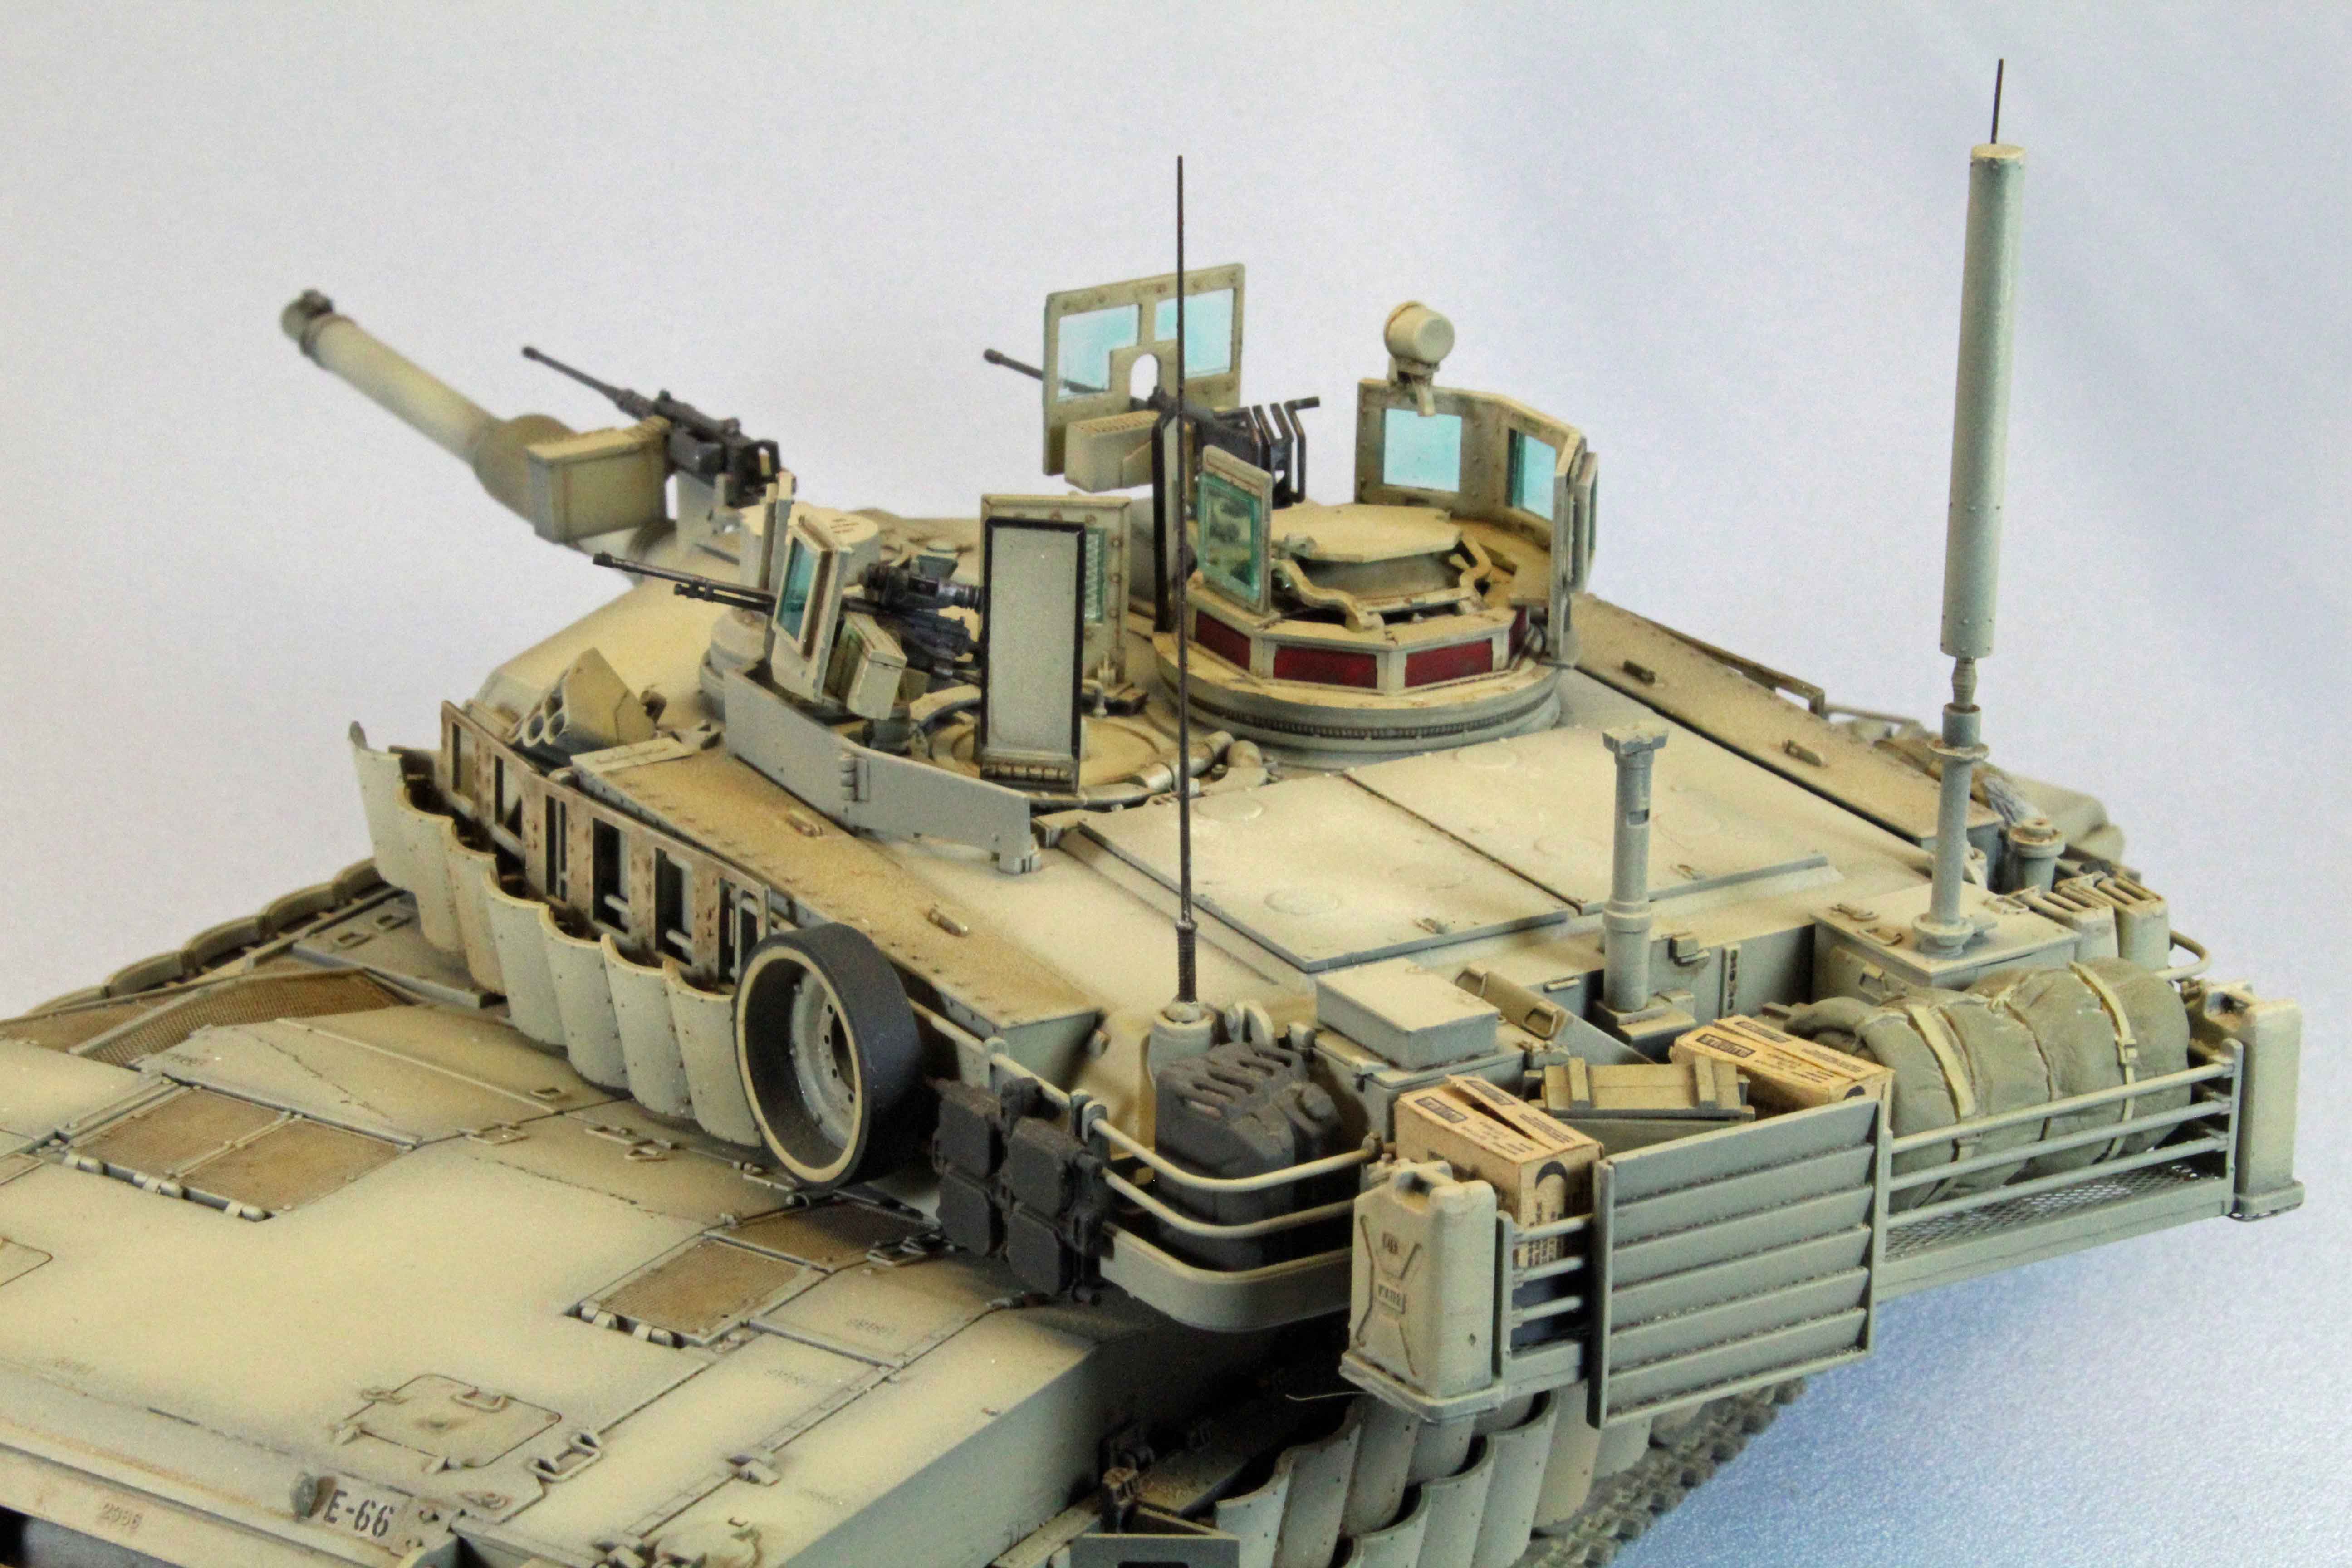
I followed the dark pre-shade coat with Vallejo Model Air 71.028 Sand Yellow, and then a light coat of Model Air 71.075 Sand Ivory on the upper surfaces. What starts out looking yellow-green ends up as a nice pale yellow. I worked each color from the center of the panels outward to preserve some of each color showing through from underneath (see image). Some parts I left the original darker yellow and some parts were nearly ivory-white, depending on where I thought the sun would hit, achieving sort of a forced-color perspective. I used this same approach for the subassemblies while they were still free of all their glass parts.
Decals
I am not a fan of decals on armor, and in this respect, Academy didn’t disappoint. While a relatively large decal sheet is provided, precious few markings are used on the TUSK variants. Once the paint was dry, I airbrushed a coat of Future over the entire model and subassemblies to set everything up for decals and the weathering coats to come. I applied the decals using the Red and Blue Micro Sol/Set system without any problems. Once the decals were dry, I laid down an additional layer of Future to seal them. This makes the decal surfaces and edges literally disappear when the flat coat is added later. Instructions for decal placement was a little aggravating. Some decals are shown scattered in the instructions; some are shown in the ‘decal placement’ color document. Since there are four ‘manuals’ it would have been nice to include all the decal placement instructions in one place.
Pin Wash and Detail Painting (Glossy Surface)
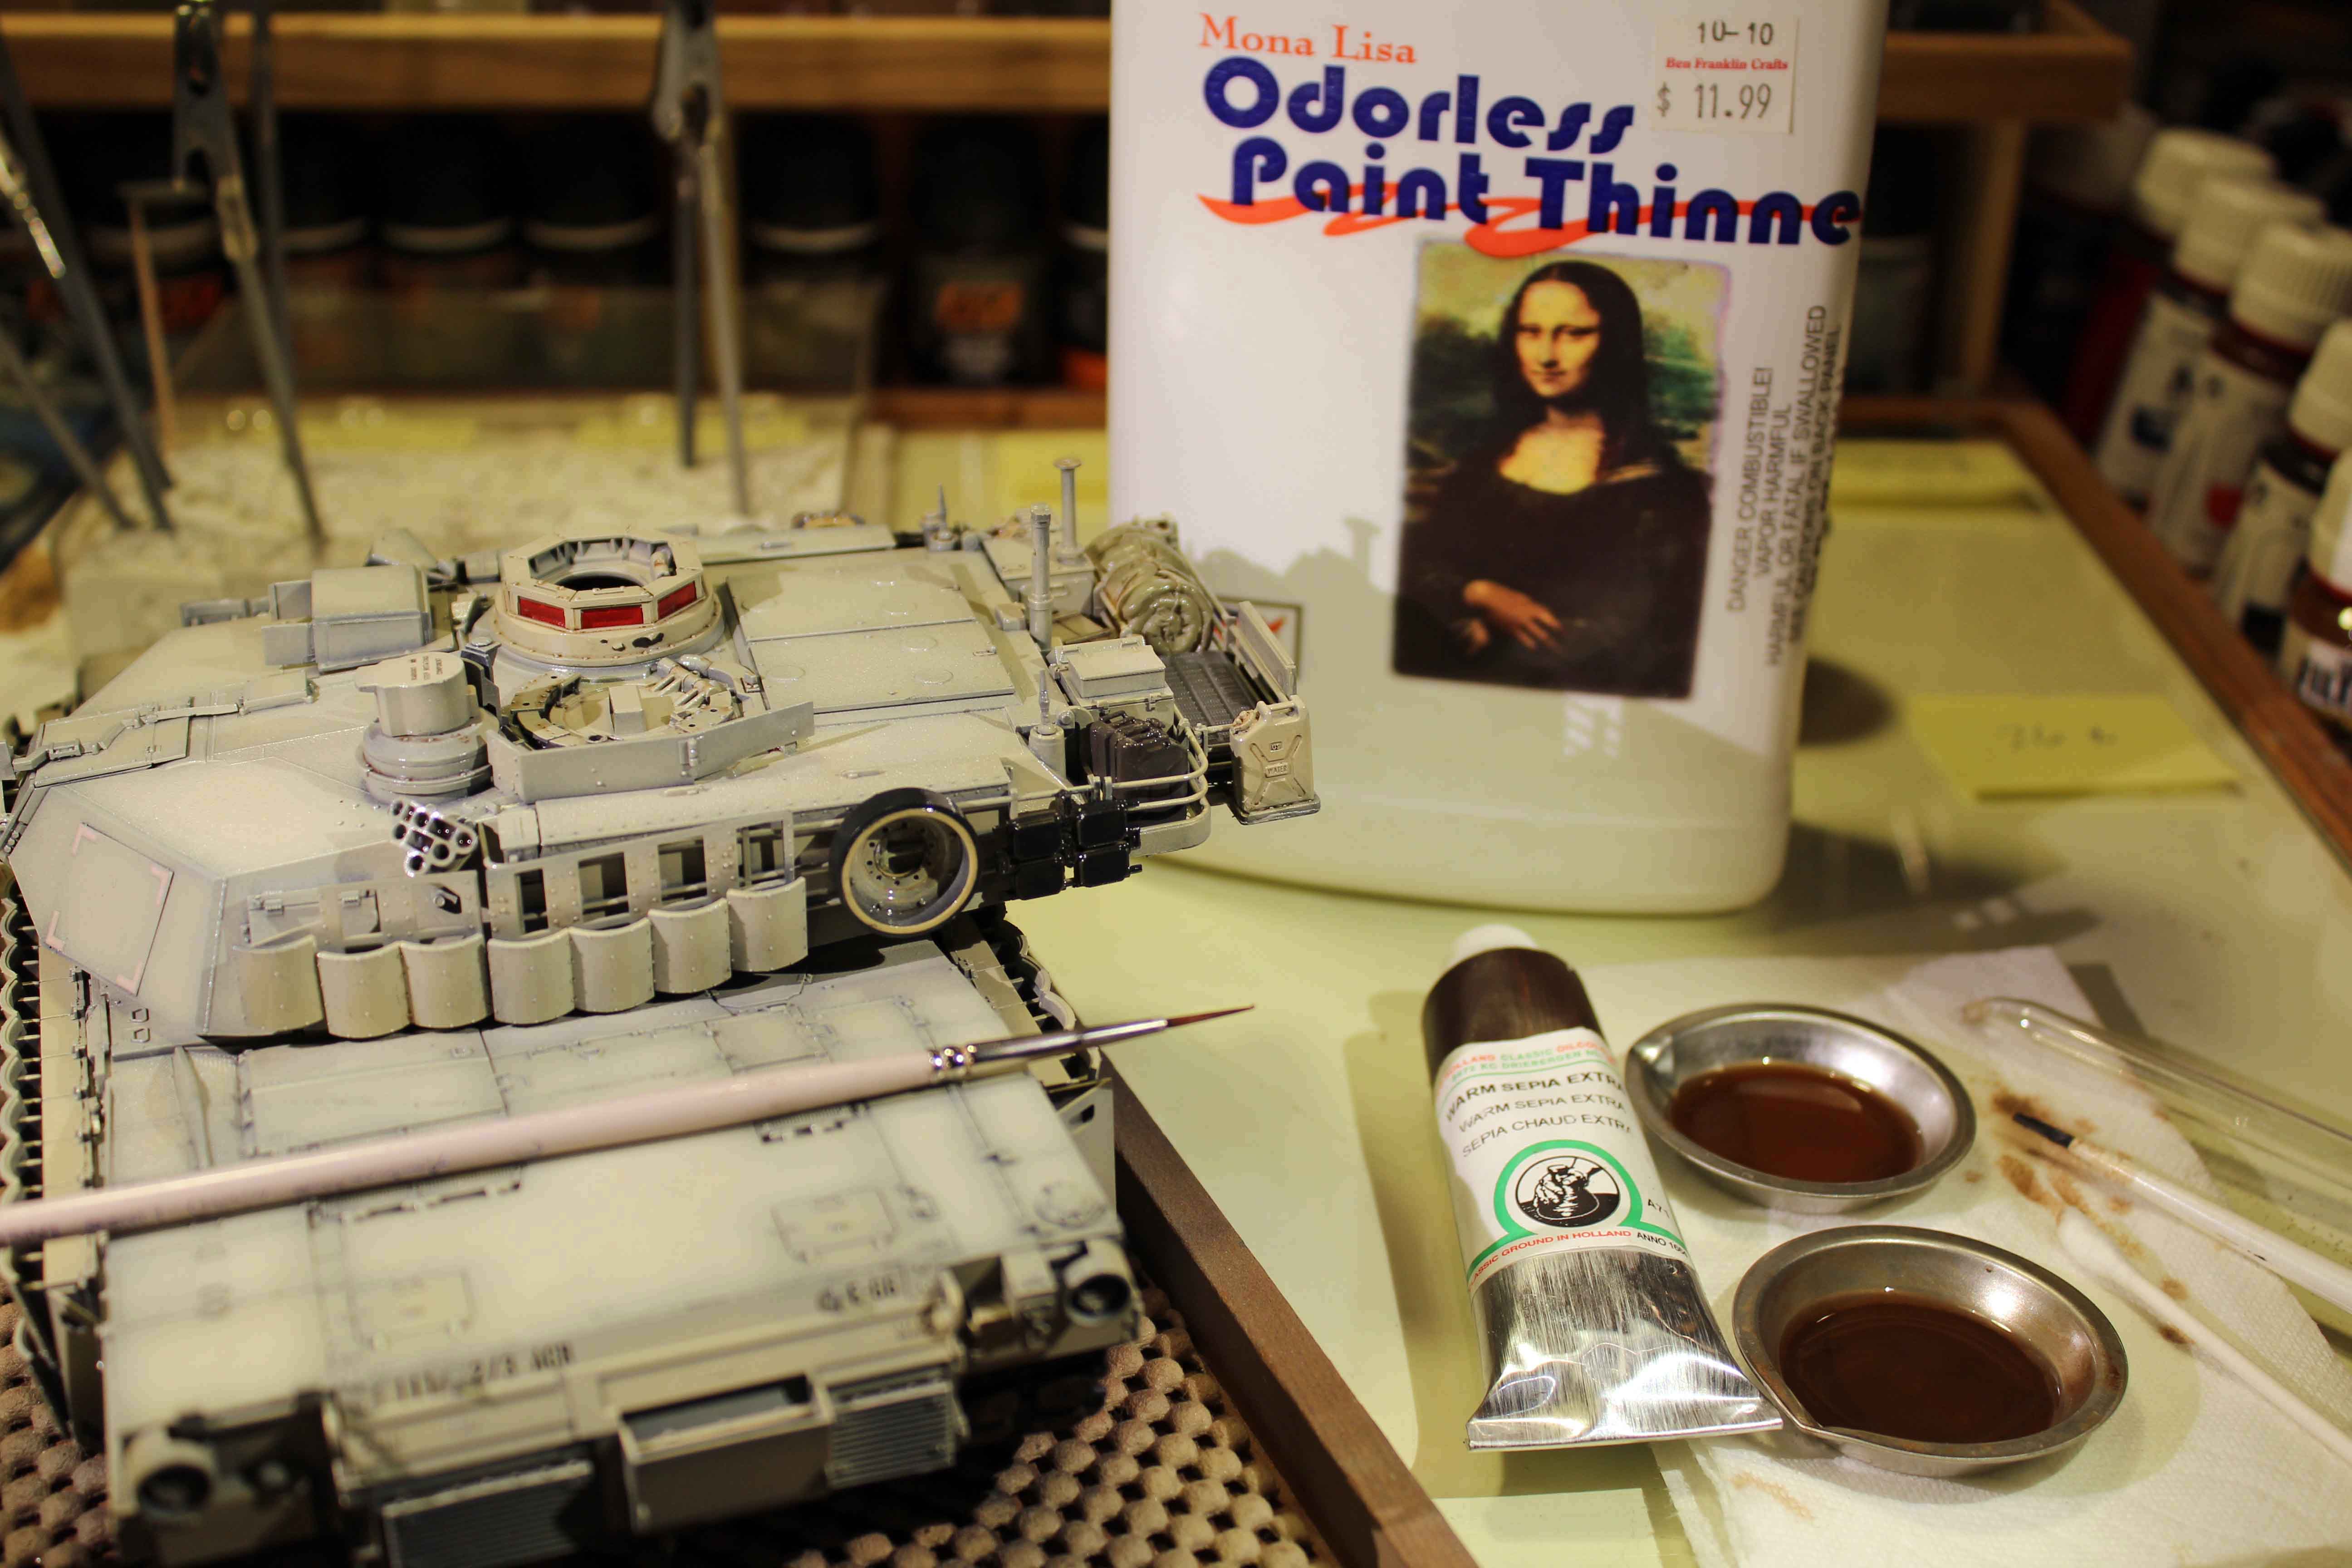
Note: I thin all of my distillate-based washes and filters using Mona Lisa Odorless Thinner, which is wonderfully mild and will not affect underlying layers of paint. Once the second future coat was dry to the touch, I went to work using Old Holland Warm Sepia Extra as a pin wash for the entire vehicle. Old Holland’s oil paint, which I first learned about from Tony Greenland’s excellent book, ‘Panzer Modeling’ (Osprey), is the perfect hue and pigment for this kind of work, and its pigment is as fine, or finer, than products made specifically for modelers.
I made two relatively thin washes using the Sepia and Mona Lisa Thinner (see image). The thinnest wash is for the detail that not recessed, or very slightly recessed. The slightly thicker wash is for the heavily recessed detail. Using a small red sable brush, I concentrated on the panel lines, recesses, buckles, and other on-board detail, letting the thin wash run itself along using capillary action on the slick, glossy surfaces.
Machine guns
I first paint these using Tamiya Flat Black, which is a little grittier than the Vallejo blacks. I need that rough surface to hold on to a layer of Uschi’s (Chrome) Metal Polishing Powder. I apply this wonderful product using an artist’s blender, which looks like a paint brush but has a rubbery end that mimics the soft ‘push’ of a finger. The blender can get into places that my stubby fingers can’t. The result is a dull, metal glint that I think looks right for the effect on guns.
Antenna and Bustle Accoutrement
I went to my spare parts bin and found two Orange Hobby brass antennas that I dipped in Blacken-It before affixing them to the turret with super glue. Likewise, I was able to find two ration boxes from Tamiya, and some extra water cans, backpacks and a rolled up tent from ValueGear. The ration boxes come in a sheet that you have to carefully cut up and glue (I left them their original color). The rolled-up tent was painted using Vallejo Model Color 71.044 Light Grey Green and Vallejo Panzer Aces 340 Highlight Afrika Korps (for the straps). The backpacks were painted using Vallejo Model Color 70.976 Buff.
Once all the detail painting was done, I gave everything a thorough coat of Vallejo Matt Varnish, thinned just like their other paint products using Flow Aid and their own thinner. This knocked the glossy shine down and prepared the surfaces for final assembly and the remaining weathering steps.
Now that all the airbrush work was complete, I went about attaching the various hand-painted glass, antennas, machine guns, and other subassemblies to the turret. I use Gator’s Grip white glue for the clear ‘glass’ parts. This superior adhesive is tacky once it touches the plastic and dries crystal clear. Once everything was in place, I touched any shiny glue spots using Vallejo Matt Varnish, applied with a brush.
Filters and Pigments (Flat Surface)
I mixed up another thin batch of the Sepia oil paint and Mona Lisa, and applied a filter to the various panels, armor plates, and storage bins on the turret and upper hull to break up the overall monochromatic surface. I went back and added a second and third filter coat to specific areas to further differentiate them from their surrounding detail. I also used pictures to help me decide what pigments to use, and where to use them. I worked on the track, the exhaust screens, and the upper, sun-bleached surfaces. I like to break this process up into multiple sessions spread over several days, so I can look at the model fresh before I add decide to more. Subtly is key, and too much weathering is hard to recover from. Once satisfied, this bad boy was off to the photo booth.
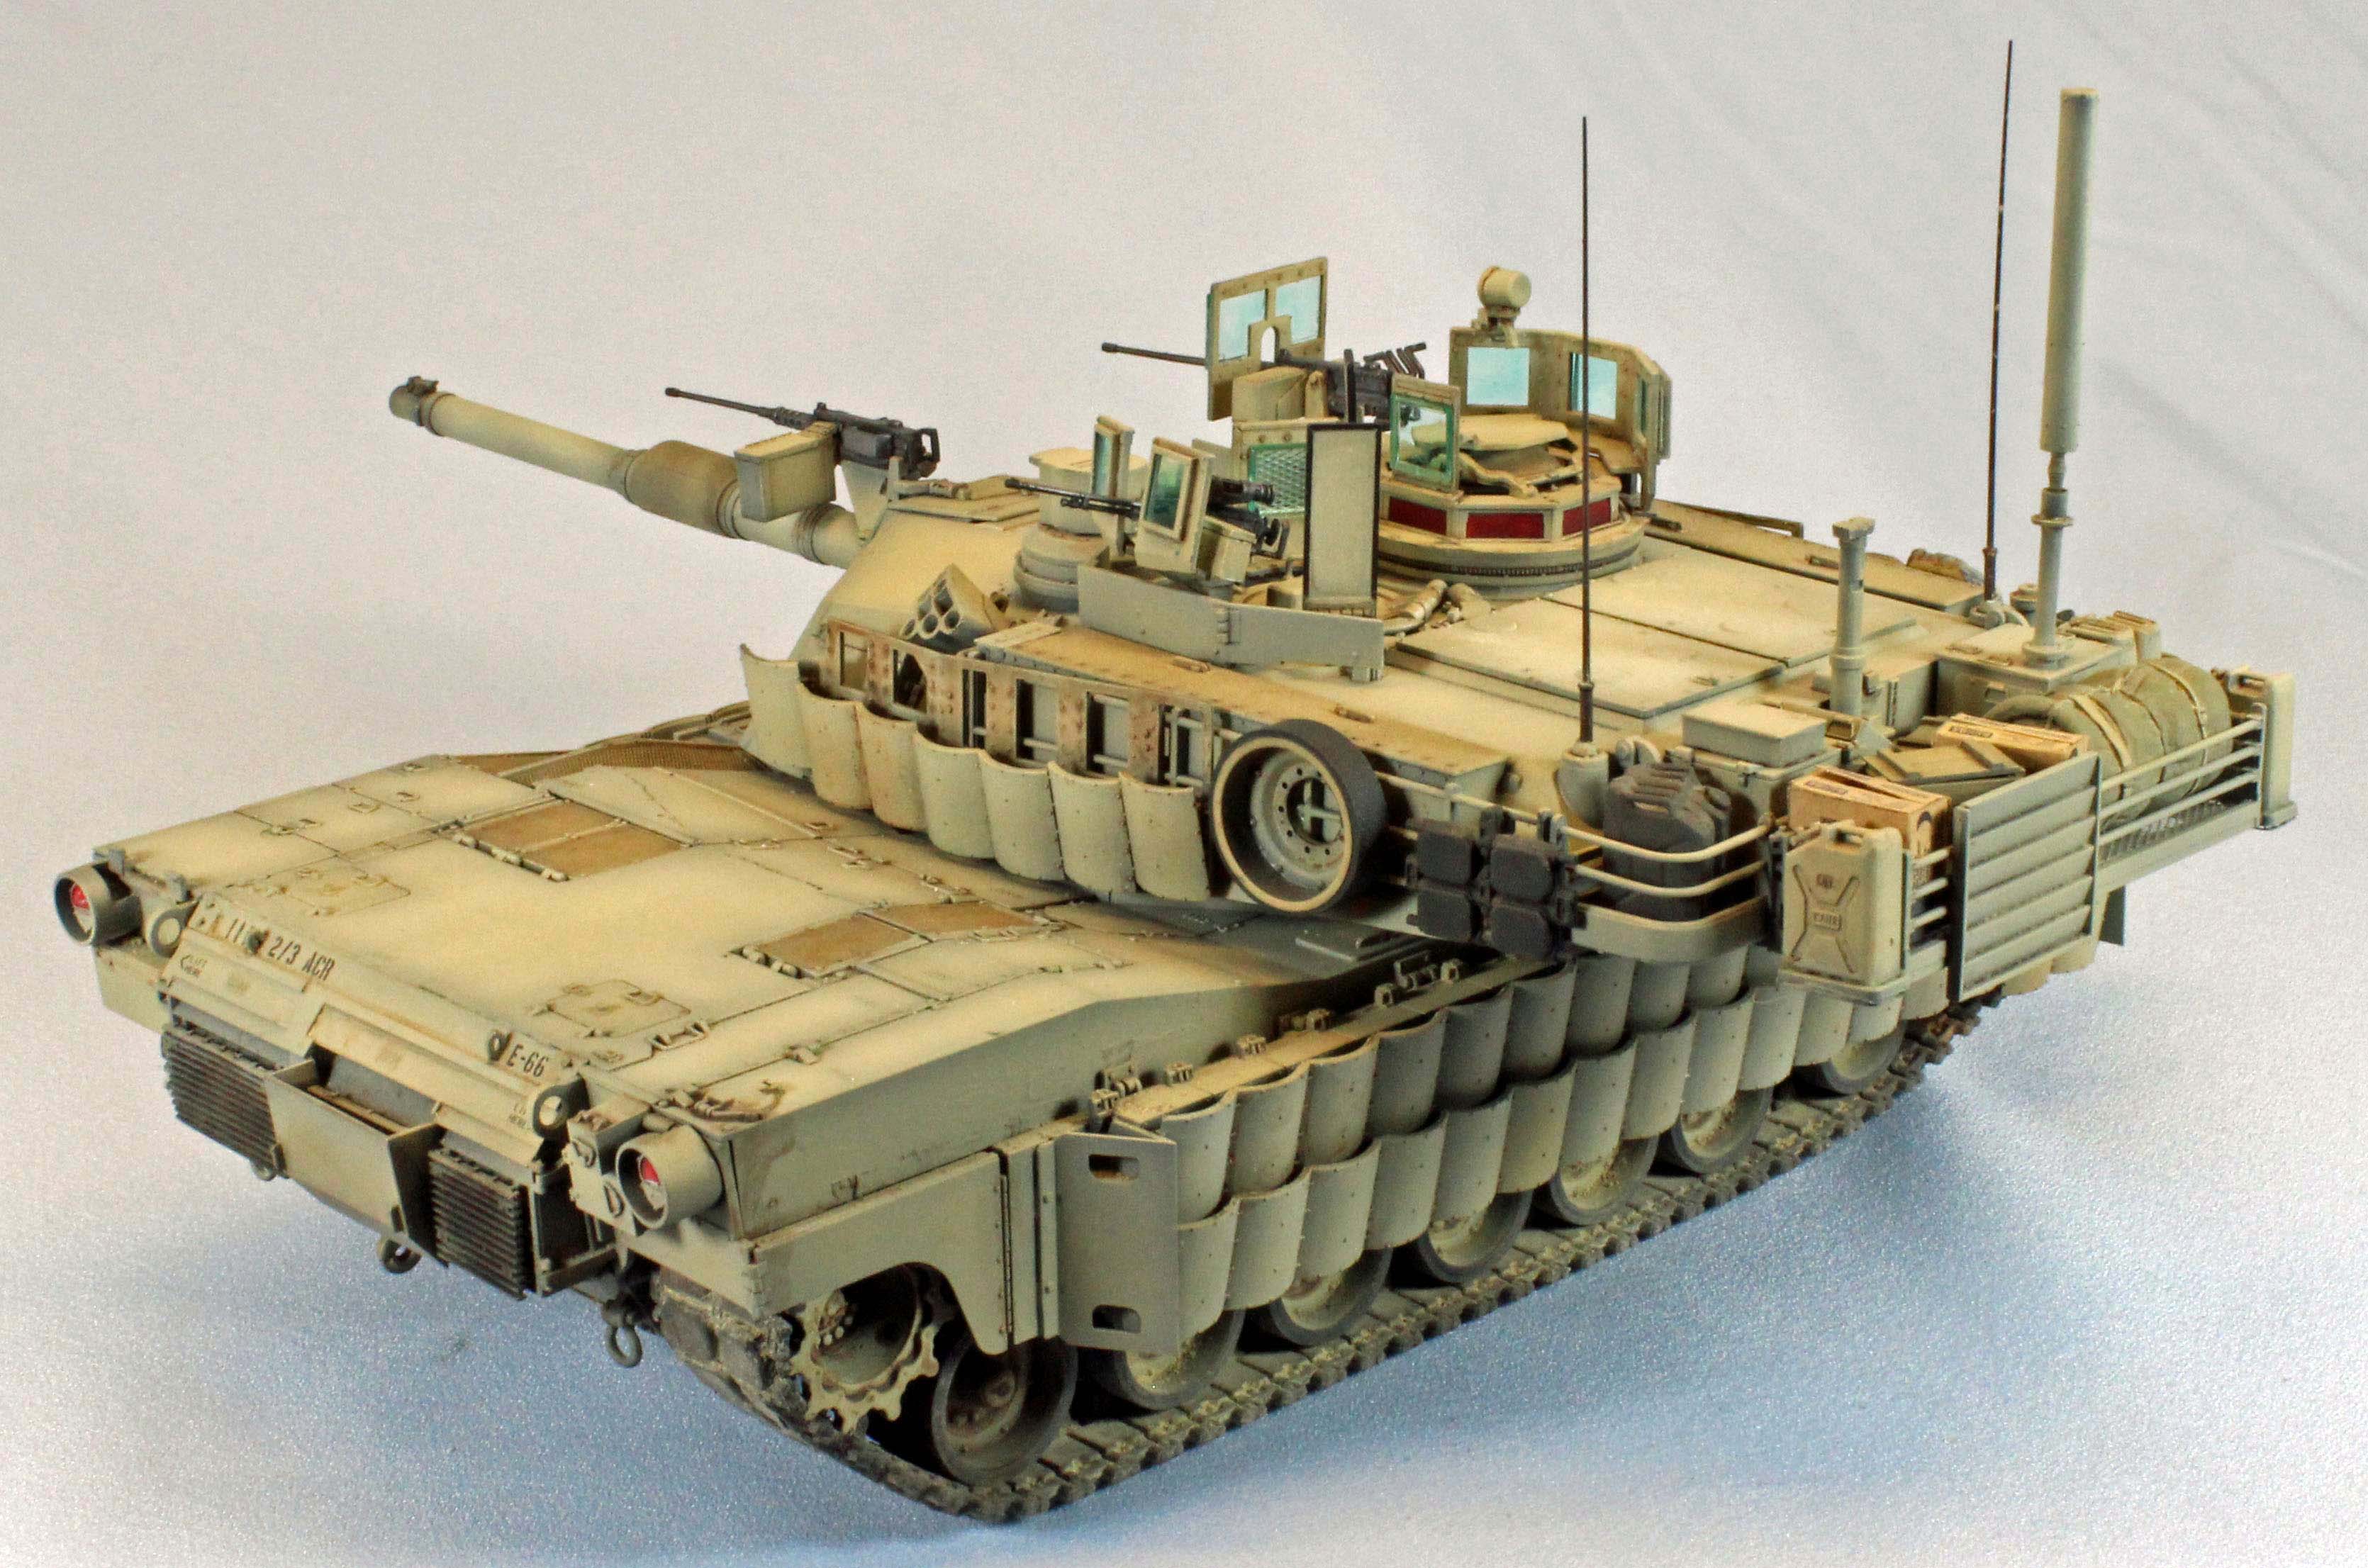
Conclusion
The M1A2 Abrams TUSK II was a lot of fun to build. Academy did an excellent job of translating the busy look of a modern U.S. AFV into this scale representation. A perfect kit would have included more stowage gear for the turret bustle, but beyond that it’s hard to imagine what could have been improved upon. The excellent fit, as well as the simple, intuitive design and engineering - focused on buildability - will keep me coming back for more. I enthusiastically recommend this kit to all modelers and all experience levels.
I would like to extend my warm thanks to Academy for providing the kit and to IPMS USA for giving me the opportunity to build it.