Reviews
Armor
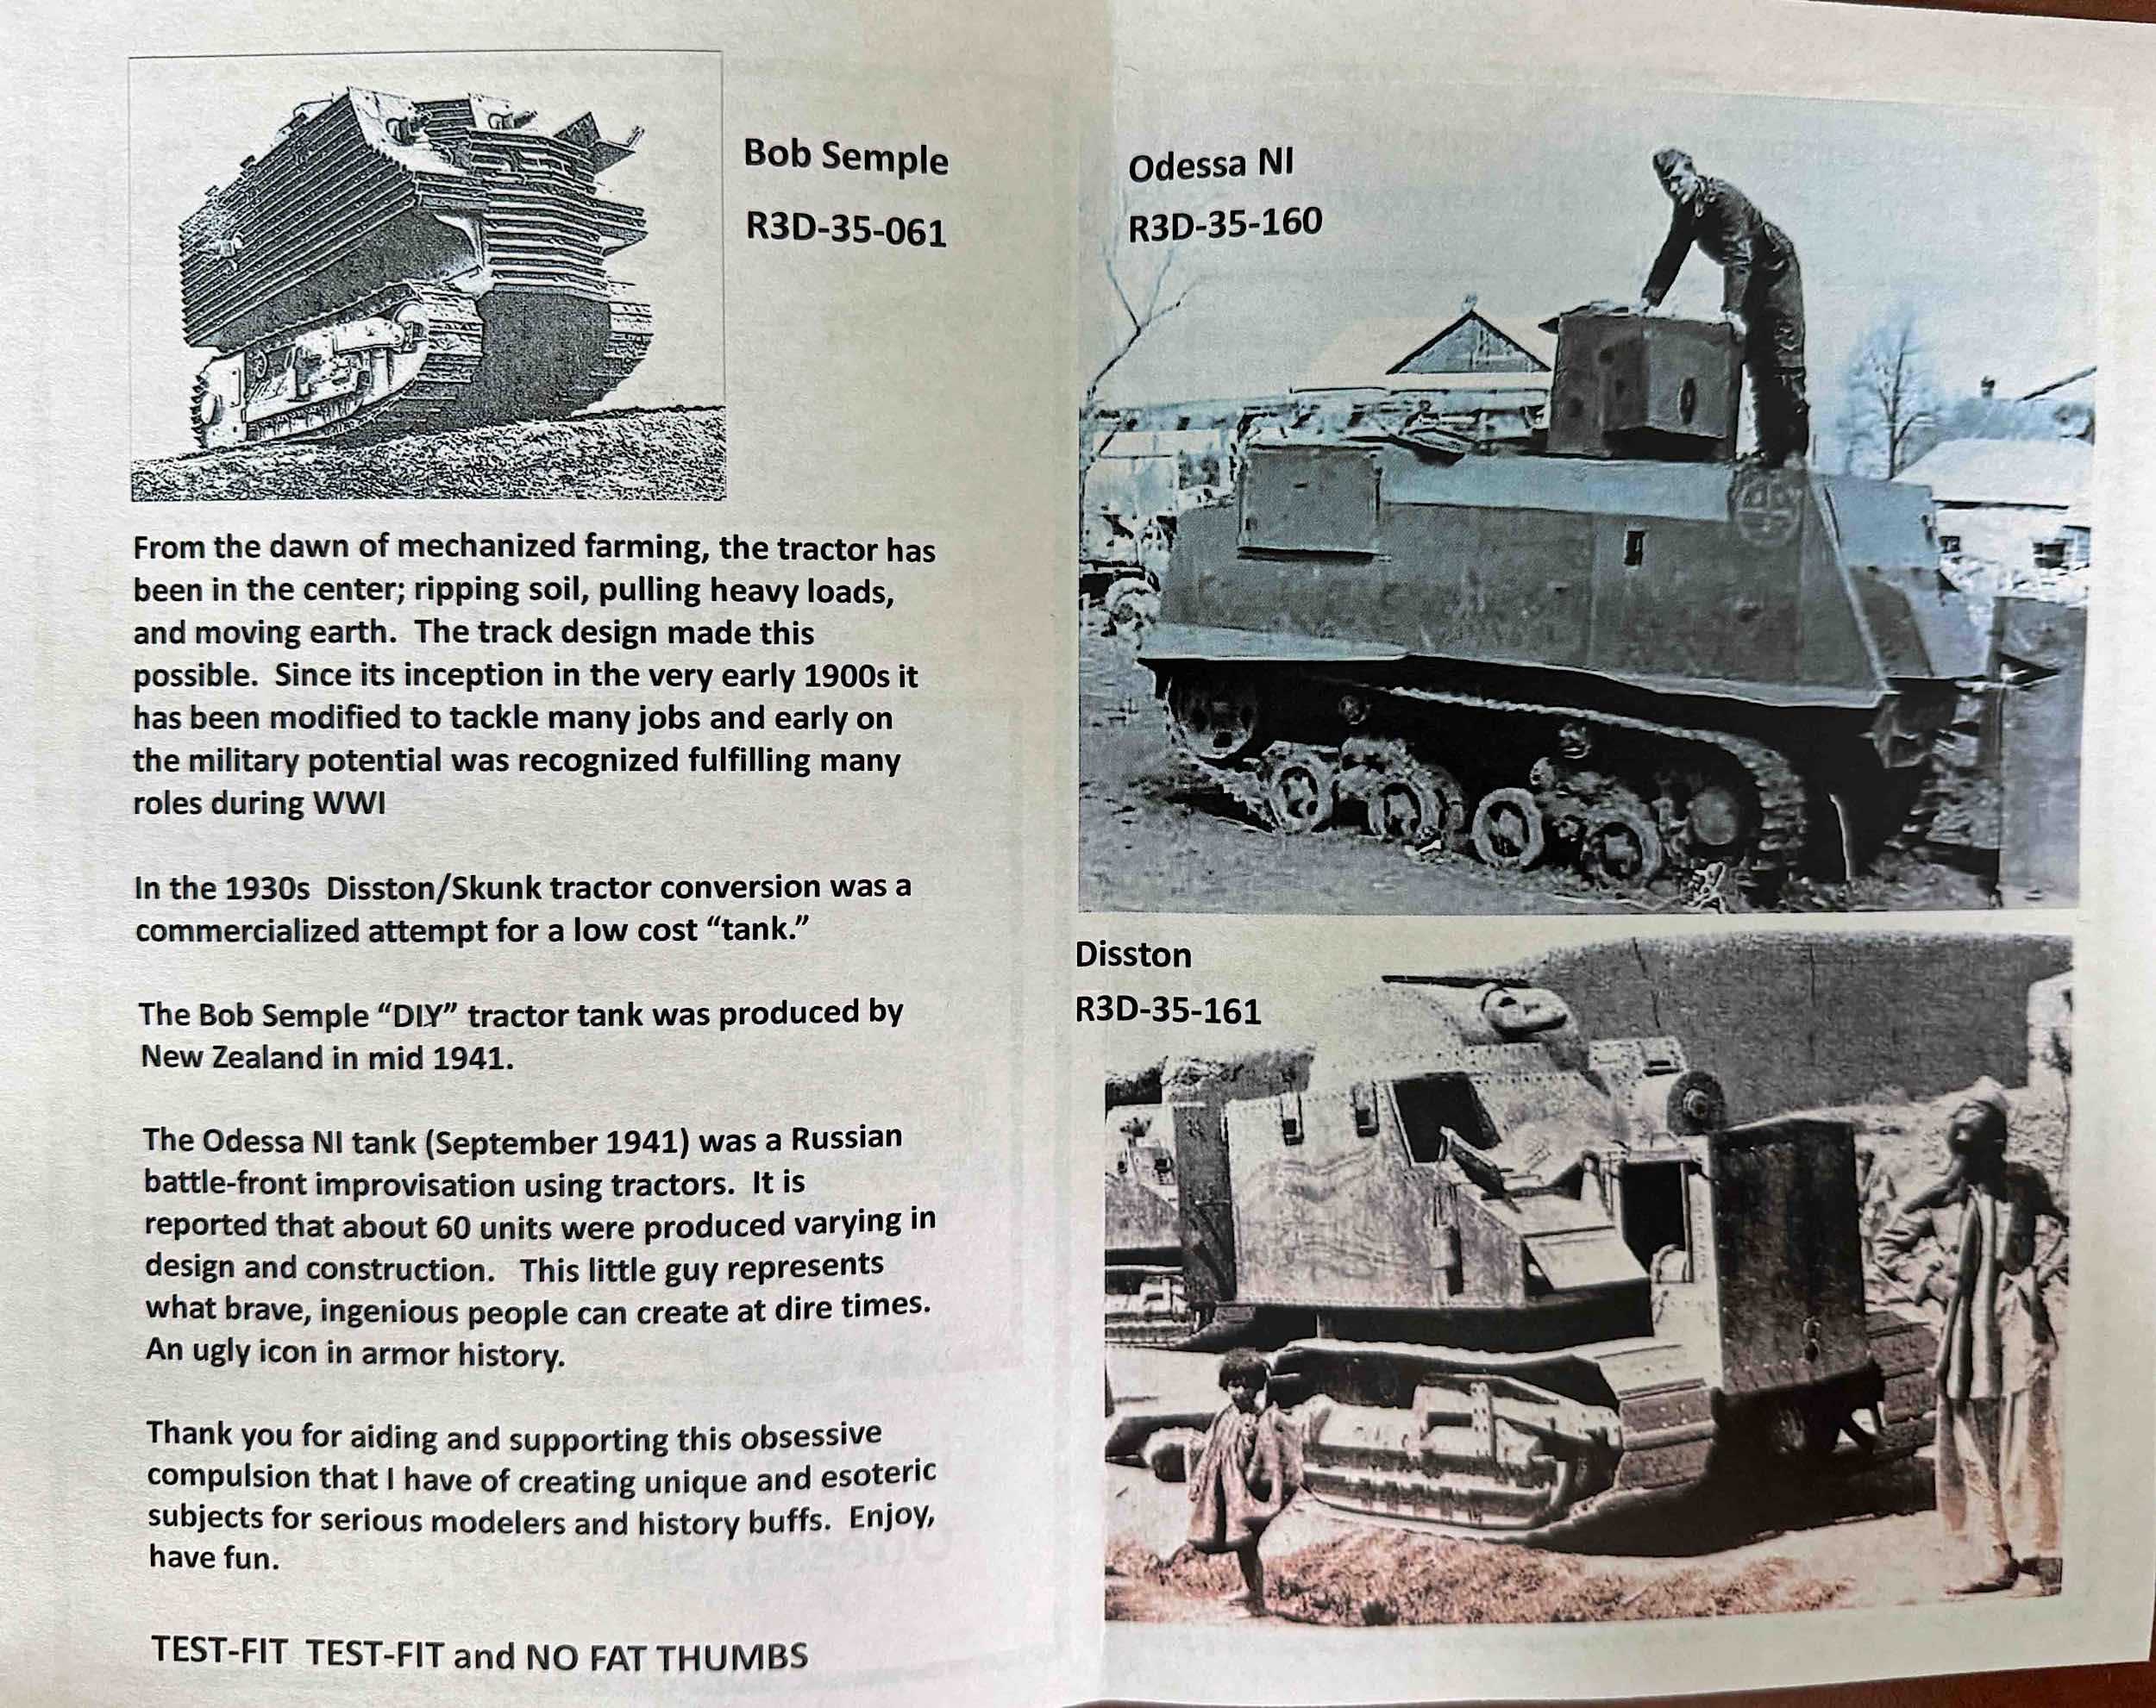
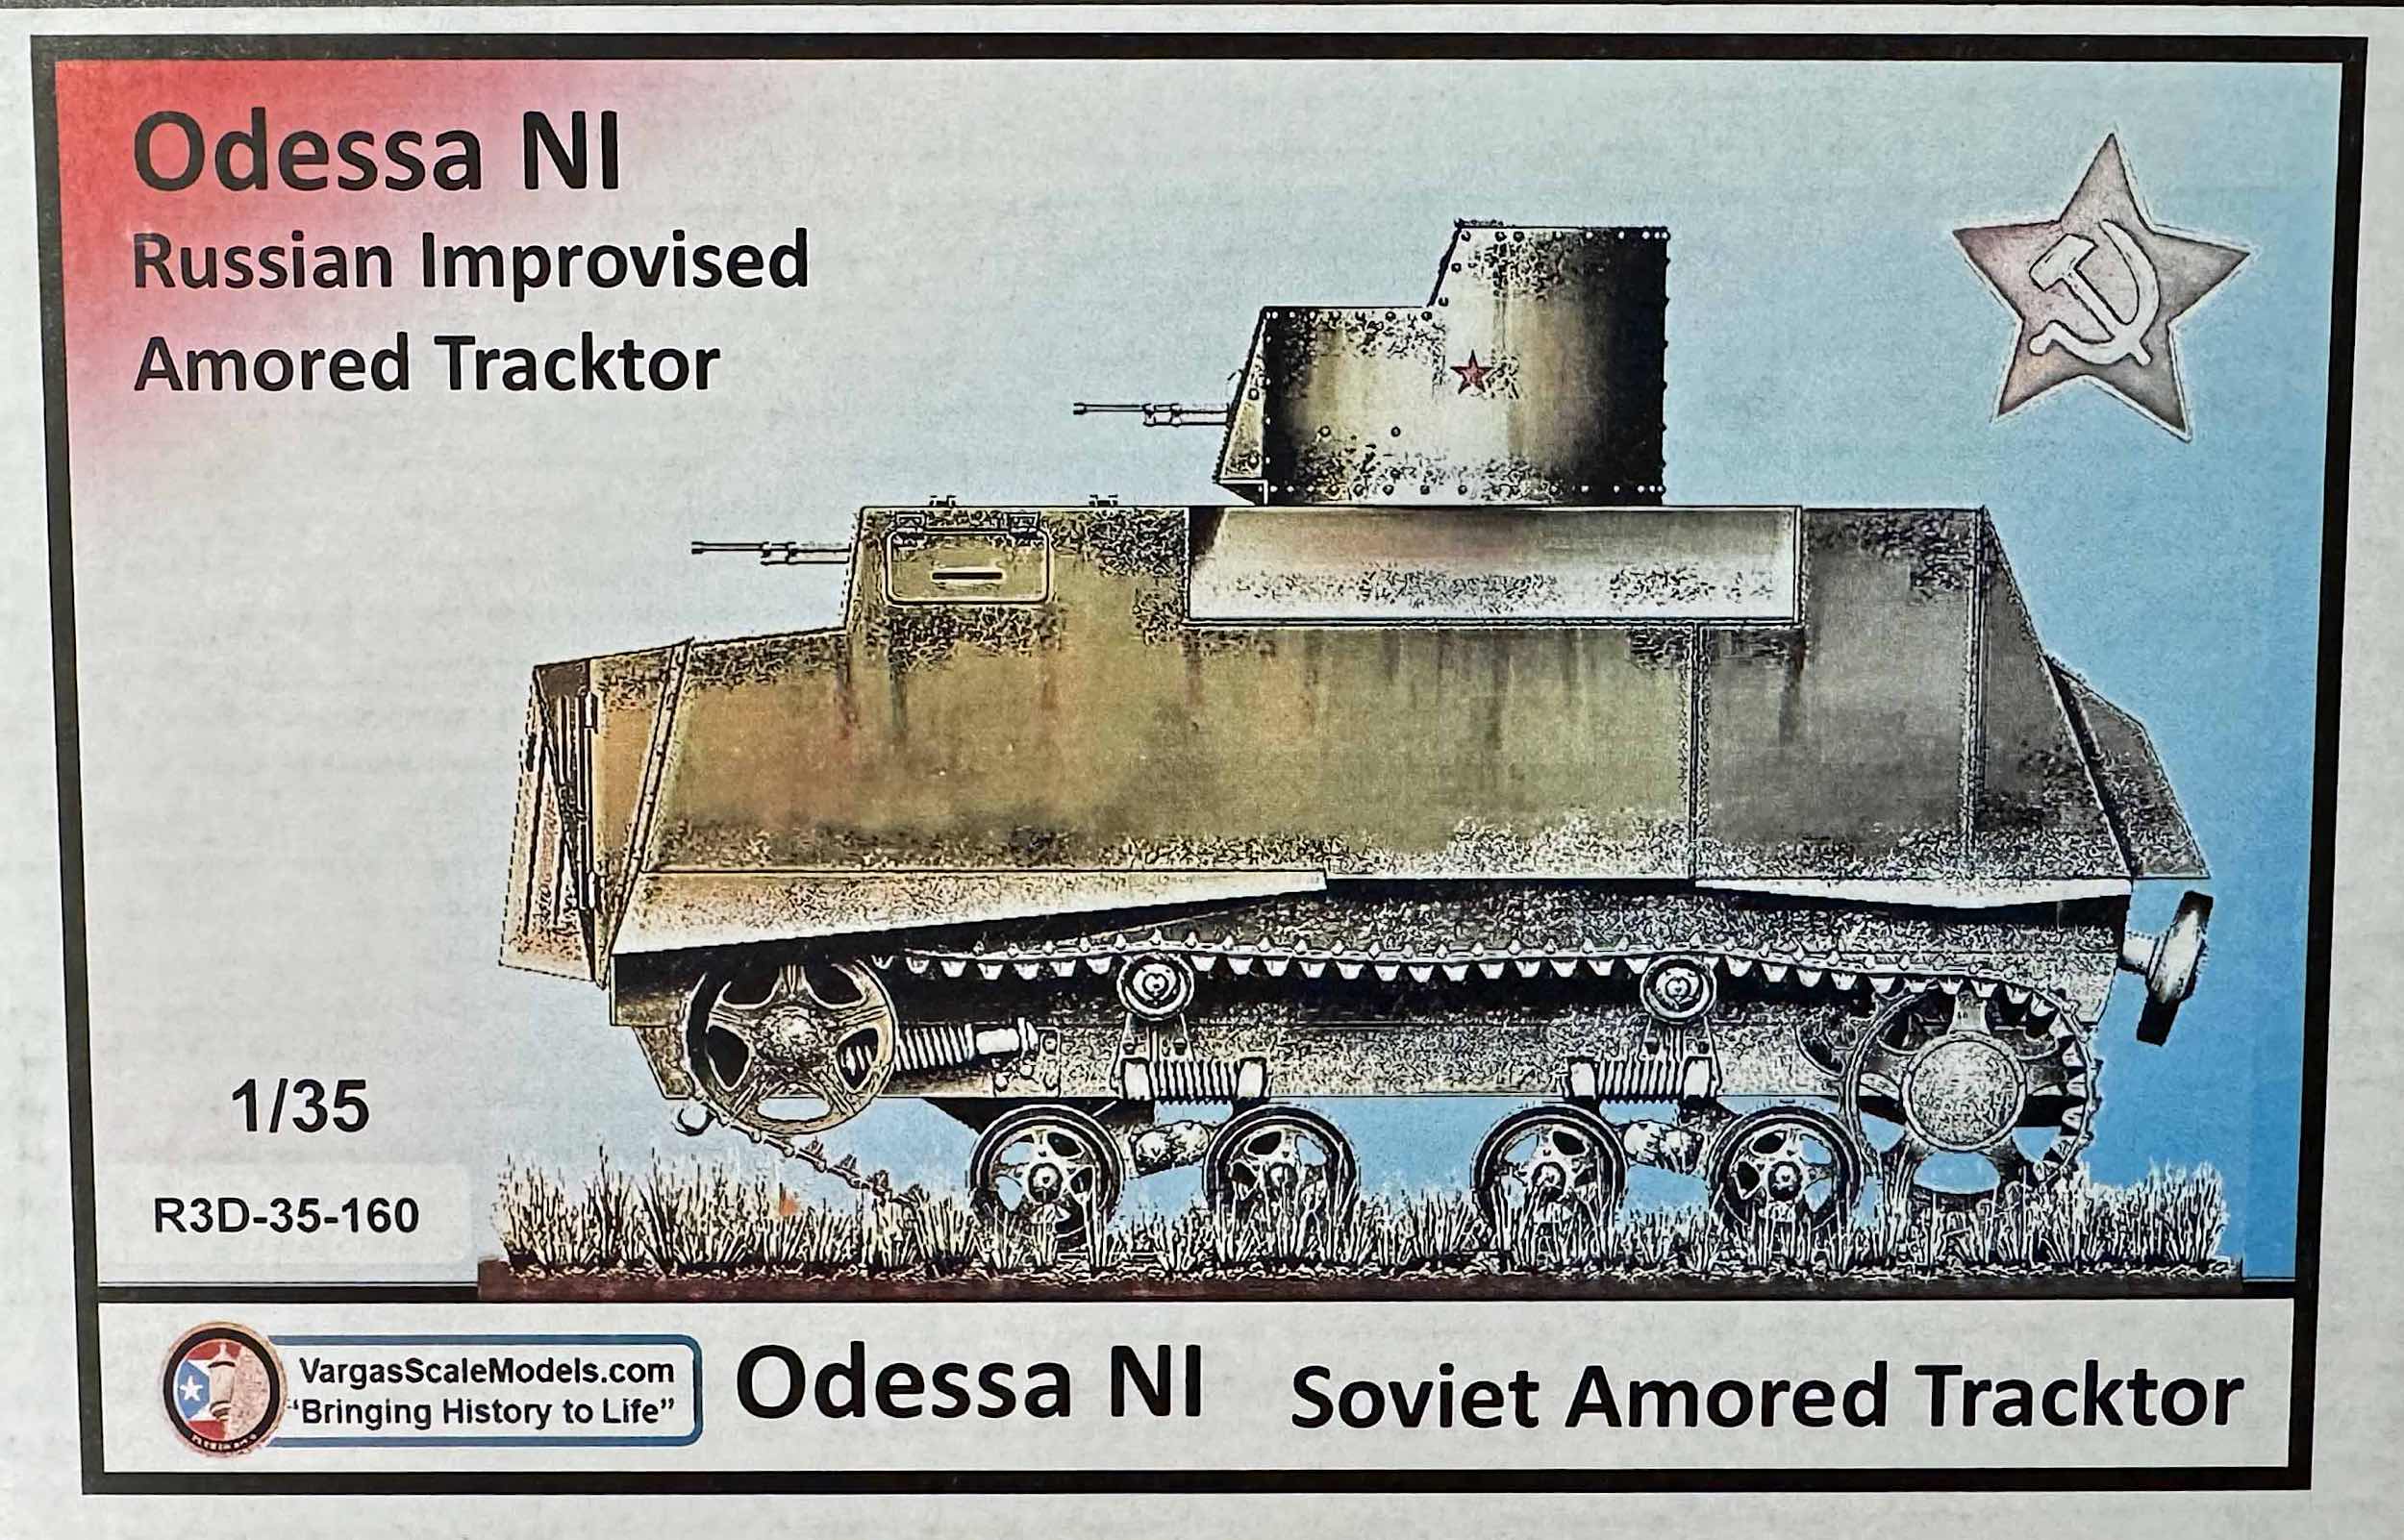
Odessa NI Russian Improvised Armored Tractor
by Eric Christianson
 Model: Odessa NI Russian Improvised Armored Tractor
Reviewed by: Eric Christianson, IPMS # 42218
Scale: 1/35
Company: Vargas
Price: $49.95
Product/Stock #: R3D-35-160
Website: Vargas Scale Models
Product Web Page: View
Product provided by: Vargas Scale Models
Reviewer’s Comments:
The ever-busy Vargas Scale Models has recently released several World War I Russian armored tractors; each one slightly different from the others. One would think this would make for a great opportunity to use an economy of scale, but that would be wrong - each version appears to have a different chassis, superstructure, armament and armor. I guess Luis Vargas just woke up one day, and, to our benefit, decided to create a bunch of Russian tractors!
Vargas has historically occupied a niche specializing in unusual, 3-D printed, limited-run resin armor models, mostly pre- and between World Wars. So far this has been a winning strategy for this prolific company, fleshing out all those subjects ignored by others. This offering continues in that tradition.
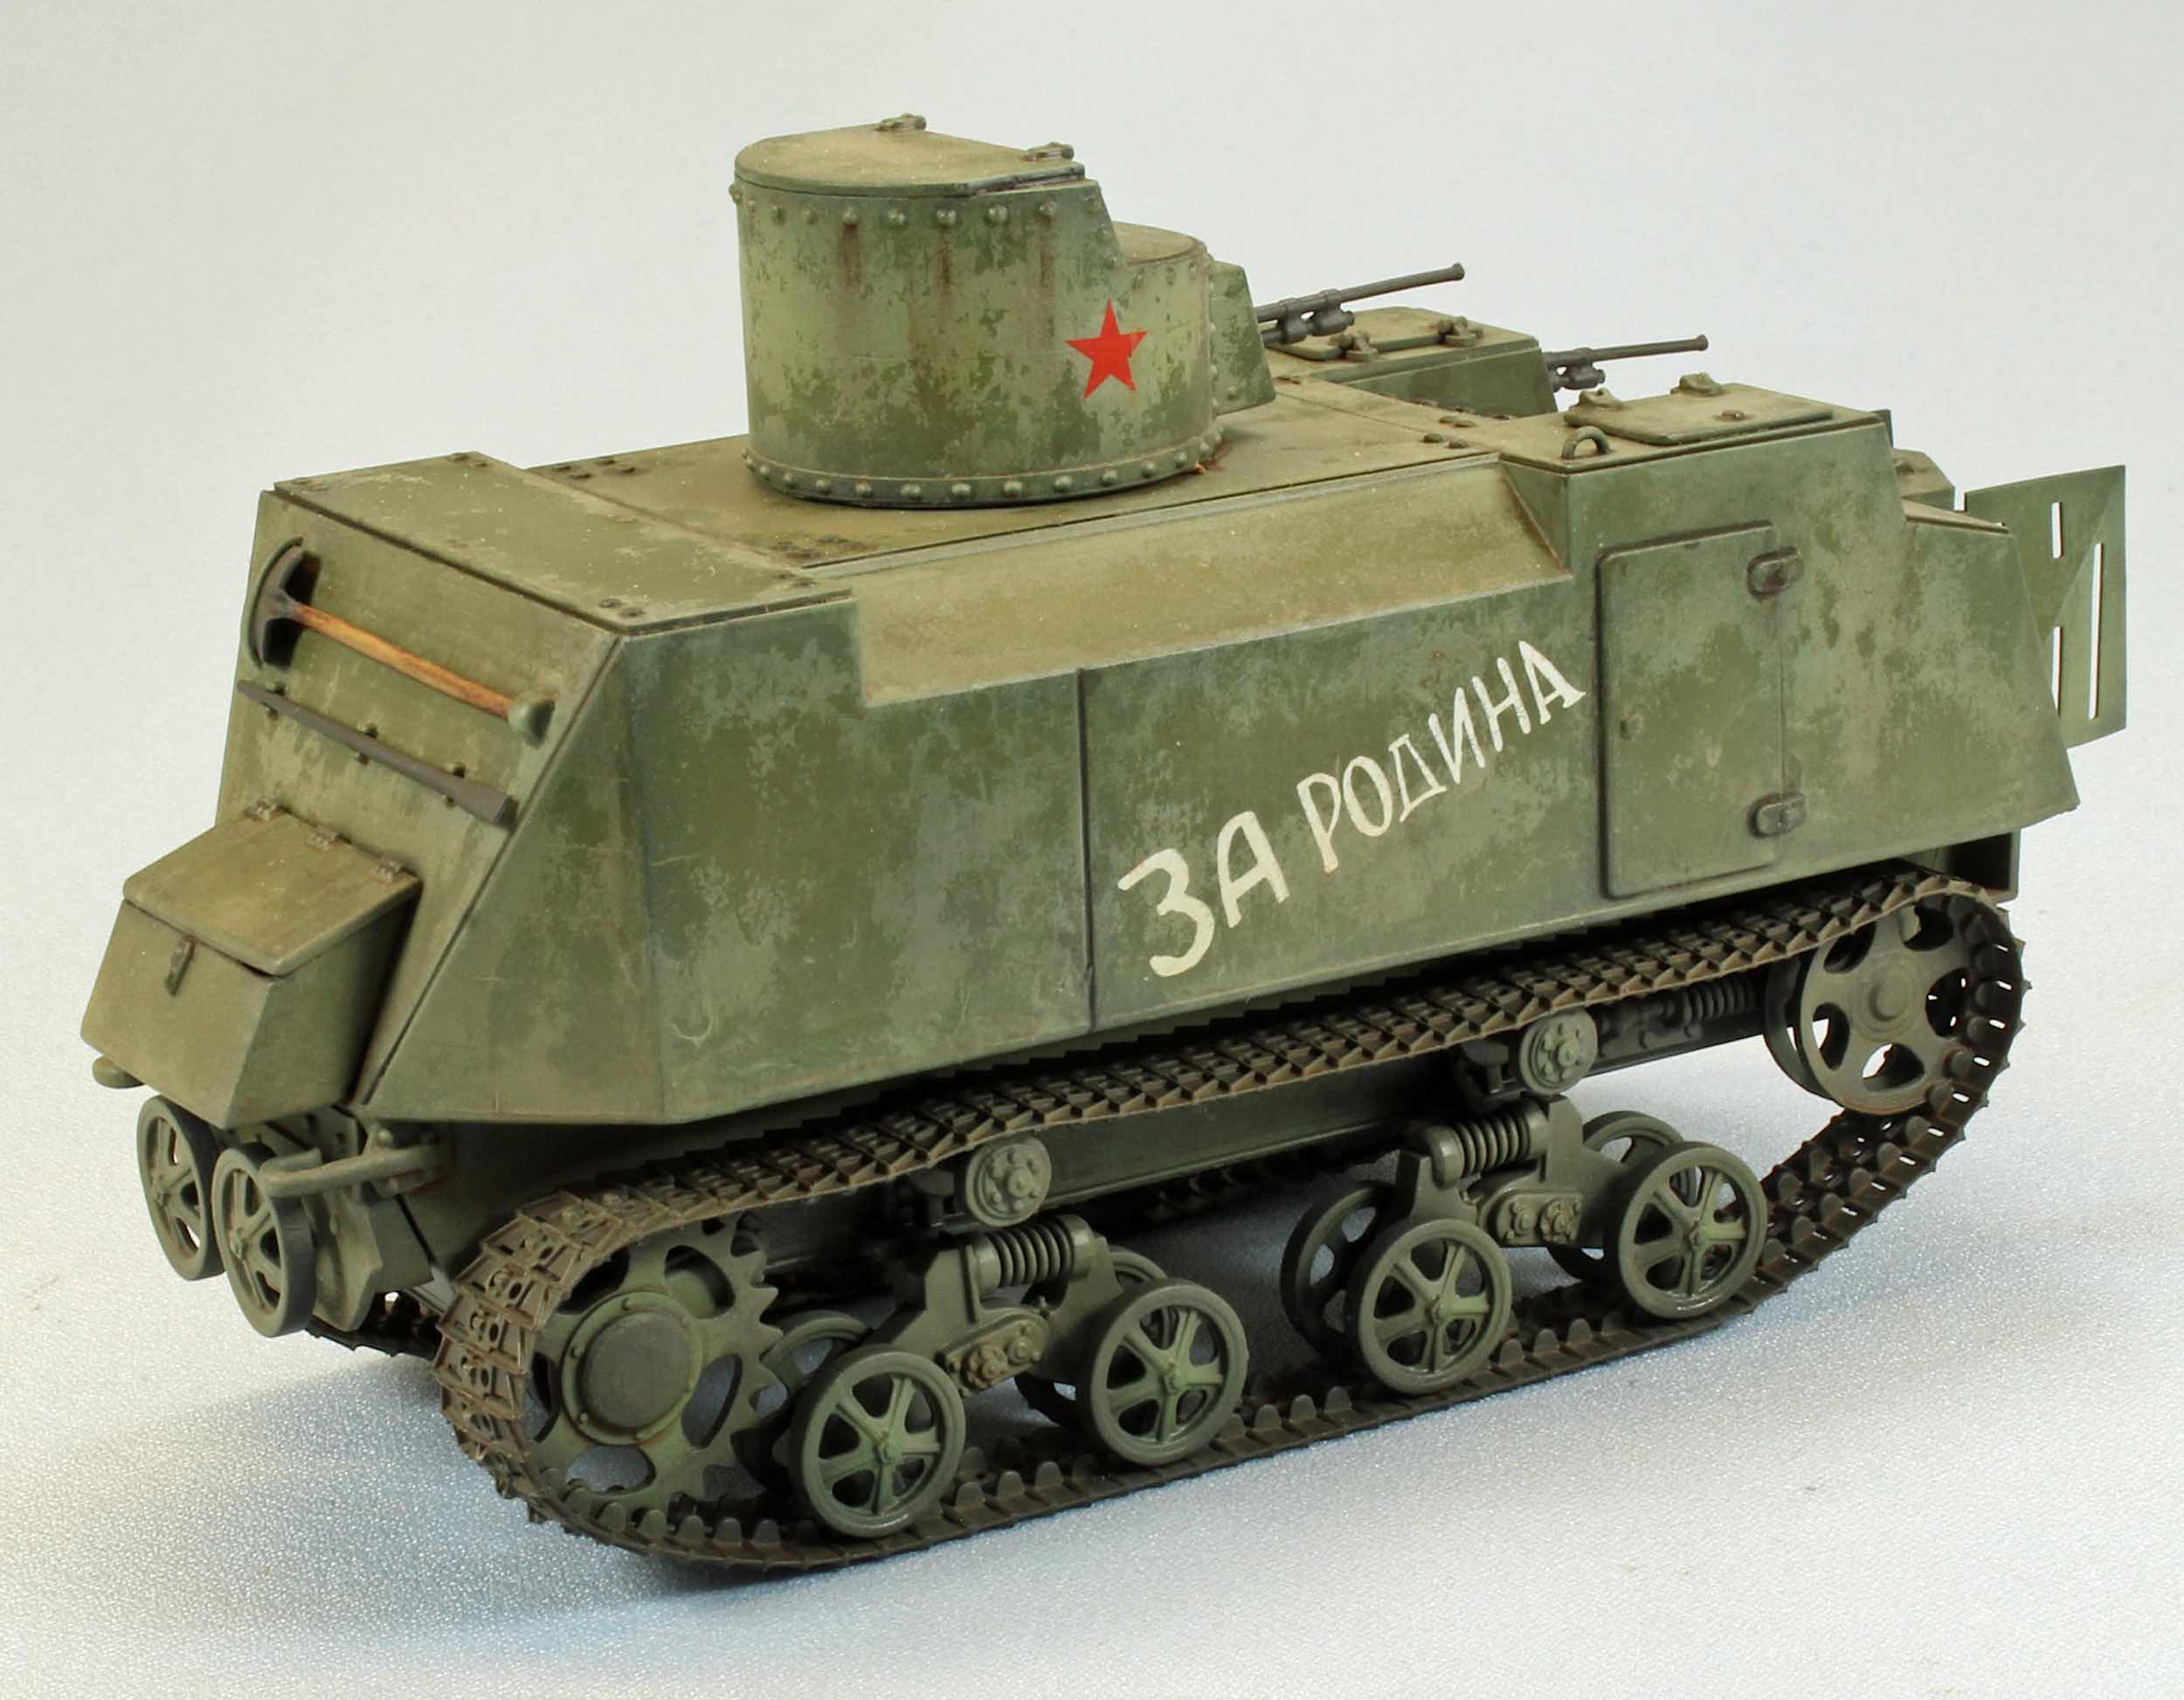
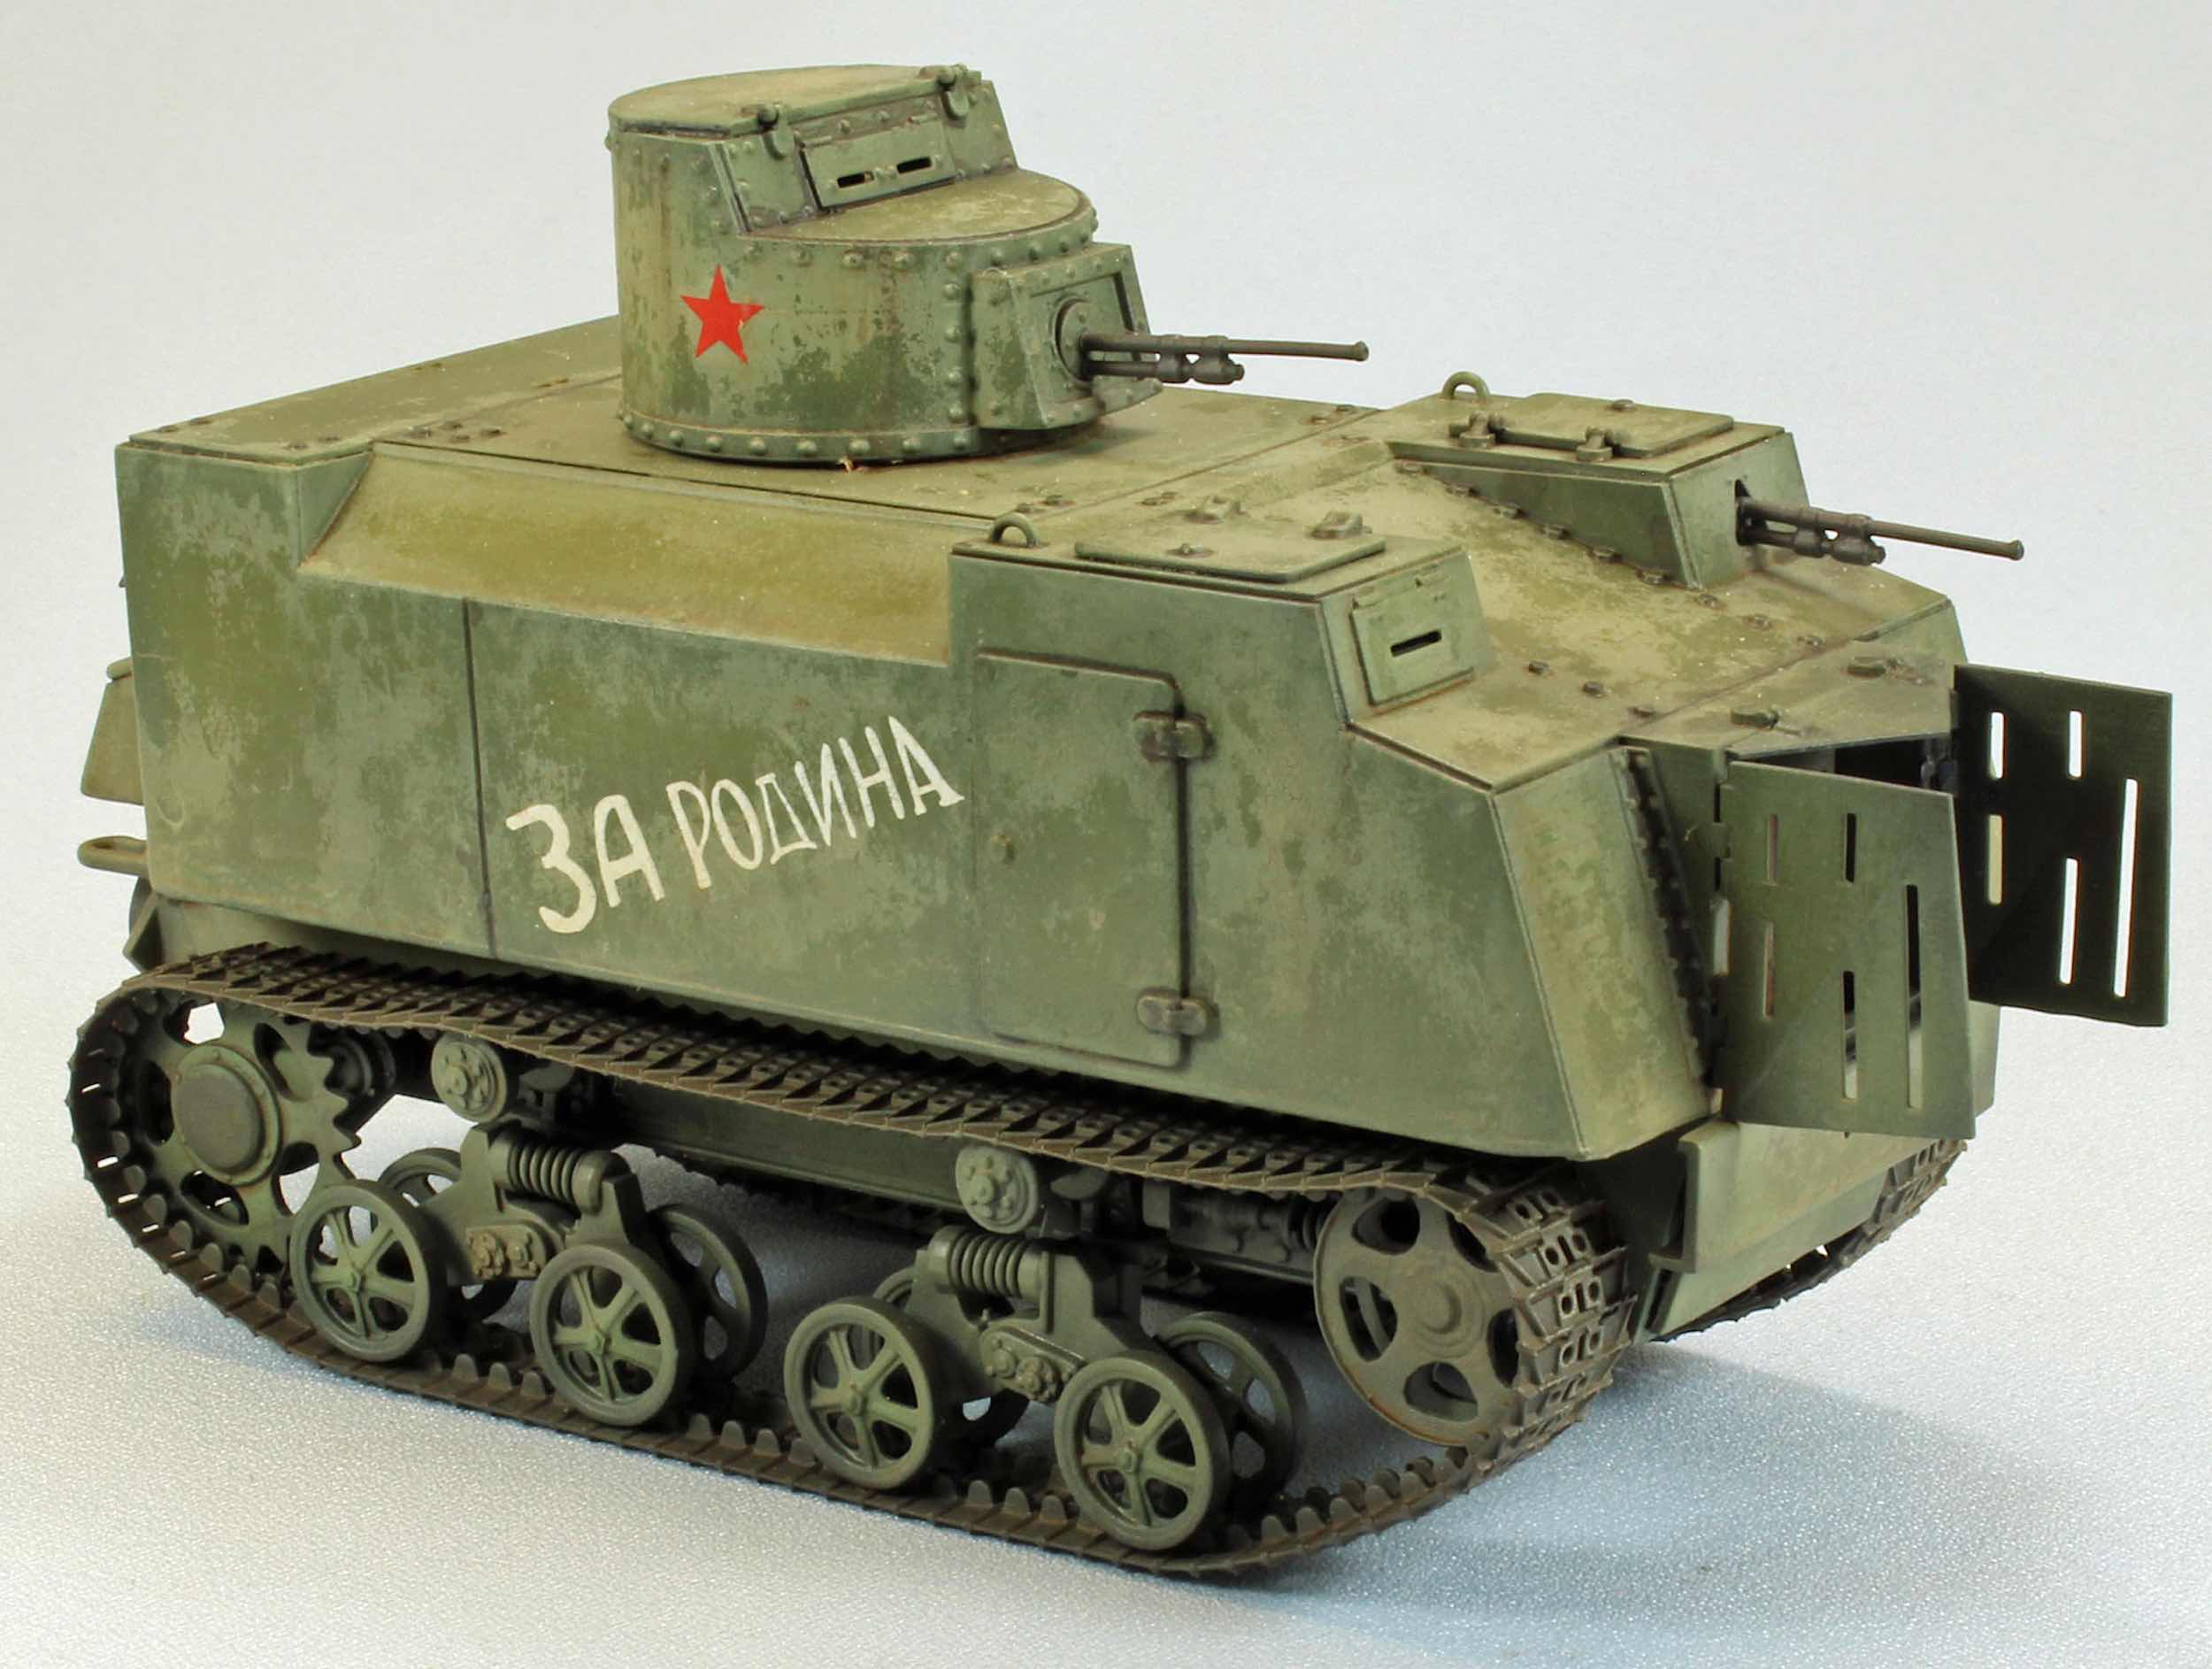
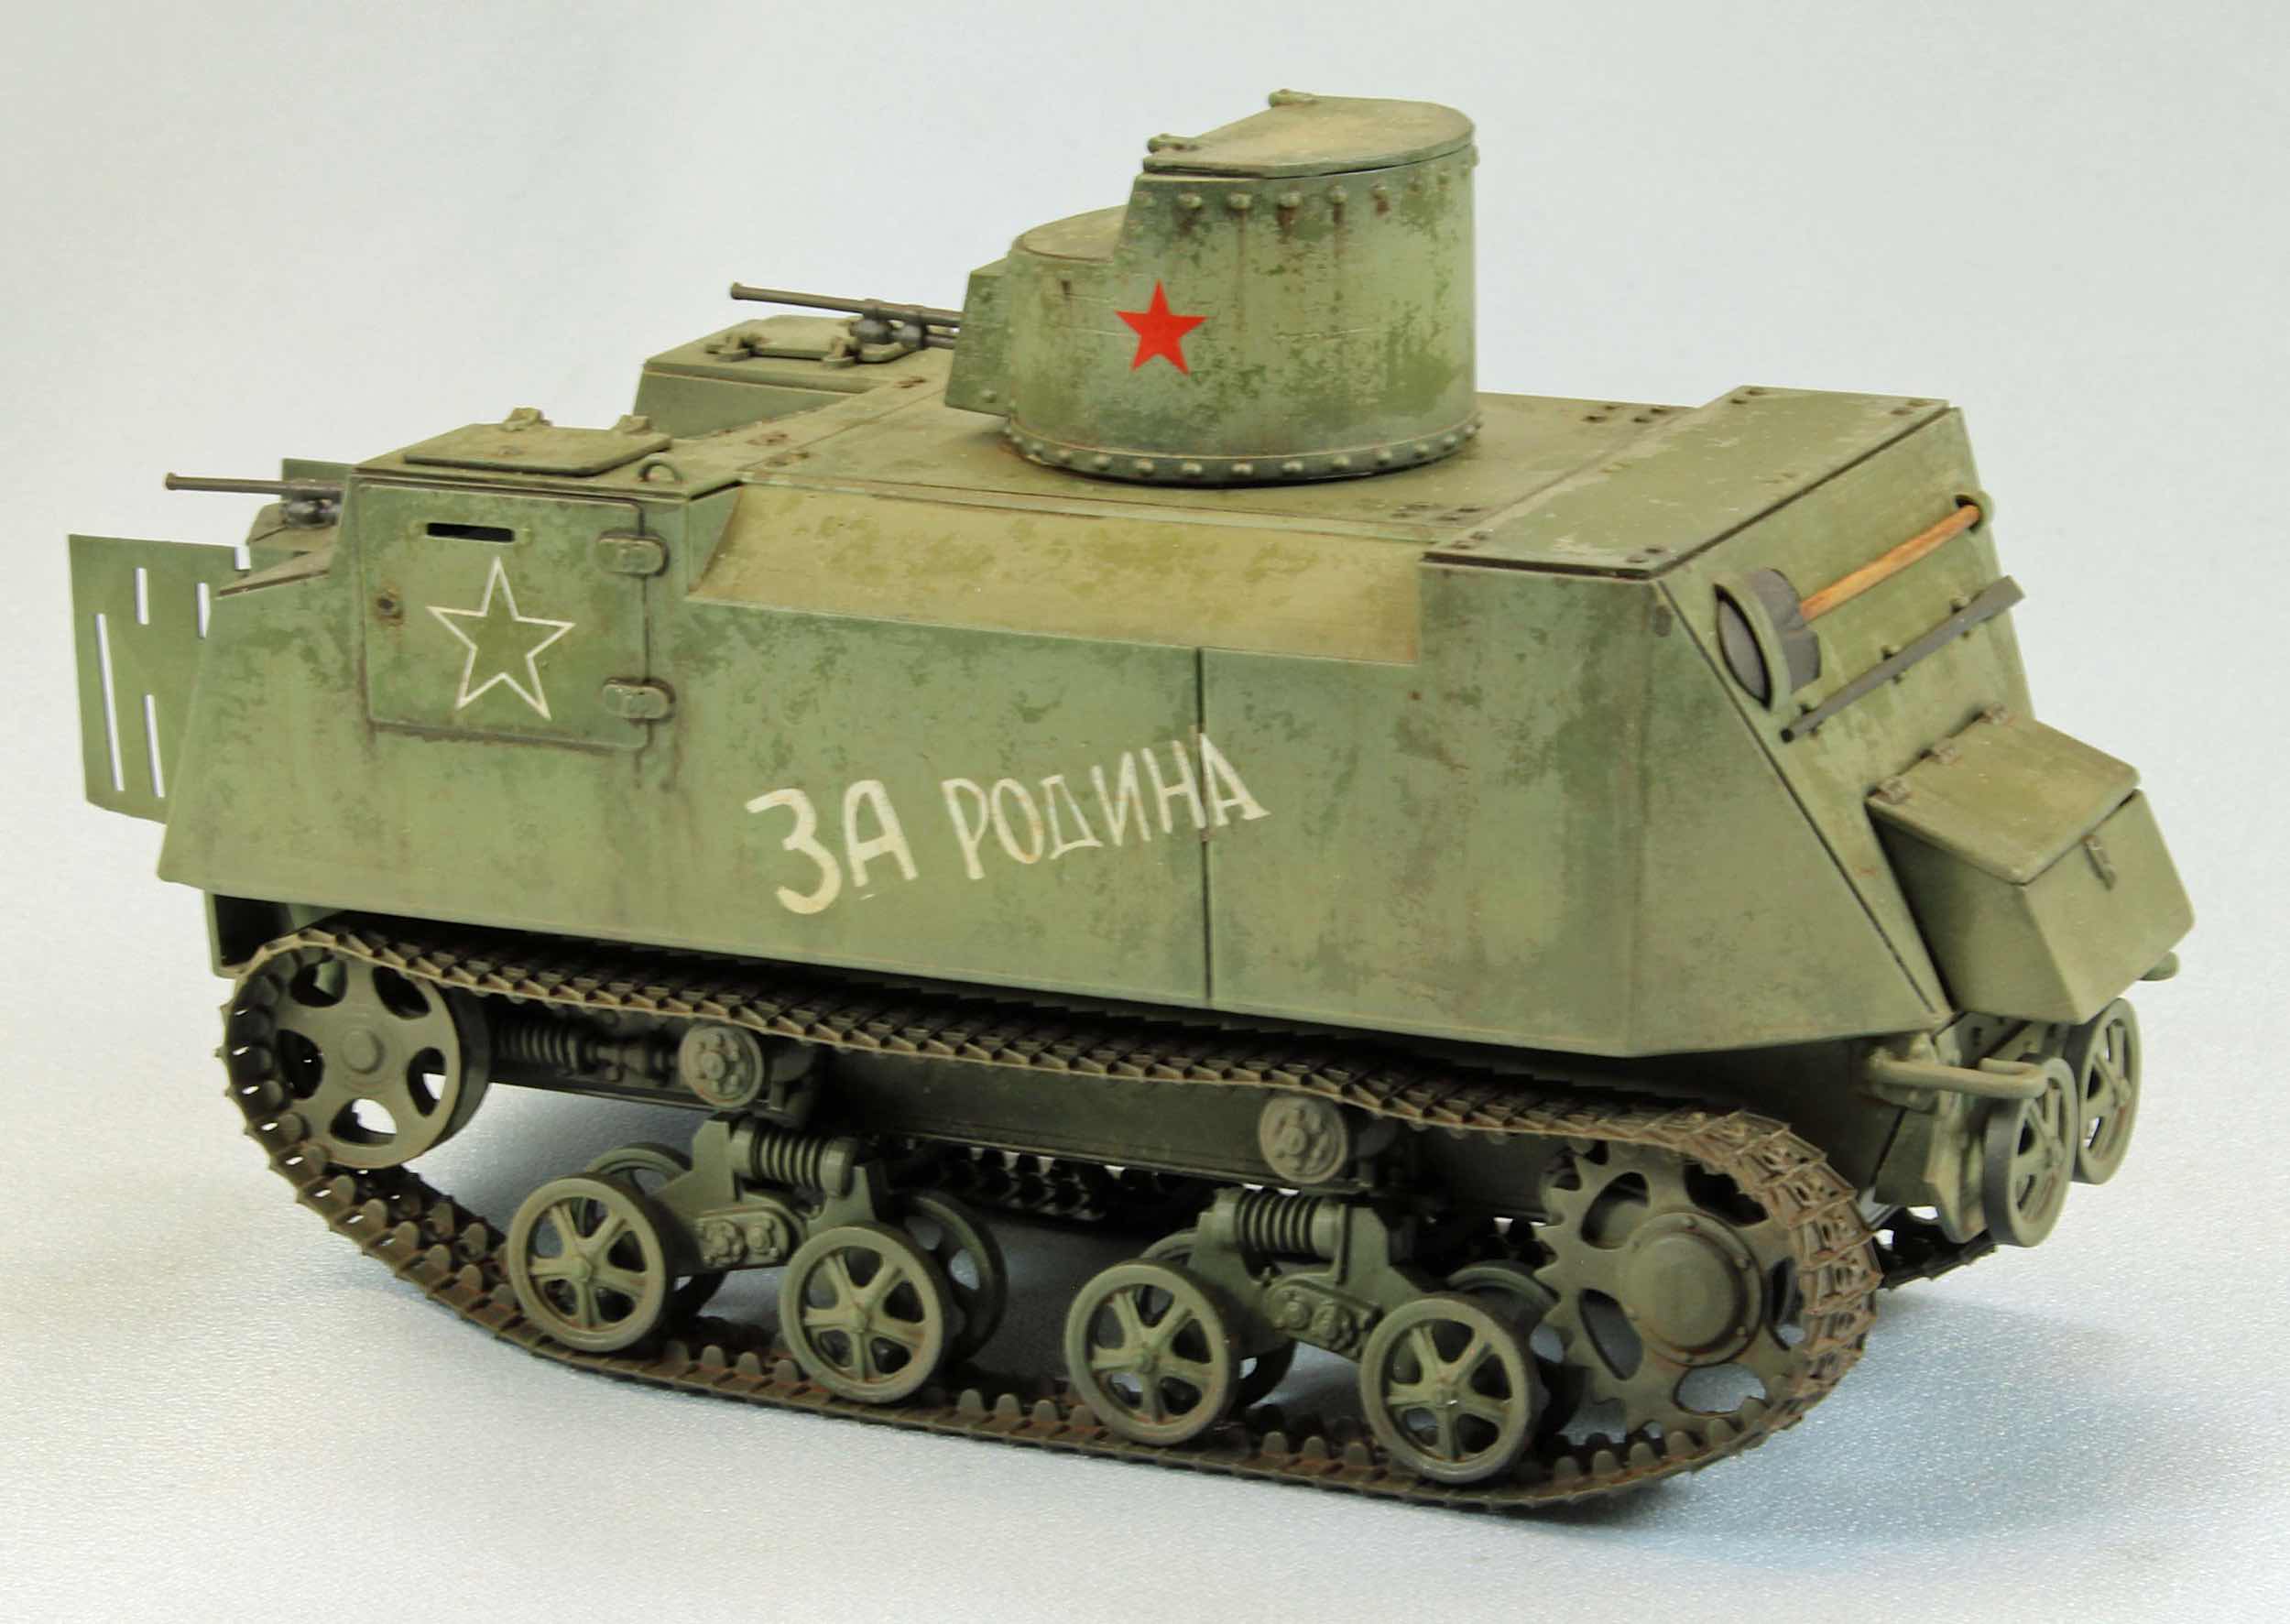
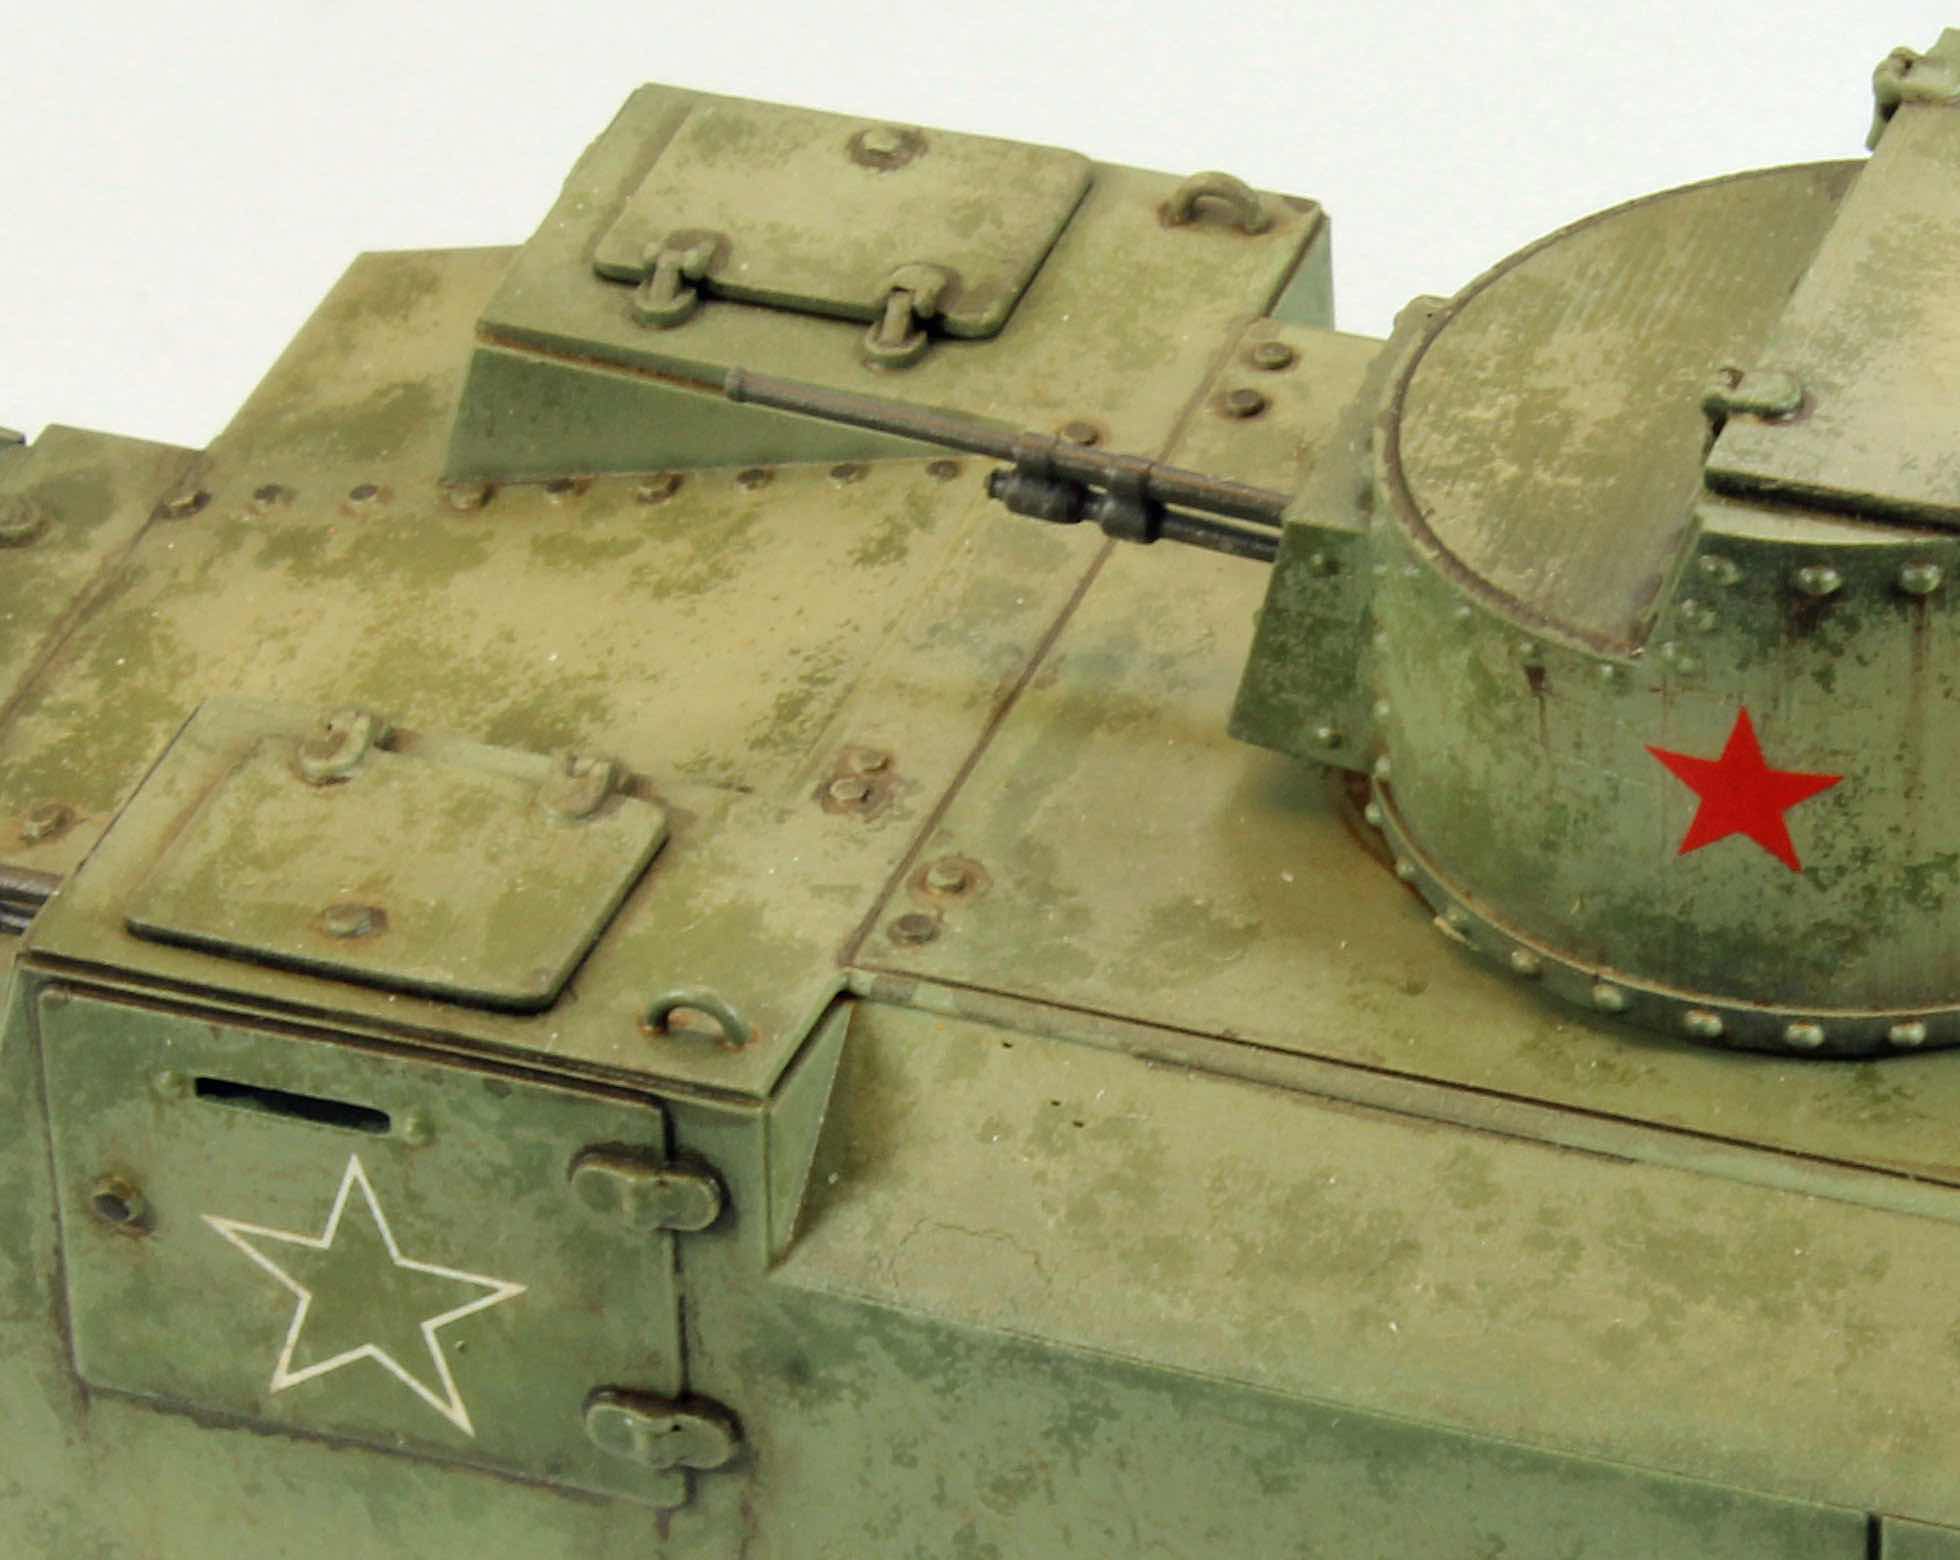
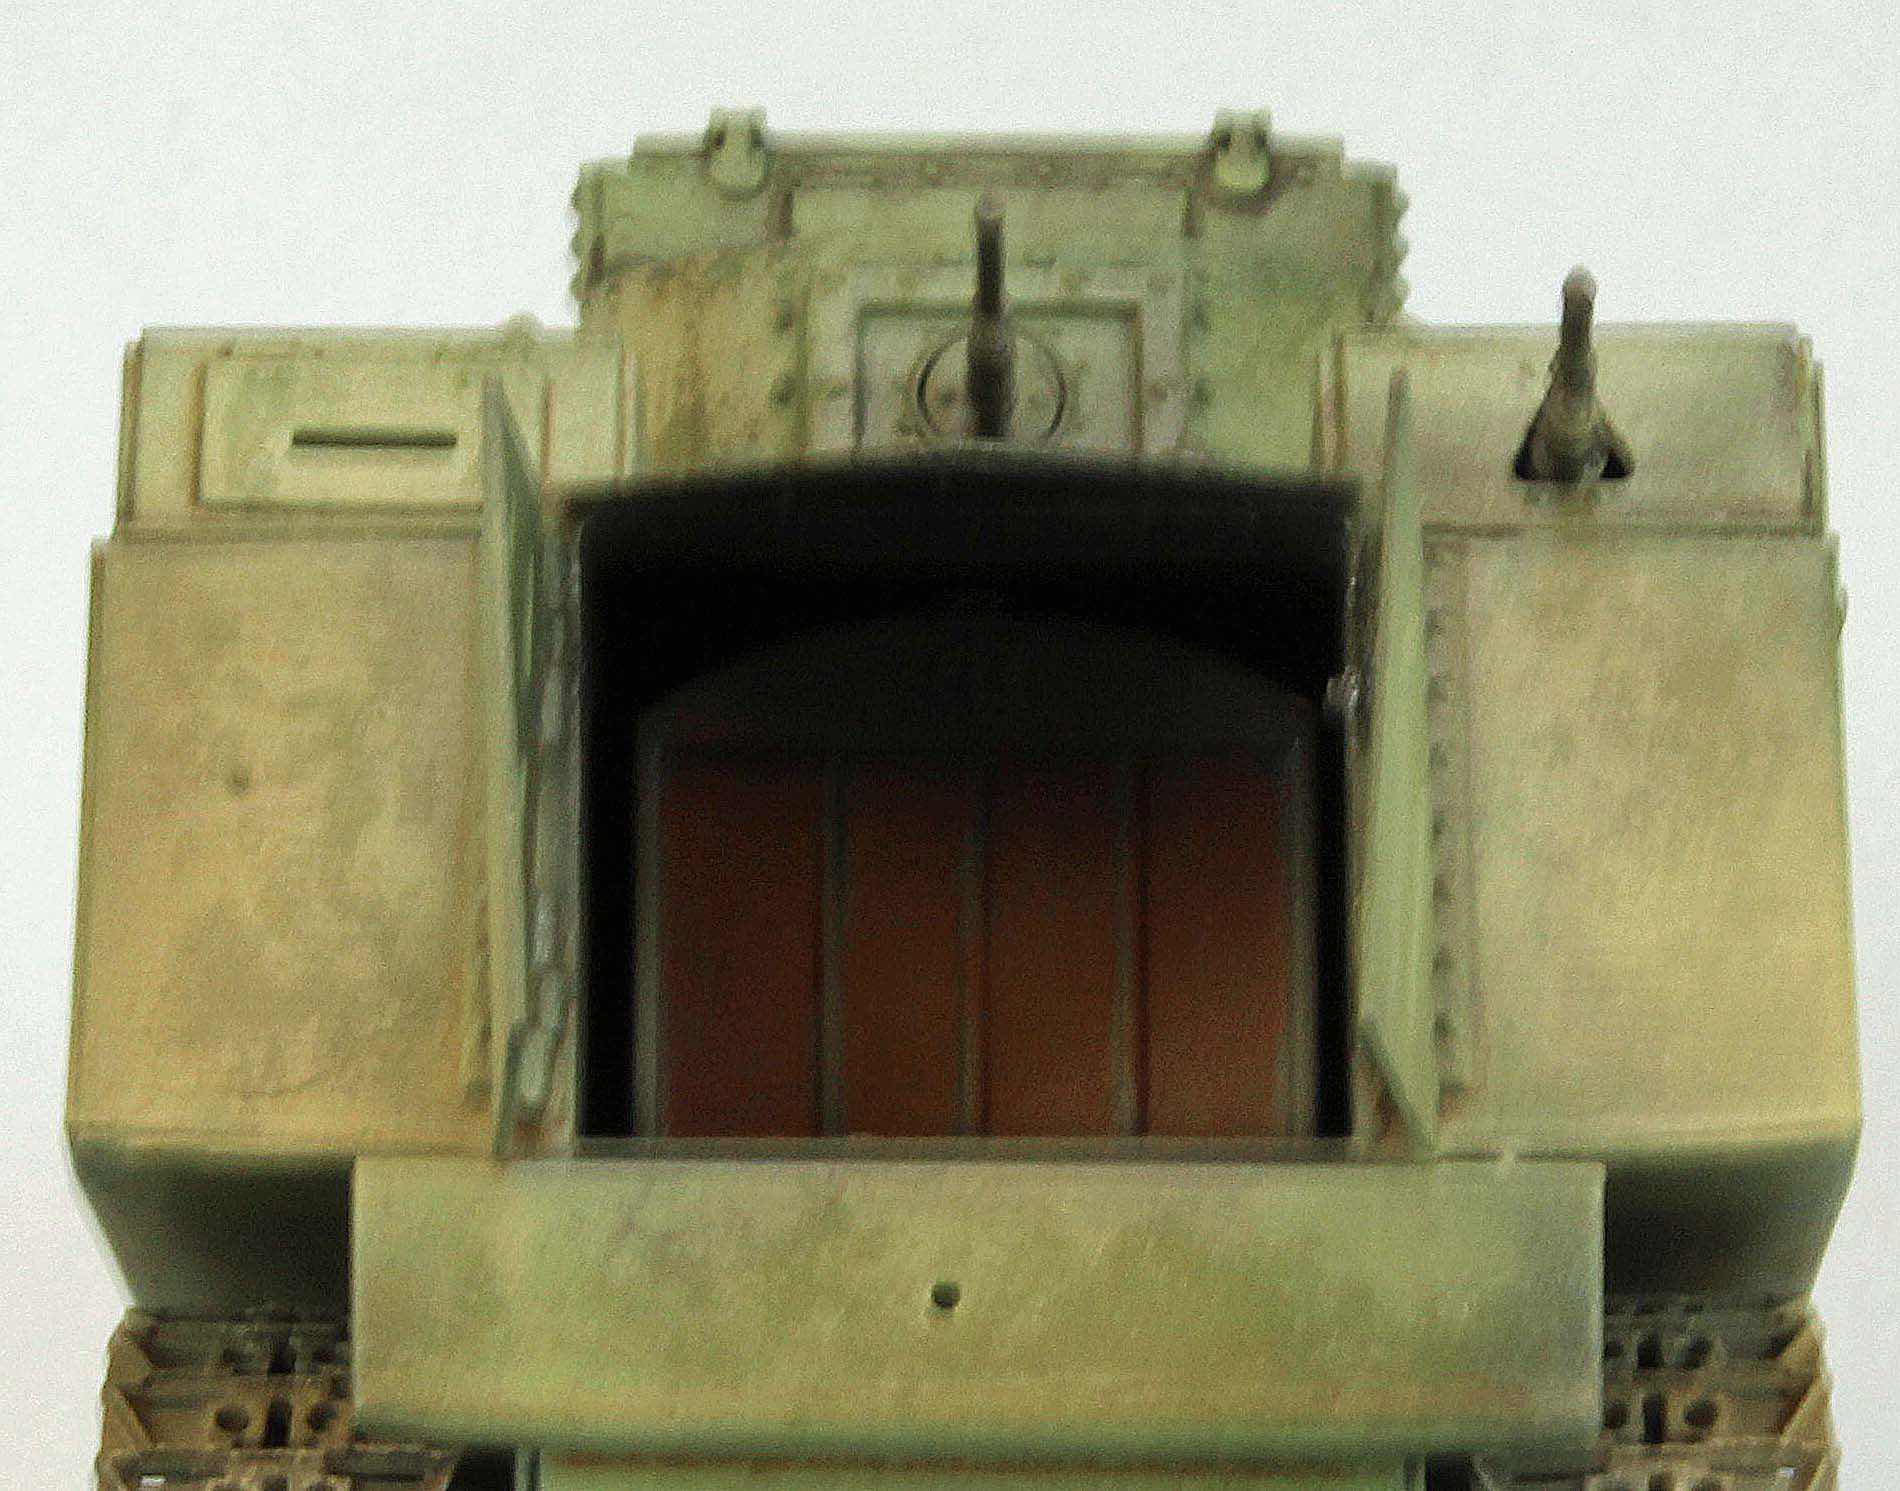
Admittedly, the Odessa NI tractor doesn’t have a lot going for it, visually. At first glance I found it difficult to tell just what it was until I looked carefully at the front end and found a nicely detailed engine radiator. The vehicle is literally a steel box placed right over a tractor, with a small gun turret placed on top, like a cherry. Officially, the NI was a Soviet improvised fighting vehicle, based on an STZ-5 agricultural tractor. A total of 69 vehicles were produced during the Siege of Odessa in World War II. These fought during the siege against the Axis forces in support of Soviet troops. Some versions sported old turrets cannibalized from damaged tanks. The NI was powered by a 44hp MA-4-cylinder gasoline engine, which proved to be very noisy, and slow. In an unusual note, several NI derelicts were found by our troops in Afghanistan, years later.
The Kit
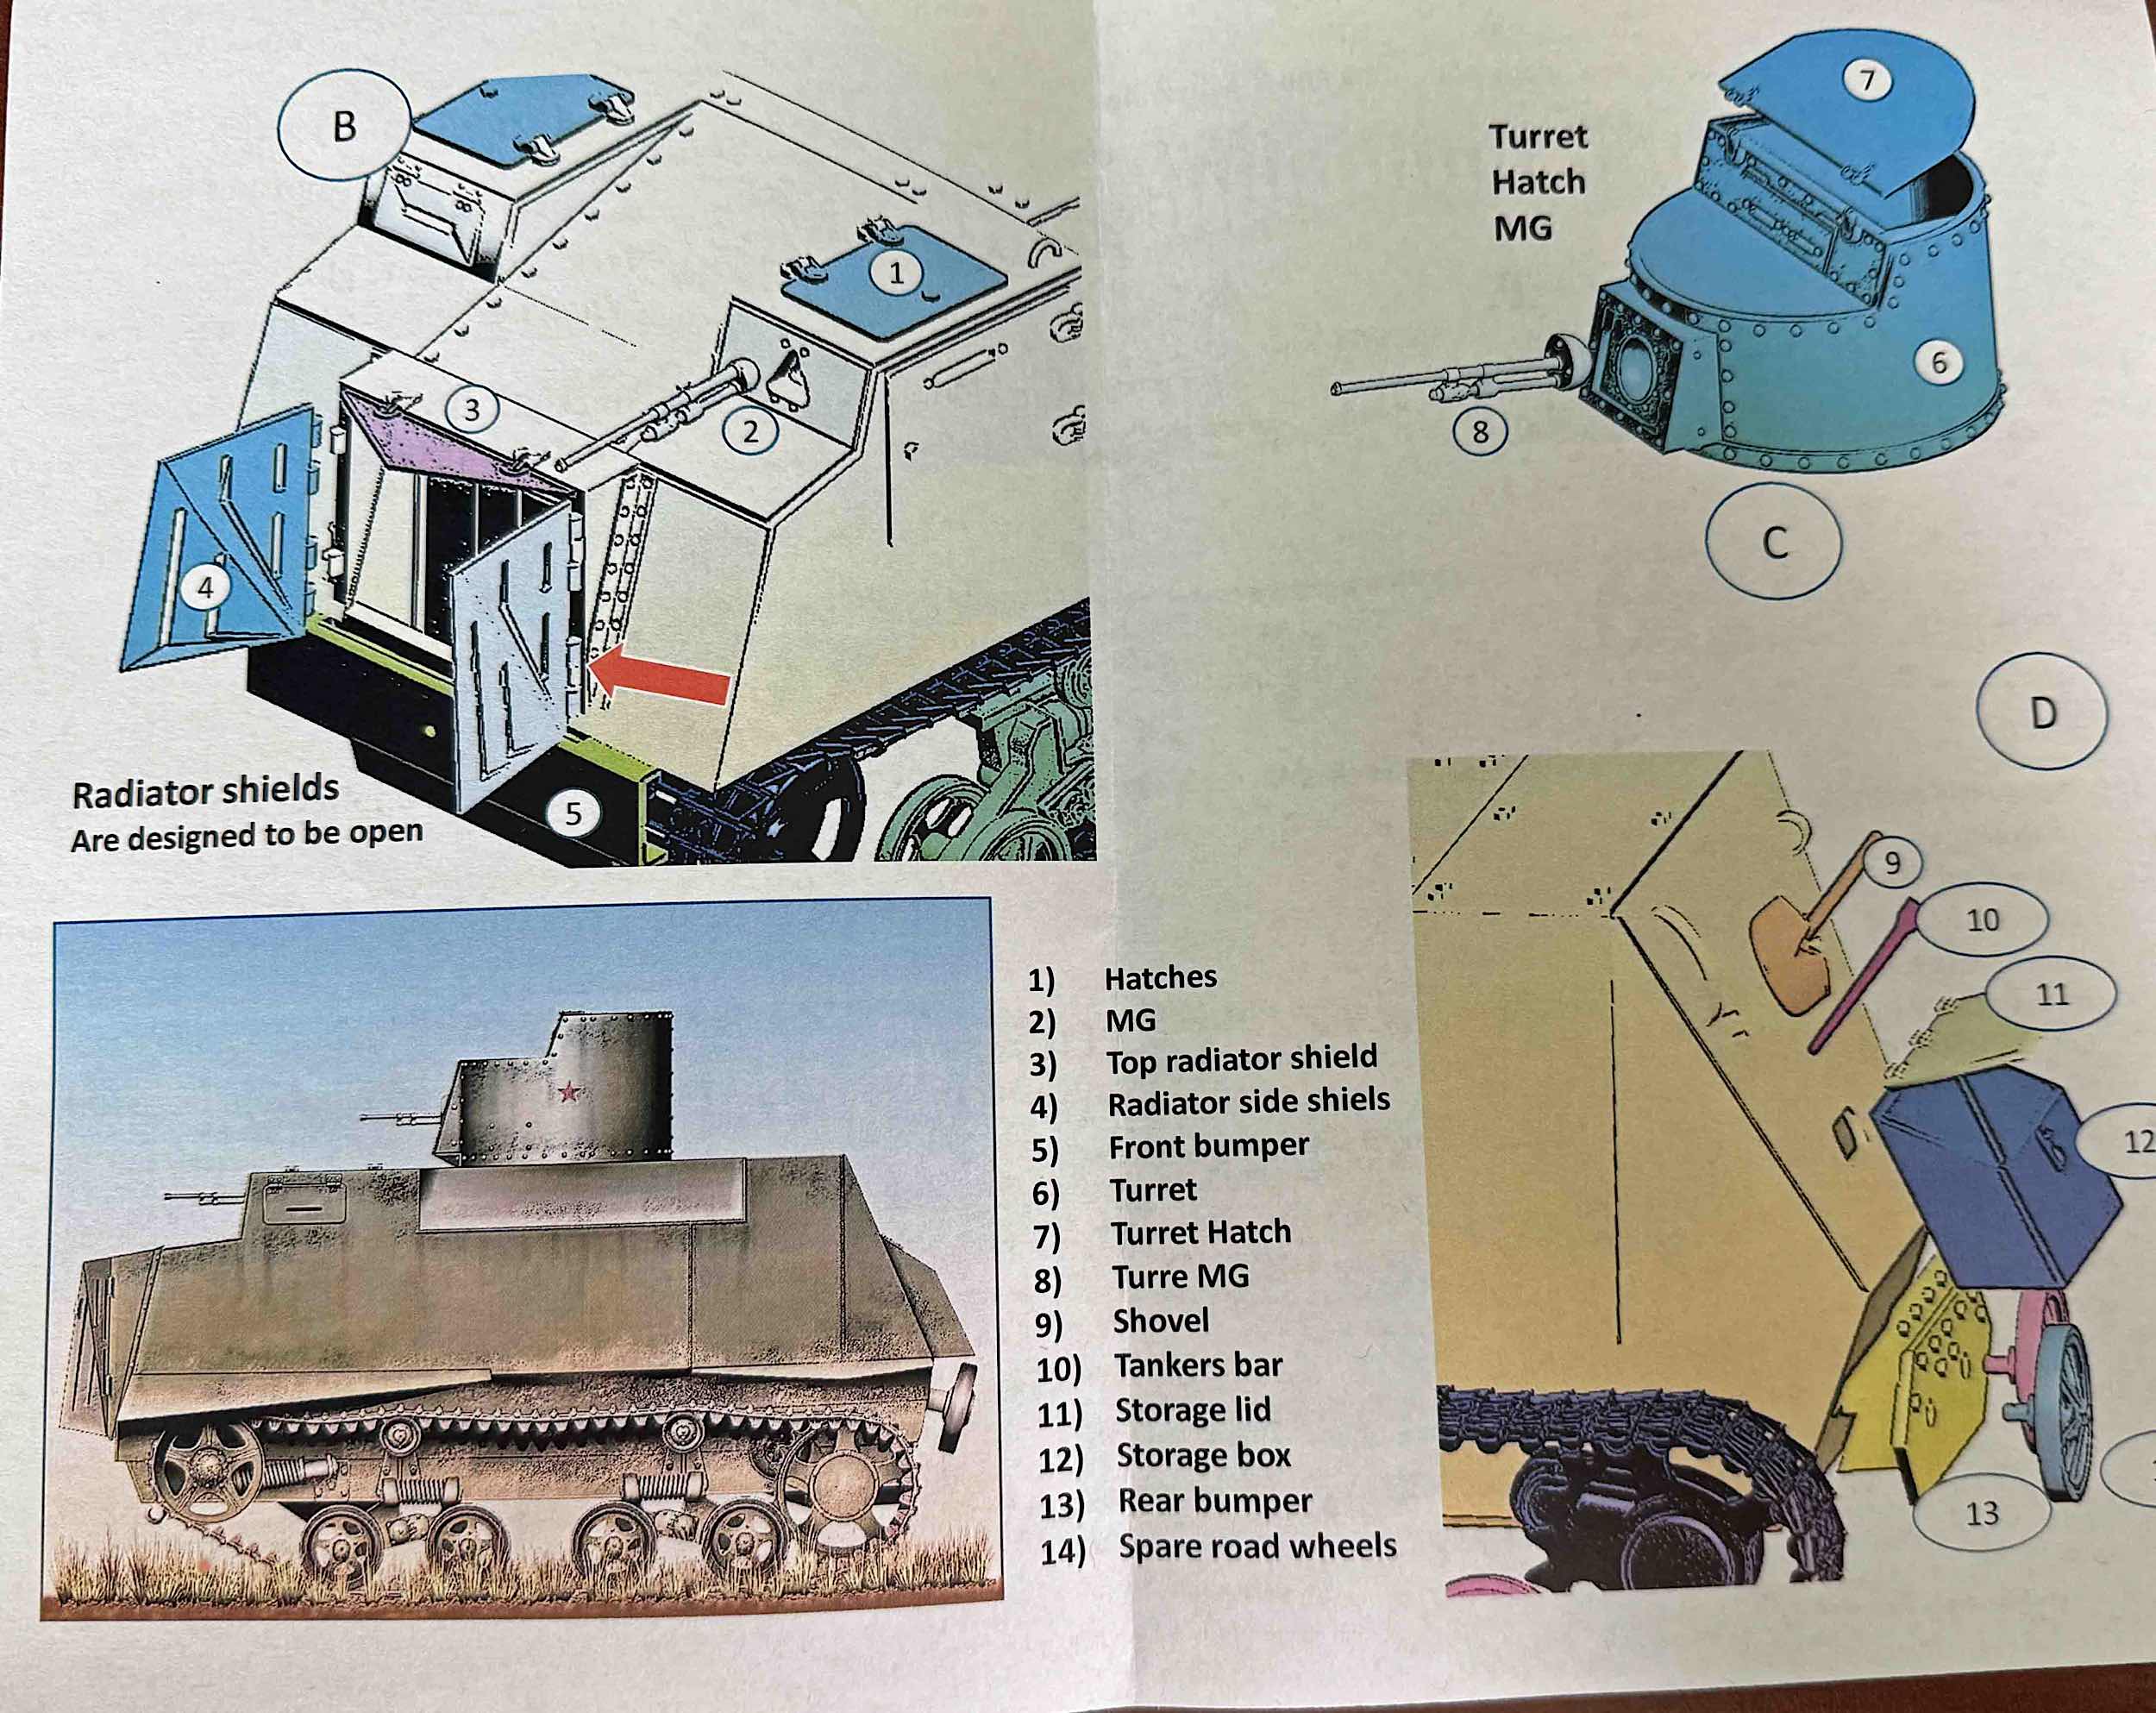
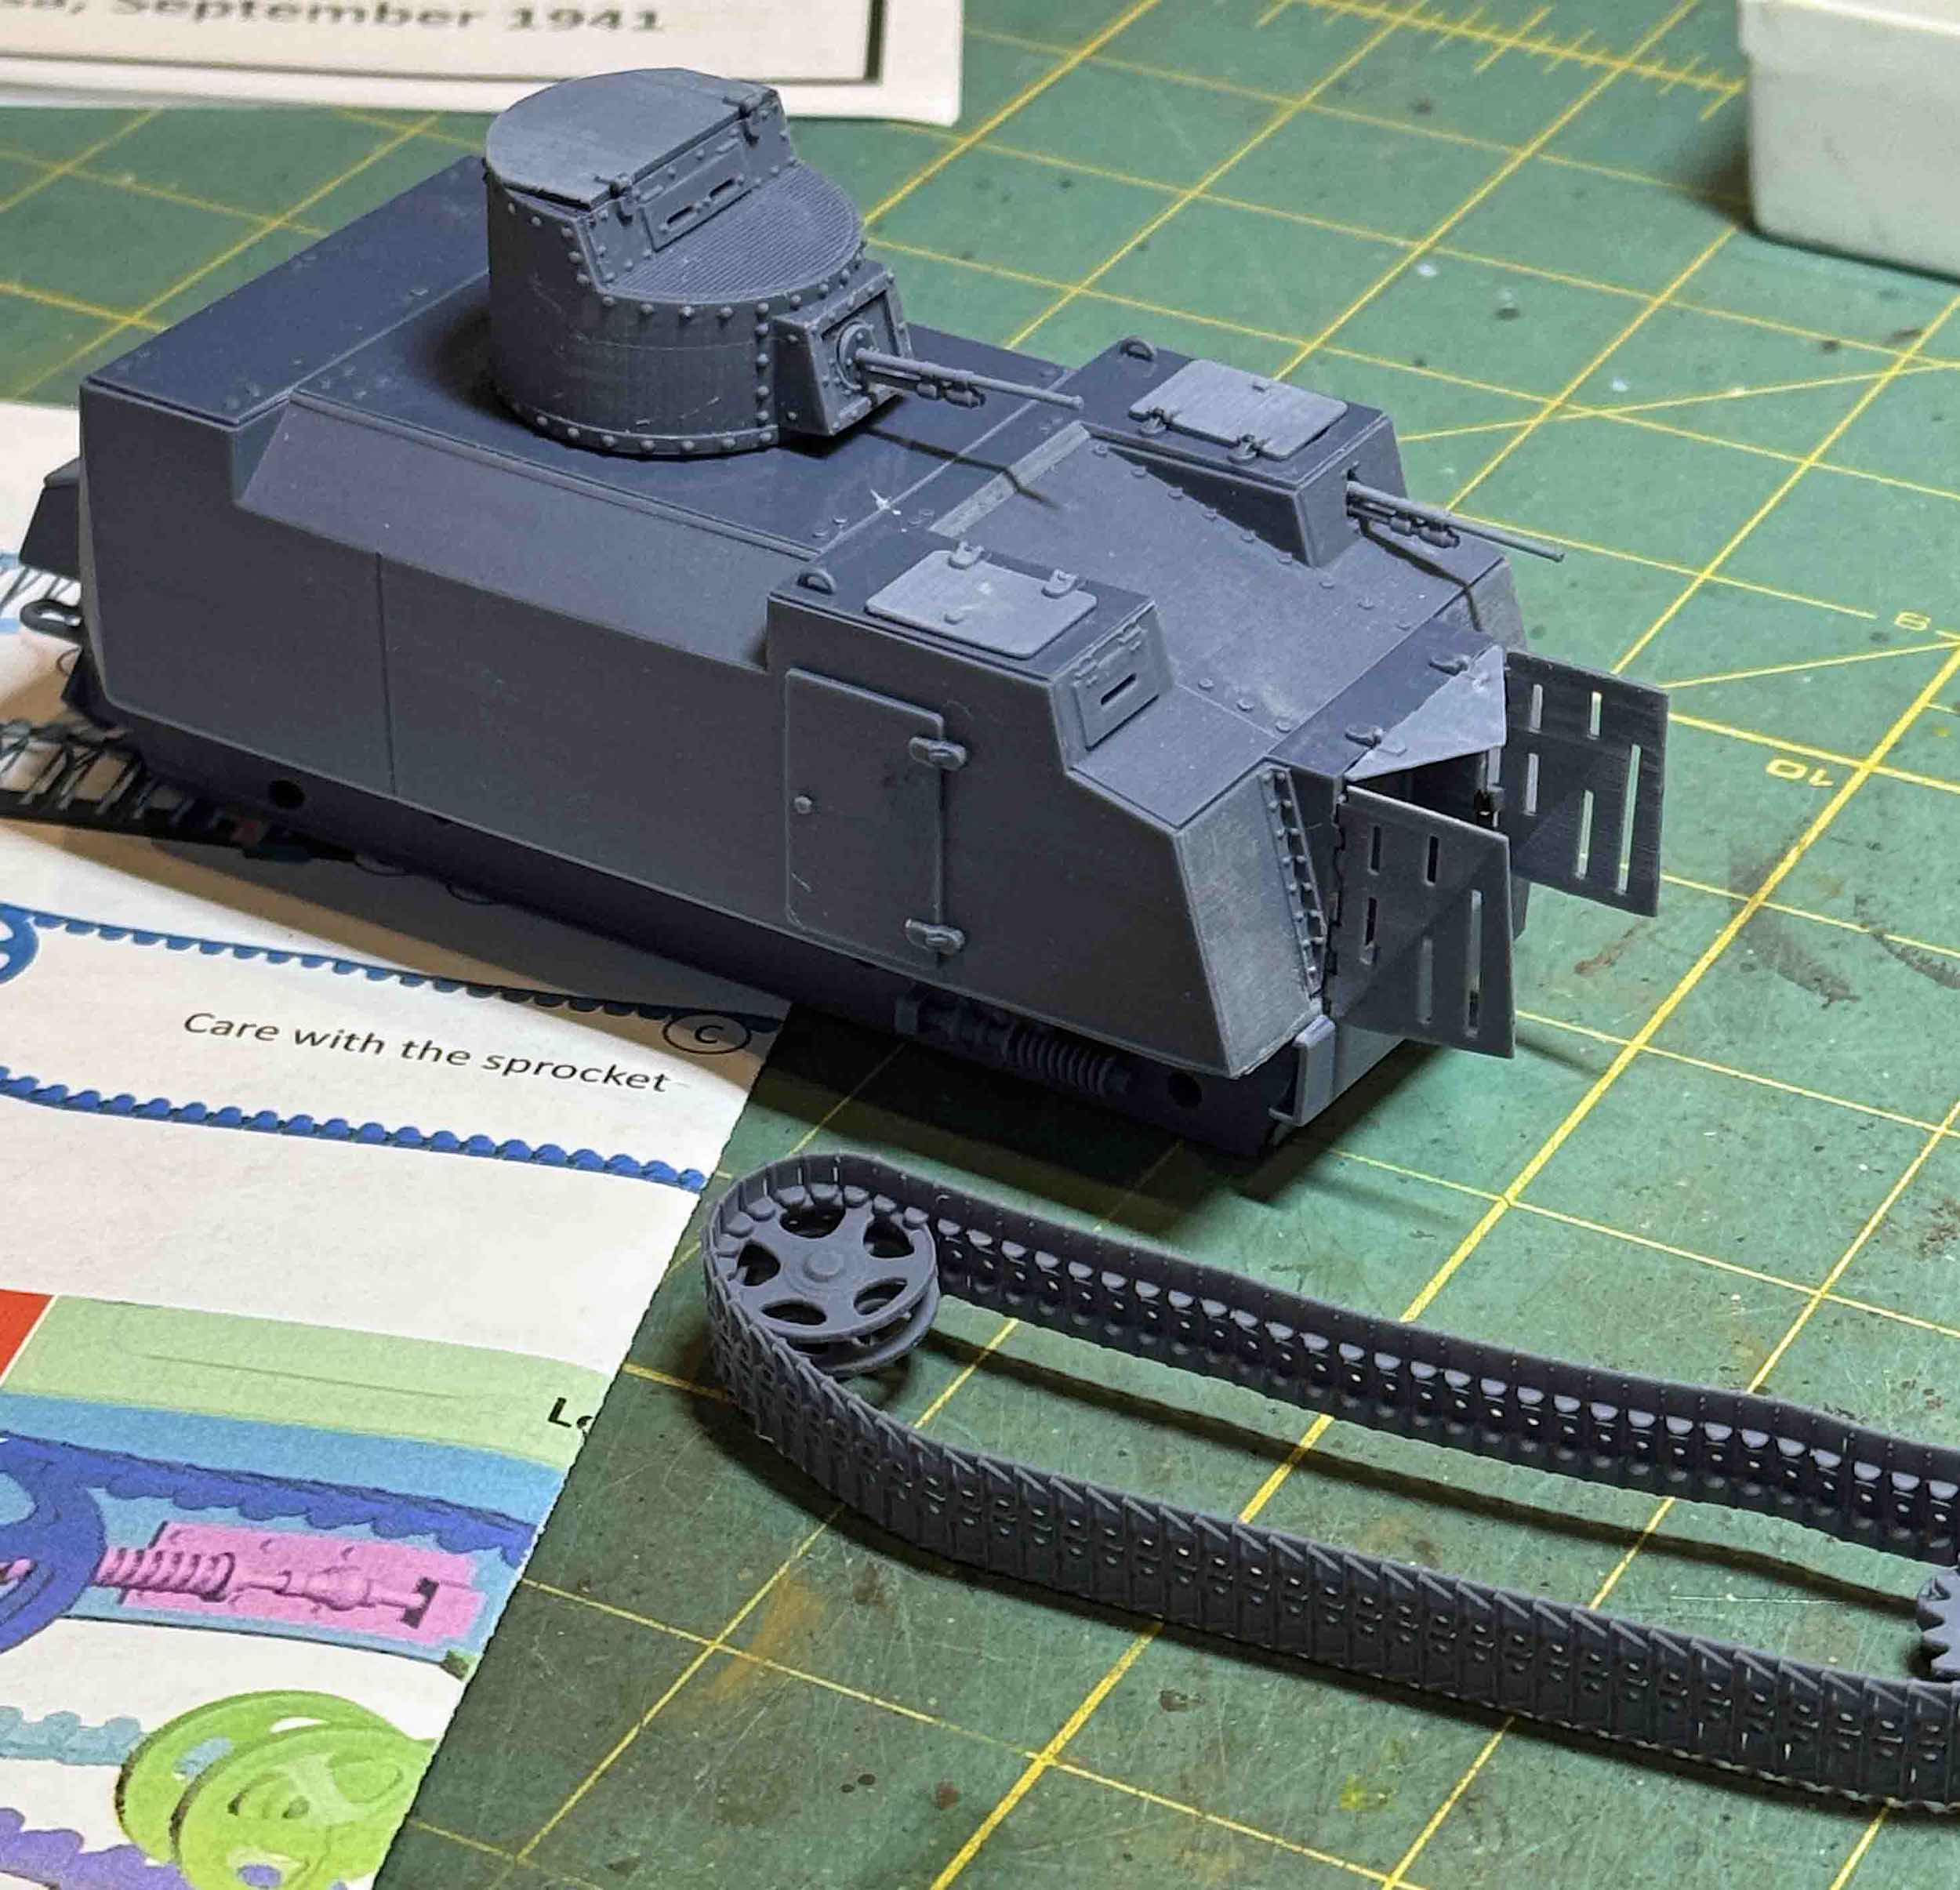
In this release, the NI is armed with two heavy machine guns: a fixed gun in a small box on the port side of the hull and the other in the turret.
As with many of the Vargas models, some of the molded-on detail is breathtakingly thin, such as the brackets that hold the on-board tools. These are so perfectly engineered that I was able to firmly ‘click’ the various shovels and hammers, etc. into place. The two doors in front can be positioned closed or opened to uncover the radiator inside. Vargas also provides its usual handful of random parts (crates, sandbags, helmets, etc.) for enhancing the vehicle and/or diorama.
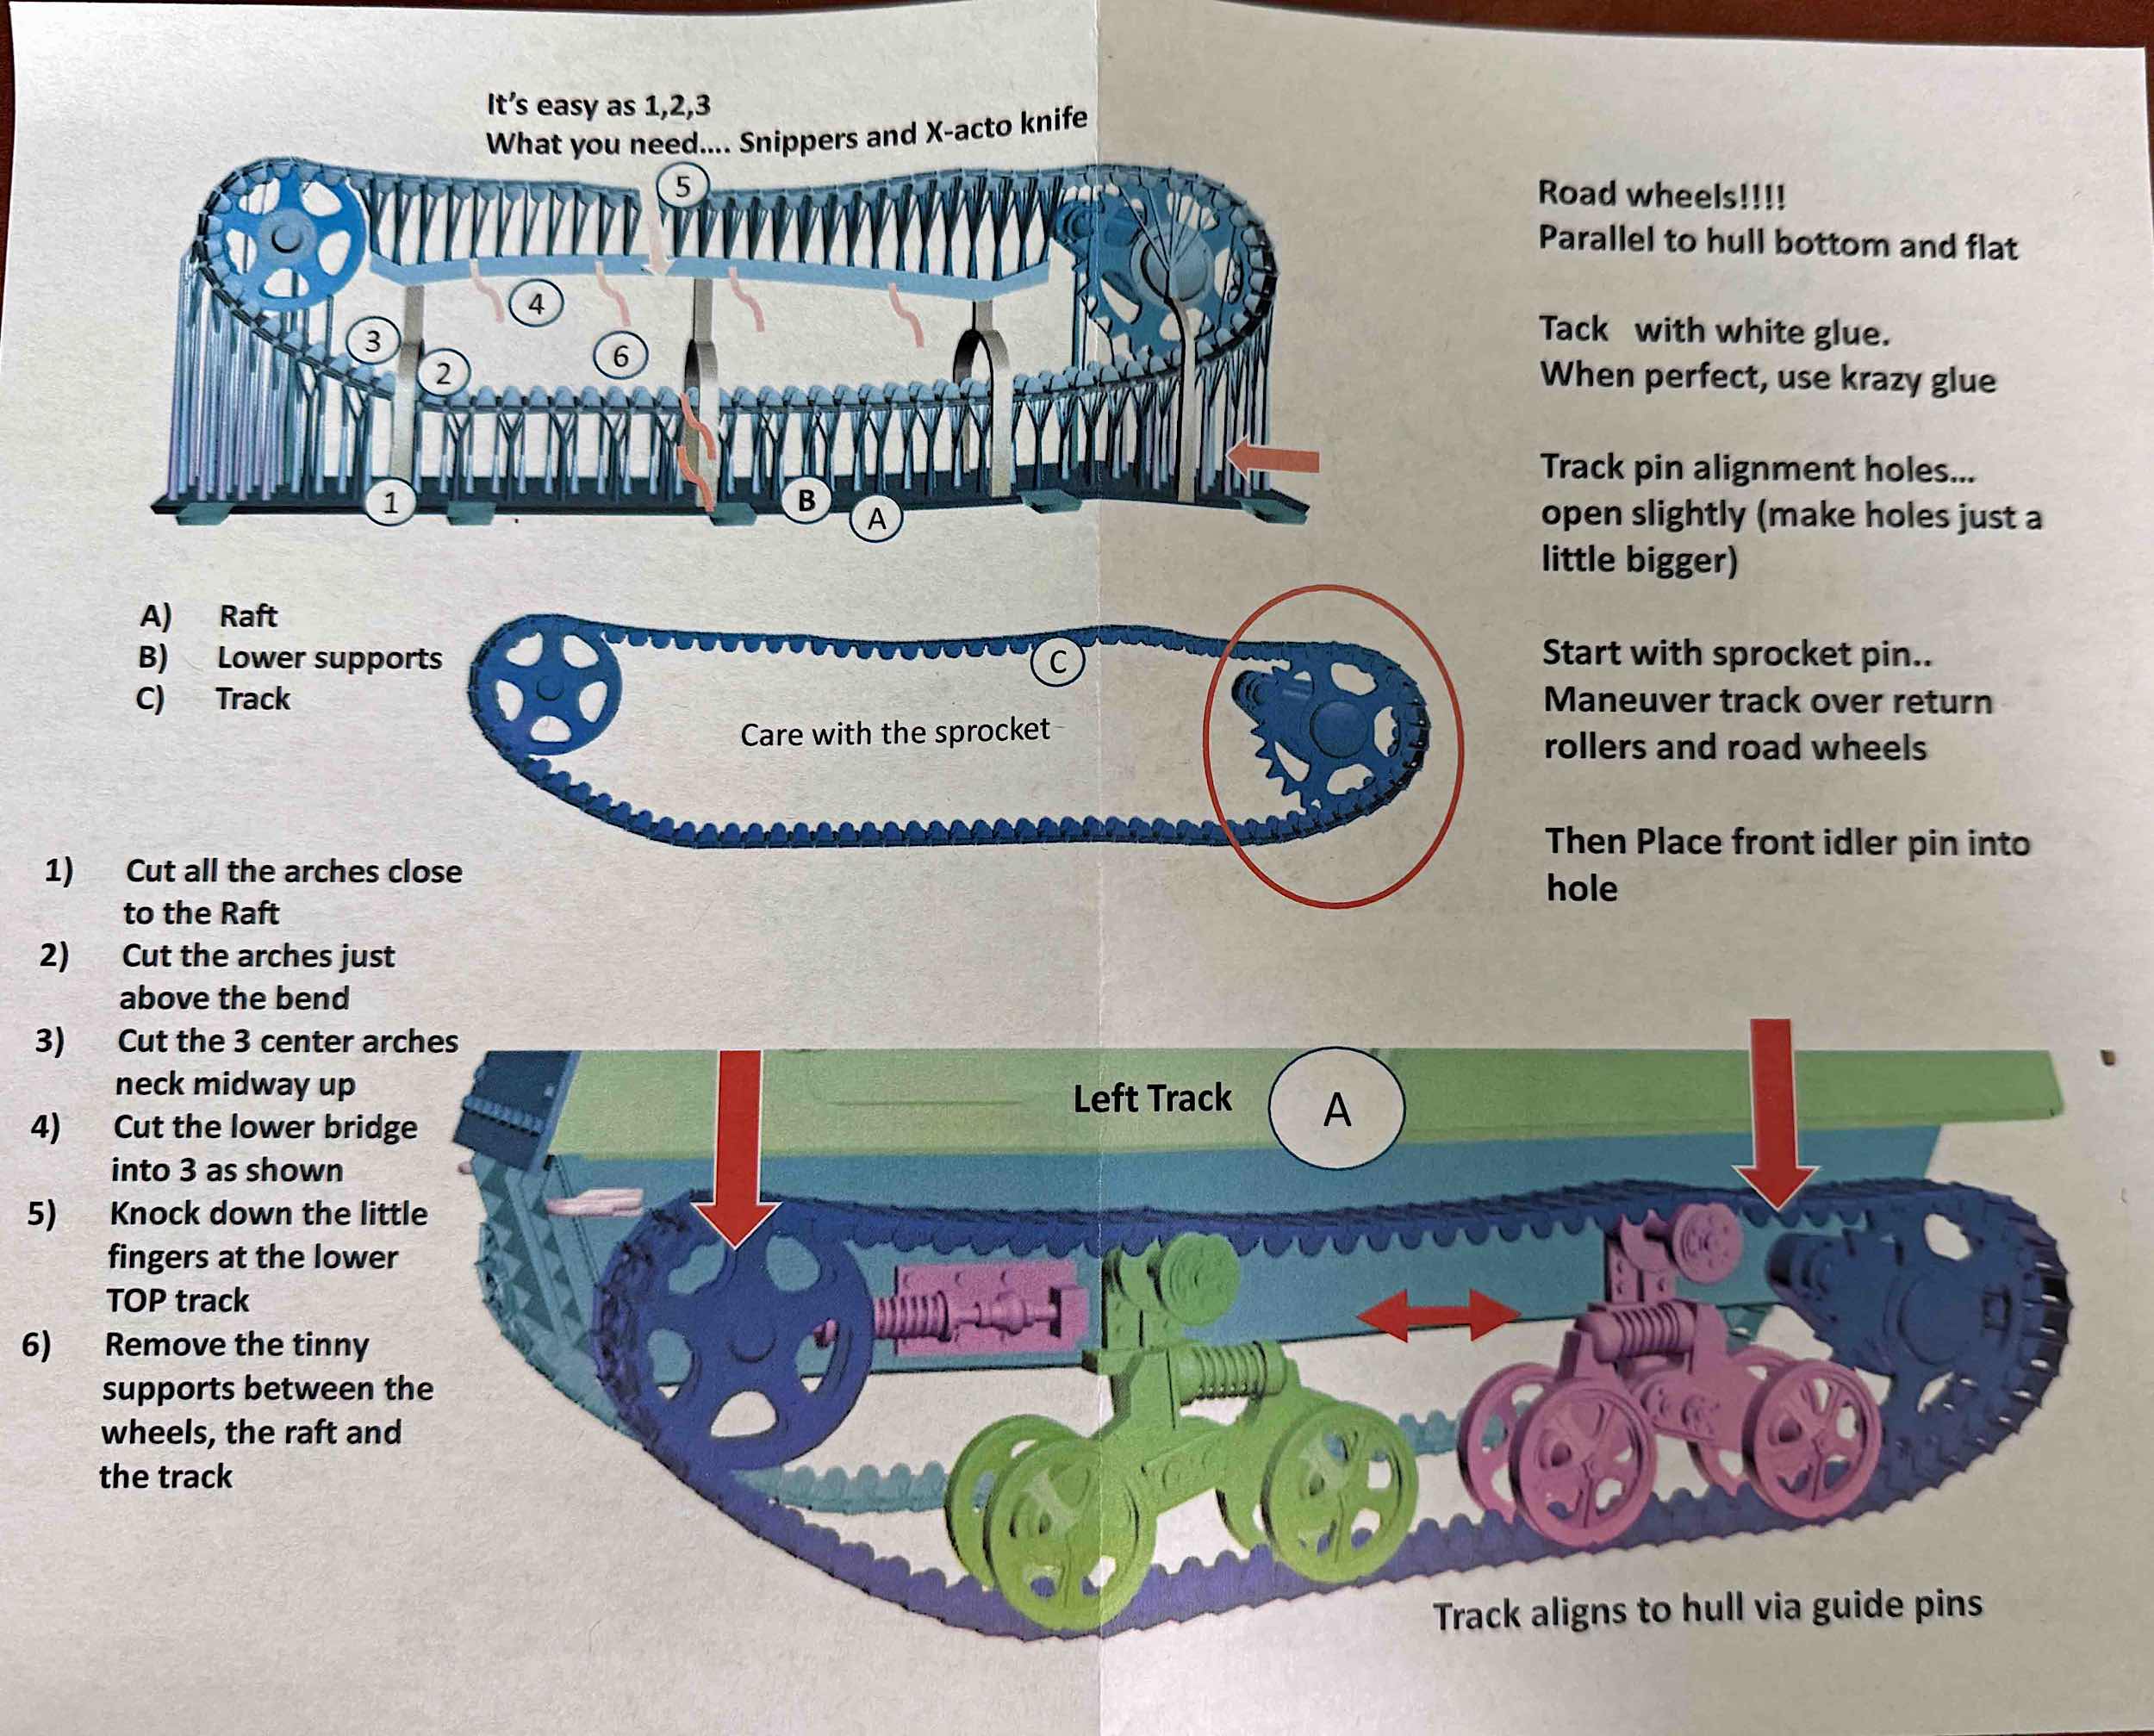
The track and running gear, unusually for Vargas, are provided in three pieces – the track run is a well-supported single piece that includes the drive sprocket and the return roller, with the two double-wheel bogies making up the second and third pieces, also well protected. I believe that Vargas wanted to make sure the delicate assembly arrived in good shape. The instructions said to attach the bogies to the hull first, followed by the track section, but I found that assembling each side (all three pieces) first worked just as well and was a little less fiddely. The detail here, and elsewhere is beautiful.
As with most 3-D printed kits, the Vargas sprues do not have any old-school poured-resin blocks to remove; instead, each sprue contains dozens of very thin connecting rods that are part of the printing process. This makes the parts very simple to remove from the sprues. Most of the smaller parts are printed within a flexible, protective ‘cage’ of resin. There is cleanup required, to be sure, but nothing like what I would normally expect for a limited-run, resin subject.
The dark-grey resin is firm but sands easily enough, and there are some very slight surface striations on some of the curved parts that require attention, making preparation more important than with typical styrene kits. Minor flaws are easily removed with the sanding stick or simply filled with a primer such as Gunze 1000 or 1200 Mr. Surfacer primer. Comparatively, however, these models are shipped good-to-go. Vargas pulls everything together without resorting to using photo-etch or other finicky mediums, which is a big plus (for me, at least).
I spent about four hours assembling the vehicle and about twice that painting and weathering it.
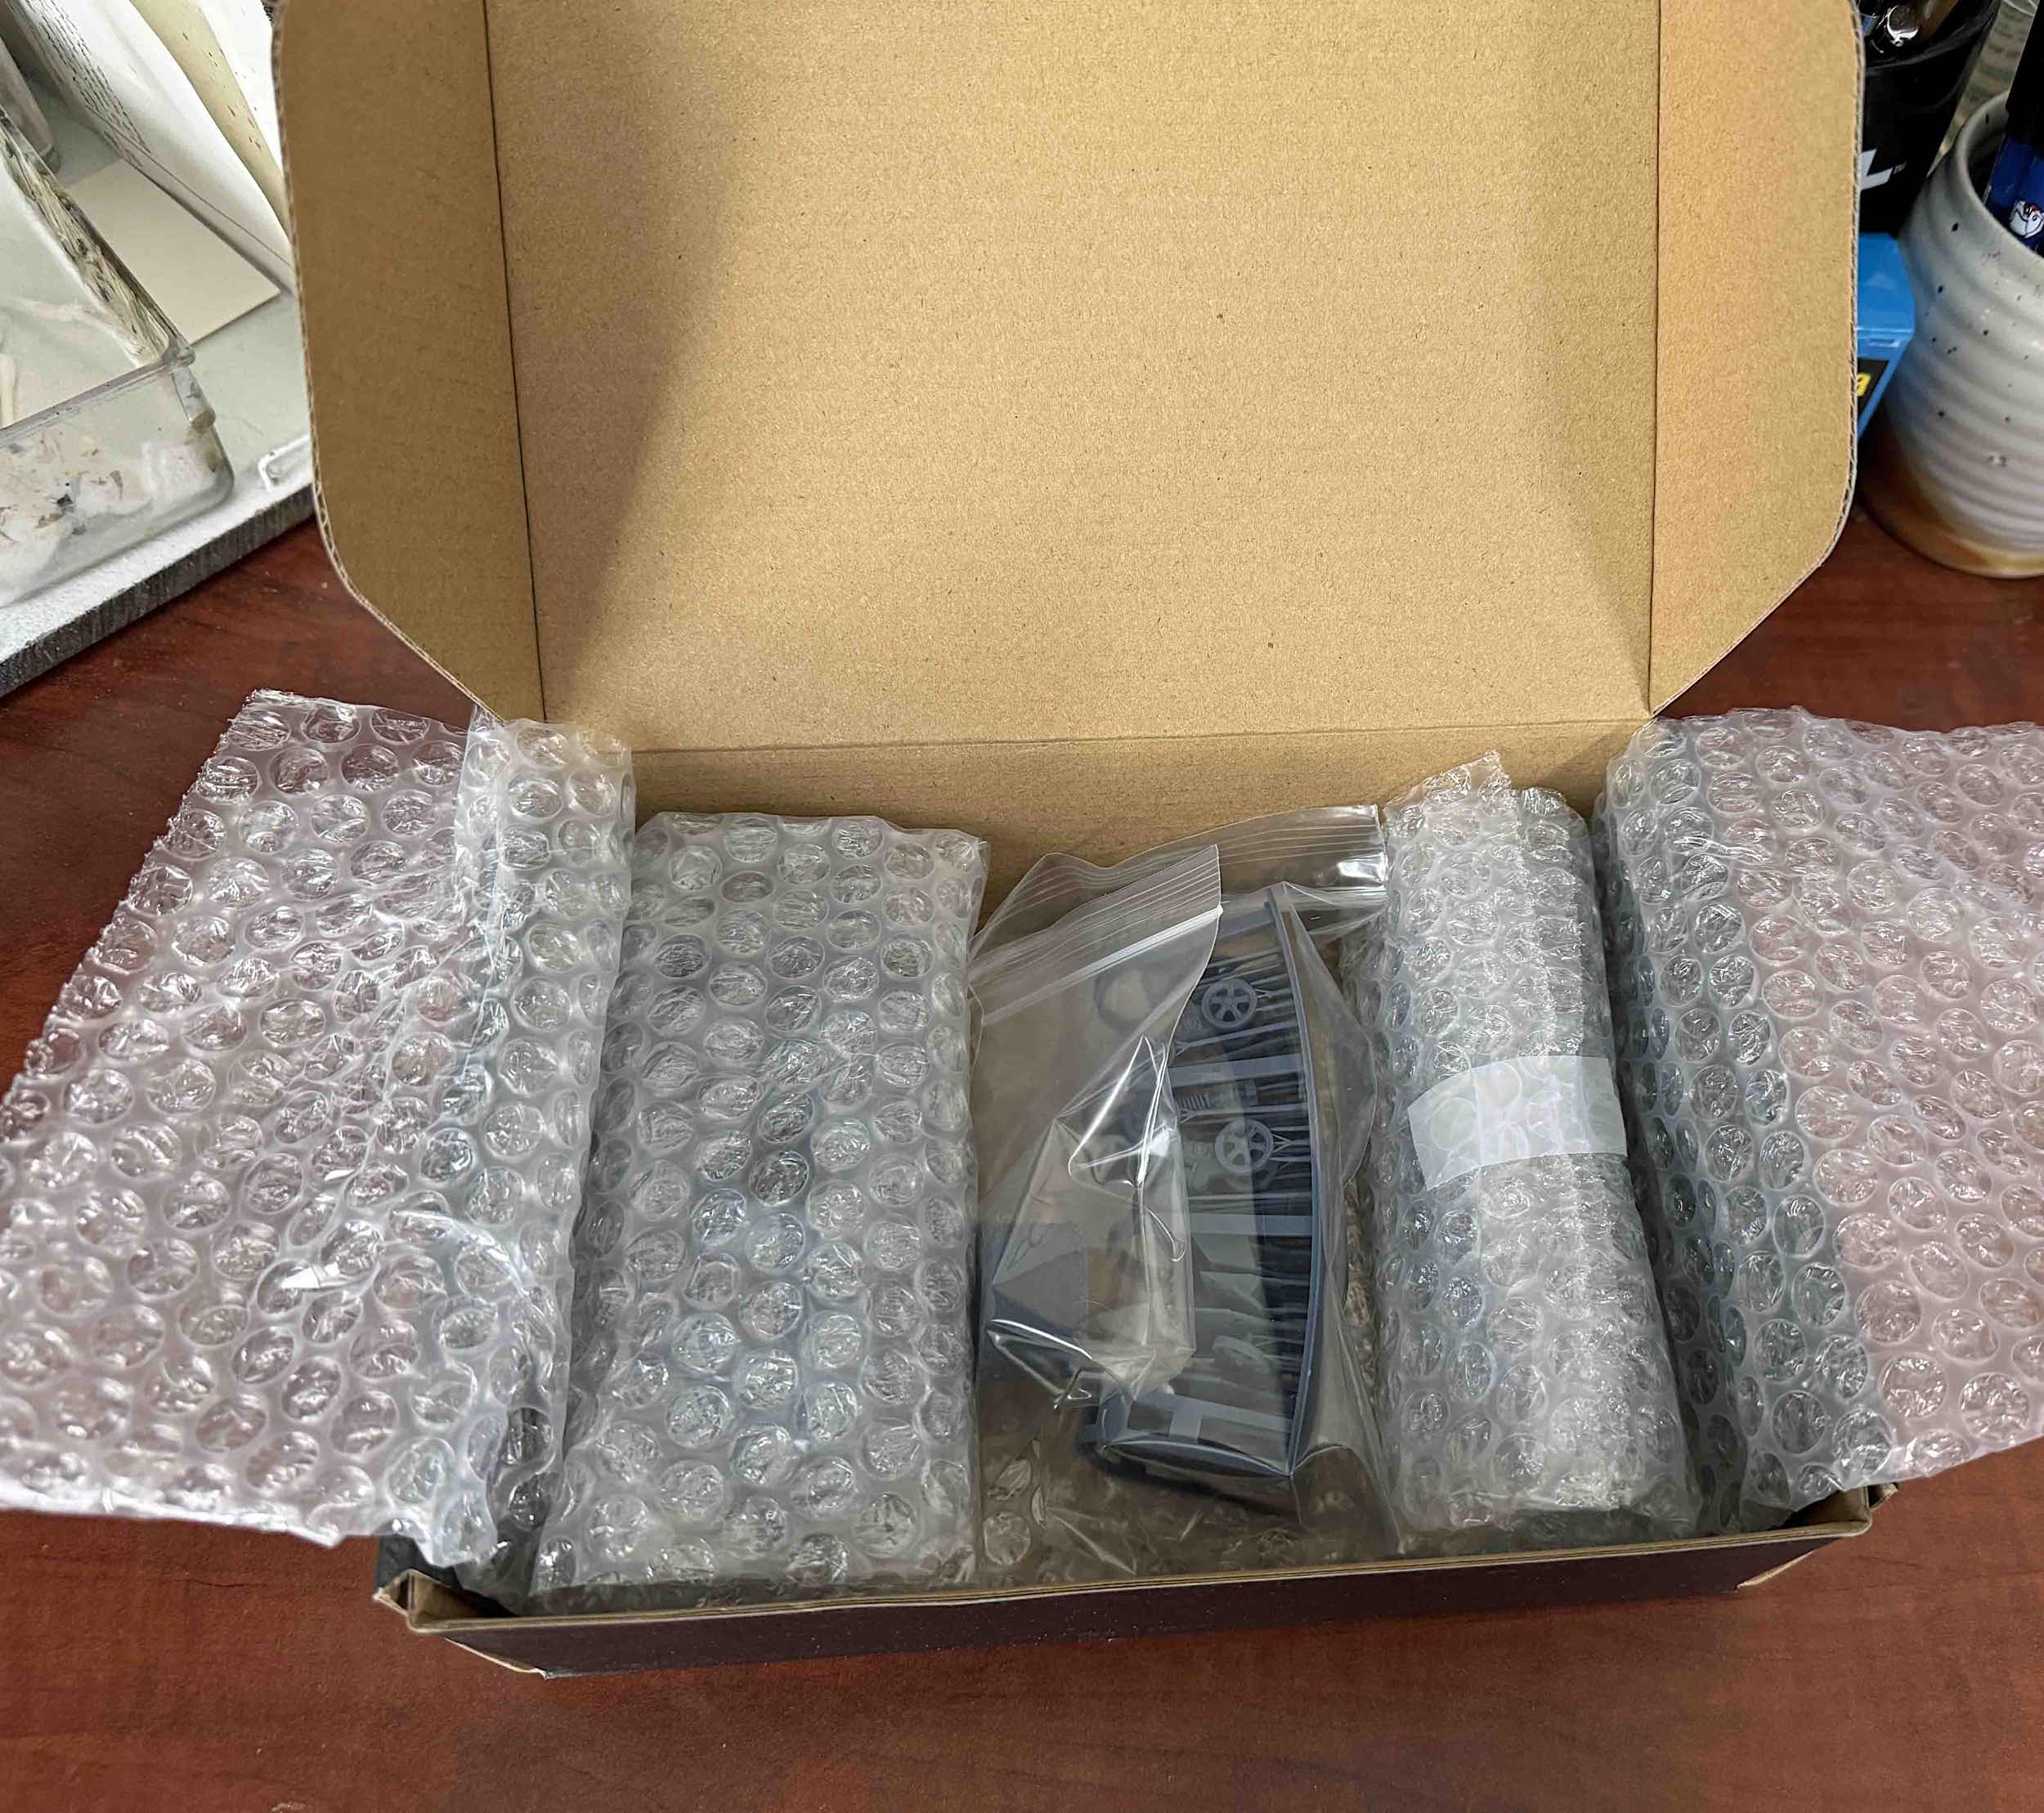
The contents of the box include:
- Main Hull, packaged separately.
- Track & Bogie assemblies, packaged together.
- One sprue of all the remaining parts, packaged separately.
- An 12-page, color instruction booklet consisting of three, full-size sheets, folded in half. Four of the 12 pages focus on the assembly. All text and label information are printed in English.
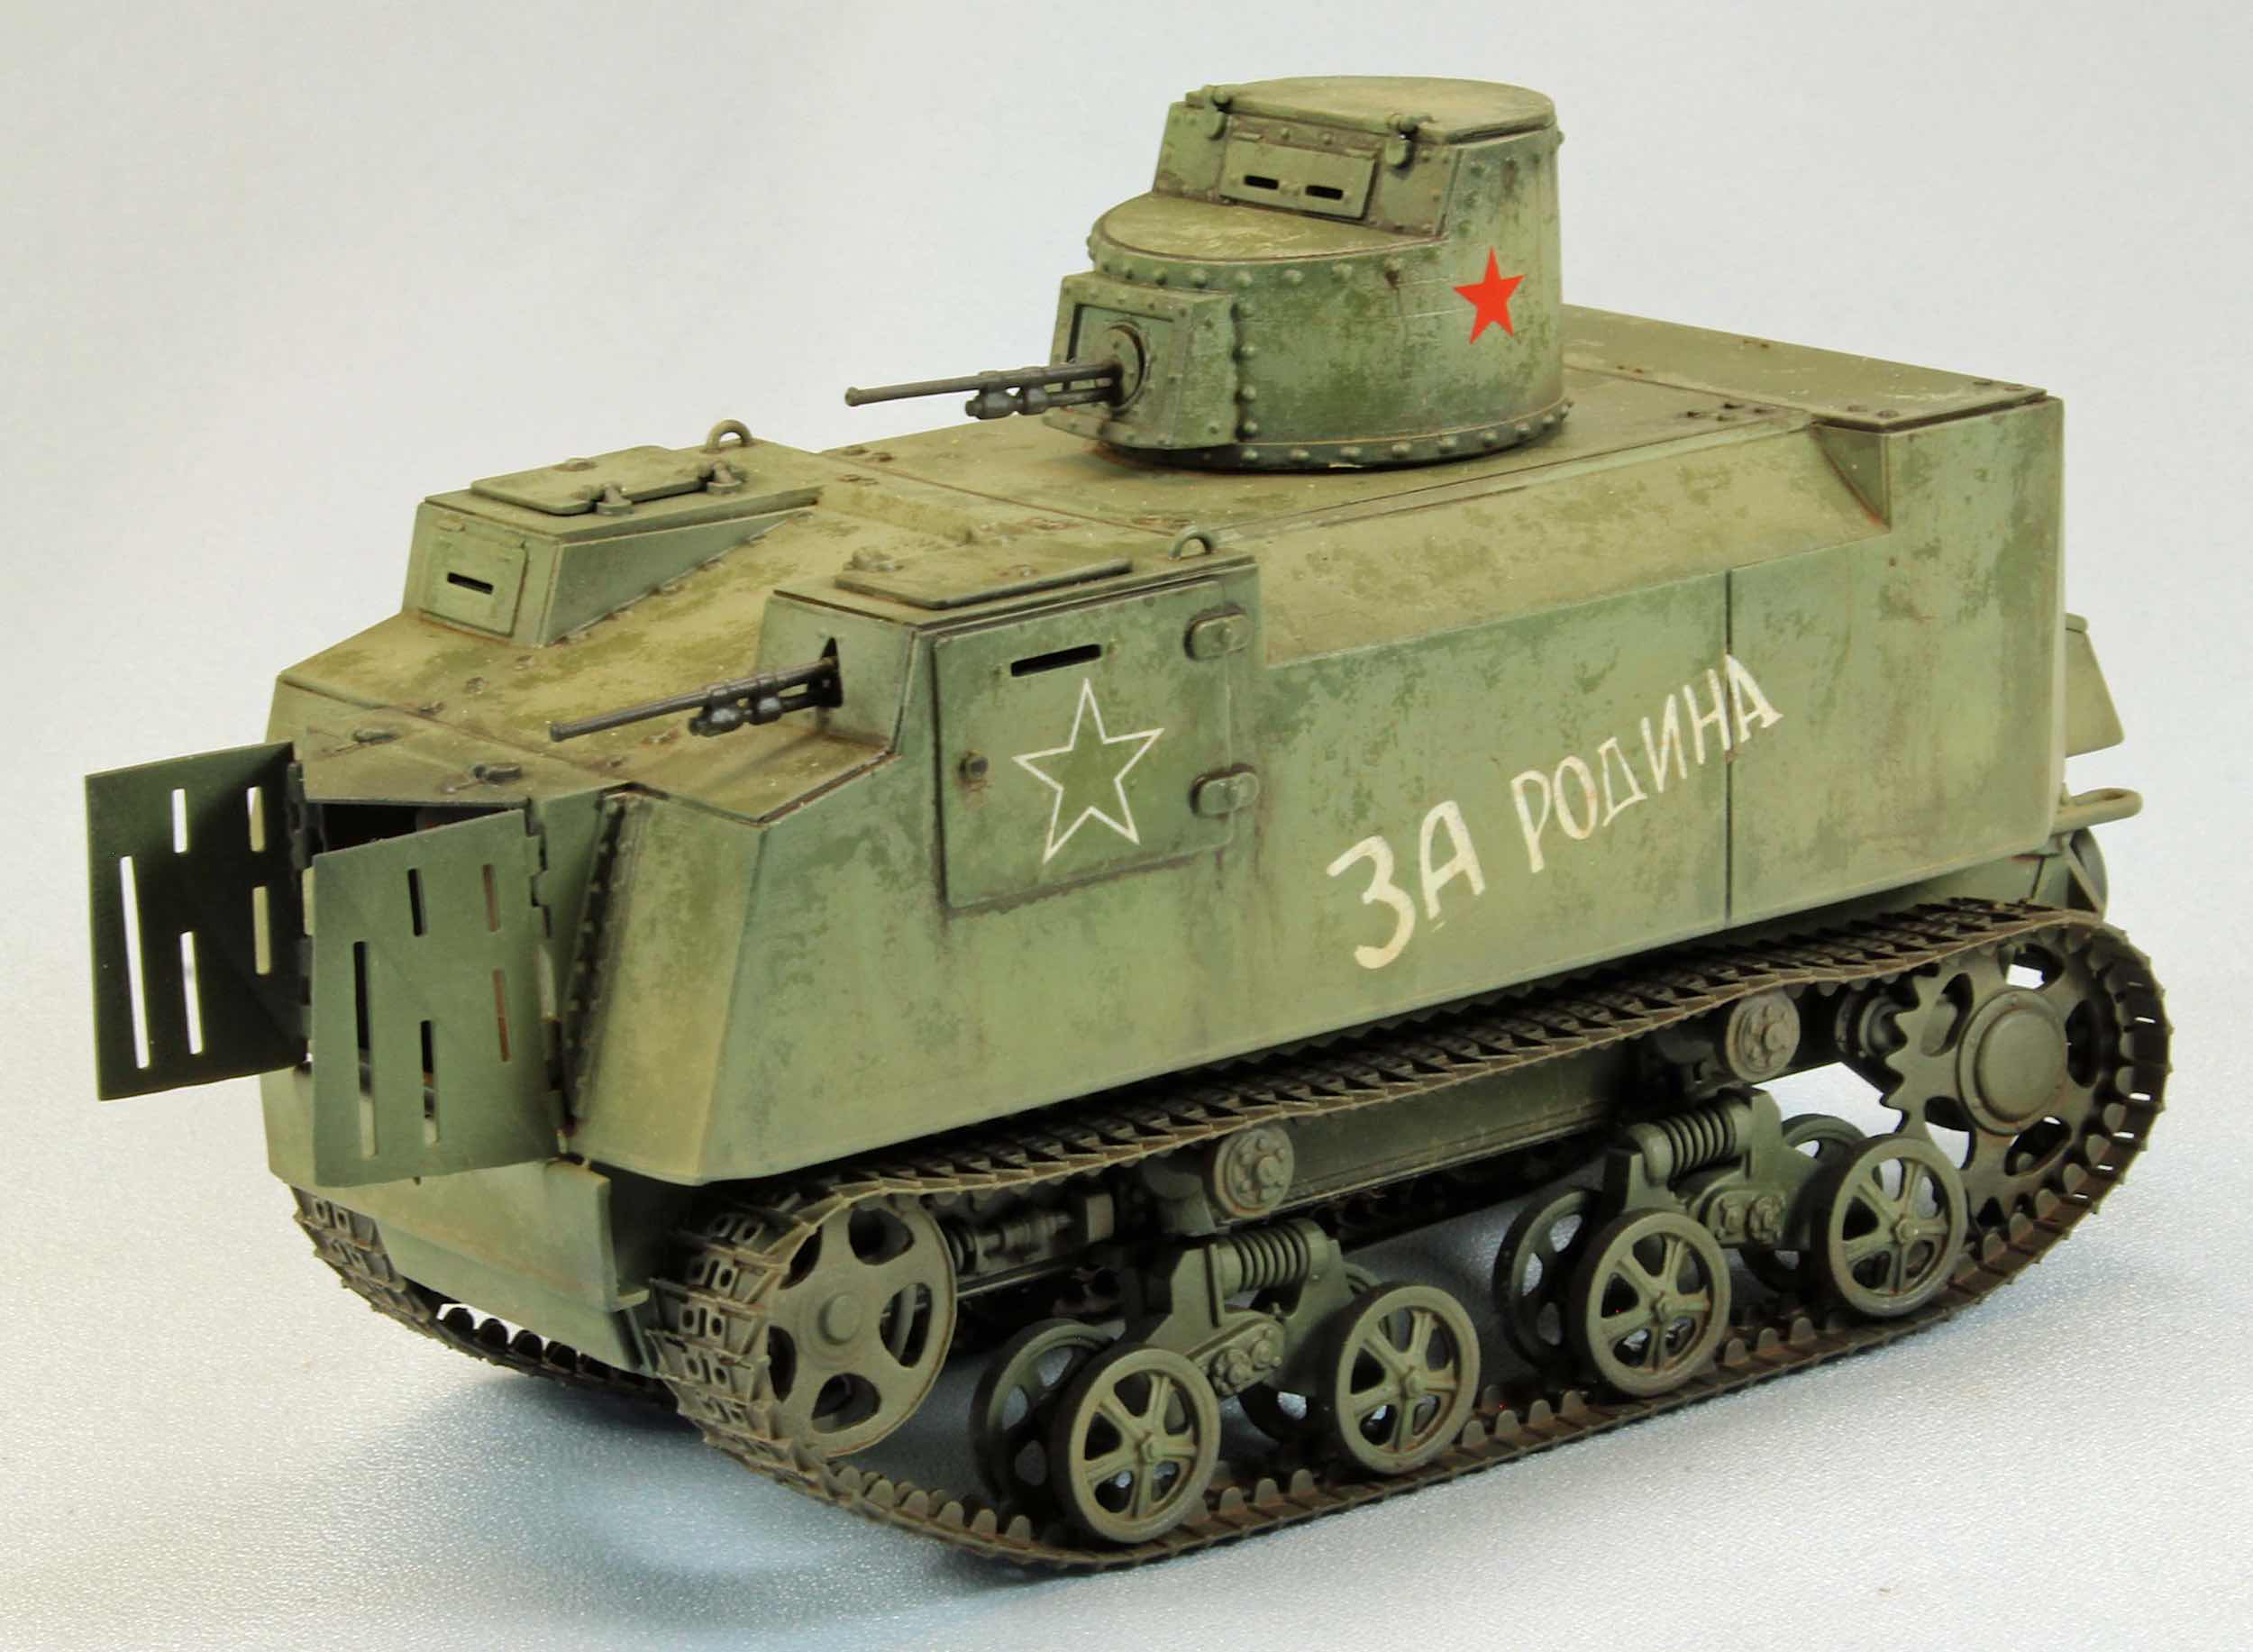
There are no markings included in the kit; those in the images of the completed model were from my spares, based on images found in the instructions and online.
The Instructions
As with most limited-run kits, the instructions are brief and not always ‘enough’. Assembly requires test fitting and comparing what you have to drawings and images of the real thing, easily found on-line. In place of text, Vargas provides simple CAD images from the printing process itself for use as a rough go-by to start with. Fortunately, each piece is shown assembled and printed in a different color from the one adjoining it, which makes things a little easier to follow. If you have built limited-run kits before, this one is typical – a lot of testing and sometimes adjusting surfaces to fit. Fortunately, the images are rendered from several angles, so you are rarely forced to guess about how things go on ‘the other side.’ Note: some of the images appear to have been mixed up with other versions of the NI – still, there is plenty there to get you on your way and through the build.
Clean Before You Start
Even though there are relatively few parts in this kit, a 3-D printed model requires a good amount of preparation before assembly. Each piece on the sprues is held in place by dozens of very, very thin connection points that are easily removed, sometimes simply by twisting the part, as is the case with the track and running gear. Once separated from the sprue, the soft gray resin is easily cleaned with a knife and/or sanding sticks. While there are very minor striation marks on round parts, such as the turret or barrel, these are easily removed with the sanding stick or simply filled with primer. With all the parts cleaned and free of defects, I was ready for assembly.
The Build
Assembly was straightforward and nearly hassle-free. Attachment points are very small on the detail, but their relatively light weight won’t need much CA glue to stay in place, as long as you are careful during painting and weathering. I wanted to make the engine radiator visible so I left the two hatches off until the end for fear of damaging them in subsequent steps.
The turret and the track/bogie assemblies can be assembled and put aside, to be attached later. I also left the pioneer tools off for painting after realizing that they literally ‘snapped’ into place under their brackets molded on the hull. This leaves a couple of tow and lifting hooks and various hatches to attach, and that was that – assembly complete! With the major parts still separated for painting (hull, track/bogie assemblies, on-board tools, and two front engine hatches), I was headed for the paint booth. Vargas models are perfect for modelers like me, who enjoy the ‘finishing’ steps to those involving assembly!
Painting and Finish
There are few color pictures of the NI tractor online - I only found a few, and all were essentially 4BO Russian green. To break up the monochromatic finish I used a technique loosely called the ‘Sugi’ method, patterned after an approach championed by a Japanese modeler who goes by the name of named ‘Mr. Sugi’. Essentially, the surfaces start out dark and are lightened by several similar, and consecutively lighter, greens. Each layer is partially scrubbed off with the aid of AKI Worn Effects, revealing the darker color underneath. Here is a breakdown of the colors and materials I used to finish the build:
Overall Primer - Mr. Hobby Mr. Finishing Surfacer Mahogany 1500
Chassis and Wheels -
- Base Coat – AKI.RC.284 Olive Green
- Post Shade Mottling – Tamiya XF-71 Cockpit Green (IJN), then XF-76 Gray Green (IJN), and finally XF-14 JA Grey
Track and remaining detail
- Mr. Hobby Mr. Finishing Surfacer Mahogany 1500
- Tamiya XF-84 Dark Iron
Weathering
- A.MIG Wash Brown overall
- A.MIG Dark Wash pin wash overall
- Model Master Afrika Dunkelgrau 1942 for dry-brushing overall
- Vallejo 77.716 Semi-Matt Aluminum and Uschi Chrome pigment for bling overall
Conclusion
This is my eighth Vargas kit and, as always, the build was a breeze. It is not unusual for me to open the box and finish assembly in the same afternoon. Luis Vargas does a solid job researching his subjects, and the superb design and engineering that went into his kits is readily apparent. As I said with the most recent (and every) Vargas project – each one makes me want to build another. As with any all-resin project, this kit has its challenges, but these are minor compared to resin kits of old. This build was straightforward enough, however, for any modeler to finish. Having a solid working knowledge of alternative adhesives (CA Glue, epoxy, and/or ‘fortified’ white glues) would certainly be a plus.
I would like to thank Luis Vargas at Vargas Scale Models for providing this kit for review, and to IPMS USA for giving me the opportunity to build it.