Reviews
Armor
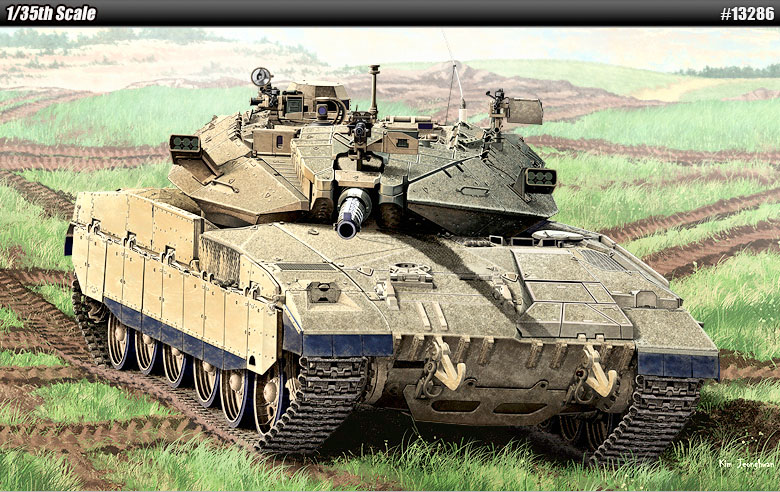
Merkava Mk.IID
by Eric Christianson
 Model: Merkava Mk.IID
Reviewed by: Eric Christianson, IPMS # 42218
Scale: 1/35
Company: Academy Models
Price: $59.00
Product/Stock #: 13286
Website: Academy
Product Web Page: View
Product provided by: Academy Models
Summary
Academy has recently offered a nice update to its venerable Merkava main battle tank line; this time the Merkava Mk. IID, with its distinctive flat-bottomed side armor. In a market flooded with Merkava kits I believe this is the only one containing this feature. Academy makes a real effort to keep the parts count down while still providing stunning detail and engineering. The Merkava IID sports many of the features of the higher-end manufacturers, but offers it at a much lower price – representing one of the best values on the market.
Background
The Merkava ("Chariot") is a main battle tank used by the Israel Defense Forces (IDF). The tank began development in 1973 and entered official service in 1978. Four main variants of the tank have been deployed to date and was first used extensively in the 1982 Lebanon War. The name "Merkava" was derived from the IDF's initial development program name.
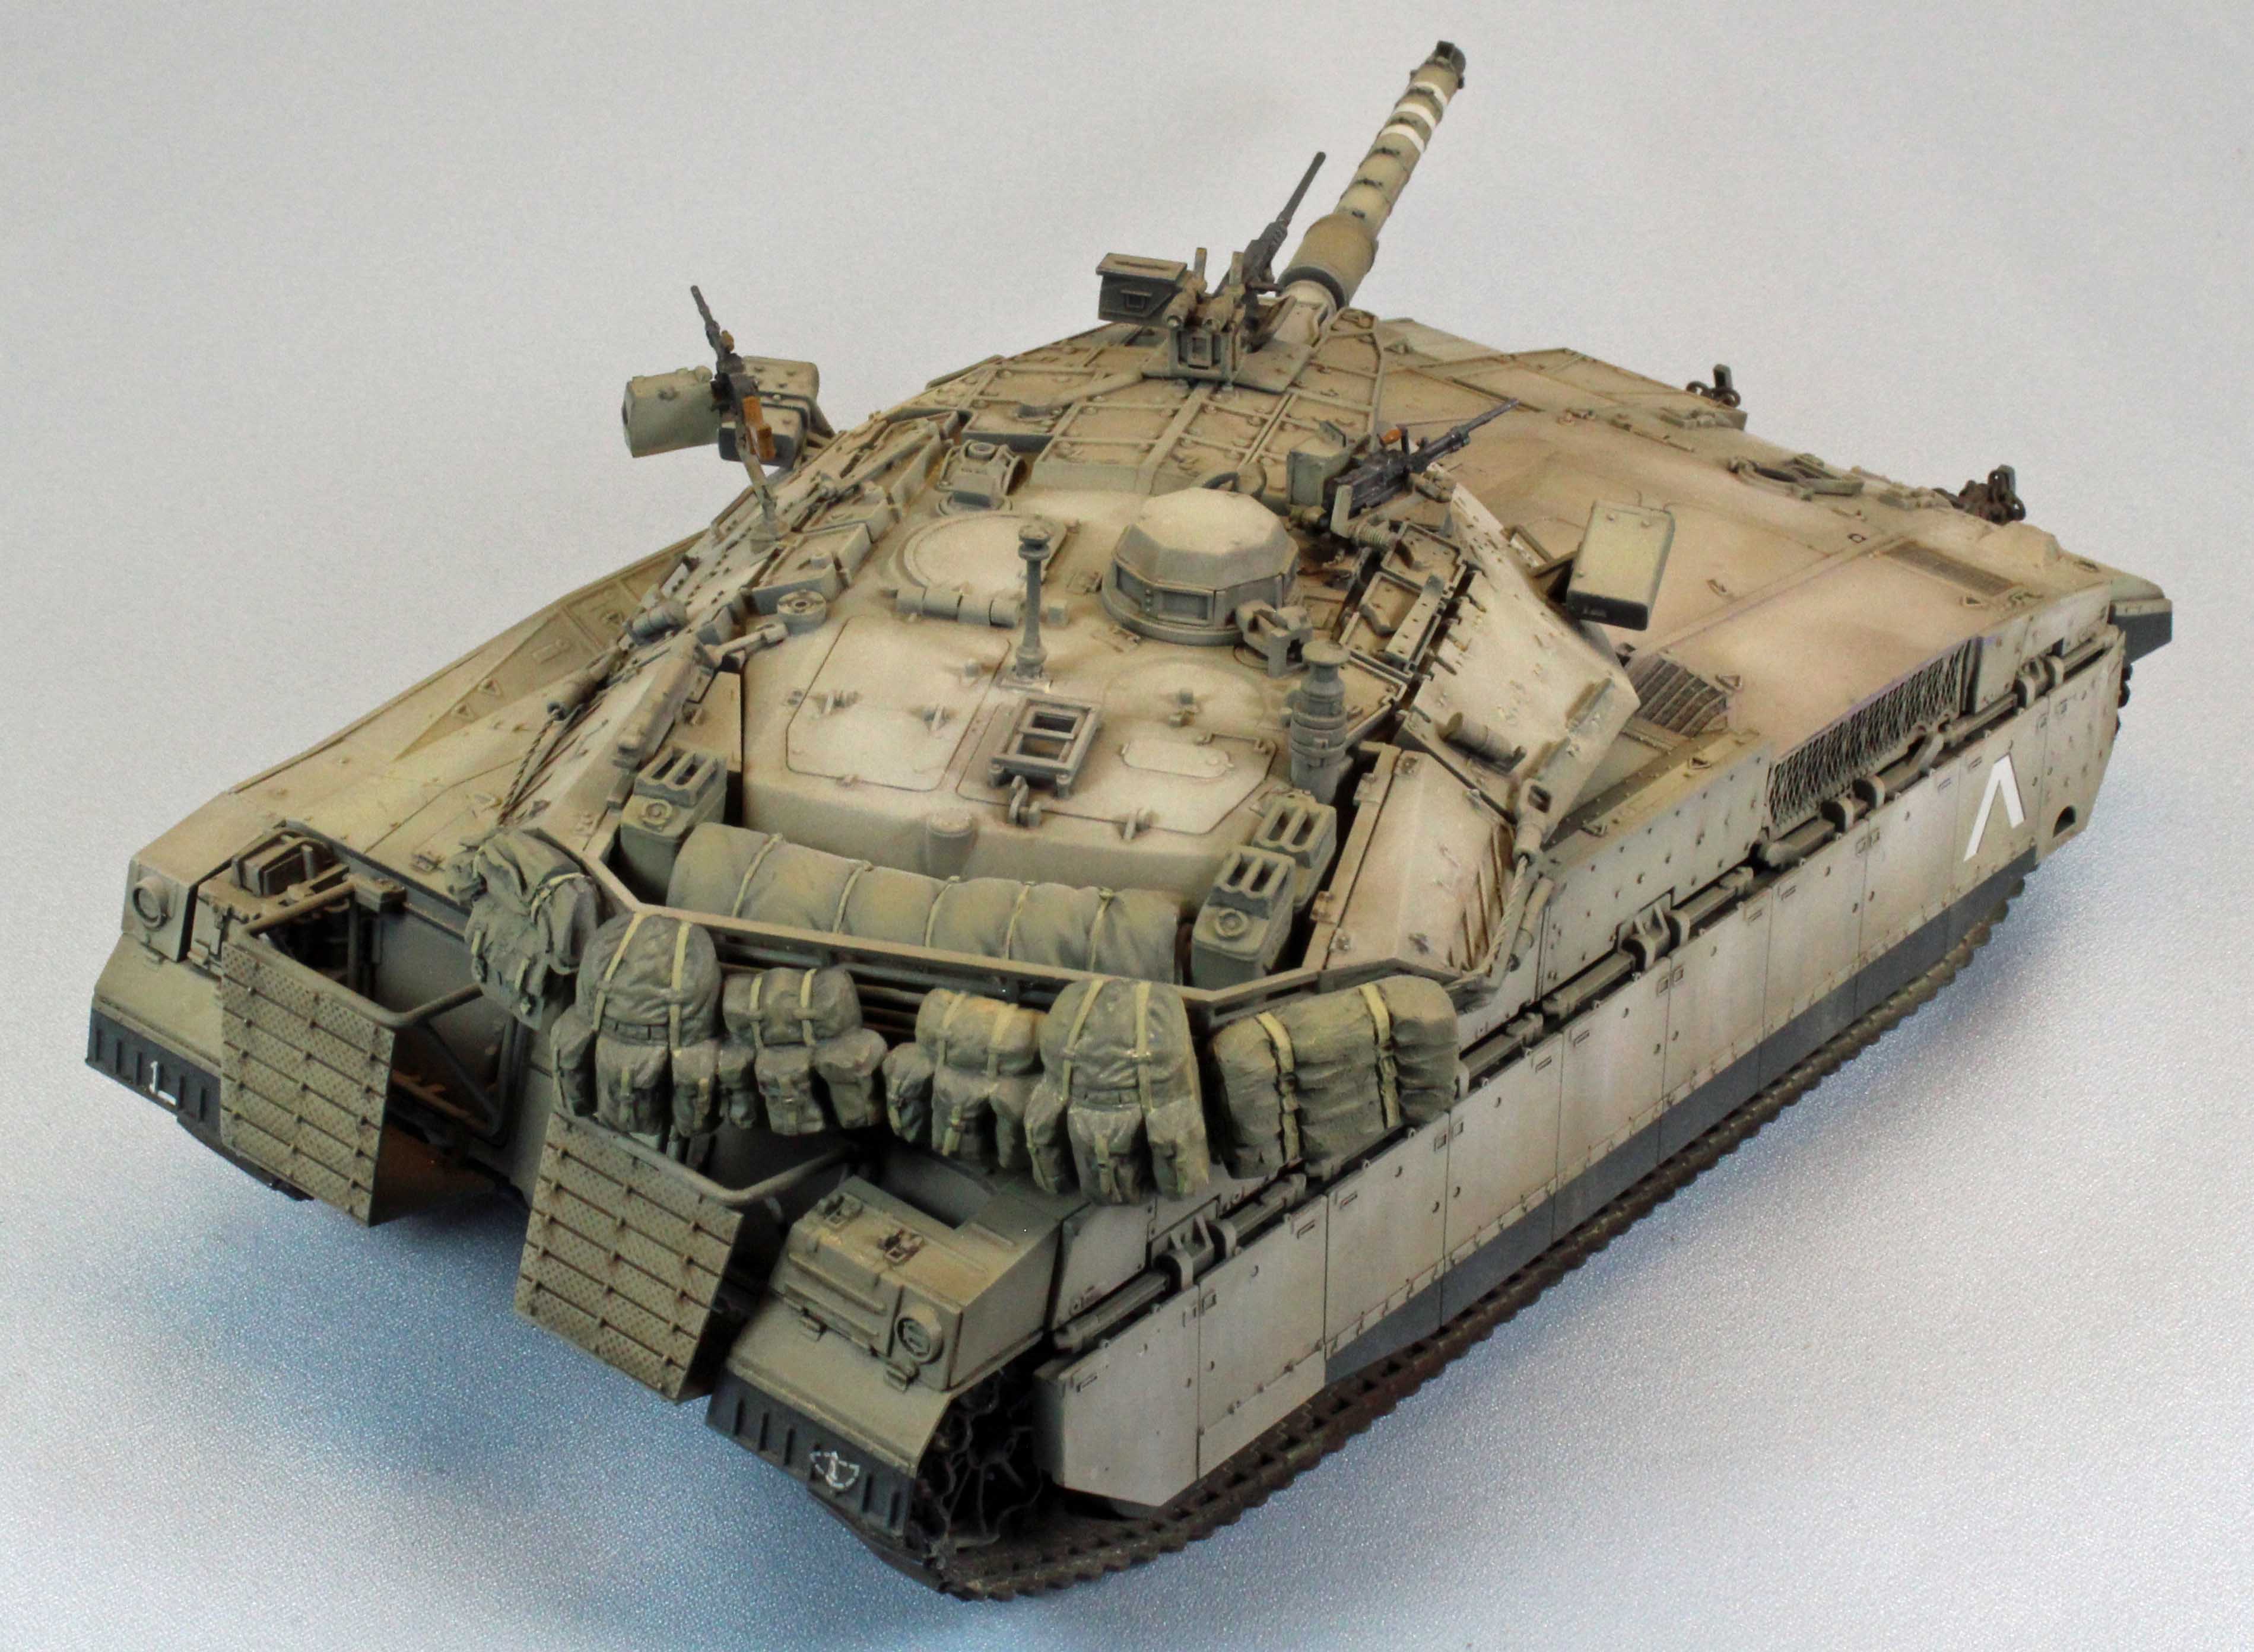
Design criteria include rapid repair of battle damage, survivability, cost-effectiveness and off-road performance. Following the model of contemporary self-propelled howitzers, the turret assembly is located closer to the rear than in most main battle tanks. With the engine in front, this layout is intended to grant additional protection against a frontal attack, especially for the personnel in the main hull, such as the driver. It also creates more space in the rear of the tank that allows increased storage capacity and a rear entrance to the main crew compartment allowing easy access under enemy fire. This allows the tank to be used as a platform for medical disembarkation, a forward command and control station, and an infantry fighting vehicle. The rear entrance's clamshell-style doors provide overhead protection when off-and-on-loading cargo and personnel.
While originally slated to be retired in 2010, production soon resumed on the Merkava line in 2013 with continually improved variants.
The Merkava Mark I and II were armed with a 105 mm M68 gun. The Mark III and Mark IIID (Dor Dalet BAZ kassag) are armed with an IMI 120 mm smooth-bore gun which can fire all versions of western 120 mm smooth bore tank ammunition.
Each model of the Merkava has two roof mounted 7.62 mm machine guns for use by the commander and loader and another mounted co-axially with the main gun. A 60 mm mortar is also fitted for firing smoke rounds or suppressing dug-in infantry anti-tank teams.
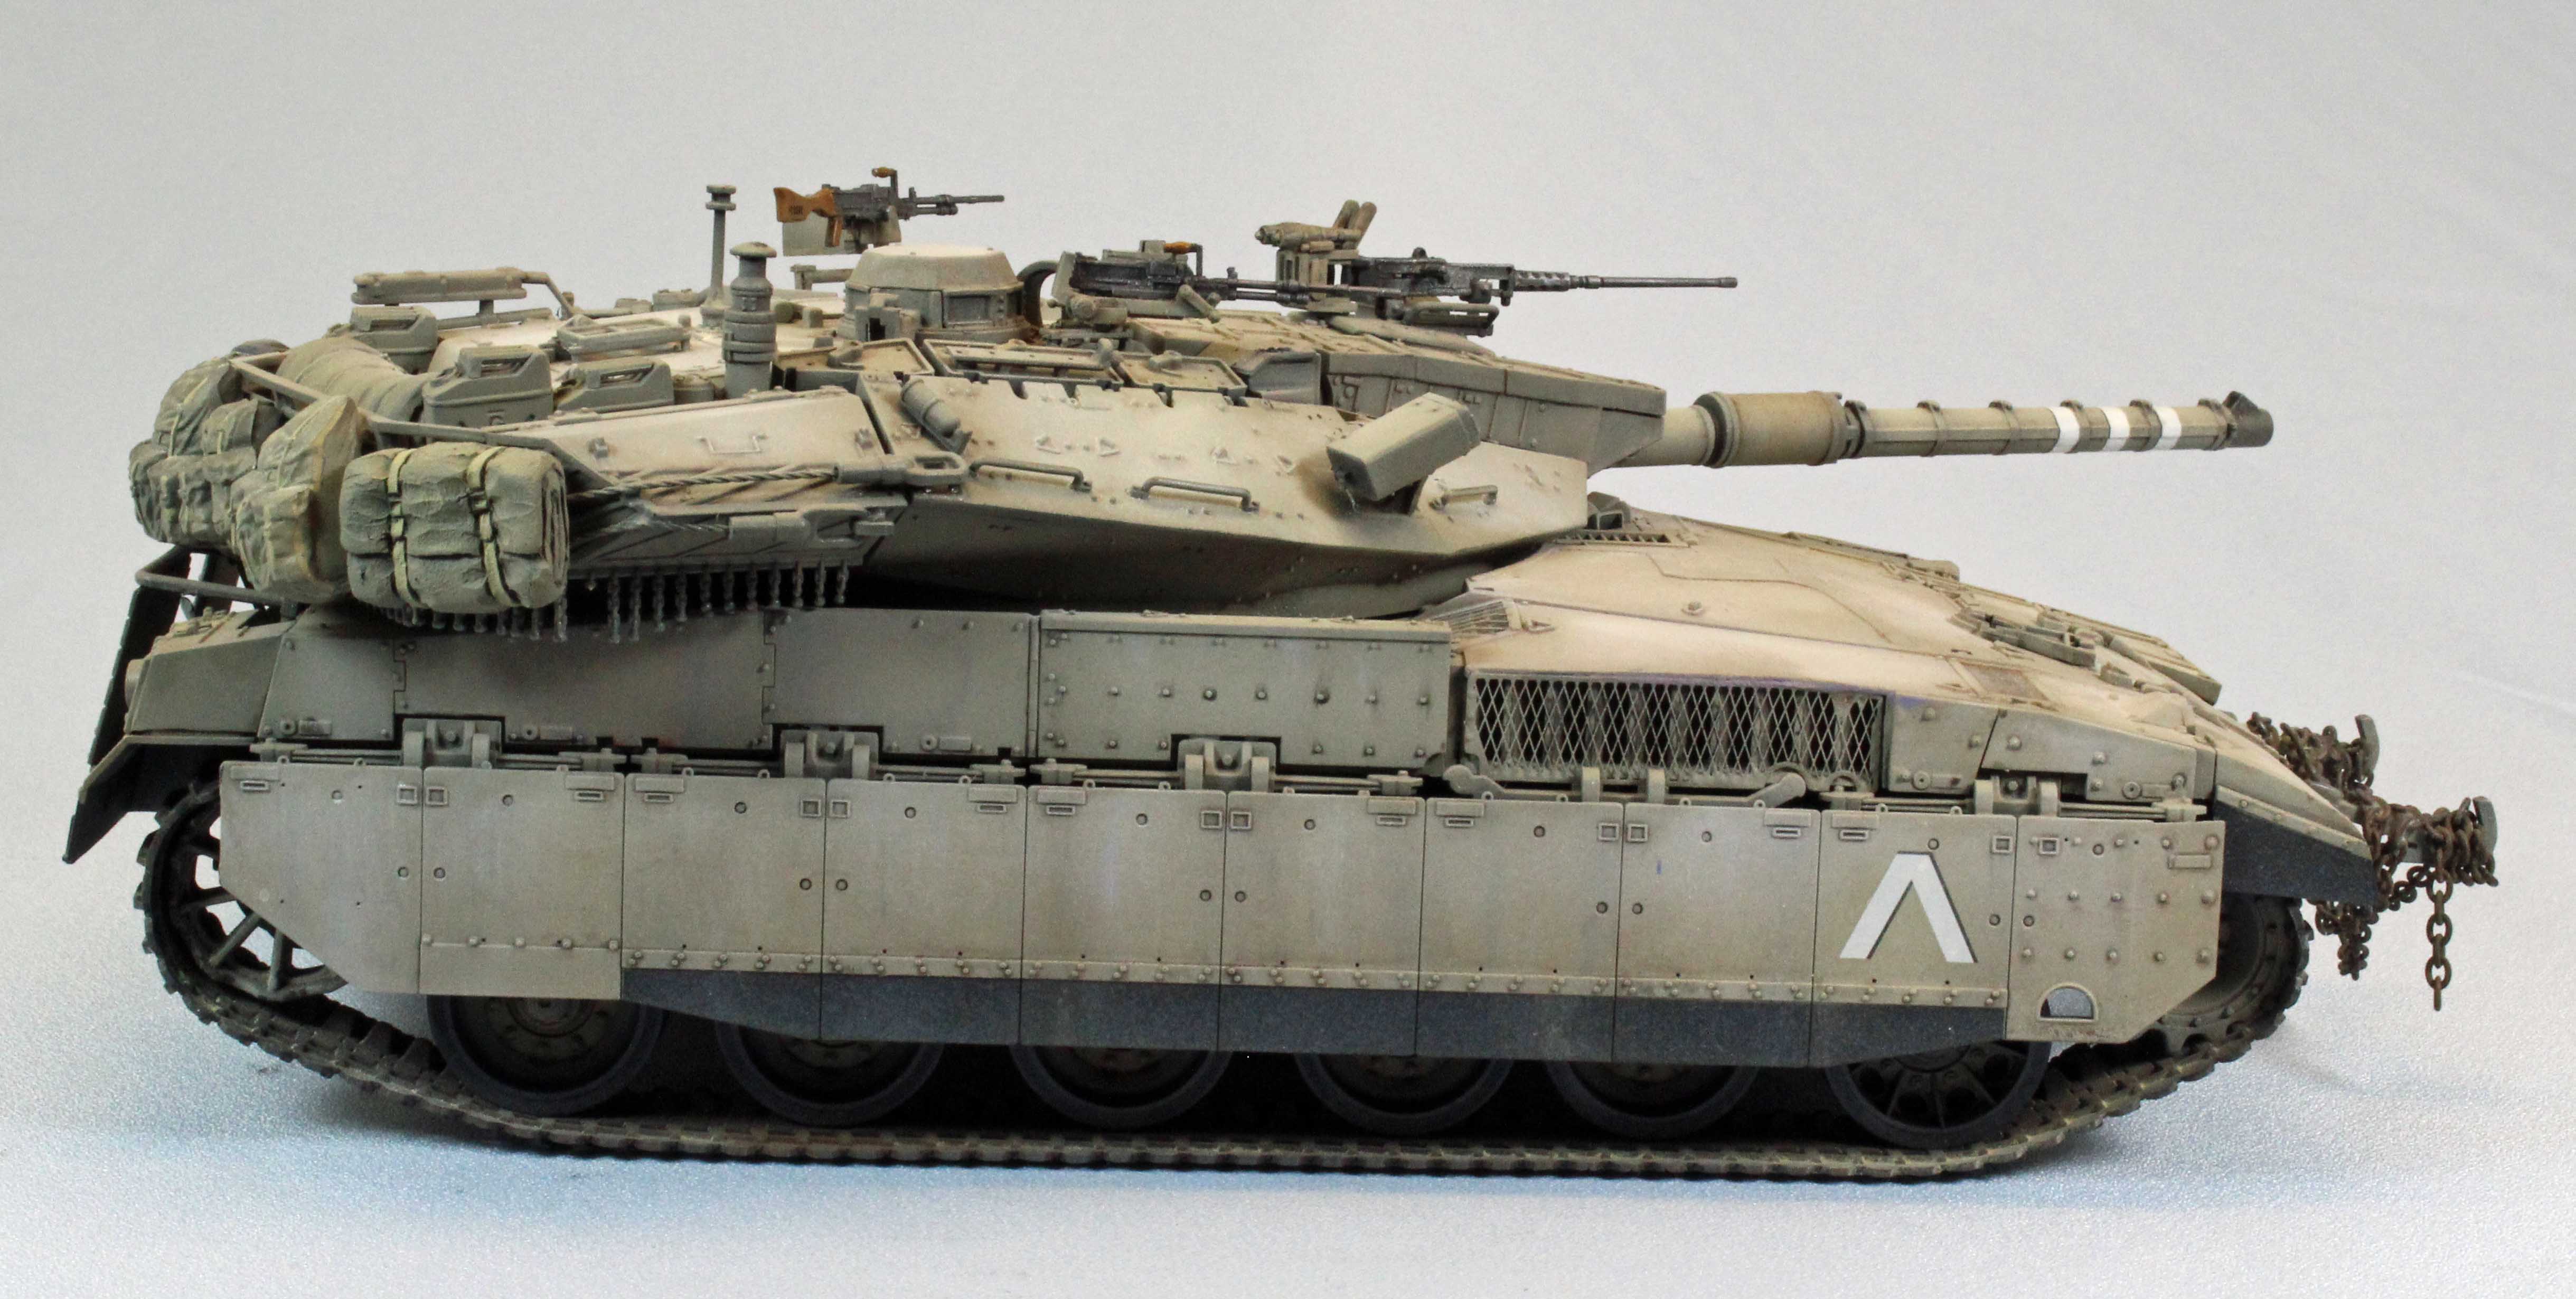
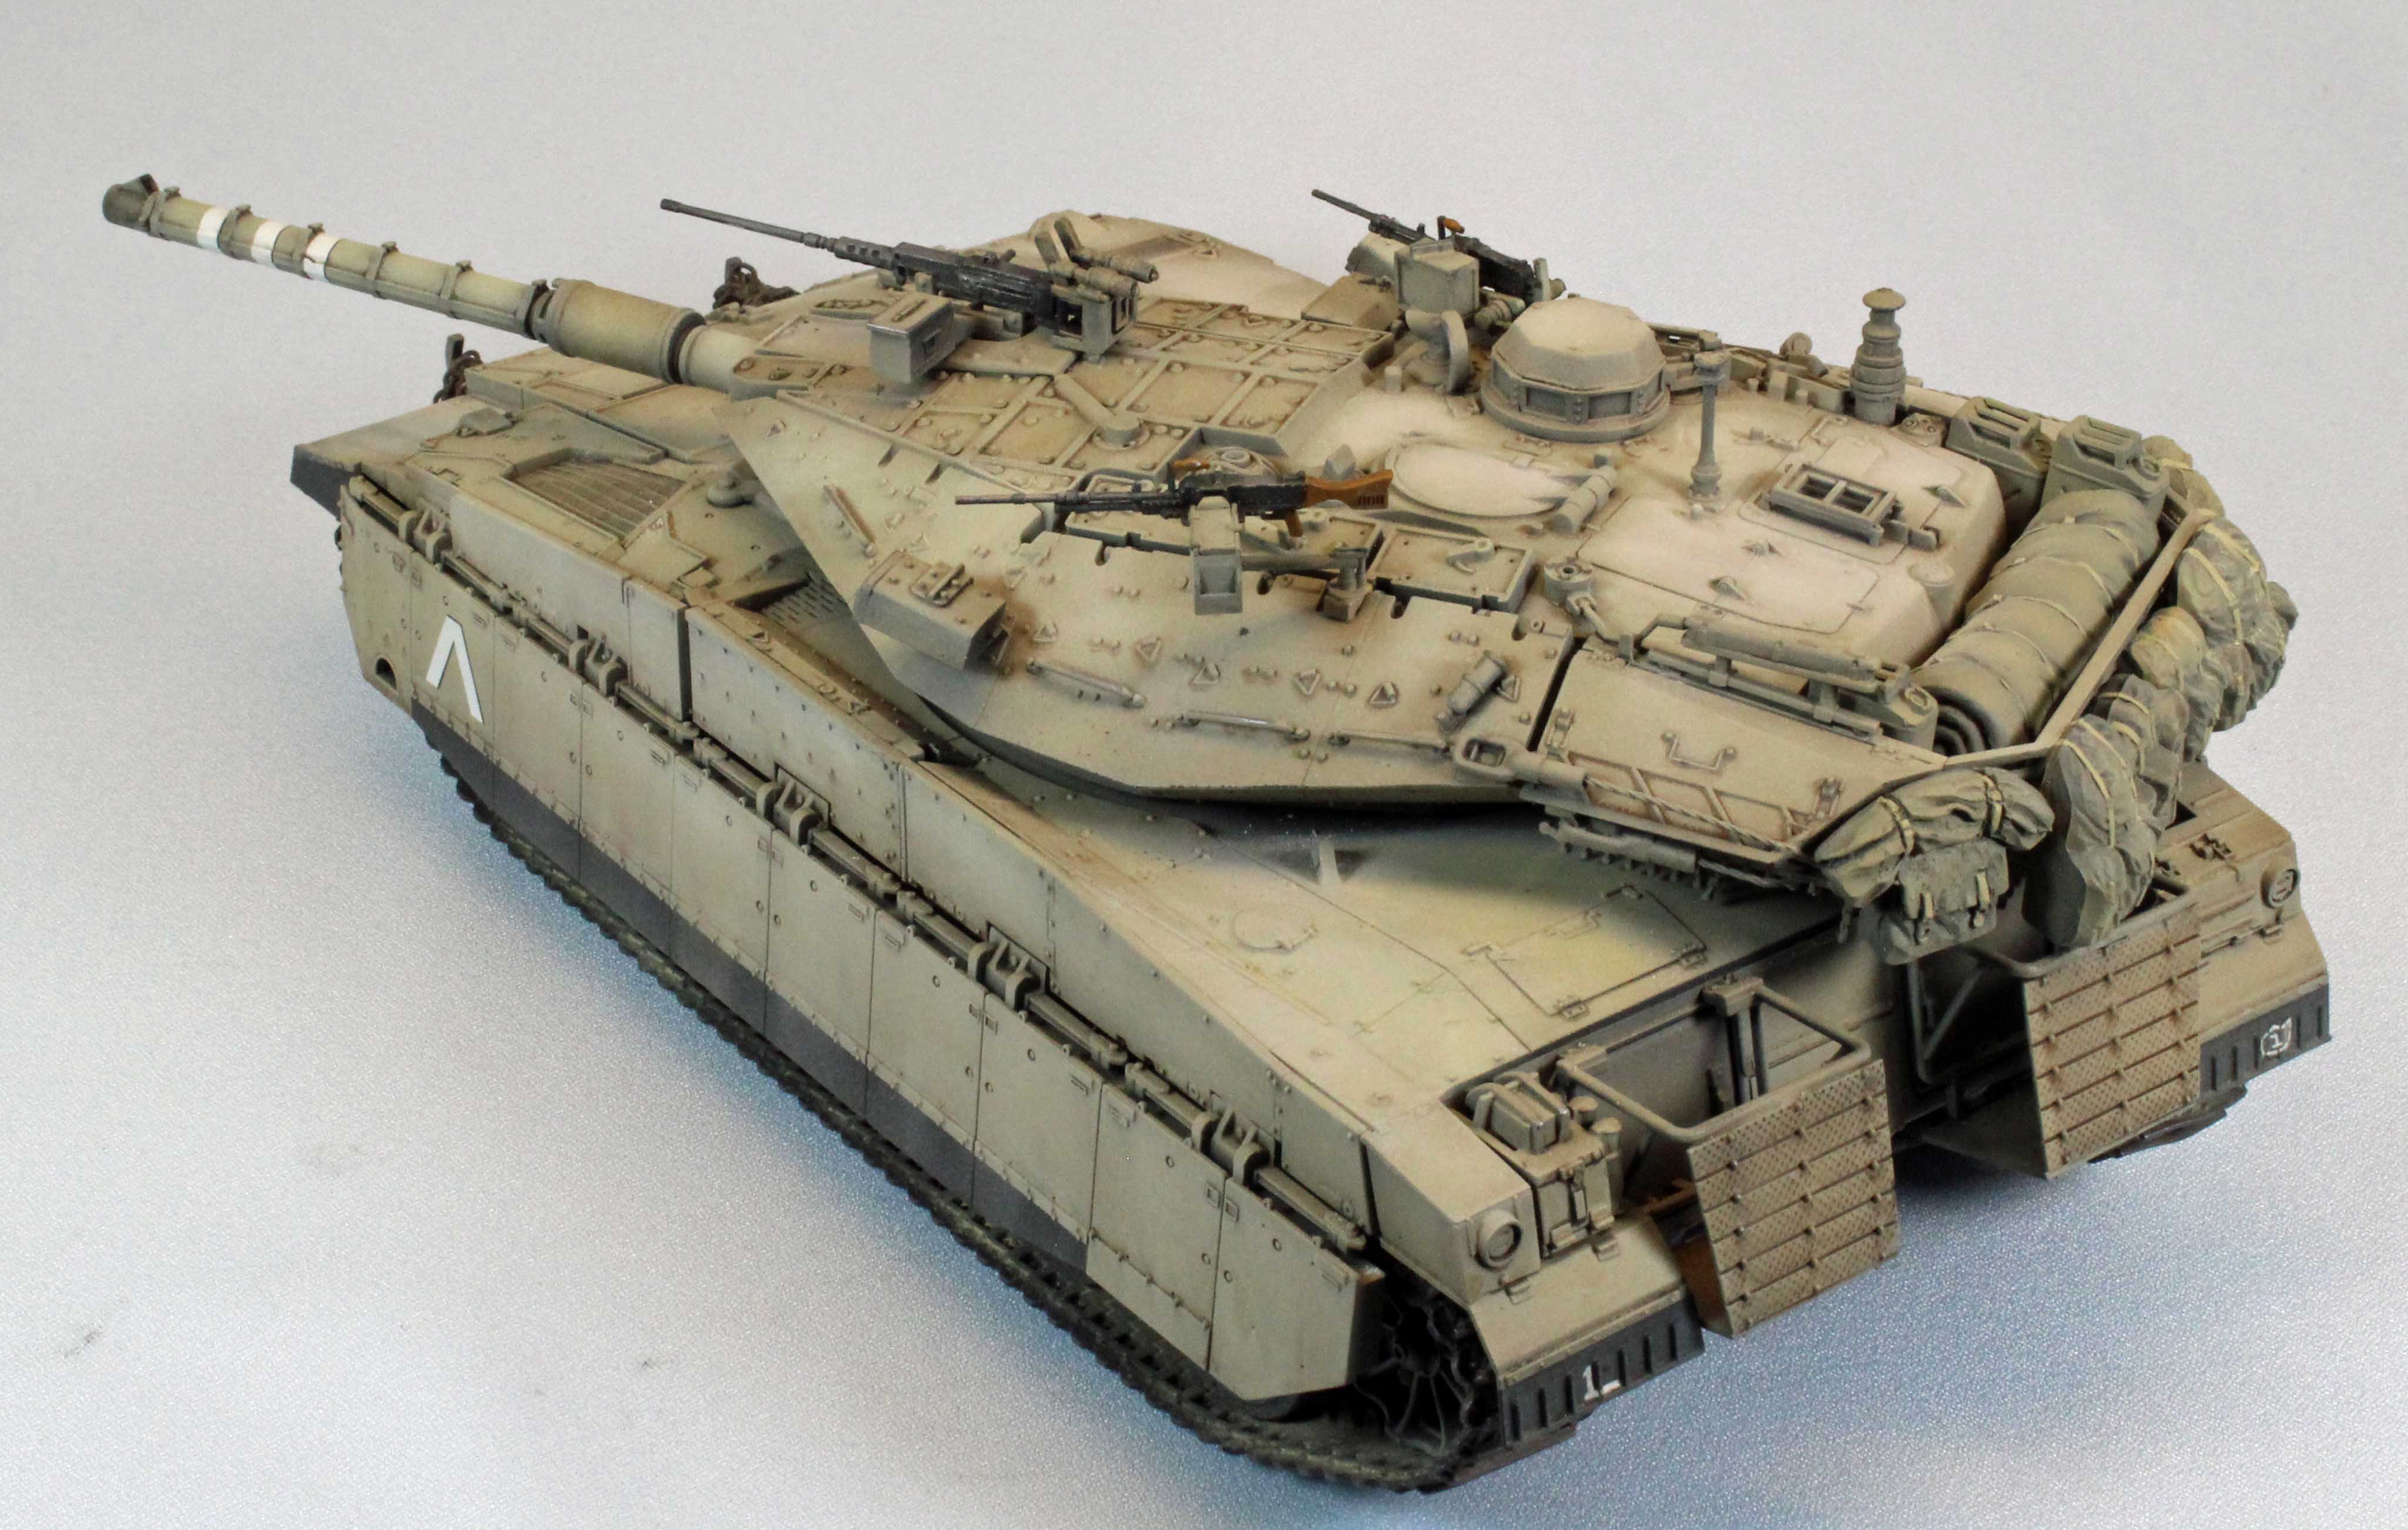
The Mark IID departs from earlier models sporting modular composite armor on the chassis and turret, allowing rapid replacement of damaged armor.
What's in the Box
- Main upper and lower hulls, packaged separately.
- 8 sprues in soft, light-tan plastic, packaged separately.
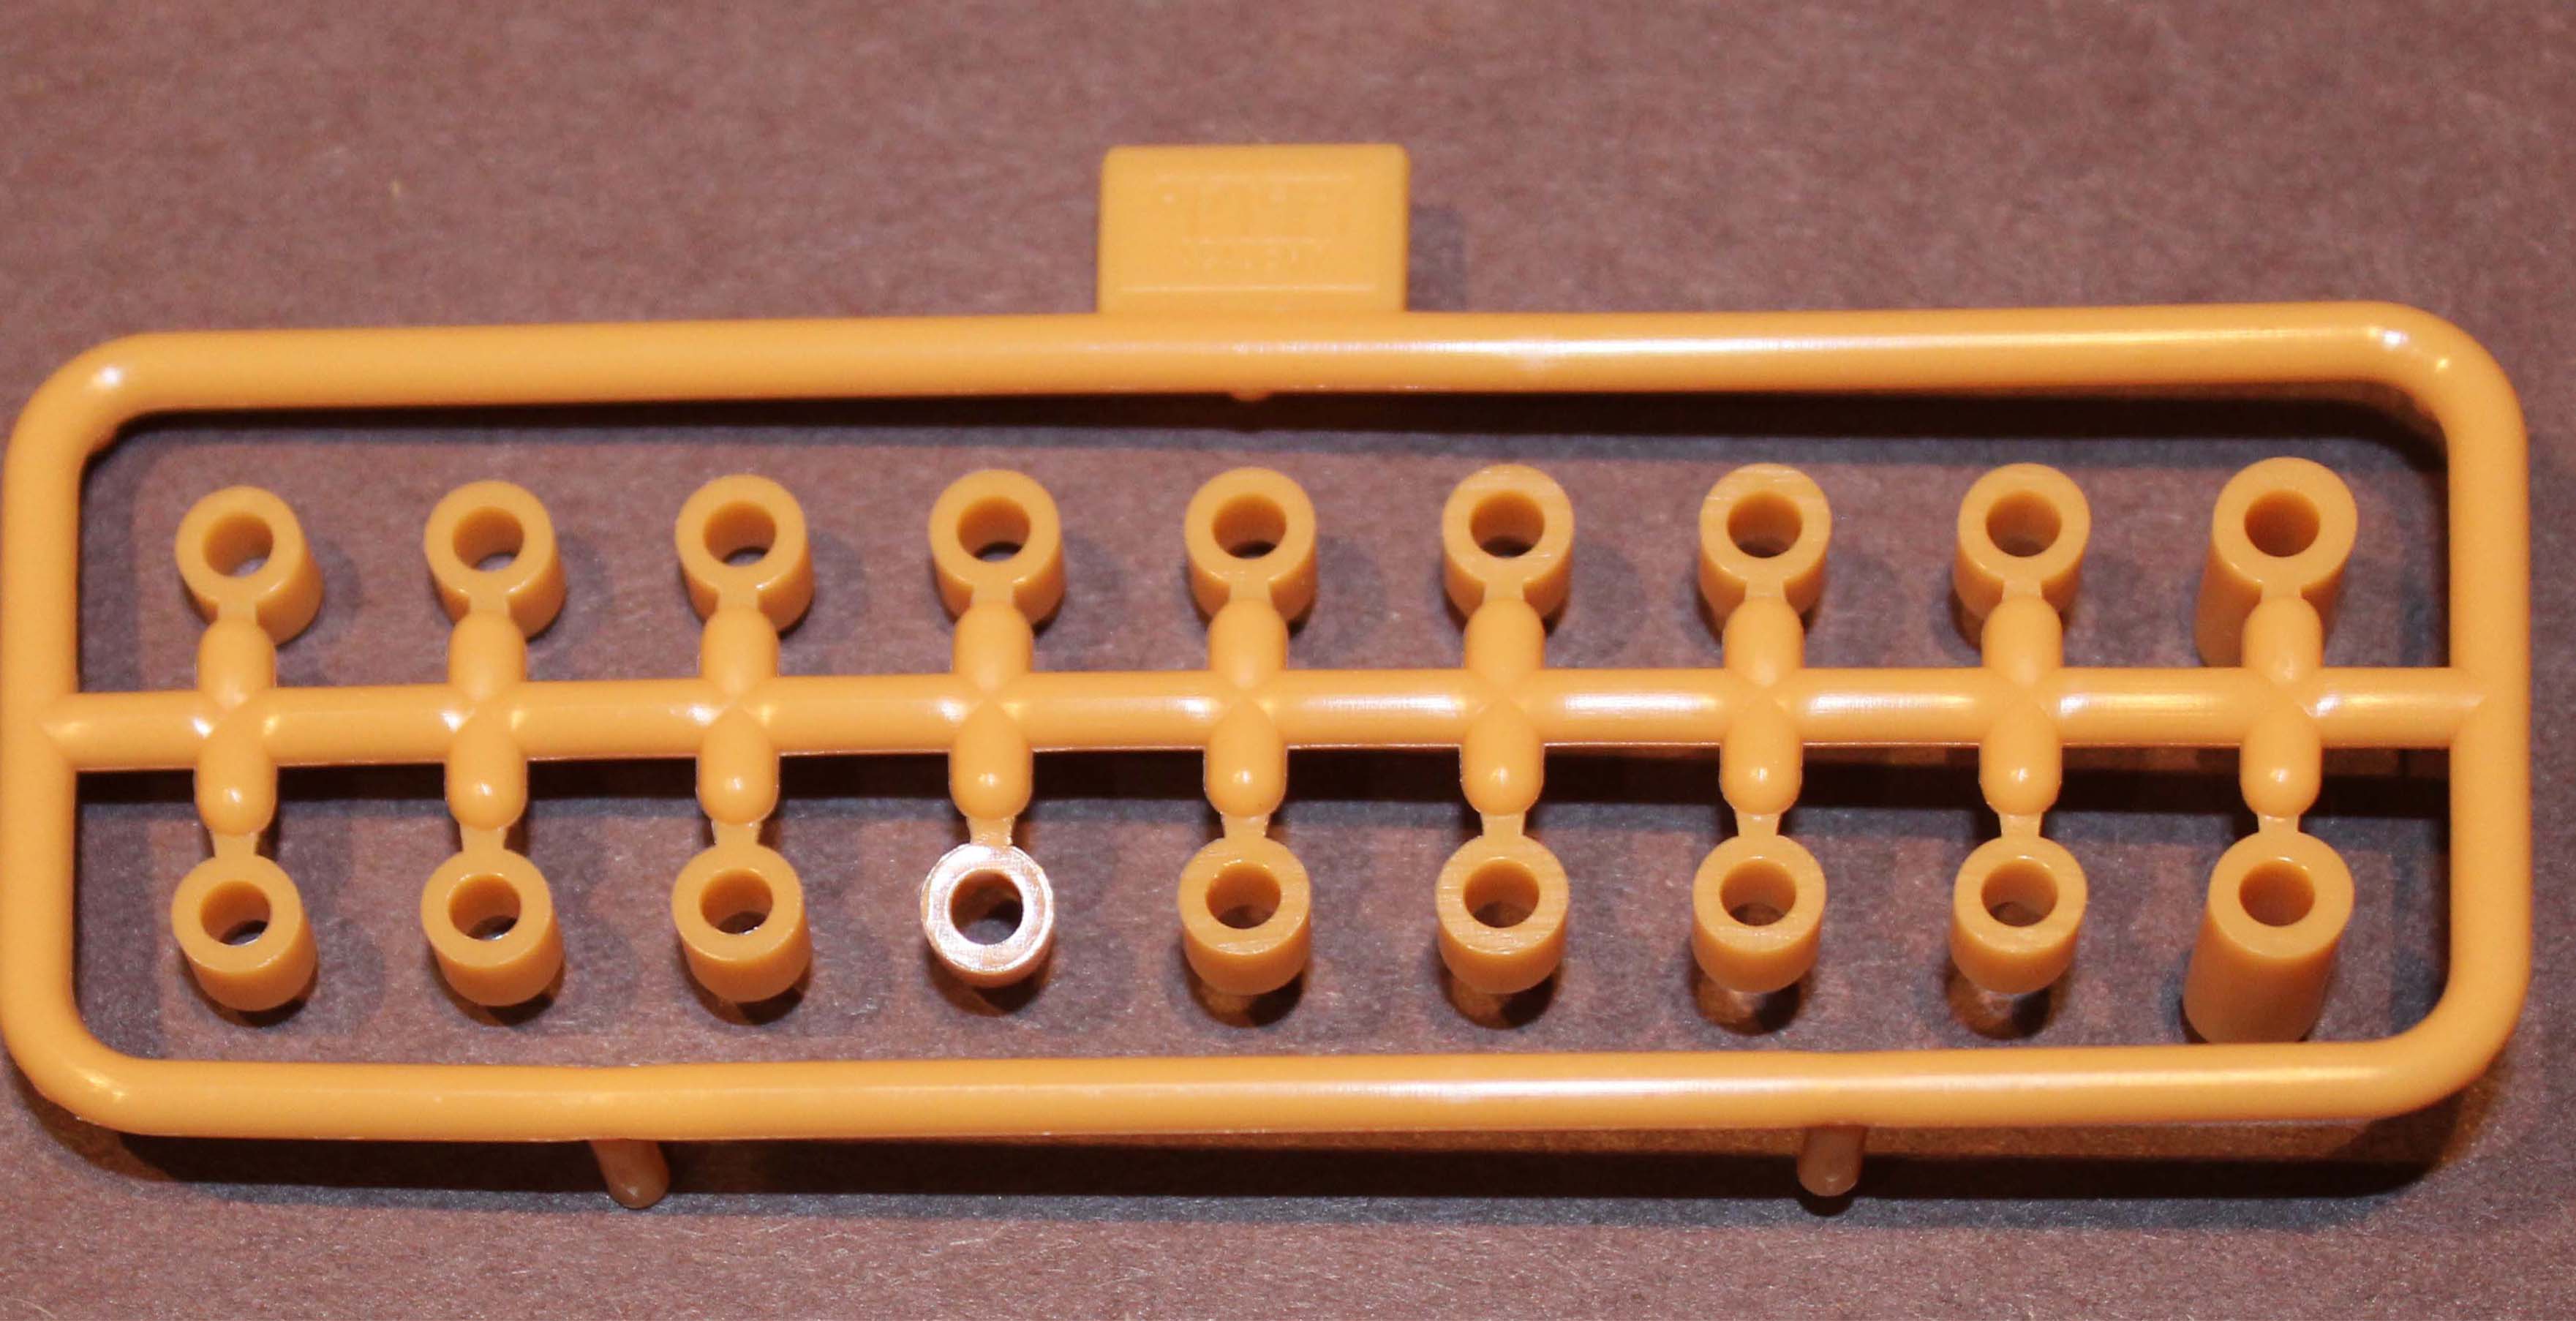
- 1 sprue of poly-caps for the wheels
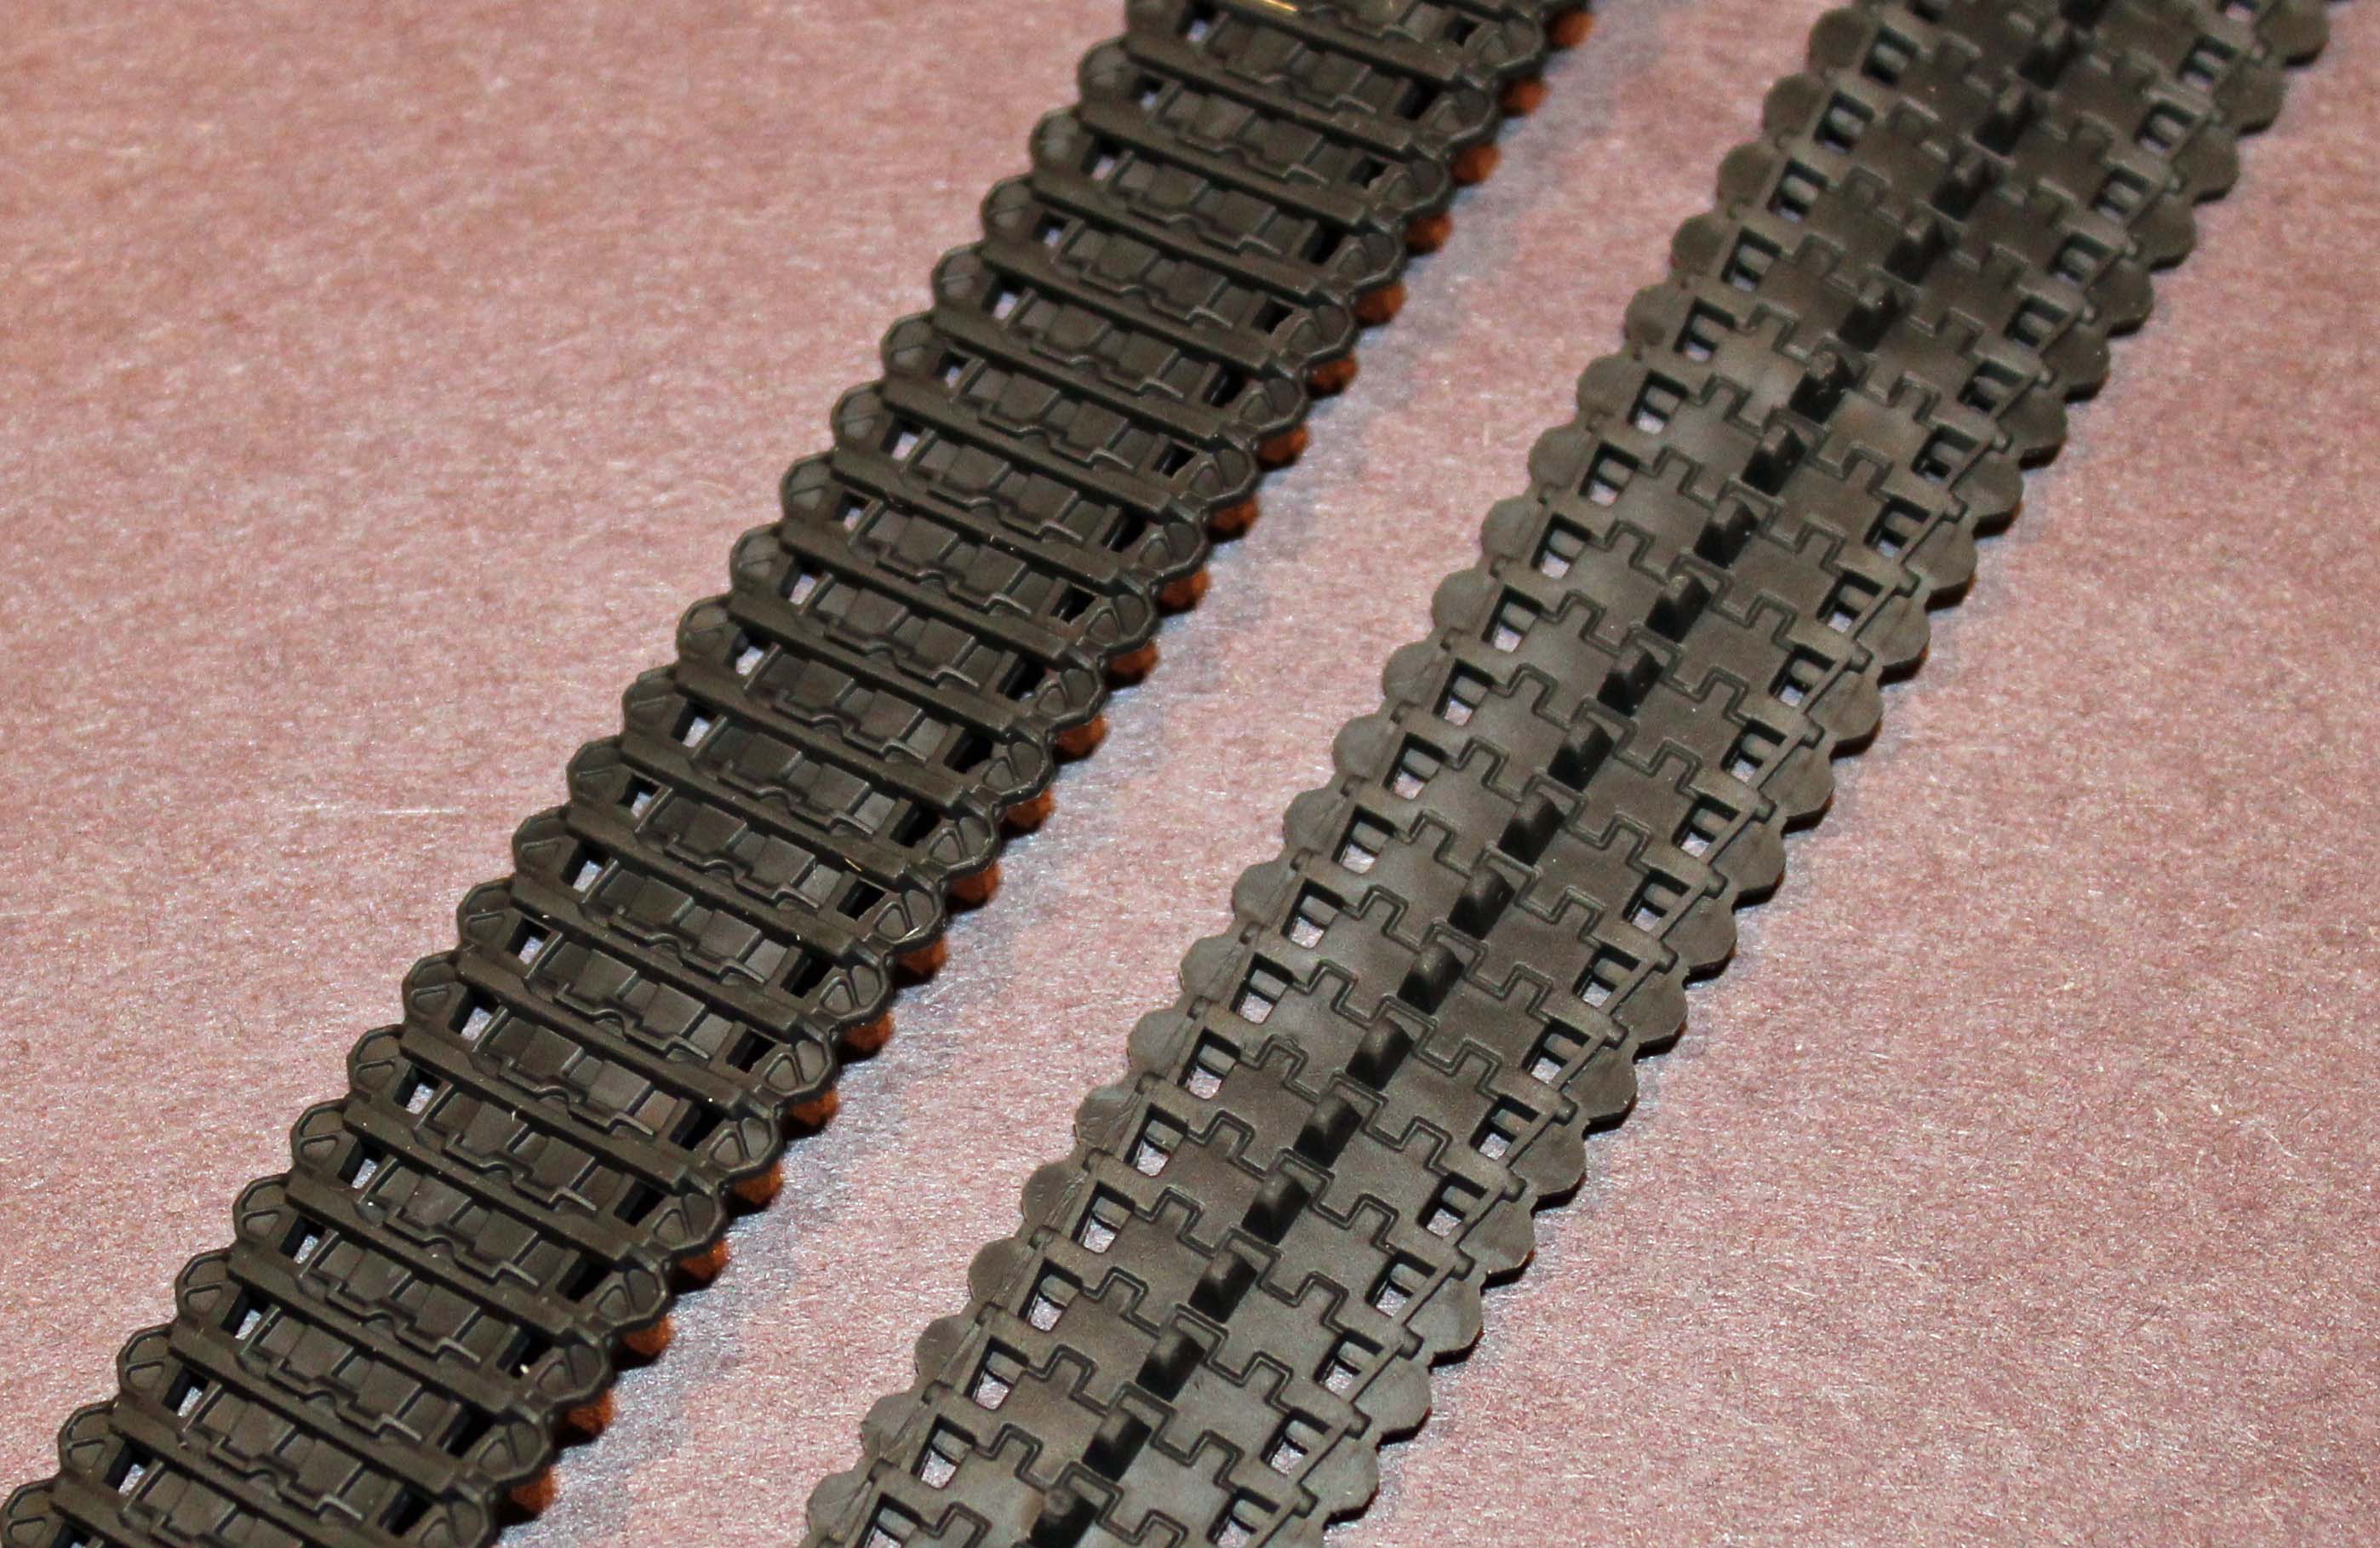
- 2 runs of flexible rubber track
- 1 piece of twisted thread for use as tow cables.
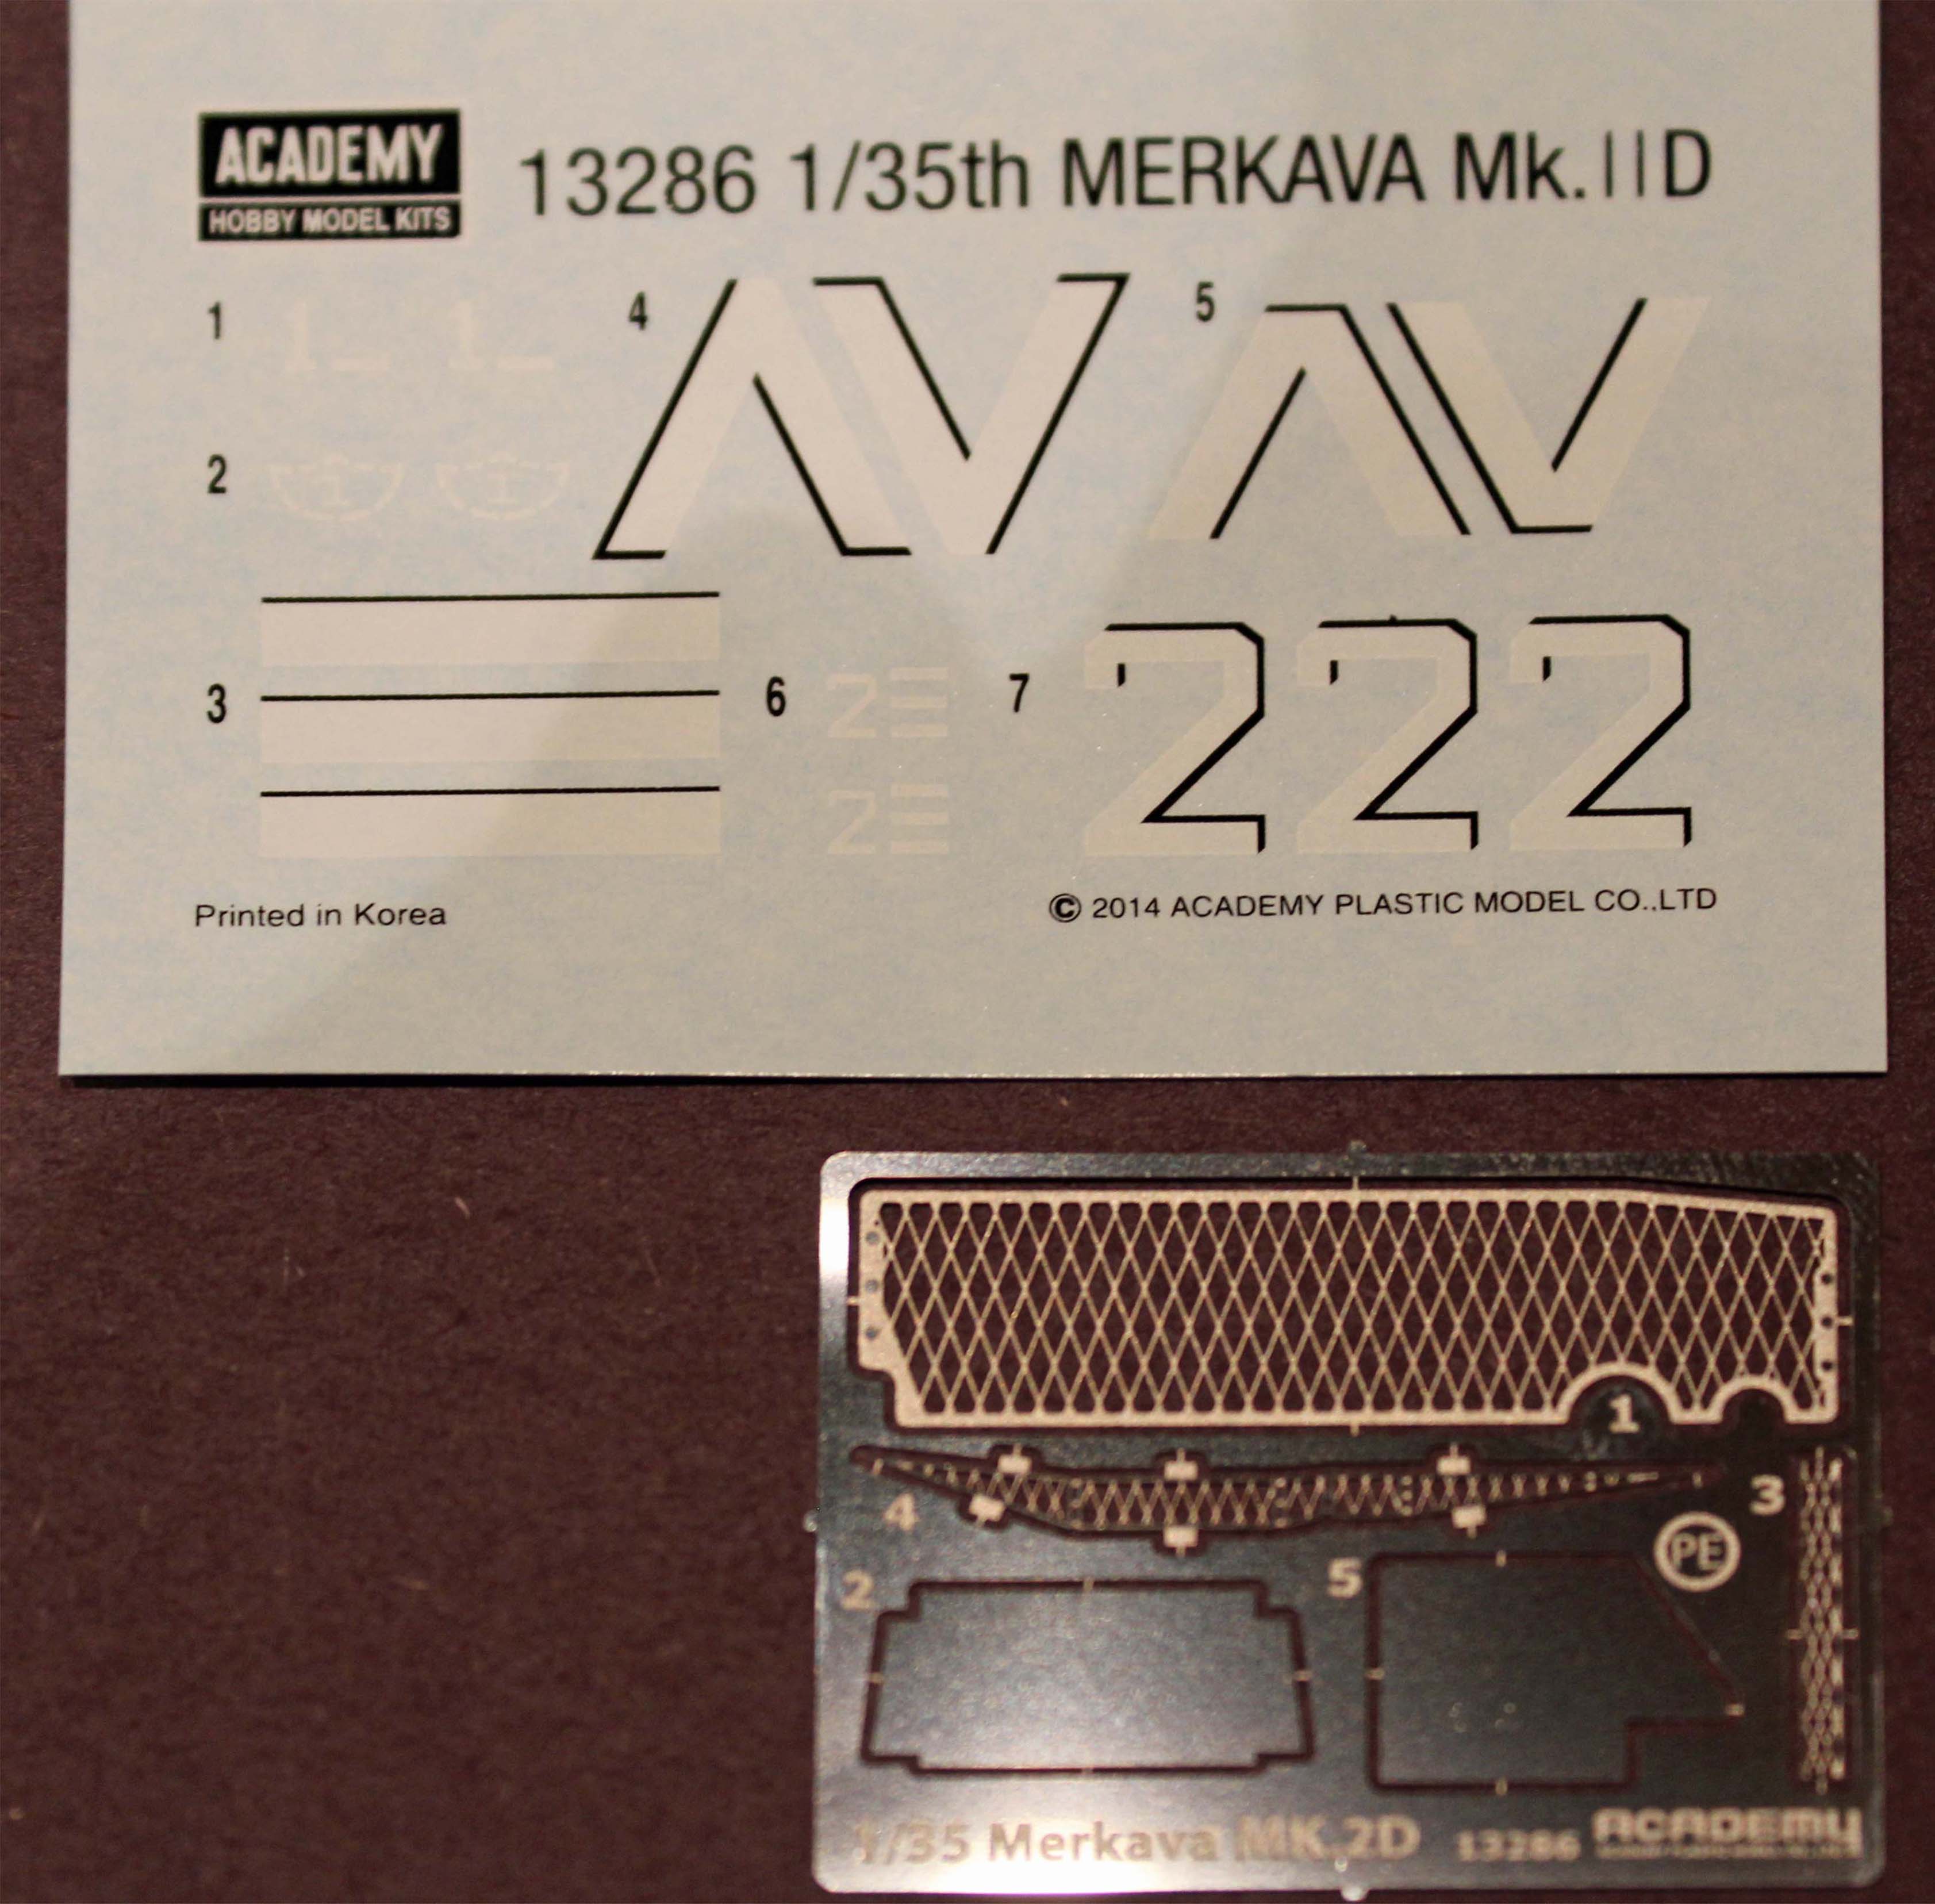
- 1 small sheet of decals with markings for two vehicles
- 1 12-page black and white instruction sheet with 16 steps, including a 2-tone color, 4-view decal placement and paint guide sheet
The kit comes with two schemes represented using black and white four-view drawings; and a small (but perfectly registered) sheet of decals printed in Korea. Both color schemes represent unidentified vehicles.
The Instructions and things to consider before starting
The instructions are separated into two sections; section 1 contains steps 1-14, and section 2 contains the last two steps, parts map and paint/decal tips. I did not find any errors or omissions in the instructions.
Paint product callouts include Humbrol Enamel, GSI Creos Acrylic, GSI Mr. Color Lacquer, Life Color, Testor/Model Master Acrylic and Enamel, Revell Acrylic and Enamel, and Vallejo Model Color and Model Aire. The –IID is a pretty straight-forward build. Academy has thoughtfully broken assembly into just three parts; the upper-hull/side armor, the turret, and finally the lower chassis – nearly opposite from how most armor kits are assembled. The upper deck and side armor is built as one piece to be dropped down on to the lower chassis as the last step, thereby allowing full access to the track and wheels all the way to the end of the build. Smart.
The Build
Upper hull and Side Armor
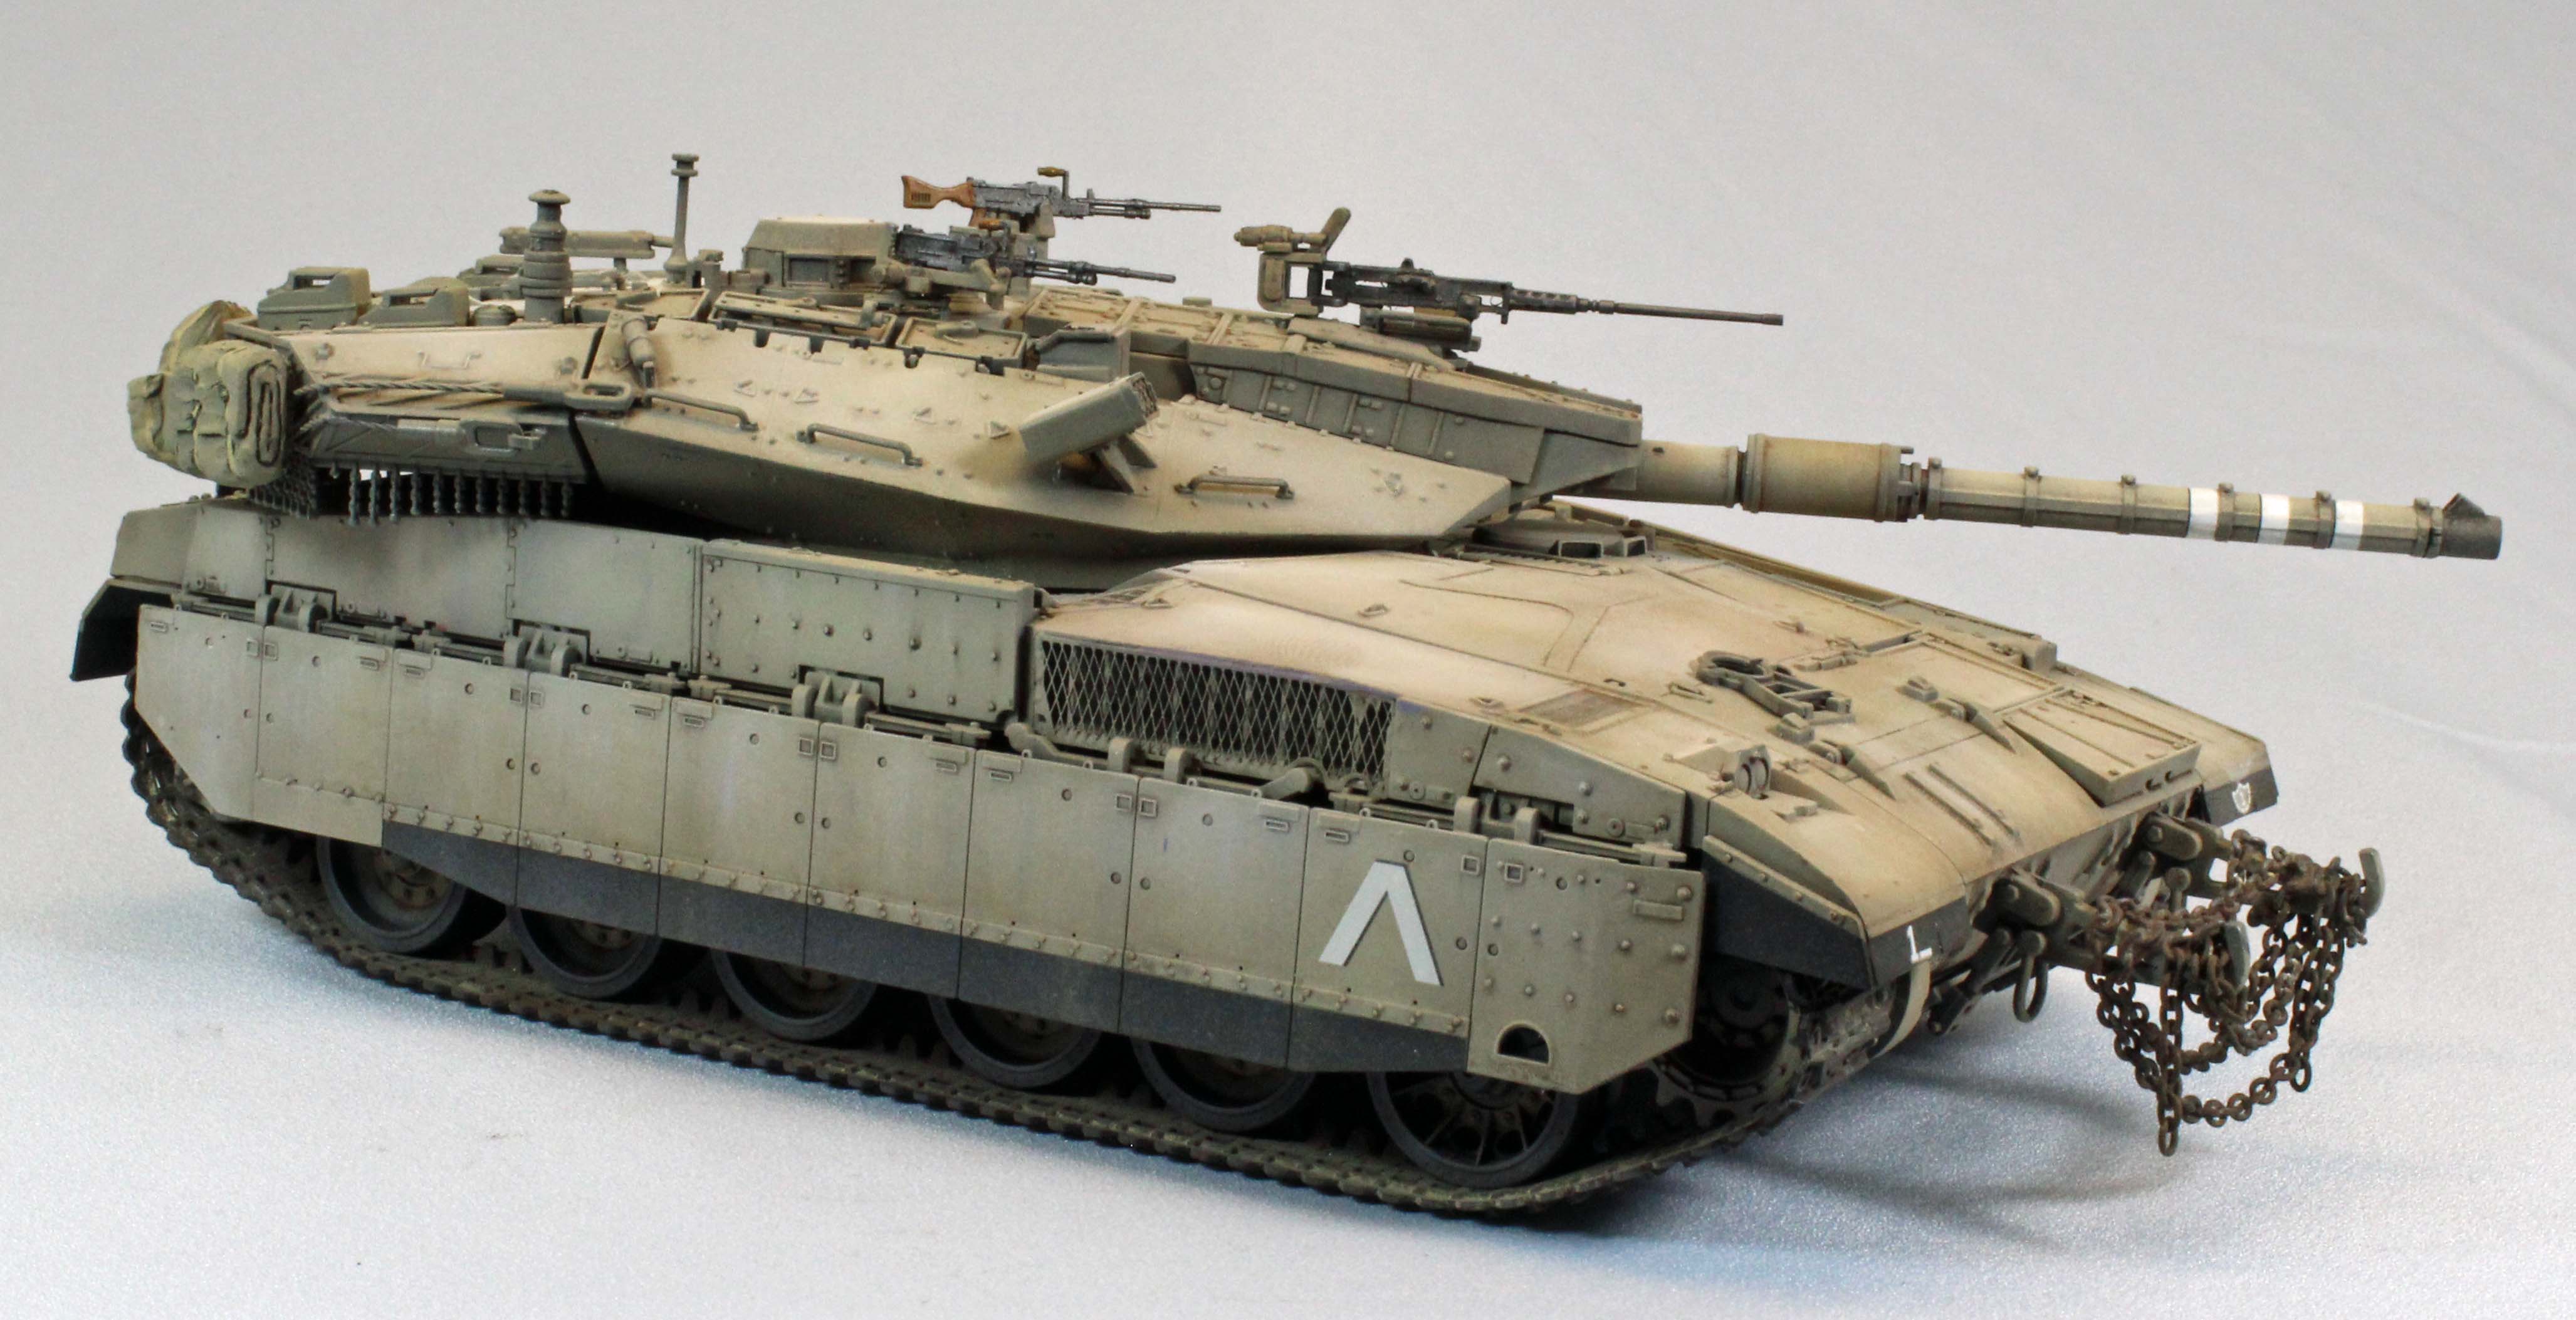
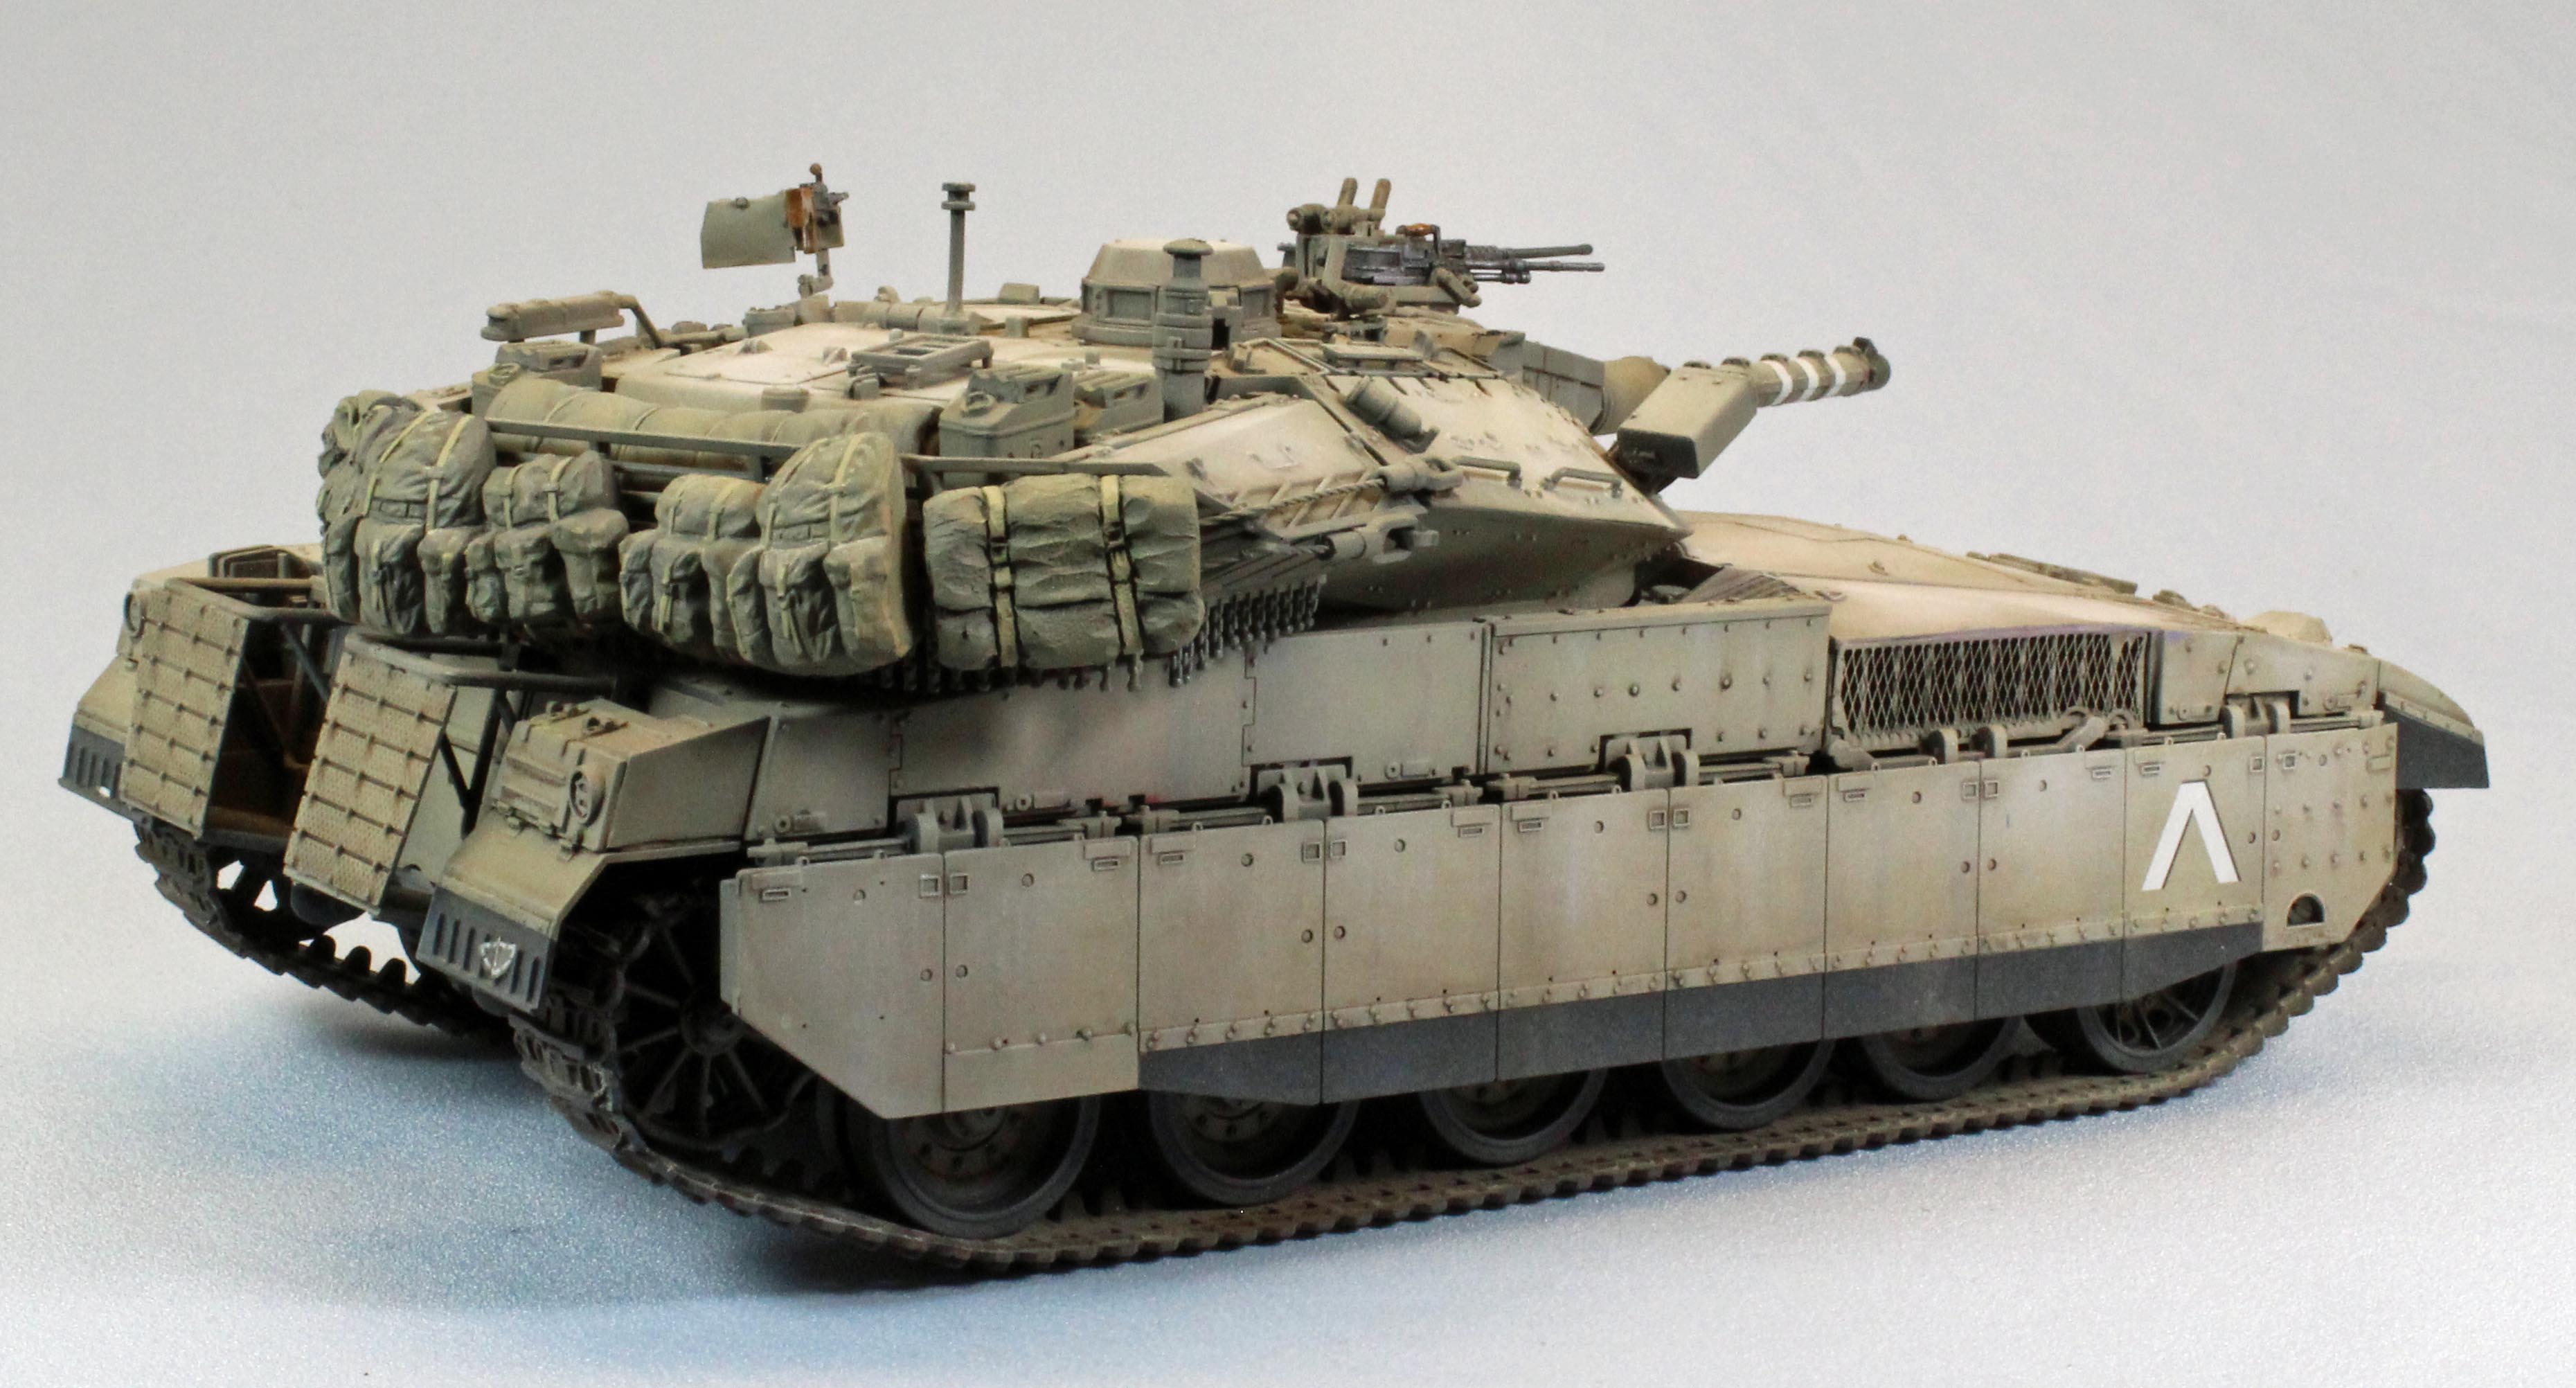
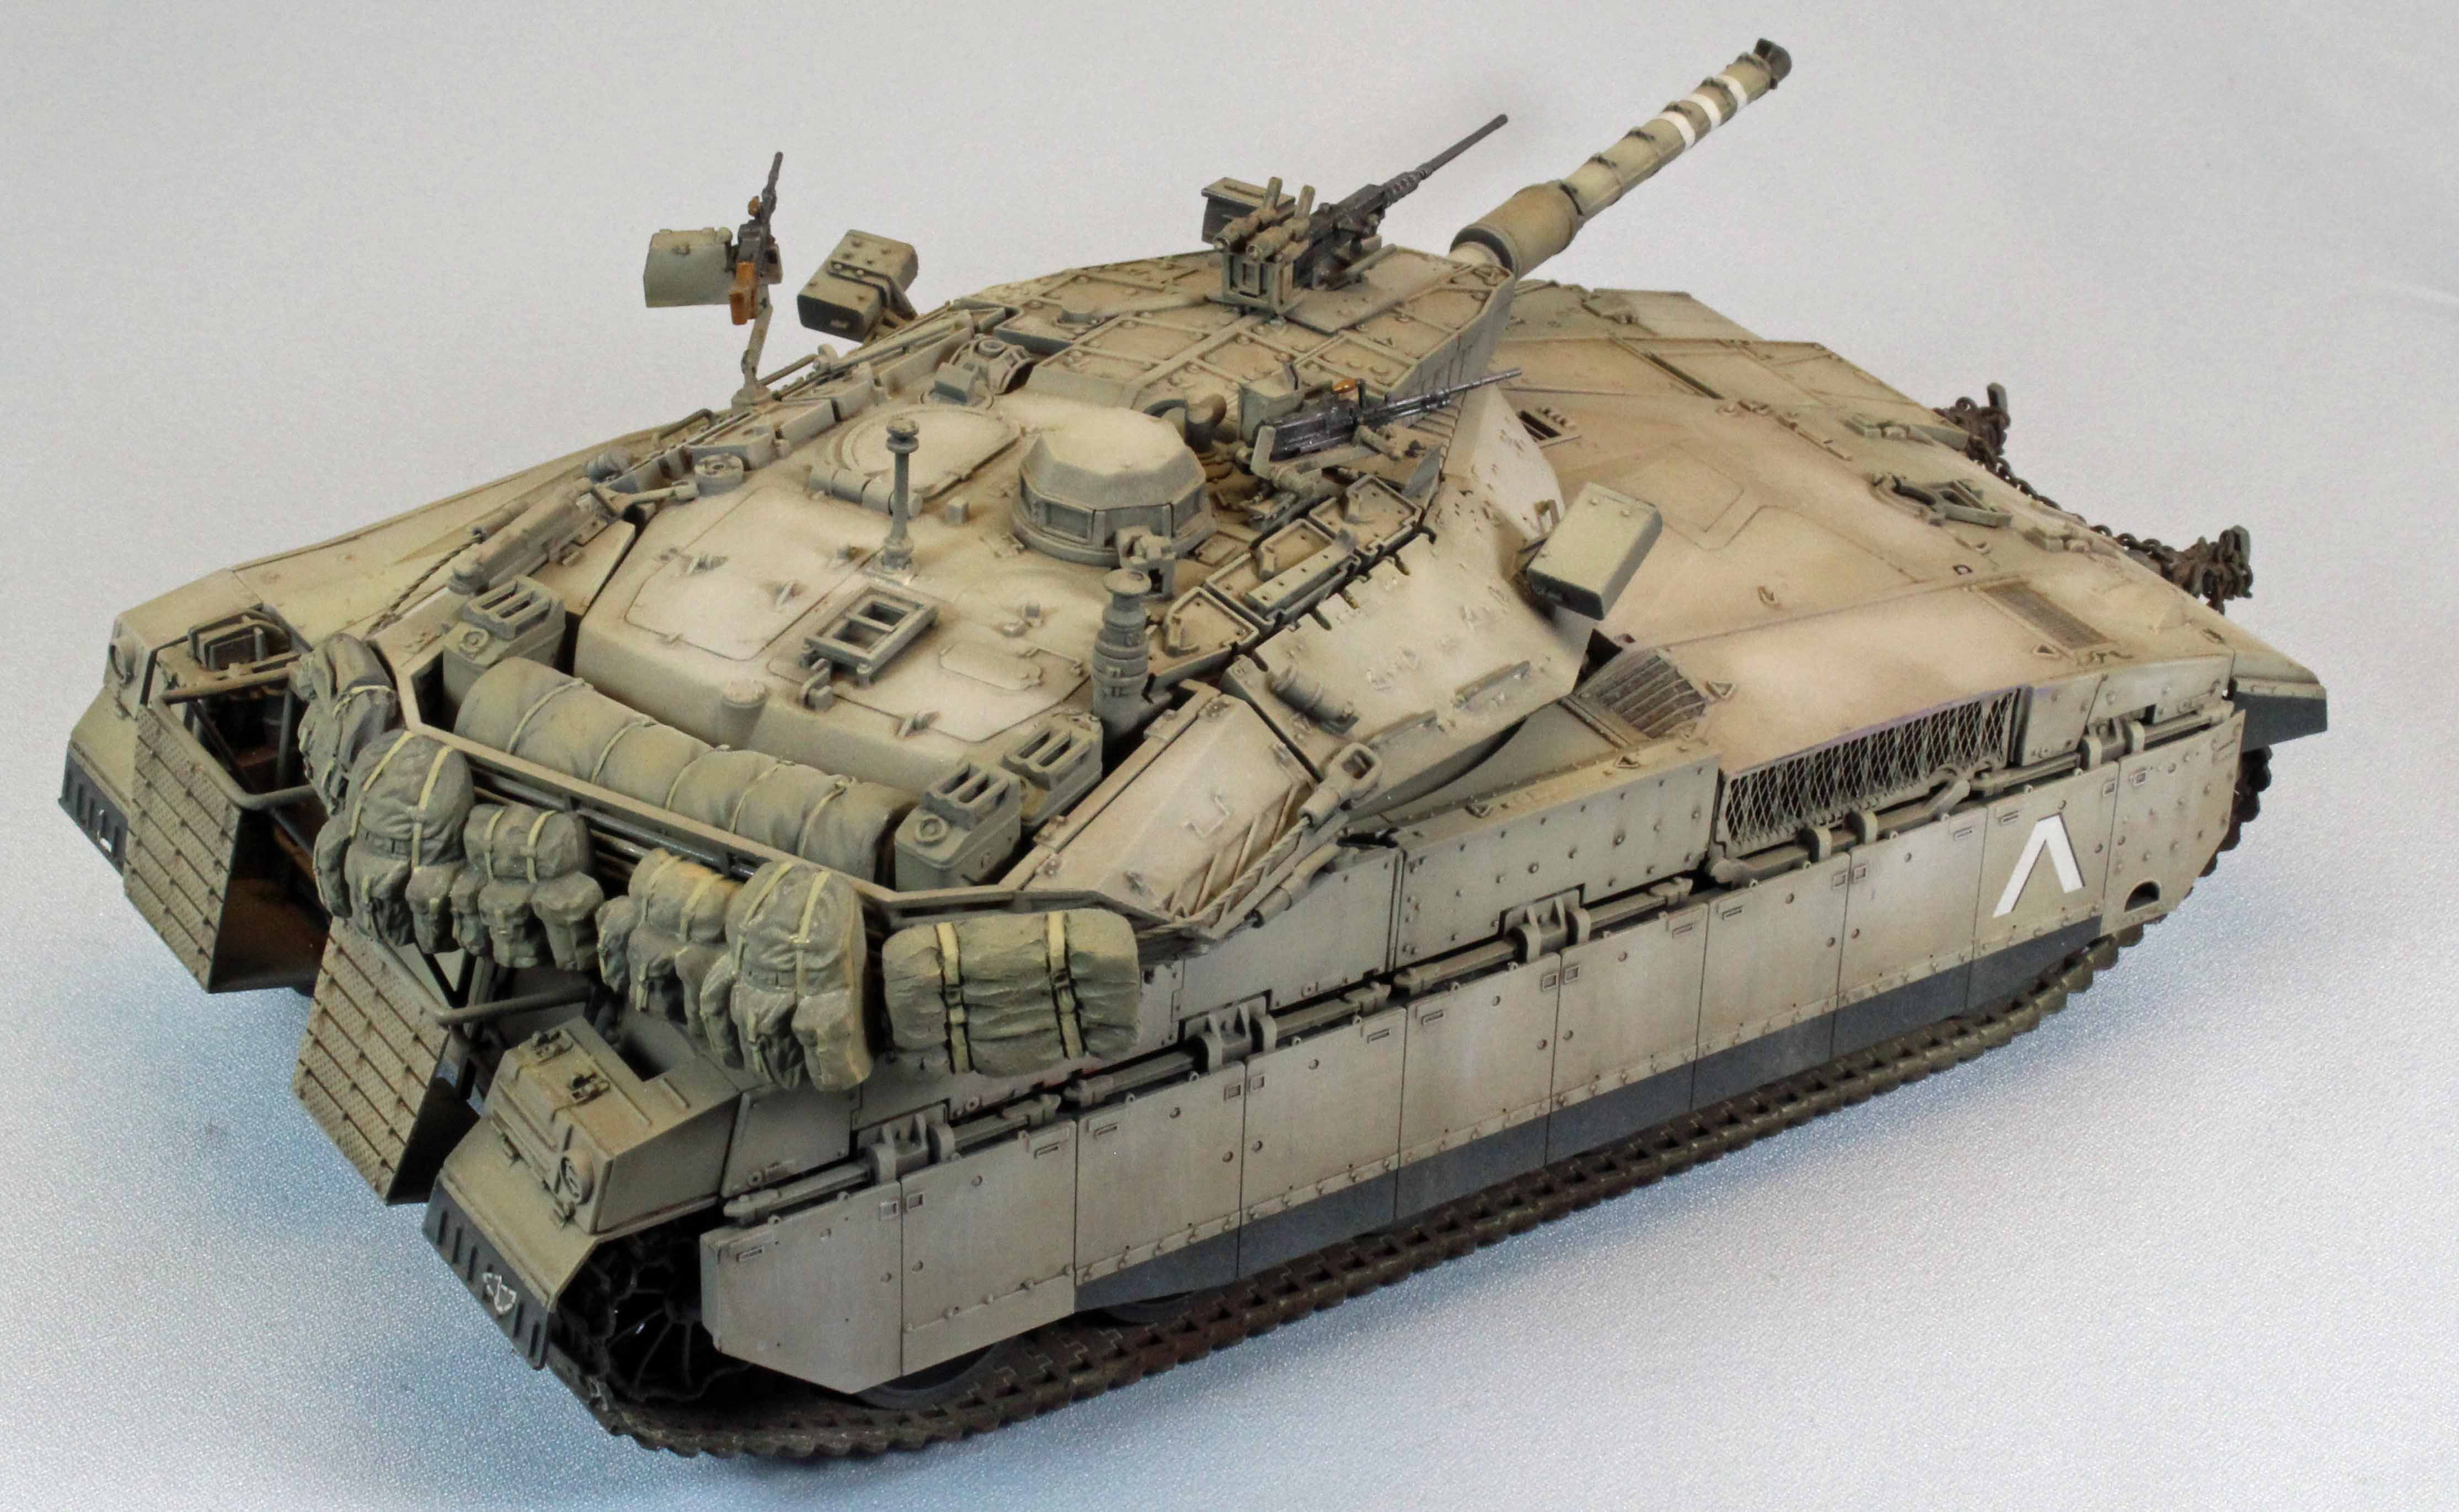
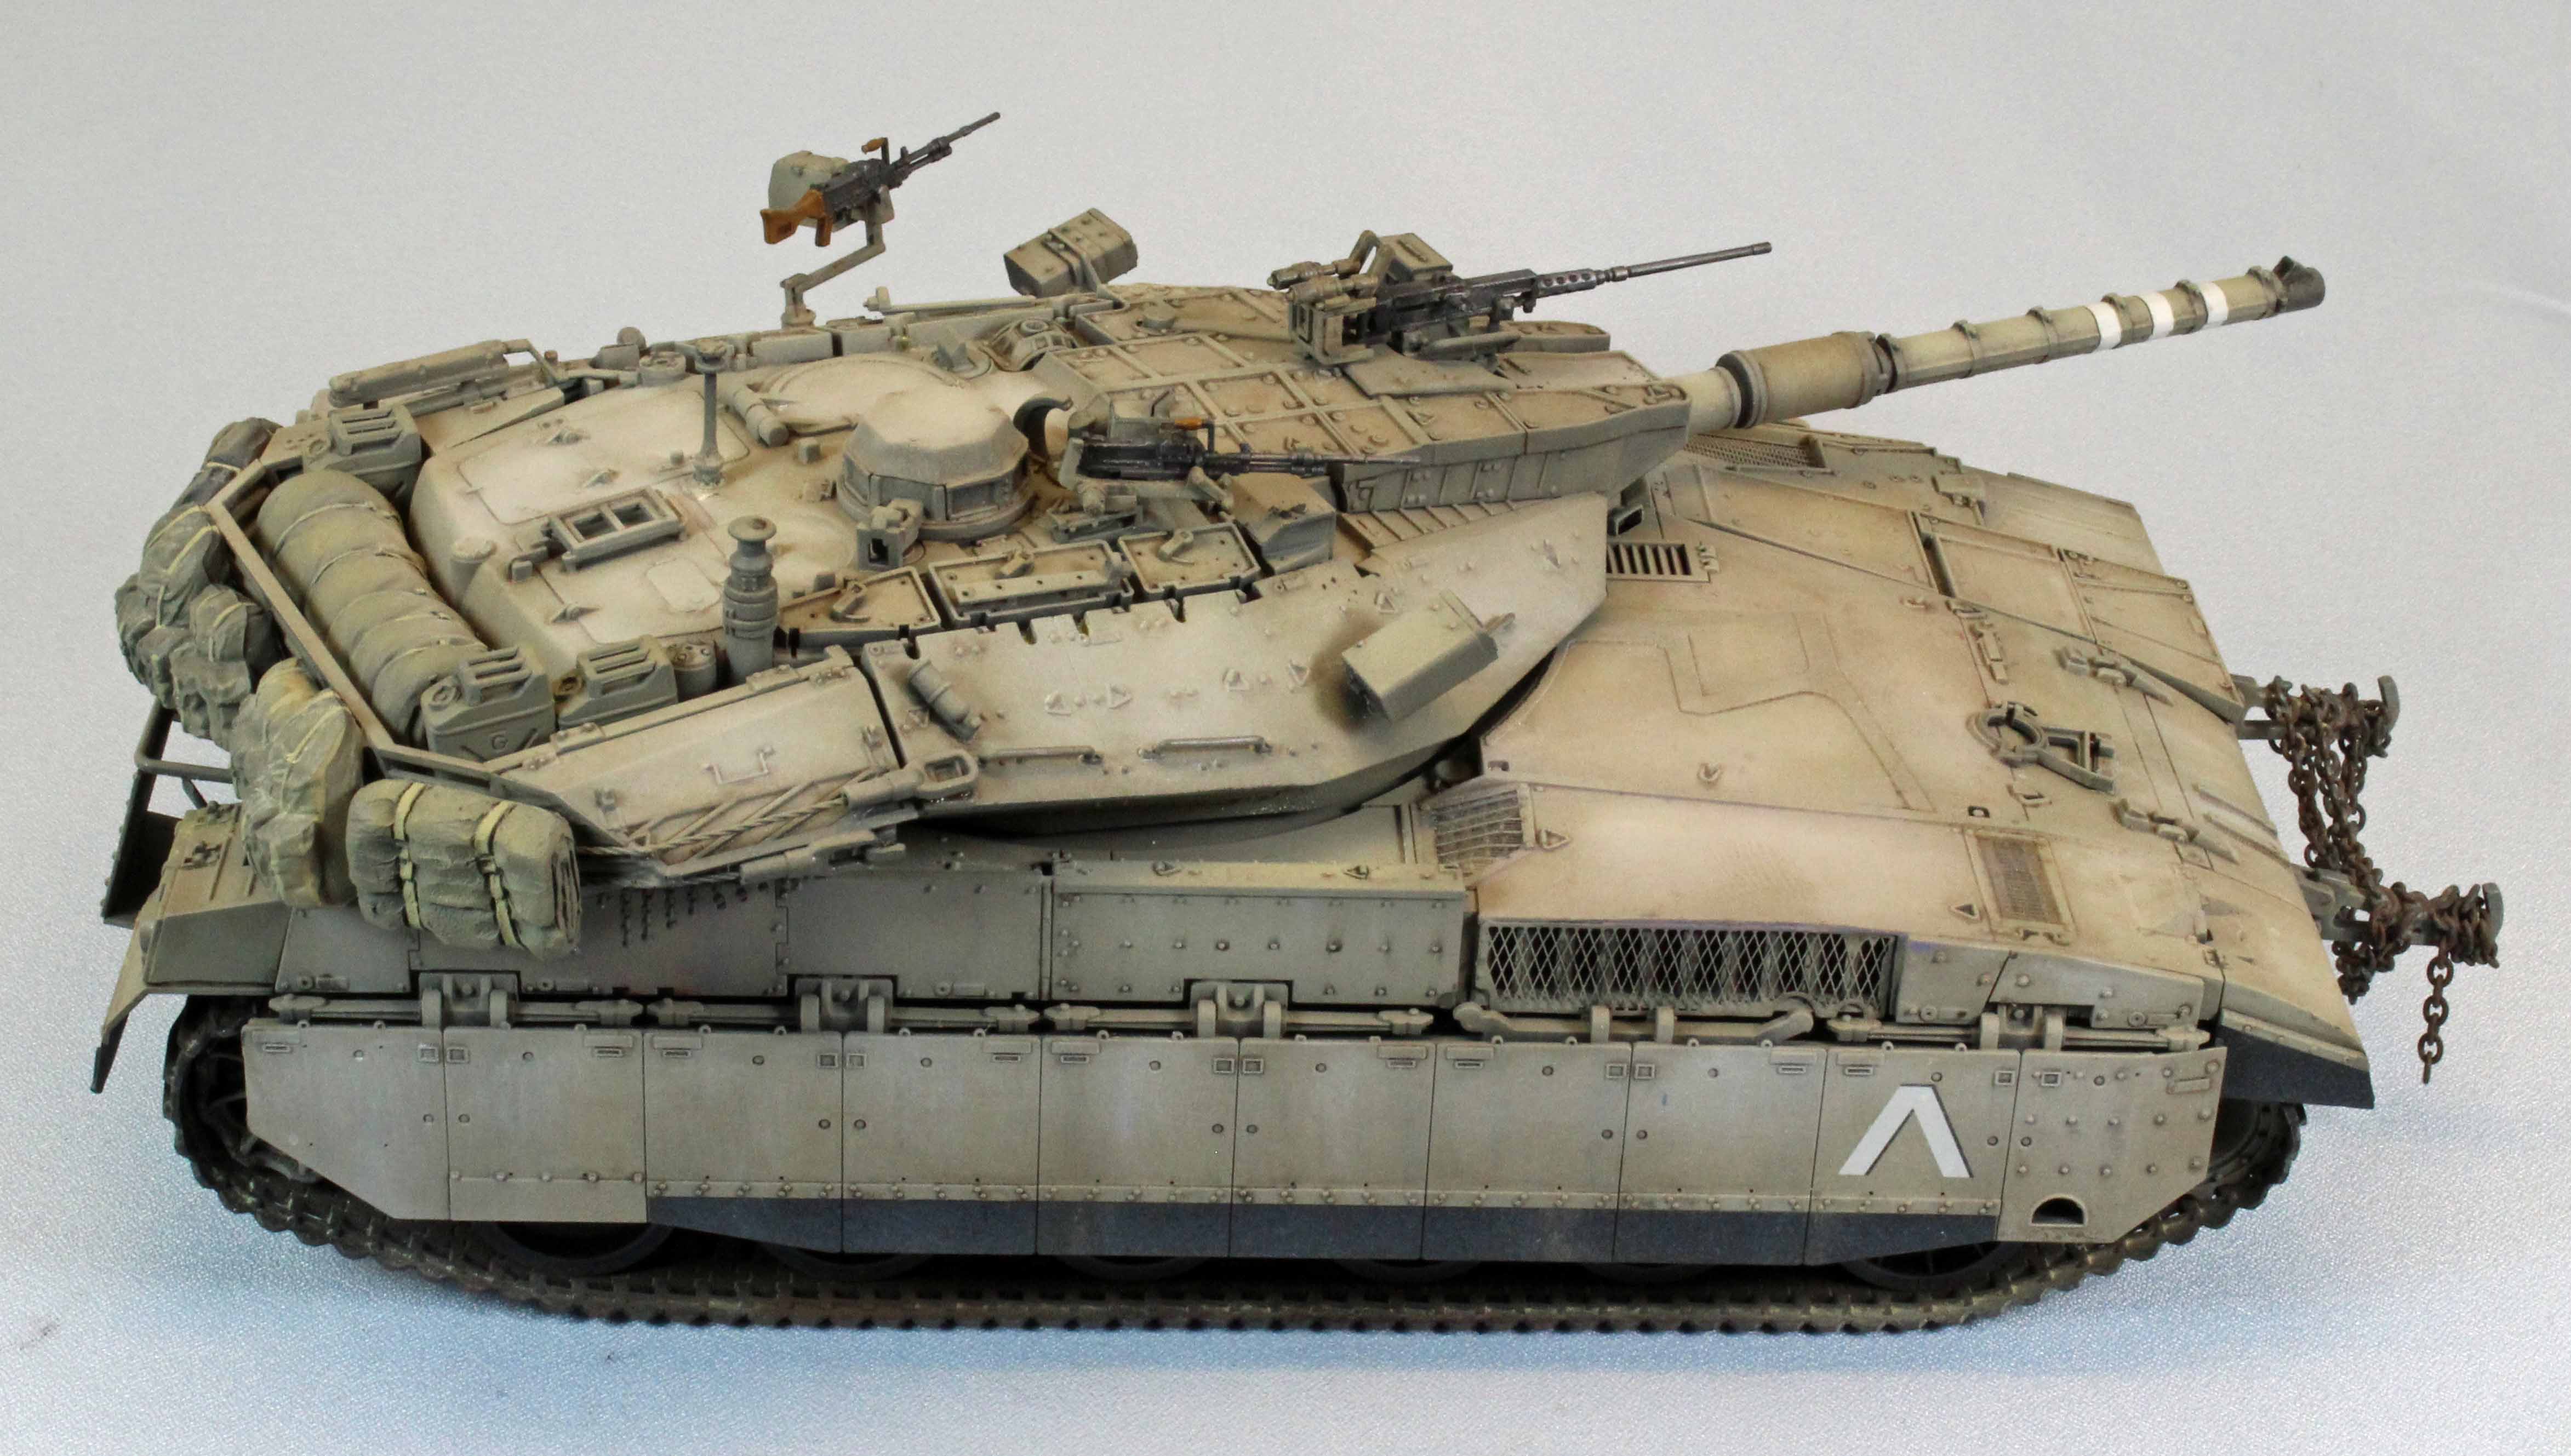
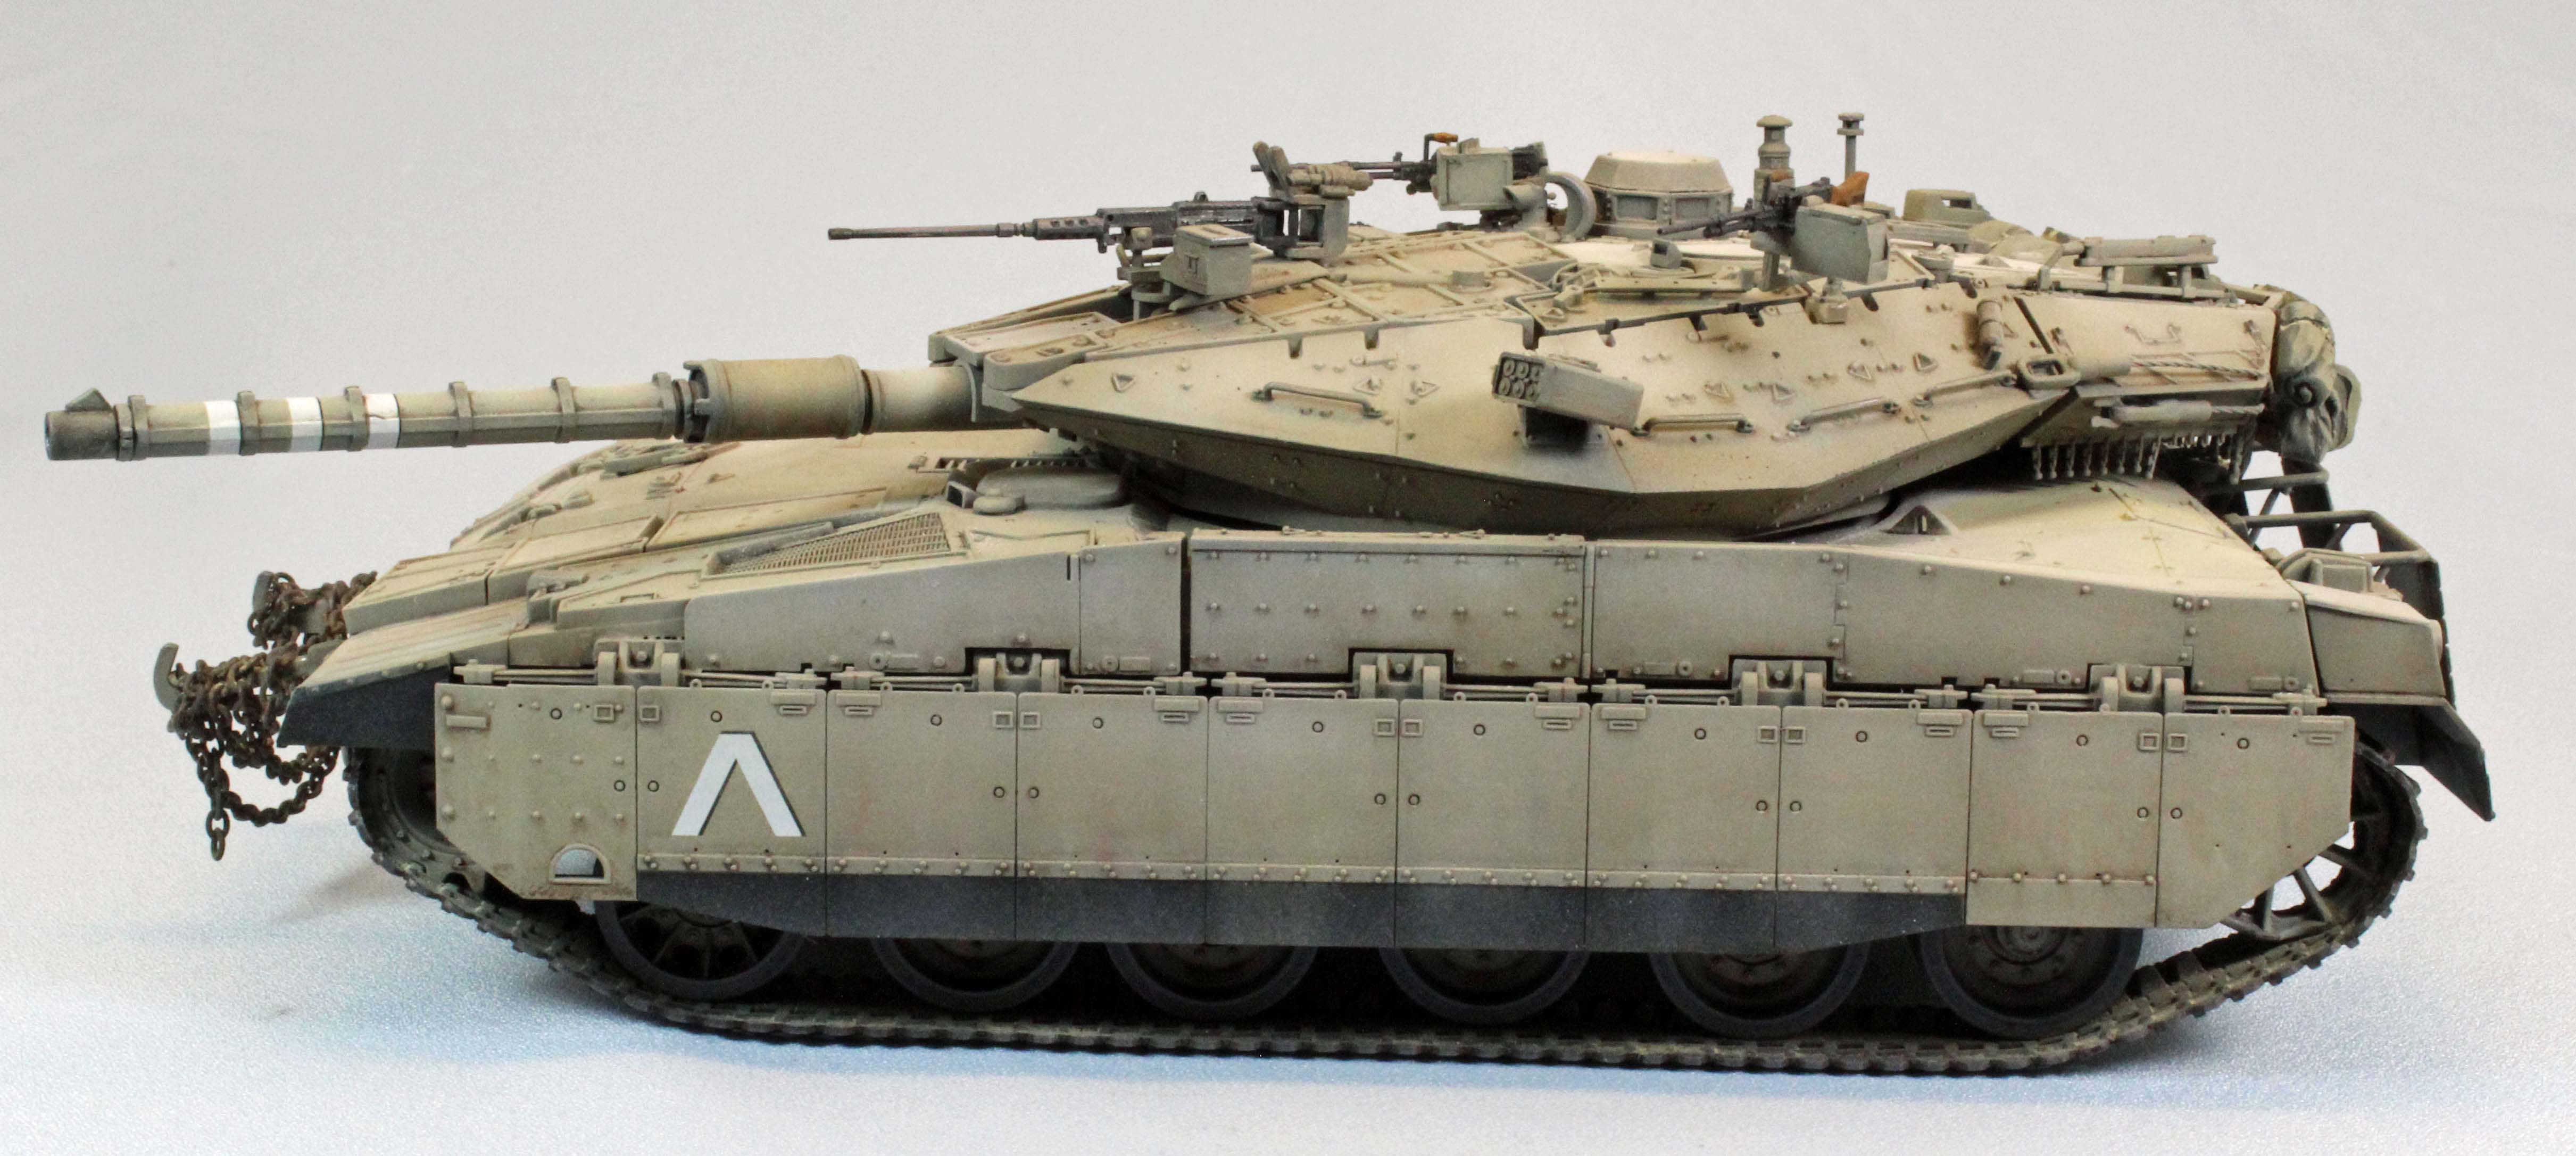
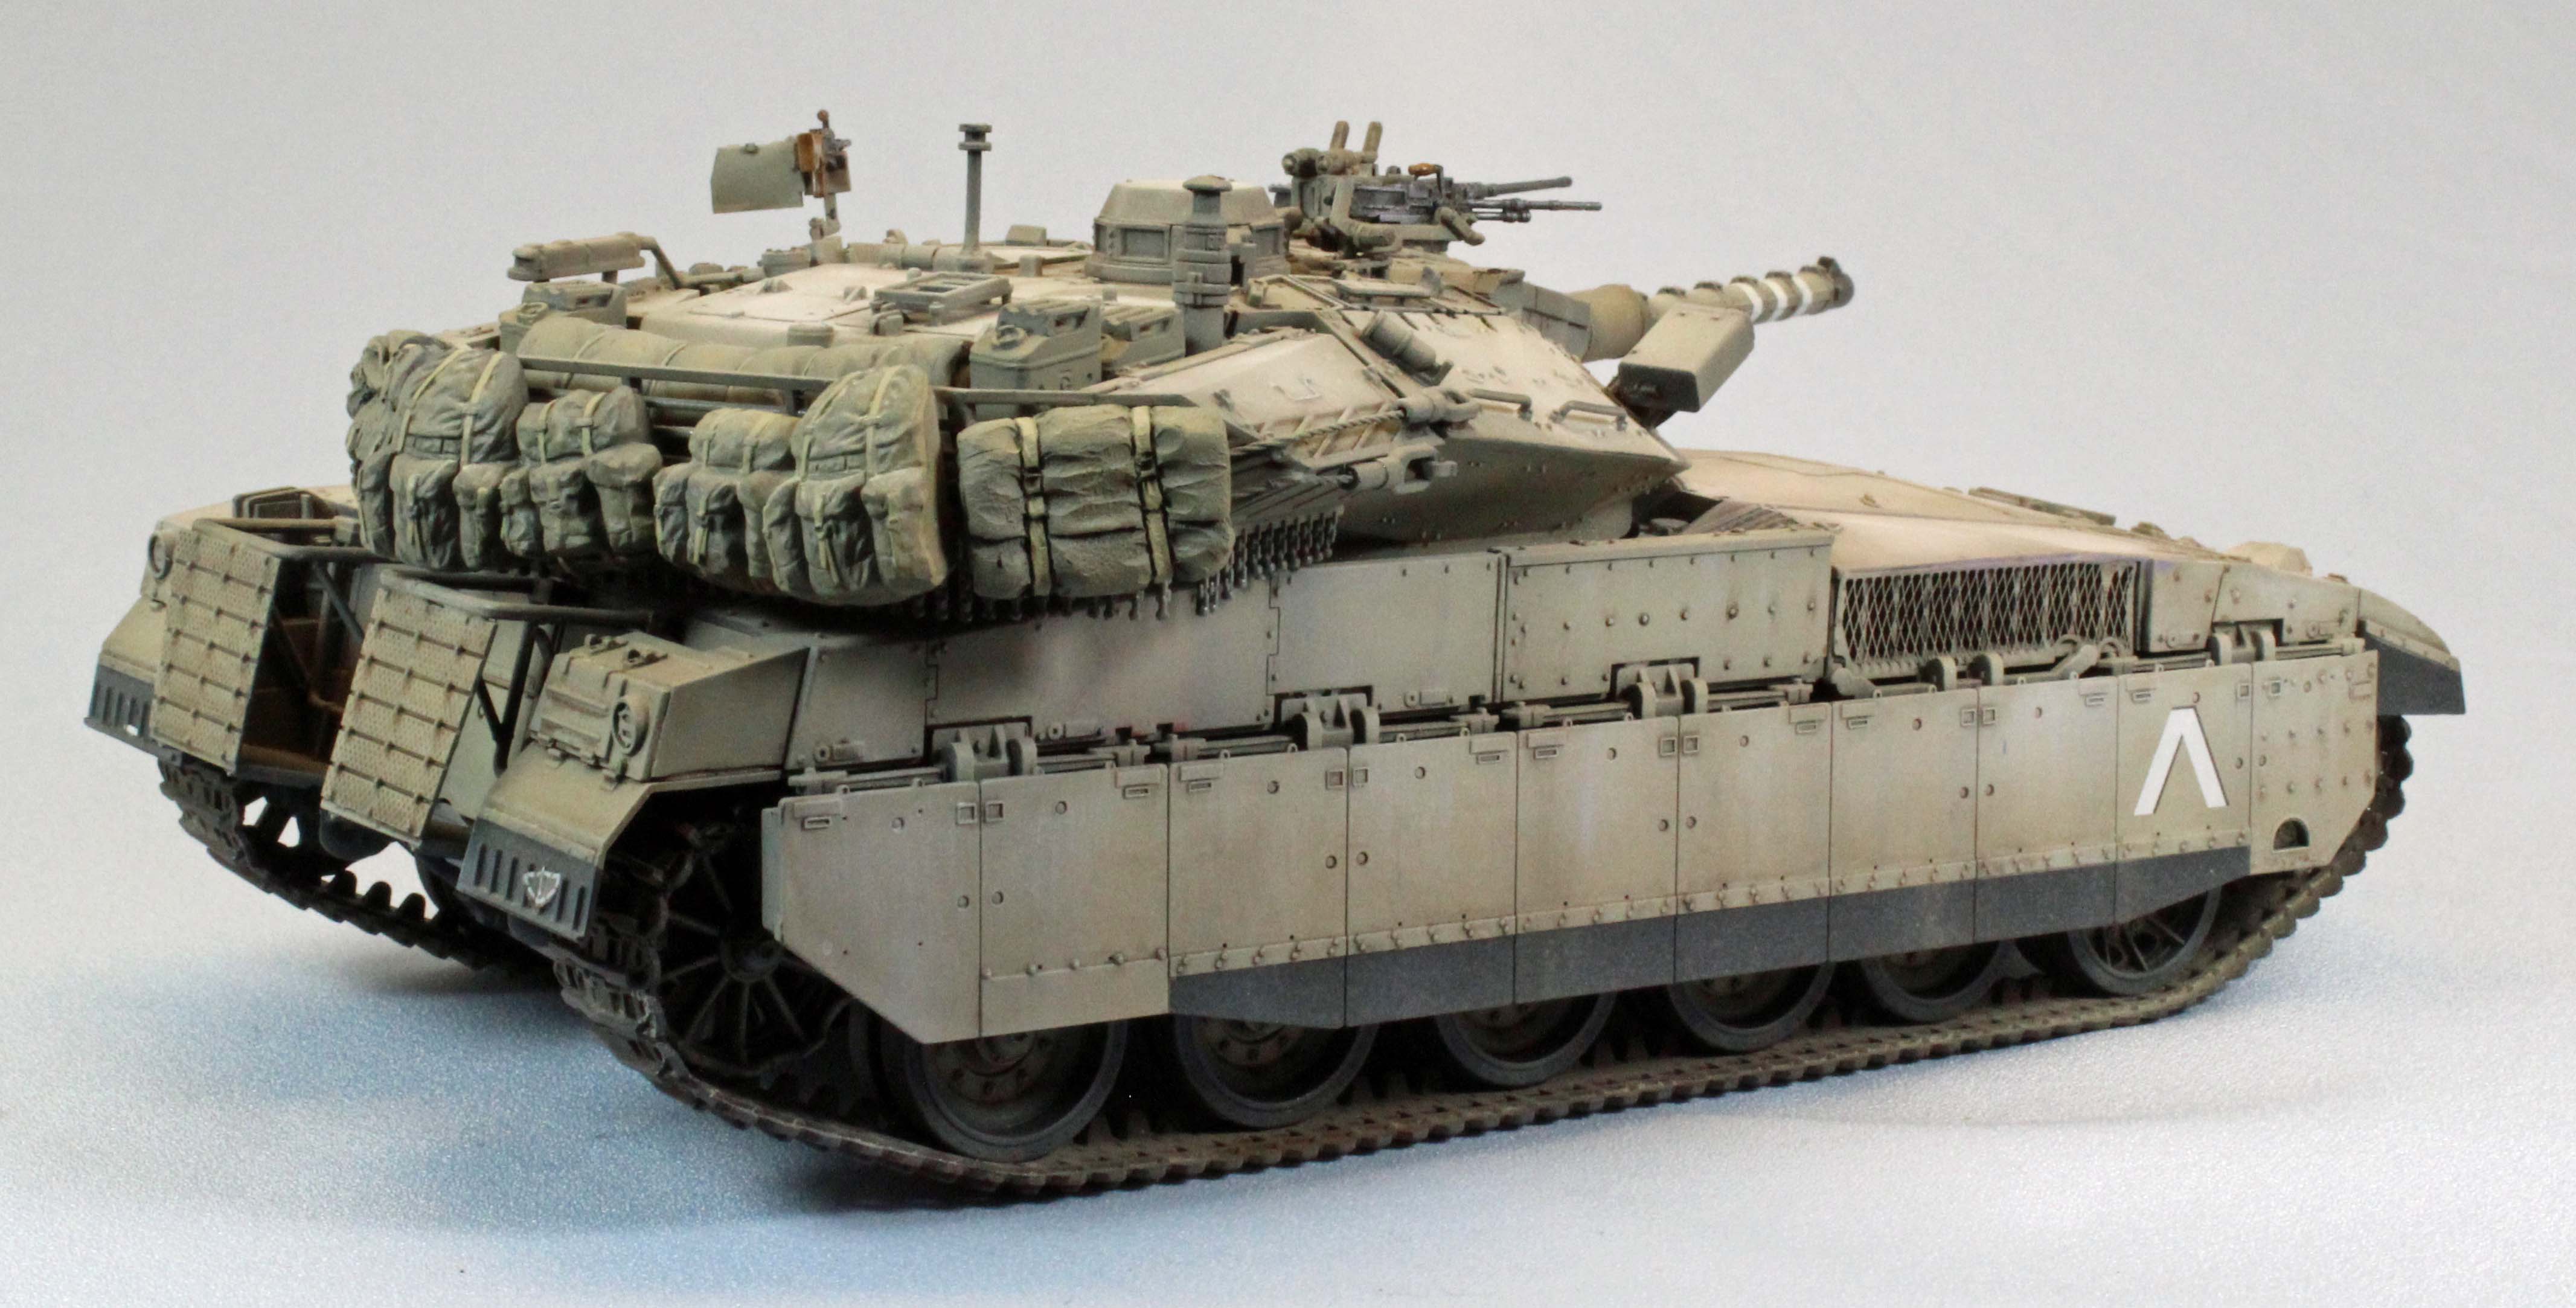
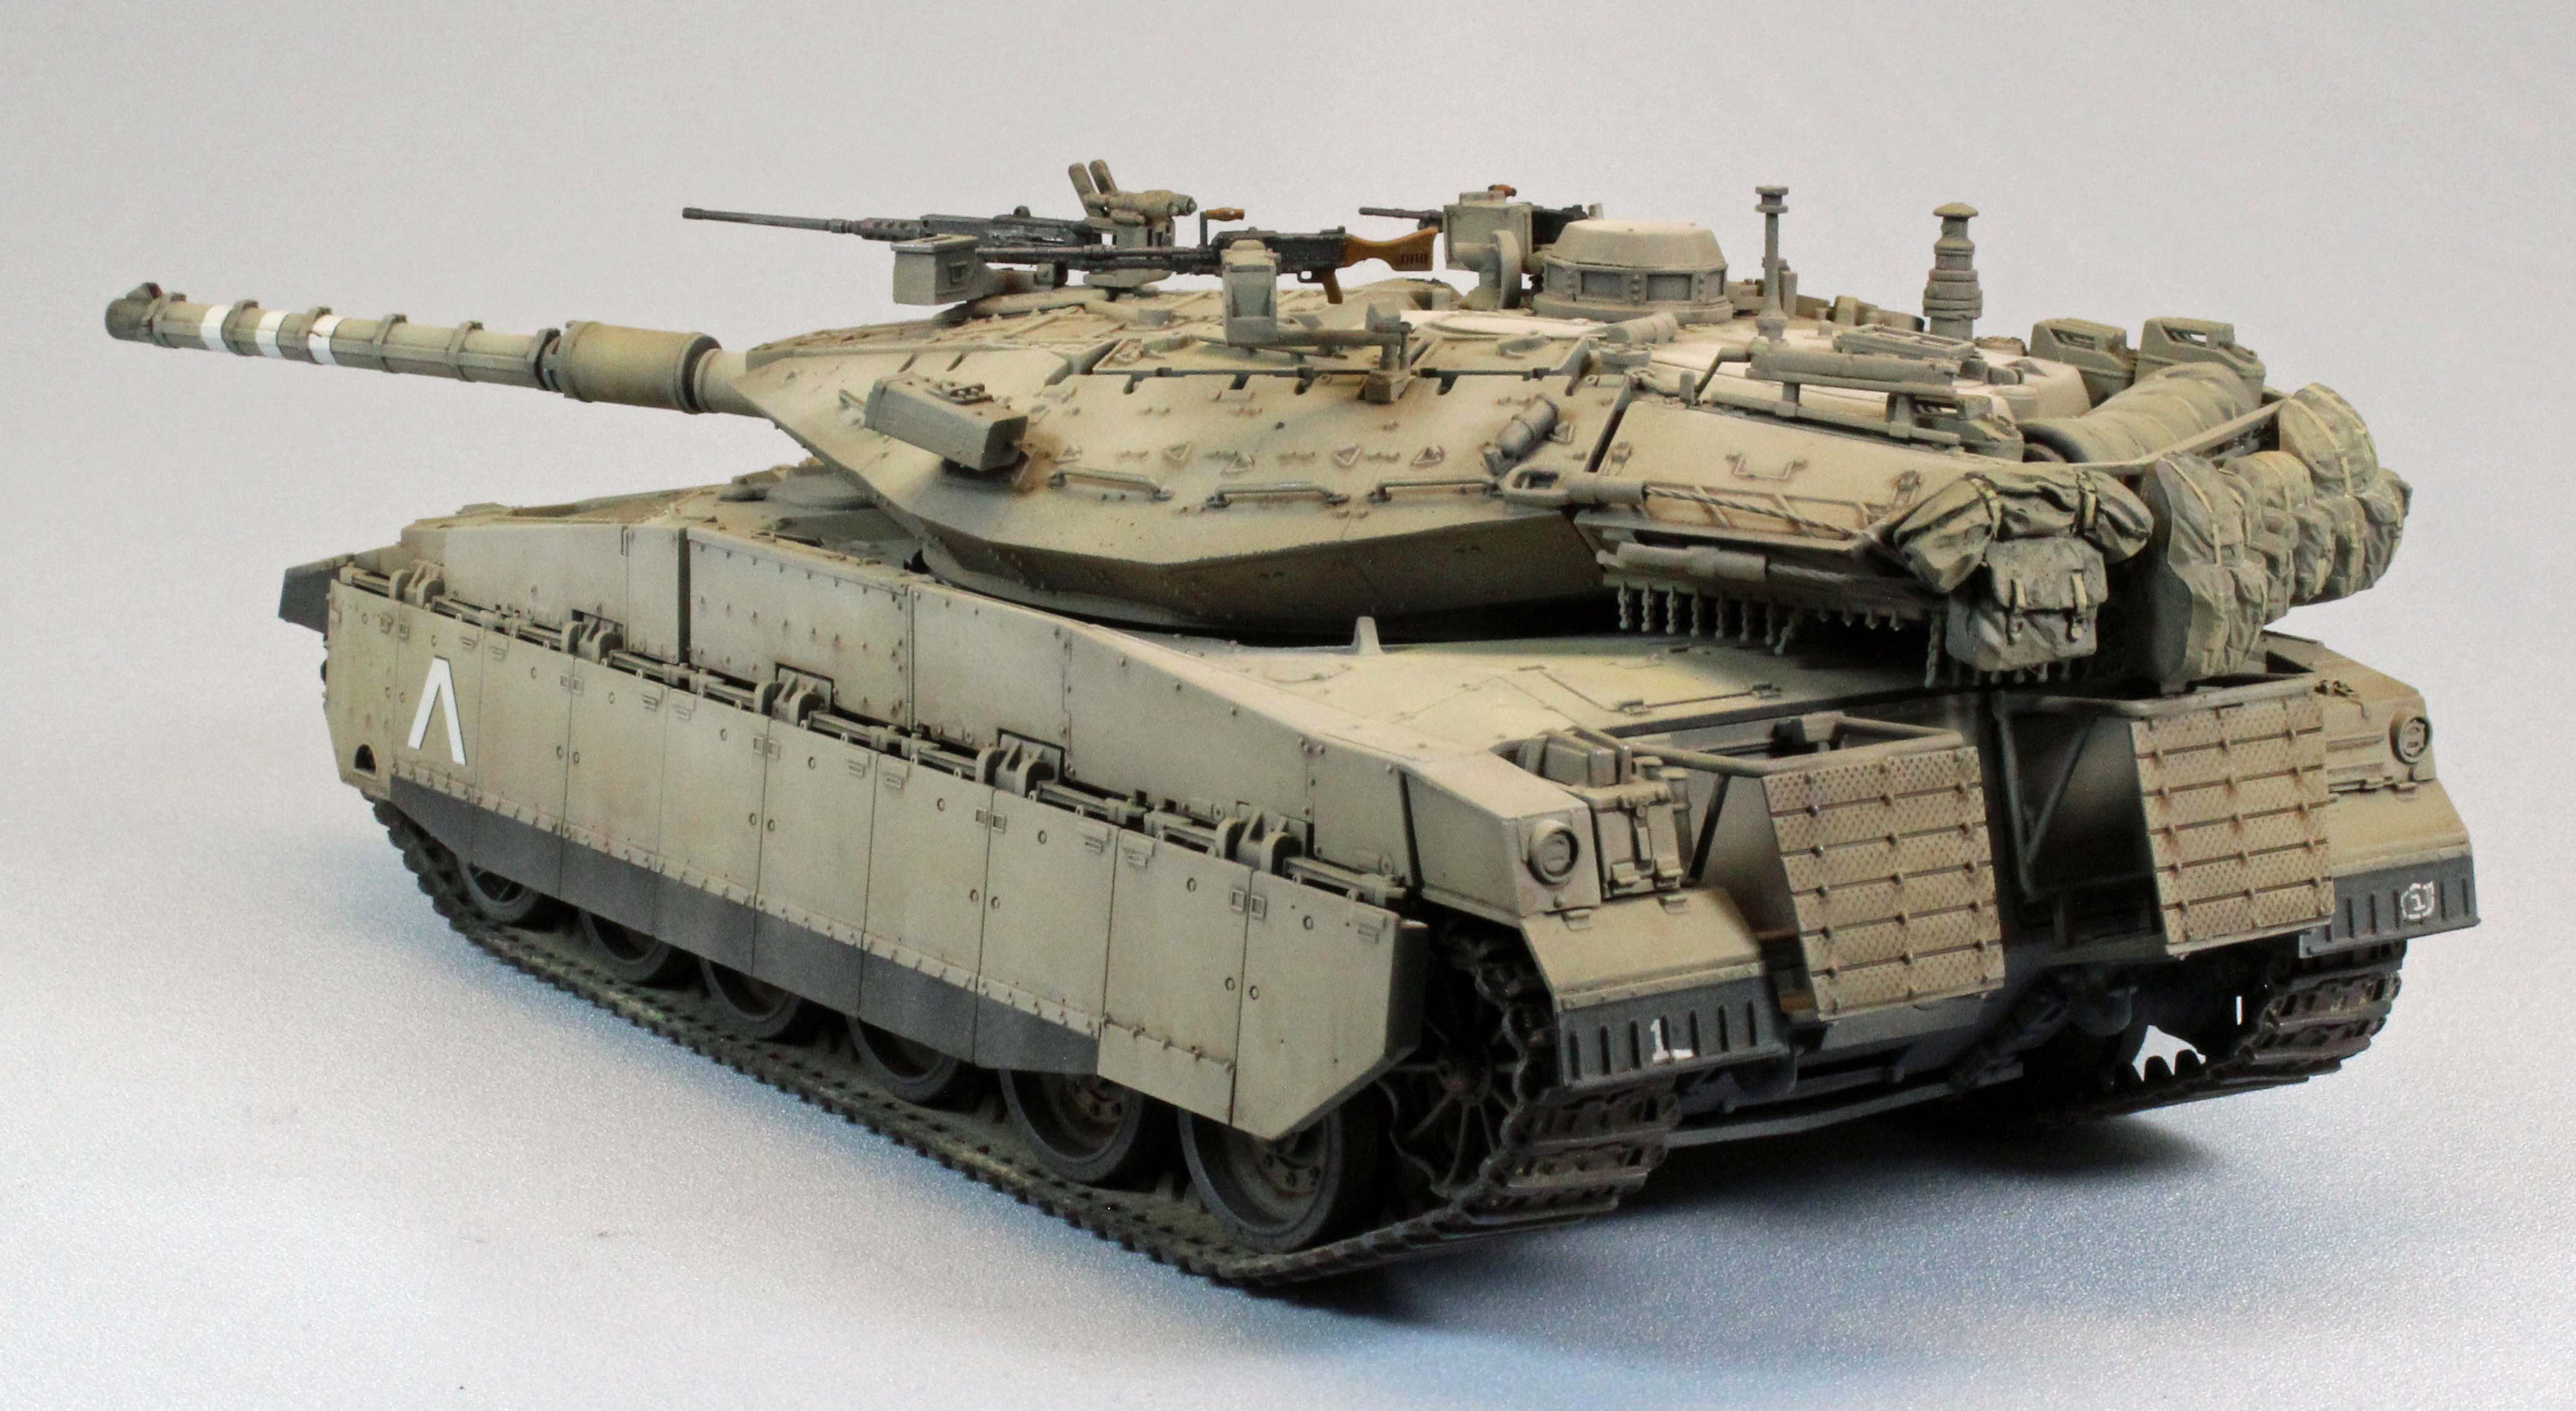
The upper hull comes as a single piece, with the side armor attached on each side. The drivers hatch can be modeled open or closed (although no interior detail is provided), as can the armor plating over the directional lights in front. Academy provides two options for the side armor; the classic Merkava clamshell-style armor that is distinctive of the type, and the new flat-bottomed armor that is new in this kit. Both options connect to the upper hull via five pieces of solid-fitting hardware on each side. When finished the hull and side armor are a single, solid assembly that can be painted and weathered by itself.
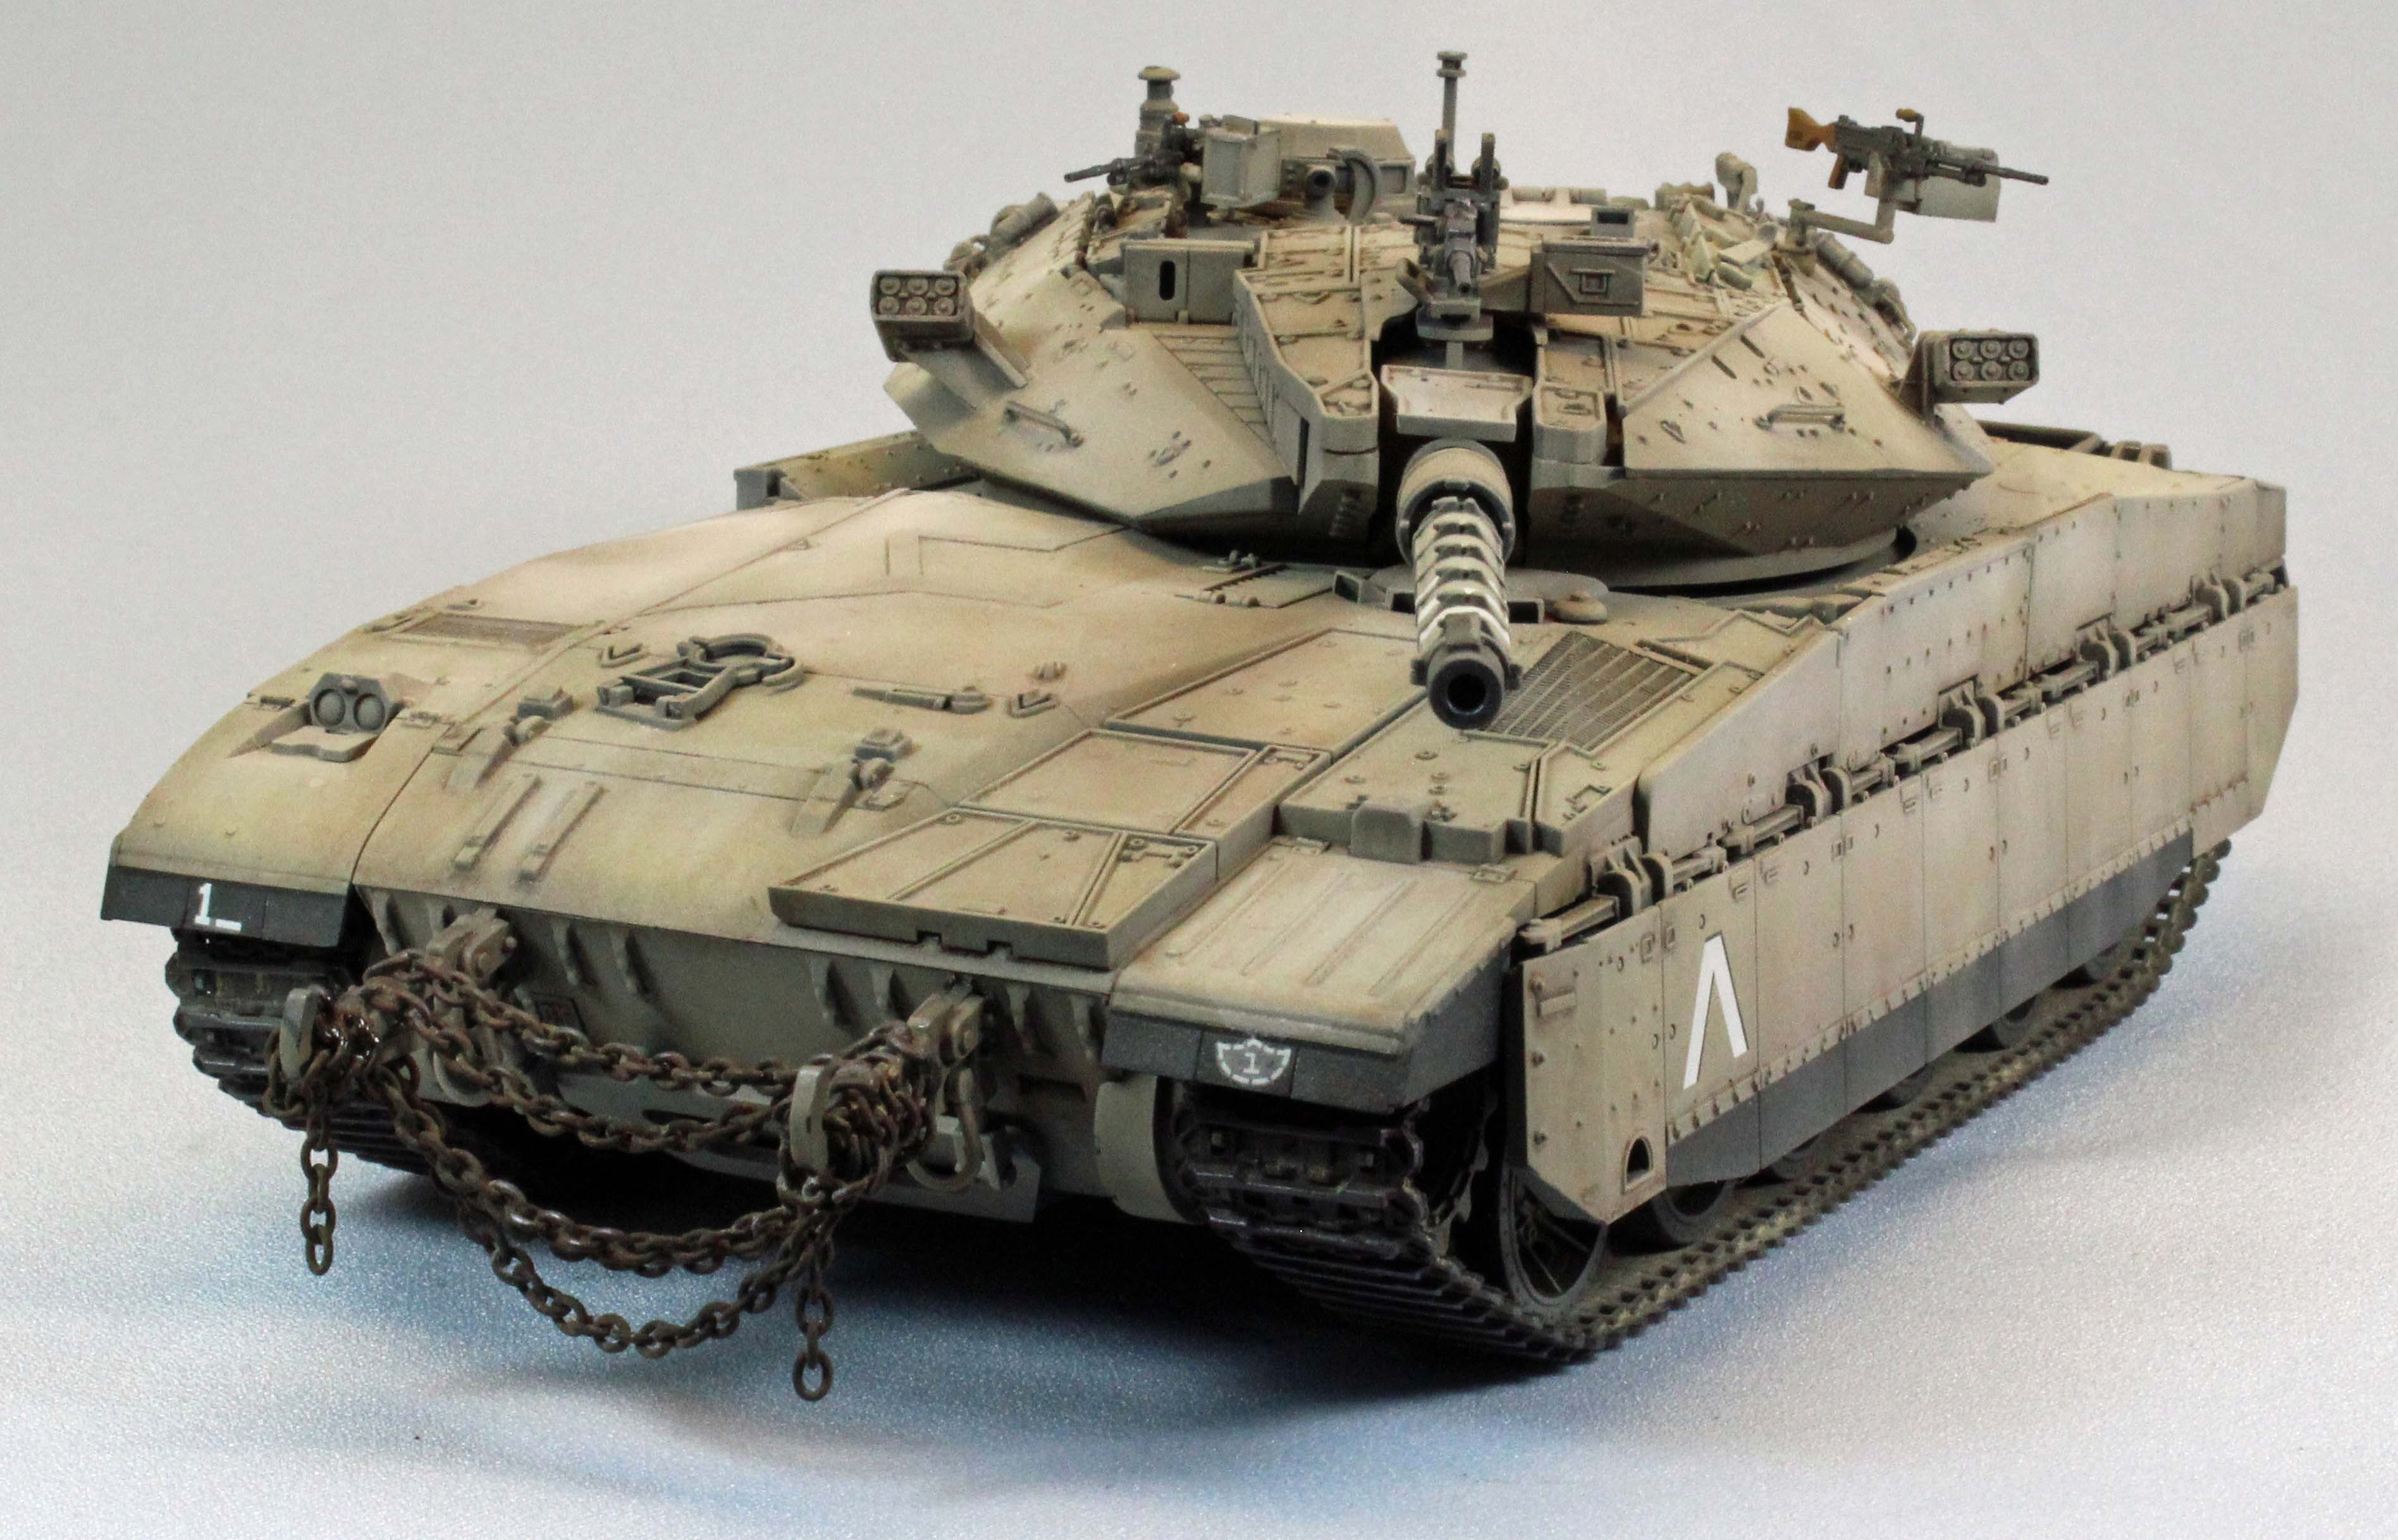
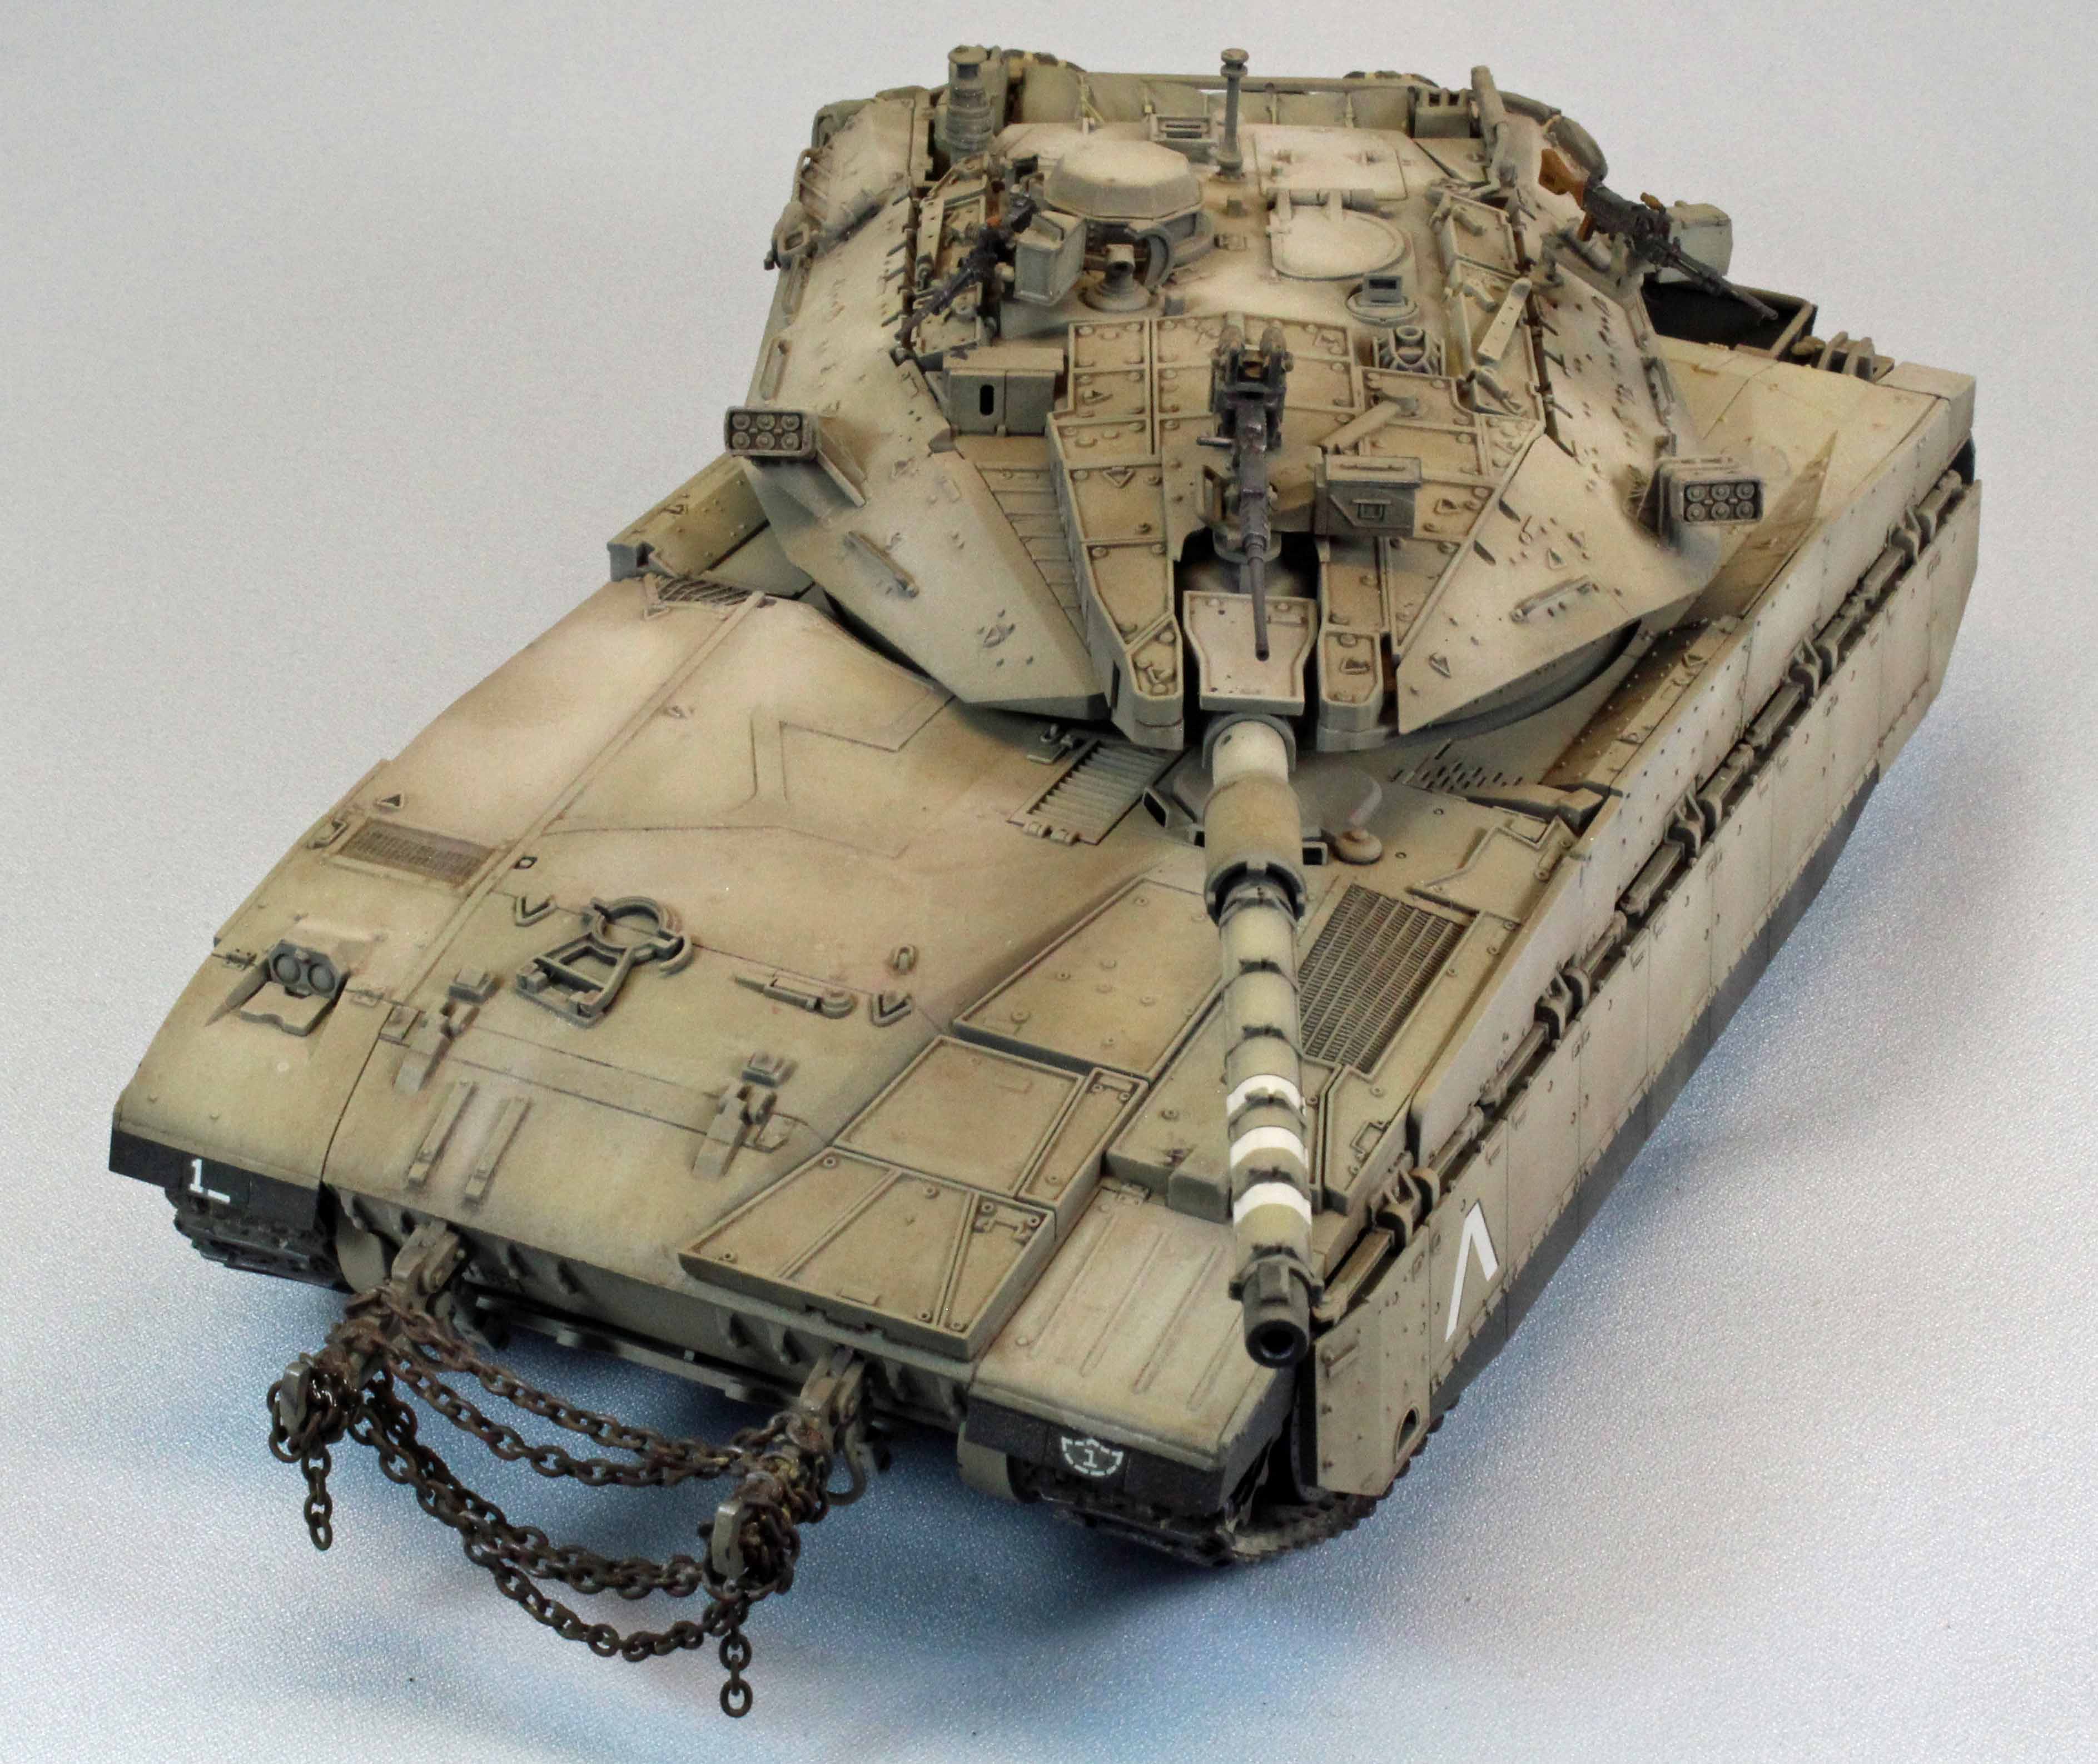
The Turret
The turret on the Merkava has always been a busy affair. The main gun mantlet is trapped between the upper and lower halves of the turret, which come together in the first step. While the two hatches can be left open, there is no turret interior provided. The prominent rear bustle comes together in three sturdy parts and literally ‘clicks’ on to the rear of the turret. Several optional parts are provided so a little up-front research is in order to decide what specific version you want to represent.
The main gun barrel comes in six parts, with the main tube separated into two side-by-side halves, requiring some seam cleanup. The hollowed, open end of the barrel is a separate part. Later Merkava models featured hanging weights across the rear shot-trap of the turret to defeat incoming projectiles such as rocket propelled grenades (RPG’s). Academy (thankfully!) chose to represent these as solid moldings, seven in all. They are very delicate and break easily so I suggest you do (what I didn’t) and wait to attach them just before painting.
All Merkavas sport three separate machine guns, and these are represented well in the kit. I had problems with the starboard weapon design (b), the one with the night scope. Parts H14, H15 and H21 didn’t seem want to come together around the gun – the design here, in my opinion, lacking.
Tow Cables
The only significant problem I had was with the tow cables. Academy continues to use twisted thread for tow cables which need to fit into relatively small cable ends – a design decision which continues to elude me. Invariably, the thread frays and even if coated with super glue is simply too thick to fit where it is supposed to go. I chose to replace the cables with twisted wire, secured to the turret using six hooks that are among the unused parts in the kit.
The Lower Hull
The final five steps of the instructions bring the lower hull and running gear together. Everything assembled perfectly save one area, the two large bustles surrounding the hatch in the back. These are fiddly affairs that took some coaxing to stay together and mount on the vehicle symmetrically – I’m not sure my attempt will win any awards. I suggest you use slow-drying cement and go slowly, with lots of references. Other than that, the fit of the parts, and especially the running gear, was superb. Academy provides two options for the twelve main wheels, ostensibly to assist with painting, since one option has separate tires. Since you have to paint a thin outside line on each wheel anyway, I’m not sure this option is as useful as it sounds. Still, with poly cap inserts and complete access, Academy thoughtfully provides all the running gear options any modeler will need, depending on their own preferences.
The Track
The black, rubber-band type vinyl track in this kit is still pretty old-school considering the state of the market today. While you can following the directions and melt the tabs on one side into the holes on the other with a hot screwdriver, I’ve never found the results from using this procedure strong enough to hold together when the track is stretched over the wheels. Fortunately, the side skirts cover up the three staples I used to connect the ends!
I was able to use distillate products on this track, but they do take some time to dry. I primed the track using Rustoleum (rattlecan) Flat Black enamel paint, followed by a dusting of Rustoleum (rattlecan) Beige enamel. Once these coats dried, I brushed on a thin layer of AK Interactive Track Wash straight from the bottle. When that (finally) dried, I worked several layers of Mig Pigments into the nooks and crannies using Gulf War Sand, Concrete, Light Dust, Dry Mud, European Dust and Russian Earth. In the end, with a little makeup those floppy, vinyl tracks look just fine.
Painting and Finish
I already have a completed Merkava (in a light, greenish desert scheme), so I thought I’d go full Desert Yellow with this build. Except for priming and pre-shade coats, I used Vallejo Model Air paints throughout. I’ve come to really like airbrushing this paint from a health standpoint, and I appreciate the amazing variety of ready-made colors available locally.
Primer and Pre-Shade
I started by applying a coat of (rattlecan) Krylon Flat Black Lacquer Paint/Primer for my dark, primer/pre-shade coat. Surprisingly, this low-cost solution sprays on easily and dries very thin and level – replacing a time-intensive task I normally use an airbrush and more expensive paint for. I use a dark primer coat to give the plastic and PE some grip, and to fill in the recesses - creating a shadow effect near the flat surface edges, and adding depth for the subsequent coats to come. After the primer had degassed, I taped off the lower skirt areas and fenders to retain the full black color.
Camouflage
I followed the pre-shade coat with Vallejo’s 73.614 IDF Israeli Sand Grey Surface Primer. Once that was set for a few minutes I laid down a light post-shade coat of Vallejo 73.613 Desert Tan Surface Primer. These primers work just like paint and they are a heck of a deal in the size they come in, considering the cost of the standard size paint bottles.
Baggage
For the baggage around the turret I used 50/50 mix of Vallejo’s 73.614 IDF Israeli Sand Grey Surface Primer and Vallejo 71.027 Model Air Light Brown. I wanted this detail to pop just a little from the monochrome Sand-Grey background. Curiously, Academy did not provide any kind of miscellaneous accoutrement’ in the kit – something that they have a good reputation for doing in many of their other armor kits. Everything extra on this build is from my spare parts bin.
Decals and Photo Etch
With painting finished, I hand-brushed the surface areas that would be receiving decals with a coat of Future floor polish to give the decals a smooth surface to slide on to. Once the Future was dry I went about applying the decals using the Red and Blue MicroSol and MicroSet products without any problems. Once the decals were dry, I airbrushed the same areas with Future to seal the decals then knocked down the shiny areas using Vallejo 70.520 Flat Varnish to bring everything back to flat for applying filters and pigments.
Academy included a thick PE sheet made up of what feels like thin steel – very difficult to cut and sand. I managed to use the engine grille mesh but discarded the rest.
Finish
After removing the masking tape, I added an overspray of the Desert Tan color to calm down the stark black portions of the side skirts and fenders. I followed with several filter applications using Old Holland Warm Sepia Oil, thinned with Mona Lisa thinner, and Mig Black Filter on the engine exhausts.
Once everything was dry, I went about applying pigments to lighten up the areas affected by the intense desert sun using Mig Light Dust and Concrete pigments.
Conclusion
This Merkava was a lot of fun to build. The low parts count, the design of the parts representing the hanging weights around the turret rear, the very small PE sheet, the design and fit of the lower chassis and wheels all added up to a truly pleasurable experience. Choosing to drop the upper hull/side skirts down over the lower hull at the very end of the build allowed completed access to an area that rarely offers that in a model kit.
A perfect kit would have included stowage gear for the turret bustle and a better track medium, but that kit might have cost more as well. I think what you get in the box is a good compromise, and a great value. I can recommend this kit to all levels of model builders. If you go slow and follow the suggestions above, you should be able to have a lot of fun building kit.
I would like to thank Academy Models and Stevens International for providing this kit for review, and to Internet Modeler for giving me the opportunity to build it.
.jpg)
.jpg)
.jpg)
.jpg)
.jpg)
.jpg)
.jpg)
.jpg)