Reviews
Armor
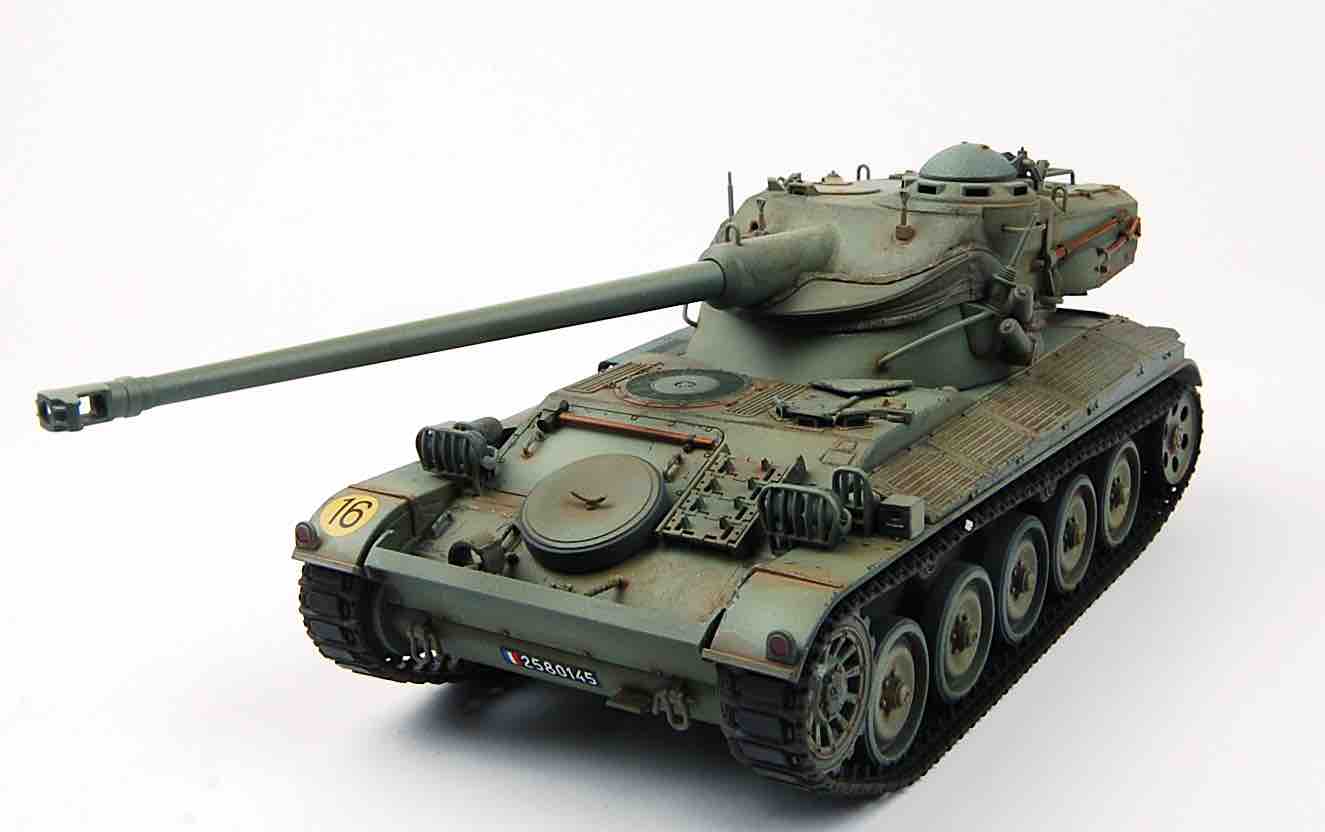
Tamiya French Light Tank AMX-13
by Andrew Birkbeck
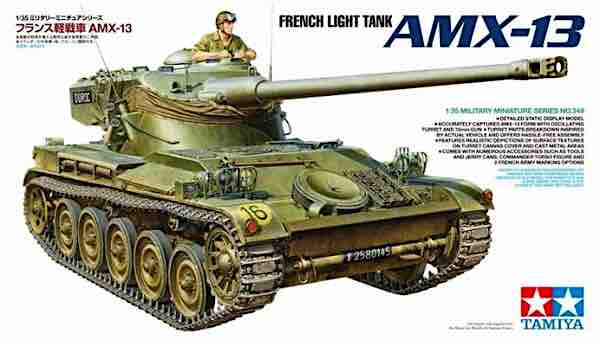 Model: French Light Tank AMX-13
Reviewed by: Andrew Birkbeck, IPMS # 27087
Scale: 1/35
Company: Tamiya
Price: $56.00
Product/Stock #: 35349
Website: Tamiya
Product Web Page: View
Product provided by: Tamiya
Background
The French military has a proud history of tank design, starting with the grandfather of all modern tanks, the FT-17 during the First World War. This was the first tank to incorporate a gun mounted in a rotating turret. Immediately prior to the start of the Second World War, the French Army fielded a good number of world class tanks such as the Somua S-35 (Tamiya kit 35344). But disaster struck the French, and their massive Army was humiliated when it was outmaneuvered by German forces in May 1940. However, immediately following the cessation of hostilities in Europe in 1945, French designers once again began to think of new designs from which to produce home-grown tanks. One of the first such designs was a 1946 specification for a 13-ton air-transportable light tank, which military commanders realized would be a priority given the conflicts brewing throughout the French colonial empire. Of the three designs submitted to meet the 1946 specification, that of the firm AMX (Atelier de Construction d'Issy-les-Moulineaux ) was chosen: the AMX-13, the “13” referring to the tonnage of the tank. It initially mounted a 75mm gun based on the WW2 German design as found on the Panther tank, which was housed in an innovative oscillating turret. This is the version depicted with this Tamiya kit. Later upgrades included a change in the gun, first to a 90mm and then to a 105mm version. Over its long production cycle (1952 through to the late 1980’s) 7,700 vehicles were produced, of which 3,400 were exported to over 25 nations. The AMX-13 was fielded in a number of conflicts including by French forces in the Algerian War and the Suez Crisis of 1956. The AMX-13 was Israel’s first modern tank, and as such took part with IDF forces in the Suez Crisis of 1956 and the 1967 Six Day War. U.S. forces destroyed two AMX-13 tanks when the US invaded the Dominican Republic in 1965. And AMX-13s were fielded by the Indian Army in the Indo-Pakistani War of 1965, and also saw extensive service during the Lebanese Civil War.
What's in the Tamiya Box?
- 5 sprues of tan plastic parts plus separate lower hull and upper turret parts
- 1 photo etched nickel part
- 1 small sheet of decals, typical Tamiya, in register
- 2 small bags of poly caps
- 1 black and white instruction booklet, 12 pages, with 23 assembly steps
Under Construction
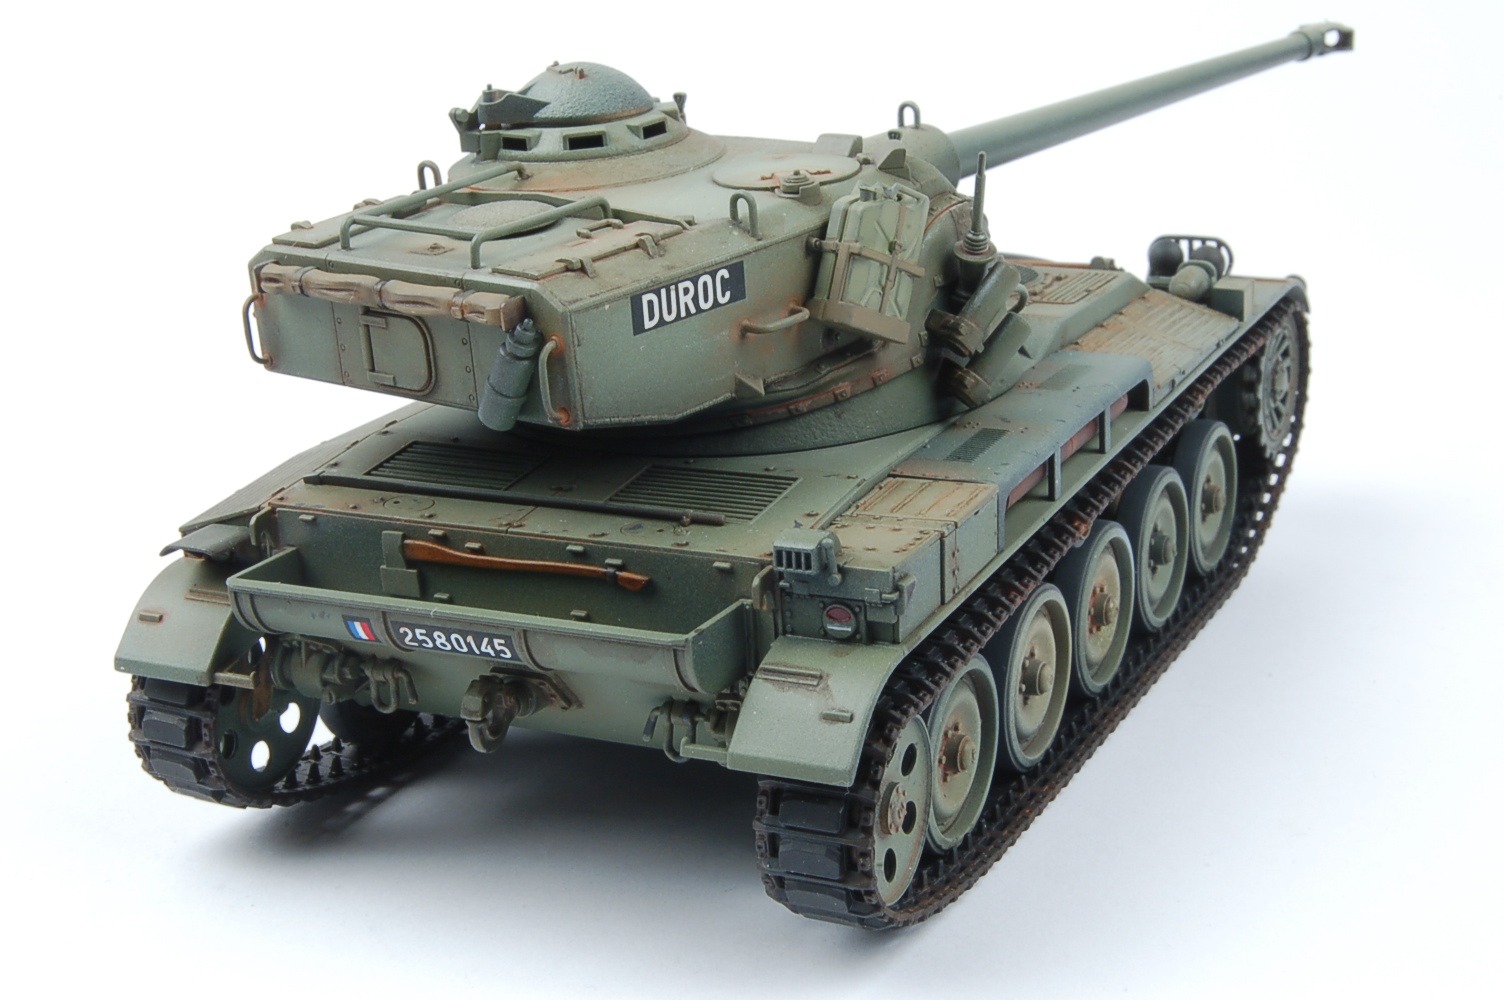
The instructions that come with the kit are typical of Tamiya’s excellent range of kits, being well laid out, easy to understand and leaving the modeler with no doubt as to where any particular part goes. The kit parts are very nicely detailed. Molding is crisp and without any hint of flash, although there are ejection pin marks to deal with on a few of the parts though they are only a minor inconvenience and easily dealt with. The small decal sheet is typical Tamiya, the decals being in perfect register, though the decal film is a little on the heavy side, but caused me no problems whatsoever. Markings for only two vehicles are provided, both French Army, and both overall Green. Marking Option A: Unknown unit, no date. Option B: Unknown Unit, 1967.
Construction begins as with many armored vehicle models with the lower hull. Tamiya’s AMX-13 has a lower hull consisting of three main parts: a well detailed main tub, plus a main front and rear plate. The suspension arms are separate parts, A36, and these are easily aligned thanks to a “hole and pin” method of assembly: on the rear of the suspension arms is an alignment hole, and on the hull sides are a series of pins that fit into the holes. The drive sprockets are two piece units. The road wheels are two plastic parts, plus a nylon poly cap sandwiched between these two parts. The drive housings have poly caps trapped between them and the hull side, onto which slip the drive sprockets. The road wheels fit snugly to the suspension arms, and then were aligned using a simple two part jig.
Over the past decade, Tamiya has gone back and forth on how they have designed the tracks for their 1/35th scale military vehicle models. The last model I reviewed, Tamiya’s Su-76M, had link and length hard plastic track, my MUCH preferred option when building a model. For reasons best known to them, Tamiya has reverted with the AMX-13 to the one piece “rubber band” form of tracks. These are well detailed for the genre and fit nicely. They are glueable using standard model cement, and paint up well. Even though Tamiya instructs the modeler to attach the tracks in Sequence 7, I left them off until later in the assembly process for ease of painting.
Next comes the assembly of the upper hull stages, and there is nothing out of the ordinary here. Interestingly, there are no clear parts on this model. No clear lenses, no clear periscopes, nothing. As is usual with my model construction, all the on board tools are left off until the end of the construction and painting of the main vehicle. The tools are painted separately, utilizing Vallejo acrylic “New Wood #311” for the handles, over-coated with thin layers of Vallejo “Smoke 70939”, with the metal parts painted the hull color. I then glued the tools onto the vehicle using thinned white glue once the vehicle was painted as mentioned..
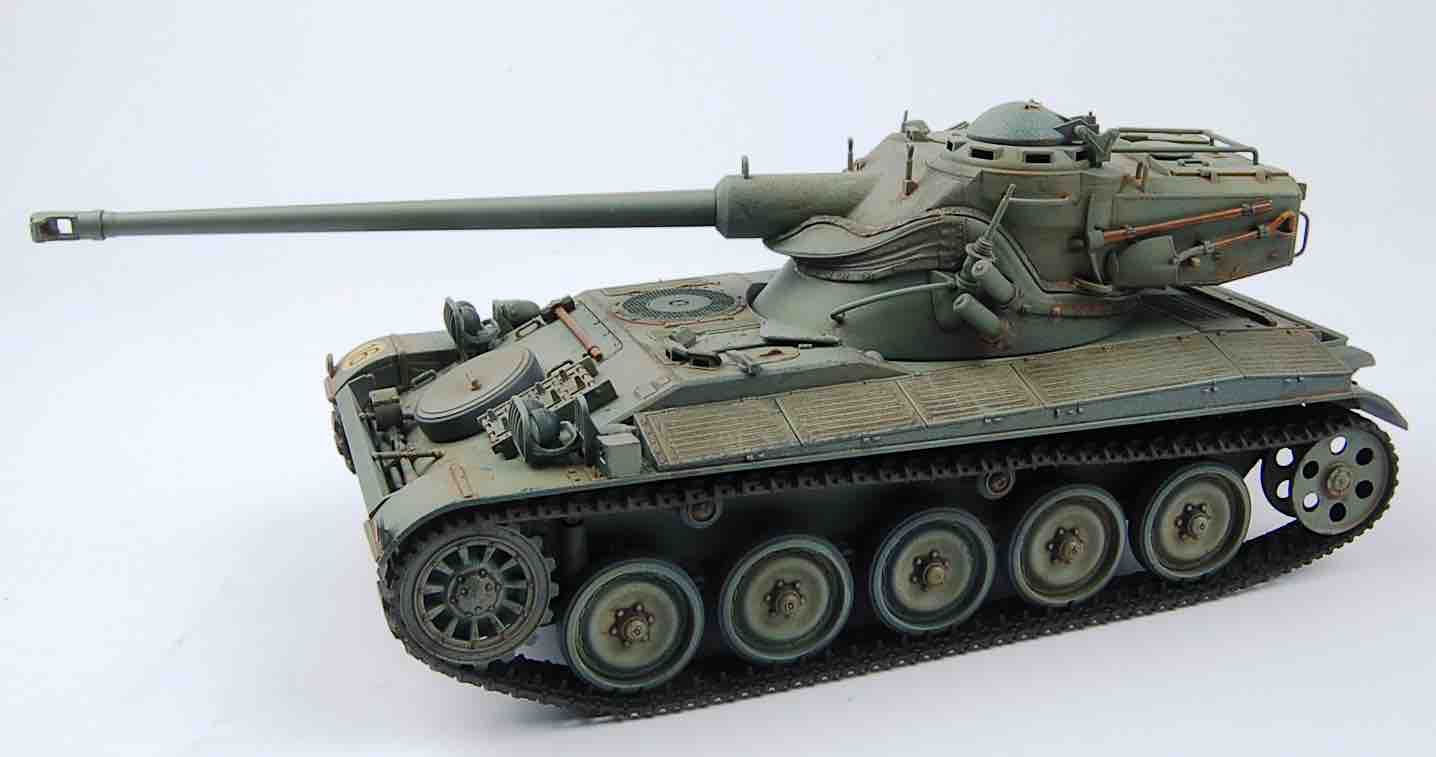
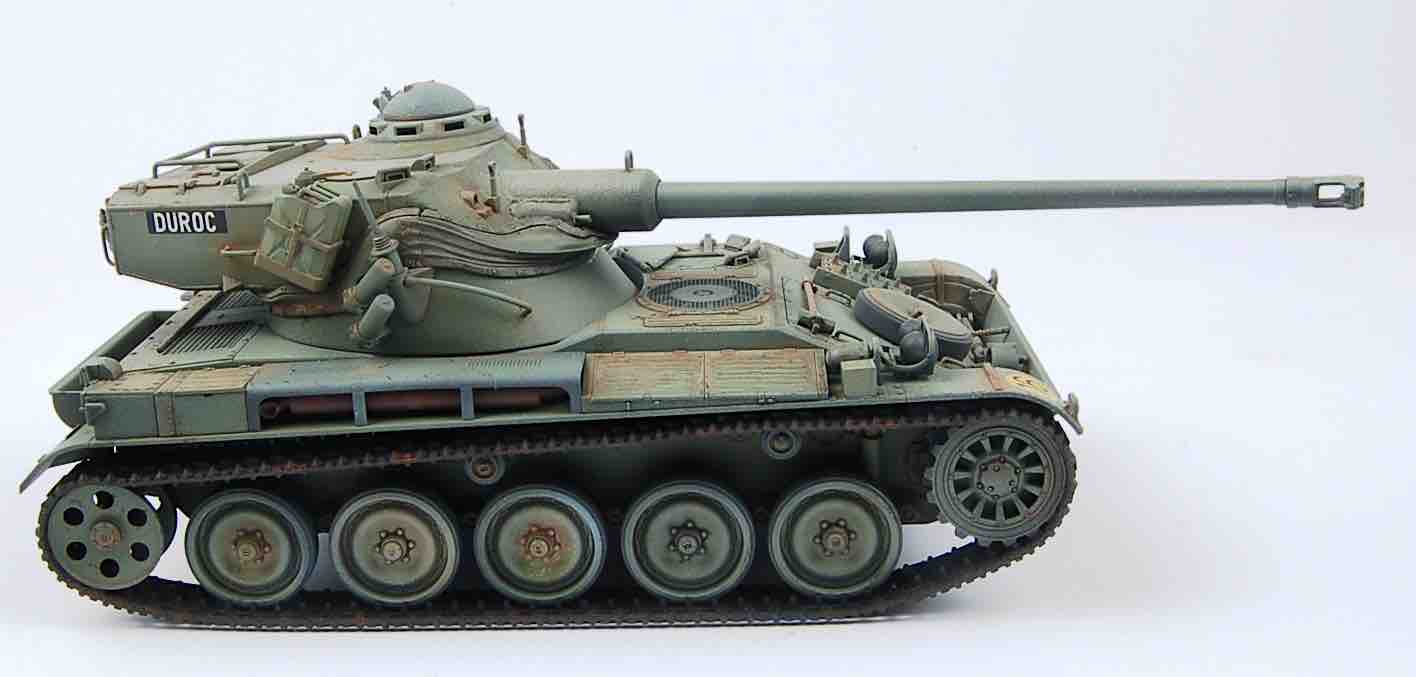
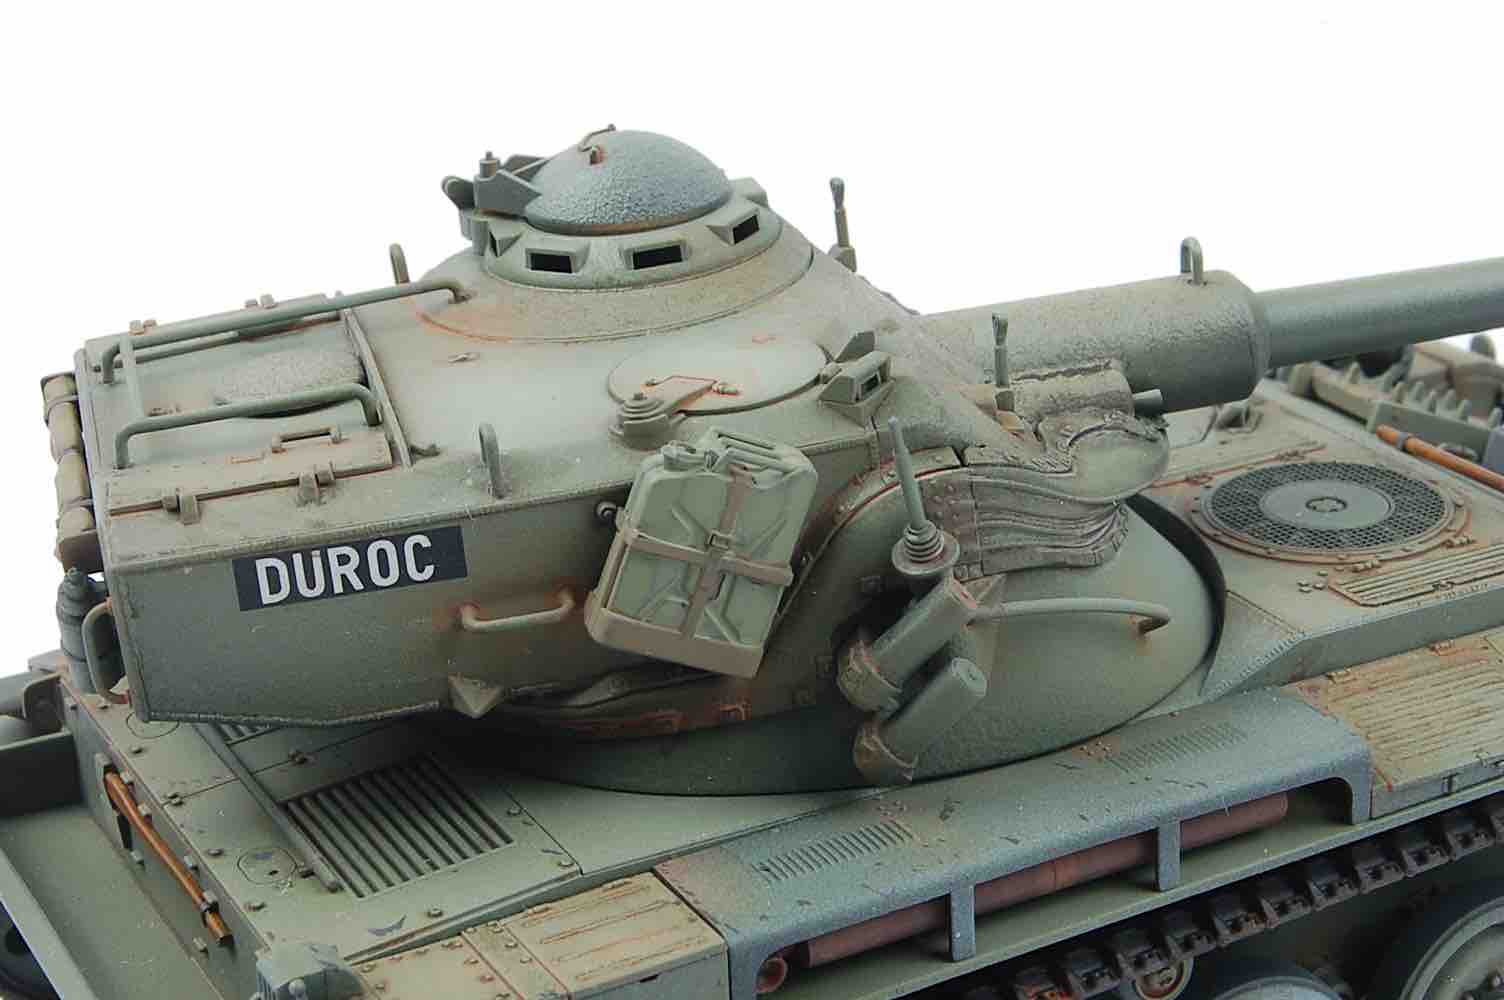
The turret of the AMX-13, remember, is a two part affair. The gun is mounted fixed in the upper turret section. In the kit this consists of a large upper shell part, a lower section, and a third rear plate part. Then there is the lower turret unit, which includes the cradle where the upper hull rests so it can pivot up and down. The gun barrel is a one piece unit, with a two piece muzzle brake. Once the seam lines are cleaned up, these fit together nicely, and then slip into the upper turret opening. The turret has the option of being build with or without the canvas cover that is prominent on AMX-13’s, so make sure you study this part of the instructions carefully to avoid mistakes. I built my kit with the canvas on. The parts for this are of the same plastic as the rest of the kit, not rubberized as another firm’s kit provides. The detail is very good in this medium, I feel, and the fit was very good. The turret cupola is minus any sort of detail depicting the periscopes, which I thought a bit strange. That said you will just have to tell folks they are deployed in the retracted position! The cupola hatch is a separate part, and thus can be deployed in the open or closed position. The kit comes with a commander figure depicted from the waste up, and who obviously goes in the hatch. He is well detailed for the medium, and has a separate head, helmet and separate goggles, together with two separate arms.
The kit comes with precisely ONE photo etch part, a mesh screen that covers the upper front hull engine air intake. It is made of a nickel colored material, and is more difficult to cut from its fret than brass PE I have used, but this didn’t cause any particular issues. It cleaned up nicely with a diamond dust file, and fit the opening precisely.
I first airbrushed the model with Badger’s Stynylrez Water Based Acrylic Polyurethane Surface Primer, SNR-403 Black. Badger states you can airbrush this right out of the bottle, but I felt it could do with a little thinning, so utilized some distilled water and a few drops of Vallejo airbrush thinner. The primer went on without any issues. Tamiya’s instructions only provide painting instructions calling out colors from their own range of paints. The instructions inform the modeler to paint the vehicle overall “US Air Force Olive Green, AS-14” from their rattle can paint range. Myself, I didn’t have that particular Tamiya color to hand, but did have“Forest Green #065” from the Ammo by Mig range of acrylic paints which looked suitable for post WW2 French Green. Having airbrushed the entire model using this color, I then mixed some of the Forest Green with Ammo by Mig “Warm Sand Yellow #061” and used this to post shade various panels on the model. The rubber areas on the road wheels were painted Vallejo “Dark Rubber #306”. The model was then given an overall coat of gloss clear, utilizing Johnson’s Future, or as it is known today, Pledge Floor Care Multi Surface Finish. I spray this without thinning; being very careful not to apply too much at once or it runs badly. I then let this dry for 48 hours to make sure it had cured thoroughly. Next I applied the Tamiya decals, utilizing Marking Option A: French Army, Unit Unknown (date too apparently). I used the Gunze Sangyo Mr Mark Softer and Mr Mark Setter decal setting solutions. The Tamiya decals as always are a tad on the thick side, but this was not noticeable once I had finished the decal work. The decals adhered well to the flat surfaces upon which they were applied. Once they had been allowed to dry for 24 hours, the decaled areas were given a couple of light coats of Future to seal them.
I must say that the one area of disappointment with this kit was the poor choice of markings. Two overall green vehicles which Tamiya can only list as “Unknown Unit” is a bit poor if you ask me, given the vehicle was exported to over 25 different nations. And even if Tamiya wants to stick solely to French vehicles for this release, surely a little research could have revealed markings for specific units, with more precise dates?
I next took a dark brown oil paint from my stash, and mixed it with Mona Lisa brand odorless mineral thinner to create a “wash” and applied this to the model to highlight the rivets etc. After the wash had been given 12 hours to dry, I cleaned up the excess with Qtips dipped in the mineral thinner. The model was then left alone for 48 hours to make sure the oil paint wash had thoroughly dried. I then airbrushed the entire model with multiple thin coats of Alclad 2’s Klear Kote Matt, which is a lacquer product. This leaves a VERY flat matt surface on the model.
Next came the addition of paint chips to the model, using a dark gray Vallejo acrylic color, and utilizing both a fine tip paint brush, and some sponge material. Again, this adds “interest” to the model. I next broke out my rust colored oil paints, and made up to different washes. These were applied one at a time, with drying time in between, to the tracks, and to other areas of the model. This “livens up” the model, at least in my opinion! and gives interest to the overall Forest Green vehicle. Once I was happy, I airbrushed a last thin coat of Klear Kote Matt over the entire model to seal everything.
Conclusion
This is a superb kit of an extremely important Post WW2 French military vehicle. I am building a collection of tanks titled “100 Years, 100 Tanks” in honor of the 100th anniversary of the first combat use of tanks at the Battle of Flers-Courcelette (part of the Battle of the Somme) on 15 September 1916. Given its high production numbers, wide service around the globe, and use in many military campaigns, the AMX-13 amply deserves inclusion in this collection. Detail on the model’s parts is to a very high standard, and thanks to the usual exemplary Tamiya engineering, the model goes together with great ease. I can unreservedly recommend this kit as a pleasant building and finishing experience, even for the novice modeler. I would like to thank TamiyaUSA for the opportunity to review this kit.
Photos