Reviews
Automobile
Revell Yenko Chevy Nova
by John Kaylor
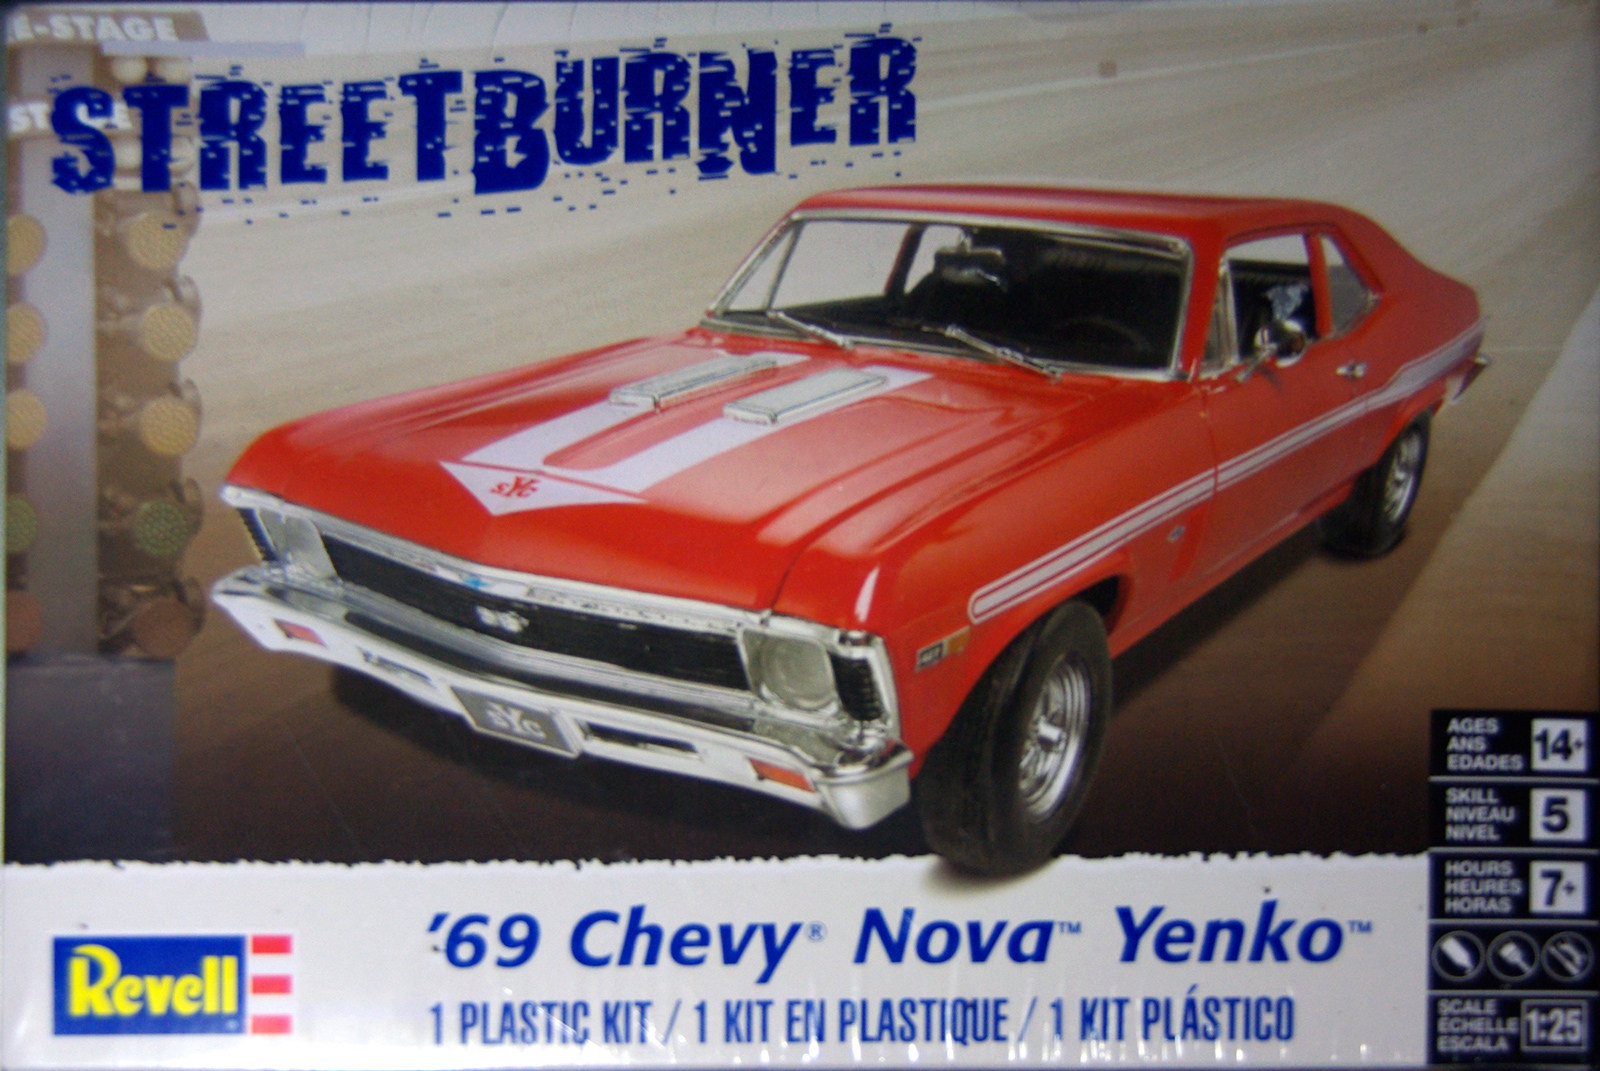 Model: Yenko Chevy Nova
Reviewed by: John Kaylor, IPMS # 48733
Scale: 1/25
Company: Revell
Price: $24.95
Product/Stock #: 85-4423
Website: Revell
Product Web Page: View
Product provided by: Revell
Summary
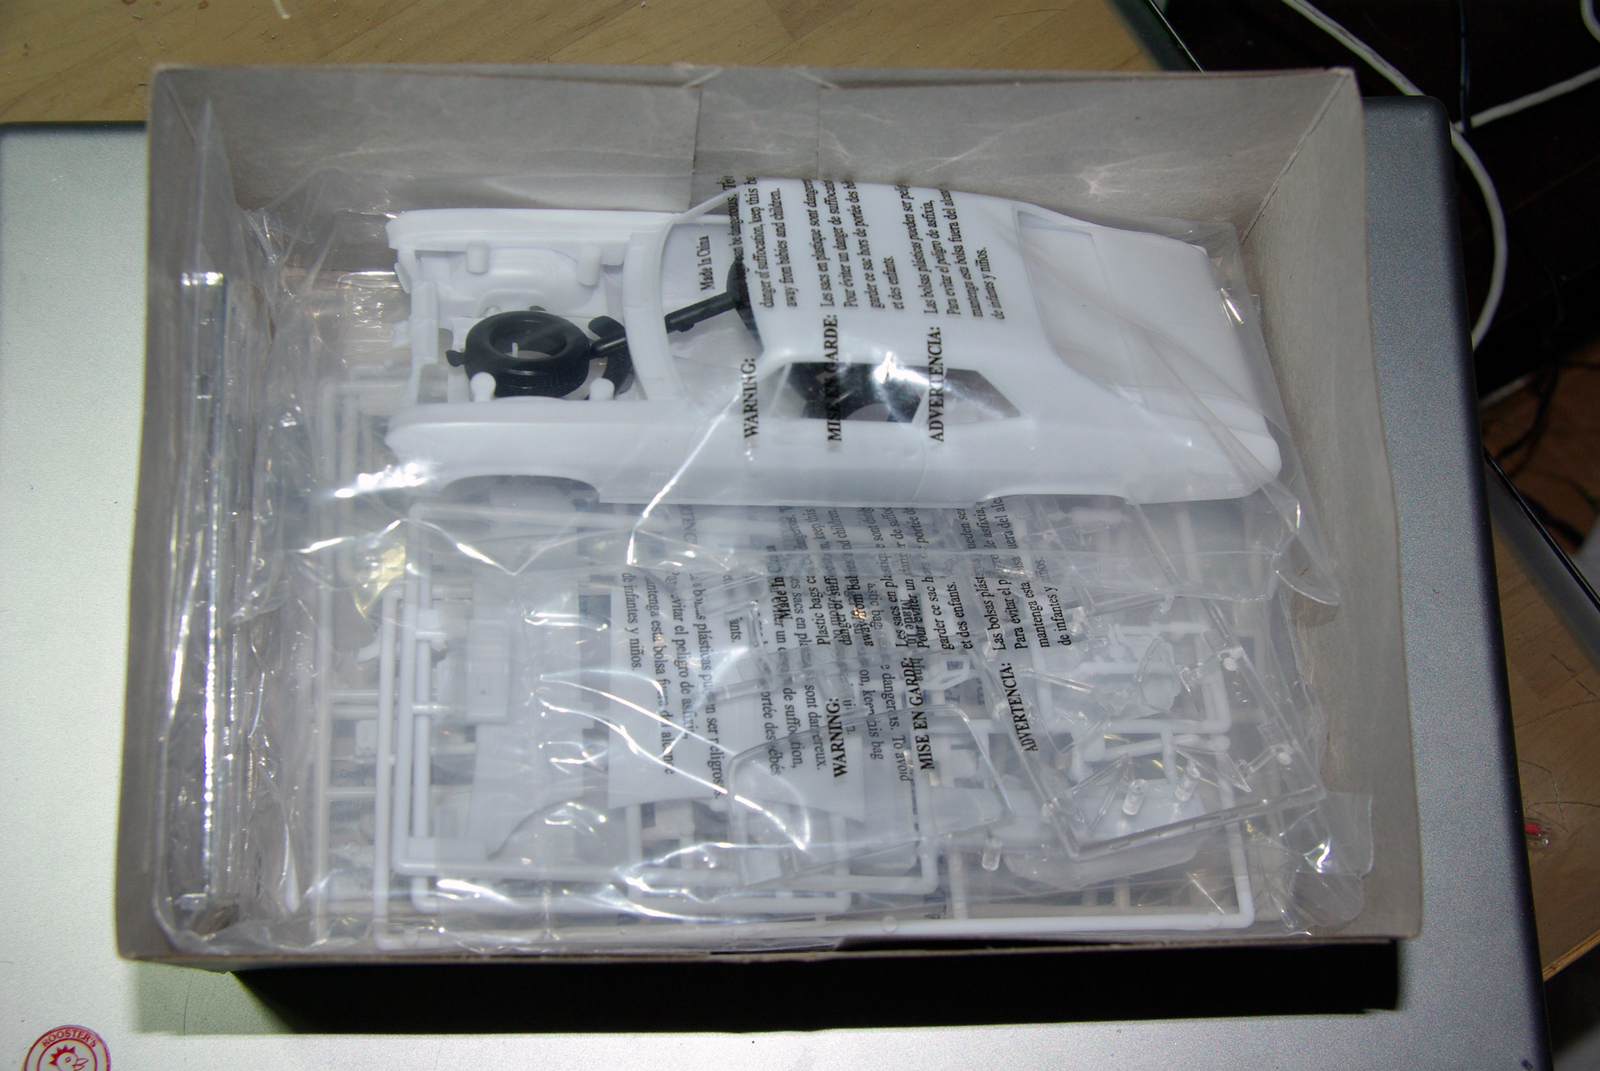
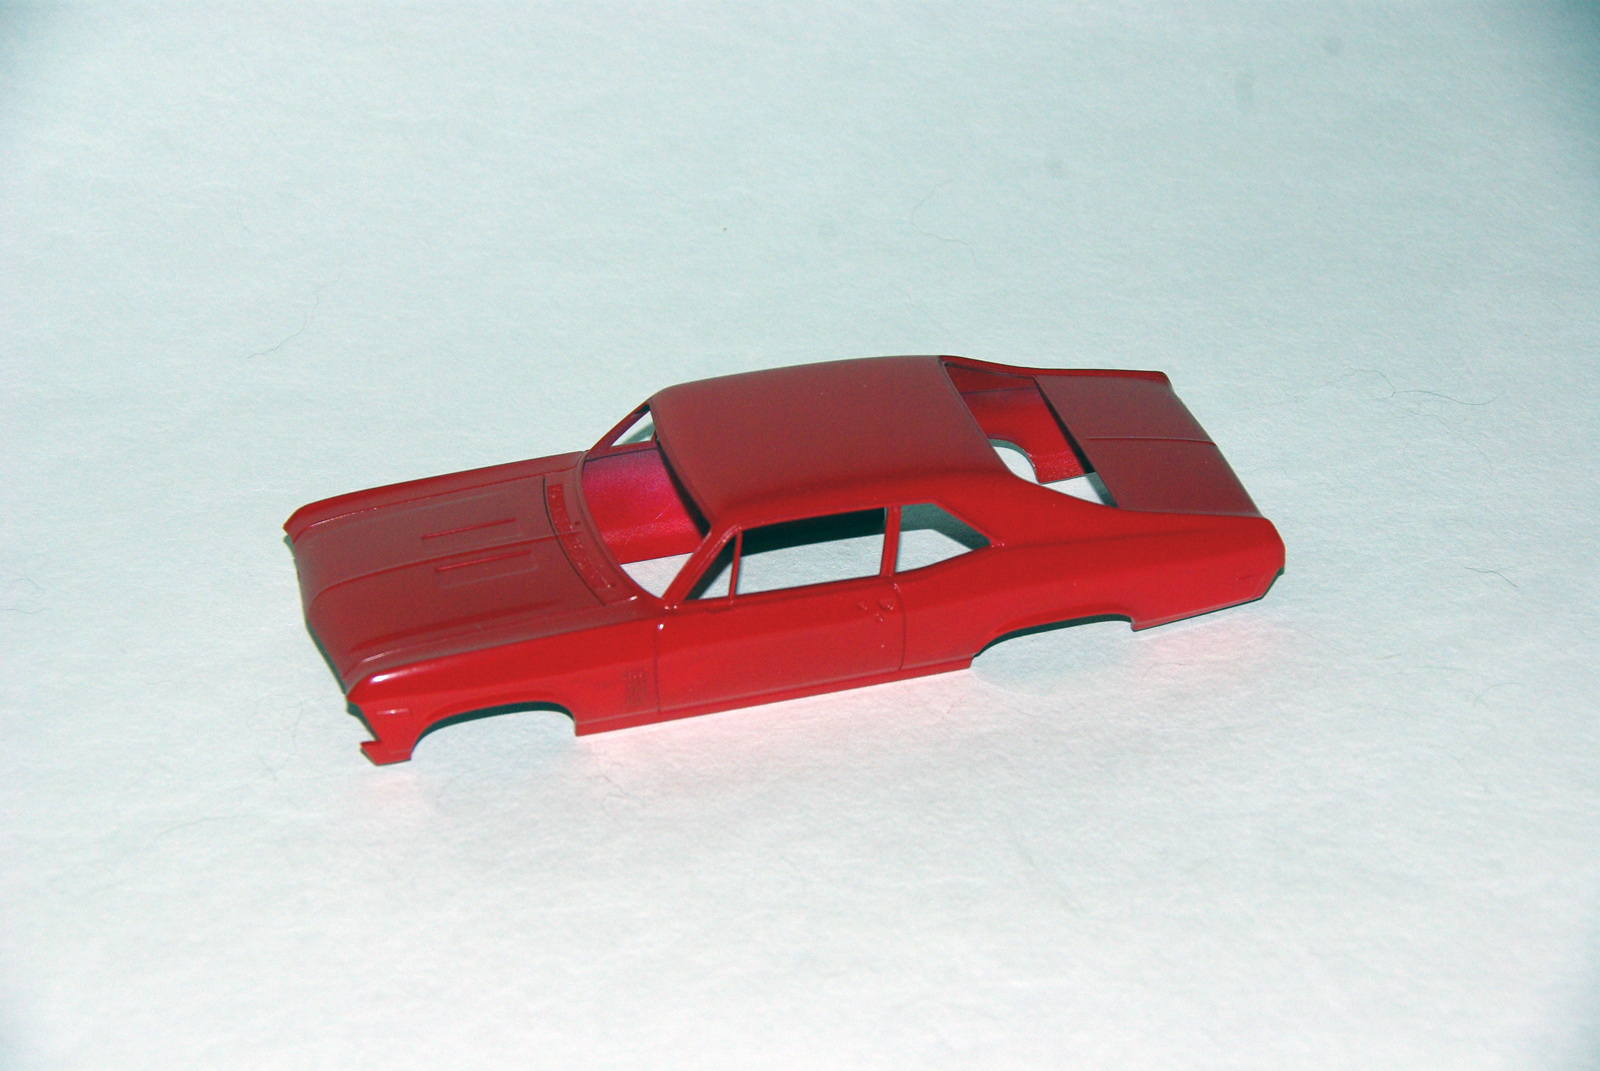
Yenko Chevrolet was a Chevy dealership in Pennsylvania between 1949 and 1982. During the late 1960s and early 1970s, Don Yenko utilized Chevy’s Central Office Production Order system to order cars built with the 427 cubic inch, 425 HP, L-72 Chevy engine. Only about 38 Yenko Novas were built in 1969, and this kit does a remarkable job at representing these incredible vehicles.
This was an easy build. It has its share of instruction-related issues, and there are a few places that I will point out where you have to be careful, but it has some nice features, and goes together nicely.
Instructions
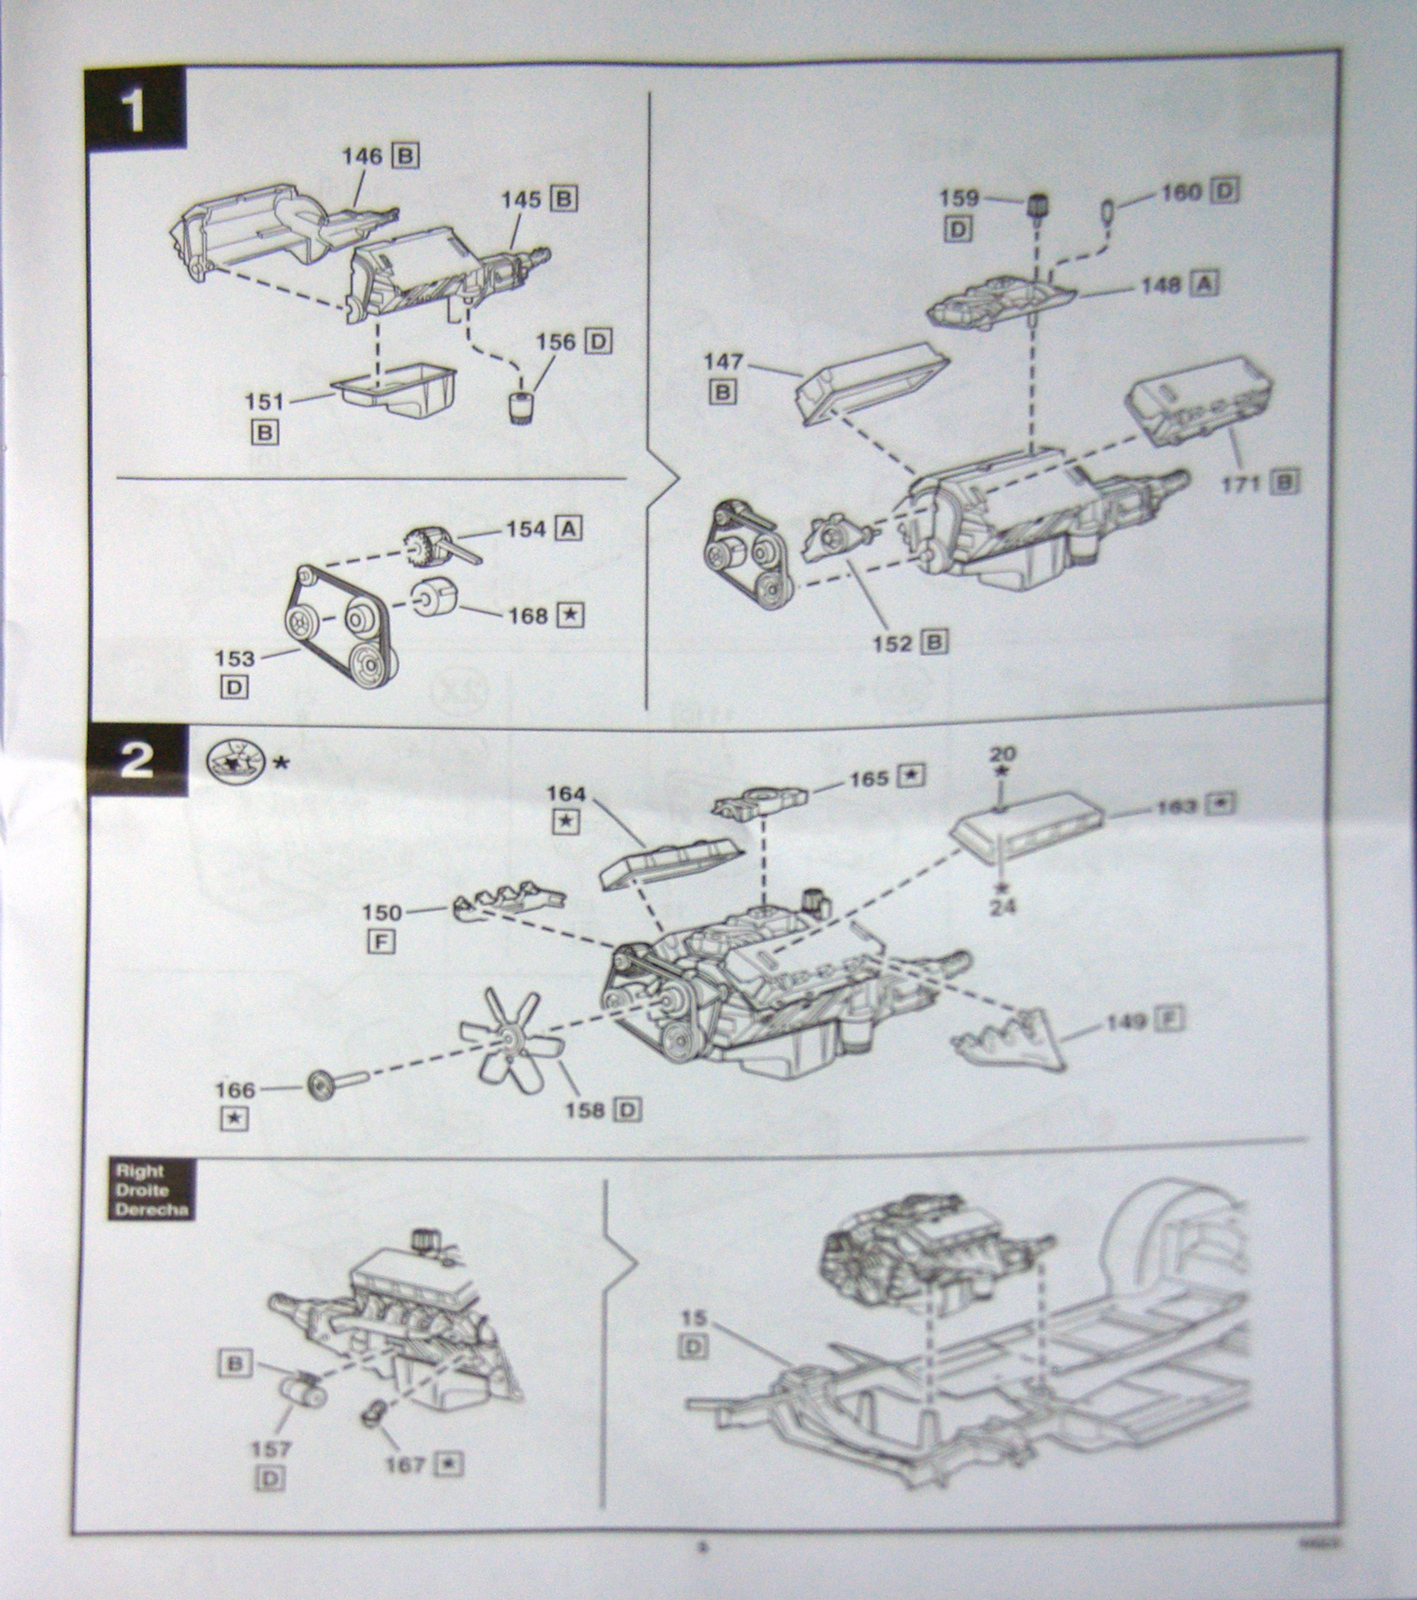
On the instruction-end of things, Revell does a great job. However, one issue that I have with them is that they choose to use an asterisk to denote that there are instructions at the top of the step that you will need to follow; like “decal”, “do not cement”, “use caution”, and things like that. To denote that a particular part is on the “chrome sprue”, they use a star. It seems to me that there are enough shapes out in the world that you wouldn’t need to have two characters that are so close to one another, a star and an asterisk, to call things to modelers’ attention. It gets even more confusing in step 2 when you are supposed to put decals #20 and #24 on chrome part 163.
Features
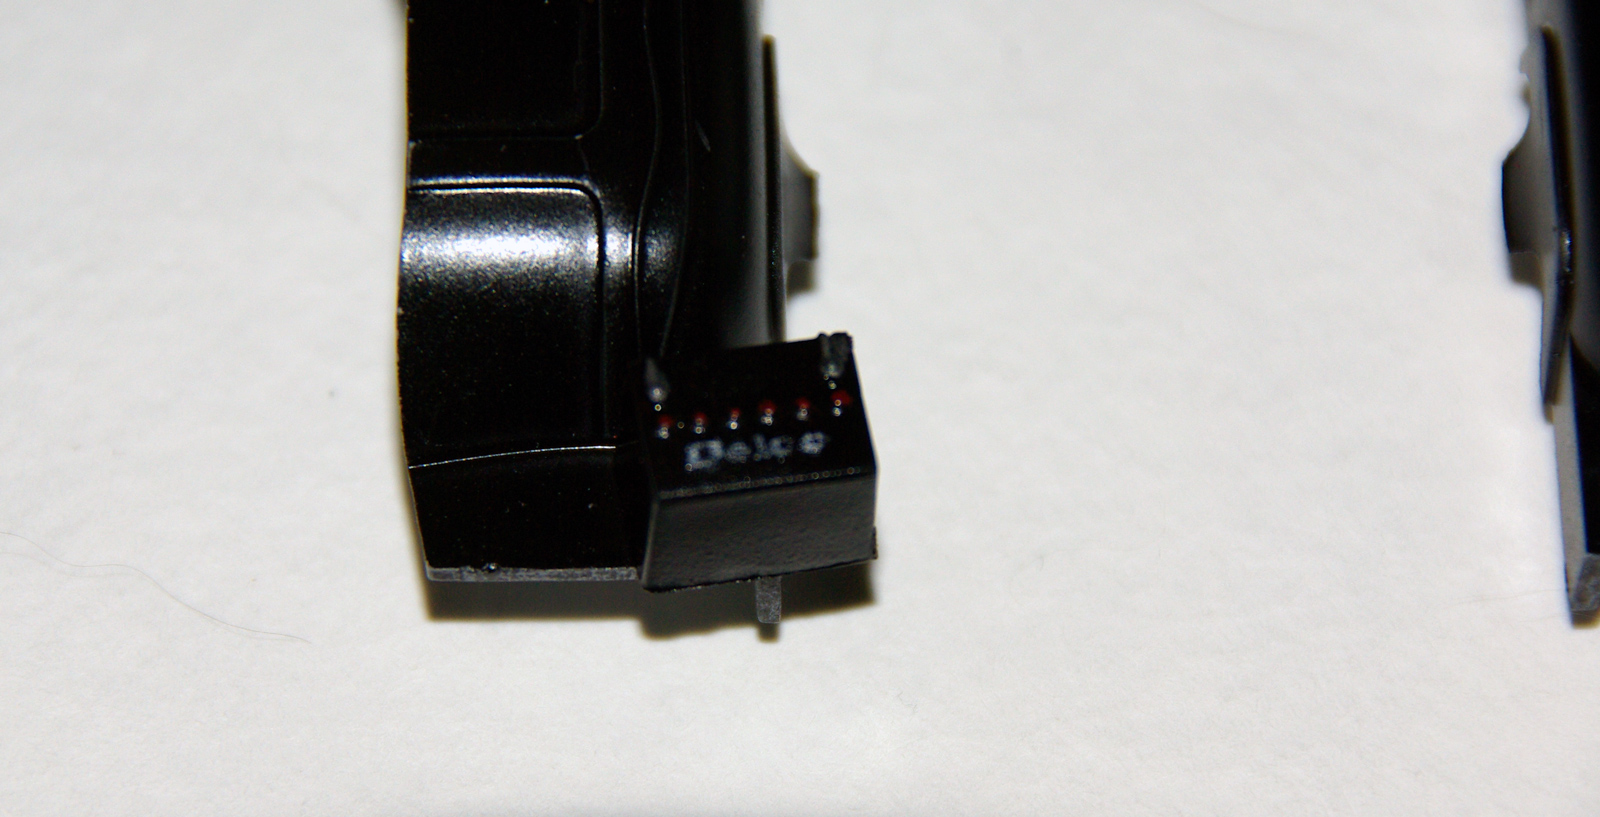
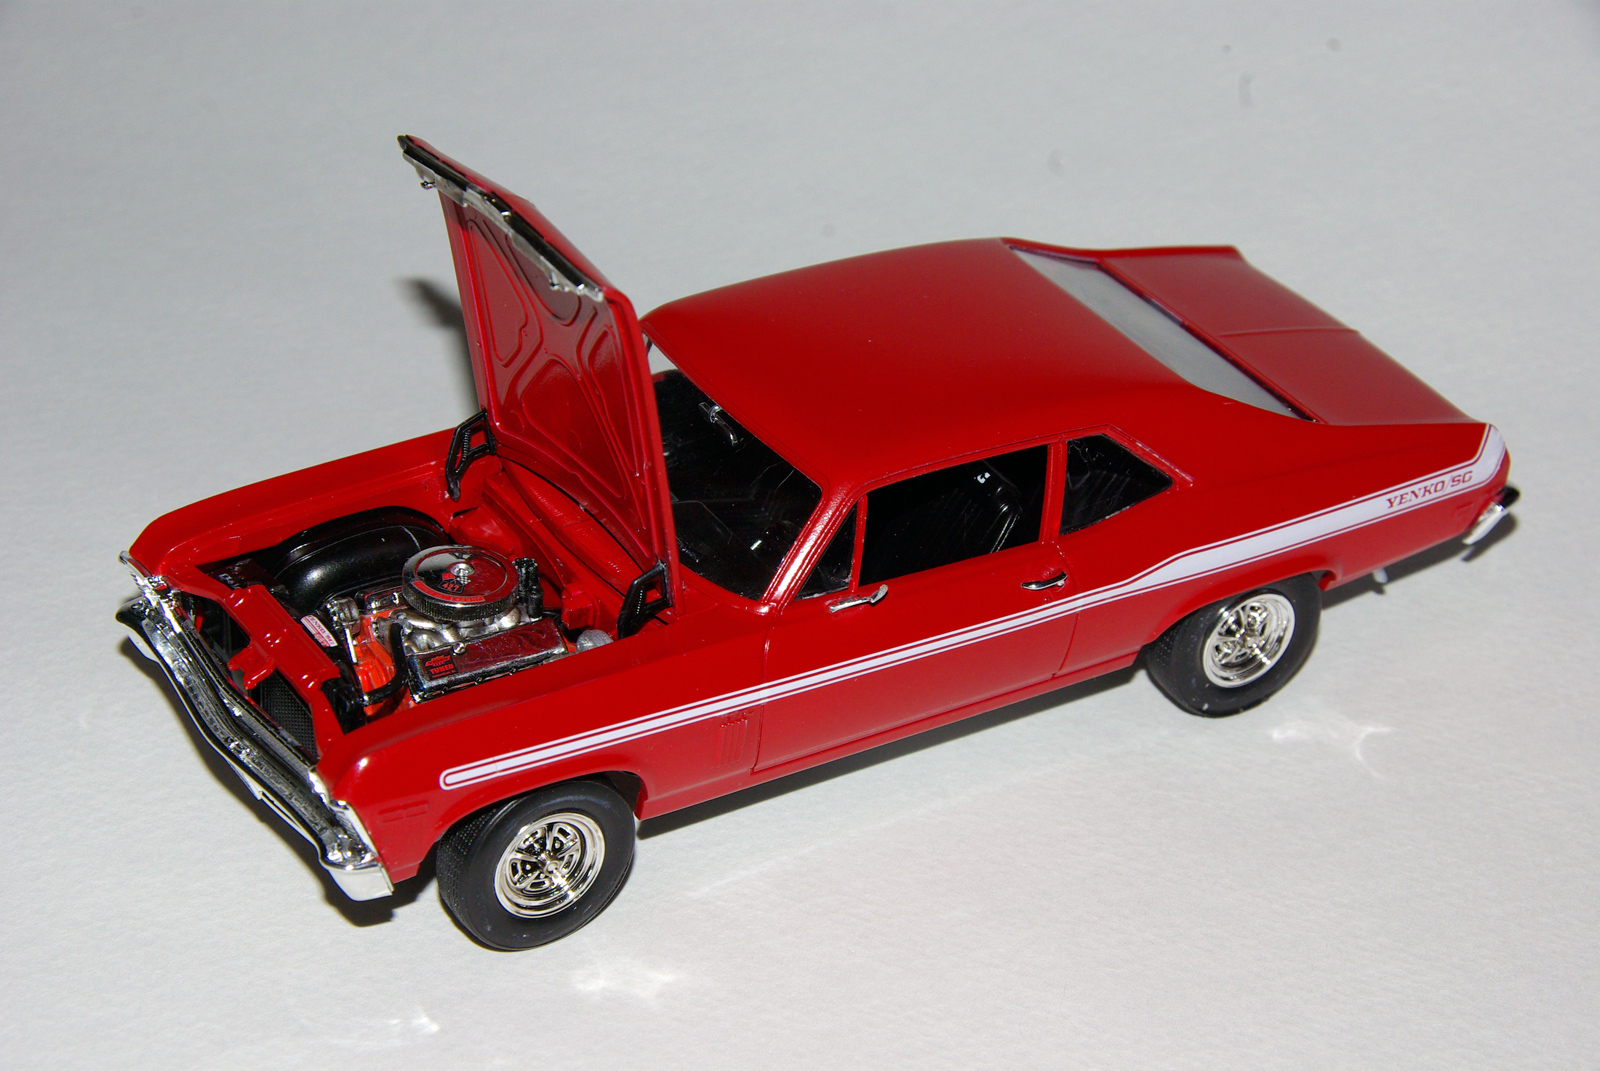
One very nice feature of the valve covers is that the sprue connection point is made on a tab attached to the inside-lip of the cover, so none of the plating has to be taken off to take it off the sprue. However, it is unfortunate that this concept did not find its way in use for other plated parts, such as the carburetor, and most notably the air cleaner. I followed the recommendation of Doug Hamilton from his IPMS-USA Porsche 915 review, and used Tamiya Smoke on the chrome plated parts to increase depth, and to hide places where I had to trim attachment points, flash and so forth. This helped, but the air cleaner has three very noticeable attachment points that clearly could have used the same technique as the valve covers, or even easier, could have just had attachment points on the bottom of the air cleaner where you wouldn’t see them. I am not a model designer, and I doubtless am not addressing myriad problems with doing it that way, but having the attachment points on the outside surface of the cleaner, where it is nearly impossible to texture like the rest of the surrounding surface detail let alone match the plating color, just seems a bit “incautious” to the layman.
Another place where Revell didn’t seem to notice that they were going to be using chrome parts is the piece of chrome under the front of the hood. For whatever reason, they decided to put the sprue connection points on the BOTTOM of the chrome part, instead of on TOP of the part, where it would be hidden against the hood of the car.
The vents in the hood are a nice feature – a little Tamiya smoke or black wash and they look perfect.
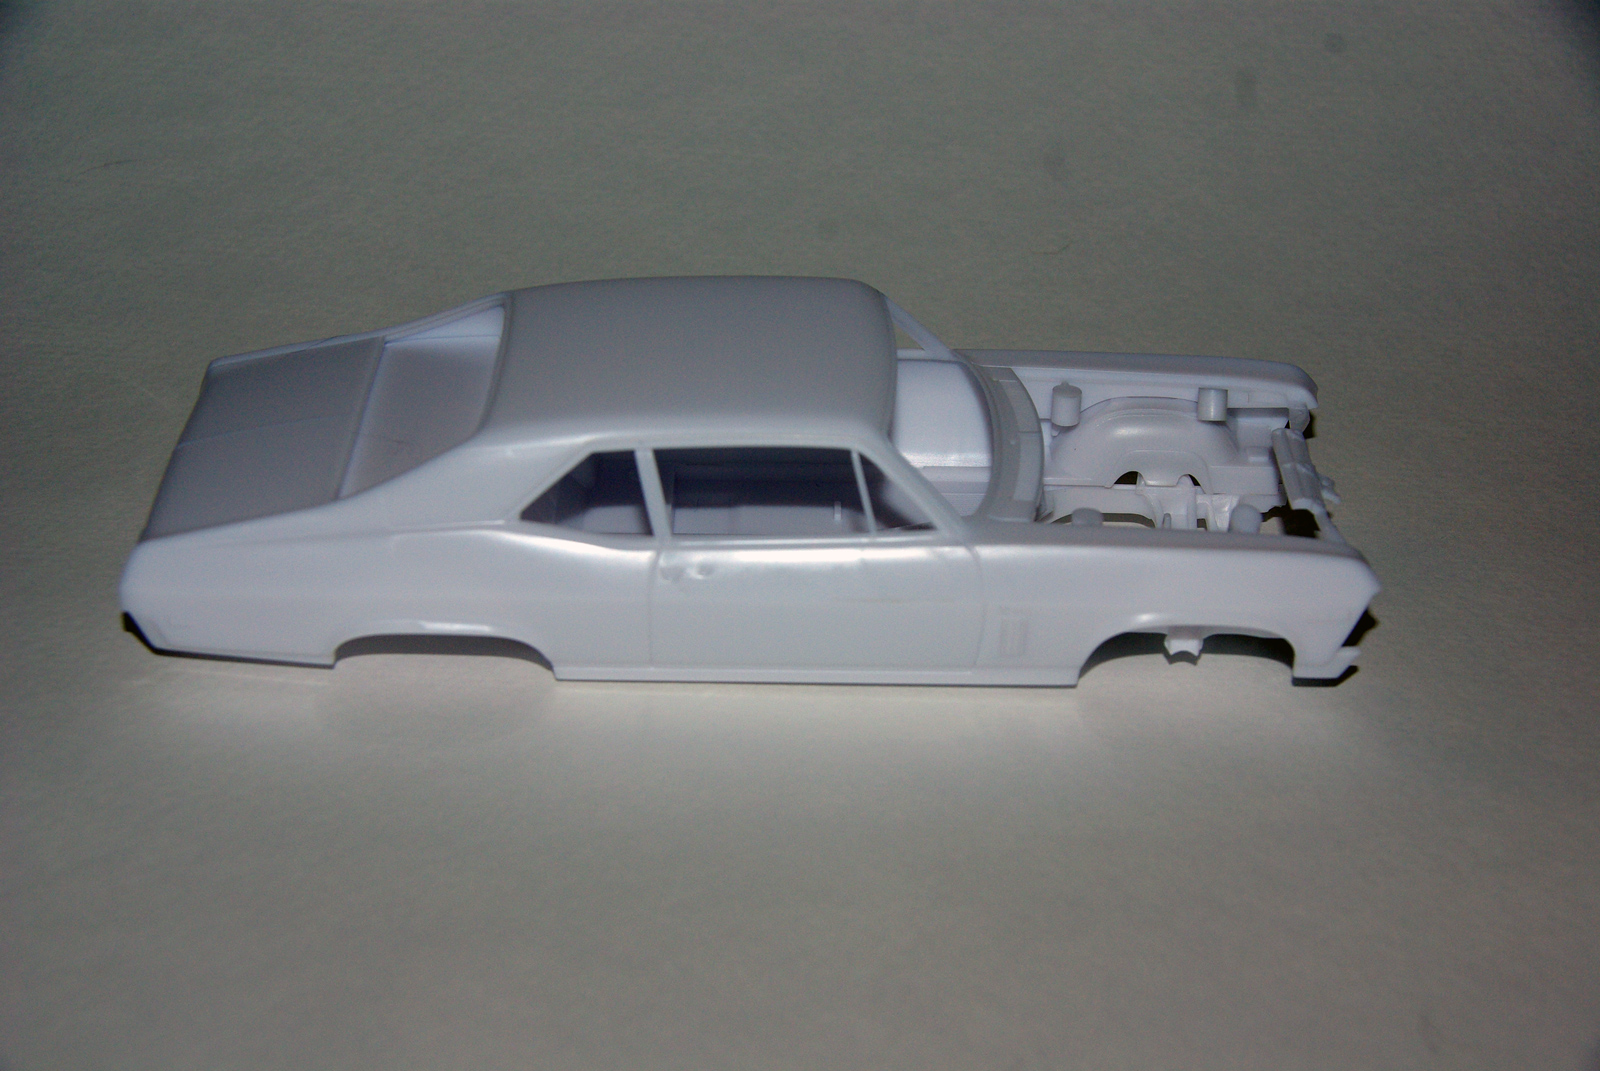
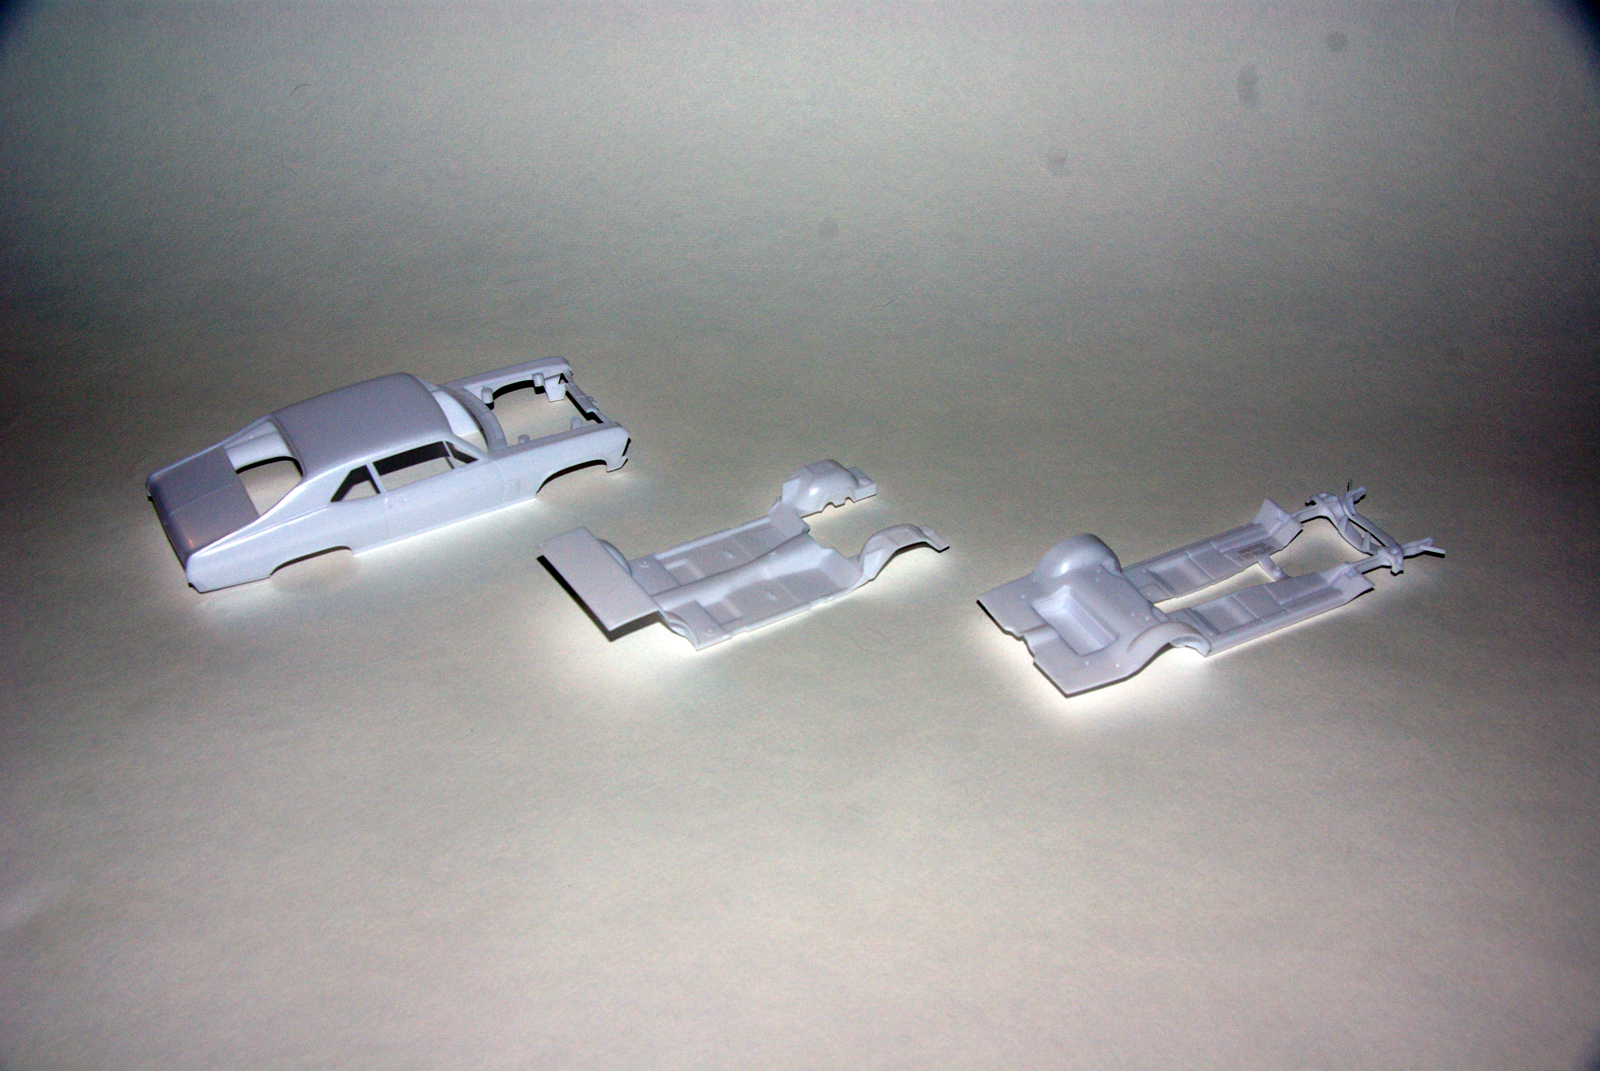
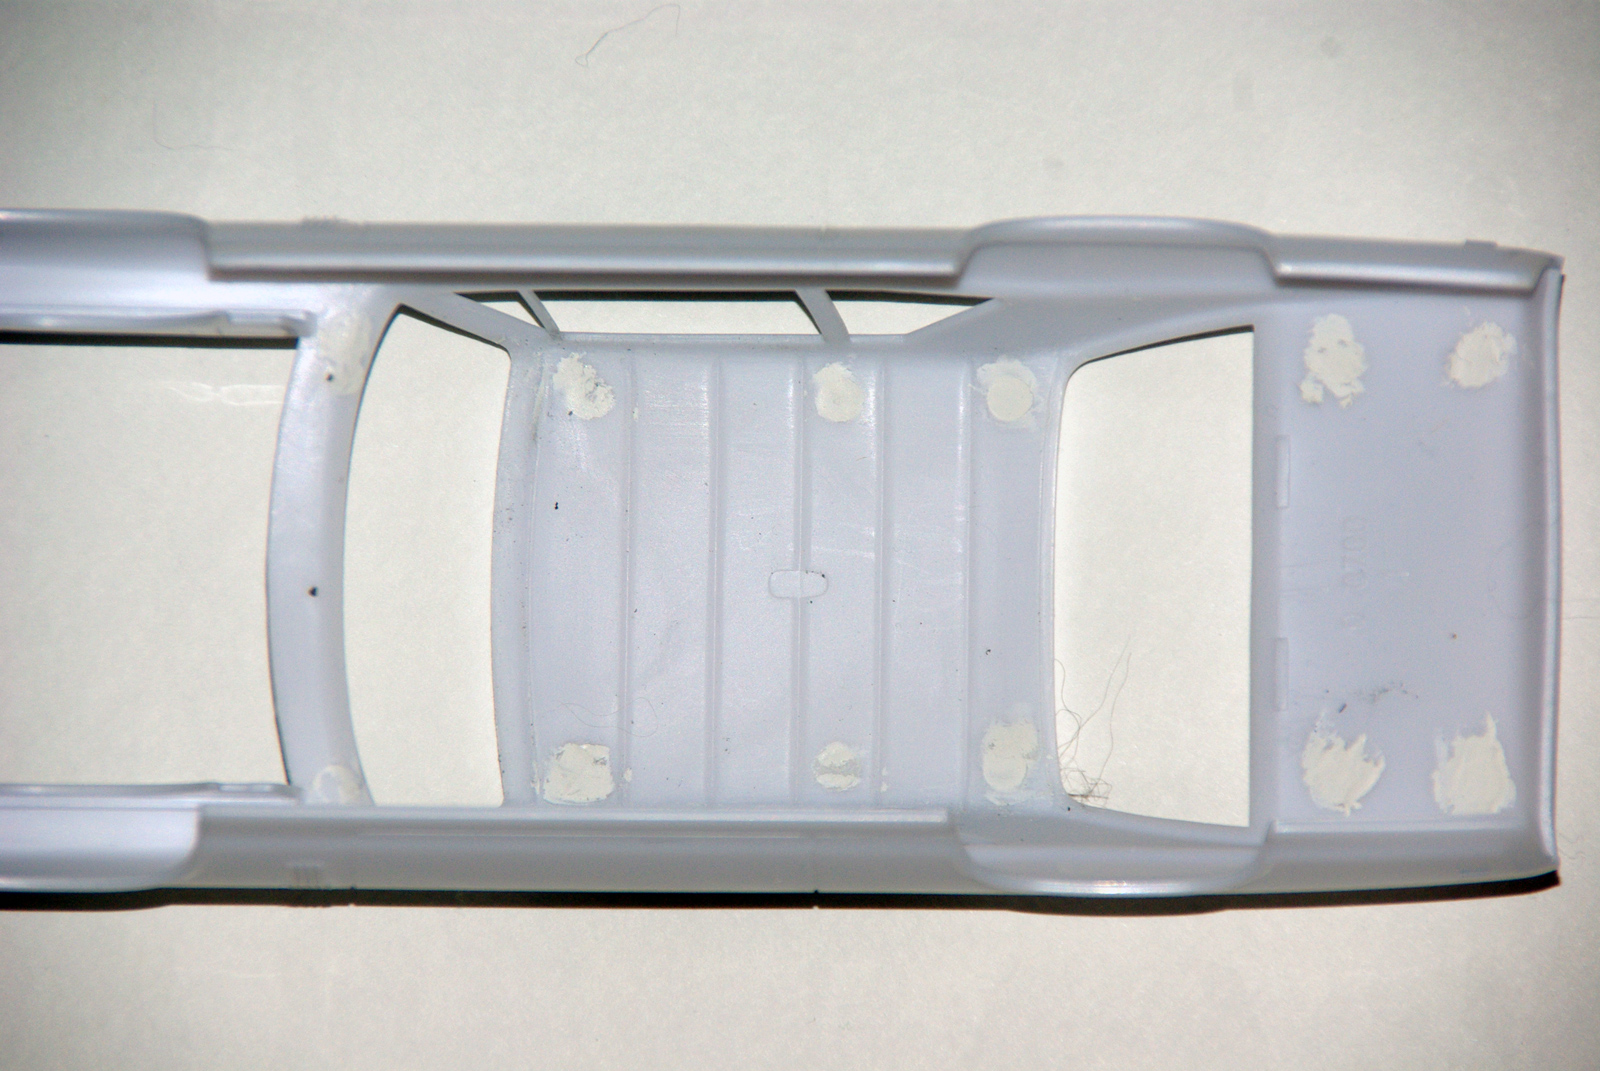
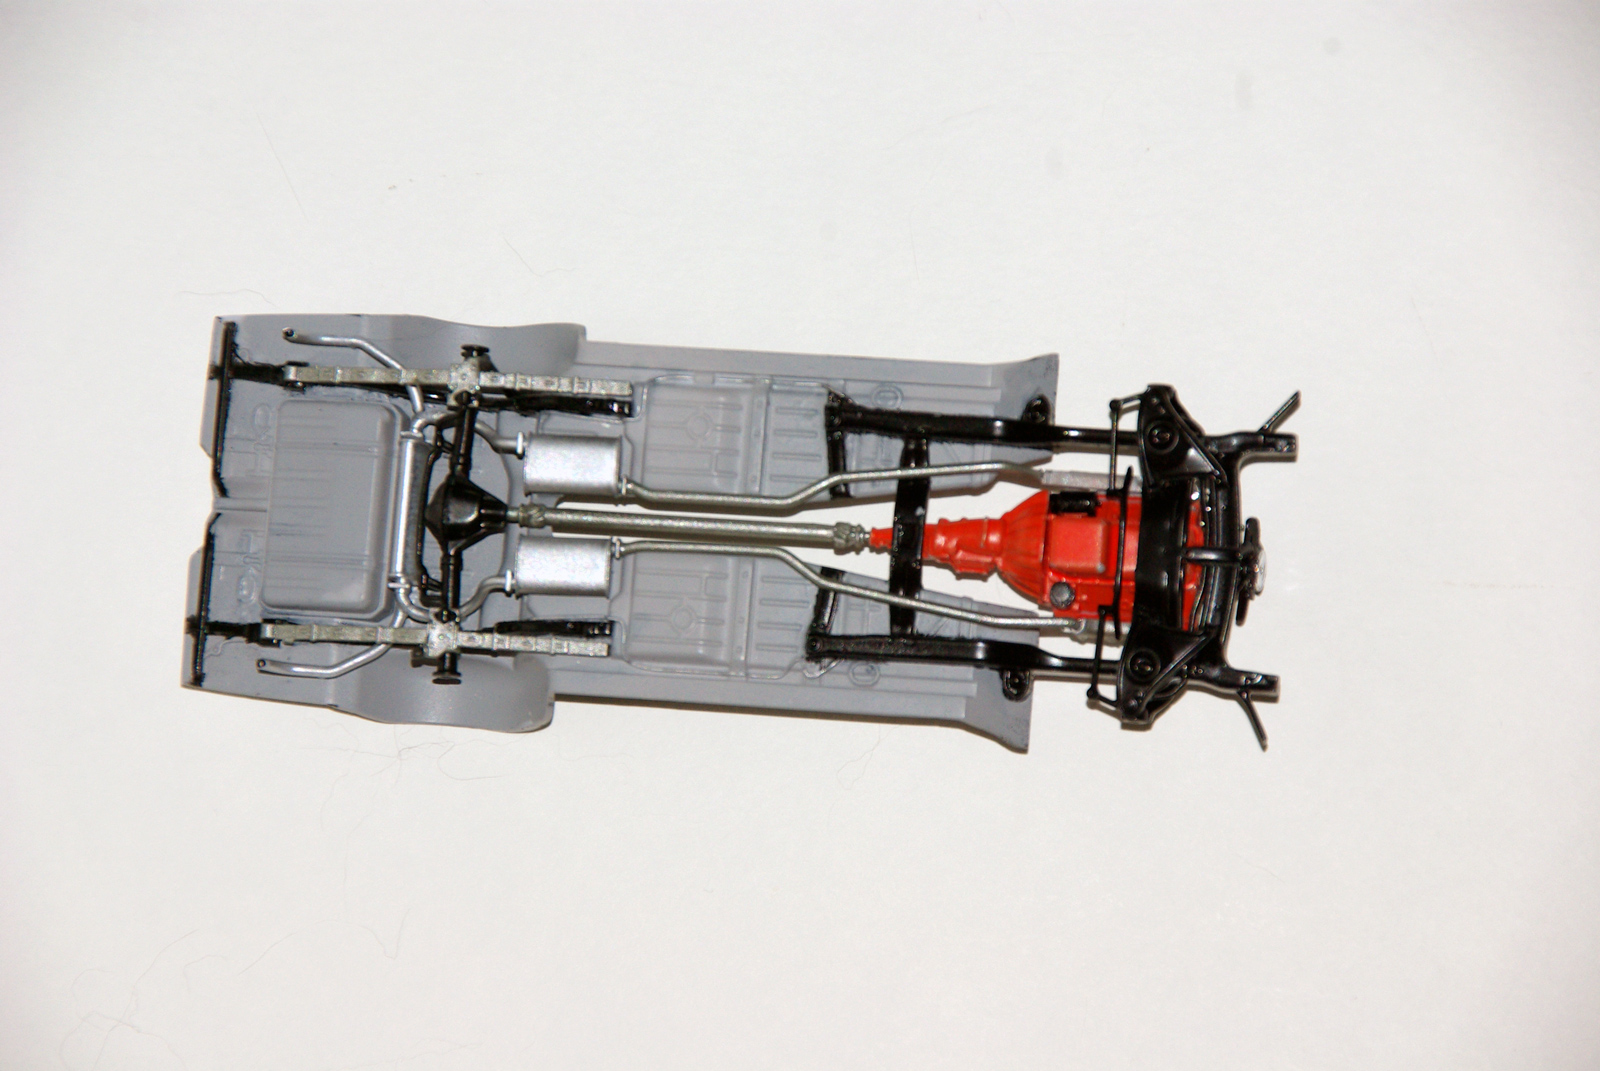
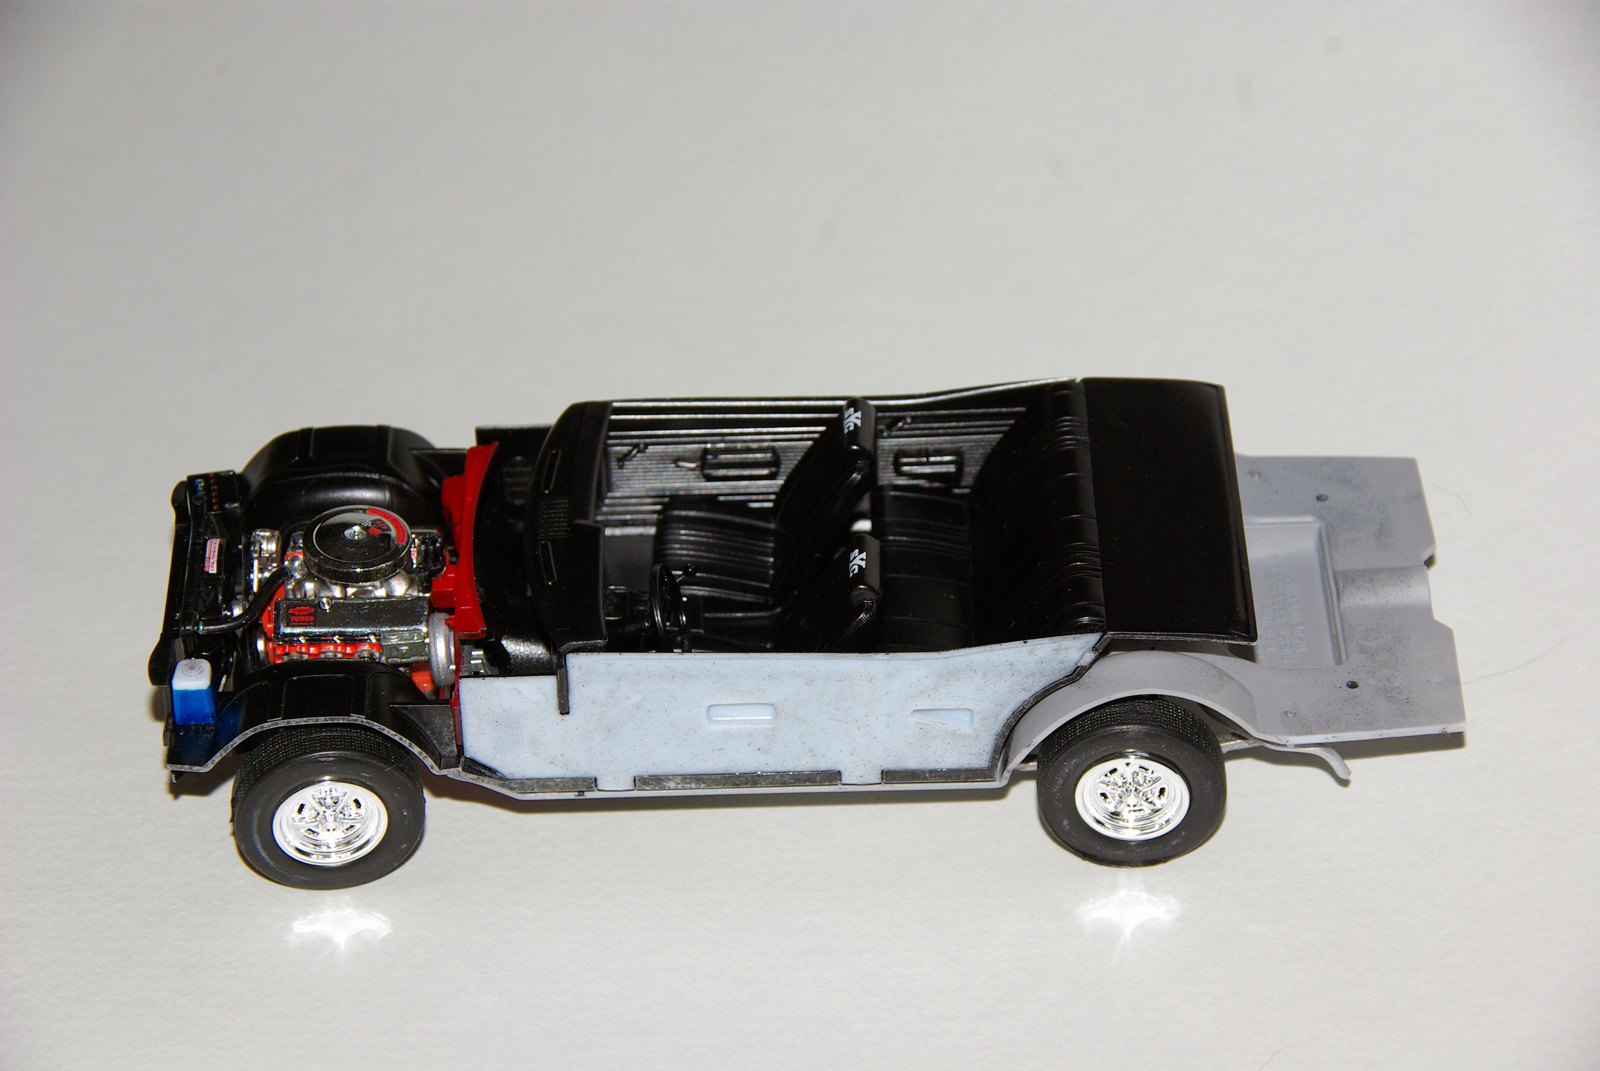
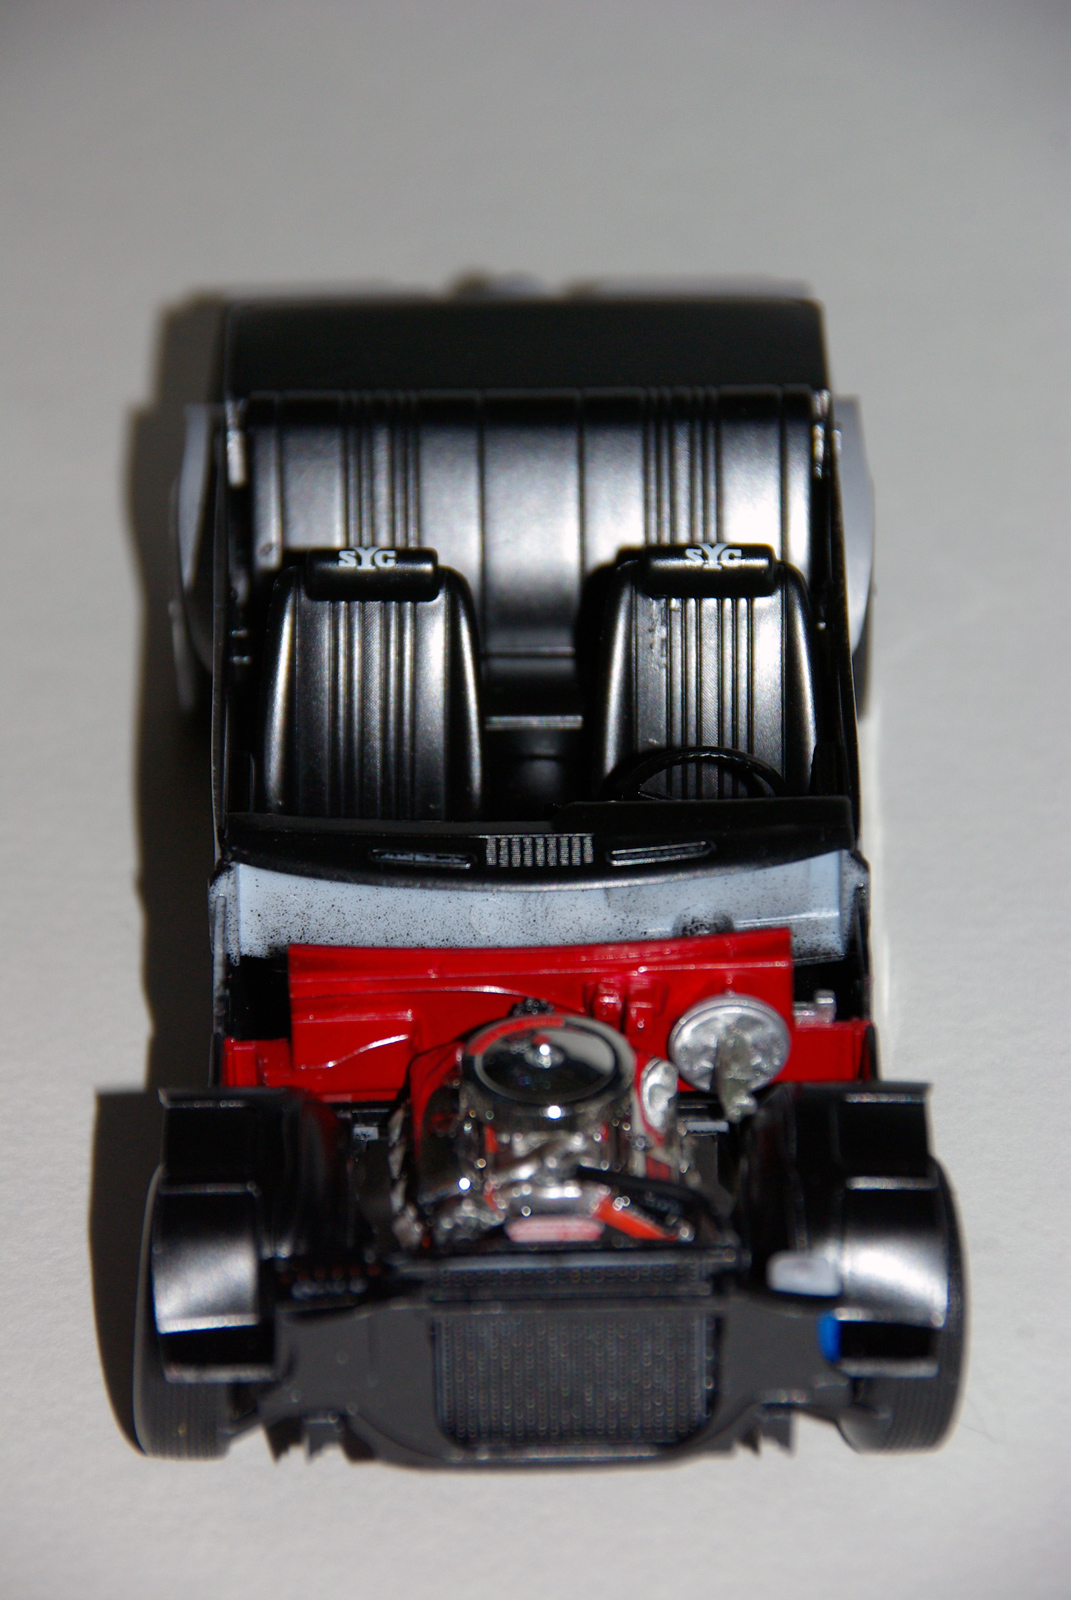
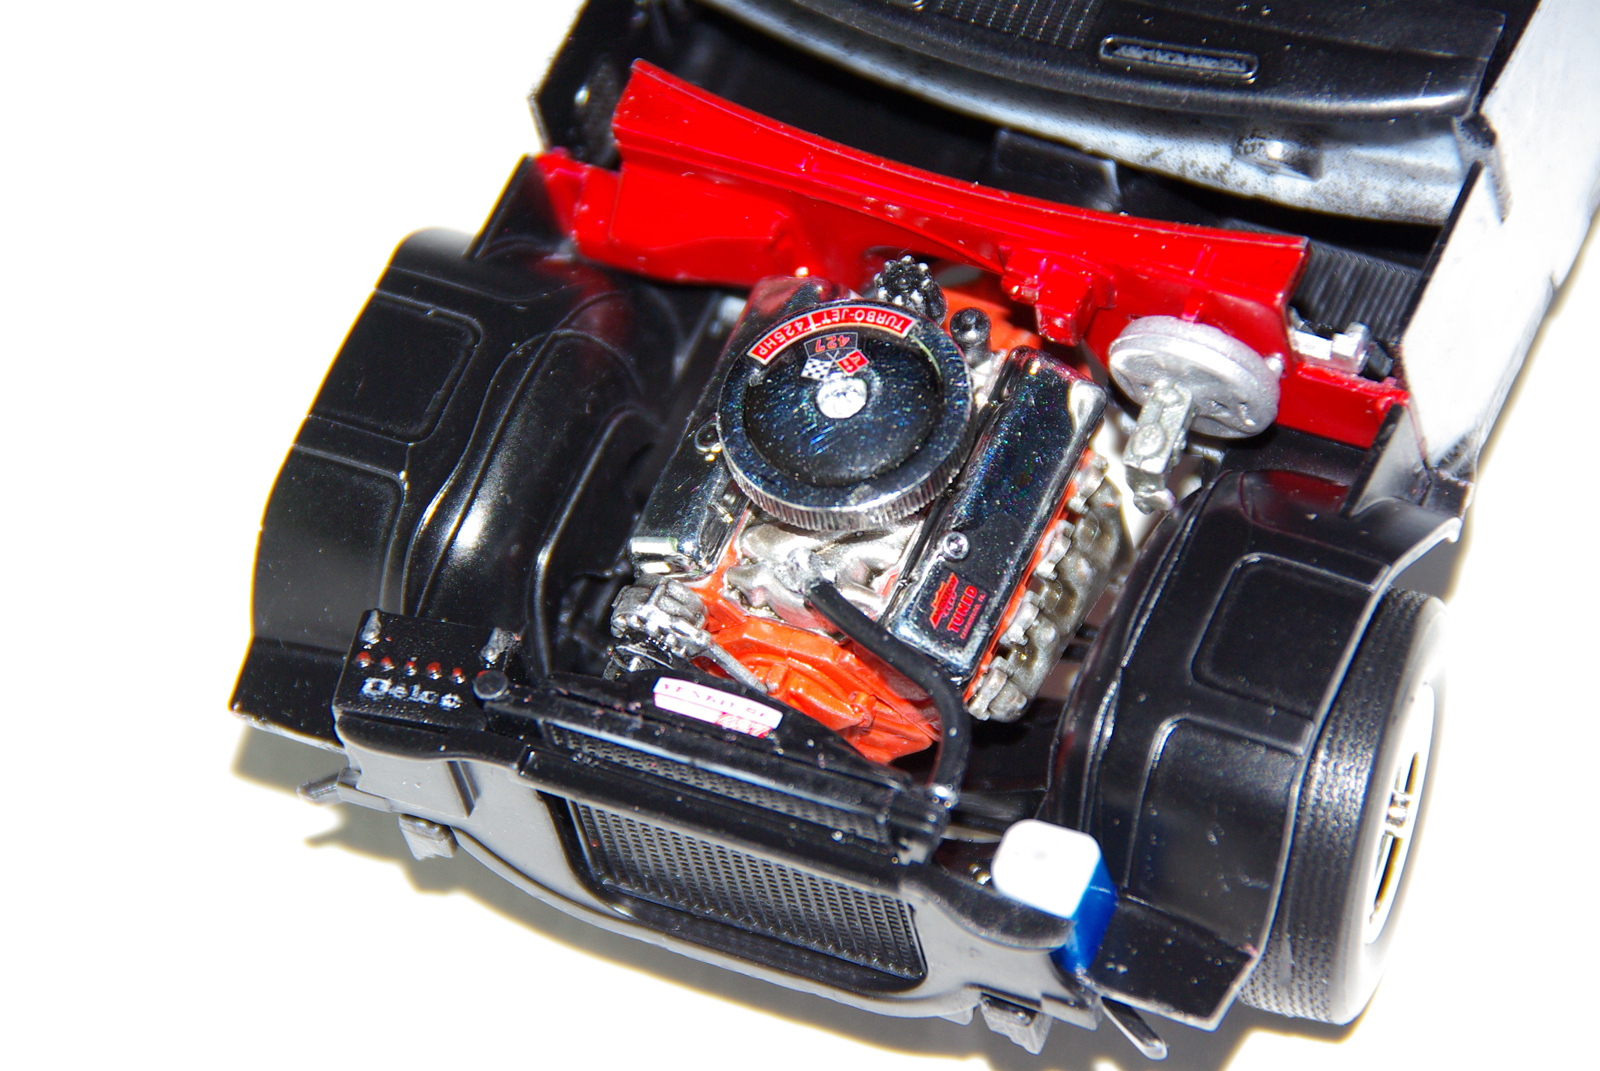
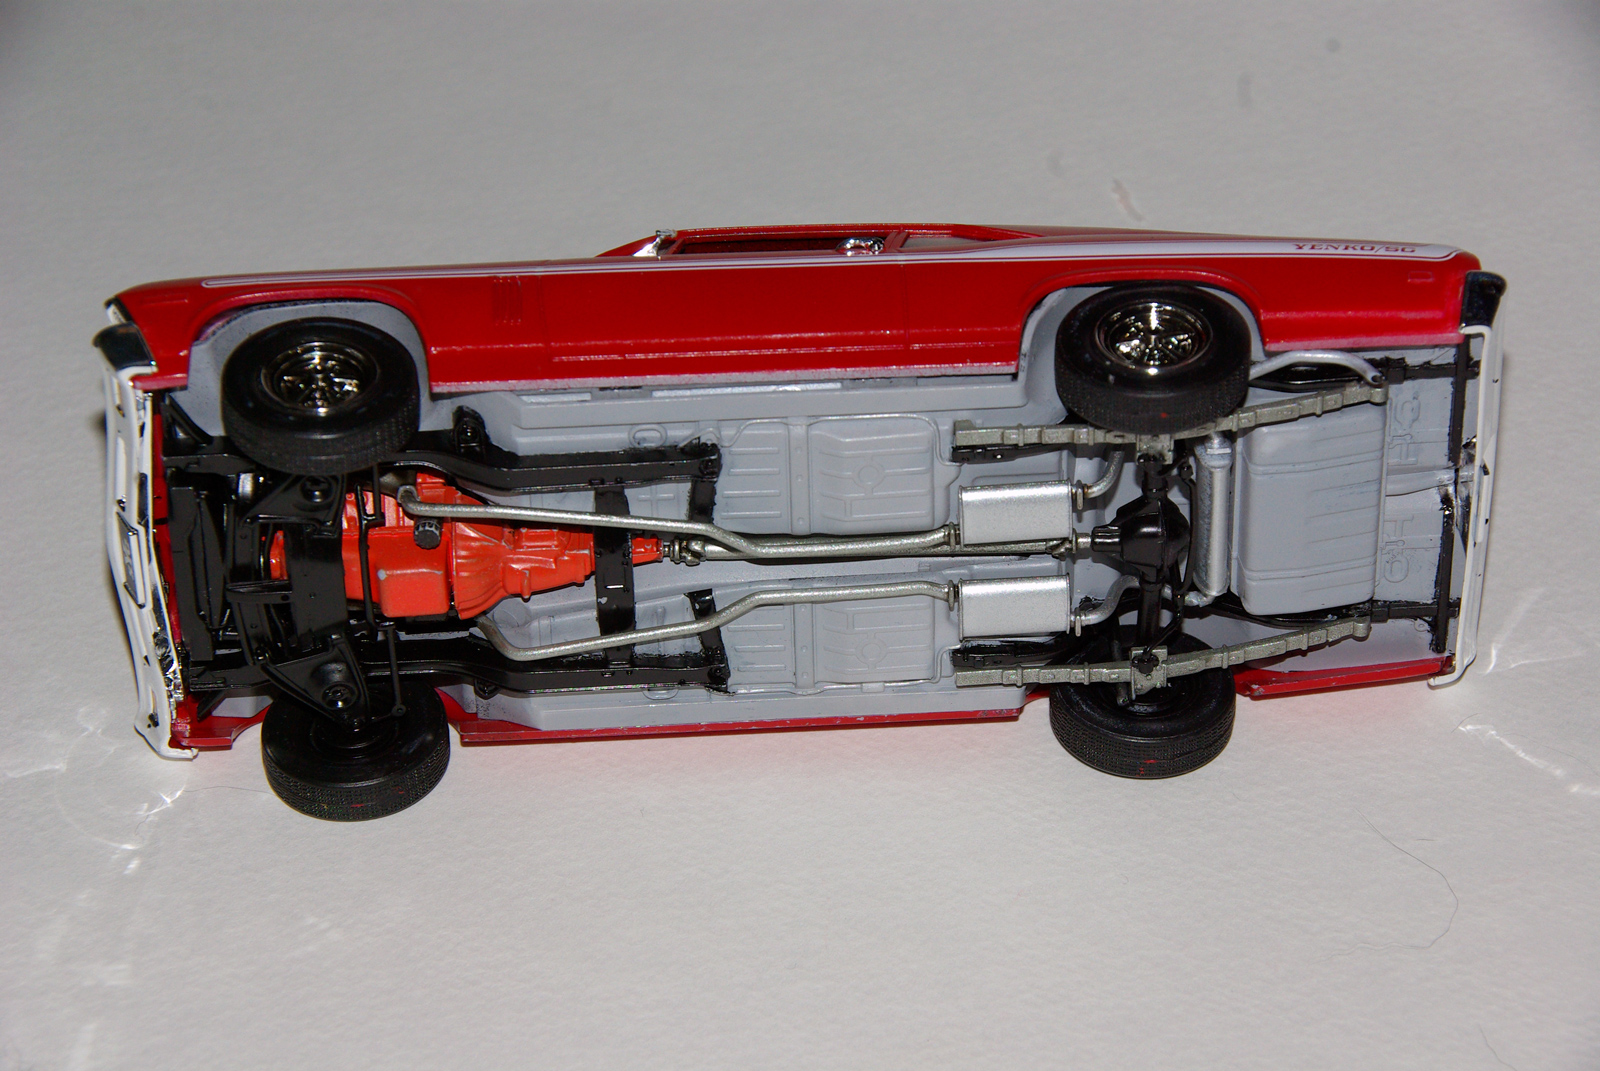
The engine is very well done. The block comes in two halves, but the oil pan is a separate, one-piece unit, and the intake manifold goes on top of the seam at the top of the engine, so there are no places where an unnatural seam exists. The interior is made up of a left and right door panel that fit into slots on the floorboard. The dashboard is a single piece, that nicely accepts a decal for the instrument panel, speedometer, etc. The pedals will take you a bit of dry-fitting to find just the right position, and being that there are no locator pins, you really need to take your time to make sure you have them glued in correctly.
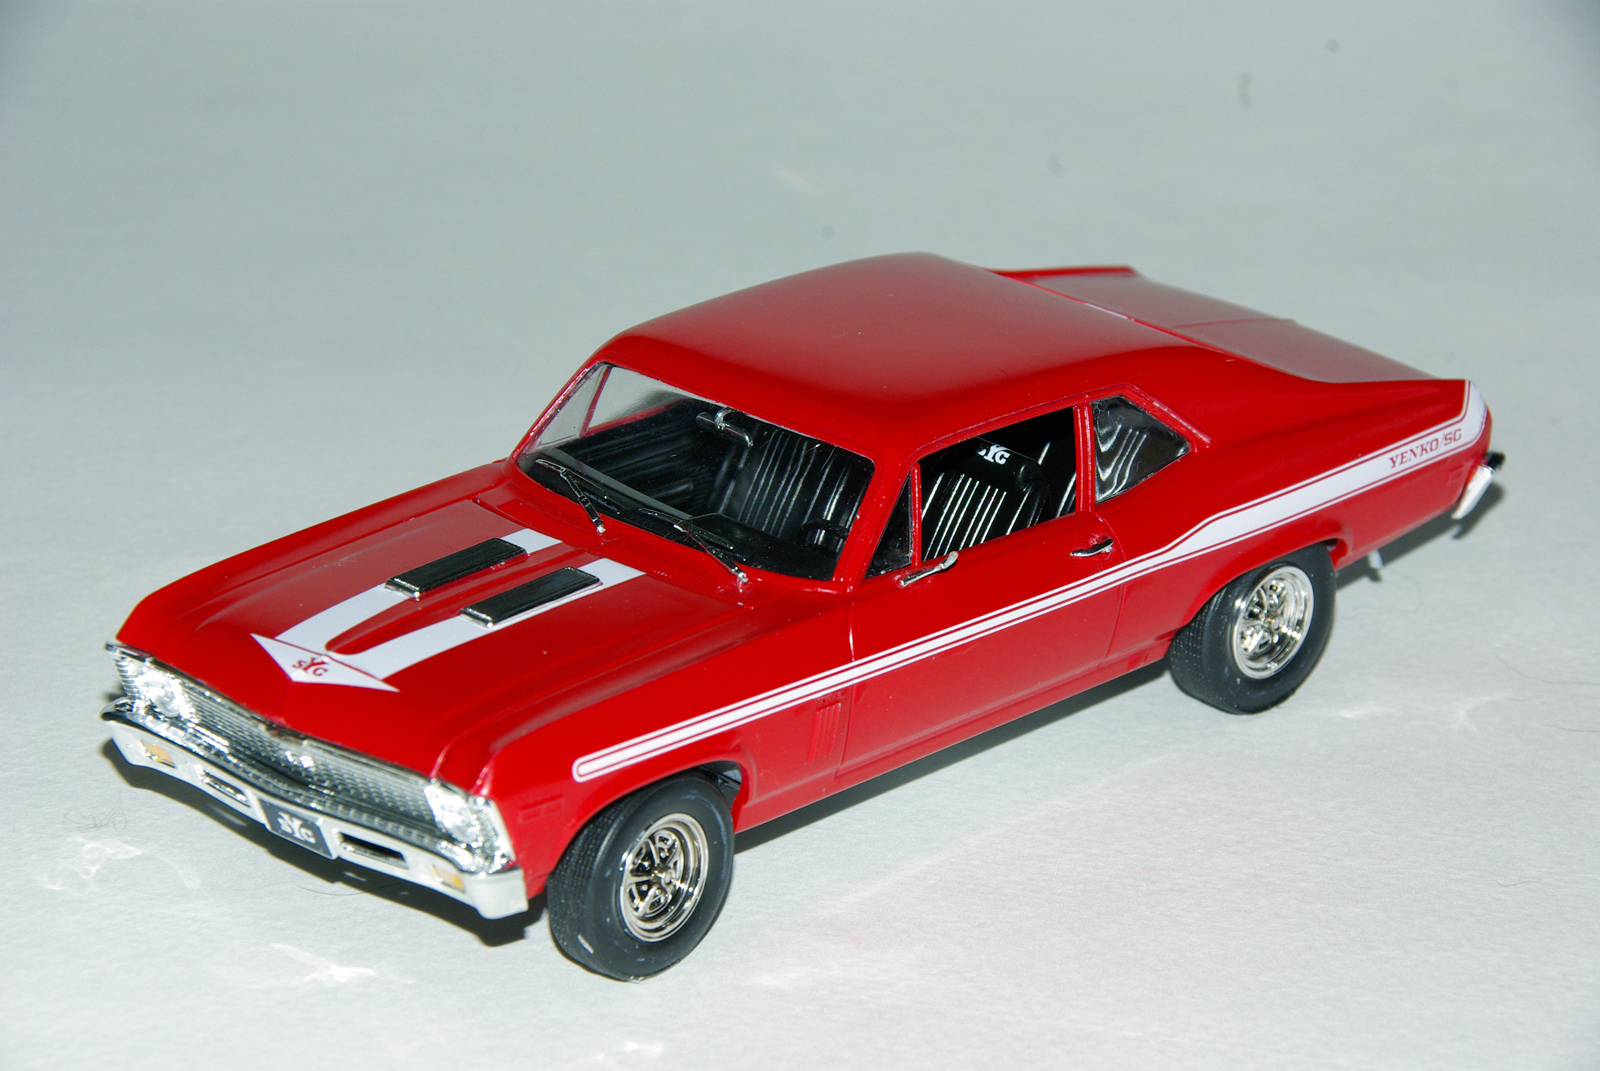
The front bucket seats come in two pieces each, and the fit is rather poor. Again, there are no locator pins, so you have to play with them a bit to find just the right orientation, and you will probably have to either tape or hold them in your fingers until the glue has cured, because if you tried any type of clamp, the clamp will cause the parts to slip, and the assembly will collapse. Once you get the seats in and the Yenko decals on the head rest, you will have a nice clean interior.
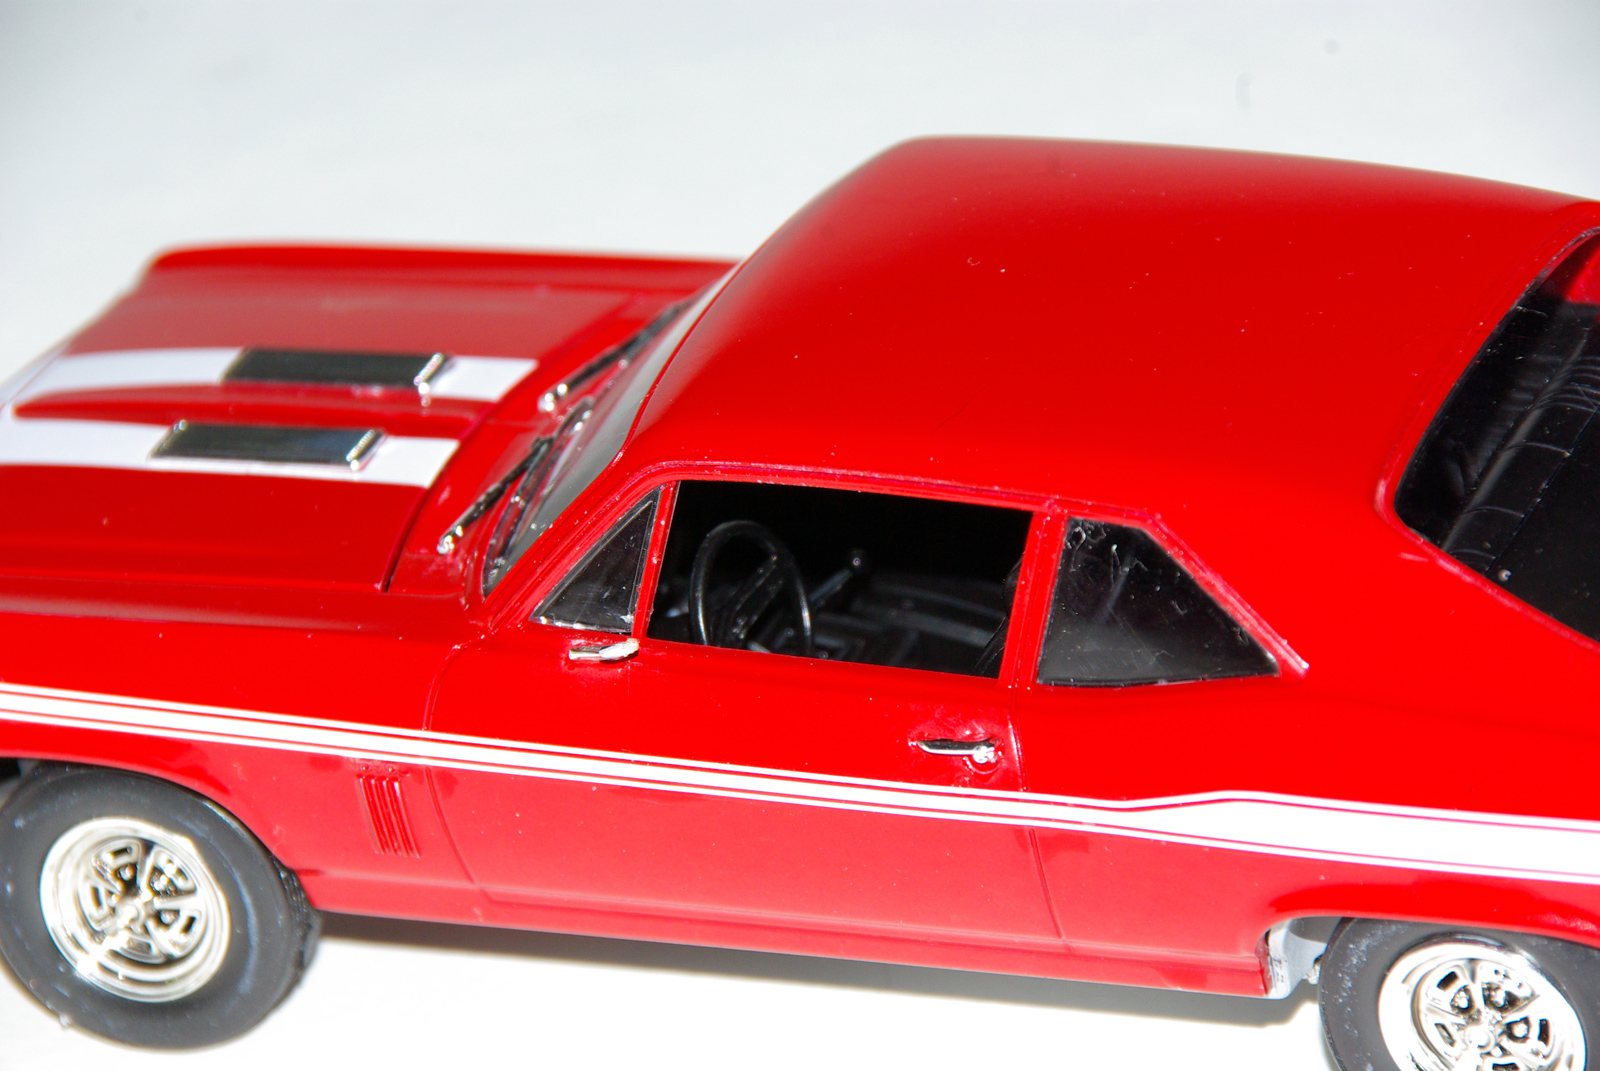
The windows are nicely done. Instead of one big clear piece that glues to the ceiling of the interior, all of the windows in the Nova are separate. I used watch-crystal glue and glued them all in place. Because there is no big piece of clear covering the ceiling, they were able to include a dome light as a nice little feature, although it takes some effort to see it through the windows. The rear-view mirror that attaches to the windshield is a one-piece unit. You will ask yourself why they didn’t make the side mirror as a single piece when you get to the point where you put that on; over and over as it breaks off at the slightest brush of the finger. Just sayin’.
Careful!
There are a few places where you should take a few minutes and check your bearings before continuing. One place is when gluing the cylinder heads to the engine block. I actually transposed my cylinder heads, which if you know what you are looking at, is easy enough to tell. They were really well glued, and to me it wasn’t enough of a sin to cause me to spend extra time taking the assembly apart. Just be careful and make sure the valve covers fit on the proper sides – 163 on the port side, 164 on starboard. The locator bars on top of the cylinder heads are different-sized, so the valve covers will only attach properly to one side of the engine. Check these before gluing the parts together. For me, because the heads were already in place, I just made the locator tabs on the cylinder heads the same smaller size, and the covers fit the opposite cylinders.
The rear-view mirror on the driver-side door, as I said earlier, is cast as two pieces. The connection point for these two pieces is the tip of the mirror bracket – what, less than 1/64 of an inch or something? So you will want to put this on VERY last, with something like Gator Glue that has a little give.
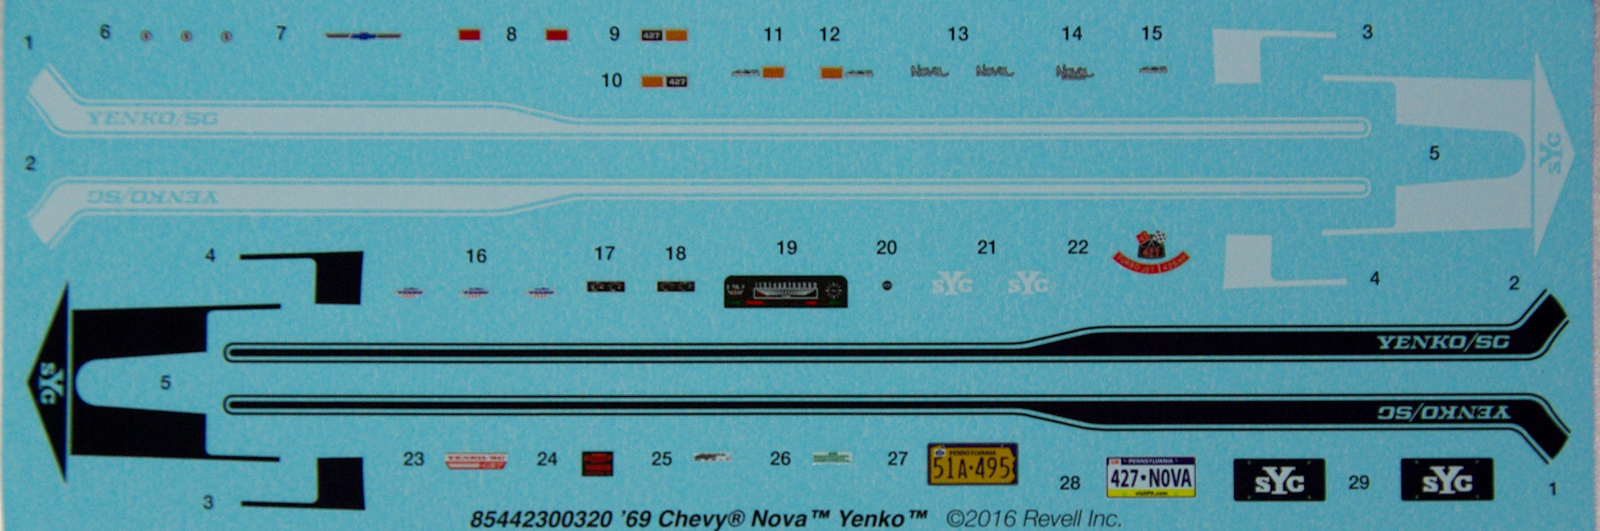
And now time for a confession. I am terrible at putting on really long decals. I took plenty of pictures of the car prior to applying decals, just in case I messed them up, so I could turn in the review without decals. Well, I did have the two long decals on the sides tear – probably more of a “me-factor” than the decals – but they butted up against their torn counterparts pretty well, so you can hardly notice them unless you are looking. Just be careful with the long decals, and make sure not to move them without copious amounts of water to allow them to float into place.
Oh, and if you are not a car modeler by trade, you should apply BareMetal Foil to the window frames. I neglected to, and received a firm, “tsk, tsk, tsk...” by the “car guys” when I brought the model in to my IPMS chapter. I don’t build cars often, so I didn’t catch this omission until the end.
Should I buy it?!
I really enjoyed this build. The kit says it is a Skill Level 5. I’m not sure I can agree with that (I think 2-3?), although there are some parts that do not have positioning pins, and I suppose that those could be frustrating to a modeler who doesn’t have just a few kits under their belt. The output, even with my mediocre modeling skills, turned out nicely, and I wouldn’t hesitate building this kit again.
Nice work, Revell!
Thank you, Revell and IPMS, for letting me review the Yenko Nova!
Photos