Reviews
Armor
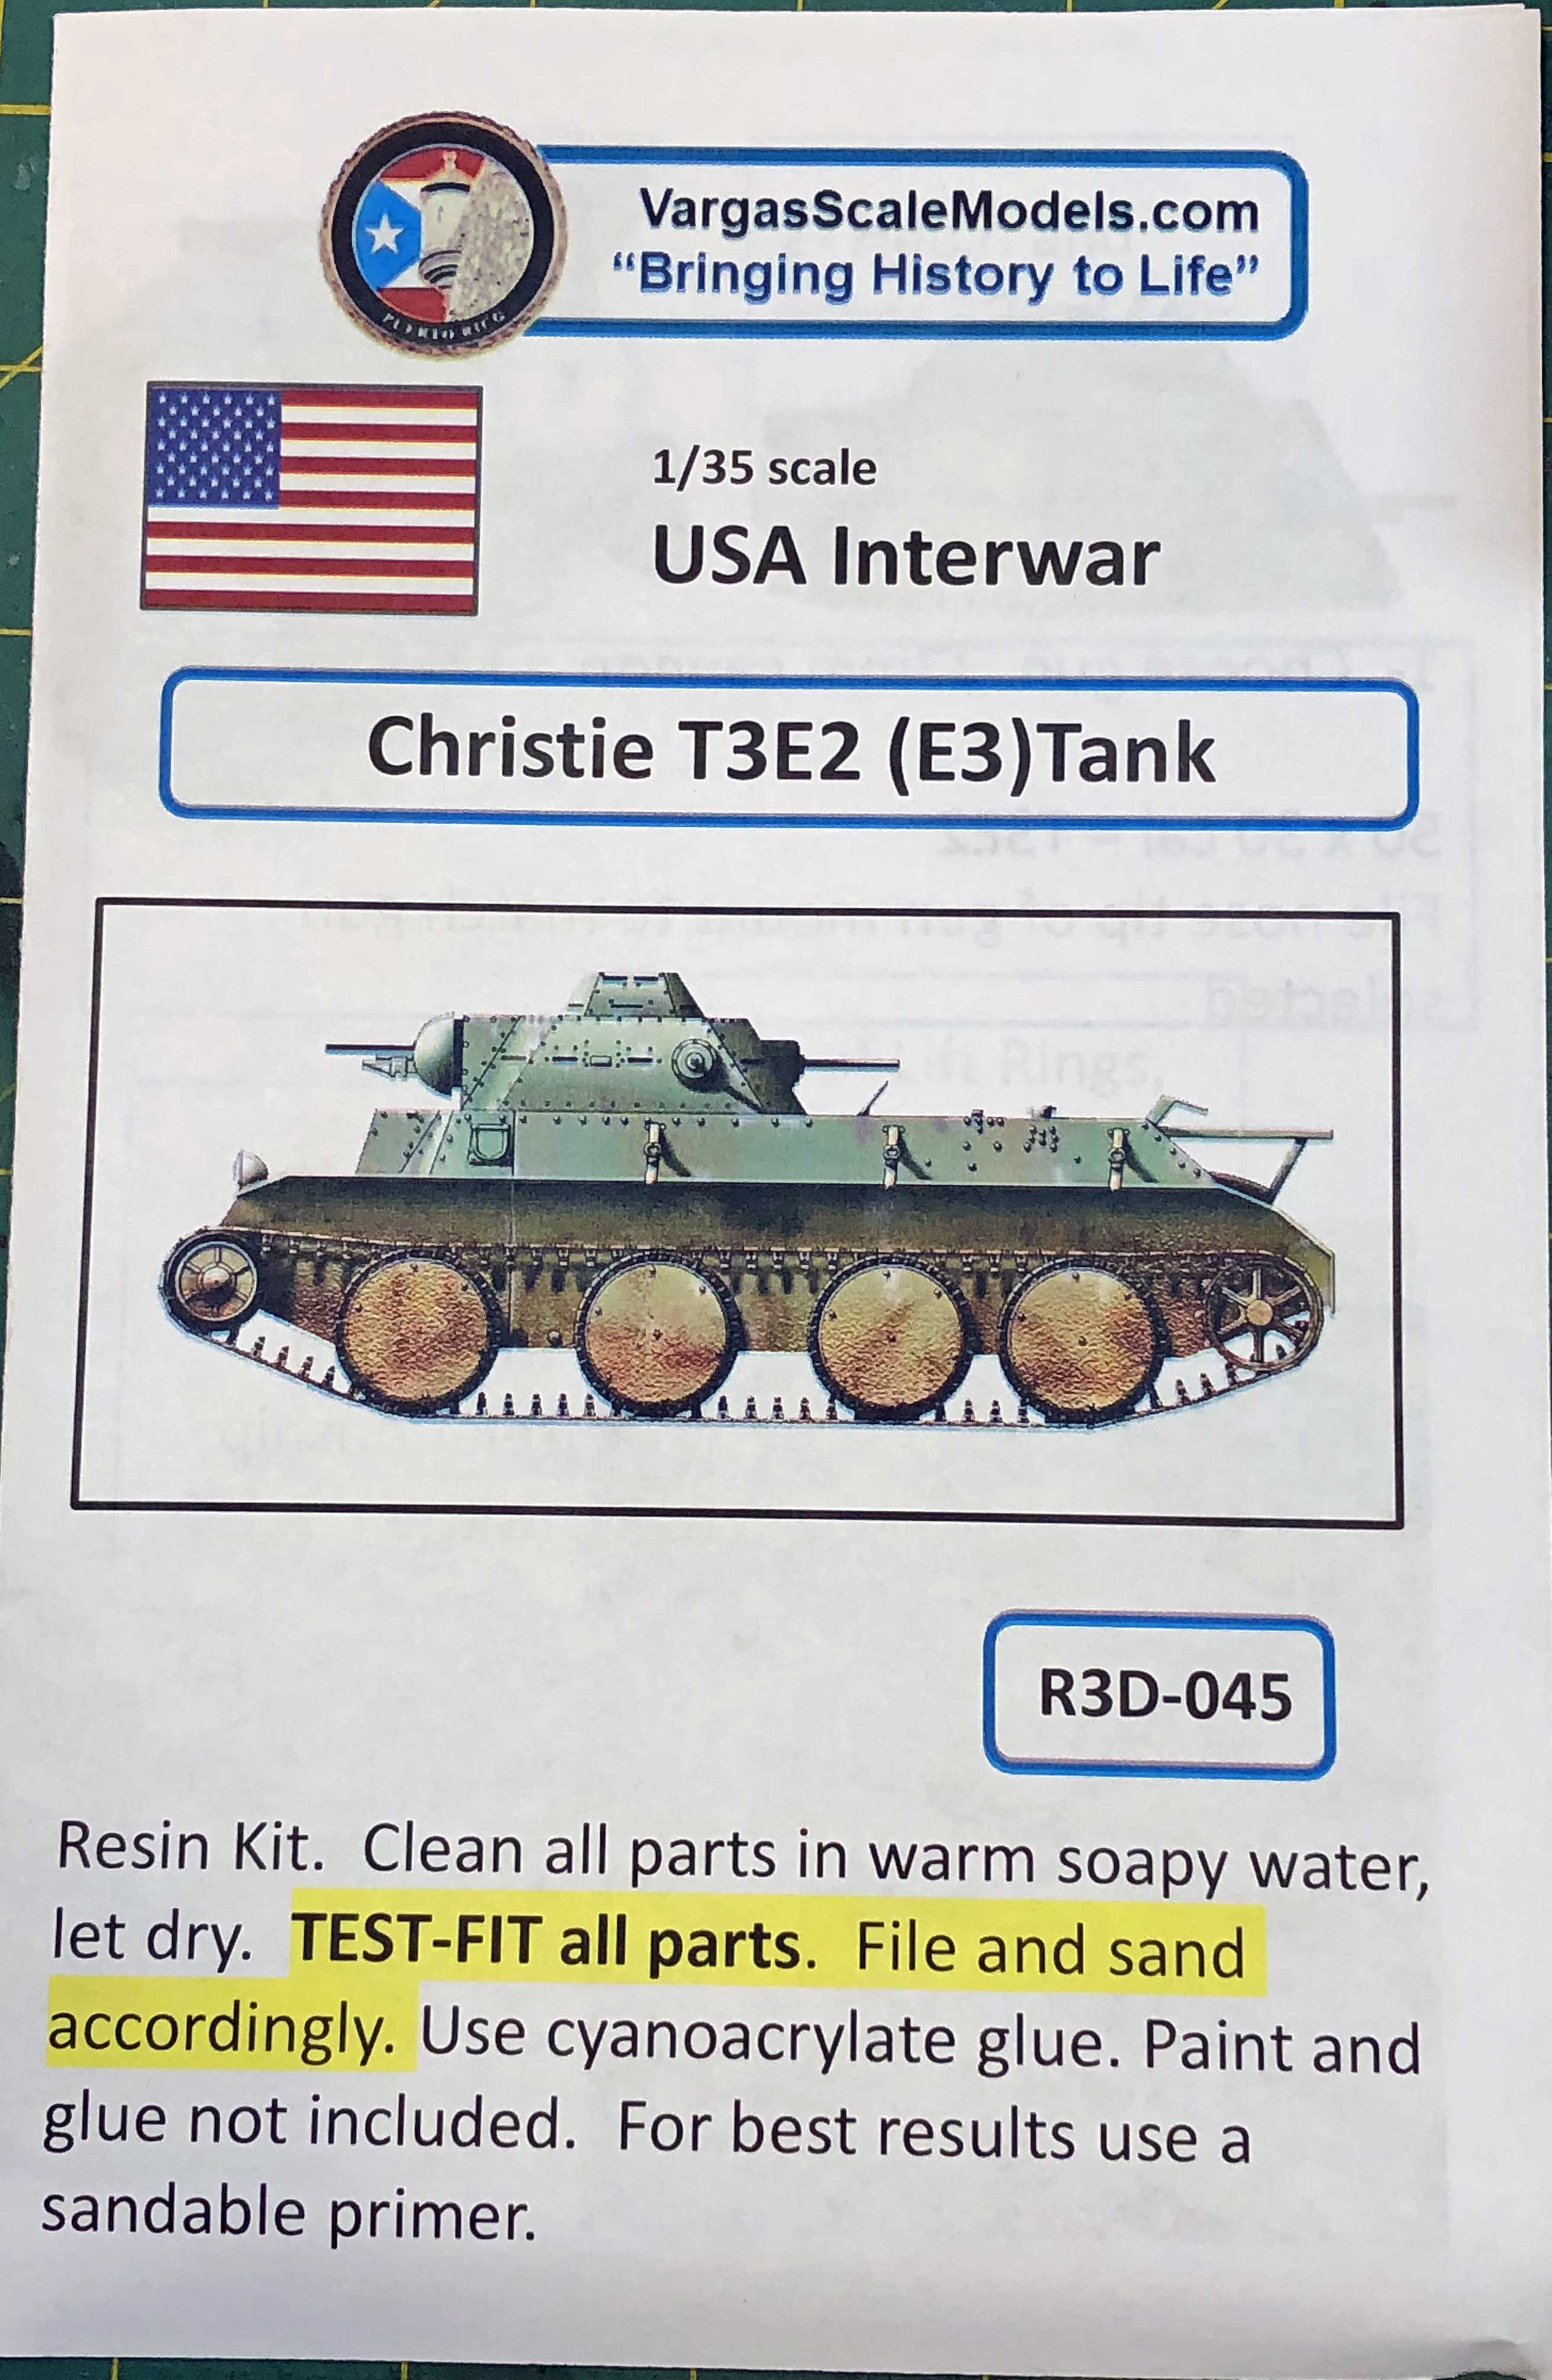
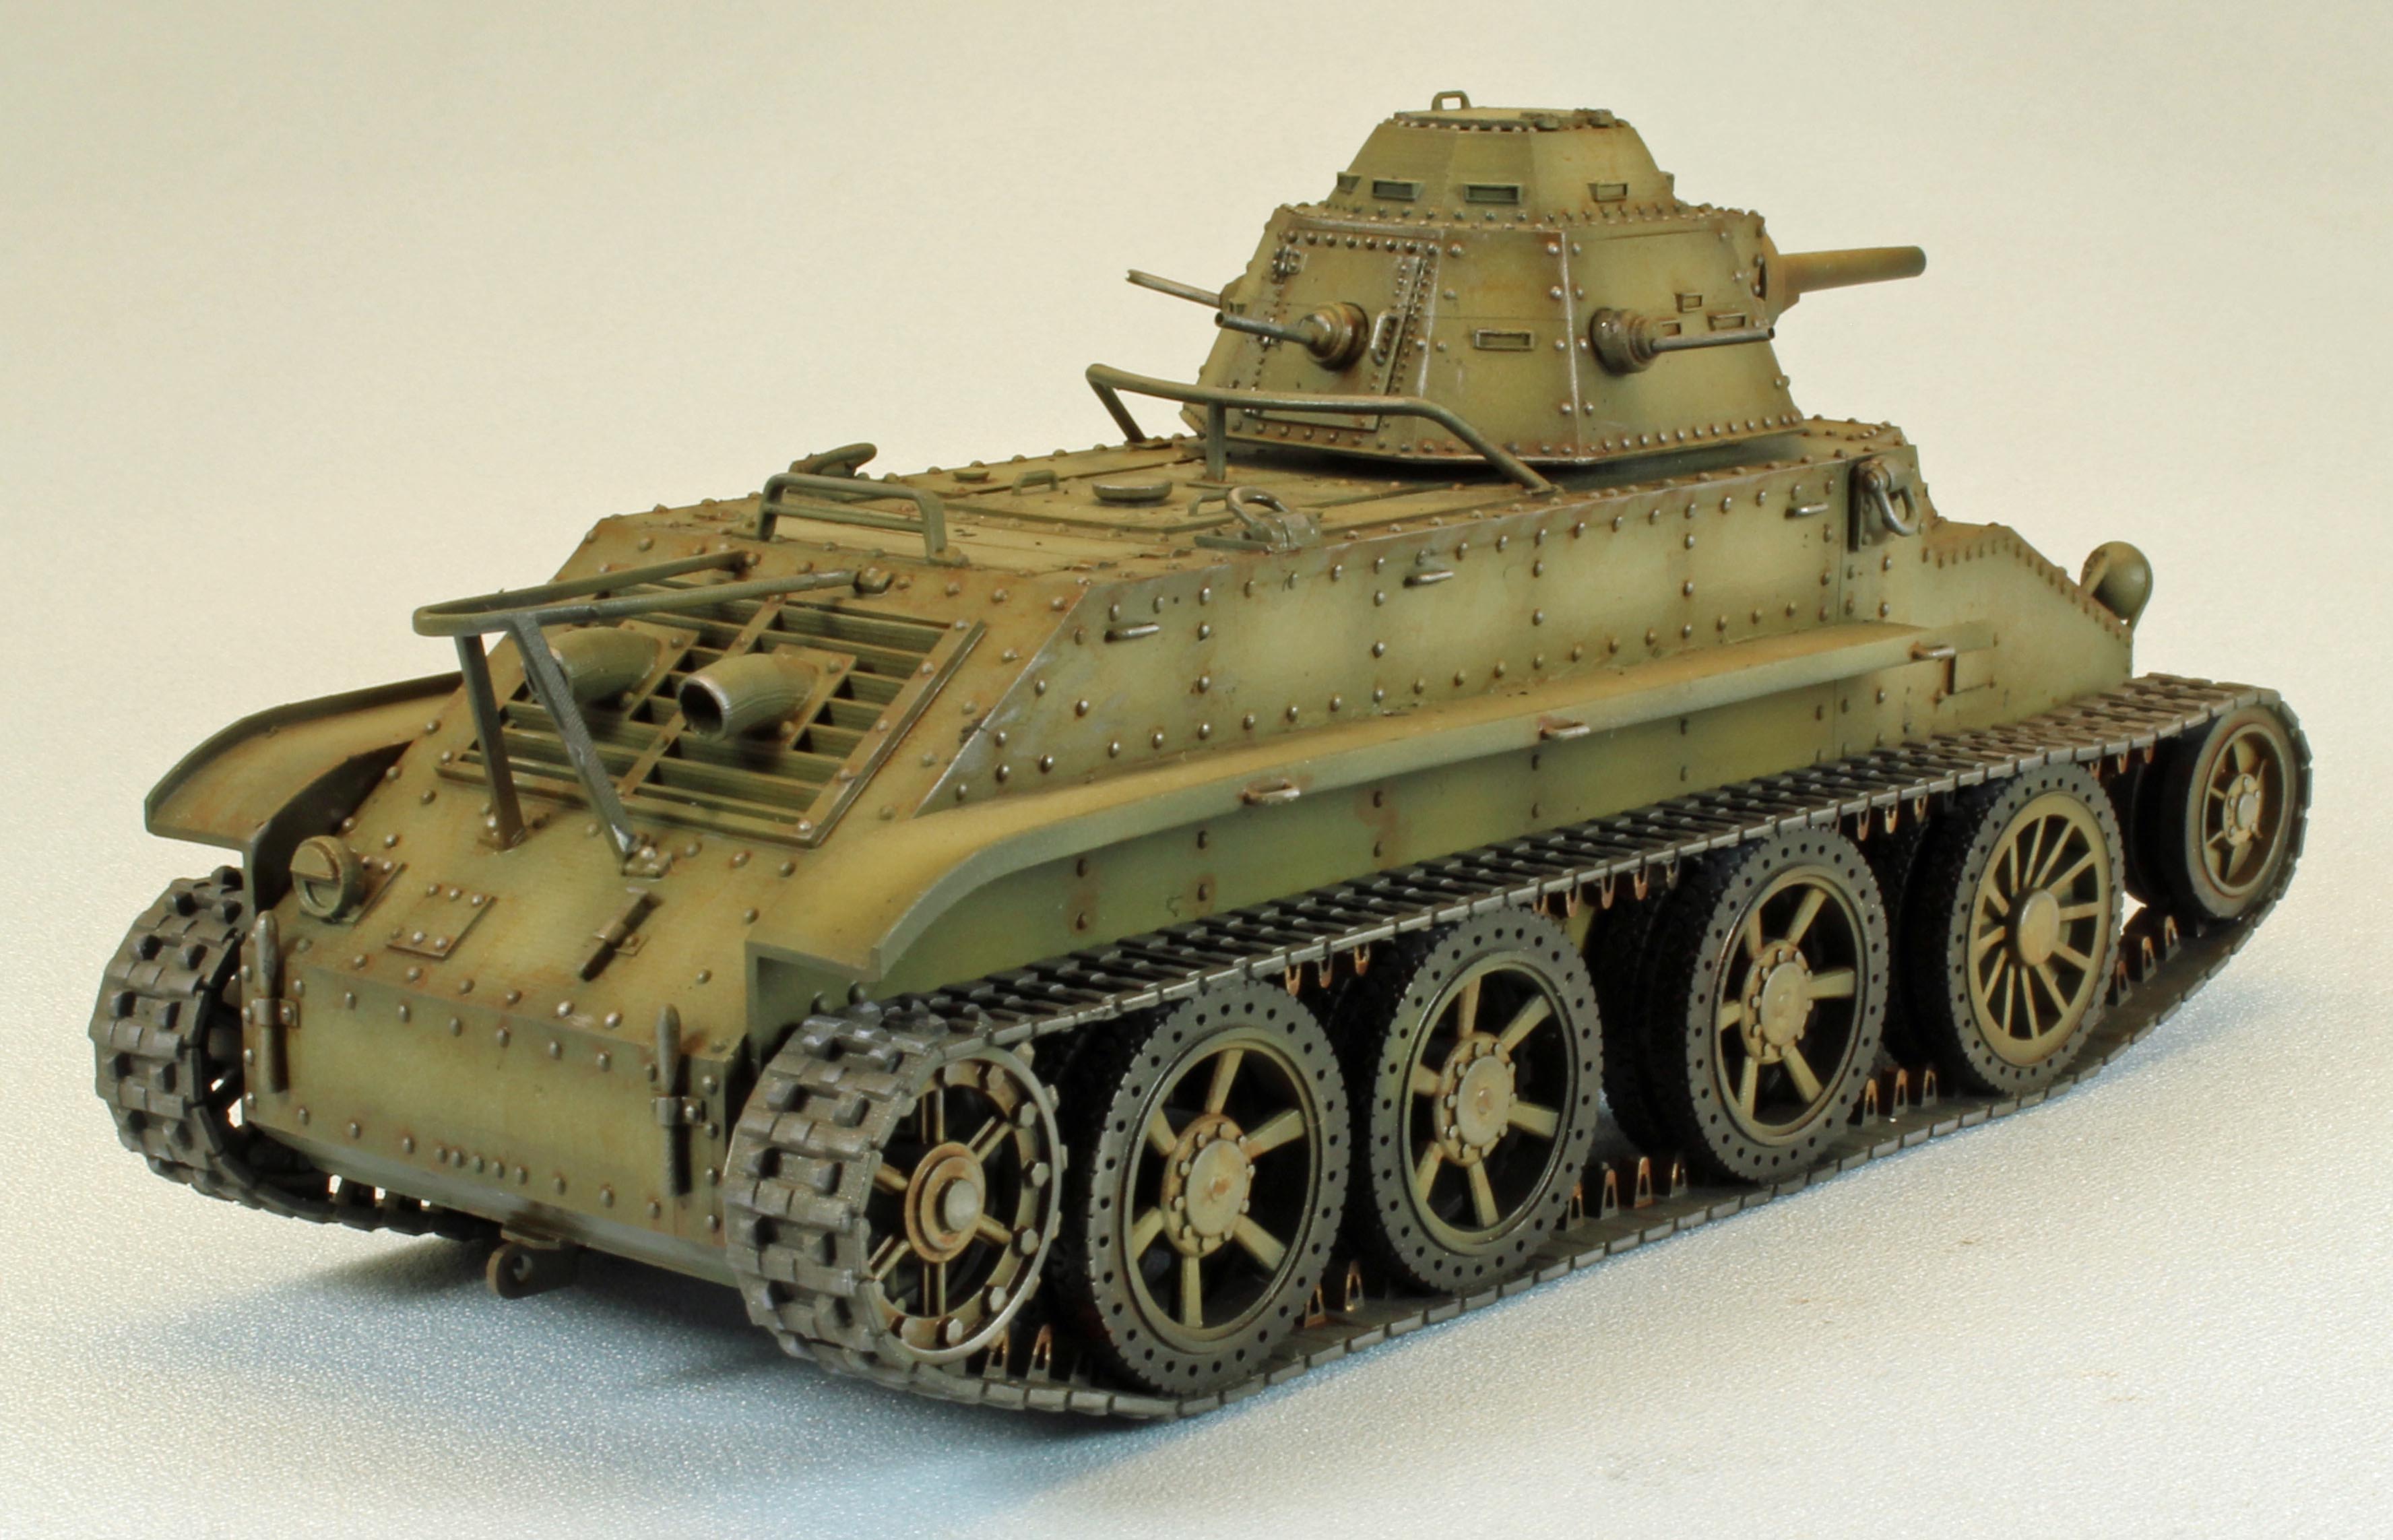
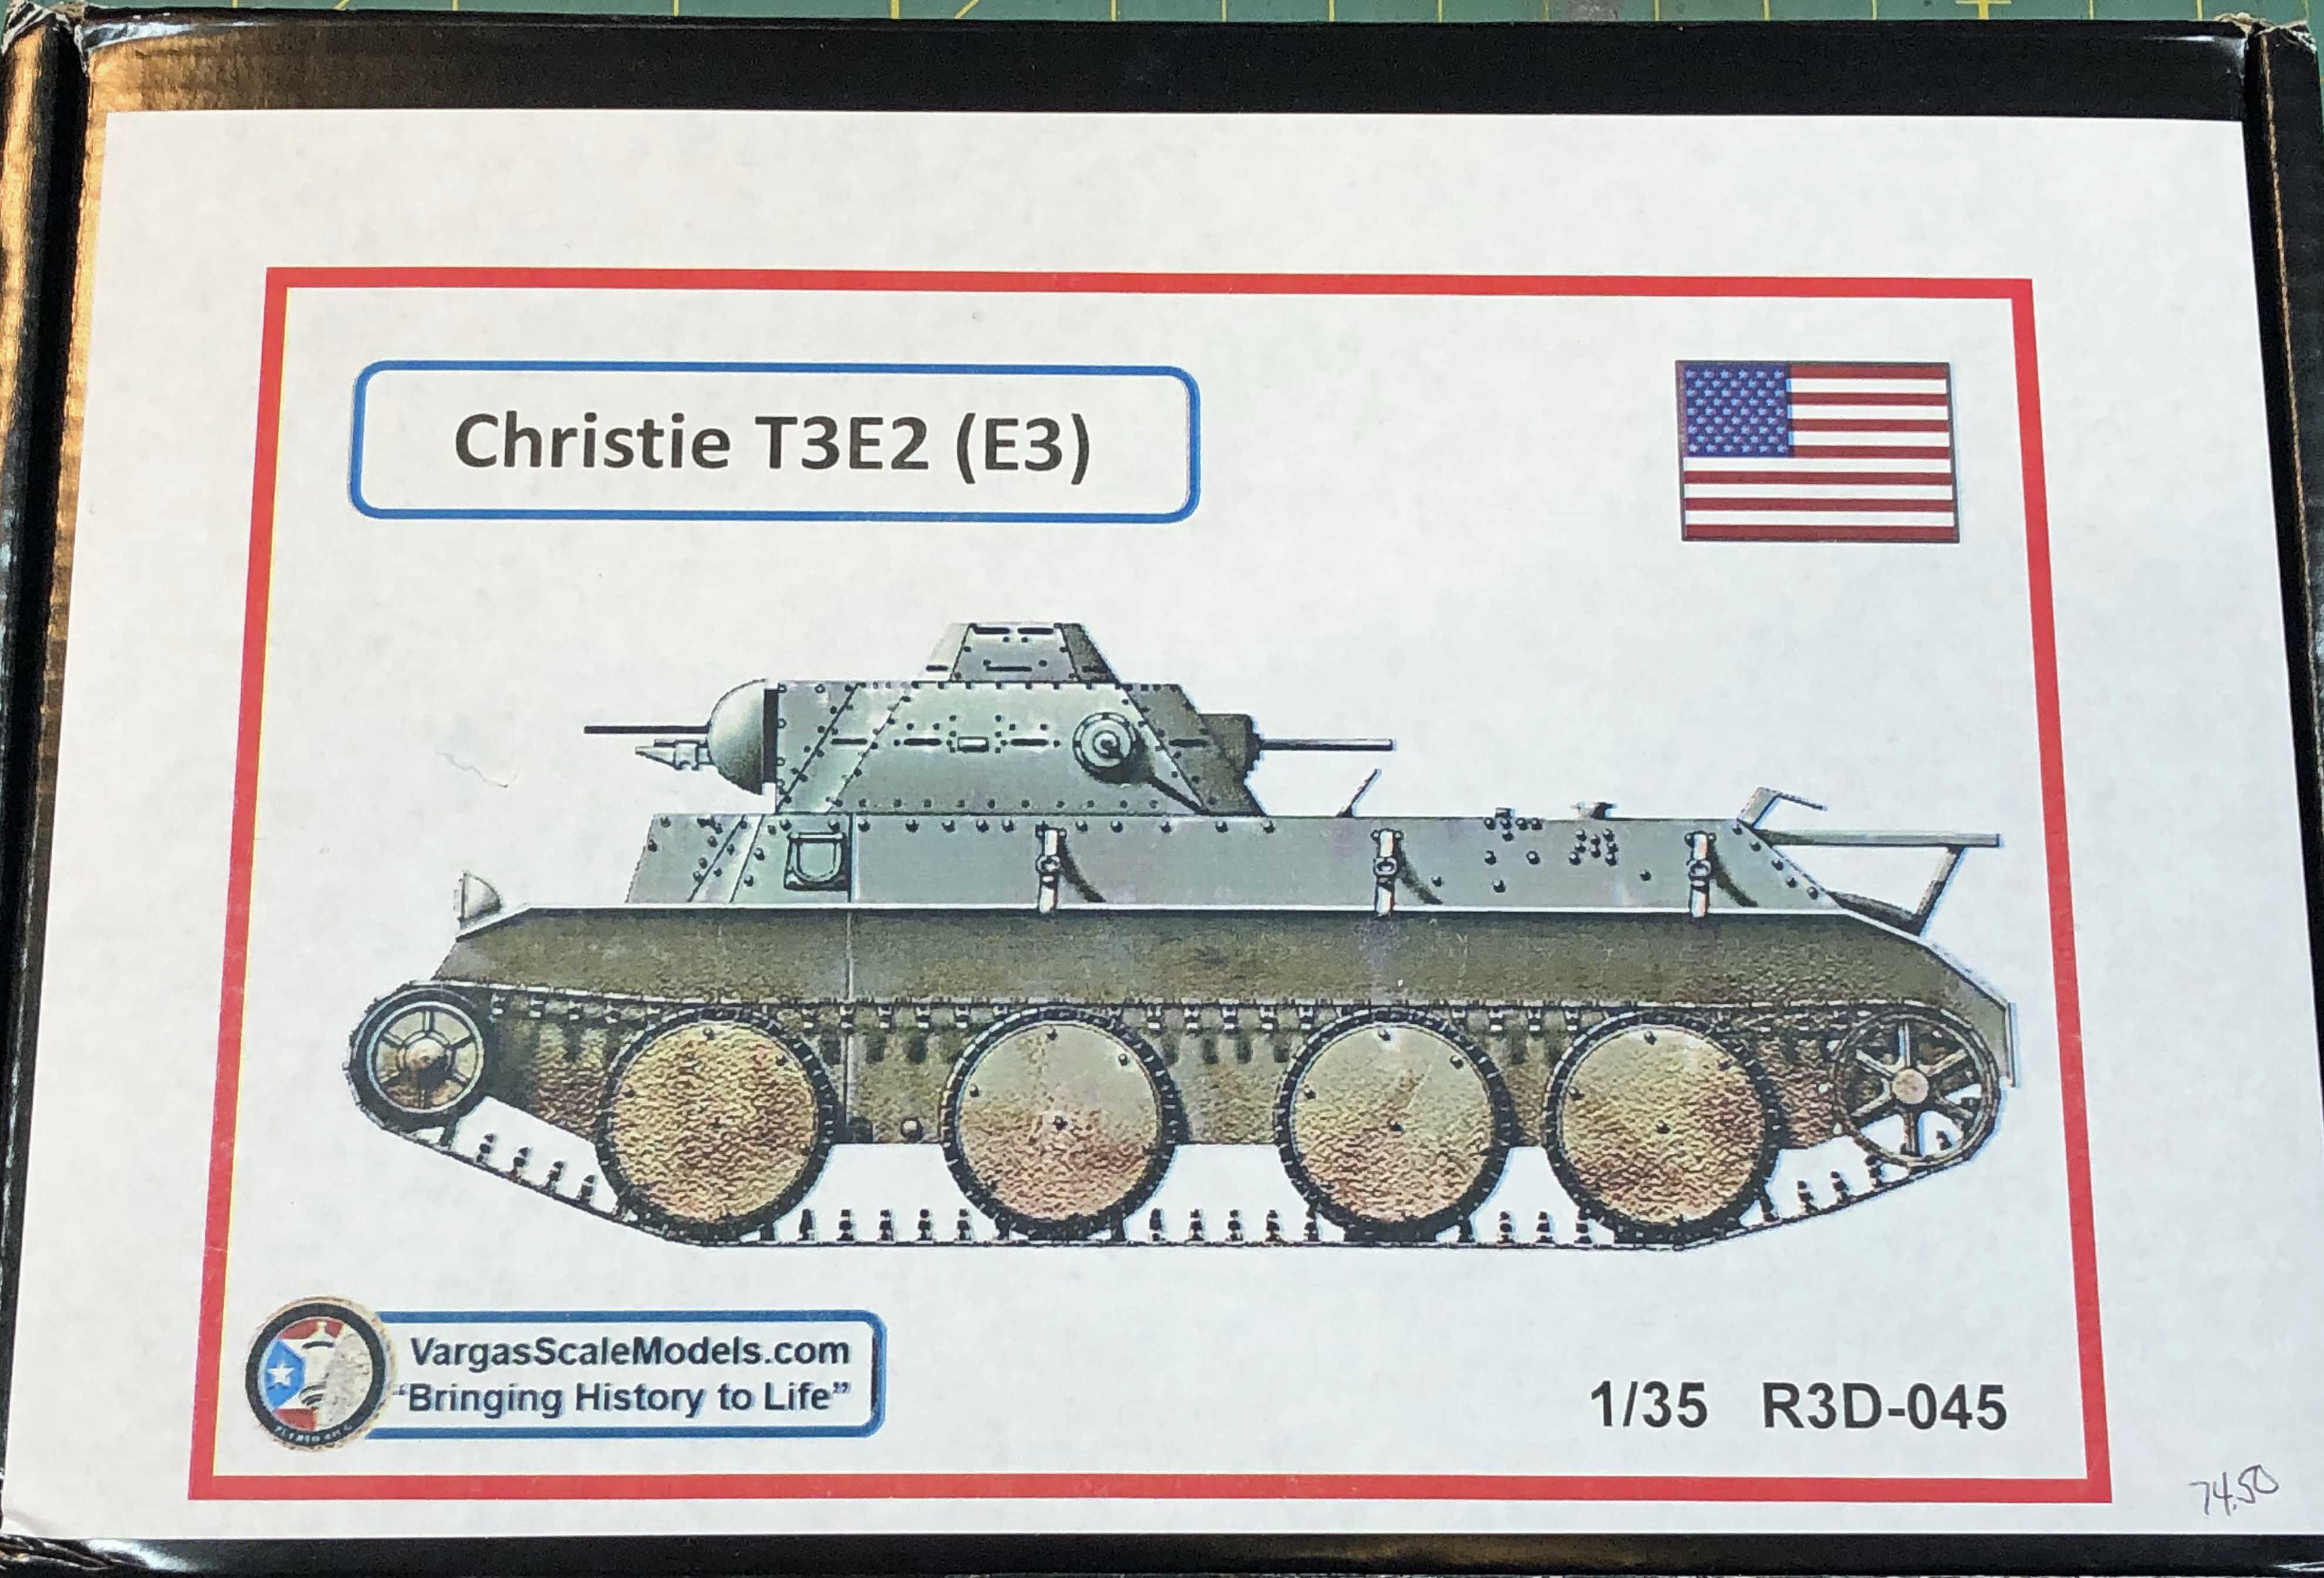
Christie T3E2 (E3) Tank
by Eric Christianson
 Model: Christie T3E2 (E3) Tank
Reviewed by: Eric Christianson, IPMS # 42218
Scale: 1/35
Company: Vargas Scale Models
Price: $74.50
Product/Stock #: R3D-045
Website: Vargas Scale Models
Product Web Page: View
Product provided by: Vargas Scale Models
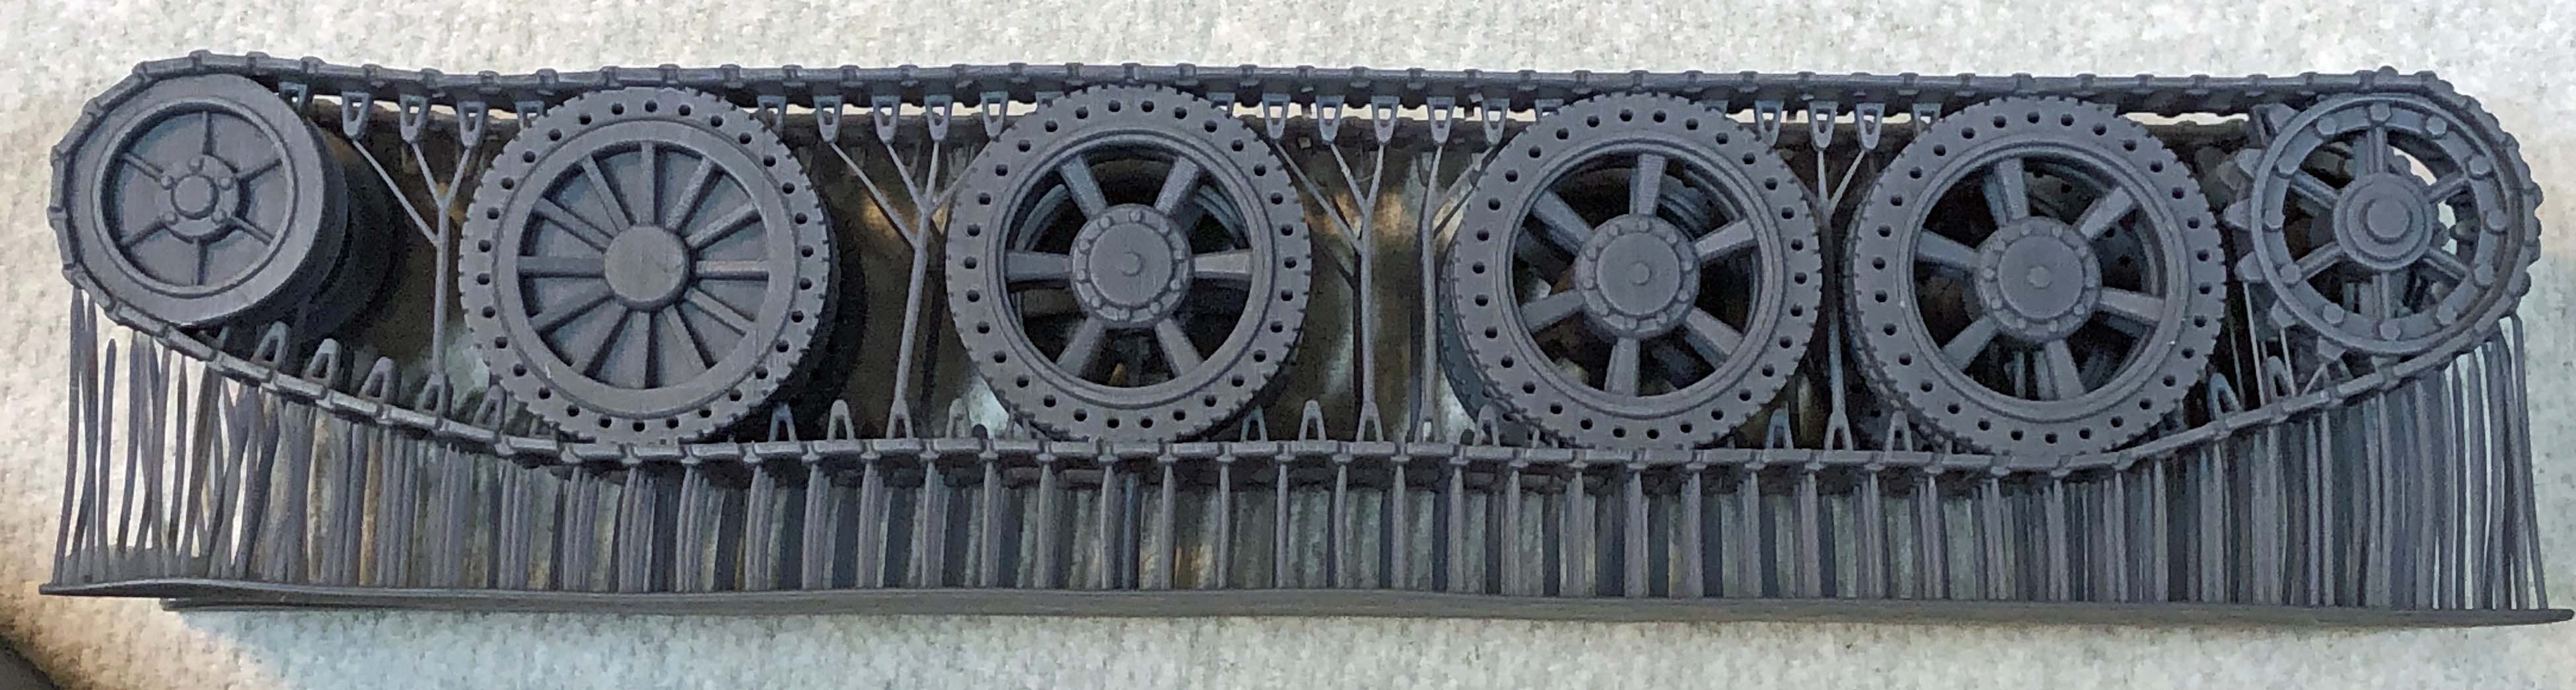
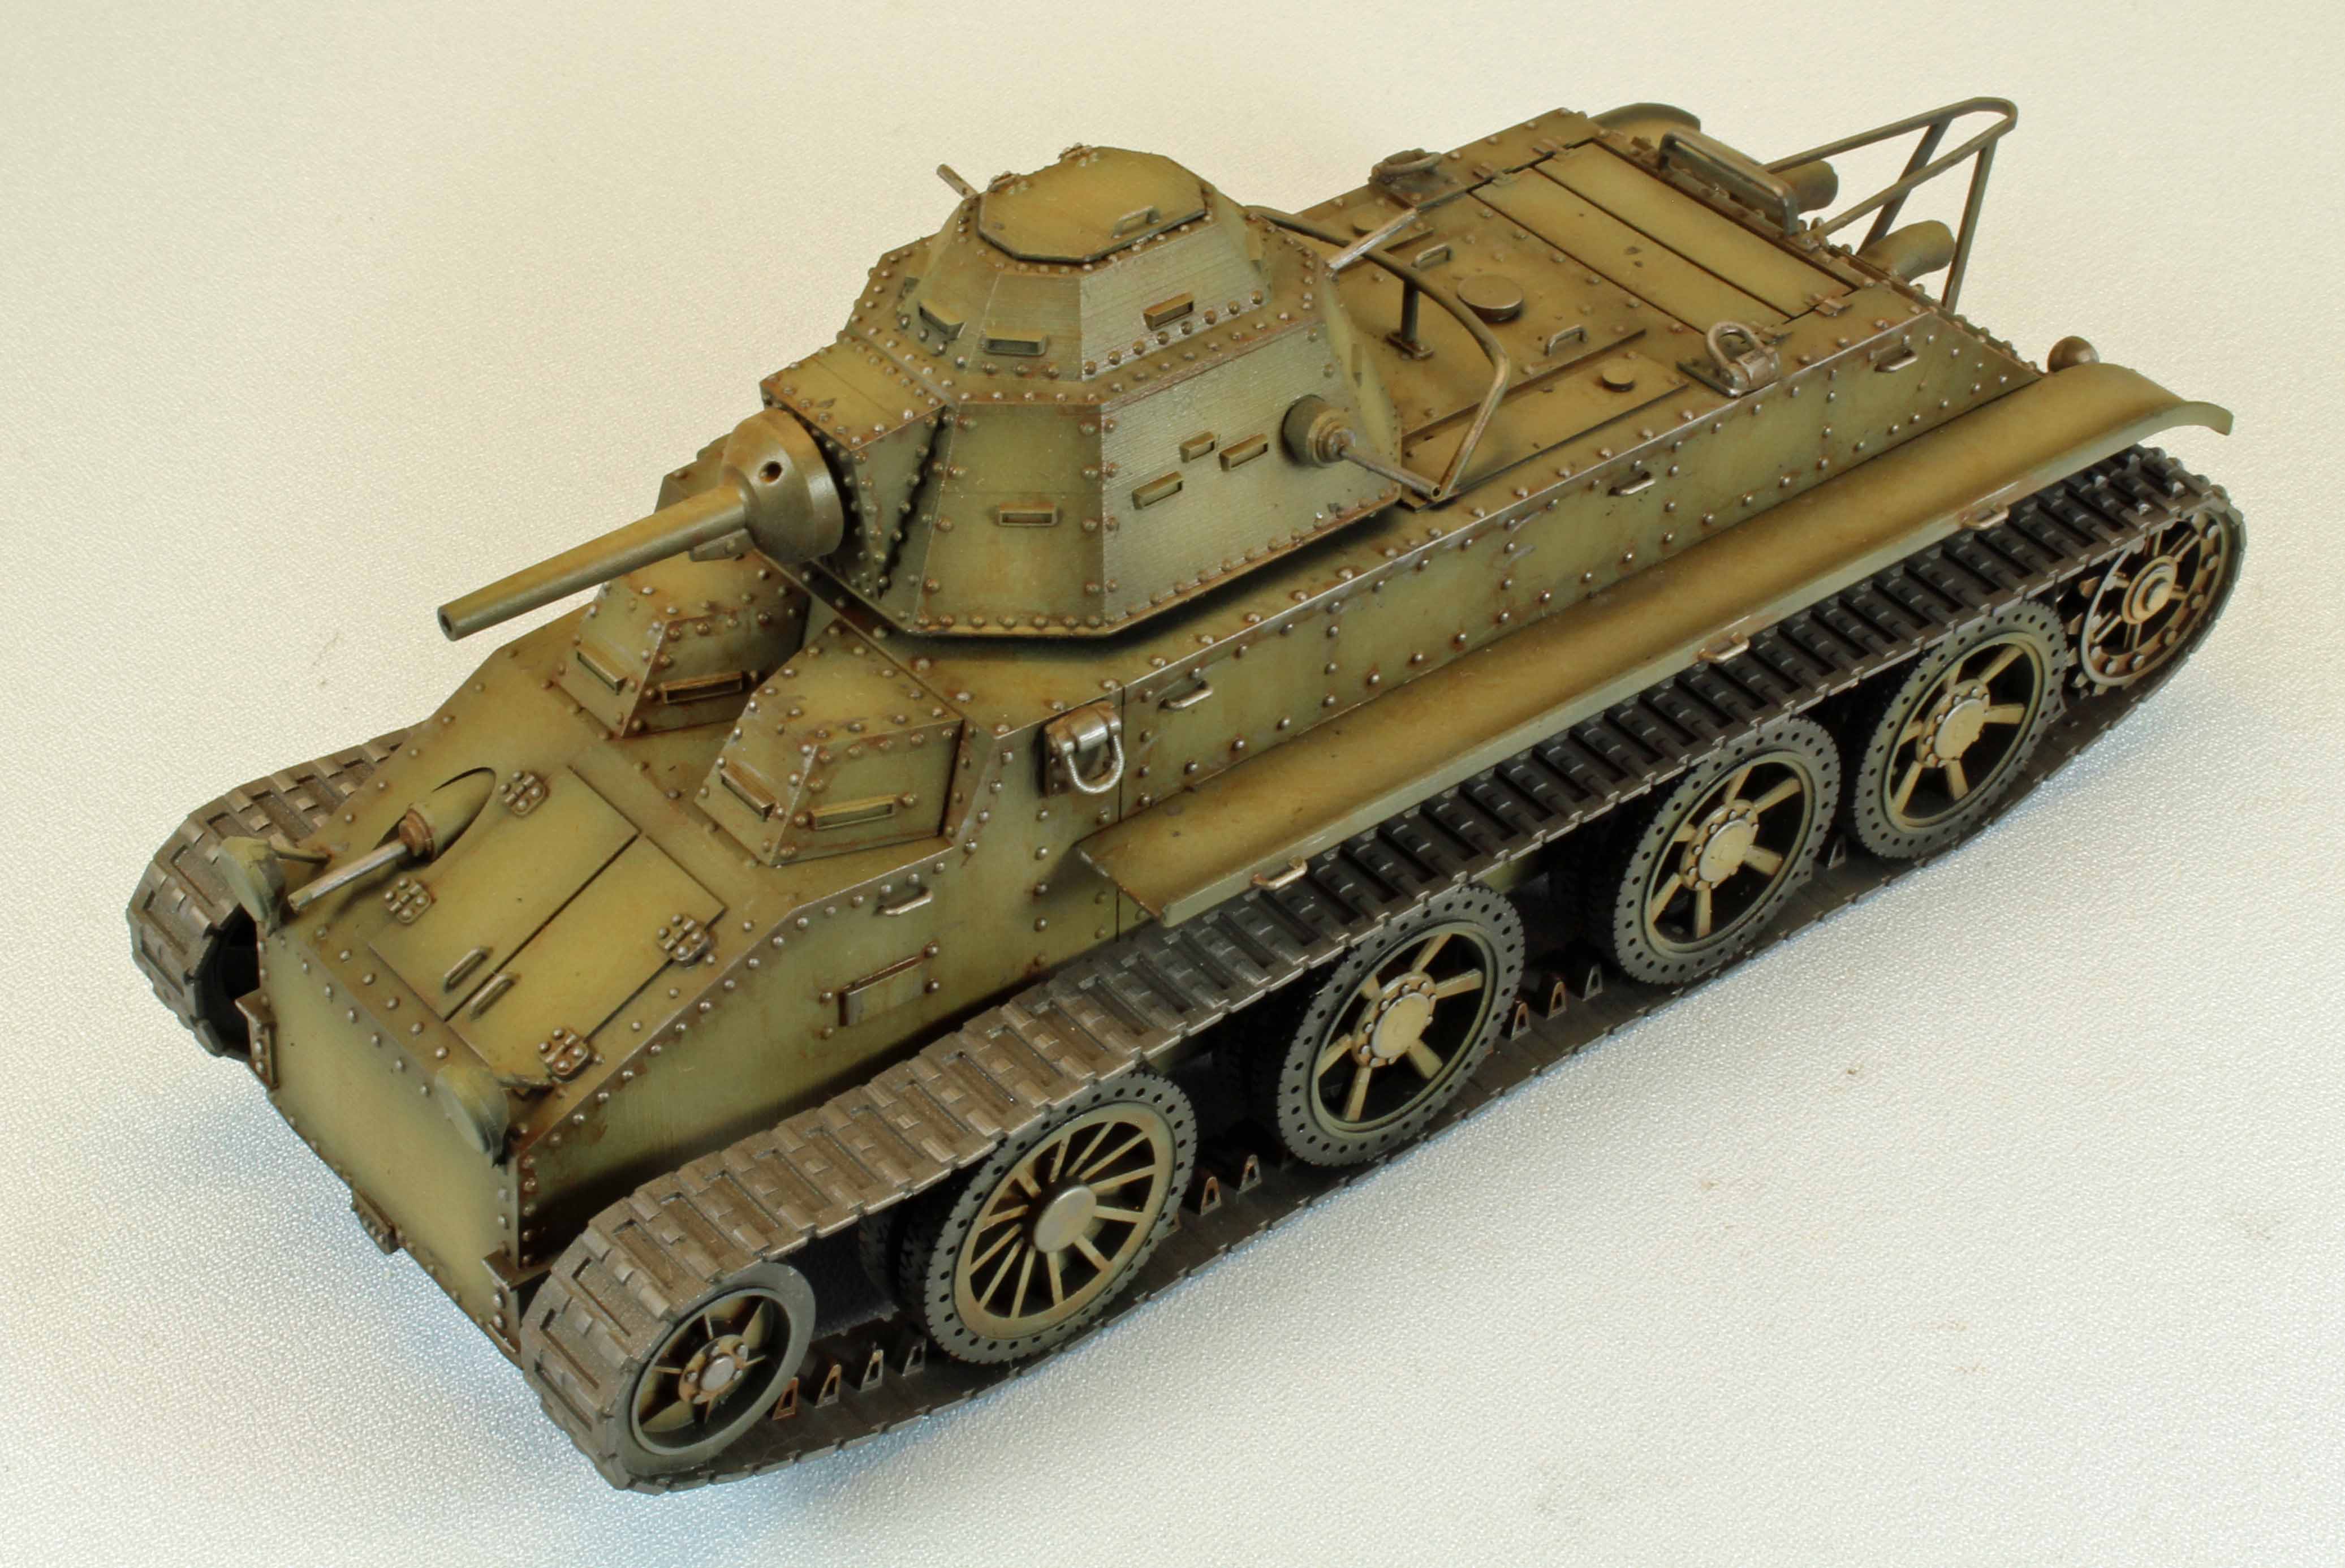
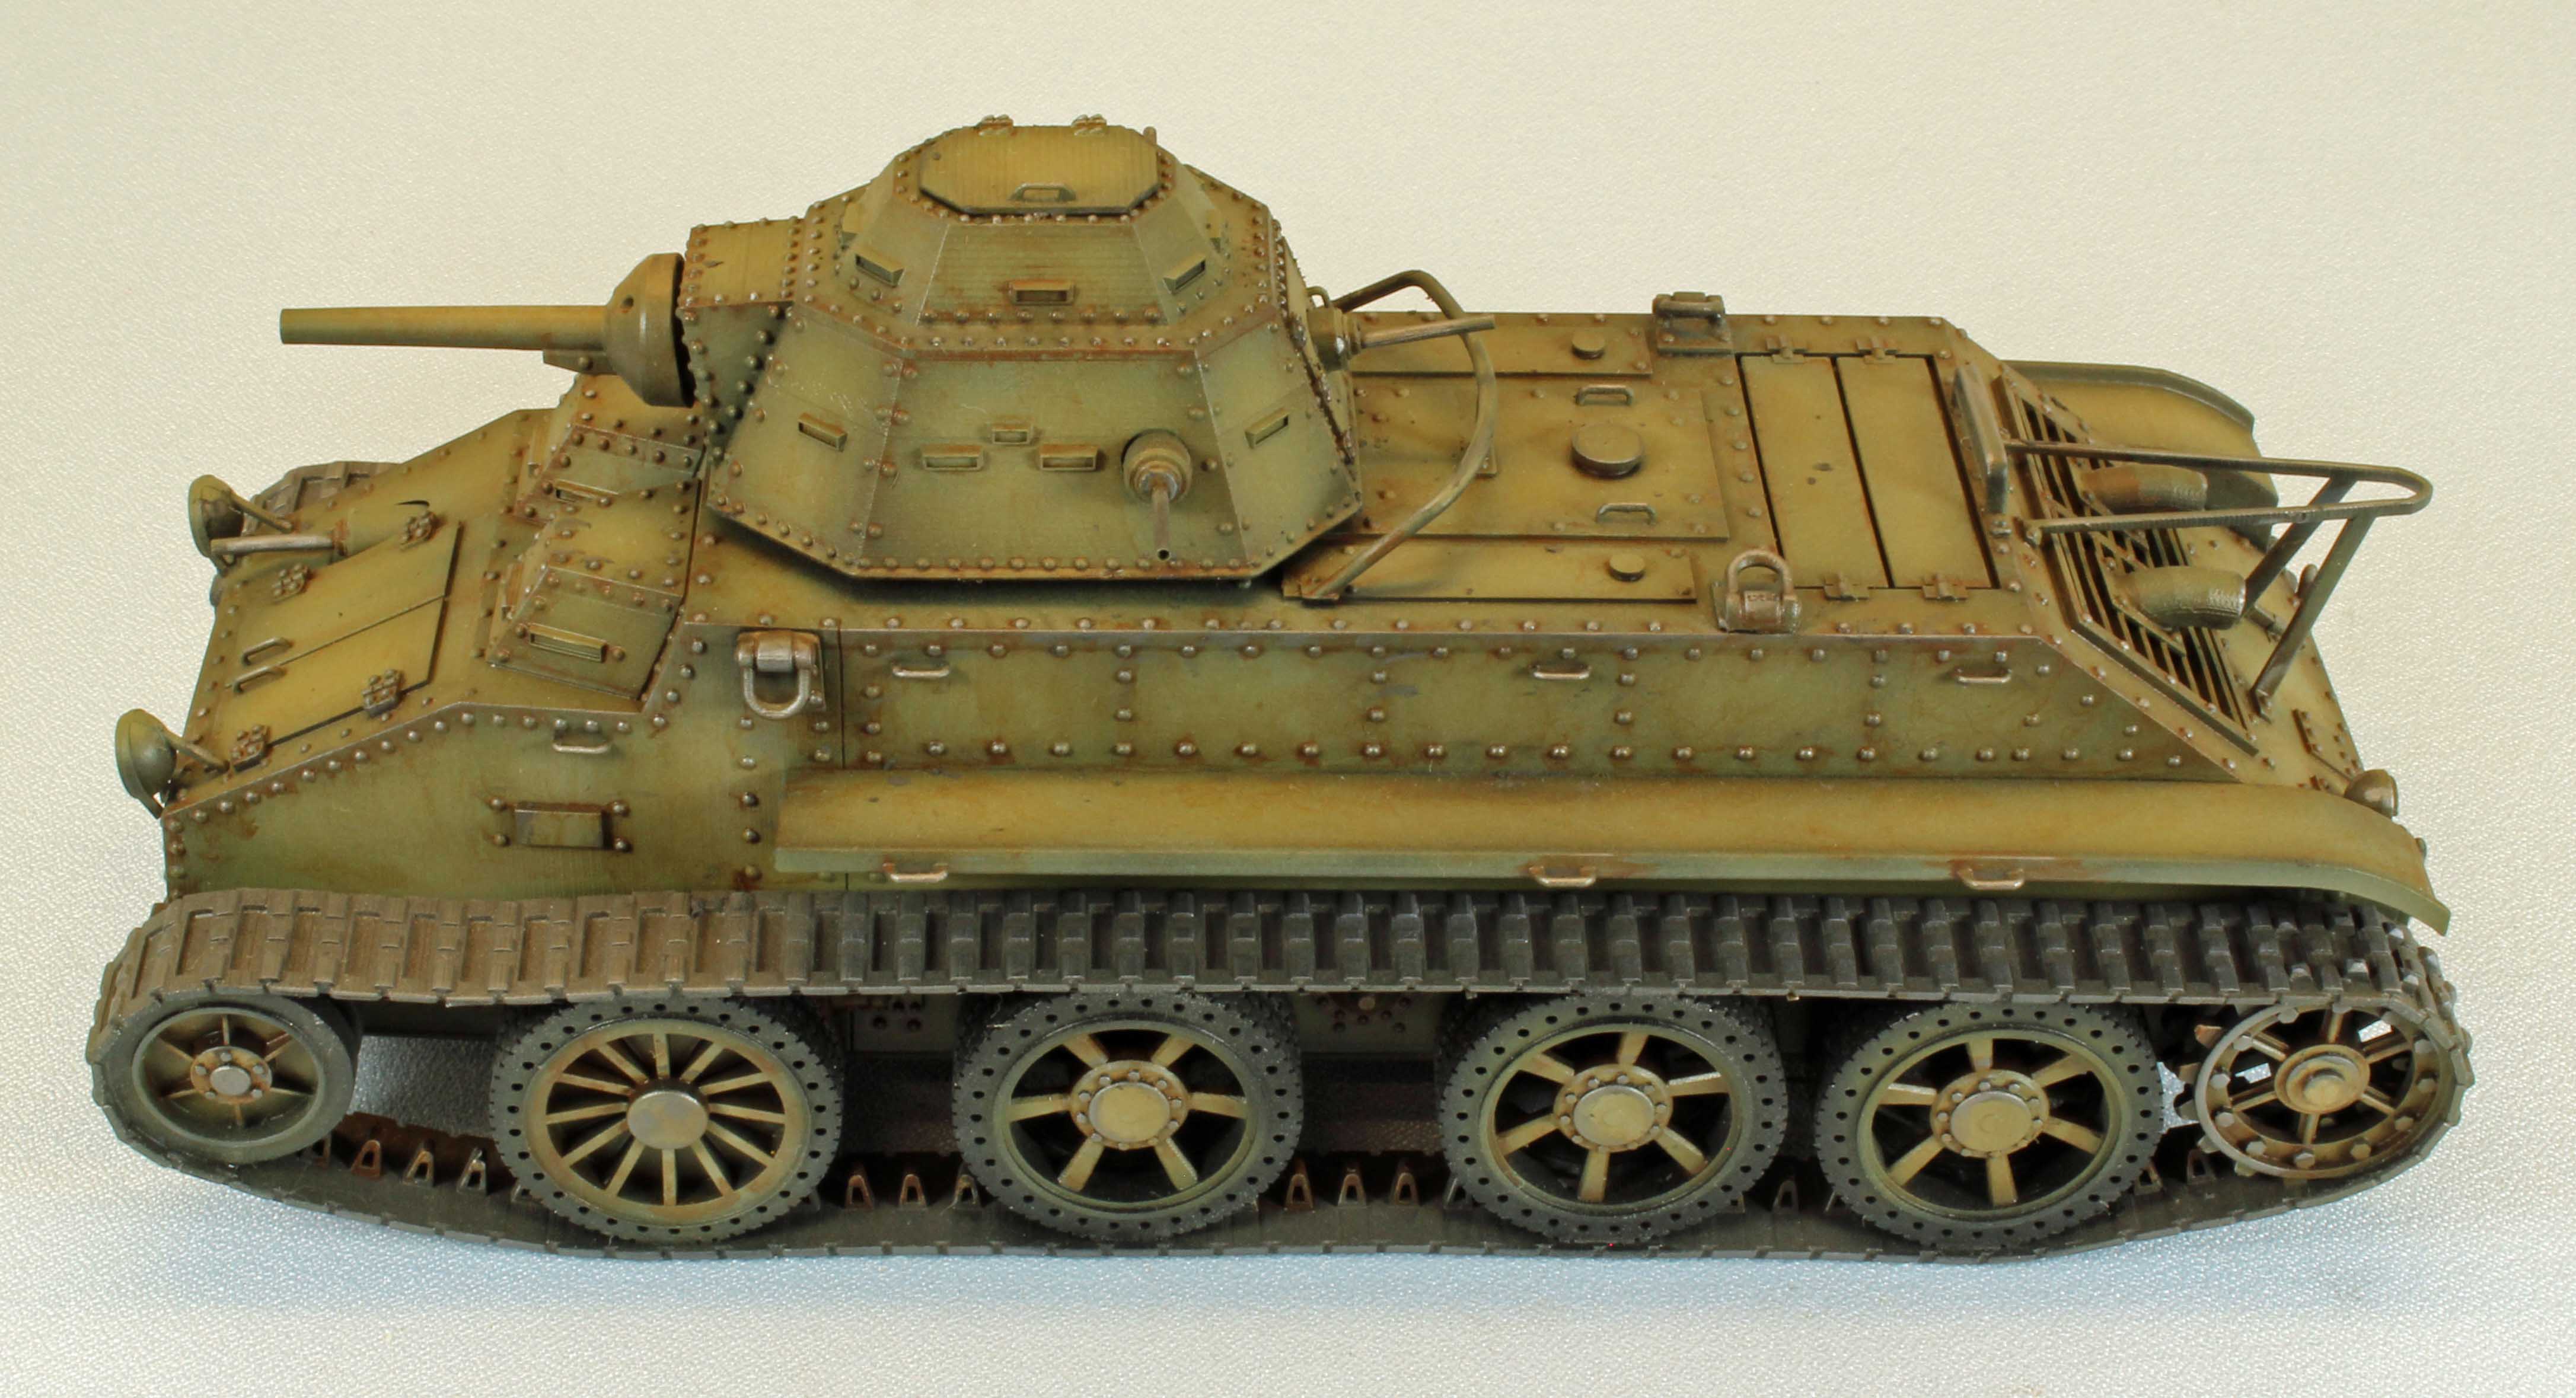
Vargas Models, a prolific maker of extraordinary resin, 3-D printed, limited-run armor models is back with another unusual subject; the Christie Model T3E2/E3 tank. The Christie had a "convertible" drive, meaning the tank had removable tracks for road travel, allowing for higher speeds and better range, and reducing wear on the fragile caterpillar track systems of the 1930s. At the time, it was the fastest tank in the world. There are no return rollers for the upper track run; the tracks are supported by the road wheels. As with many track designs with center guide teeth, dual wheels were used, allowing the guide teeth to run between them.
Even with such a revolutionary design, the Christie was ultimately rejected by the US Army, and instead sold to the Soviets, where it served as the prototype to the venerable T-34, the most produced tank in WWII.
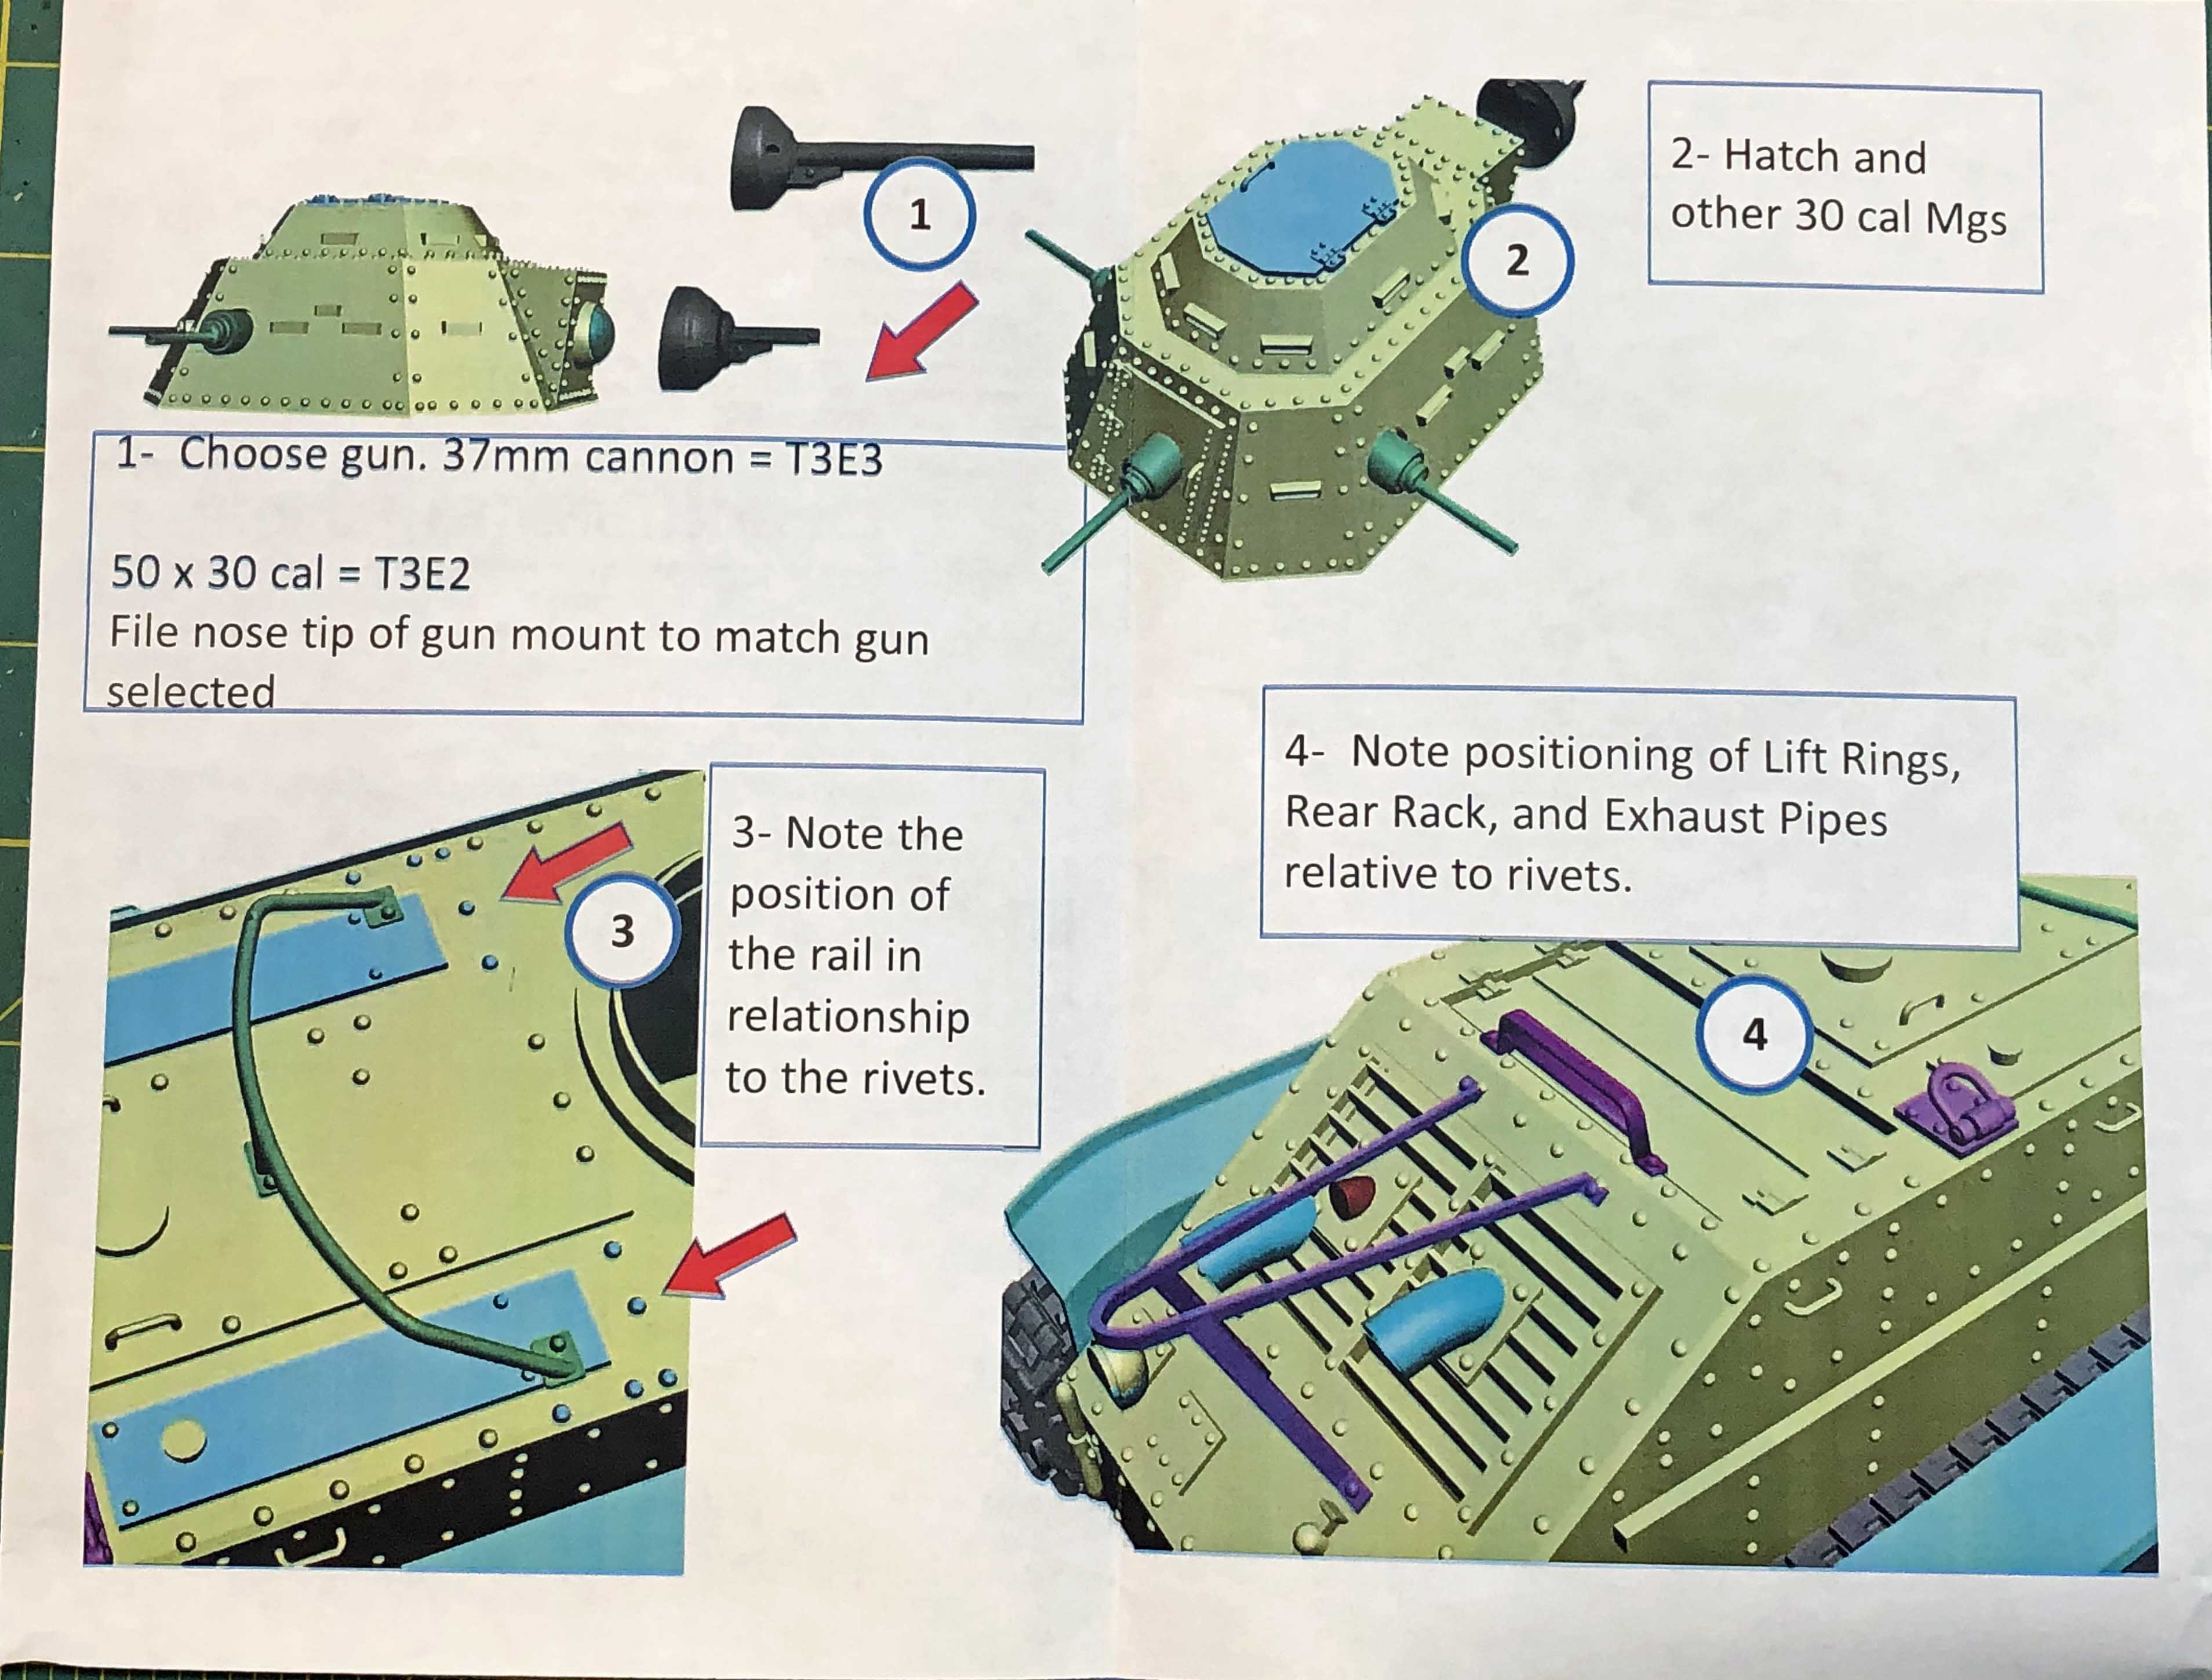
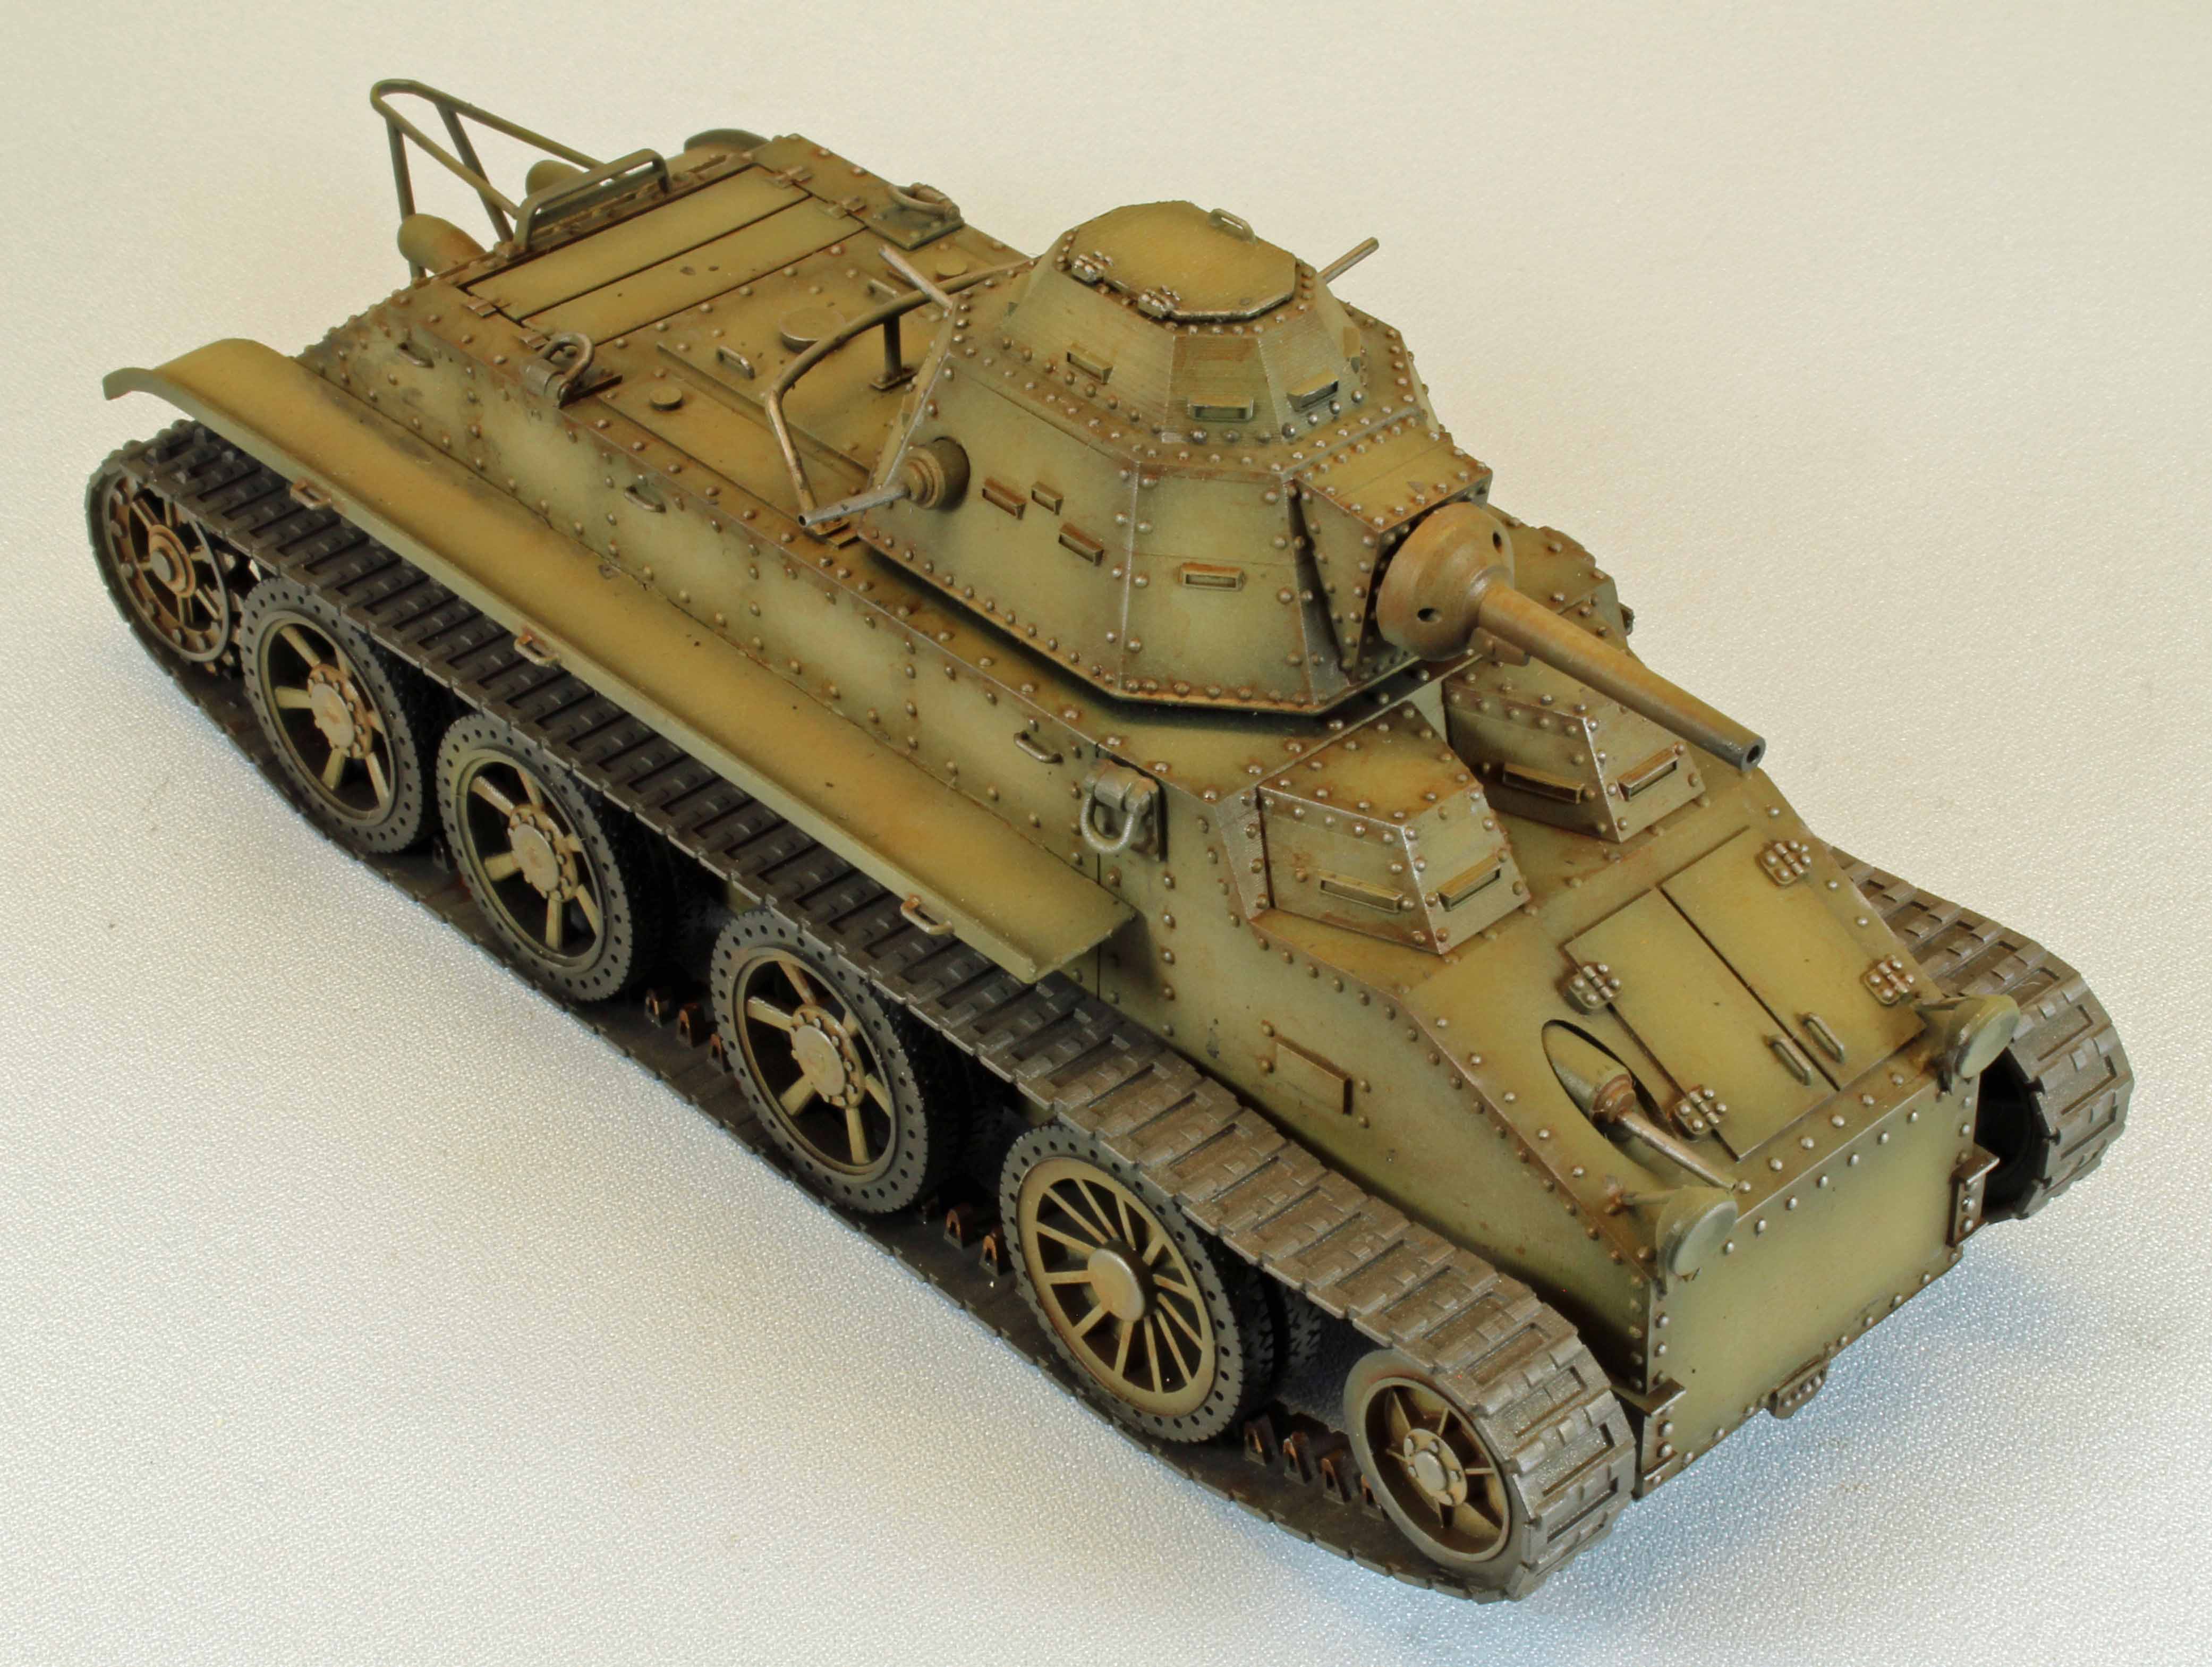
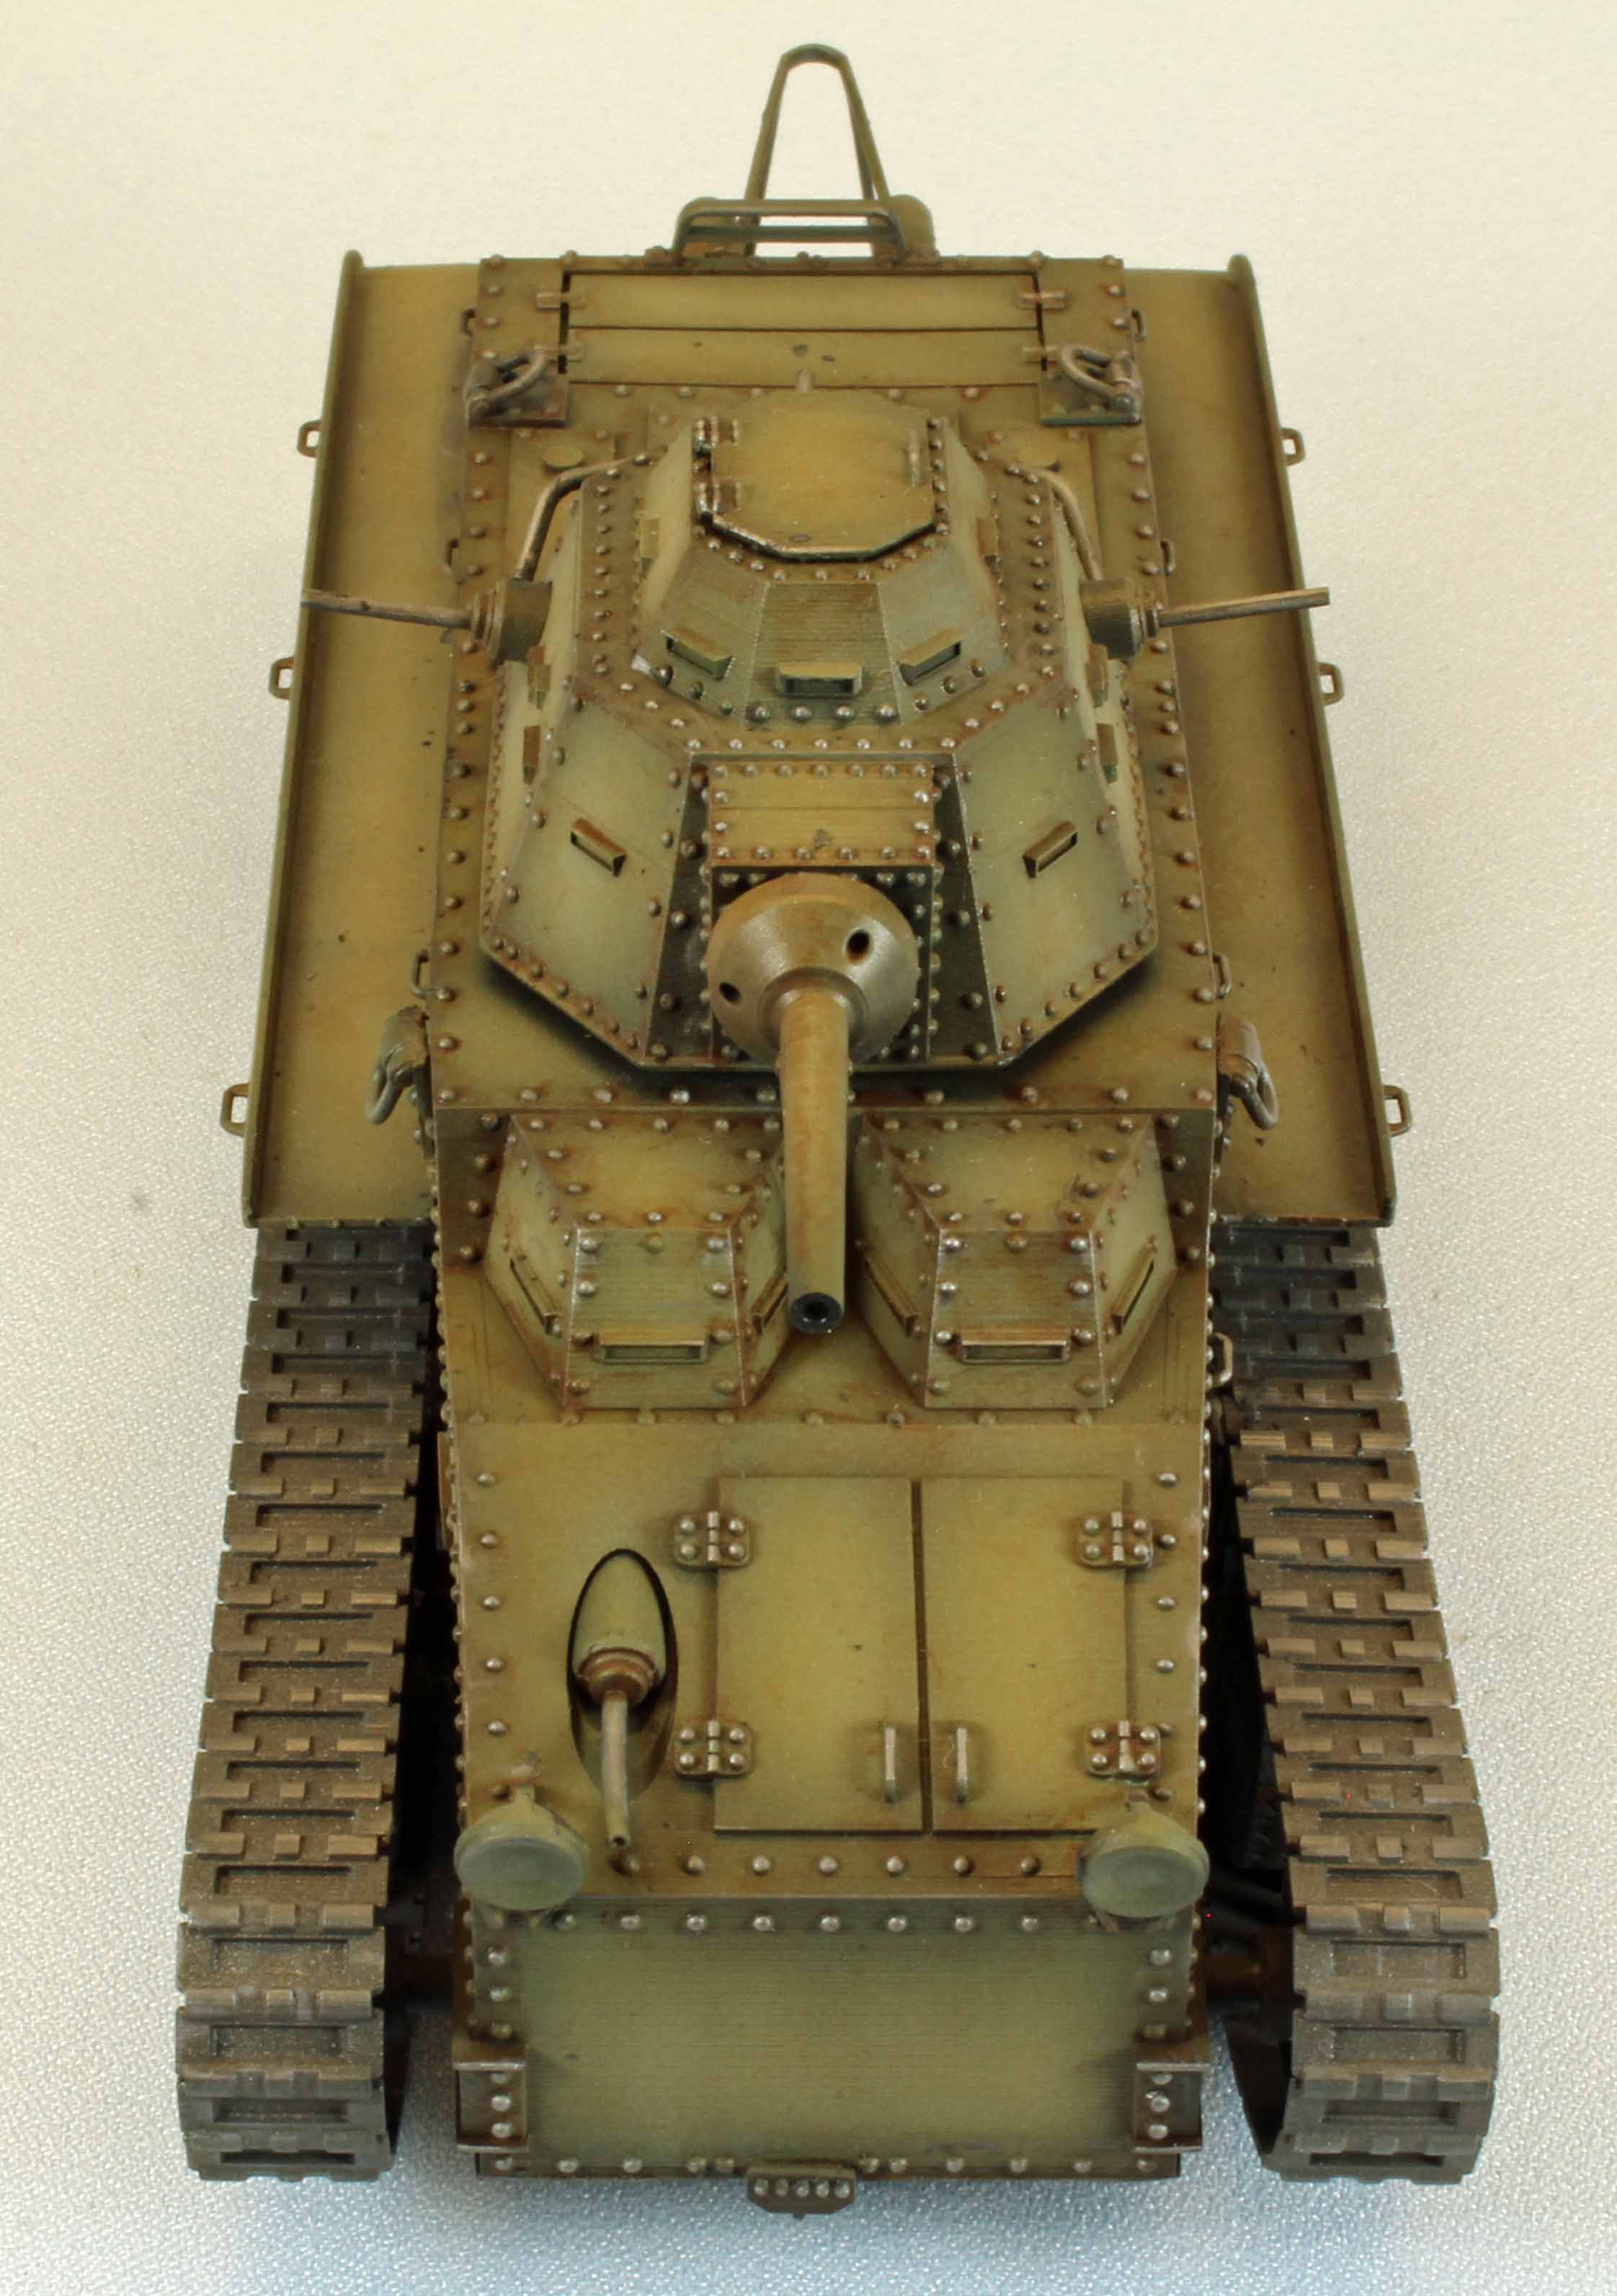
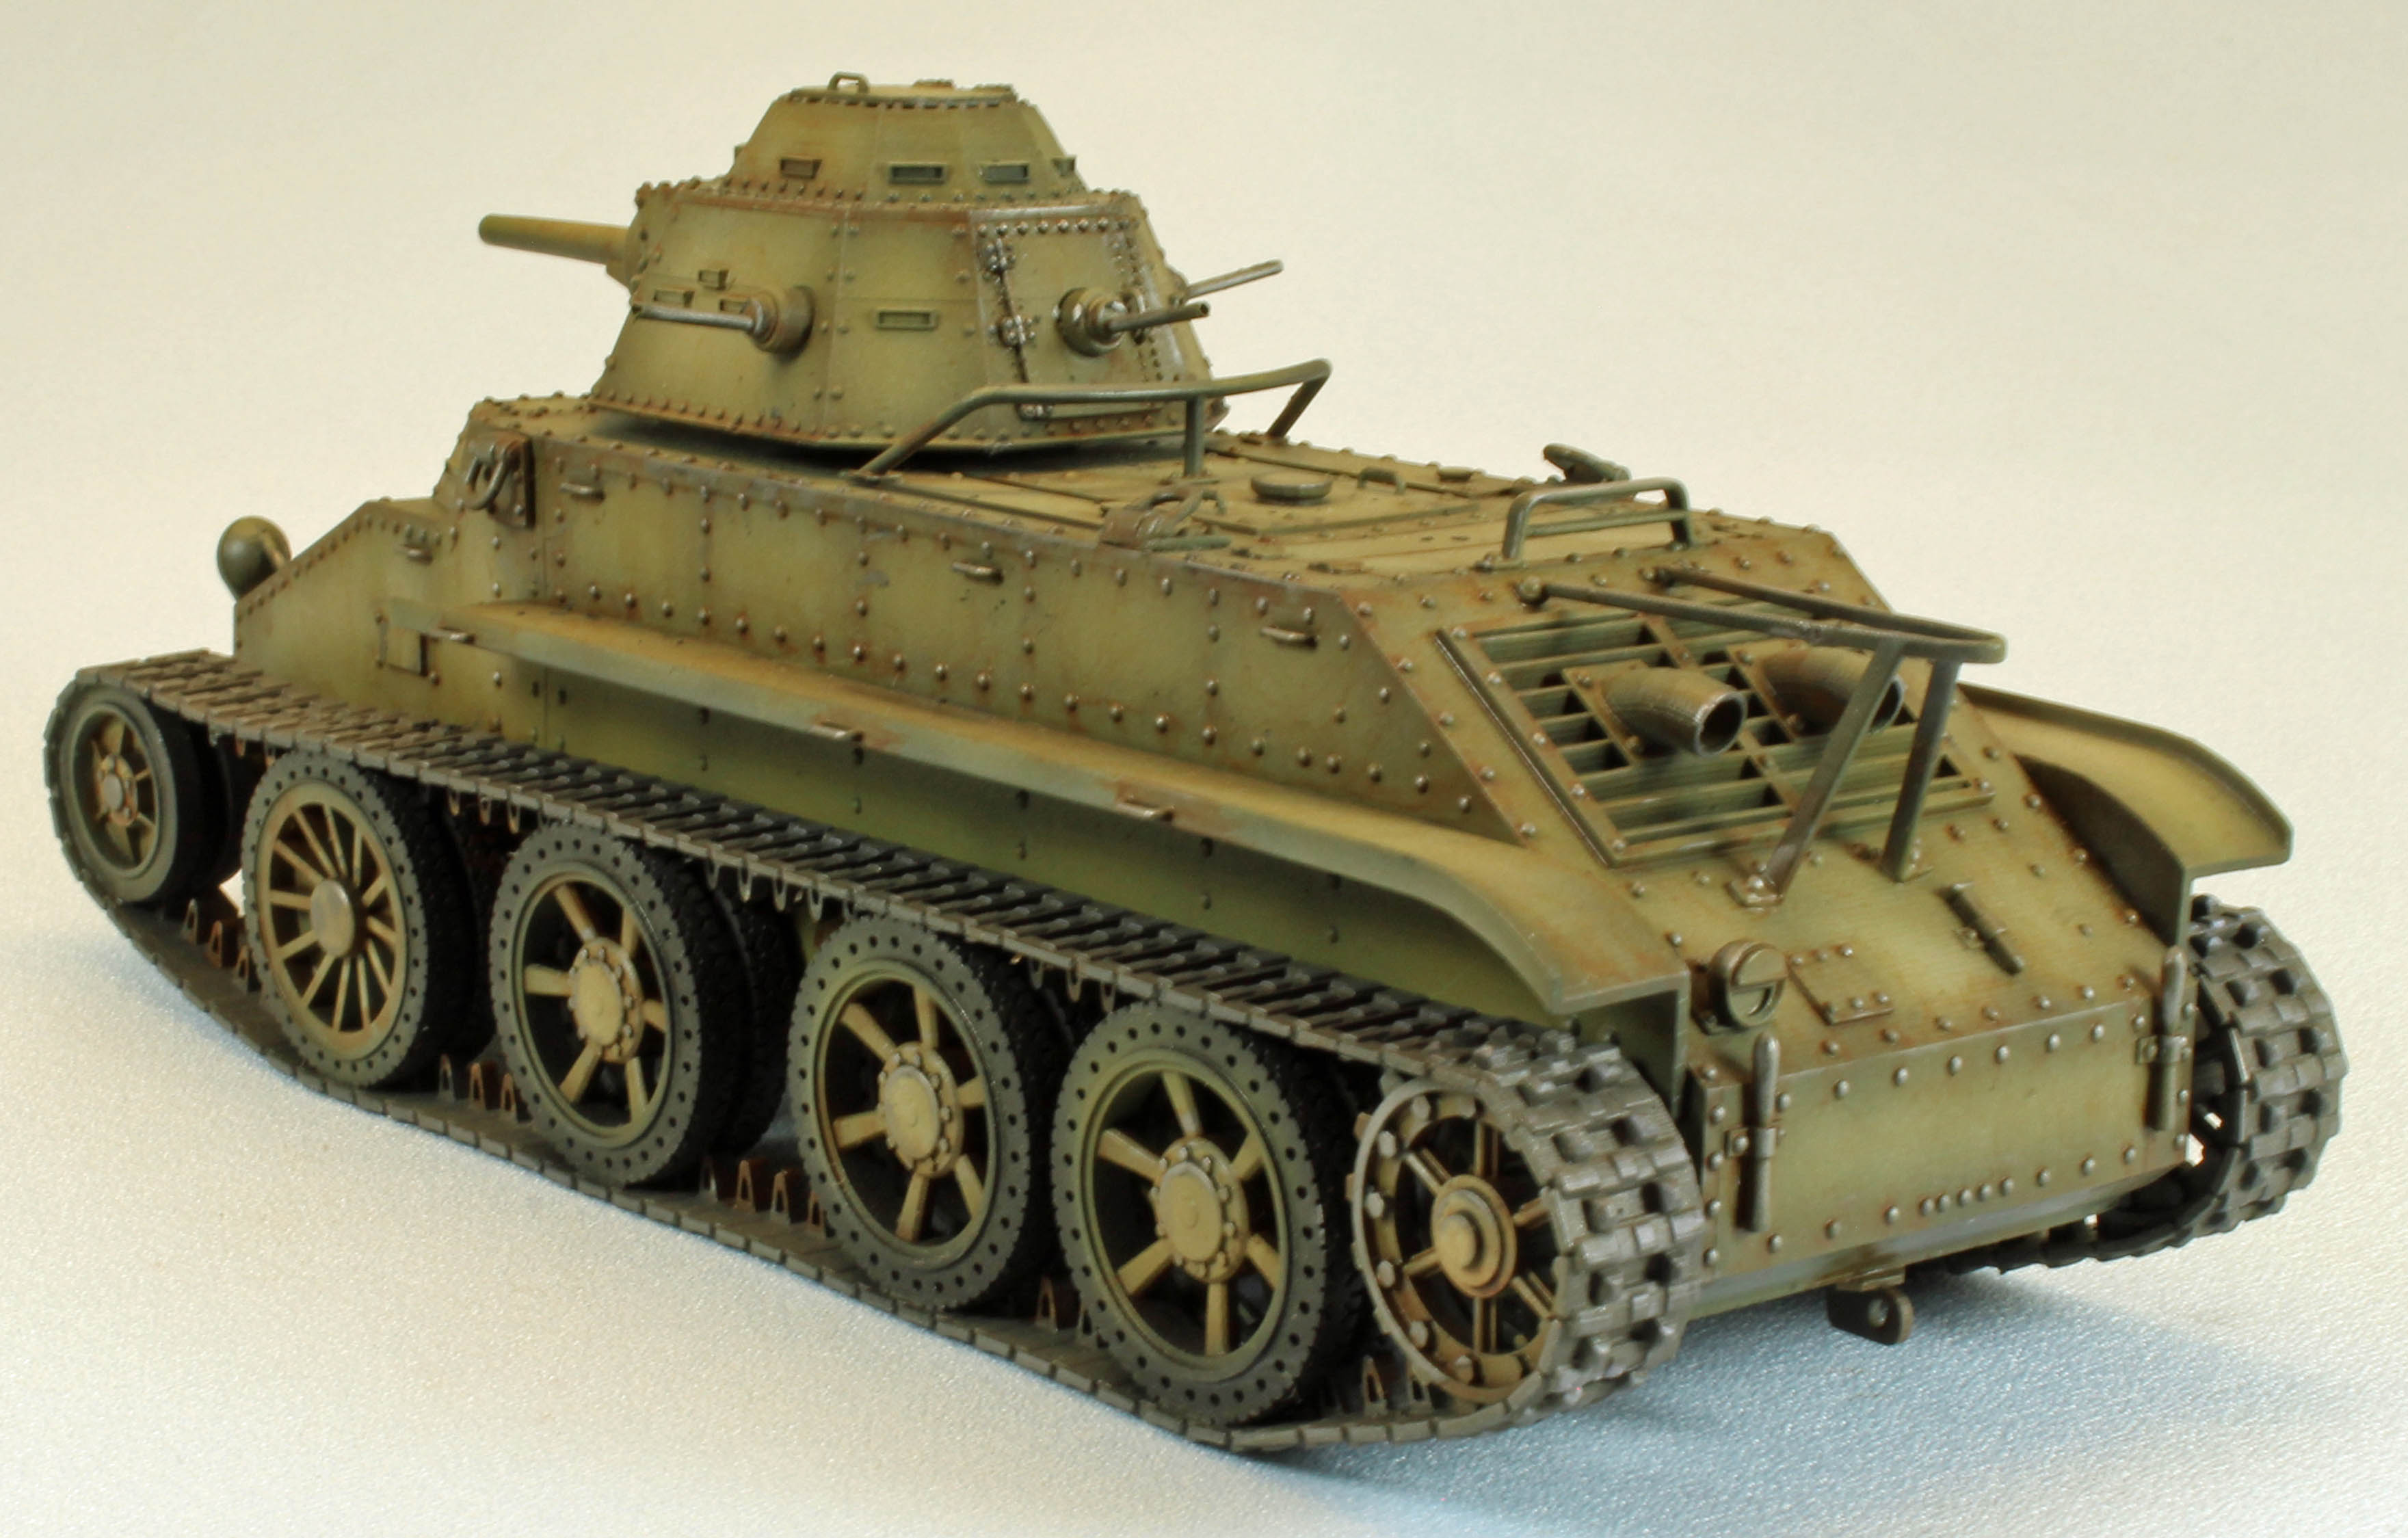
The T2/T3 designation of the Vargas offering allows the modeler to choose between two versions; the first sporting four turret-mounted machine guns, and the second, three machine guns and a 37mm main weapon, positioned forward in the turret. Both versions had a hull-mounted machine gun as well. The second version is the subject of my review.
The Kit
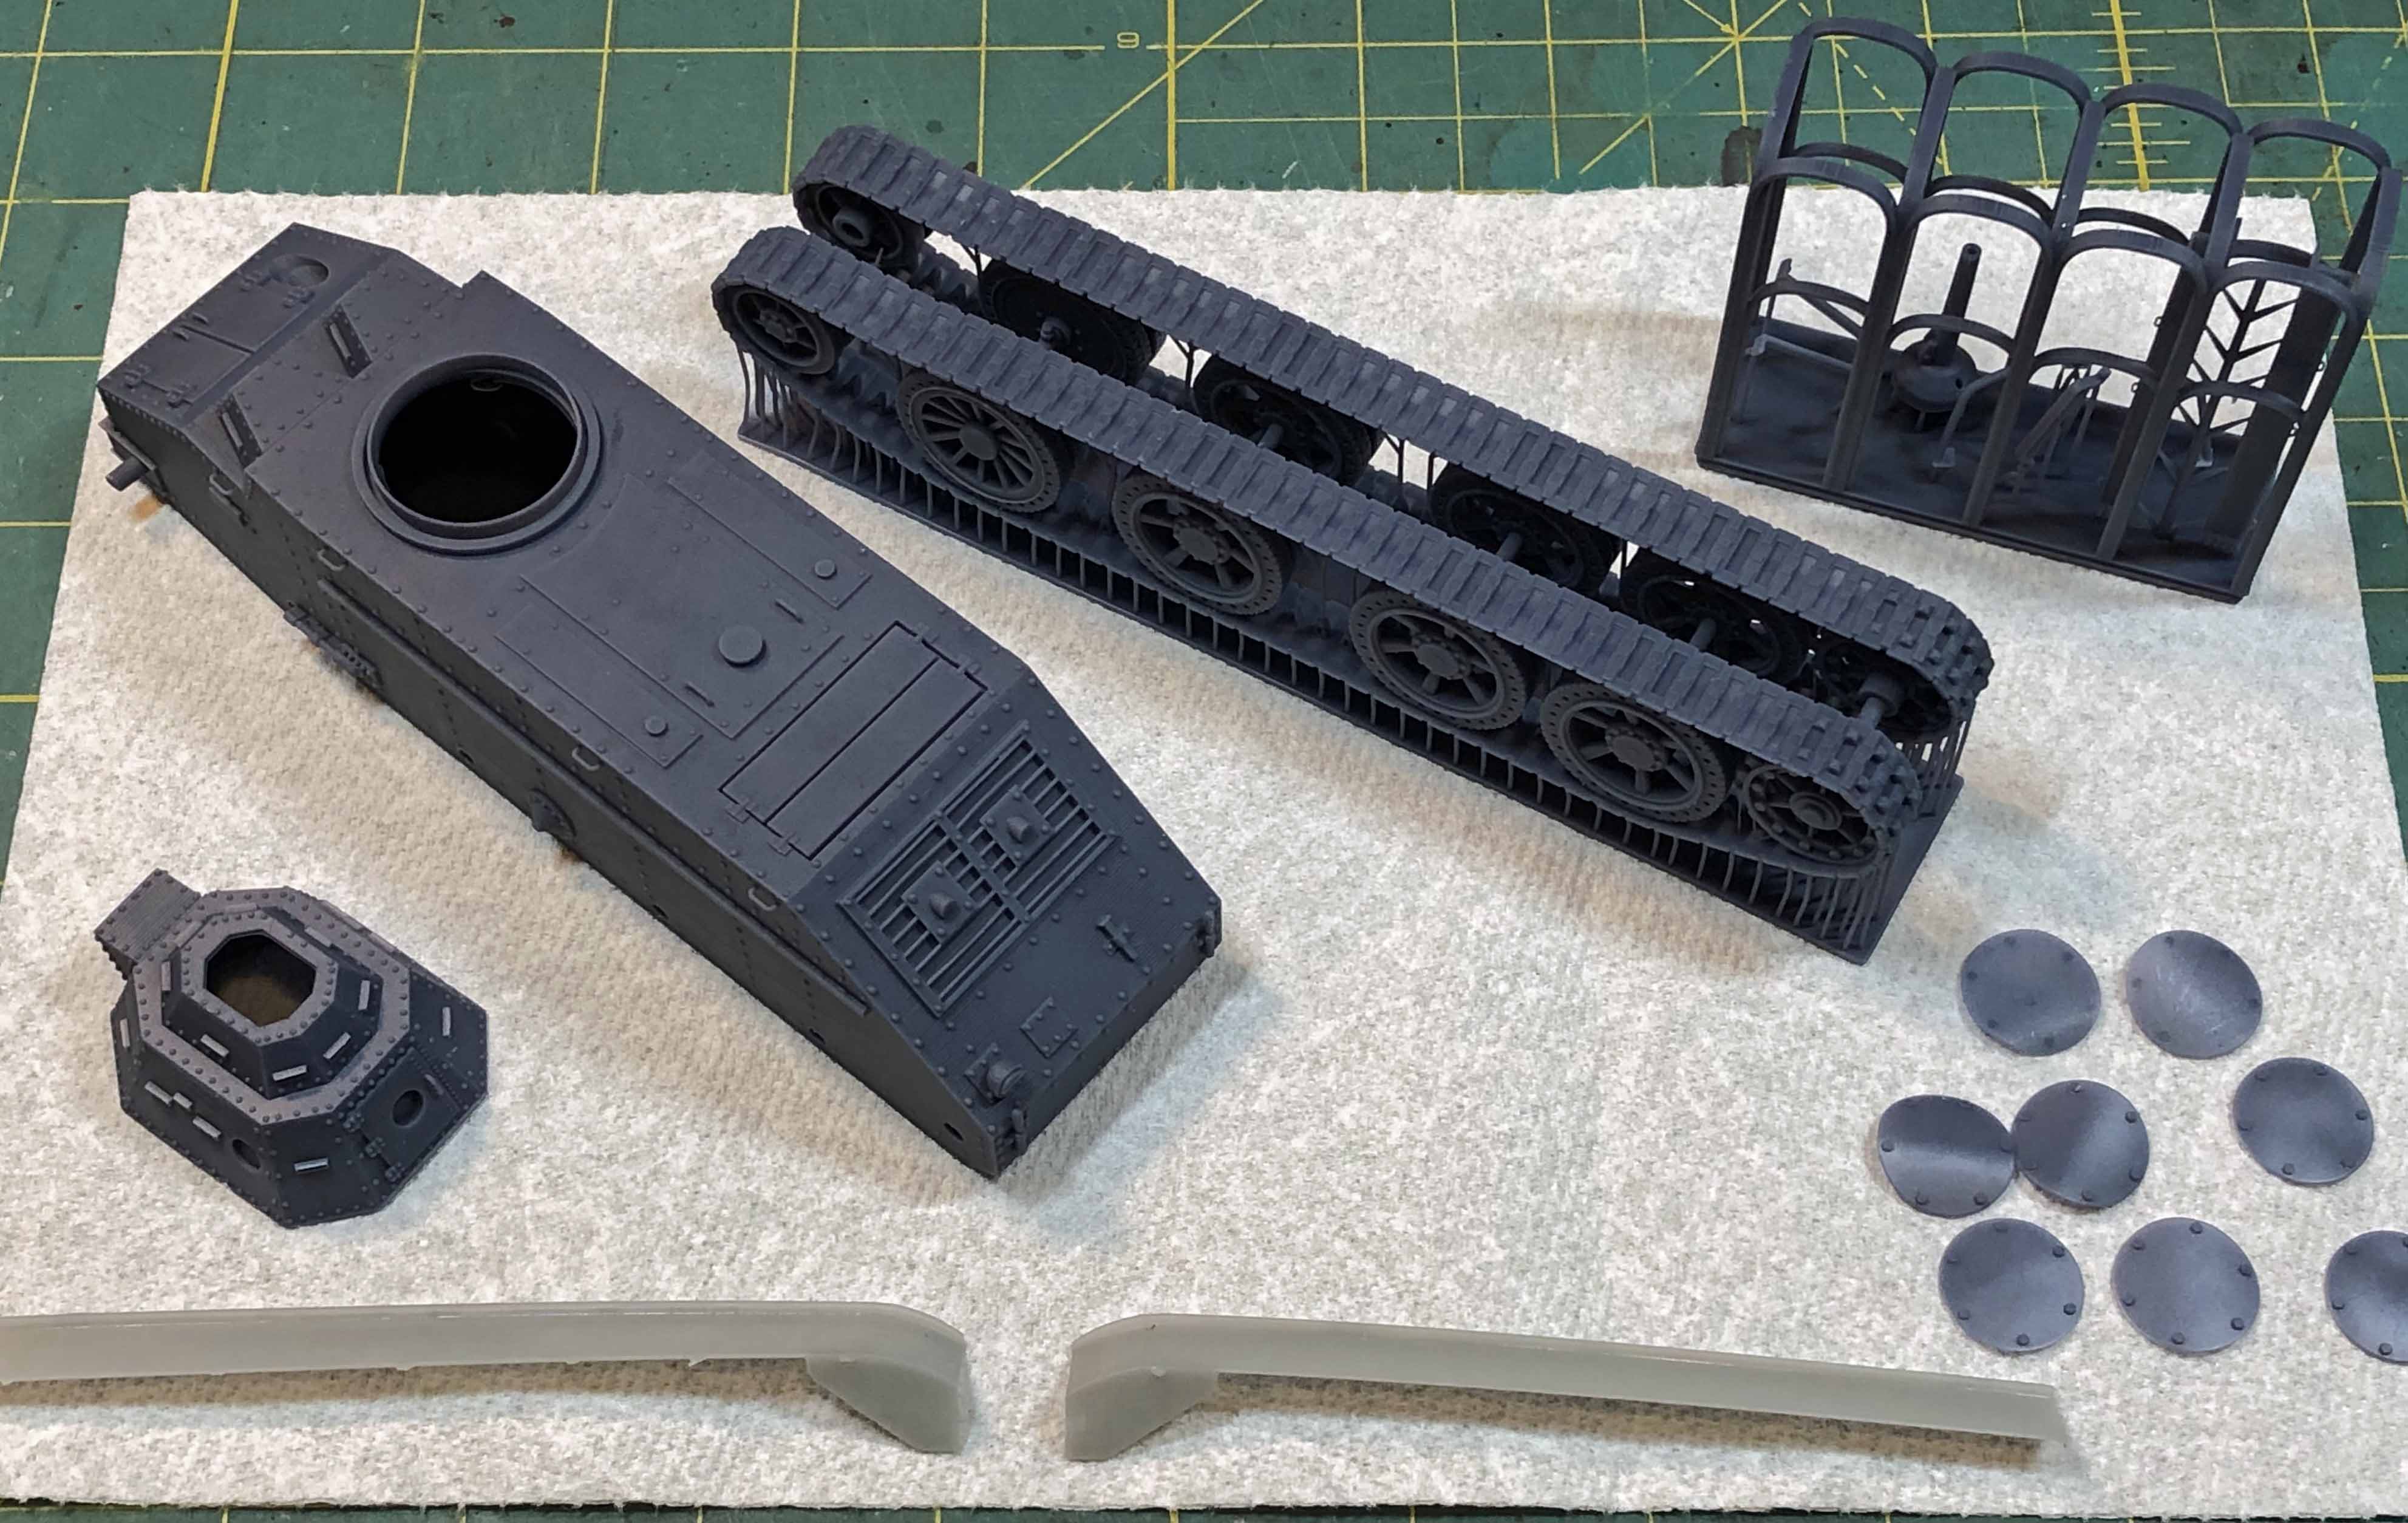
As with most 3-D printed kits, the Vargas sprues do not have any old-school poured-resin blocks to remove; instead each sprue contains dozens (hundreds?) of very thin connecting rods that are part of the printing process. This makes the parts very simple to remove from the sprues. Most of the smaller parts are printed within a flexible, protective ‘cage’ of resin. There are very few actual parts, and these are exquisitely detailed – some of the best work I have seen in this medium. There is cleanup required, to be sure, but nothing like what I would normally expect for limited-run, resin subjects.
The dark-grey resin is firm, but sands easily enough, and there are some very slight surface striations on some of the round parts that require attention, making preparation more important than with typical styrene kits. Comparatively, however, this work from Vargas is pretty darn good as delivered. There are very few, if any, surface flaws and the molding is excellent with no noticeable defects. The detail overall is crisp, and while many of the parts are very delicate, Vargas pulls everything together without resorting to using photo-etch or other finicky mediums, which is a big plus (for me, at least). The two pieces that represent the full track runs, one for each side, are simply breathtaking, as is the rivet detail throughout.
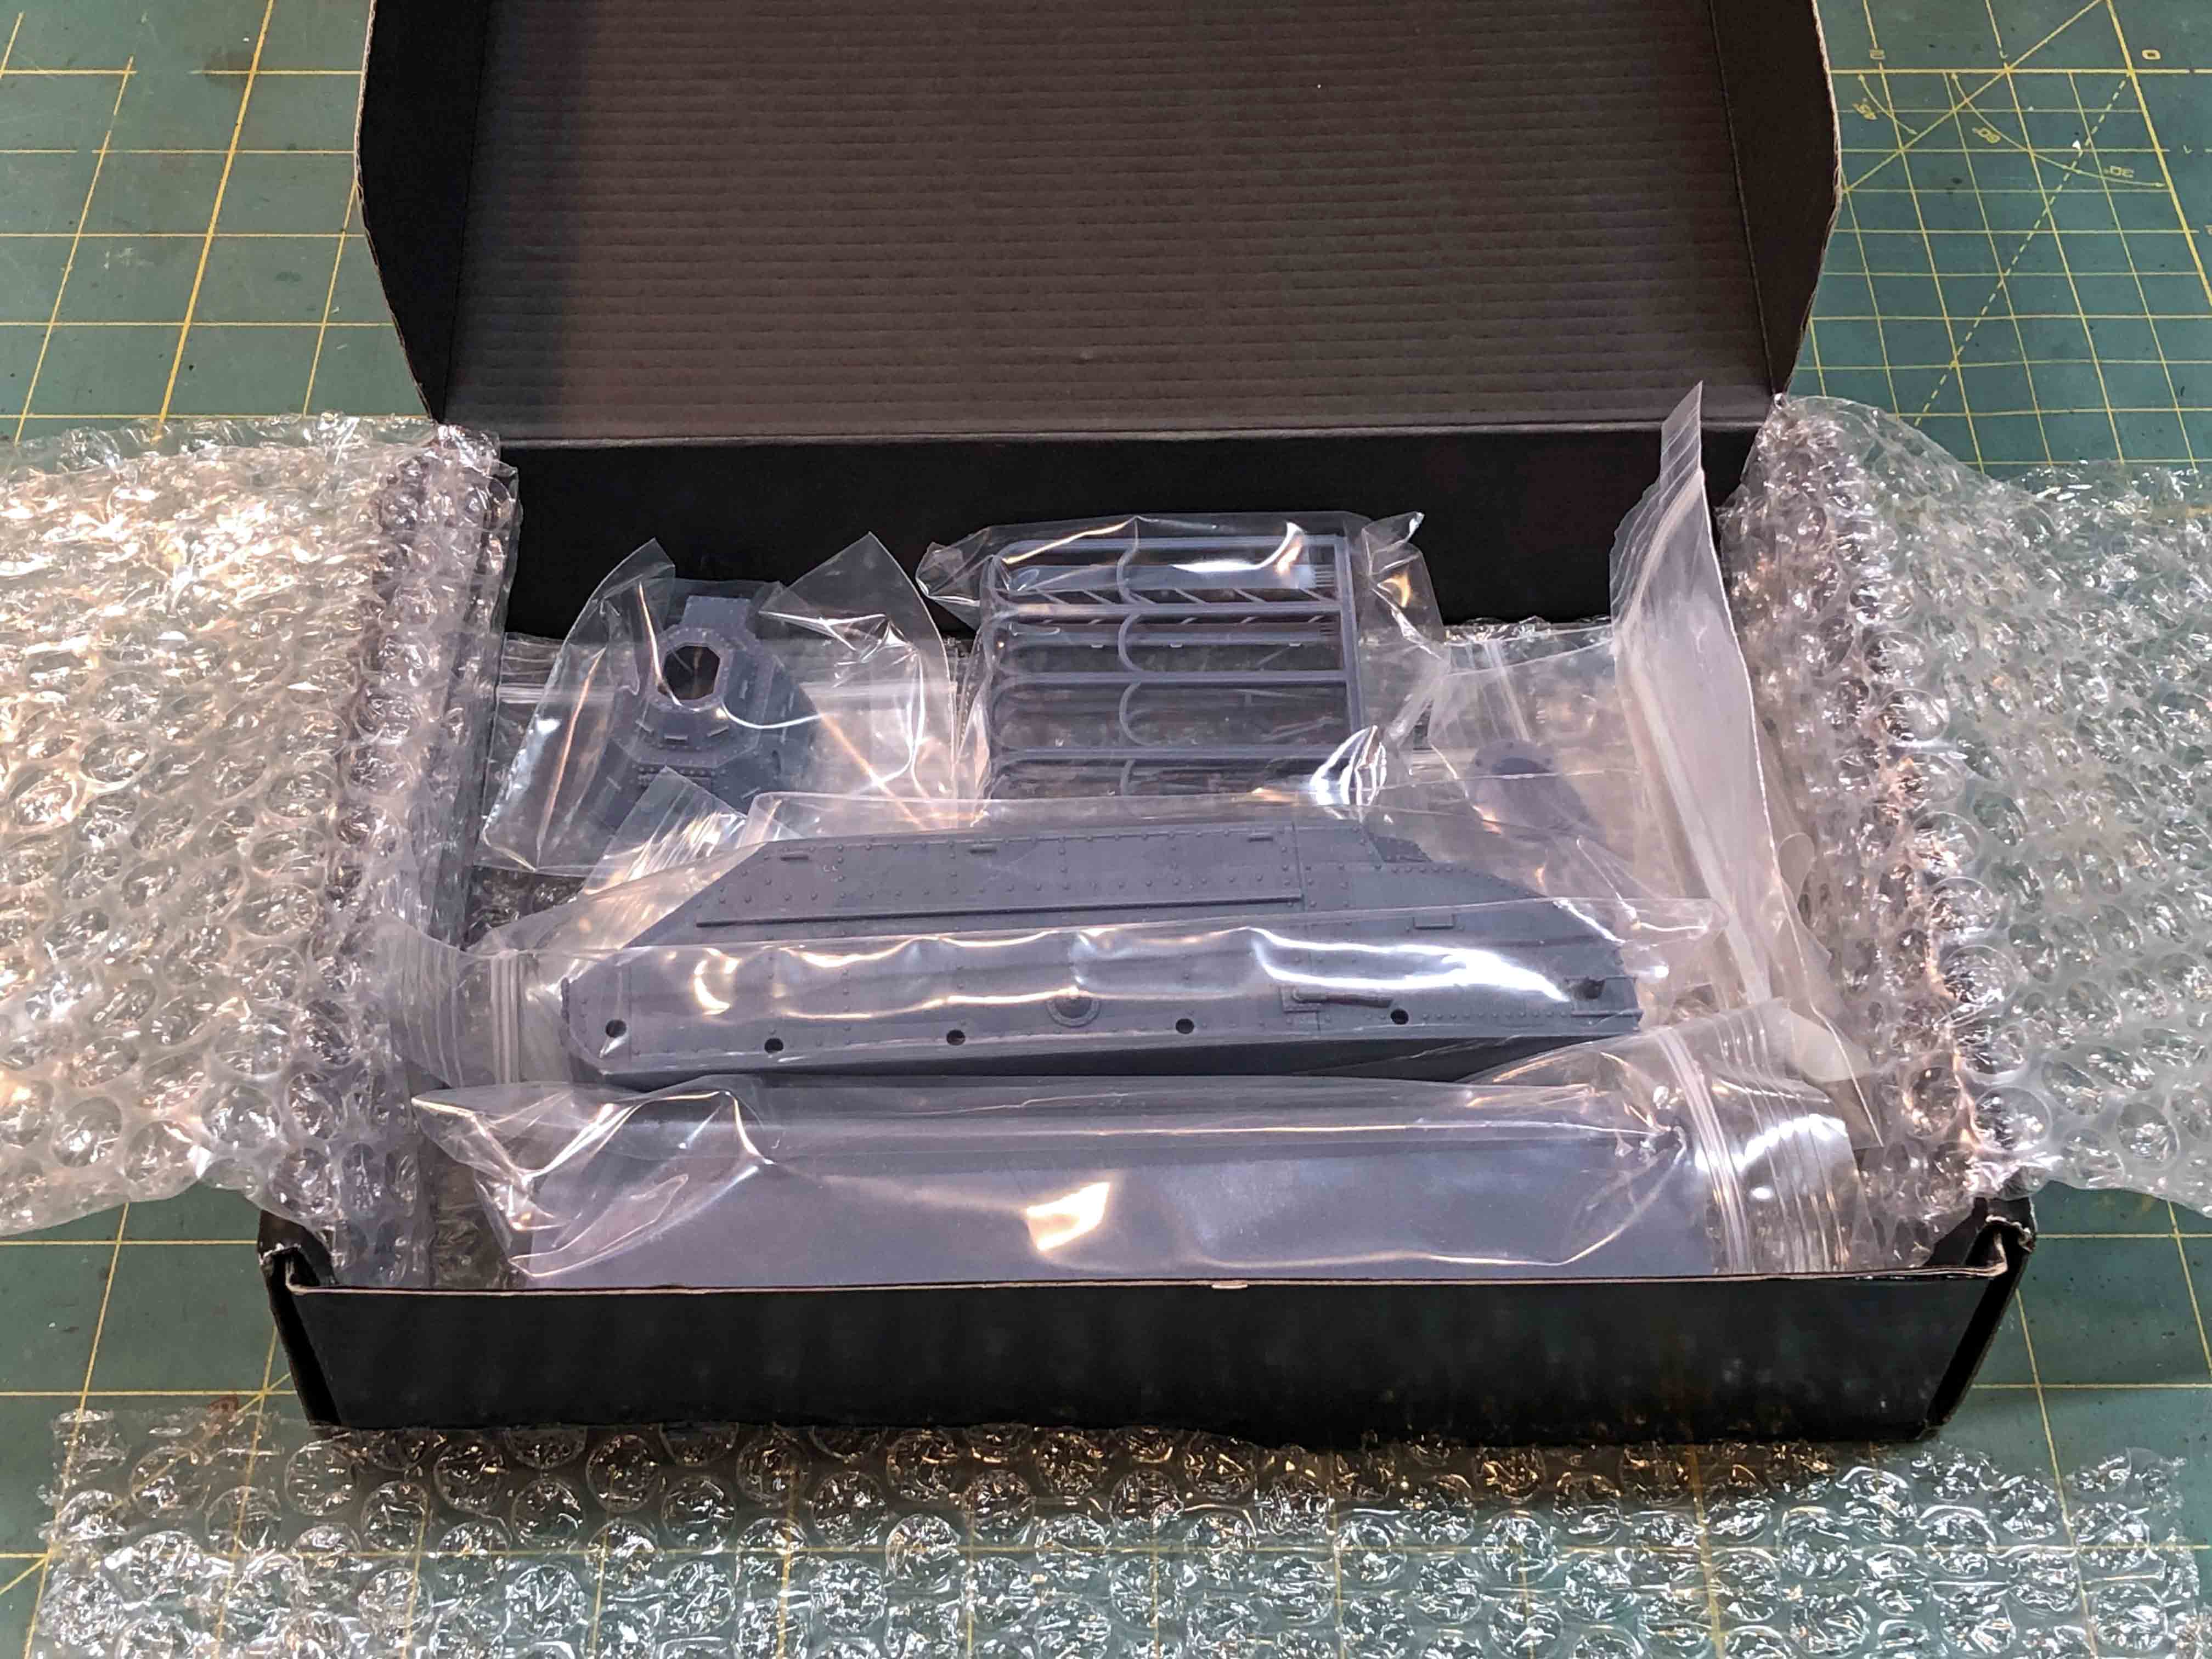
The contents of the box include:
- A single, dual track sprue, packaged separately.
- One turret, packaged individually.
- The single main hull packaged separately.
- A single sprue of all the remaining parts, packaged separately.
- A 4-page, color instruction booklet, consisting of a single full-size sheet, folded in half. All text and label information are printed in English.
The Instructions
As with most limited run, resin kits, the instructions are brief and not always ‘enough’. Assembly requires test fitting and comparing what you have to drawings and images of the real thing, easily found on-line. In place of text, Vargas provides simple CAD images from the printing process itself for use as a rough go-by to start with. Fortunately, each piece is shown assembled and printed in a different color from the one adjoining it, which makes things a little easier to follow – but only a little. If you have built limited-run kits before, this one is typical – a lot of testing and adjusting surfaces to fit. Fortunately, the images are rendered from several angles so you are rarely forced to guess about how things go on ‘the other side’.
Clean Before You Start
Even though there are relatively few parts in this kit, a 3-D printed model requires some preparation before assembly. After unwrapping all the parts and carefully snipping (not pulling) the parts printed inside the sprue ‘cage’, I carefully shaved and sanded the surfaces of everything to remove any remaining vestiges of the thin resin posts that hold the parts to the sprues. The track sections for the Christie are sturdy, but will break if mishandled – just go slowly.
Next, I went to work smoothing out some minor (but noticeable) grooves on the surfaces of the round parts, such as the mantlet of the 37mm main weapon. The resin is not soft, but it works away with a little effort, resulting in a smooth surface relatively quickly. Other areas that need attention are where flat surfaces mate together; on some parts the flat surface was slightly convex (rounded) from the production process, and needs to be made perfectly flat to prevent gaps.
Once I thought I had everything pretty well cleaned up, I gave the parts a warm bath in soapy water, rinsing them in warm water. After drying I felt the surfaces with my fingers, and, if I found anything tacky, I repeated the wash, rinse, and dry steps until all the tackiness was gone. With all the parts clean and free of defects, I was ready for assembly.
The Build
Assembly starts with a choice to make – whether you will build the T2 version with five machine guns, or the T3 version with four machine guns, and the forward-facing, turret-mounted MG swapped out with the long-barreled 37mm gun. I wanted to show a little variety in armament so the T3 prototype appealed to me.
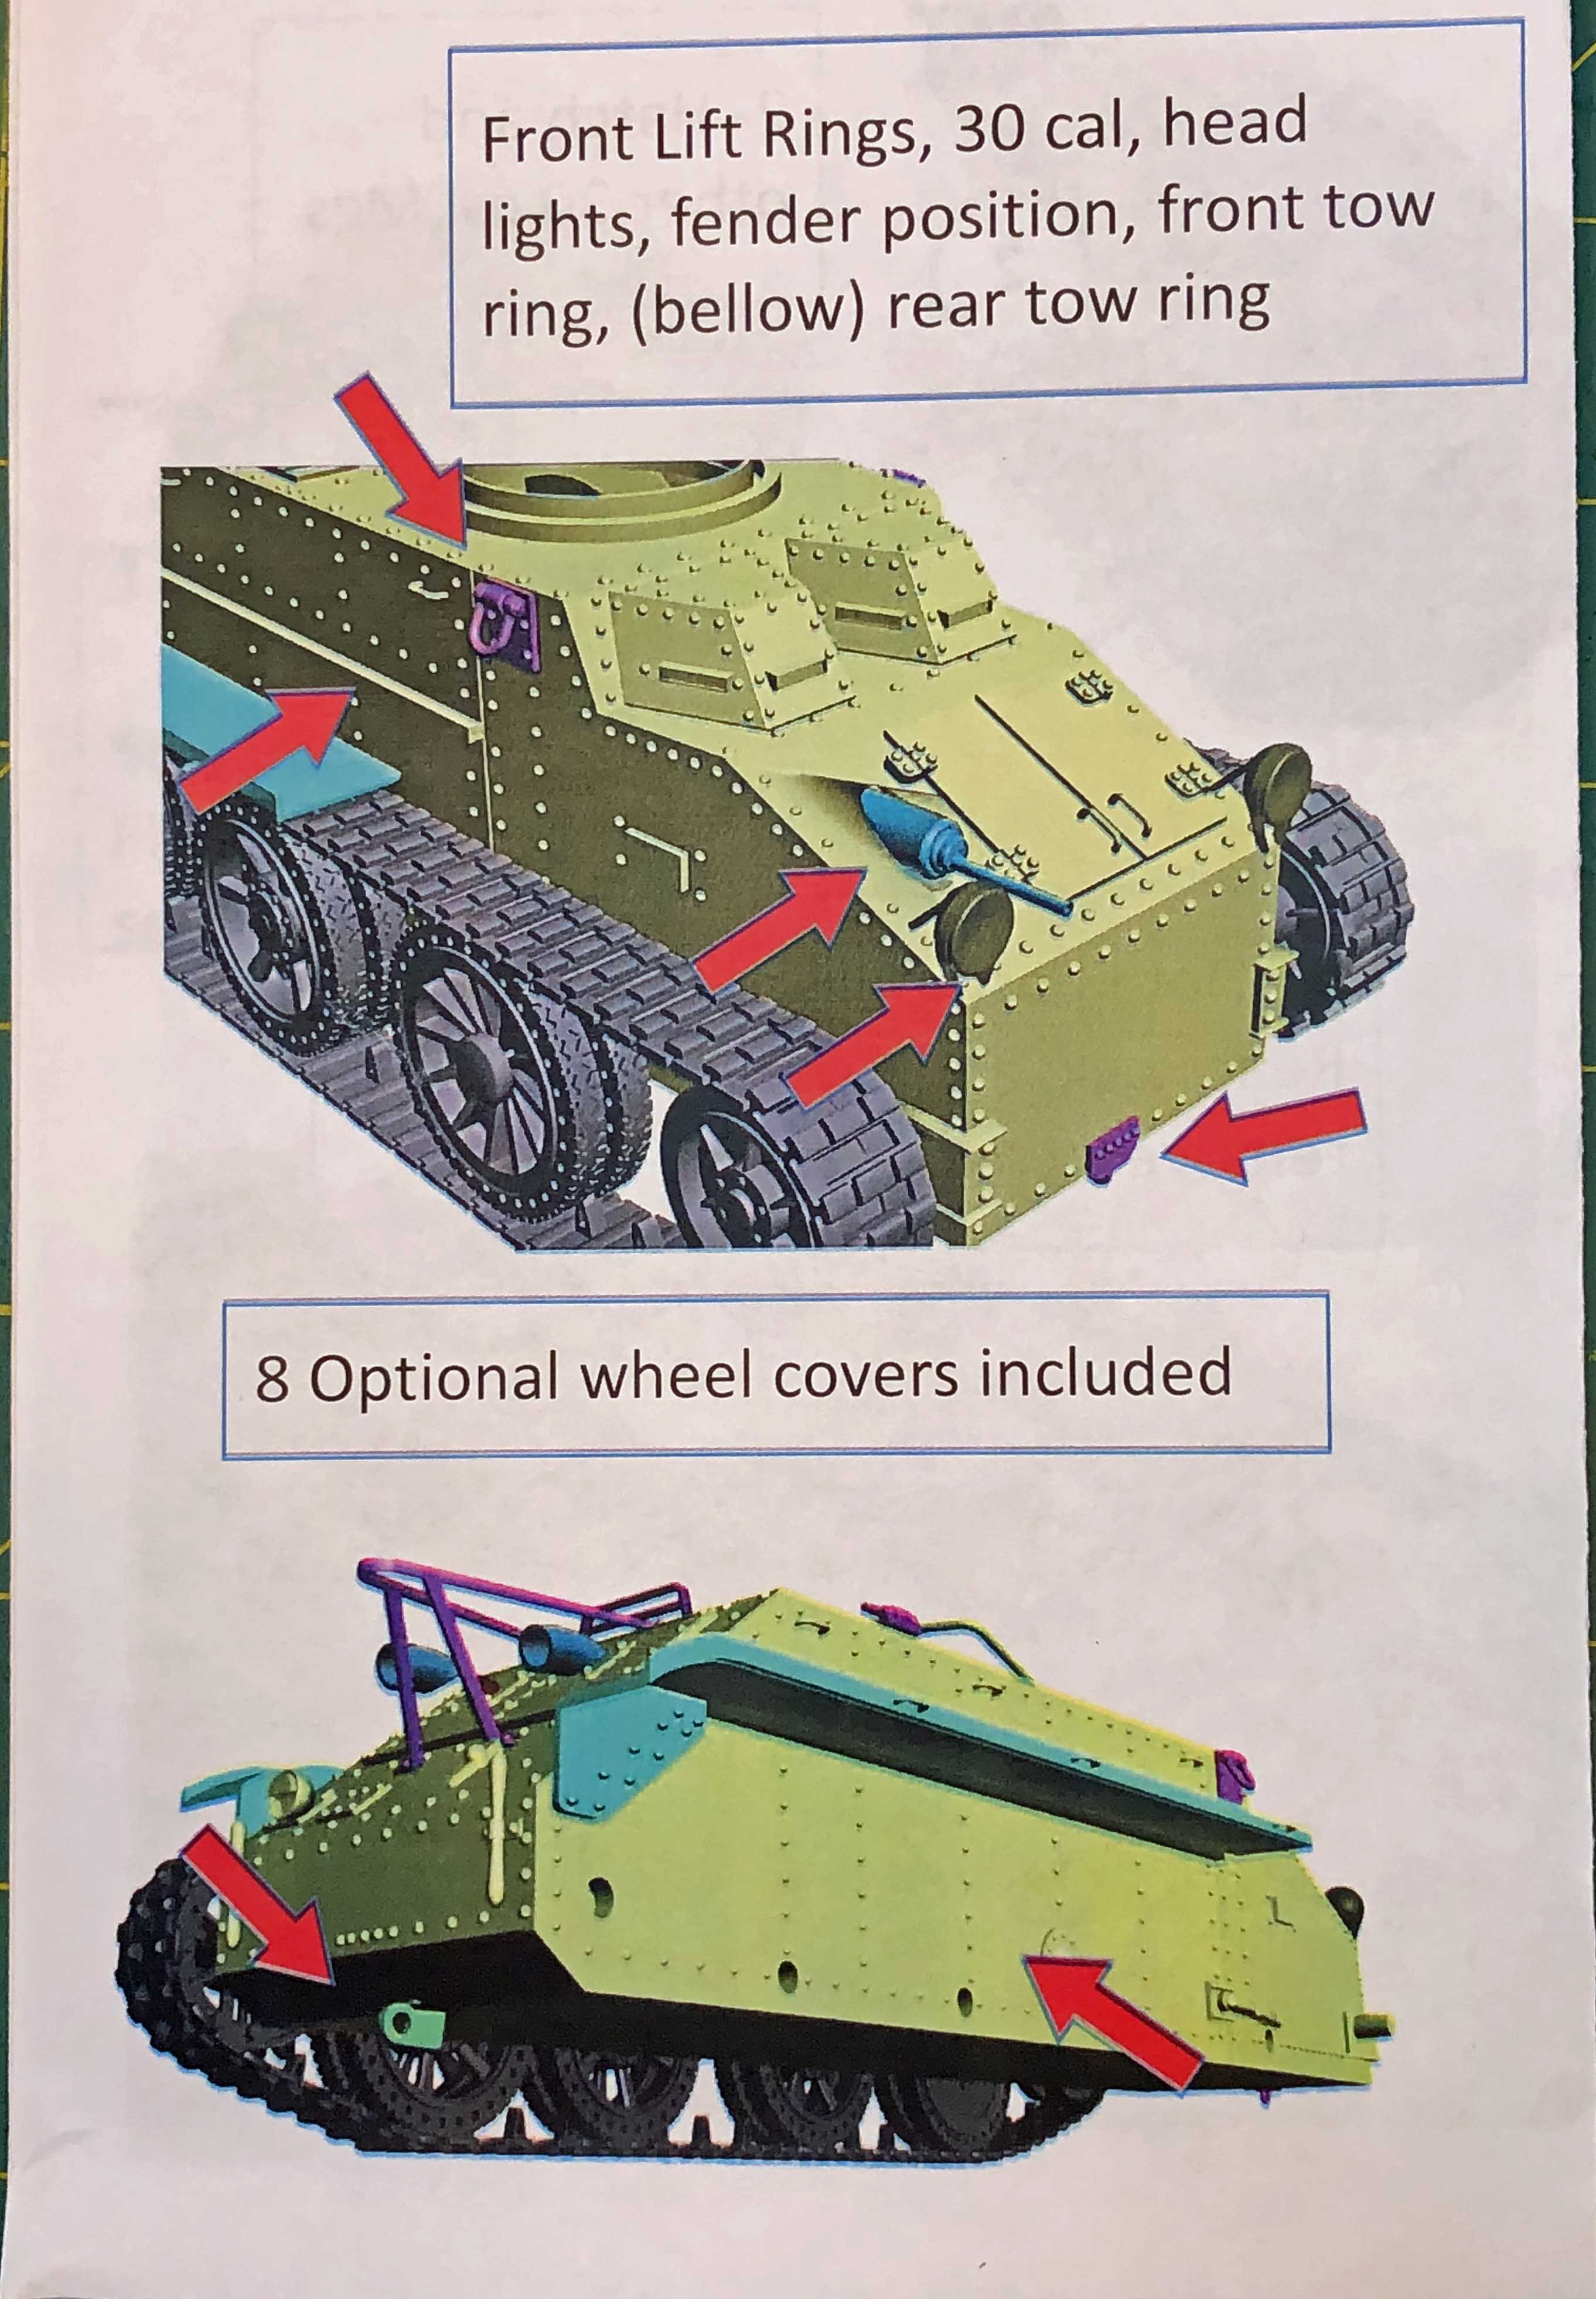
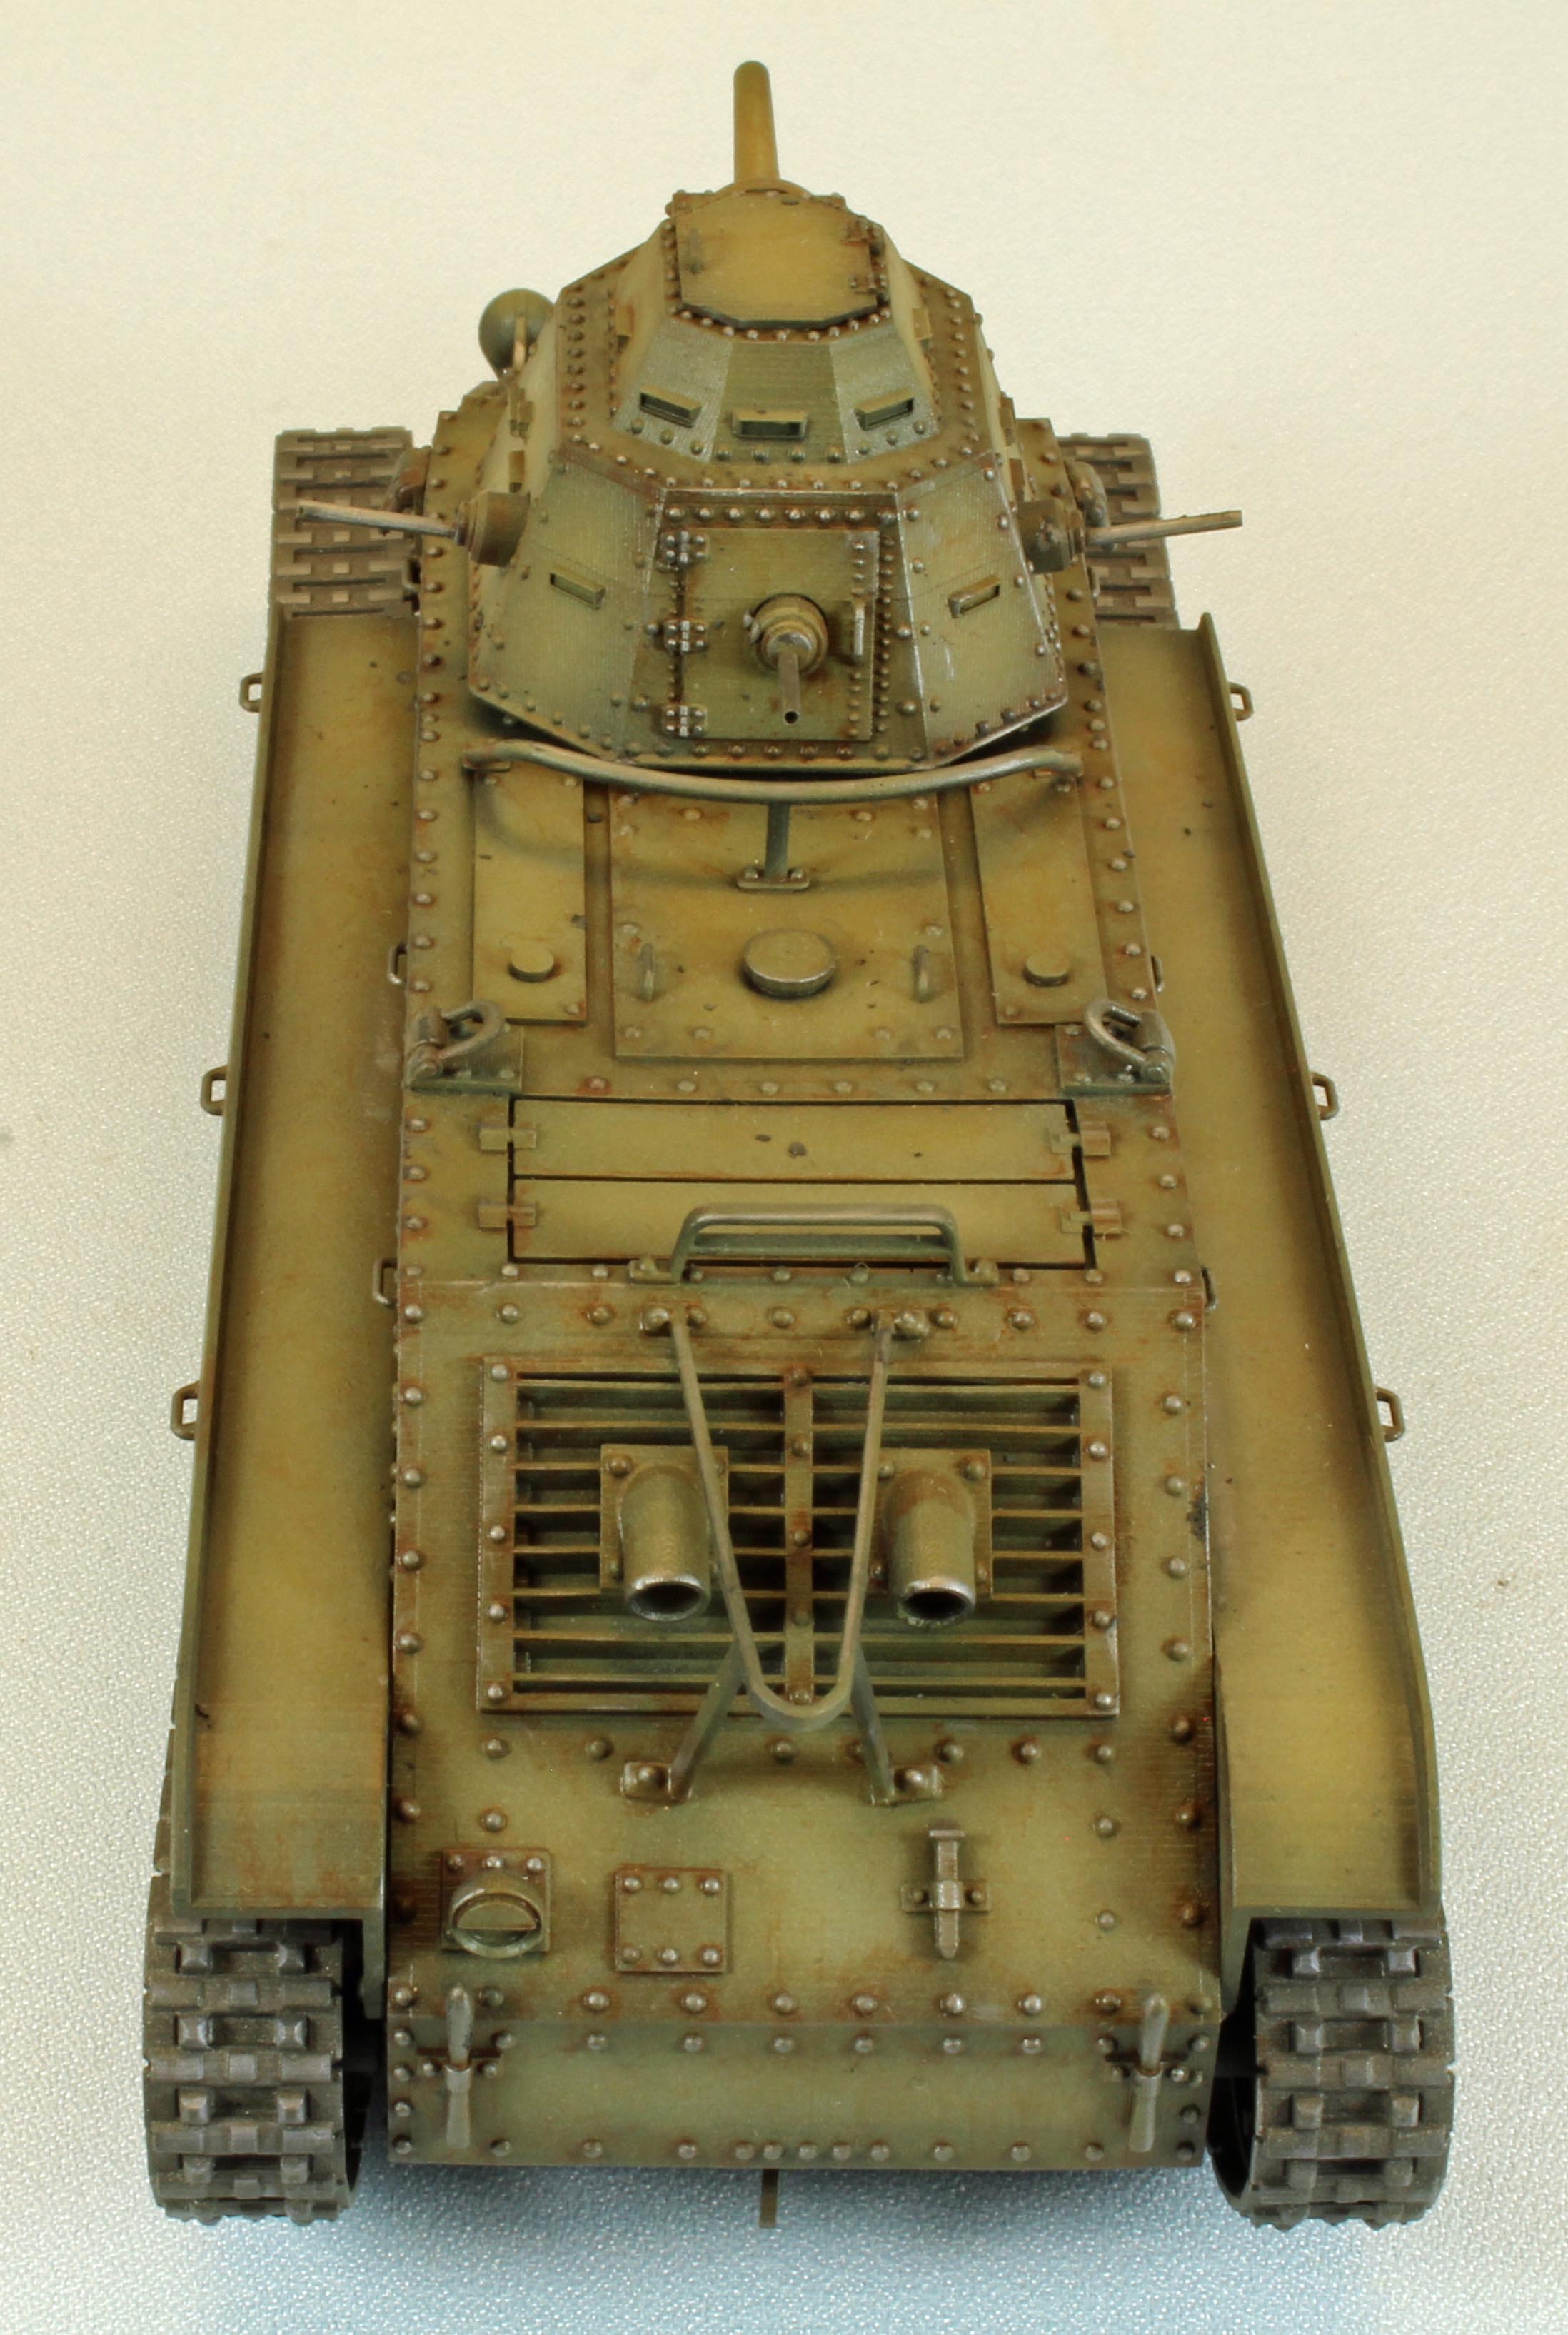
After discarding the unused parts (including eight wheel covers (IMHO - the nicely detailed wheels shouldn’t be covered up!), and donning my particulate mask, I went to work with several round files, sanding and fitting, until I had a good seal around all the parts and the places where they go.
Everything came together very well, except for a rack mounted above the two exhaust pipes – which was due to an error on my part. I counted the rivets from each side of the rear-housing to ensure that the rack would be centrally mounted, looked away to apply super glue, and then mounted the rack slight to one side. Had I noticed the error, I could have simply spread the two upper arms to fix things, but I did not. No matter how much CA-debonder I used, the rack would not budge, and was too fragile to force. So (my) T3 gained a little more character! I left the two track sections off until the end of the build so that they, and the rest of the tank, could be finished separately.
The long, thin barrel of the main armament and the two fenders had a little warpage as delivered, which was addressed by setting the parts out in the sun for a minute or two to give them a little more rigidity. I then simply bent them into place as needed and secured everything with super glue. The soft resin used by Vargas will allow you to use that technique, if necessary, on the thin parts.
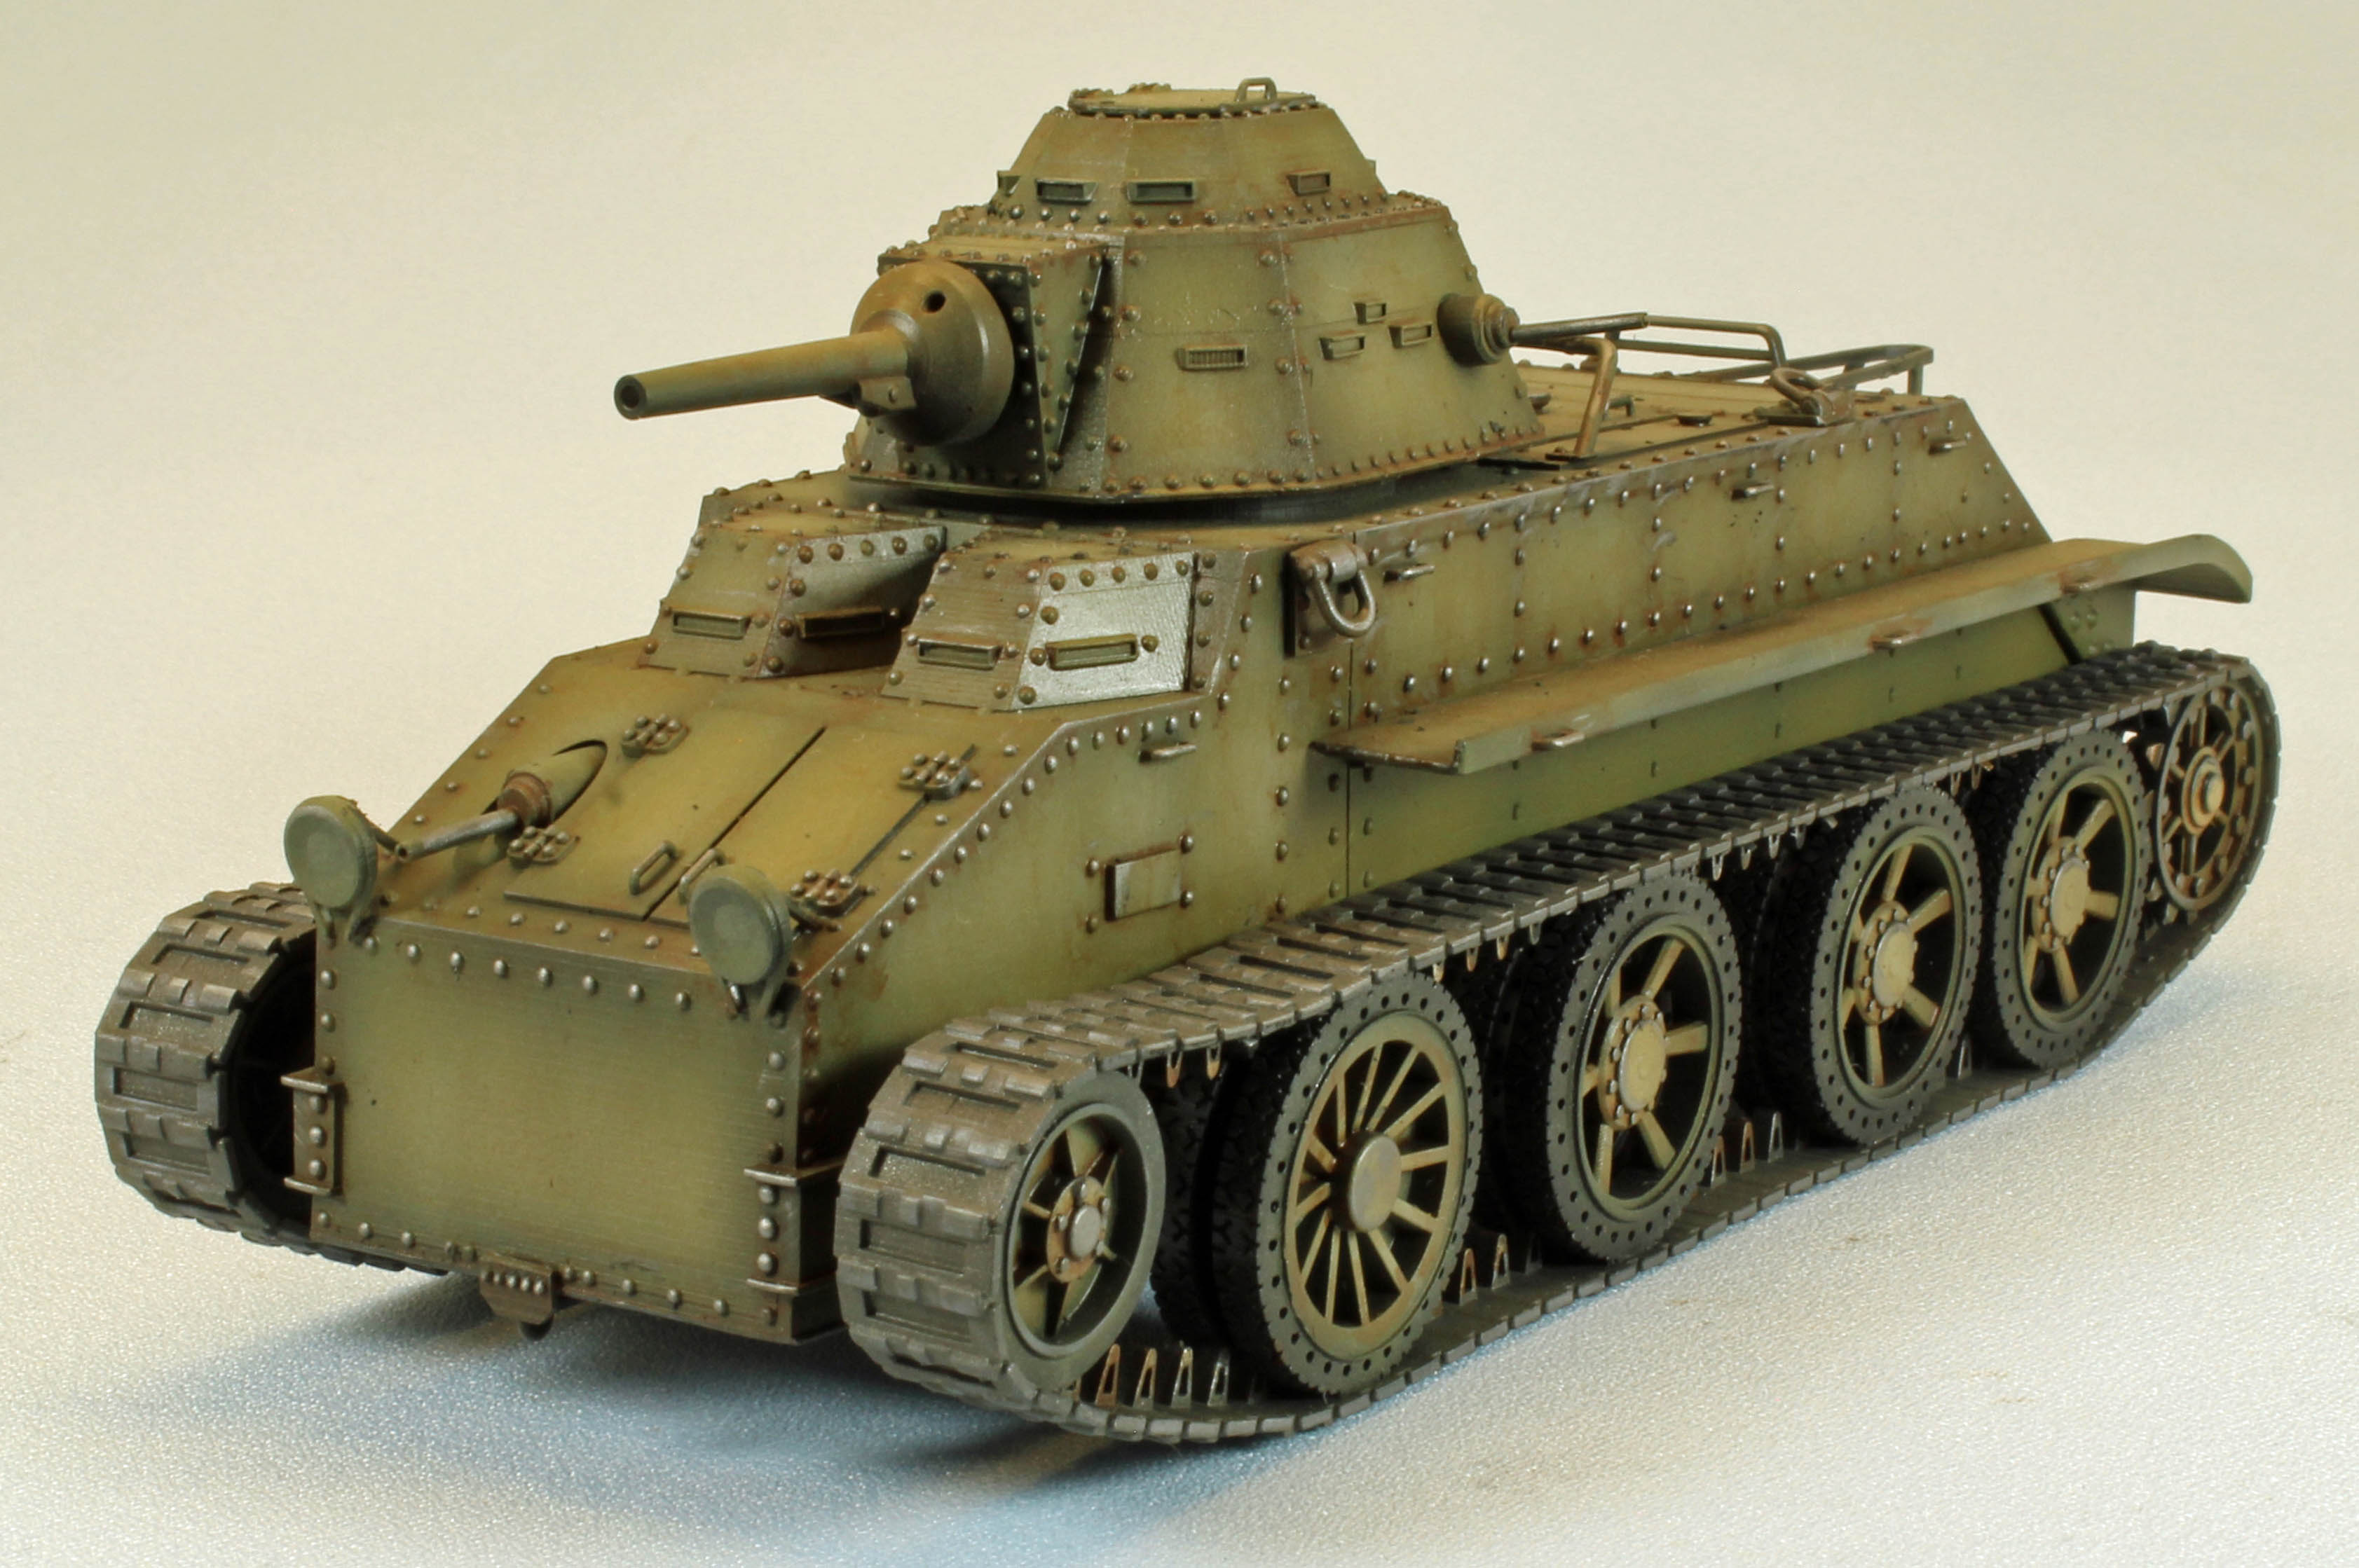
The turret, when mounted, stands a little proud of the surface – more than what I could find in online images. I shaved and sanded a little off the top of the turret ring so that everything hunkered down a little lower.
And that was that – assembly complete, with the track/wheel sections set aside for attaching at the end. Vargas models are perfect for modelers like me, who enjoy the ‘finishing’ steps to those involving assembly.
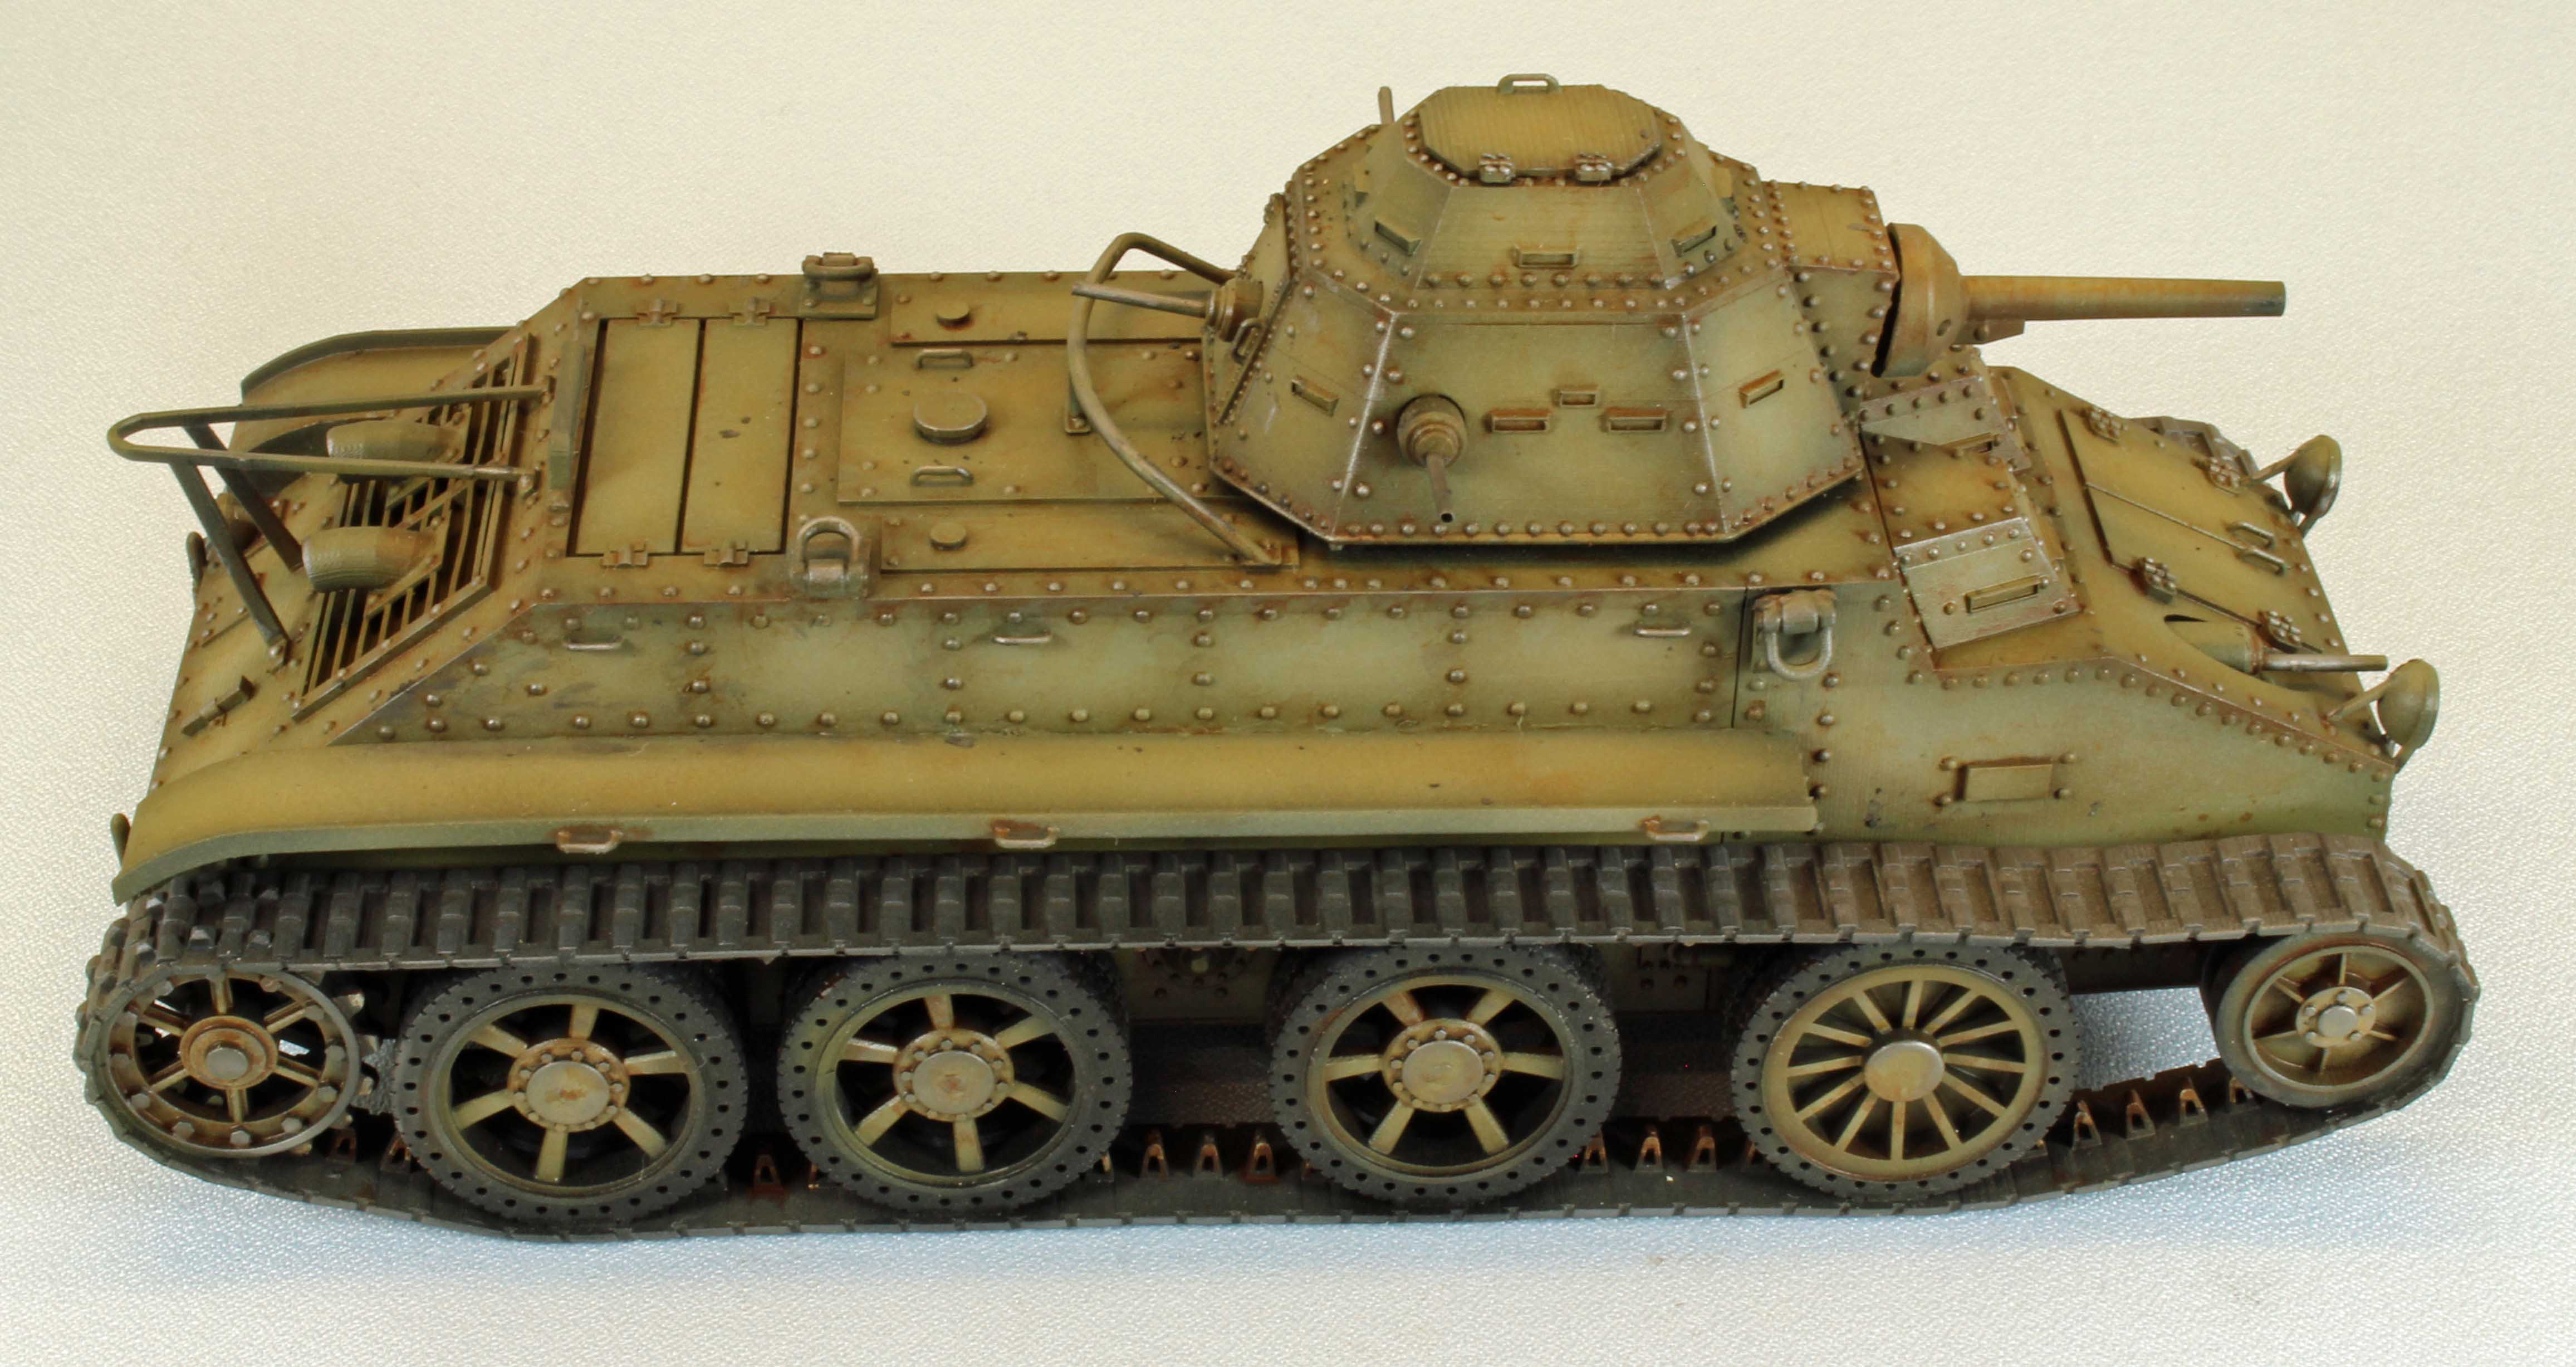
Painting and Finish
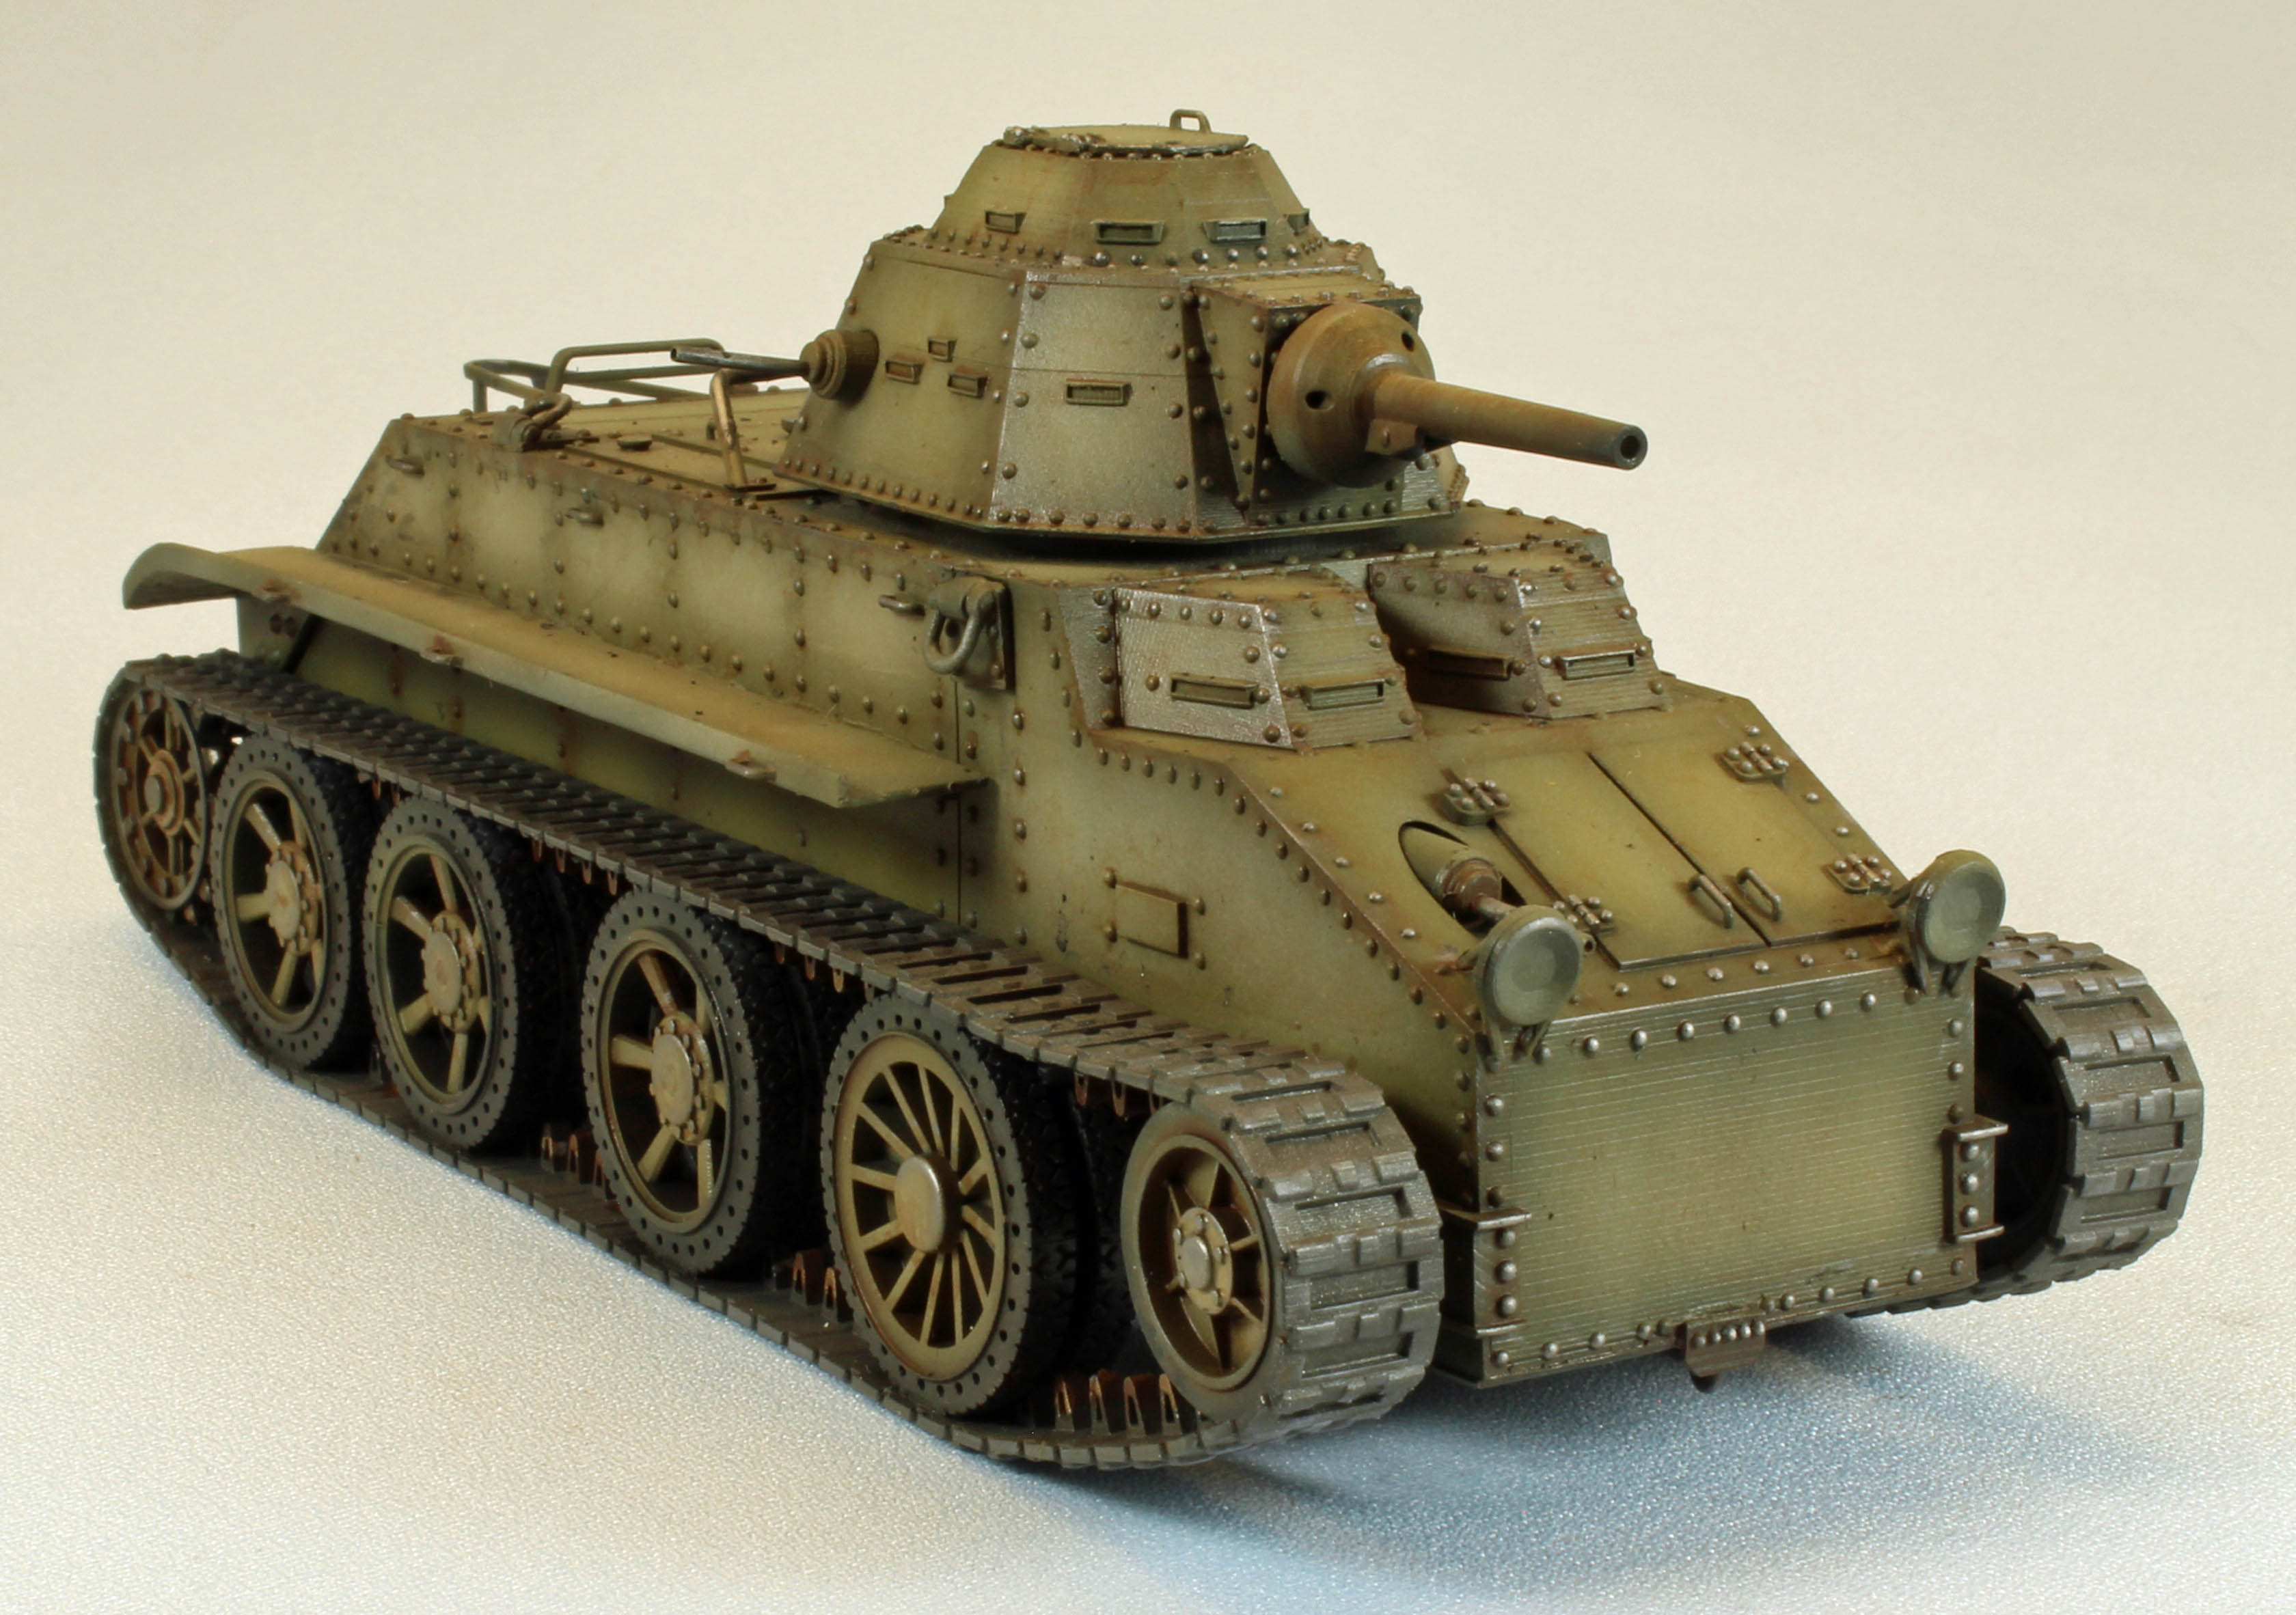
There are a surprising number of images of the Christie online, but a US Army Green scheme prevails! I chose to add a little weathering to break up the monochromatic finish as much as possible.
Here is a breakdown of the colors, materials and steps I used to finish the build:
Painting:
- Primer: Alclad Black Primer with Micro balloons
- Base Coat – AKI Real Colors RC023 Olive Drab
- Post Shade (1) – AKI Real Colors RC024 Olive Drab Faded
Painting: Track Sections and Detail
- Primer – Alclad Black Primer with Micro balloons
- Base Color: Tamiya Dark Iron
- Base Coat (wheels) – AKI Real Colors RC023 Olive Drab
- Post Shade (1) (wheels) – AKI Real Colors RC024 Olive Drab Faded
Weathering
- Mr. Hobby Mr. Weathering Color Enamels - Stain Brown – all surface detail, stumped with Mr. Hobby thinner, over a glossy surface of Alclad Klear Kote lacquer.
- Overall ‘bling’ added using Mig Ammo Gun Metal Powder.
Conclusion
This is my third 3D printed model from Vargas and the build was a breeze. Luis Vargas did a solid job researching the subject, and the design and engineering that went into the kit is readily apparent. As I said with the last Vargas project – each one makes me want to build more.
As with any all-resin project, this kit has its challenges, especially when compared to injection-molded models. I think the build was straightforward enough, however, for any modeler to finish. Having a solid working knowledge of alternative adhesives (CA Glue, epoxy, and/or ‘fortified’ white glues) would certainly be a plus.
I would like to heartedly thank Luis Vargas at Vargas Scale Models for providing this kit for review, and to IPMS USA for giving me the opportunity to build it.