Reviews
Armor
MIM-104B Patriot Surface To Air Missile PAC-1
by Eric Christianson
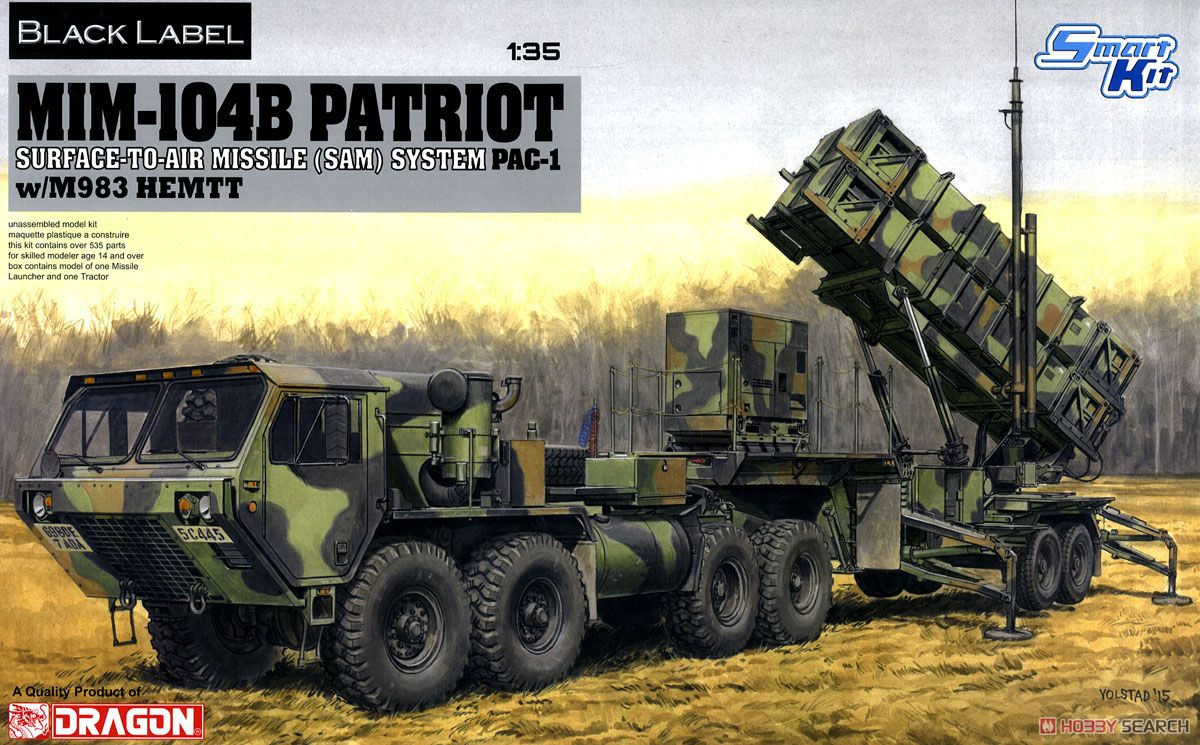 Model: MIM-104B Patriot Surface To Air Missile PAC-1
Reviewed by: Eric Christianson, IPMS # 42218
Scale: 1/35
Company: Dragon
Price: $96.29
Product/Stock #: 03558
Website: Dragon
Product Web Page: View
Product provided by: Dragon Model USA
The Black Label collection from Dragon Models offers an interesting range of novel model kits. Their latest offering, a 1/35th scale MIM-104B Patriot Surface To Air Missile (PAC-1), is not the only kitted offering of this venerable anti-missile, missile system on the market; it is not even the first version of the kit produced. But, with its relatively low parts count and absence of photo etch, it is a kit clearly aimed at modelers with a focus on build-ability. Dragon includes not only the complete launcher and four posable missile pods, but also the U.S. Army HEMET prime mover – quite an undertaking in one box.
The MIM-104 Patriot is a surface-to-air missile (SAM) system is used by the United States Army and several allied nations. It is manufactured by Raytheon and replaces the MIM-23 Hawk system as the U.S. Army's medium tactical air defense system. In addition to these roles, Patriot has been given the function of the U.S. Army's anti-ballistic missile (ABM) system, which is now Patriot's primary mission. The system is expected to stay fielded until at least 2040.
Prior to the First Gulf War, ballistic missile defense was an unproven concept in war. During Operation Desert Storm, in addition to its anti-aircraft mission, Patriot was assigned to shoot down incoming Iraqi Scud or Al Hussein short range ballistic missiles launched at Israel and Saudi Arabia. The first combat use of the Patriot occurred on January 18, 1991 when it engaged what was later found to be a computer glitch. There were actually no Scuds fired at Saudi Arabia on January 18. This incident was widely misreported as the first successful interception of an enemy ballistic missile in history. Throughout the war, Patriot missiles attempted engagement of over 40 hostile ballistic missiles. The success of these engagements, and in particular how many of them were real targets, is still buried in controversy.
What I personally remember, and what motivated me to review this kit, was the sense of great relief I felt back in 1991 when it was apparent that Israel was not going to enter the conflict, even after being on the receiving end of multiple Scud attacks. The CNN coverage of the enormous Patriot missiles heading up into the nighttime sky to meet incoming Iraqi rockets in defense of Israel was remarkable and inspiring, even if the actual results weren’t.
Opening the Box
Right off the bat, this box is big. Real big – you’ll need to make some room on your workbench once you break the seals and take a look inside. The plastic used for the trailer and missile pods is crisp and flash free, and the surface detail excellent - what we have come to expect from Dragon. The HEMET prime mover, however, most likely comes from another source – the plastic is harder and shinier, resistant to adhesive, and requires significantly more clean up.
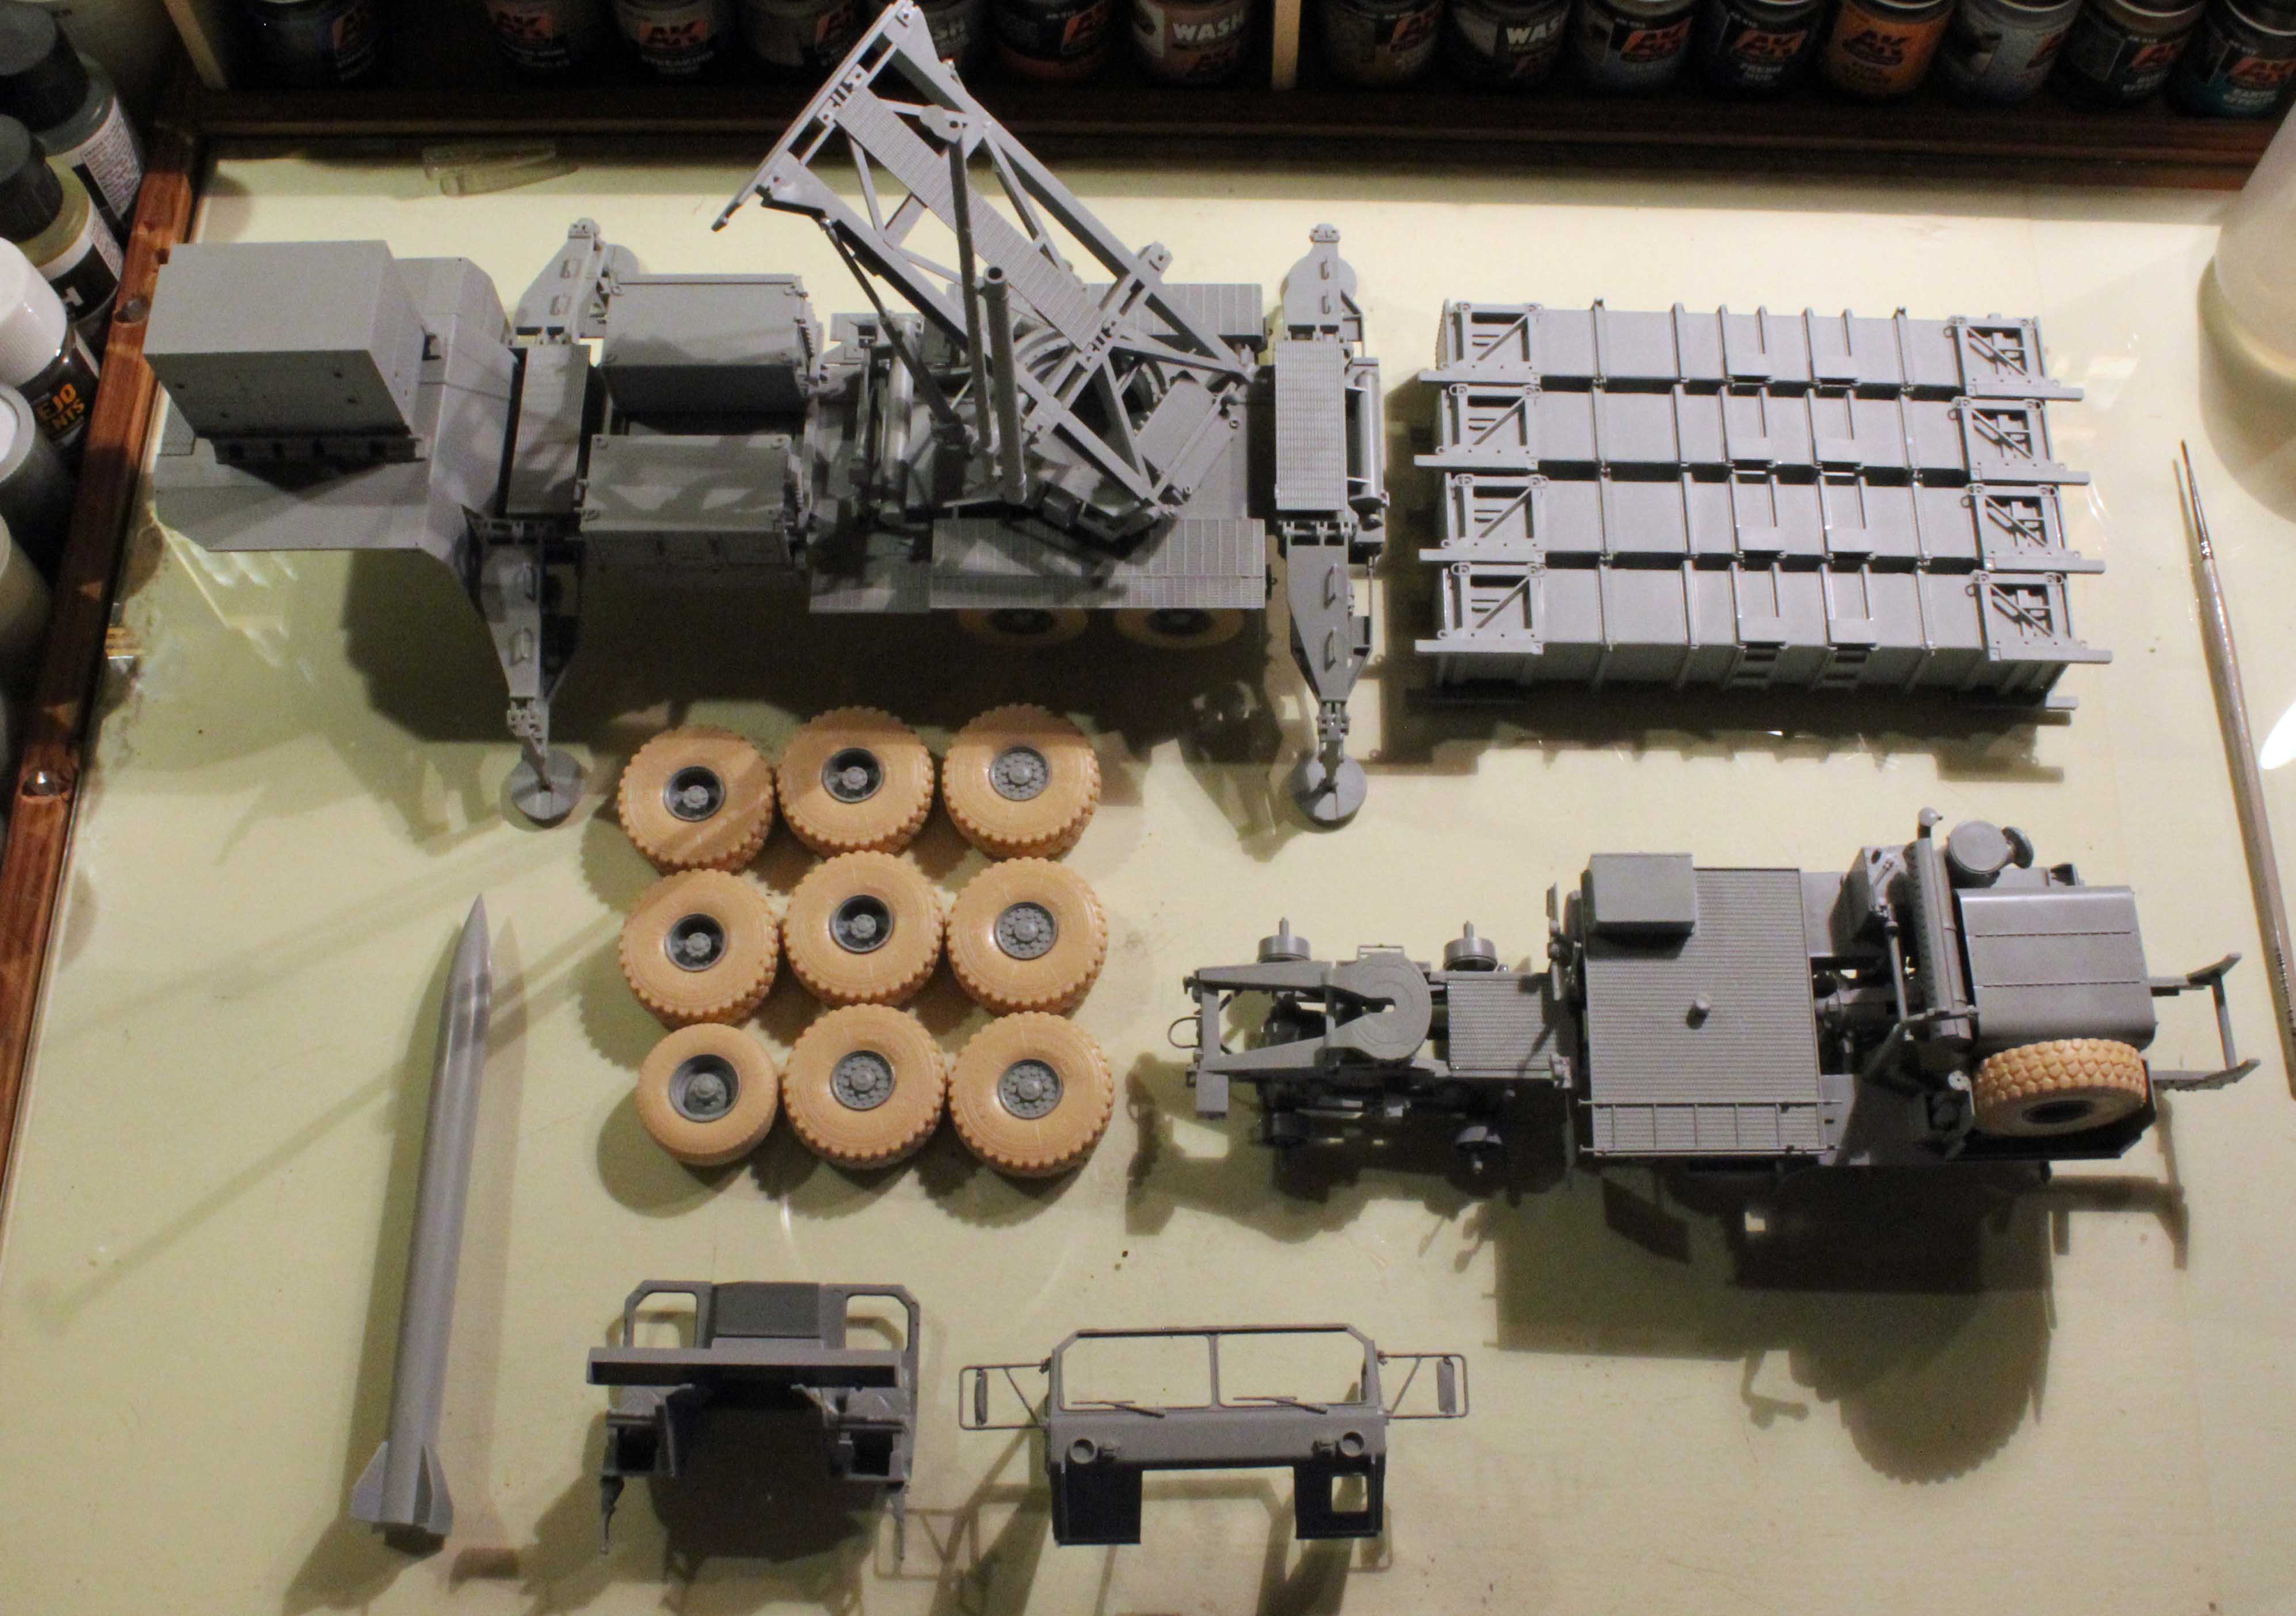
The contents of the box include:
- 13 sprues in soft, light grey plastic, packaged separately.
- Separate baggie containing 9 DS tractor tires.
- Separate baggie containing 5 DS trailer tires.
- 1 small sprue of clear plastic
- 1 piece of black thread
- 1x10-page blue and white instruction sheet with 30 steps.
- 1x2 page go-by for camouflage schemes and decal placement
The kit comes with three schemes represented, using the ubiquitous Dragon blue-and-white three-view drawings, and a very small (2x3”), perfectly registered sheet of decals from Cartograph of Italy. The camouflage schemes are loosely described as:
- U.S. Army 1990’s (European scheme – black, green, brown)
- U.S. Army Gulf War, 1991 (Overall sand)
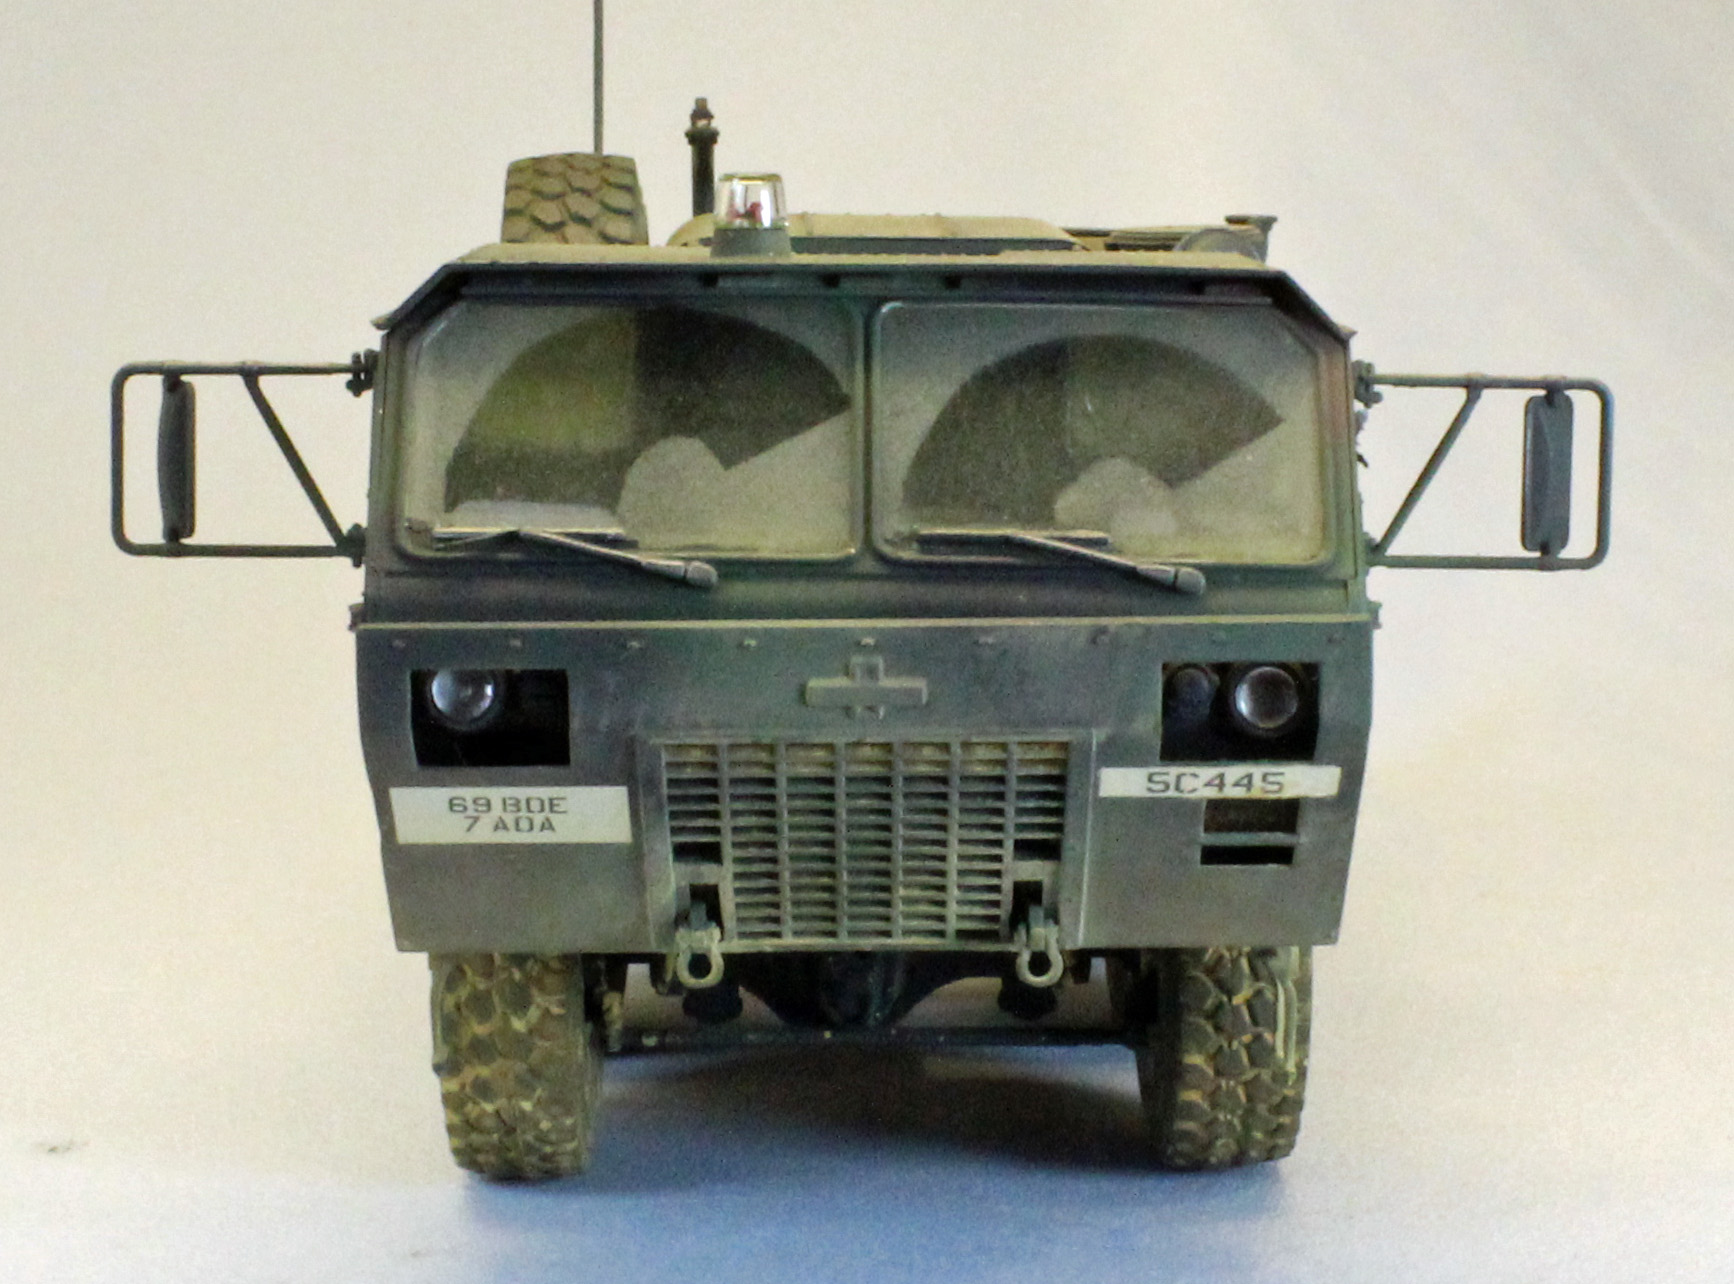
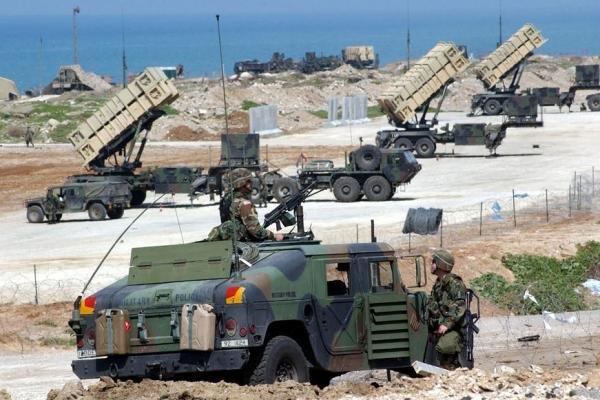
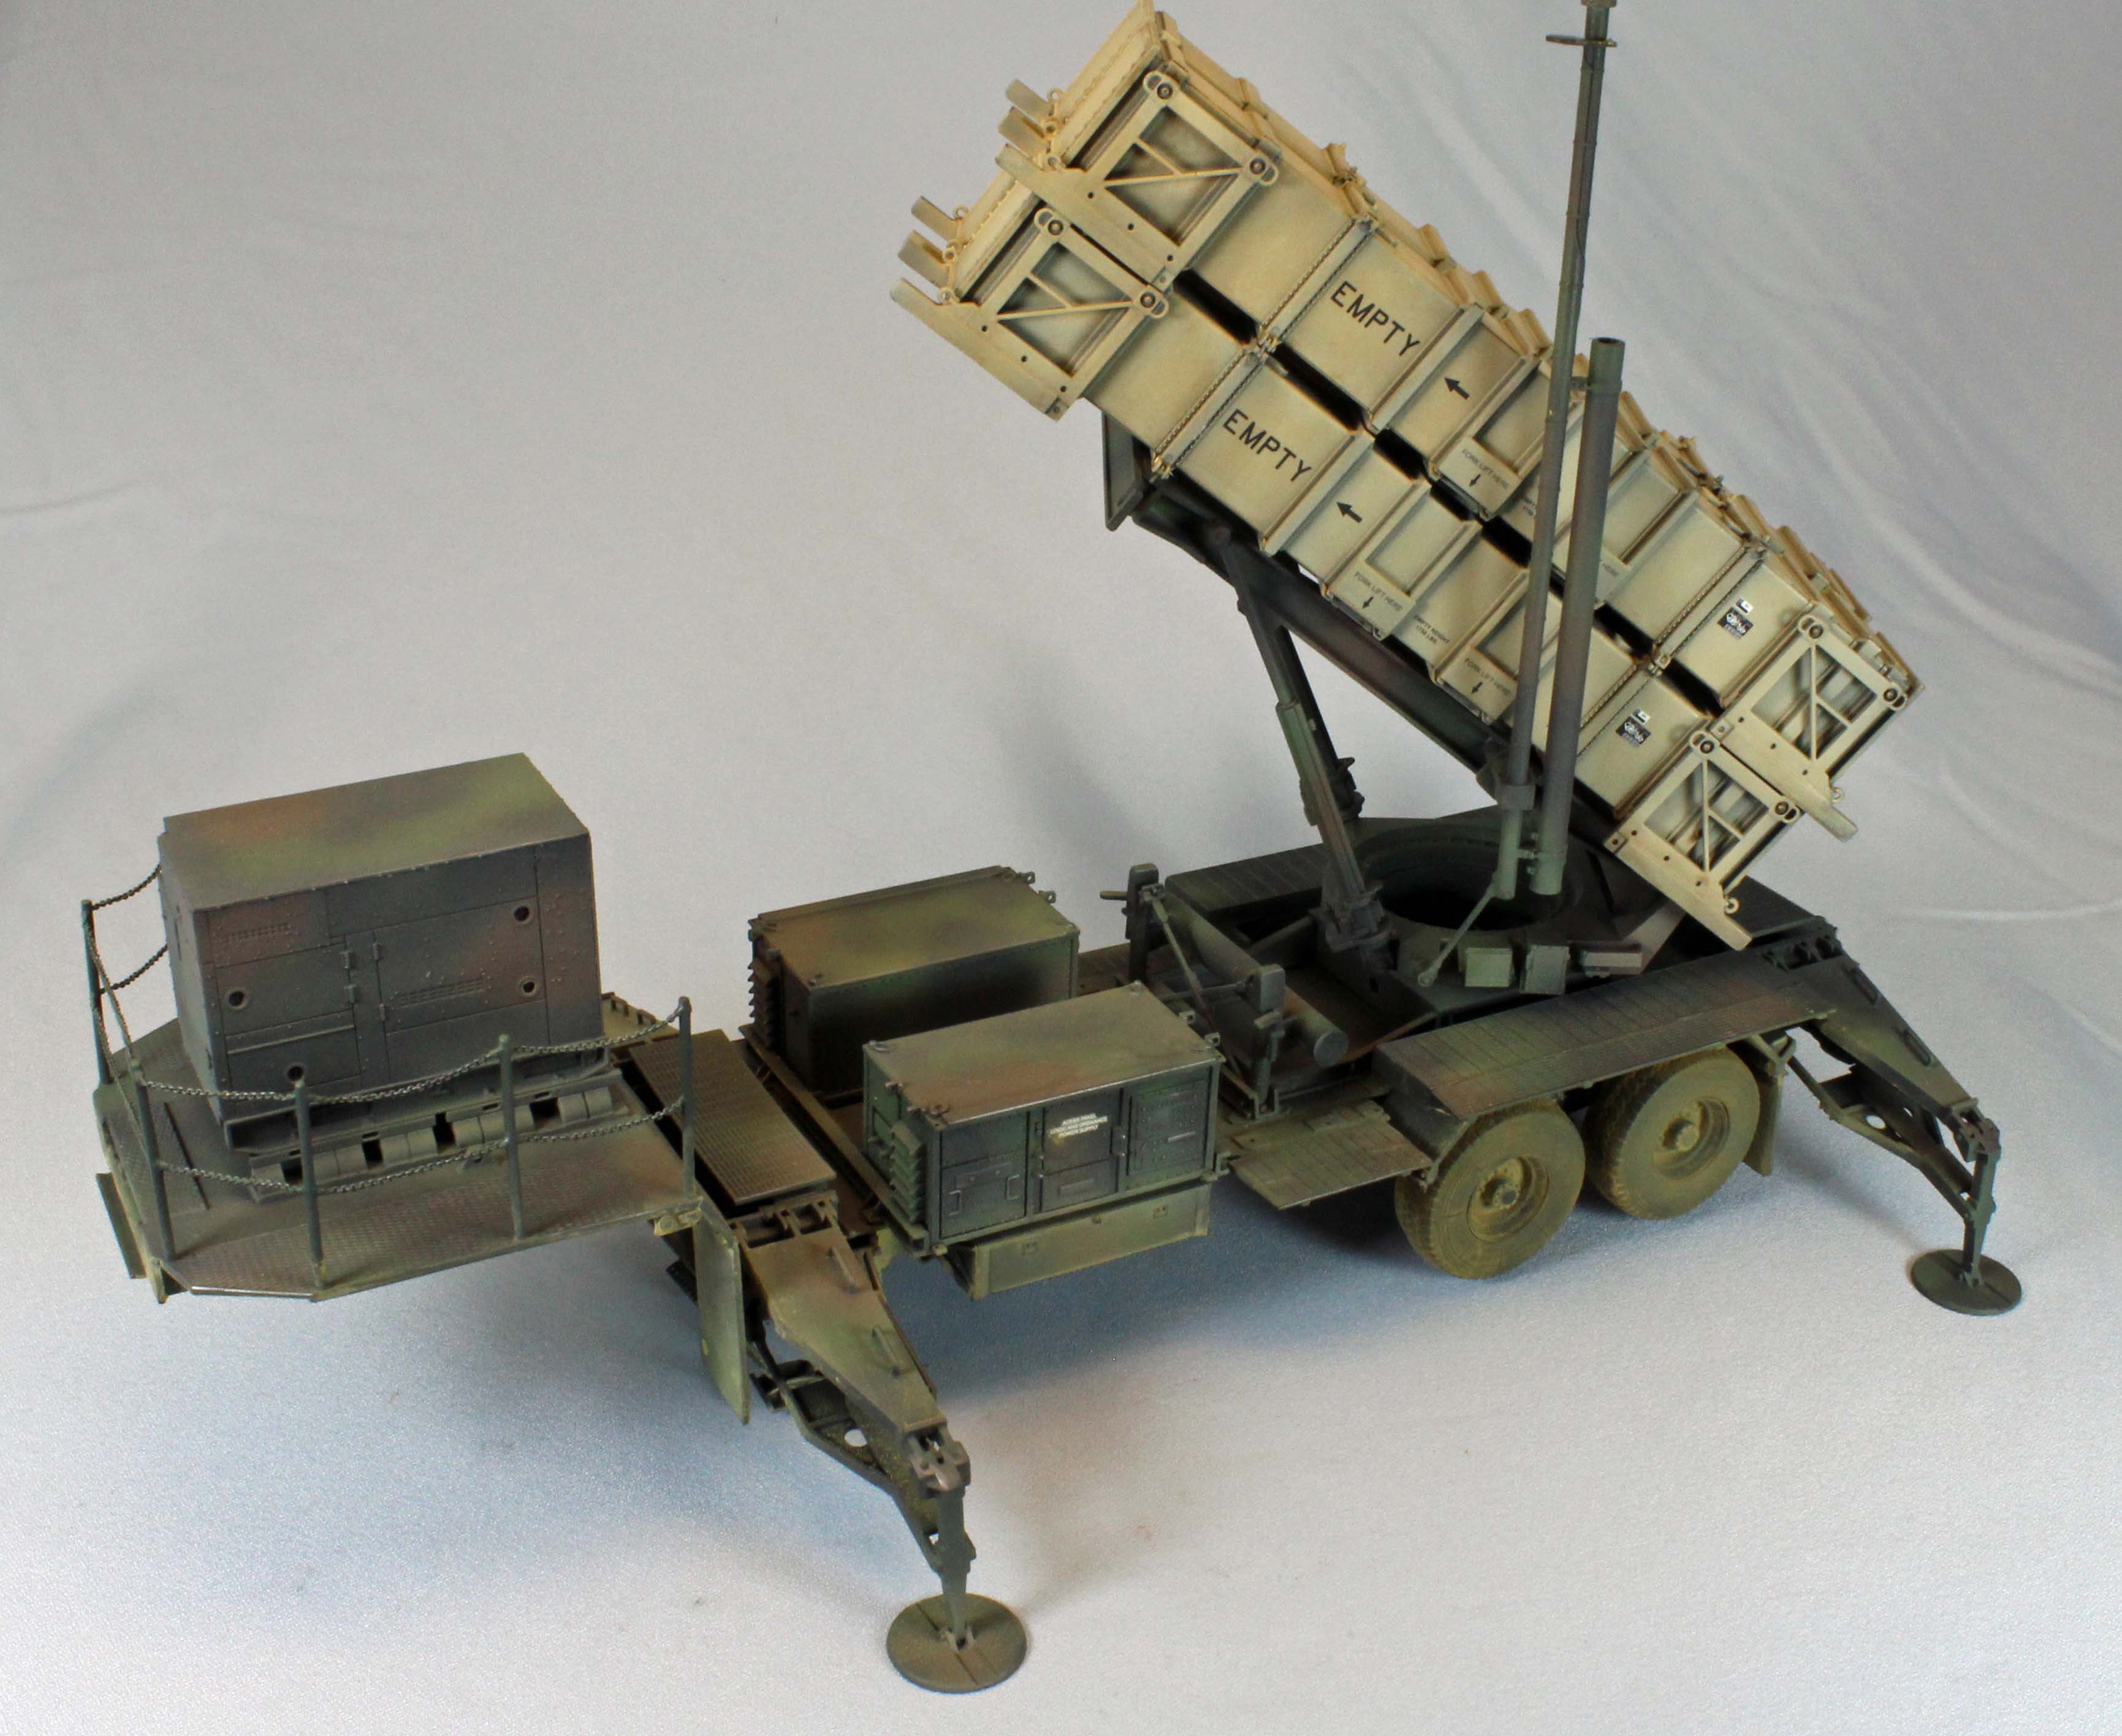
- A ‘hybrid’ of the two, and the one used in this review – 1990’s three-tone scheme with desert-sand missile pods. This scheme is represented in several photographs showing the early deployment of the system in the Gulf War (see image).
- Part J26 in Step 18 is colored as ‘unused’ in the Parts map, as is Part K56 in Step 22, Parts J72 and J73 in Step 24, and Parts K125 in Step 28.
- Parts G6 and G4 are cross-labeled in Step 21.
- The part that holds the spare wheel on the side of the superstructure (Part J60) doesn’t look anything like the one in the image in Step 24 – but it fits and serves the same purpose.
- I left Parts 31 and 32 off the vehicle – they were obstructed by other parts and wouldn’t fit as is, either way.
- In Step 25, I drilled holes in the brake drums to accept what looks like air dryers (Parts D17/D18) but shouldn’t have bothered – none of them would fit once the drums were placed on the axles. Two of the four mudguard flaps are attached to very thin and fragile posts (Parts G6) that project from each side of the tractor. By the time I got the build into paint, I had lost one flap and post altogether, and snapped the other one off several times. I ended up leaving both off.
The Instructions
This is a brand new kit from Black Label, so every part of the trailer and launcher is used. The HEMET has some unused parts, but not many. Aside from several minor instances of the instructions not matching the sprues (called out below), the instructions are excellent.
Things to consider before starting:
The build sequence starts with the trailer and launcher, then rounds out with the HEMET prime mover. All 14 tires (12 plus 2 spares) can be attached at any time, so things are pretty straight forward.
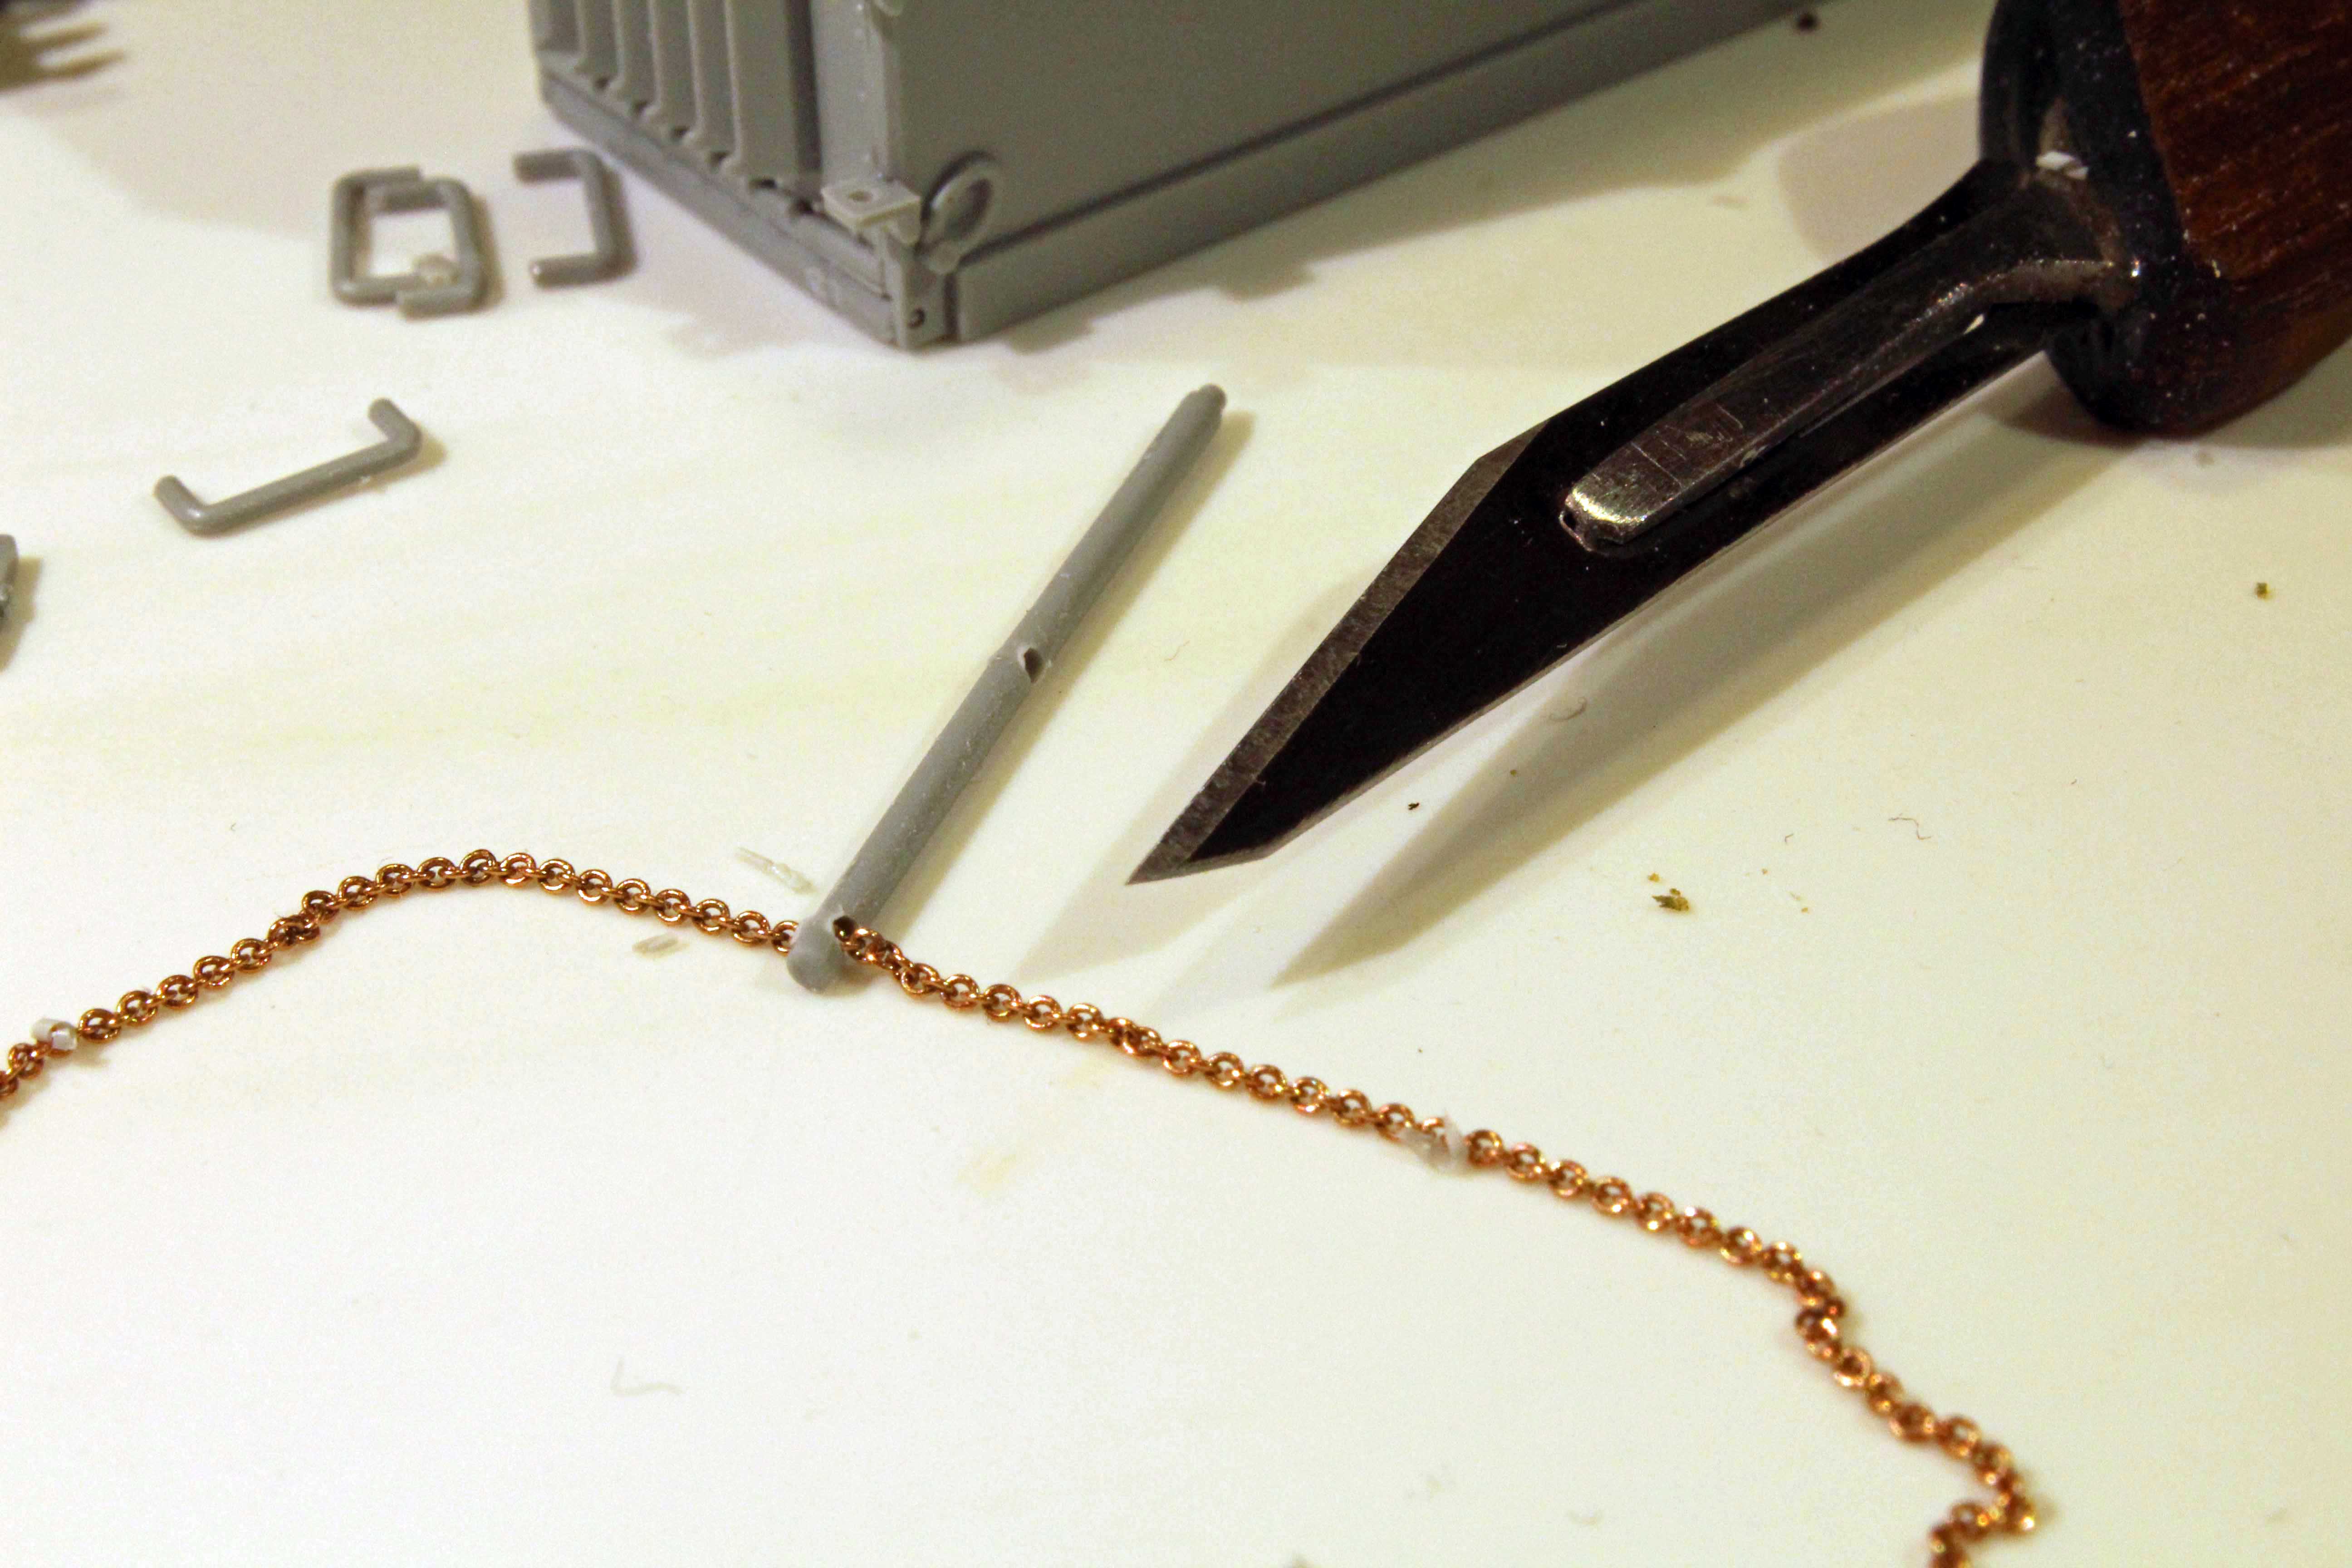
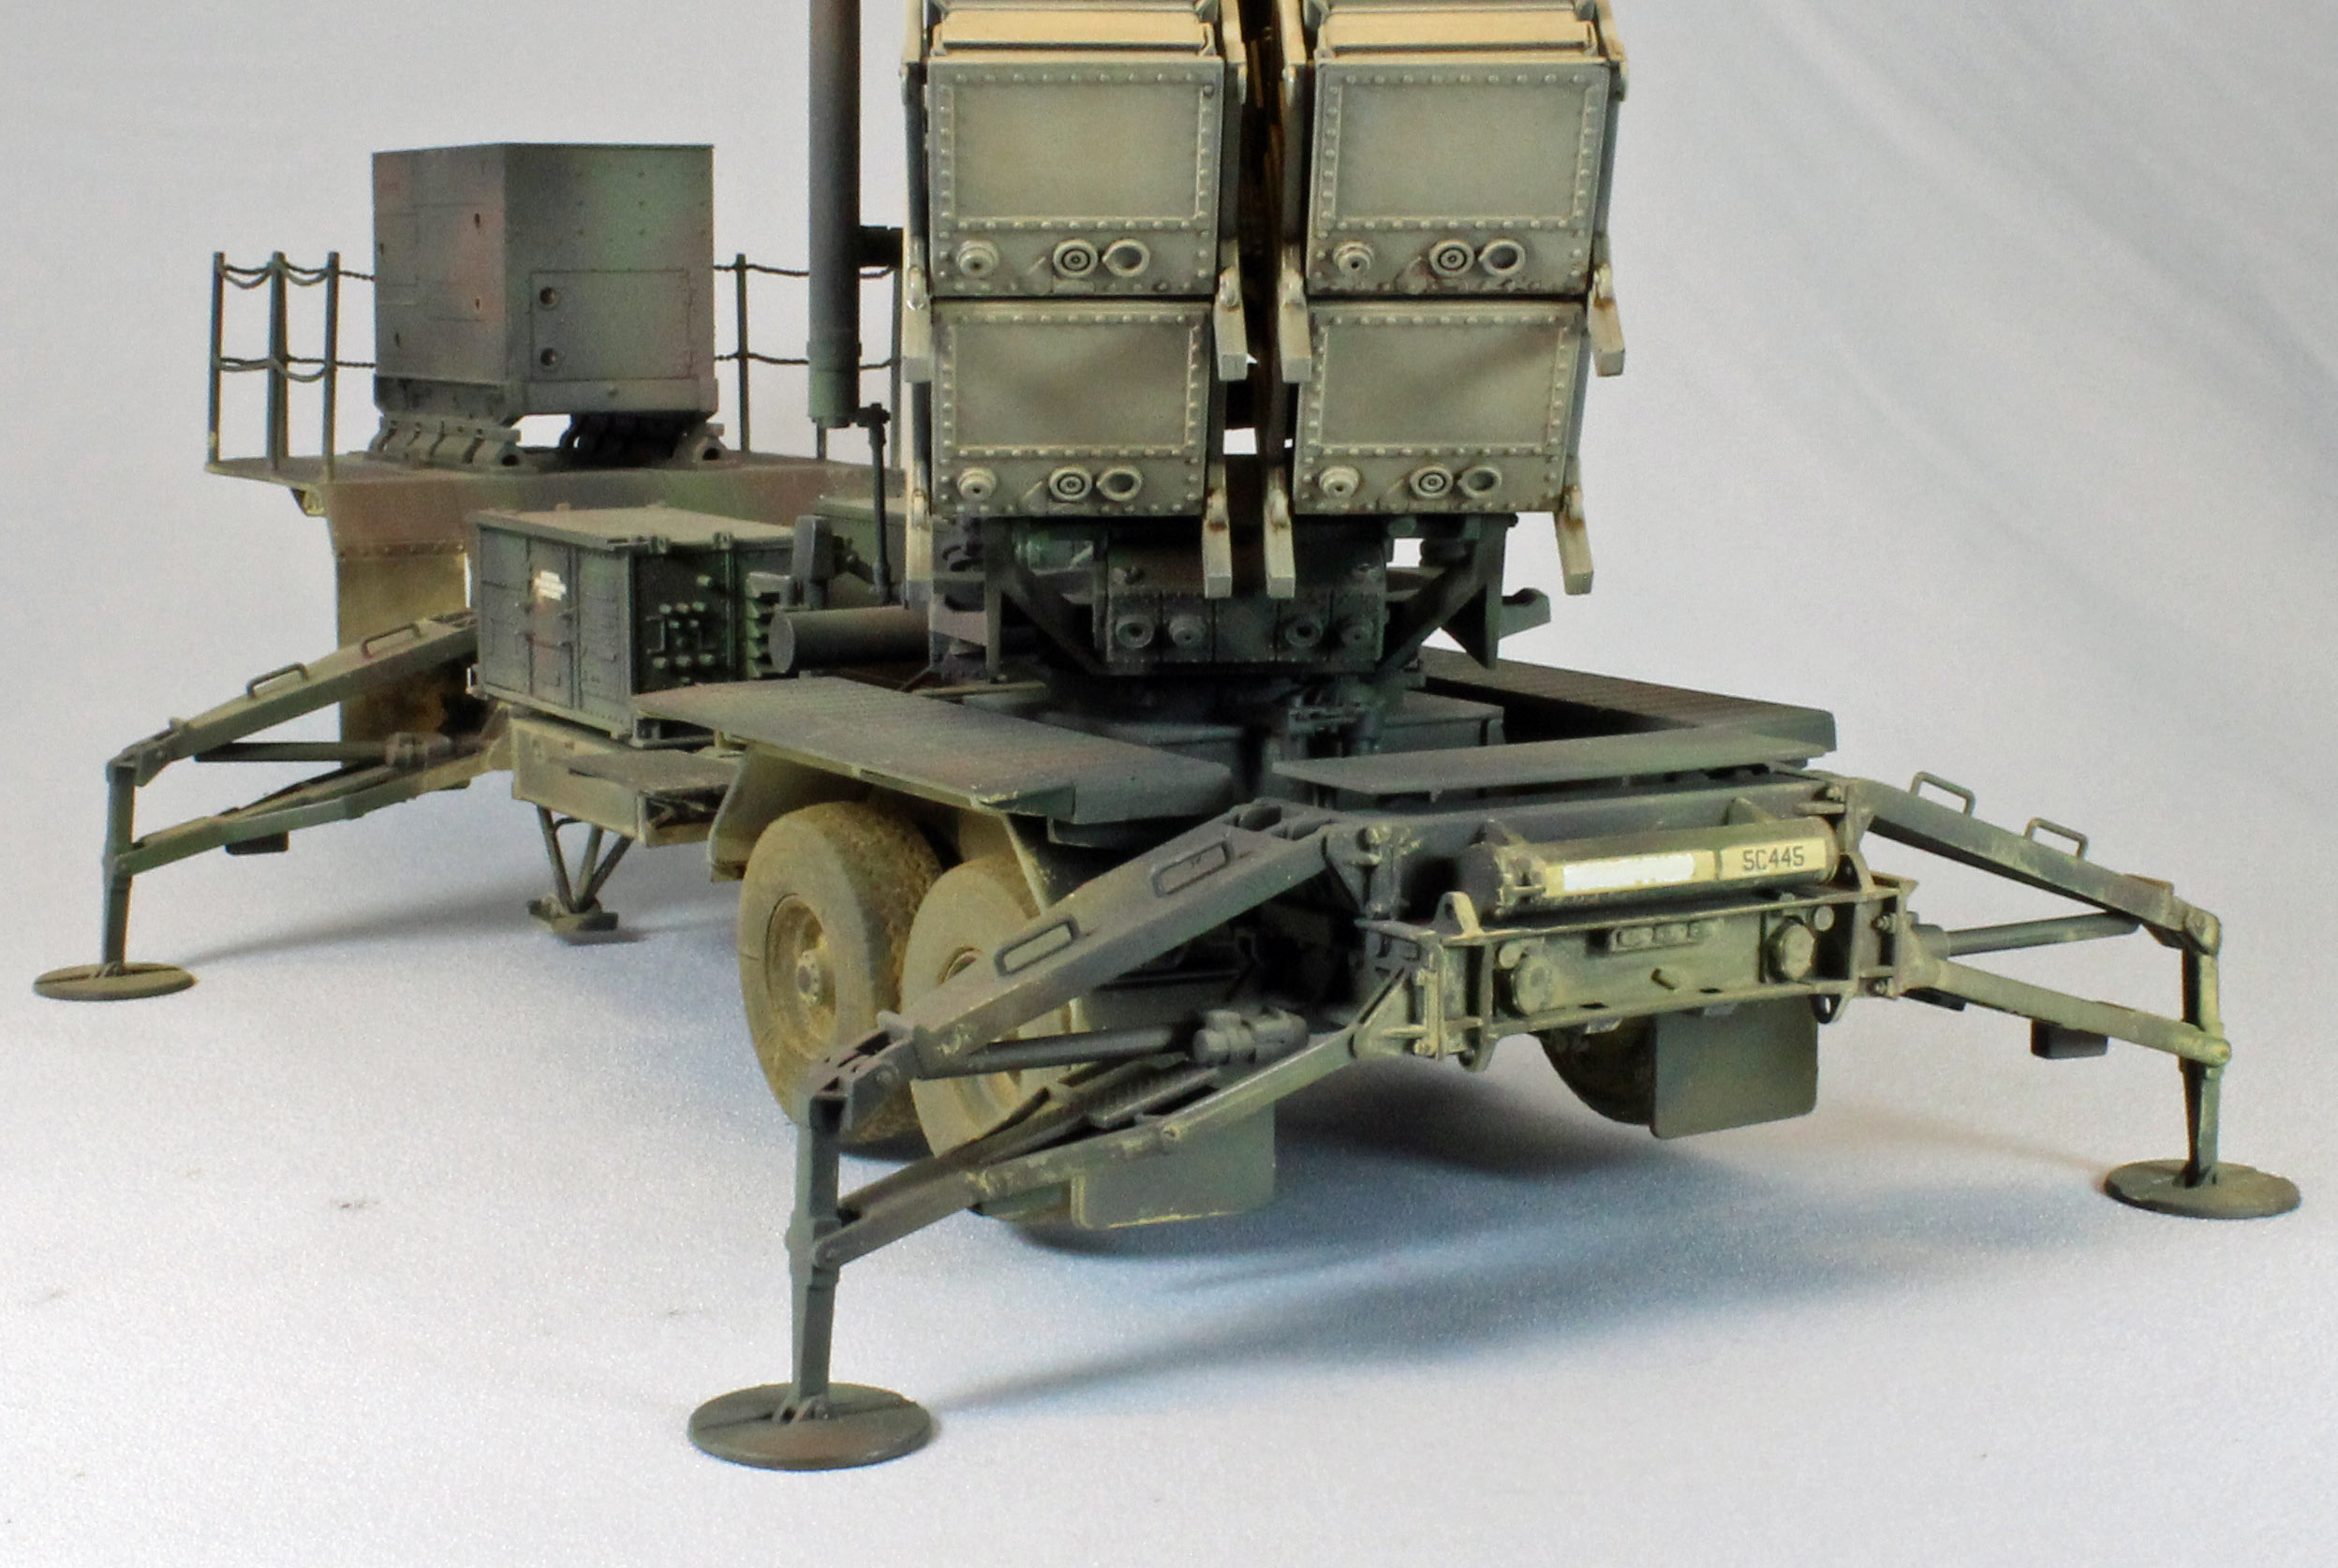
The trailer has a walkway surrounded by chain link fencing. Dragon provides simple black thread for this. I wanted to show the characteristic ‘droop’ of chain link, so I replaced the thread with impossibly small chain link I found at a train store. Even with chain that small, the original holes in the stanchions had to be carefully enlarged.
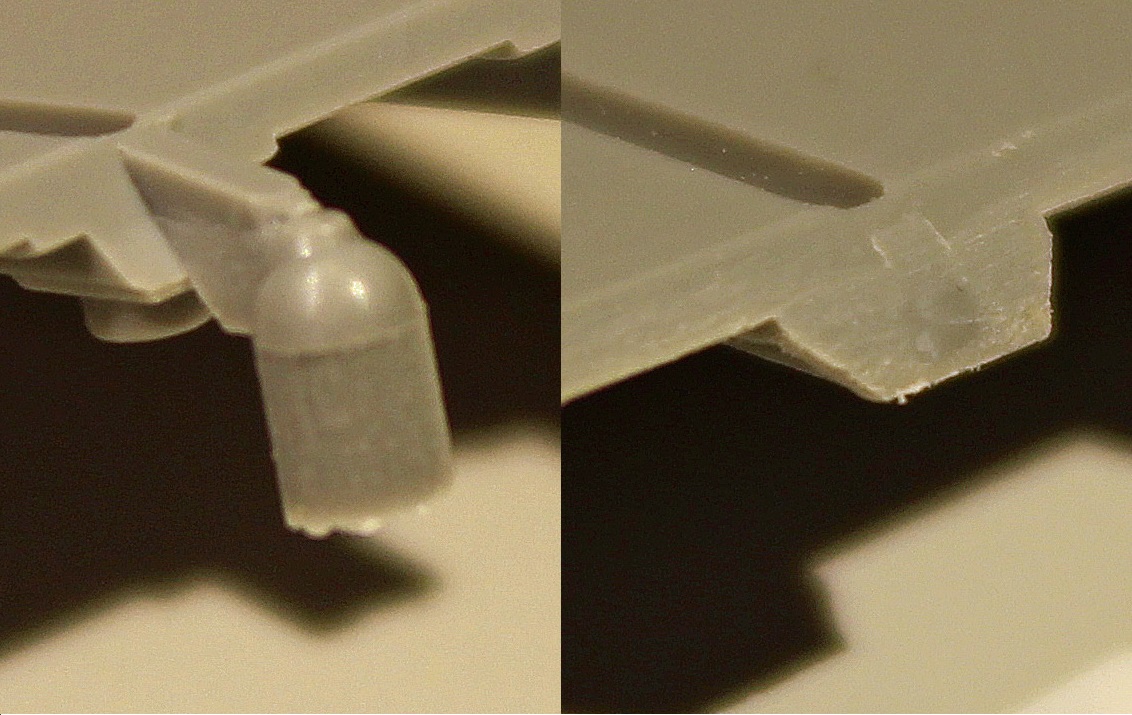
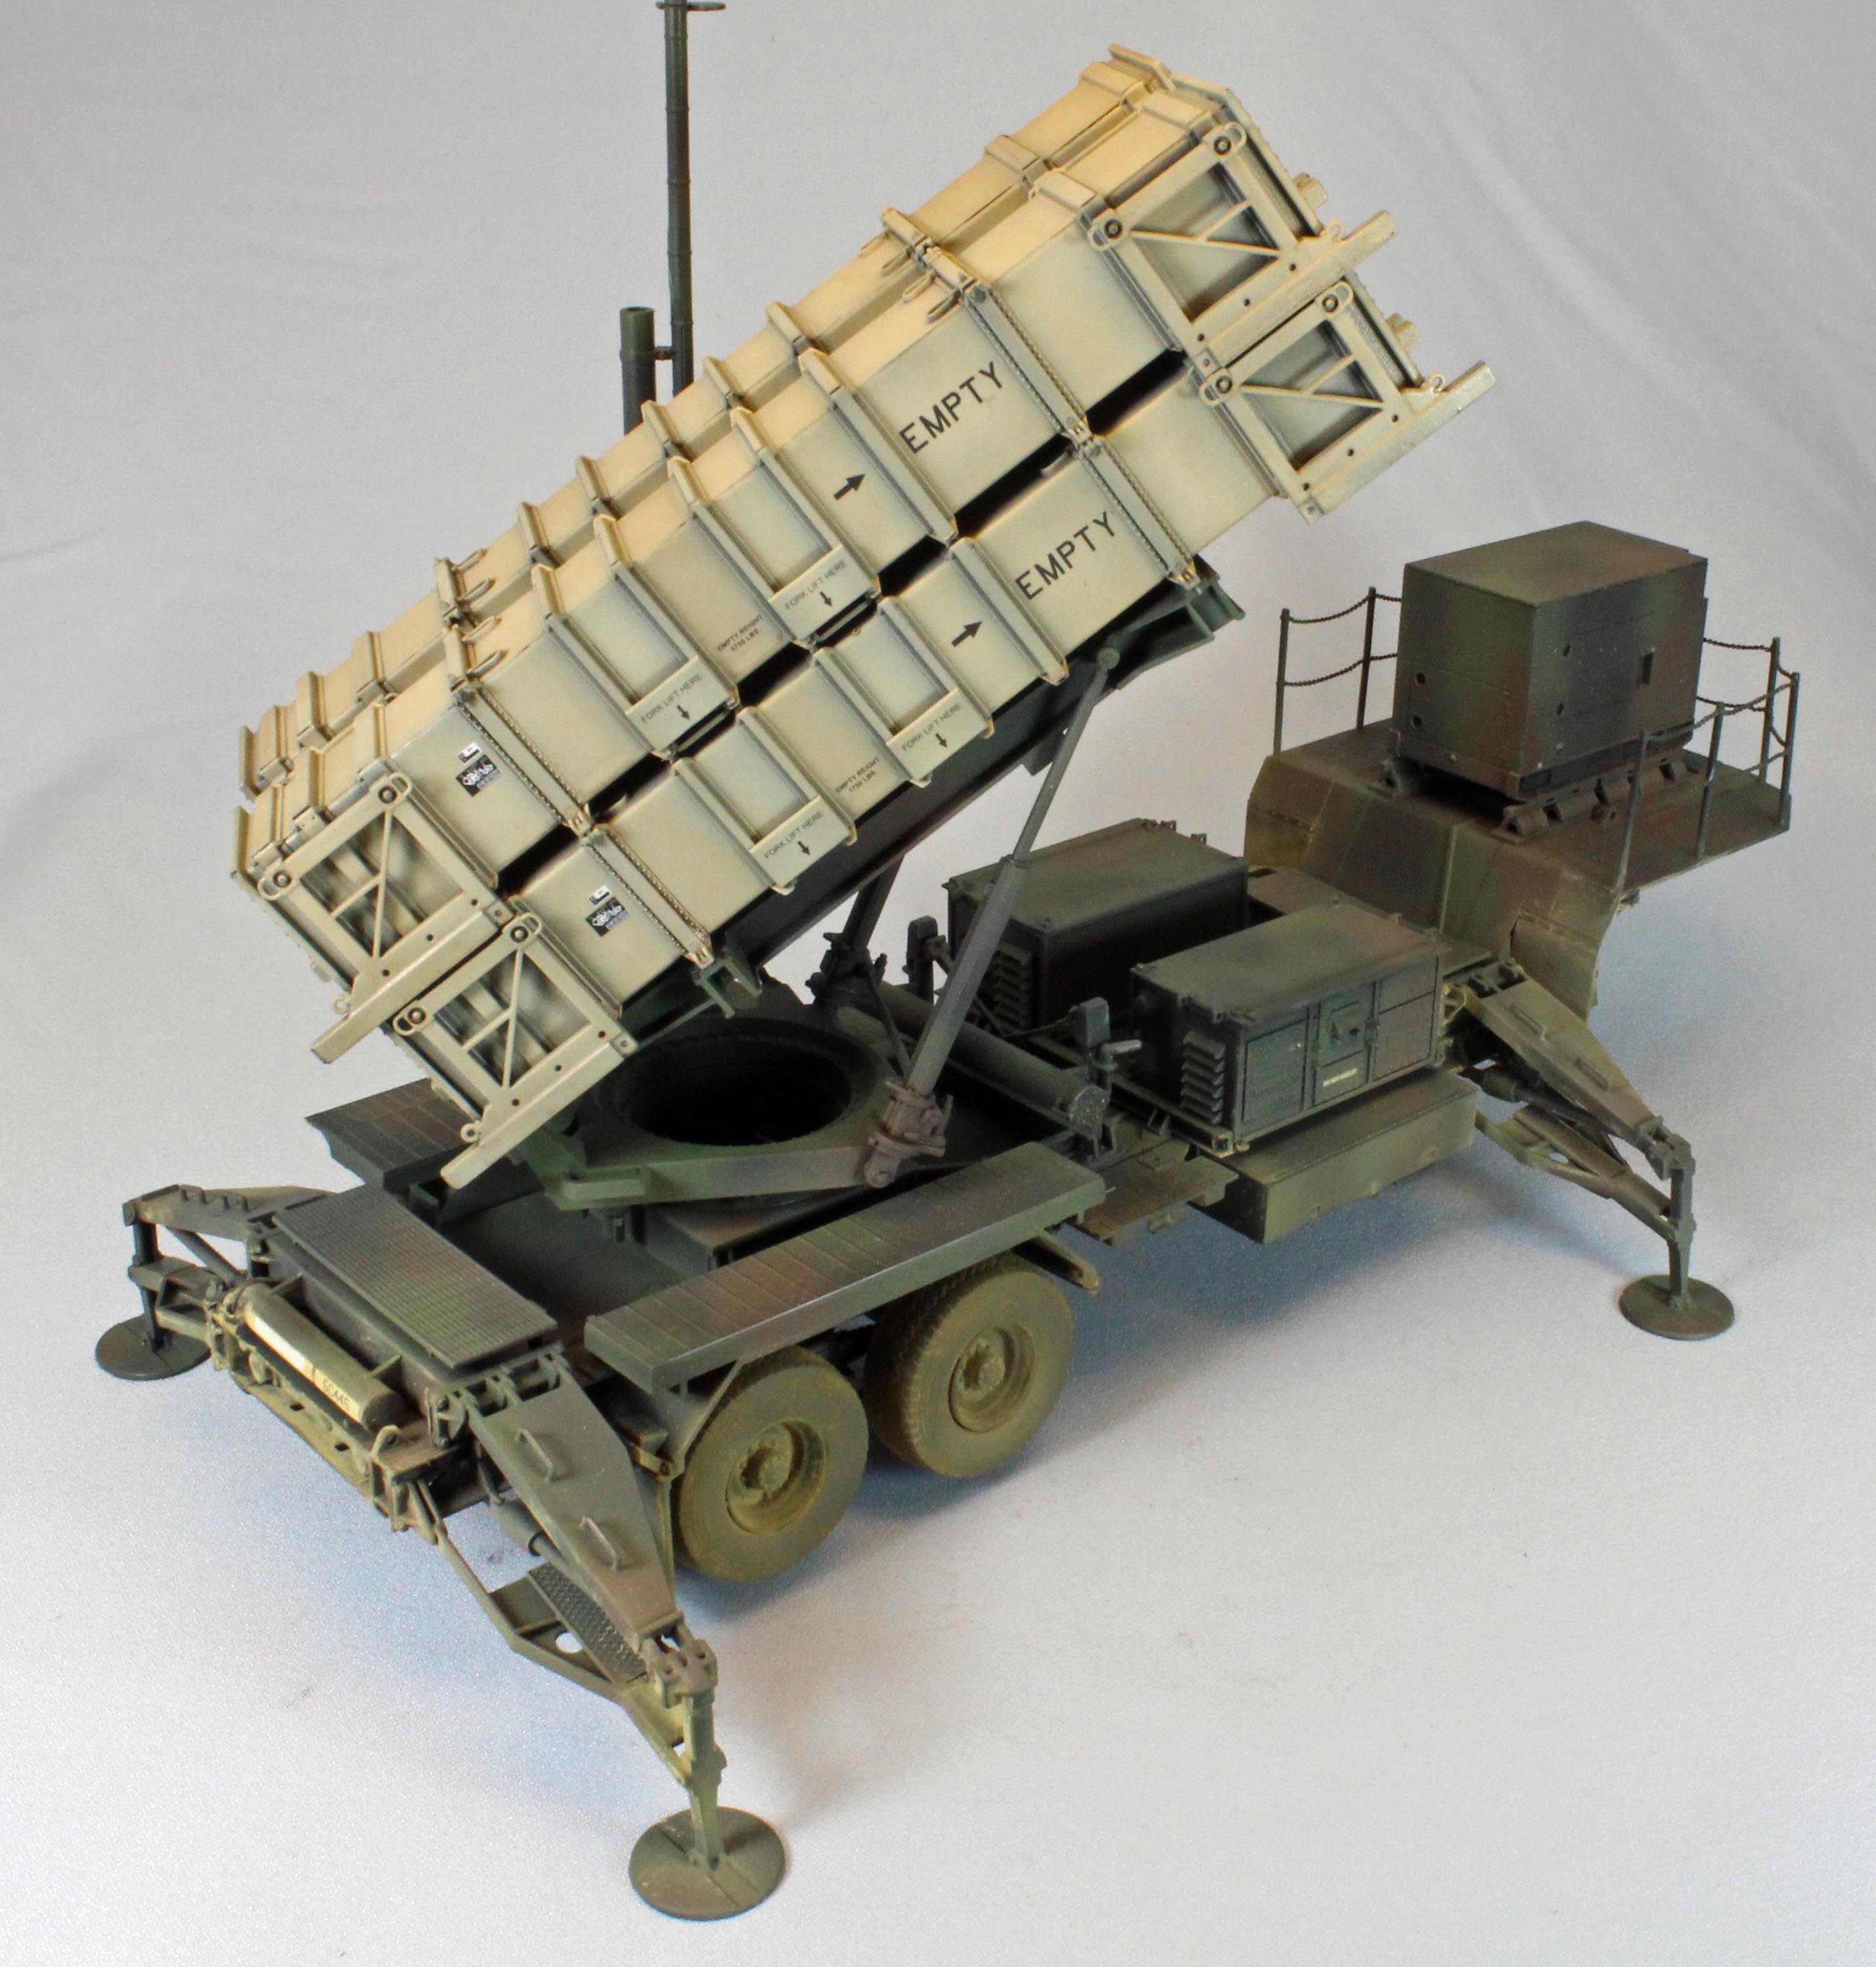
The launcher comes as with four six-part, rectangular boxes, with as total of 16 long side pieces (see image). These parts have numerous, thick sprue plugs – 400 in all, that have to be snipped and carefully sanded flat in order for the boxes to cleanly fit since, unfortunately, they are molded onto the mating surfaces themselves (see image). I spent nearly a week on just this one task, and still ended up with large gaps between many of the joints.
The HEMET prime mover is built around two long frame members (Parts E3 and E49) that must be assembled perfectly. Somewhere along the line, while attaching one of the many cross-members, I slipped and ended up with the two frame parts slightly ‘askew’, unnoticeable at the time. This caused me a number of significant problems later on – enough to warn other modelers to pay very close attention to this part of the build and check your alignment with every part you add!
I treated the excellent DS tires with paint, washes and pigments before attaching them, with the two antenna) at the very end of the build.
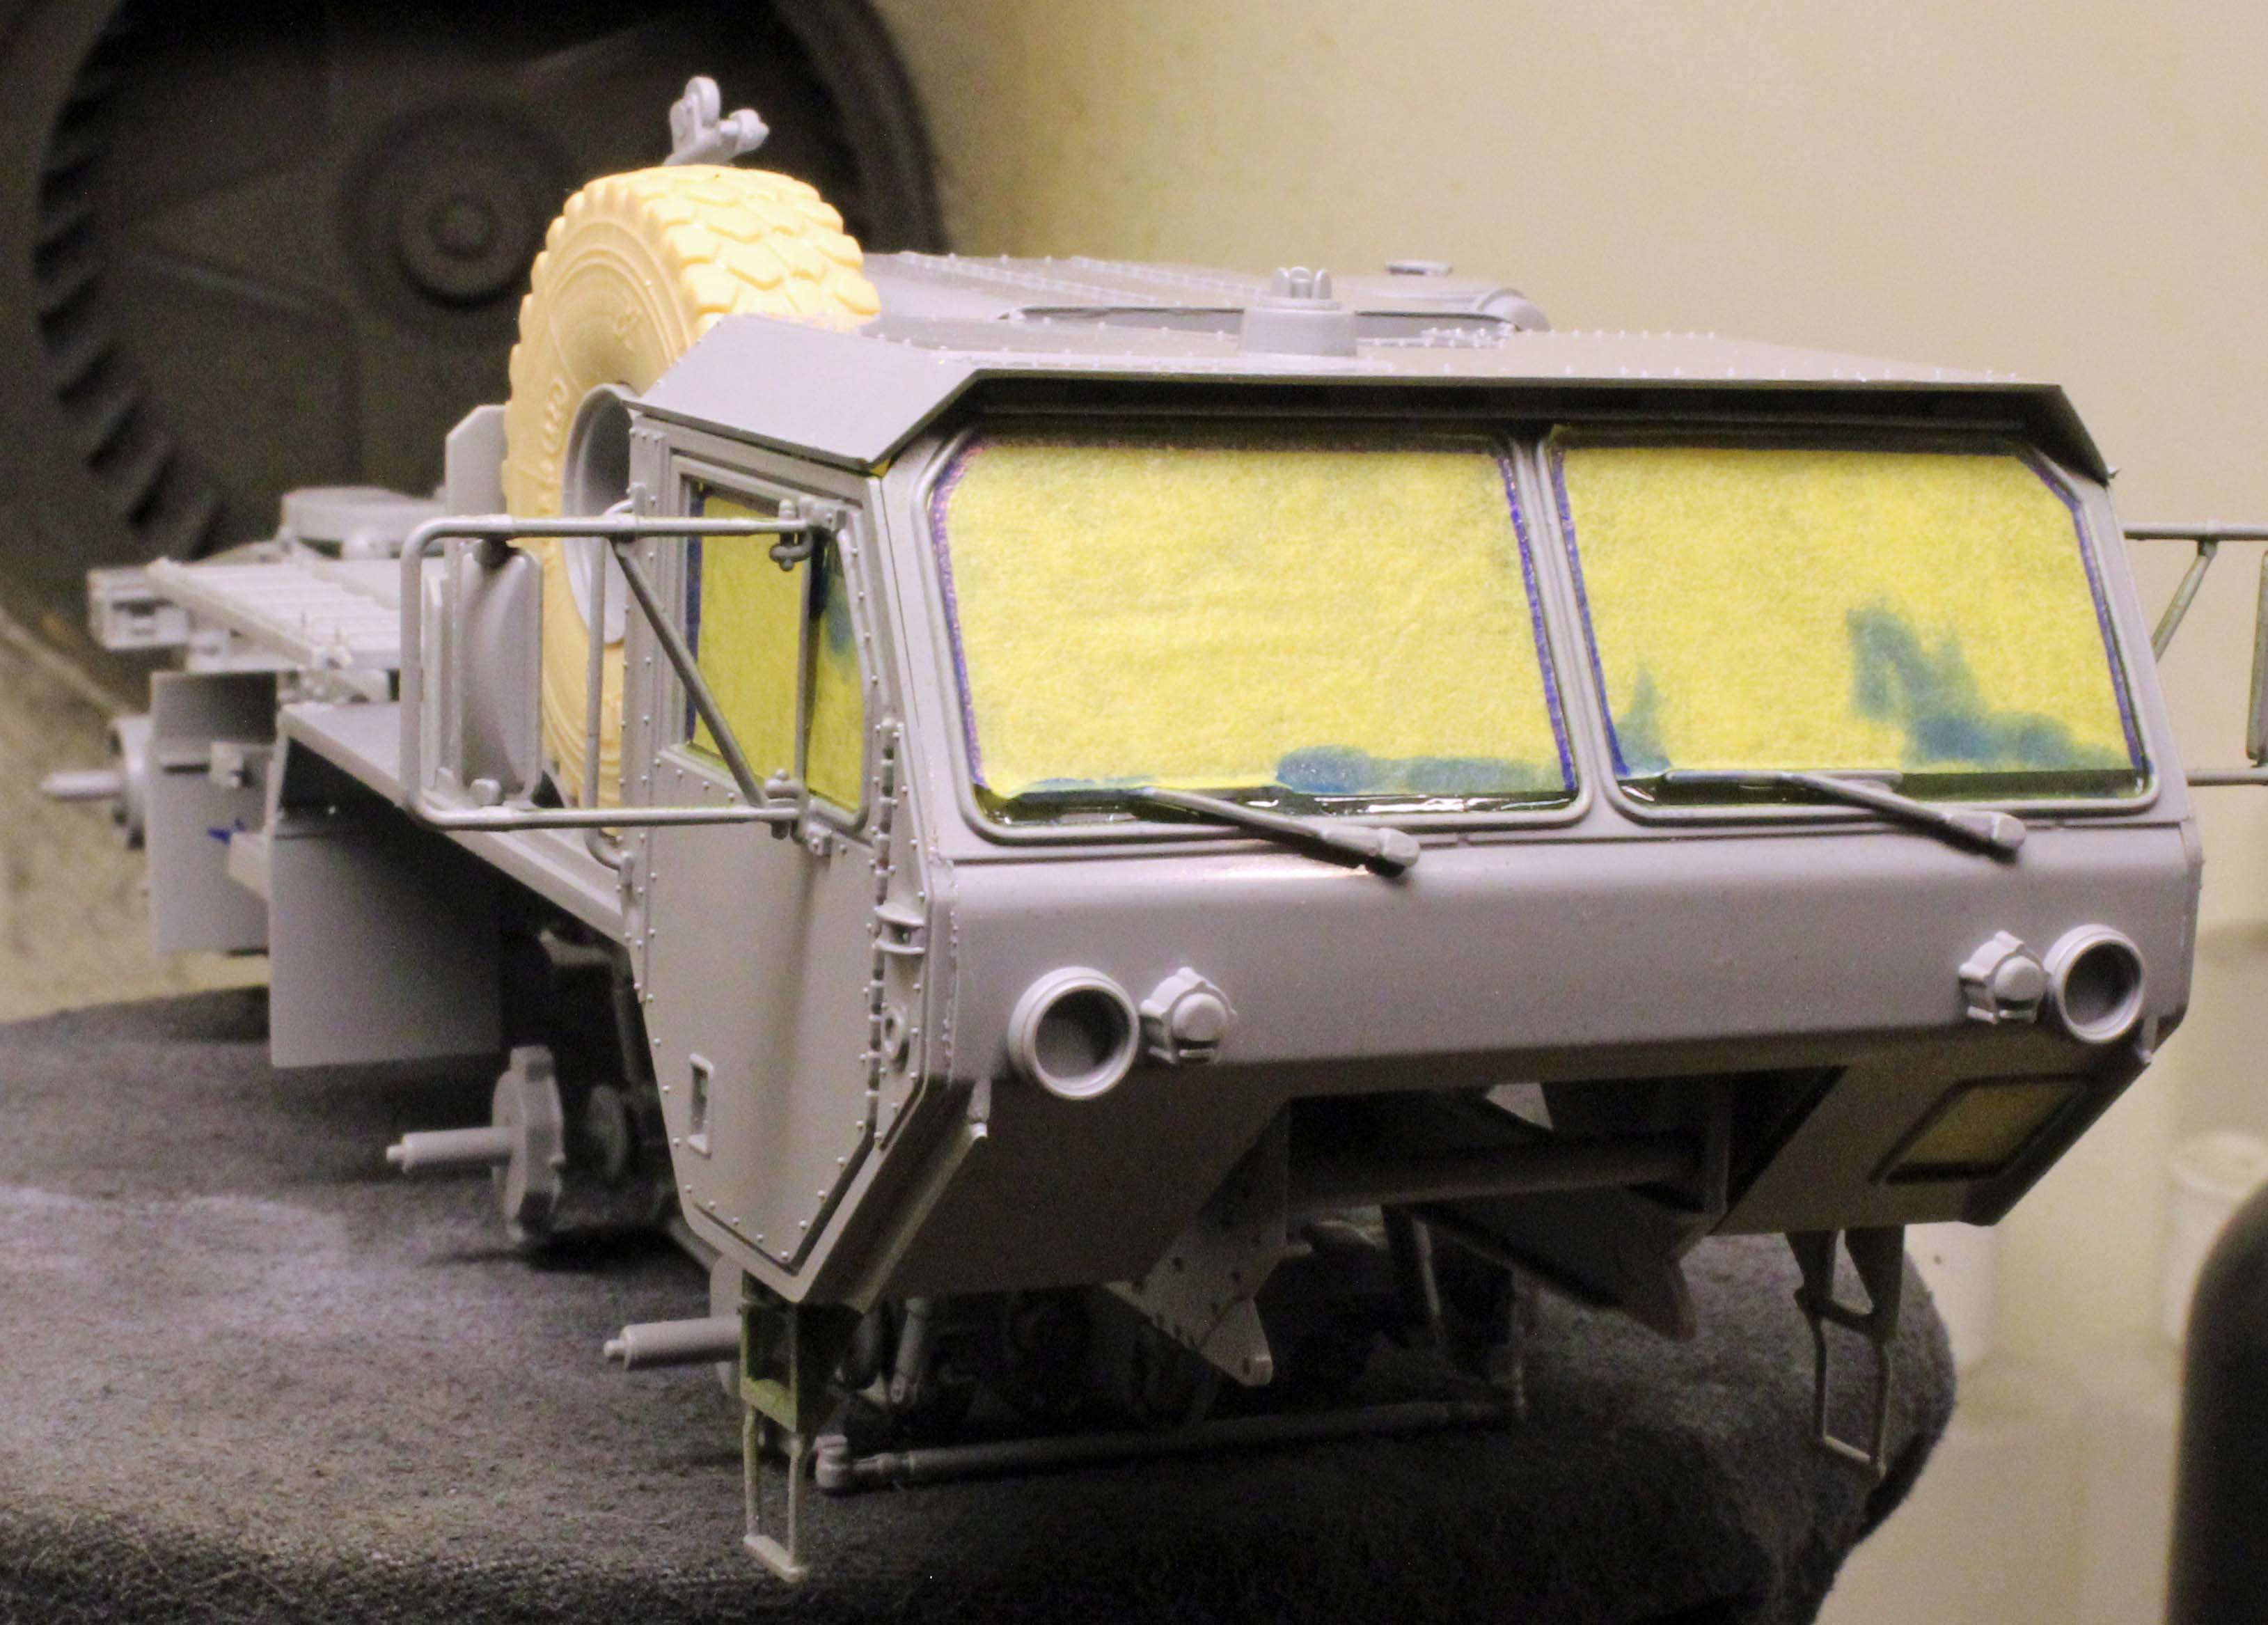
The build-it-all-and-then-paint-it approach will work (it’s what I did) but it still pays to plan ahead for the interior of the HEMET cab.
The Build
The Trailer
The overall assembly of the trailer went off without a hitch, and fit perfectly. Right off the bat, however, you run into your first head-scratcher. What the instructions are trying to communicate in Step 1 with the double opposing arrows is that if you want extend the launchers (what they are calling ‘Stand Mode’), you need to substitute Parts A5/A6 and A20/A21 with Parts G41/G40 and G36/G39, respectively. I left these parts off until I could see how they drop under the trailer, after Step 4.
As mentioned before, I carefully drilled out the two holes in each stanchion in Step 3 and slid very fine chain link through them to make the fencing, discarding the kit-supplied thread (see image). In Step 4, Section E2, Parts (26) differ significantly from their counterparts (27) in Section E, but the instructions only show the rough placement of Parts (27). It turns out that I had all four completely wrong – a fact I discovered after the fact when I looked at an online image of the area in question, which emphasizes the need for thorough research. I had to snip pieces off all four of these parts to bring everything together.
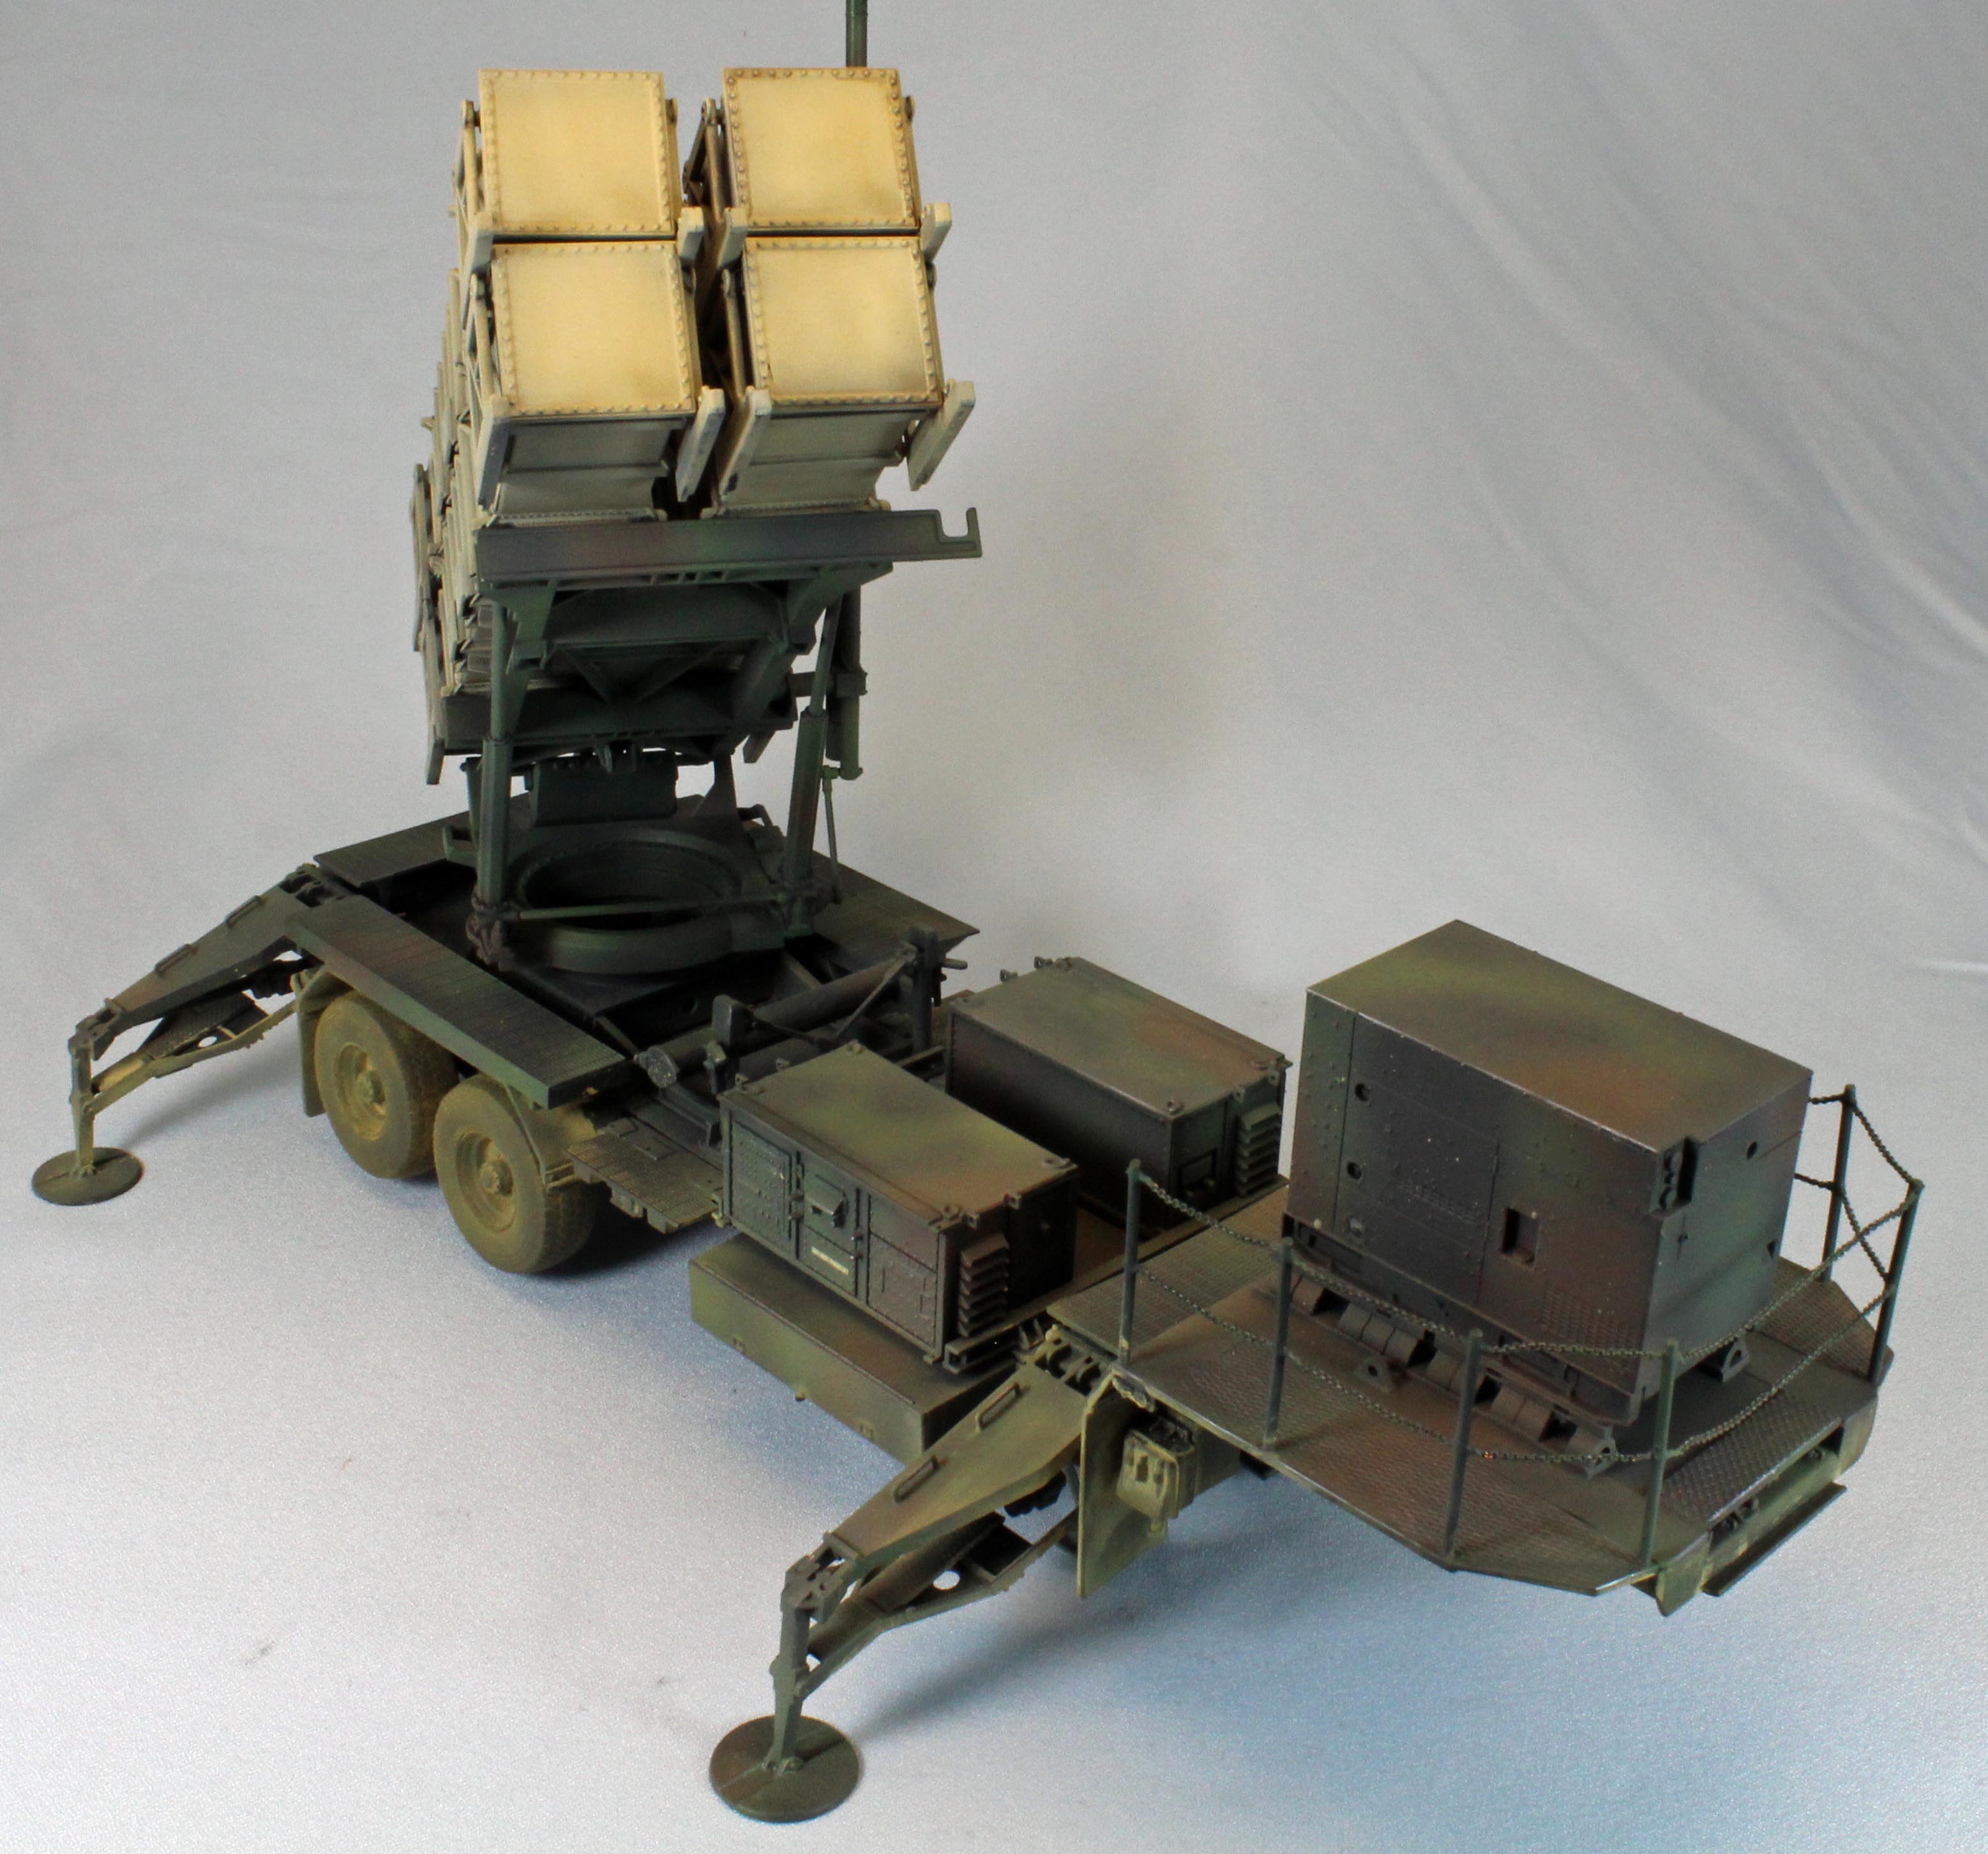
That said, the design Dragon used in replicating the four articulated stabilization arms demonstrates an elegant solution to a complex engineering problem. Each arm is composed of several parts that articulate, but in the end the four pads must end up flat against the ground surface. A ‘kinked’ part (G42) is provided so that when lined up against the inner angle of the arm, it forces all the parts into a specific orientation. You then just apply glue to all the joints, and remove the Part G42. Brilliant! In Step 6 you can optionally open or close the doors to what looks like a large power unit. The doors themselves only extend halfway, however, and each door contains several prominent ejection pin circles on the inside. Since closing the doors hides the nice detail on the power unit, I chose to leave them off altogether.
Patriot Launcher
The hardware that lifts the four boxed missiles is articulated so that you can orientate the launcher at any angle. That said, once you’ve decided on what you want to do, you will need to glue everything to fix it in place. ‘Articulated’ in this context does not mean ‘workable’. Once I cleaned up the four sides and two ends of each missile pod, the six parts came together easily but slid around a lot while drying. I was reminded of my Rubik’s Cube days while I frantically flipped each pod around to make sure the many straight edges were true as the glue dried.
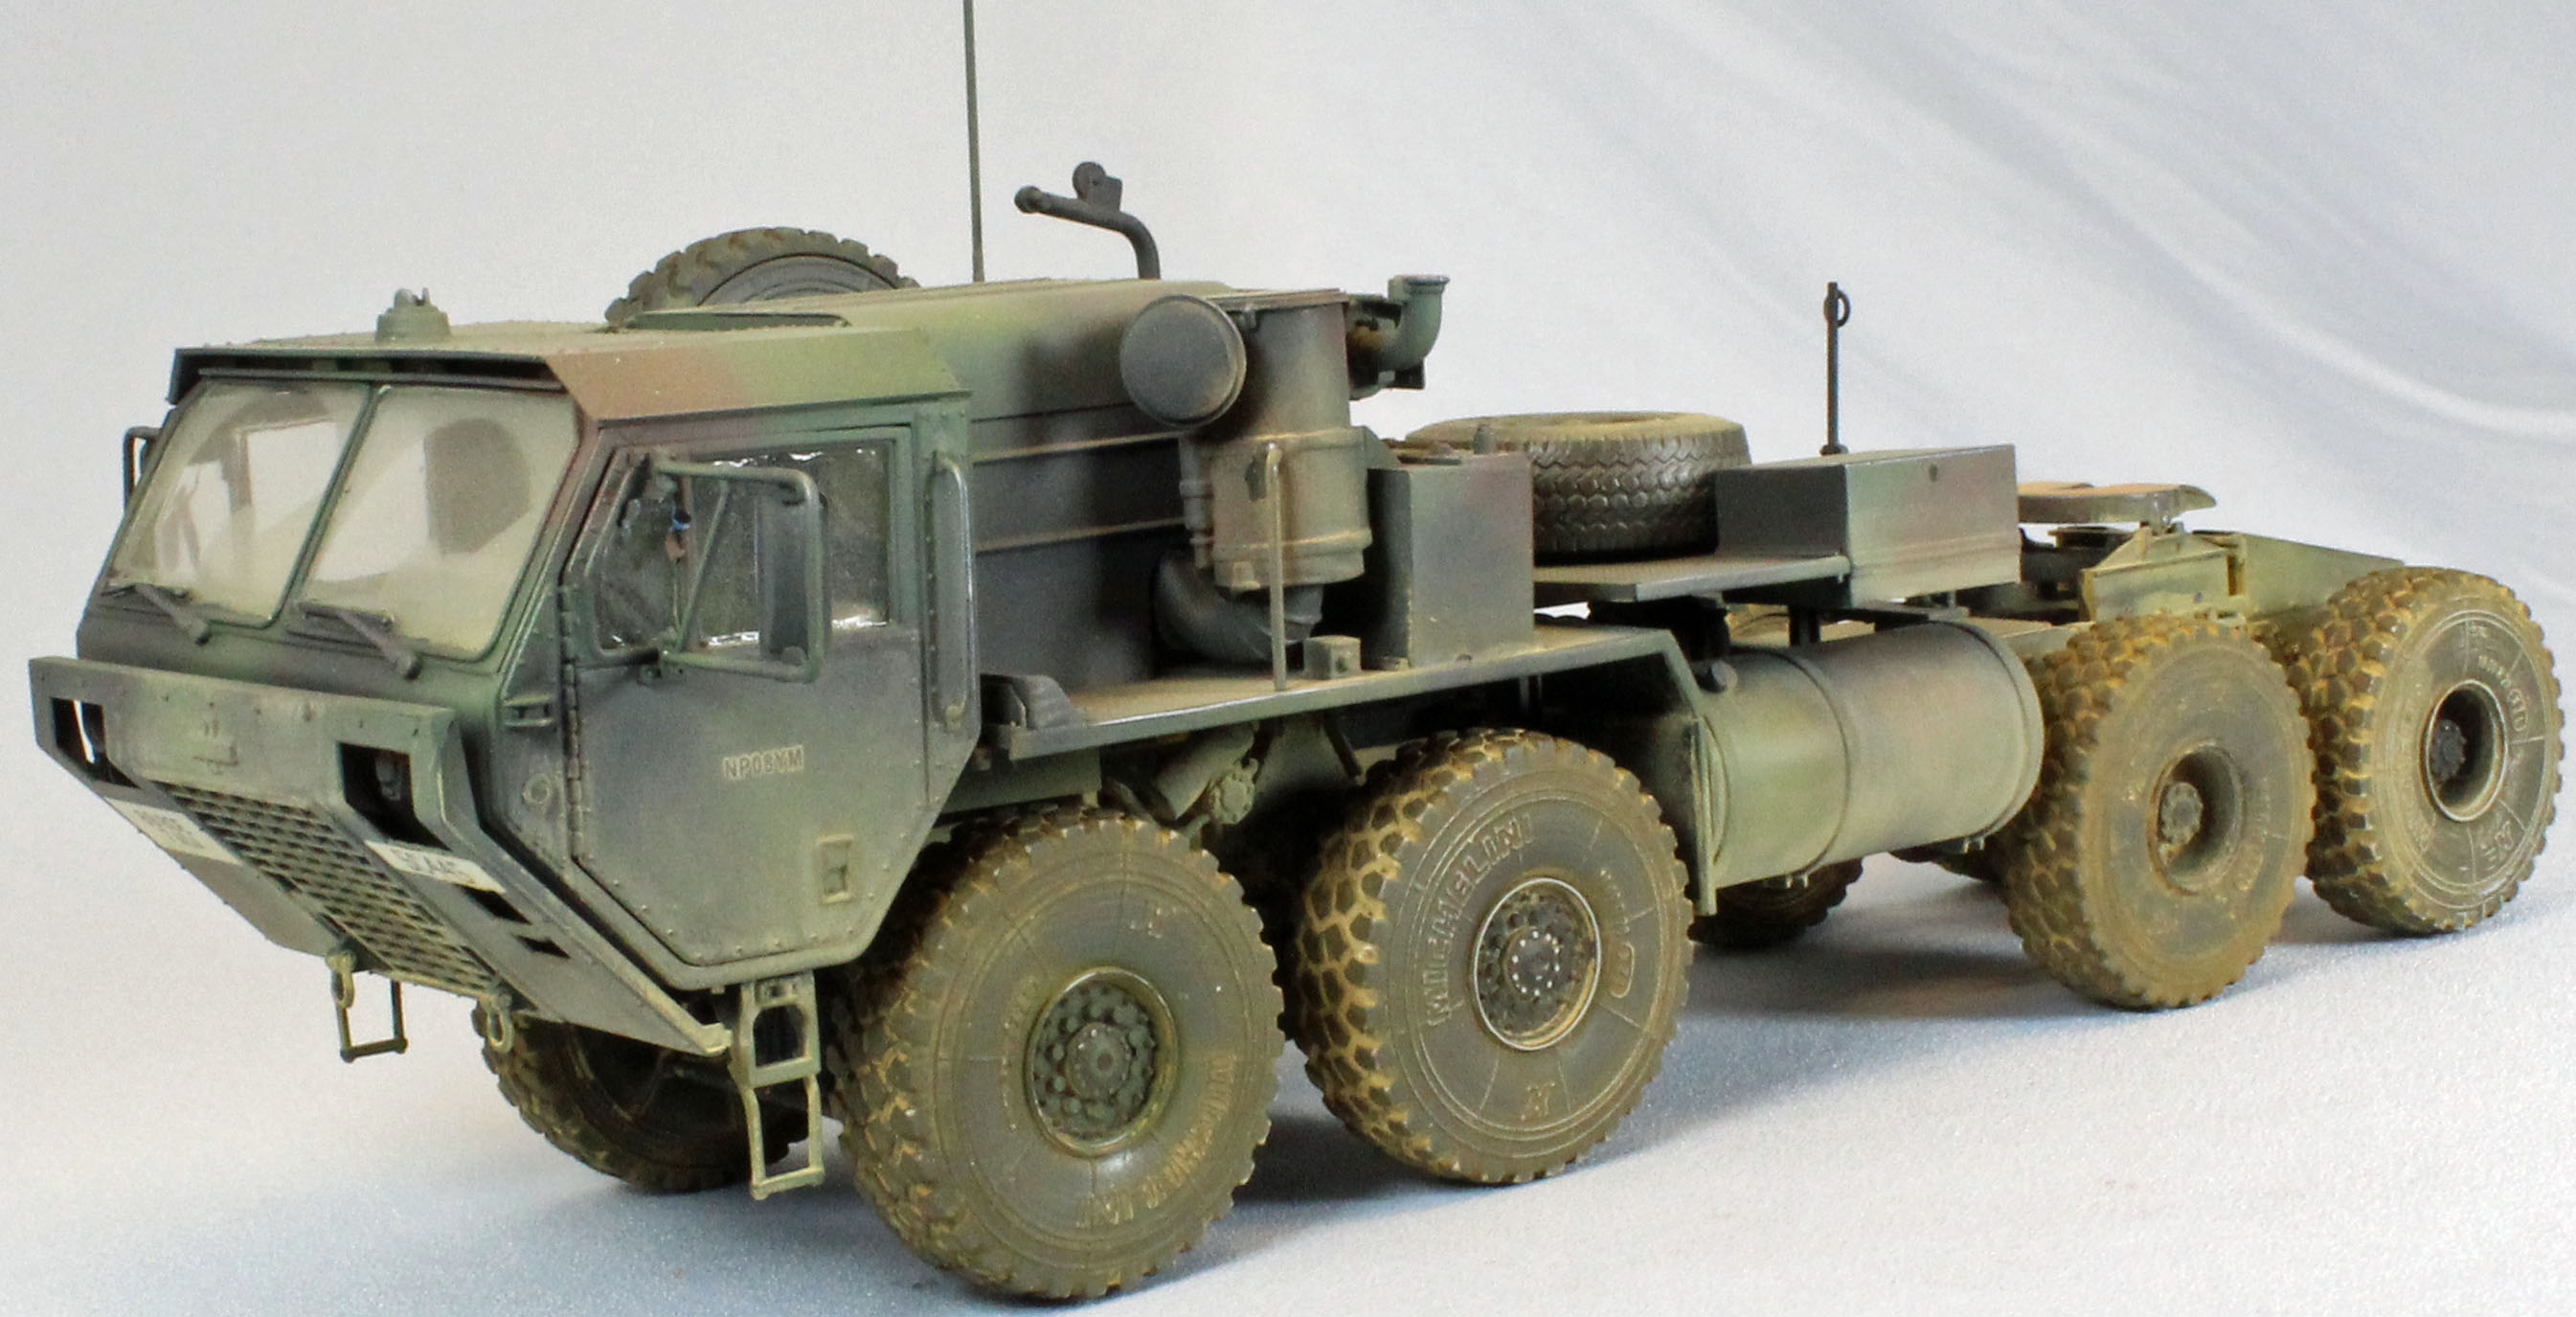
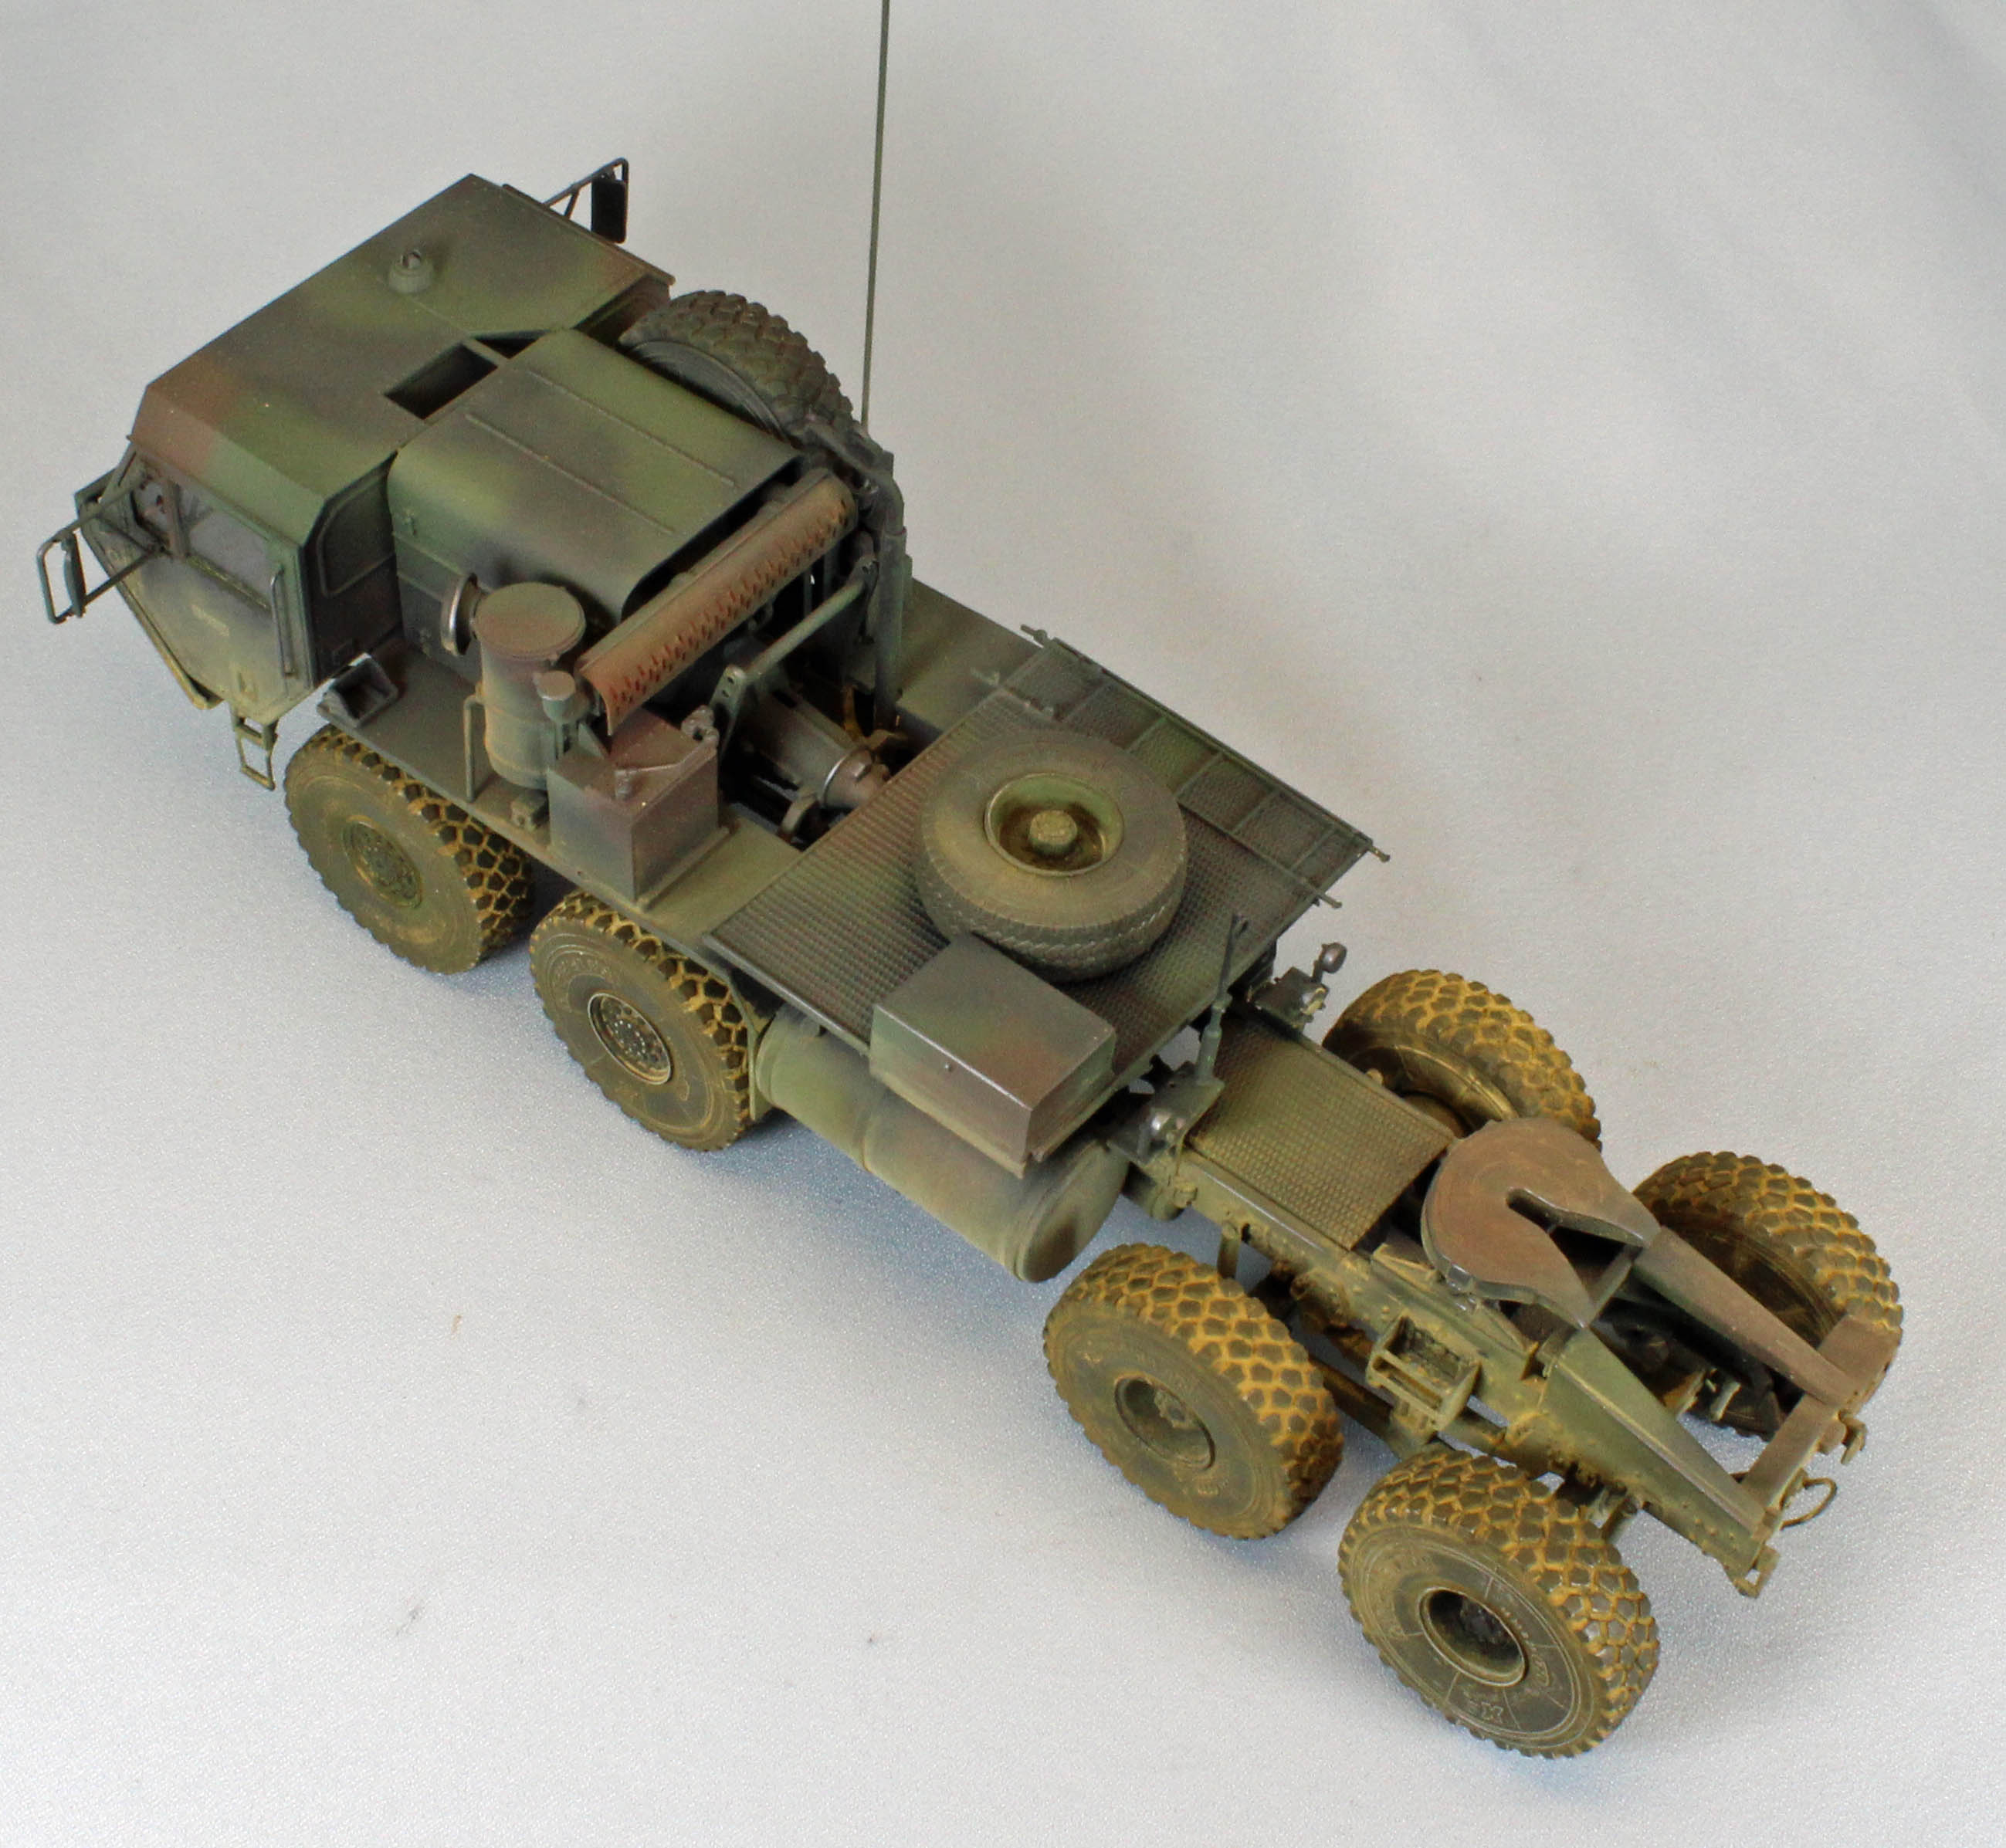
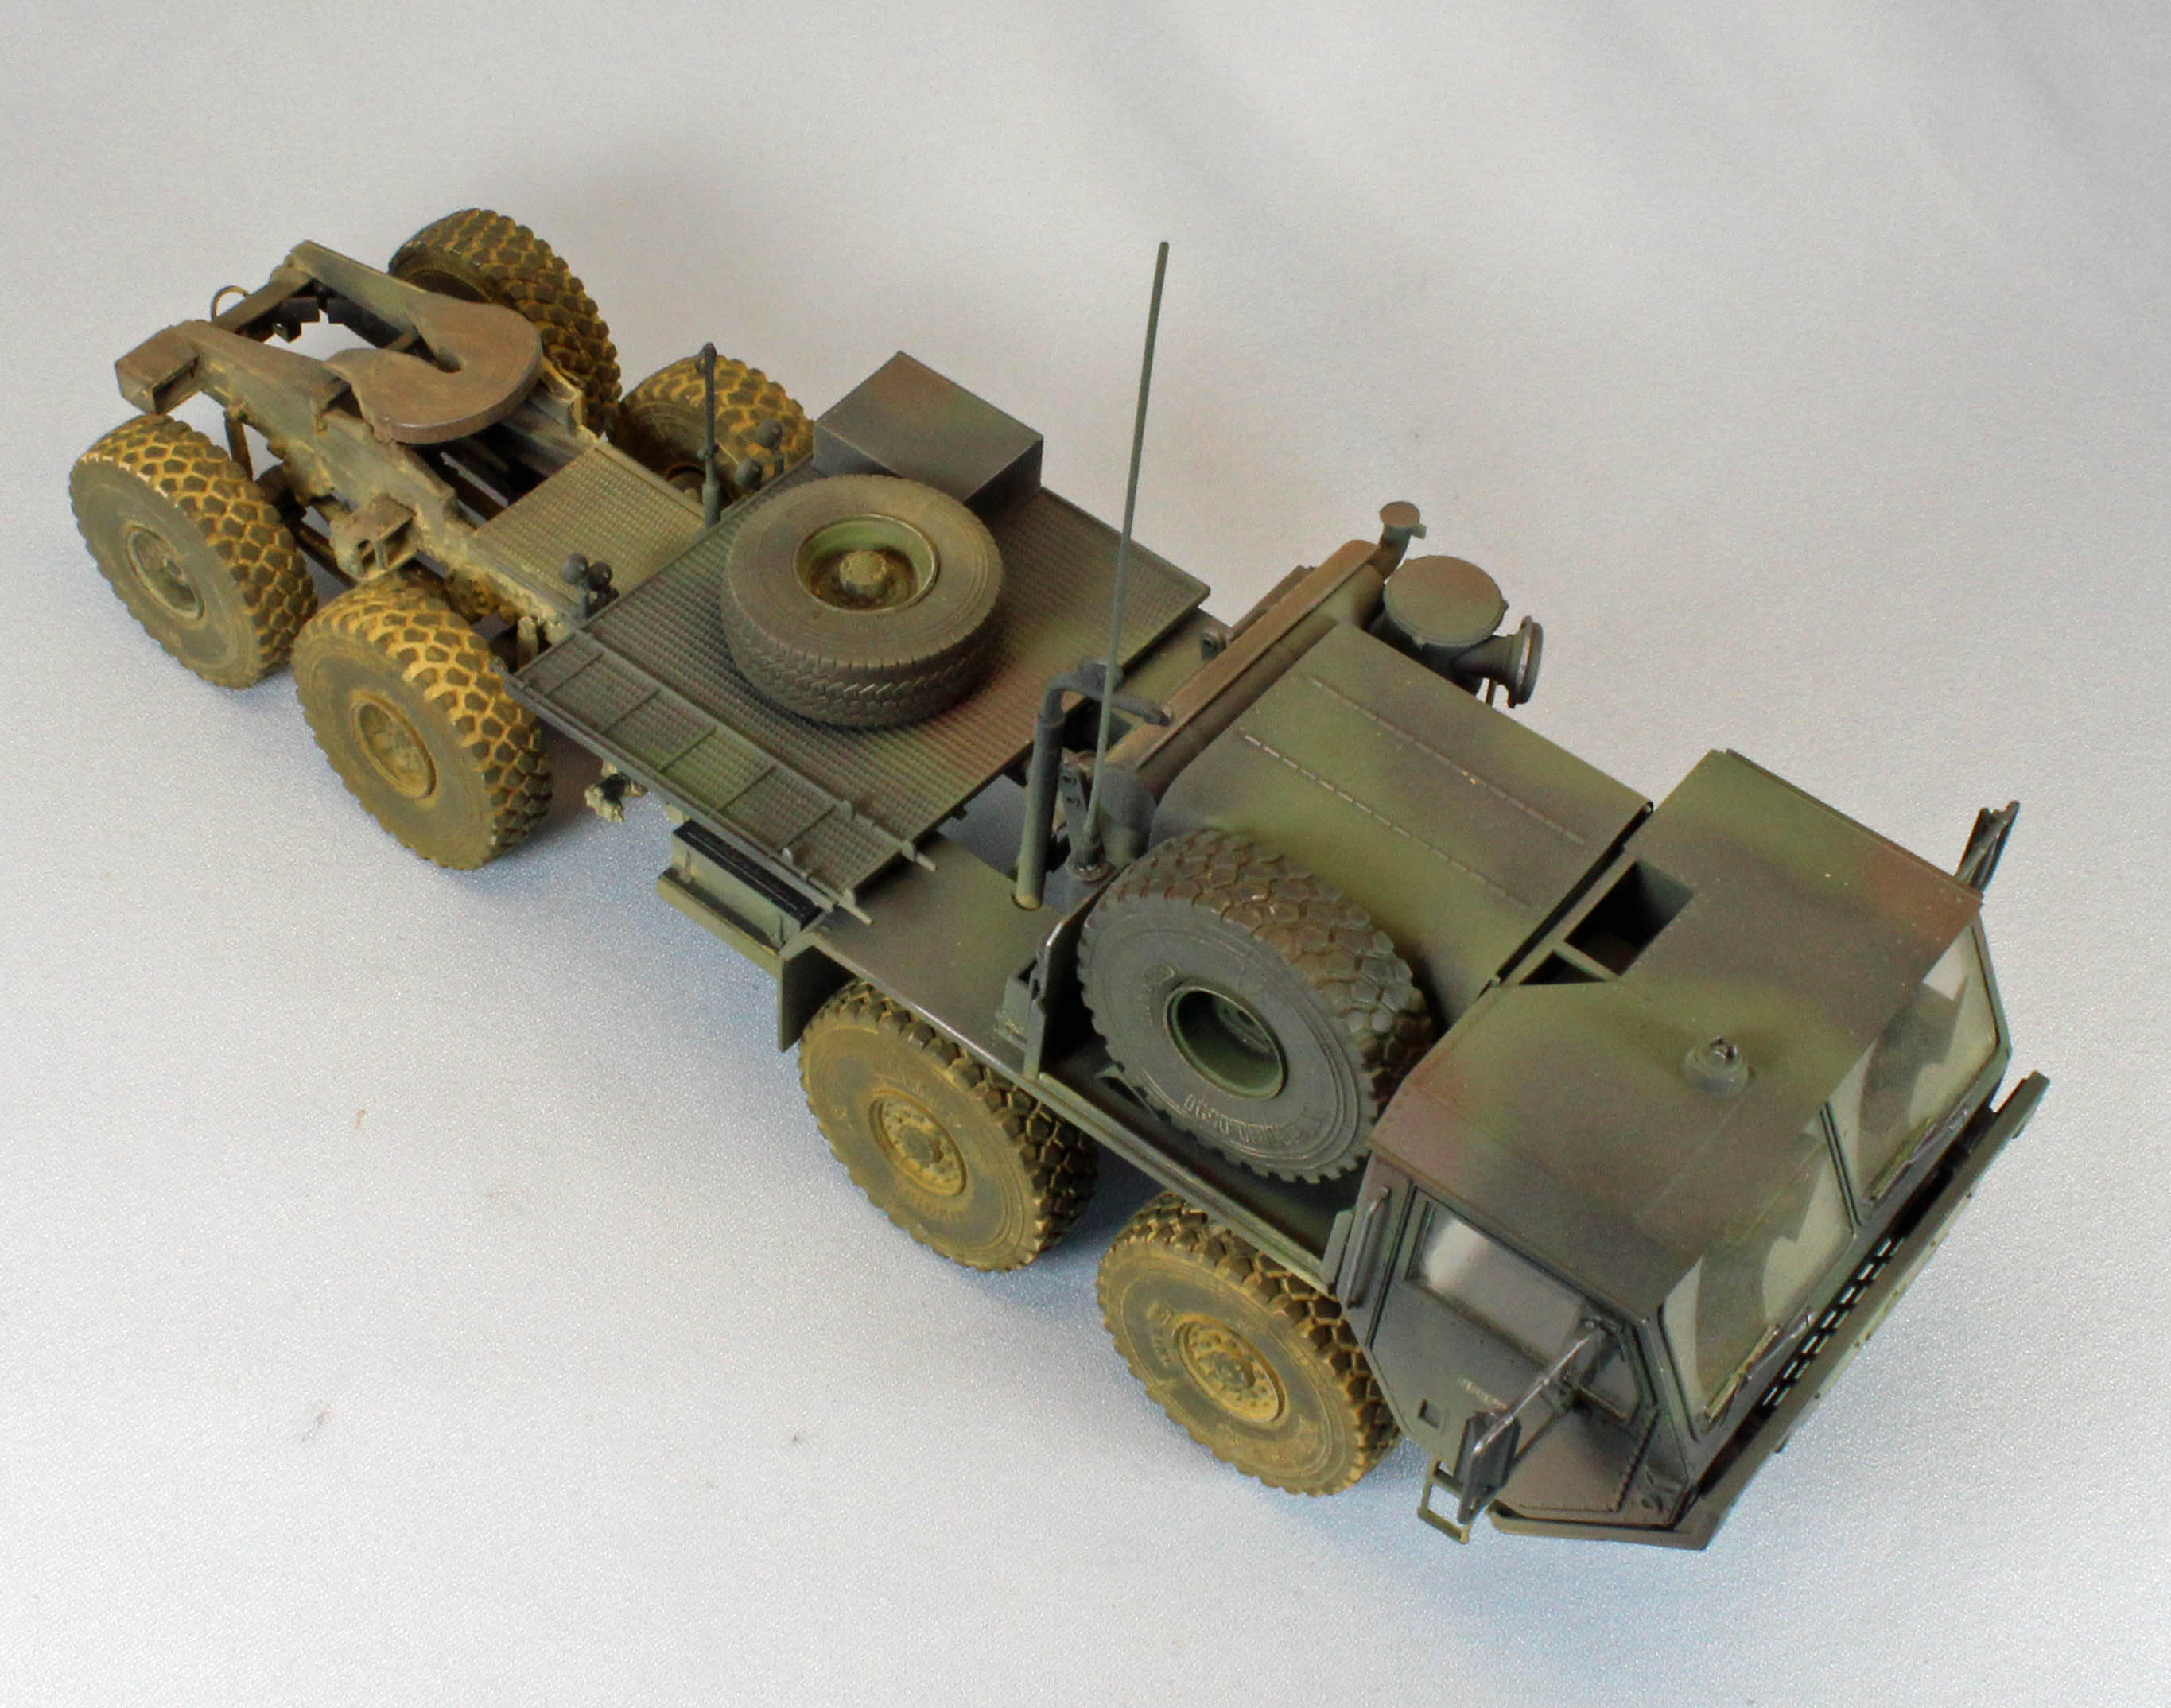
The HEMET Prime Mover
The plastic used for the HEMET is harder, shiner, and doesn’t react to my normal glue (Testor’s black bottle liquid cement) as expected, requiring me to hold or clamp pieces in order for the glue to solidify. Also, there is considerably more clean-up to do on all the parts from these sprues. (see image). On the plus side, the clear parts are nicely beveled to snuggle into where they go in the frames inside the cab.
As mentioned previously, I went astray somewhere in Step 16 where the lower chassis framework is assembled. I thought I had firmly positioned and glued each cross member correctly, but later, well after I could do anything about it, I found that the two parallel frame members (Parts E3 and E49) were slightly askew. Unfortunately (for me), this caused numerous problems later as each part I attached to the frame was then slightly out of synch as well. I did what I could to rectify each issue as it came up and muddled ahead.
Needless to say, check your work carefully in this step, and make sure everything lines up perfectly after each part is added.
Fortunately, everything from then on came together reasonably well, with the following exceptions and documentation issues:
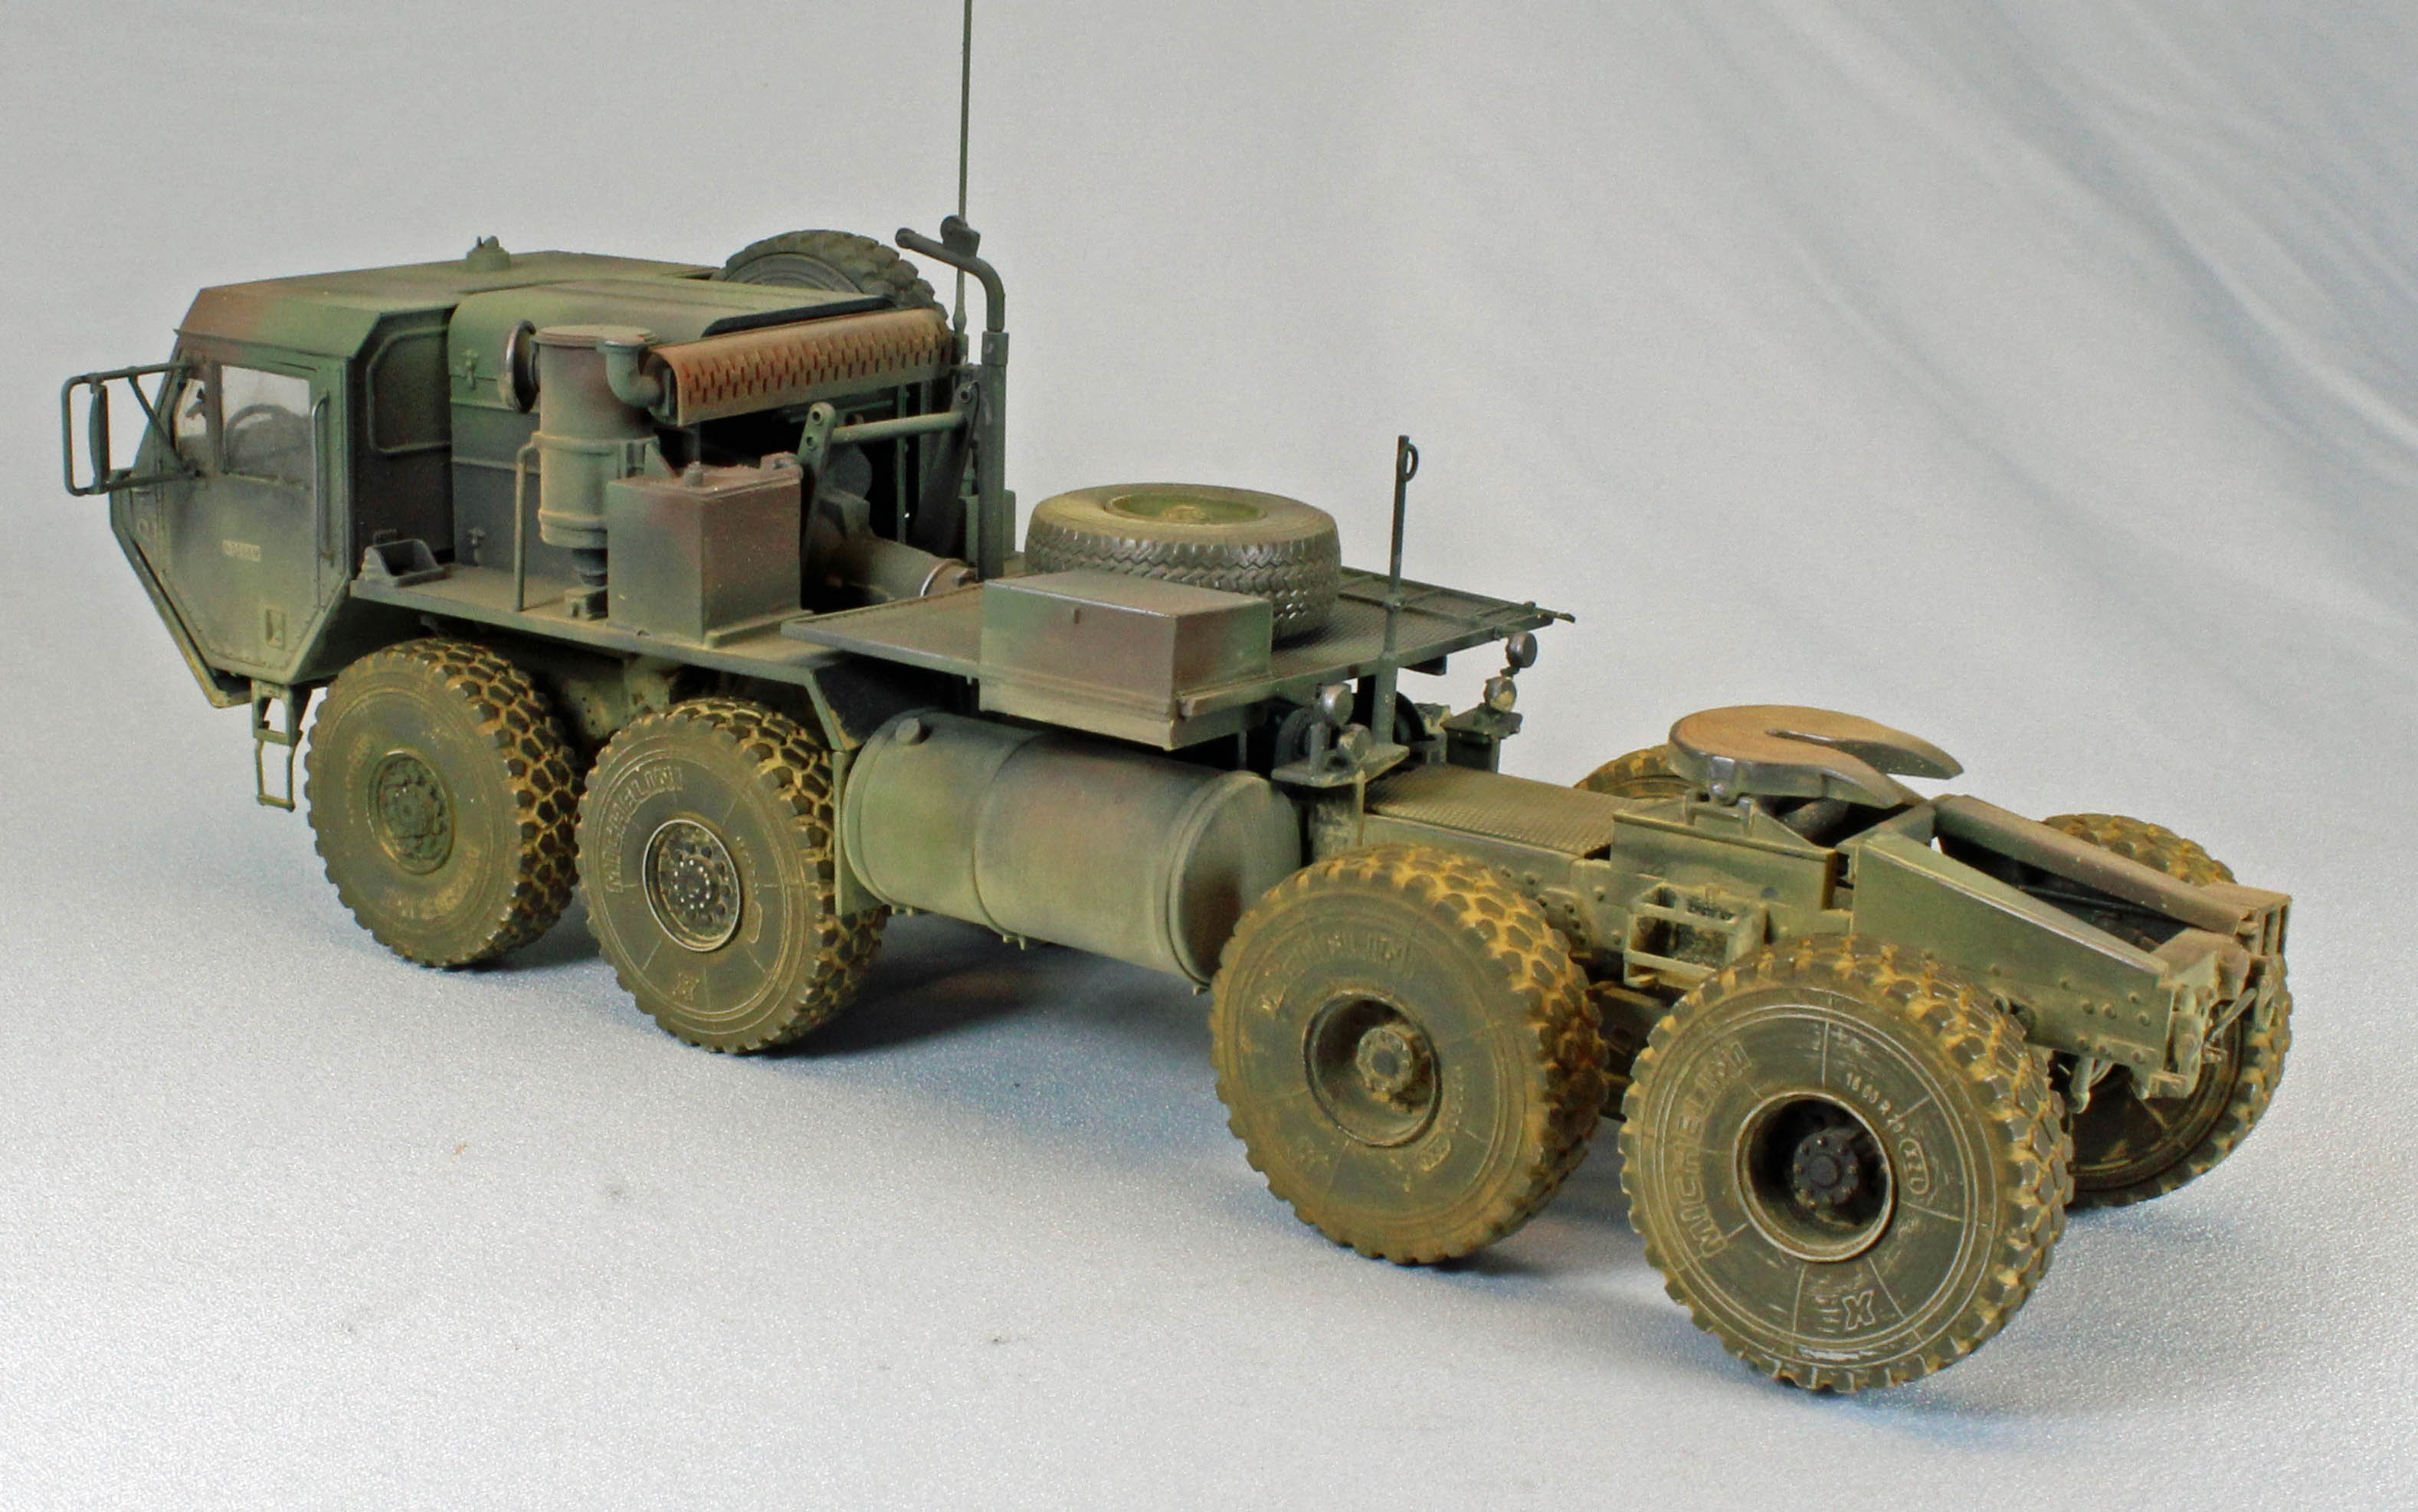
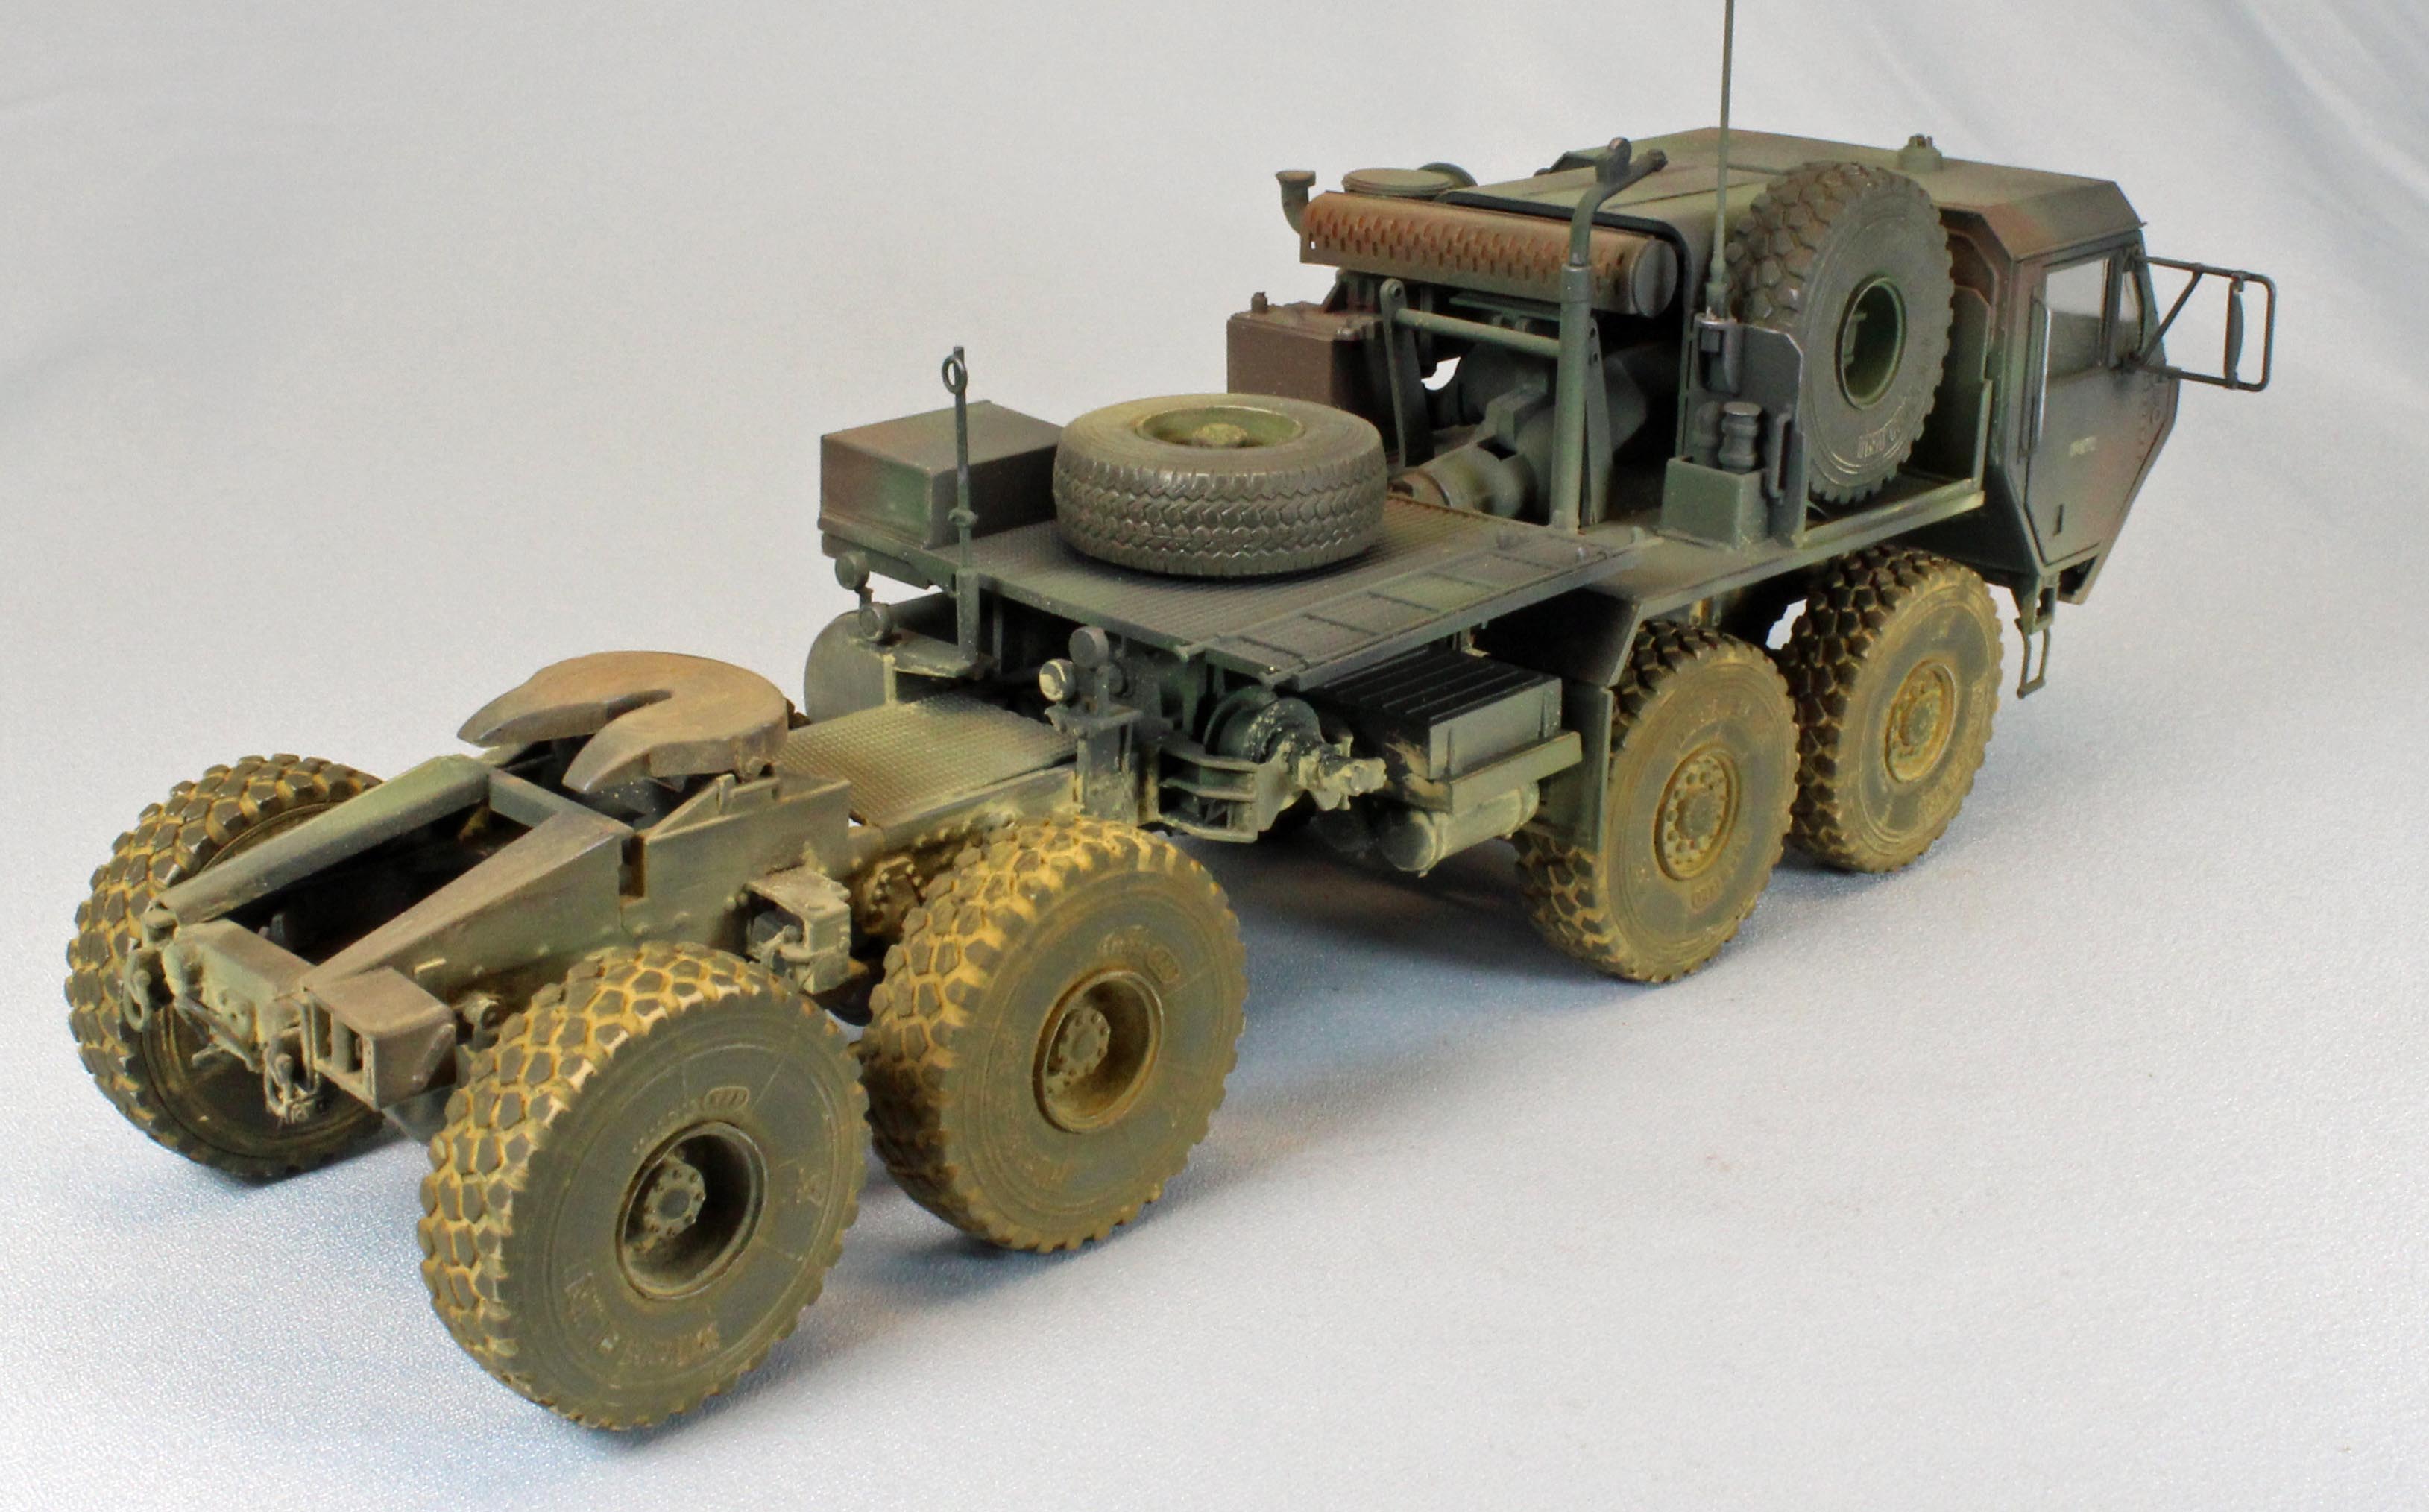
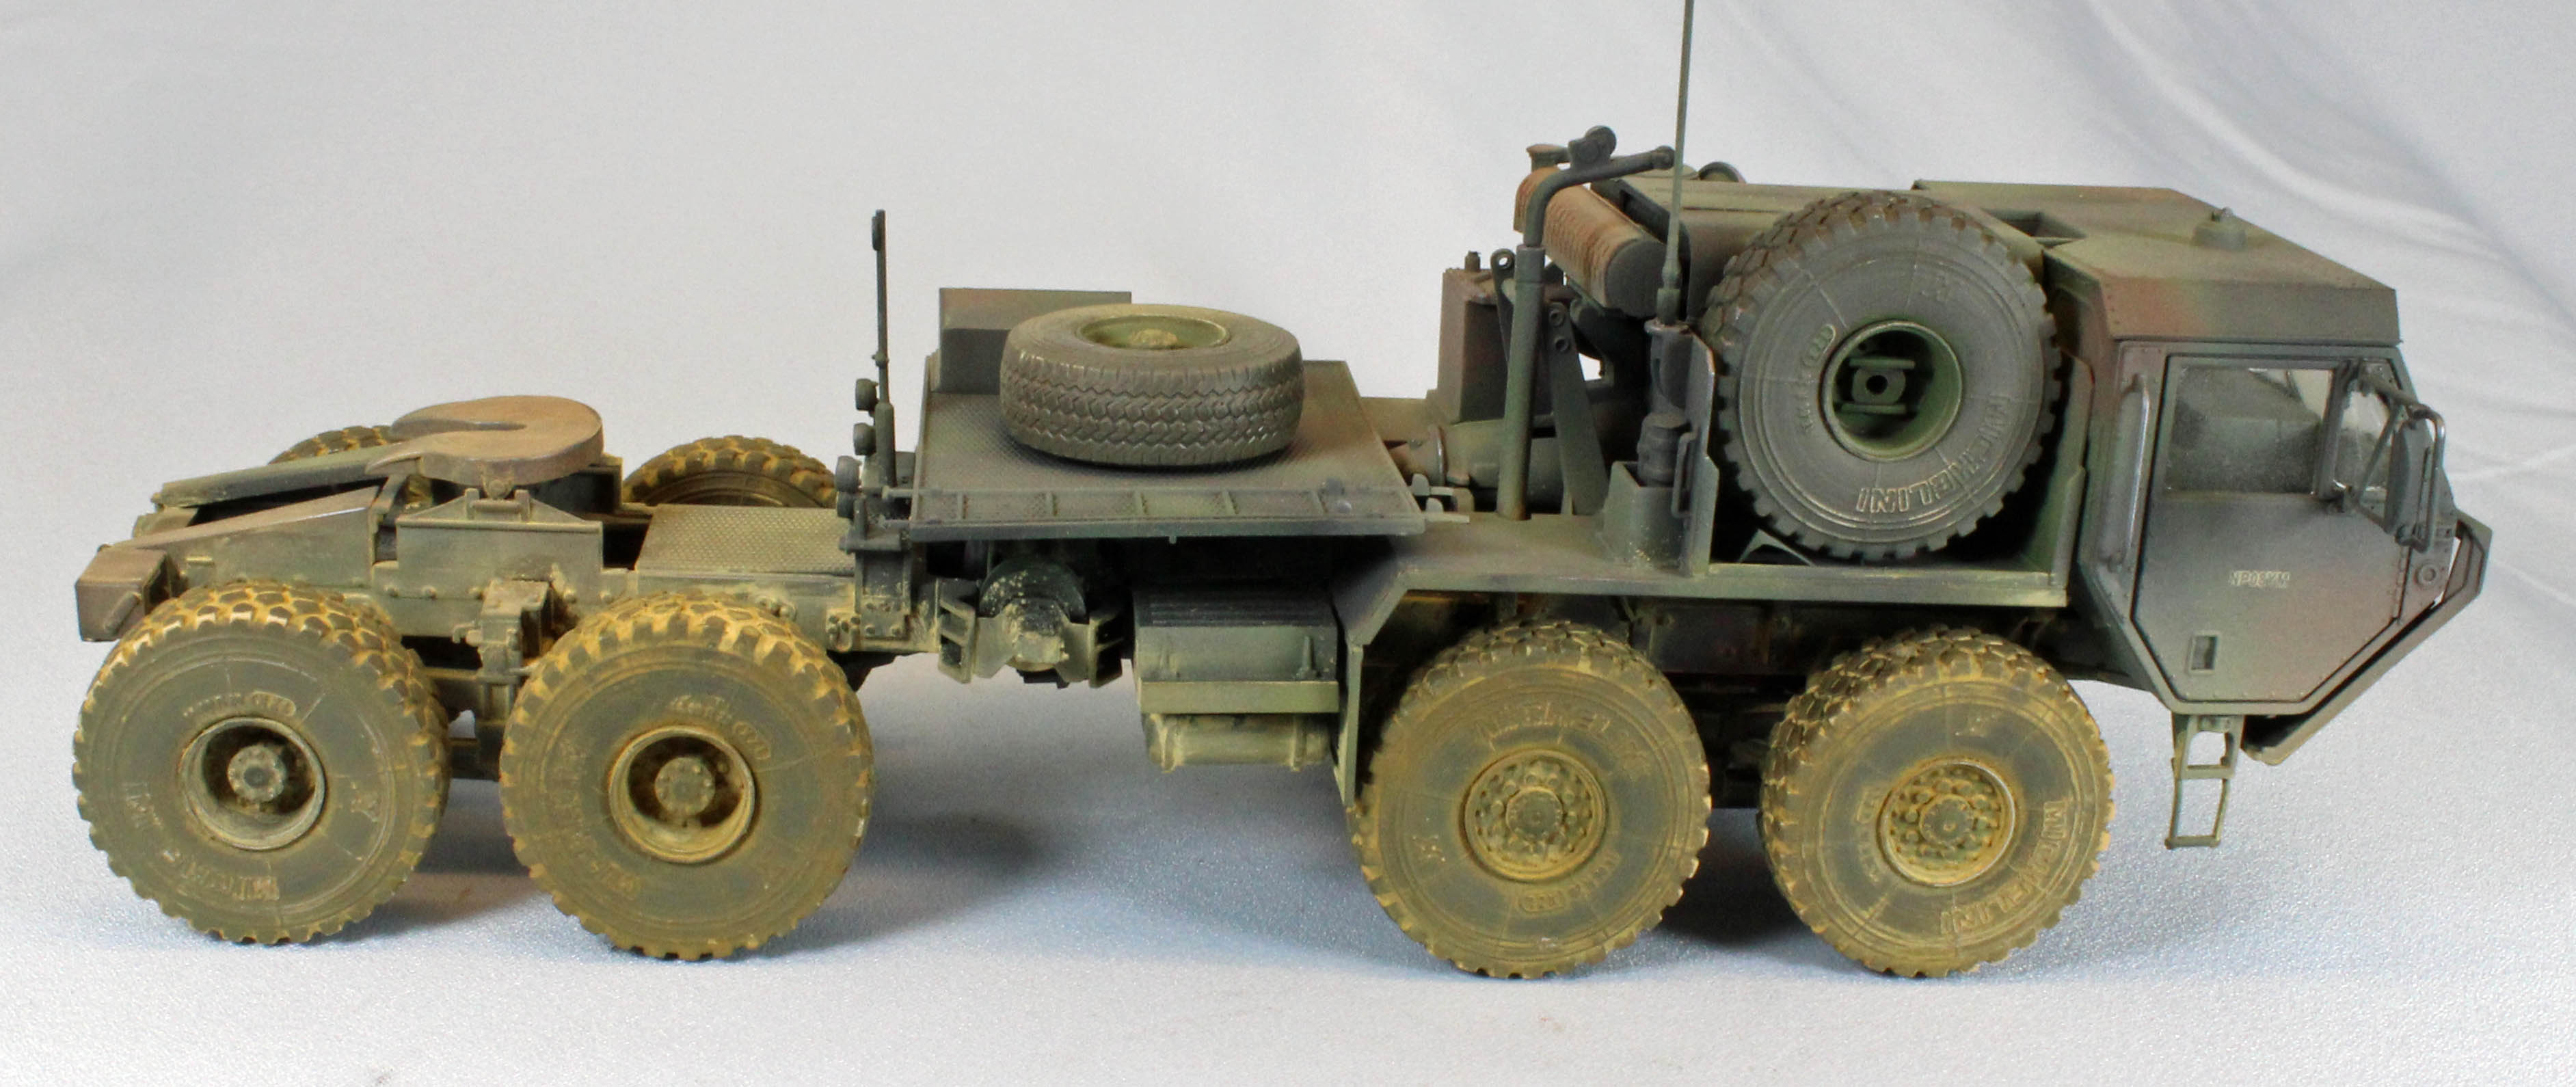
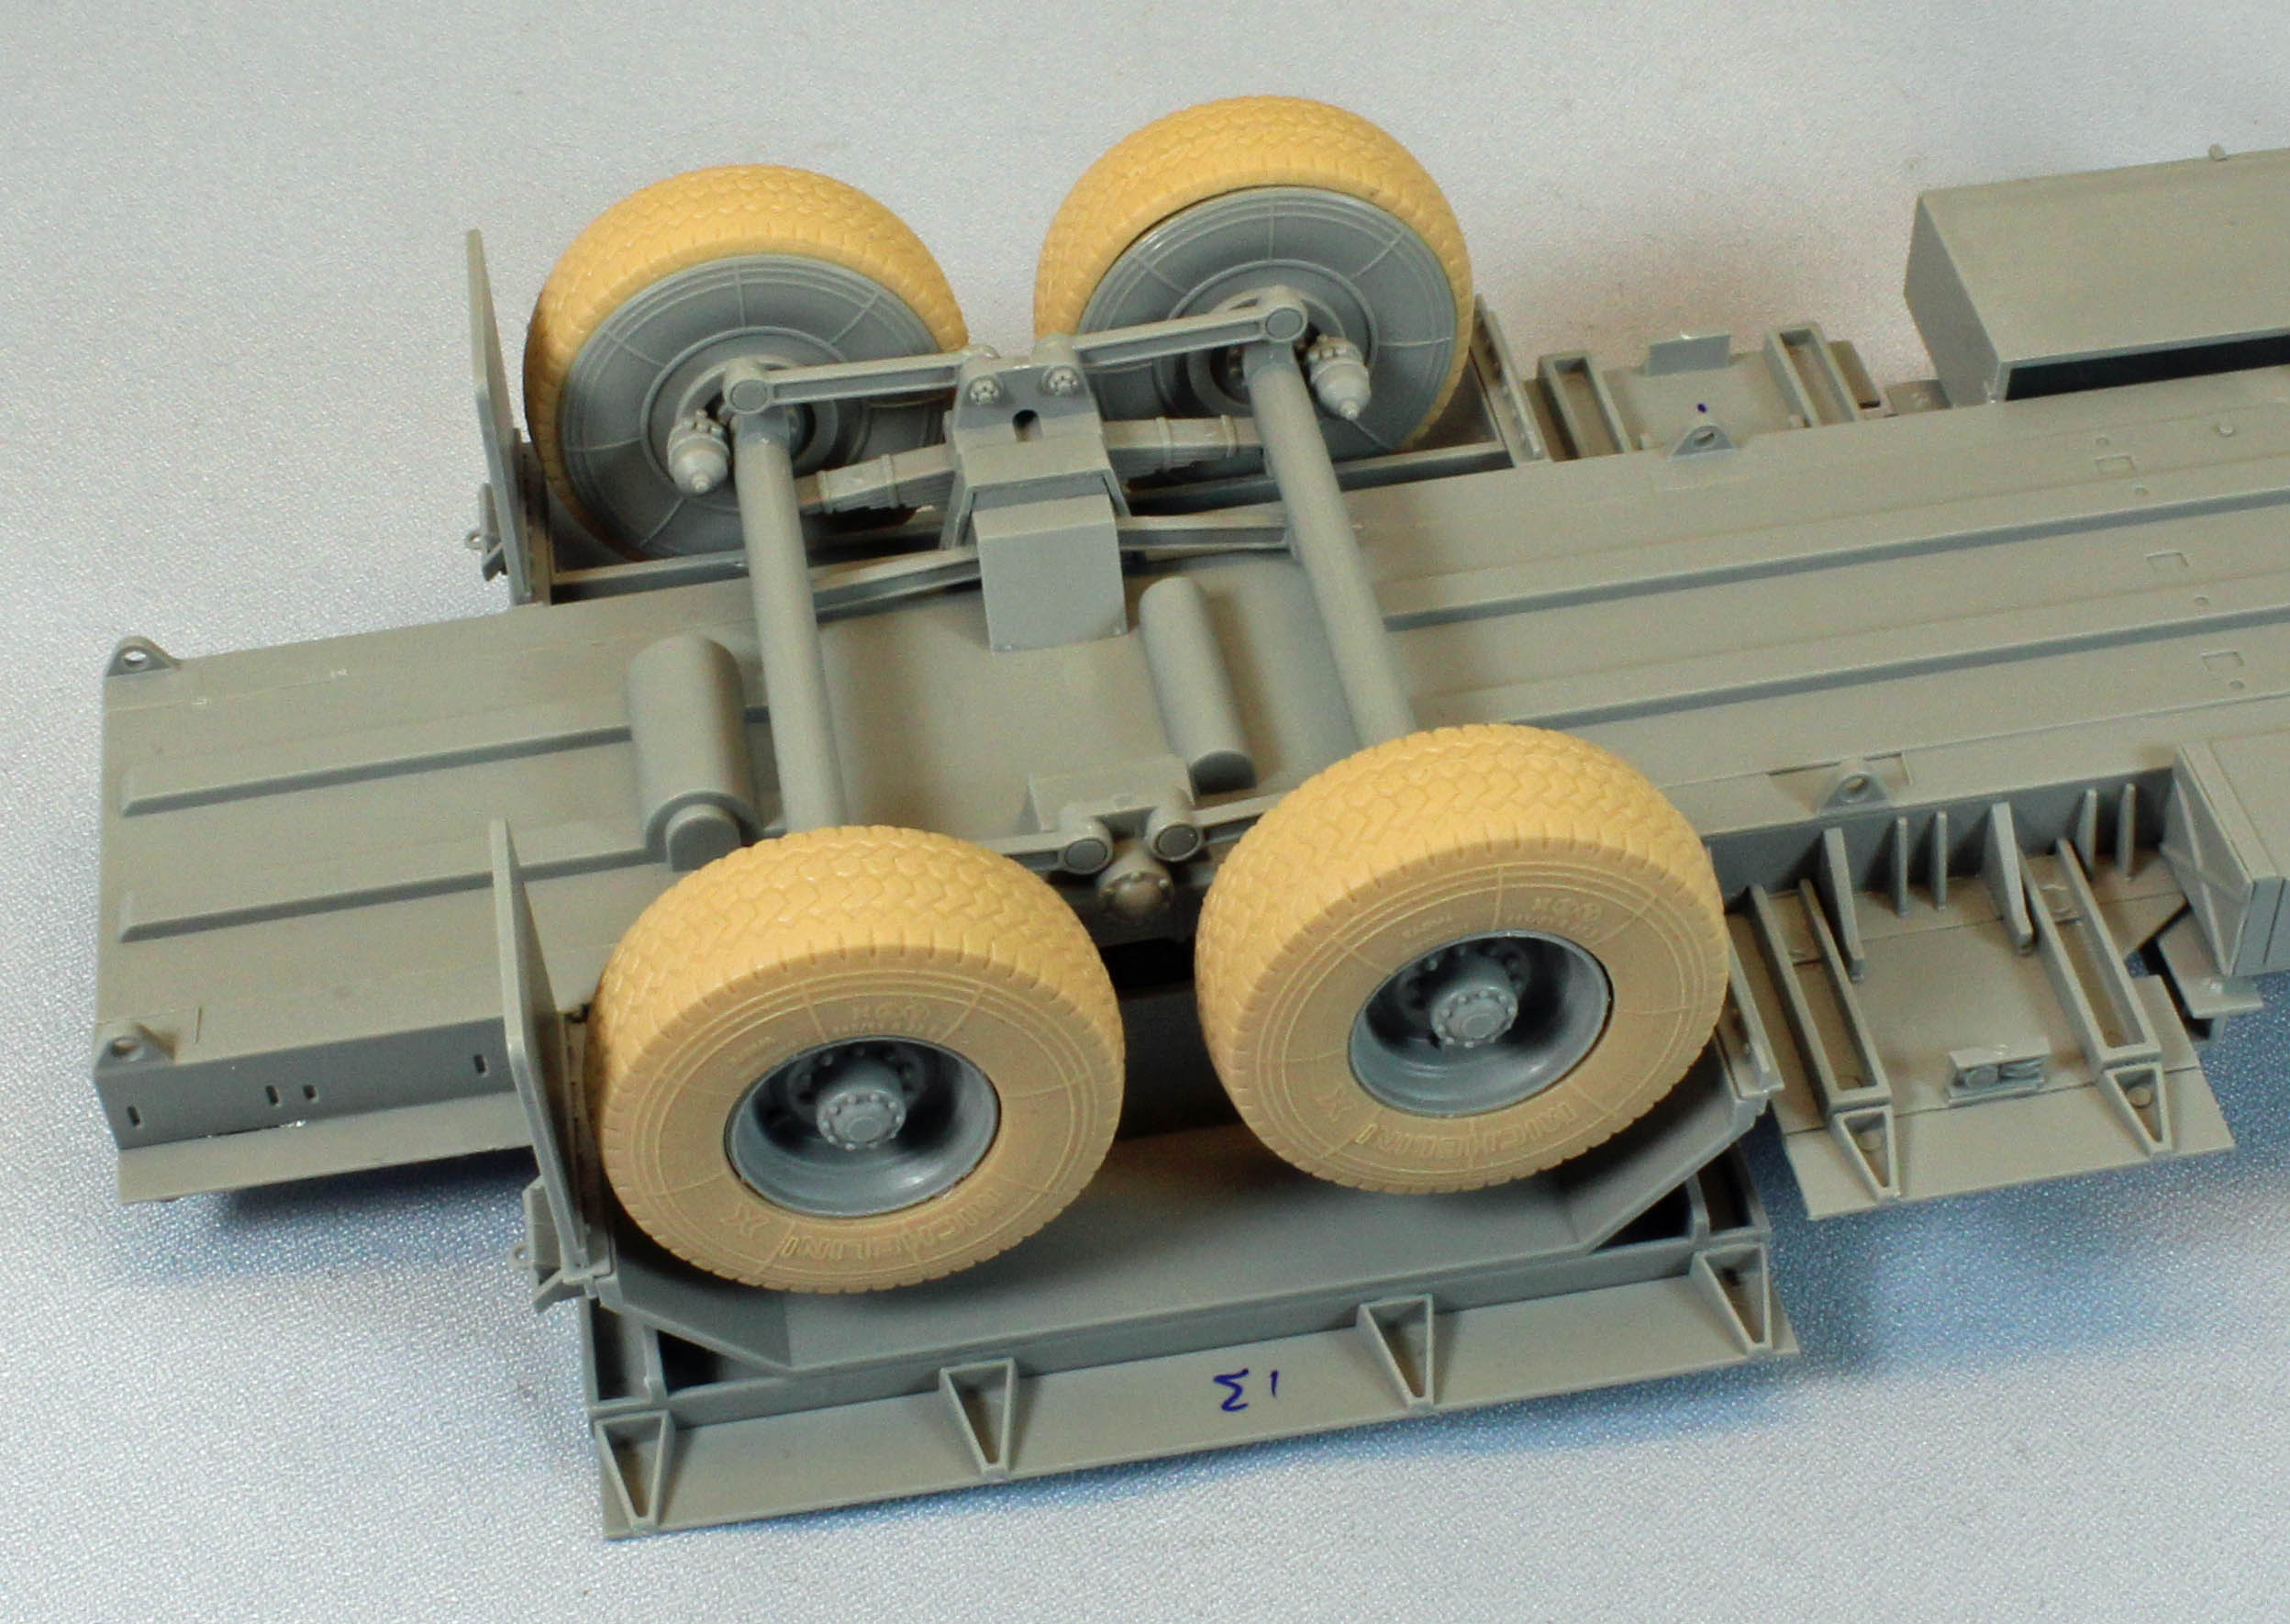
The Wheels
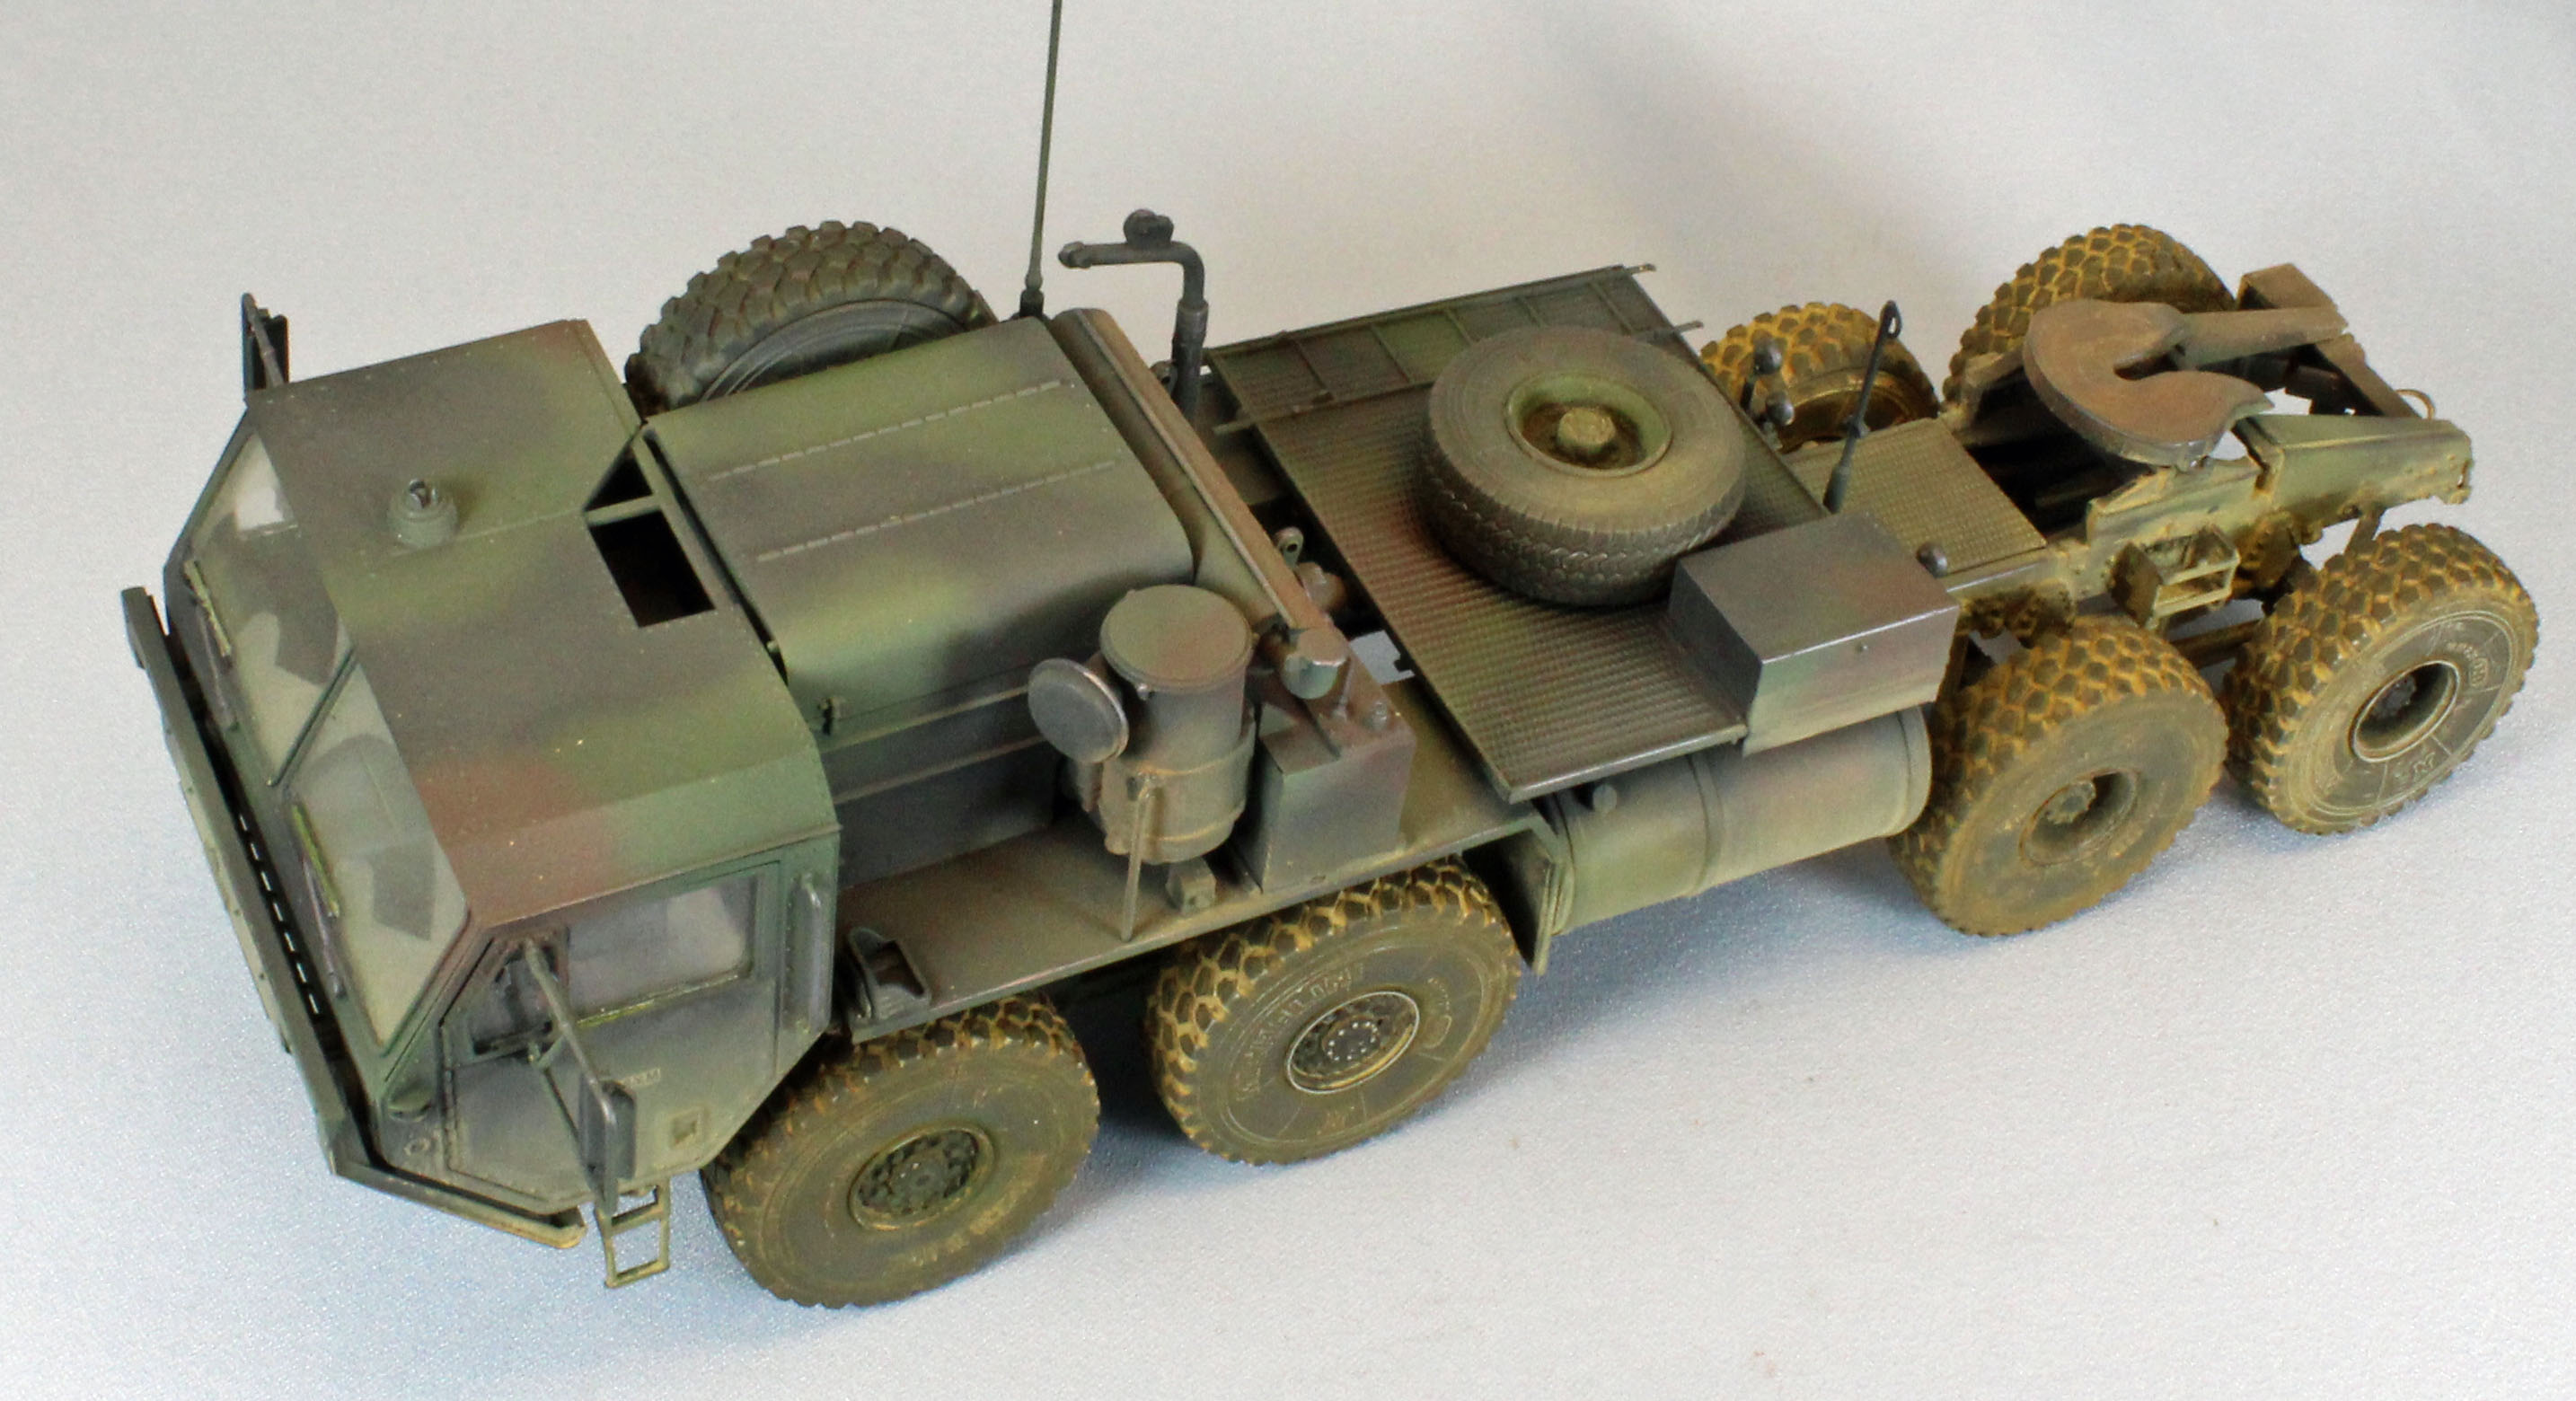
I really like the unique engineering and design of the wheels in this kit. I am big fan of Dragon’s DS material, and its use here is a big plus for me. In a perfect world, I’d prefer plastic tires with a separate tread ring around the outside to avoid the normally unavoidable middle seam, but DS tires are a close second choice. What’s more, Dragon has designed the wheels to be easily painted separate from the tires, and you can choose to attach the wheels/tires early on, or keep them both off until the end of the build, allowing full access to the detailed lower chassis.
The fit of the wheels on the trailer was perfect; you are rewarded with a nice ‘chunk’ when they are pushed on to the axles. The fit of the wheels on the HEMET, not so good. There are eight wheels, four forward and four aft. The instructions (and on-line images) clearly show the four deeply recessed wheels on the rear, but based solely on the fit it seems that they were made for the front. Regardless, following the instructions, I worked through eight ill-fitting wheels, one at a time. The front four were very loose and had to be carefully held in place while drying, lining them up as best as I could along the way. The rear four wheels barely fit on the axles – they pushed in about 1/32nd of an inch. I had to drill out the receiving hole in each wheel so that they would slip on to the axles. Unfortunately, the exact diameter of the holes fell between two drill bit sizes, so they ended up being loose as well, requiring another round of attention as each one dried.
On to the paint booth!
Painting and Finish
I was captivated by a picture I found on the internet (see image) of two launchers, near the beach, sporting a dark European camouflage and desert-sand missile pods. I don’t know the history behind the image, but I like to believe that they were rushed to the Gulf after the Scuds started flying, and had their original (European Camouflage) pods replaced with locally painted ones. I decided to use that scheme to finish my PAC 1 Patriot System even before I discovered that Dragon included that scheme in their instructions. Plus, it would give me a chance to do a European finish, a slightly complicated scheme which I have not tried in a while.
Except for priming and pre-shade coats, I used Vallejo Model Air paints throughout. I’ve come to really like airbrushing this paint, and I appreciate the amazing variety of ready-made colors available.
Primer and Pre-shade
I started by laying down a coat of (rattlecan) Krylon Flat Black Lacquer Paint/Primer for my dark, primer/pre-shade coat. Surprisingly, this low-cost solution sprays on easily and dries very thin and level – replacing a time-intensive task I normally use an airbrush and more expensive paint for. I use a dark primer coat to give the plastic and DS tires some grip, and to fill in the recesses - creating a shadow effect near the flat surface edges, and adding depth for the subsequent coats to come. I always let lacquer paint sit overnight in the garage to de-gas.
I then sprayed the 15 tires with Model Master US Army Helo Drab and set them aside for pigments later.
Cab Interior
I airbrushed everything using Model Air 71.093 NATO Green (Aka Field Green), detailing the rest using Surface Primer 73.613 Desert Tan (seats) and Surface Primer 73.603 German Panzer Grey (remaining detail). I then applied an overall wash using Mig Wash Brown Oils, thinned with Mona Lisa. I then cut masks for the windows, installed them, and sealed up the cab before attaching it to the front of the HEMET.
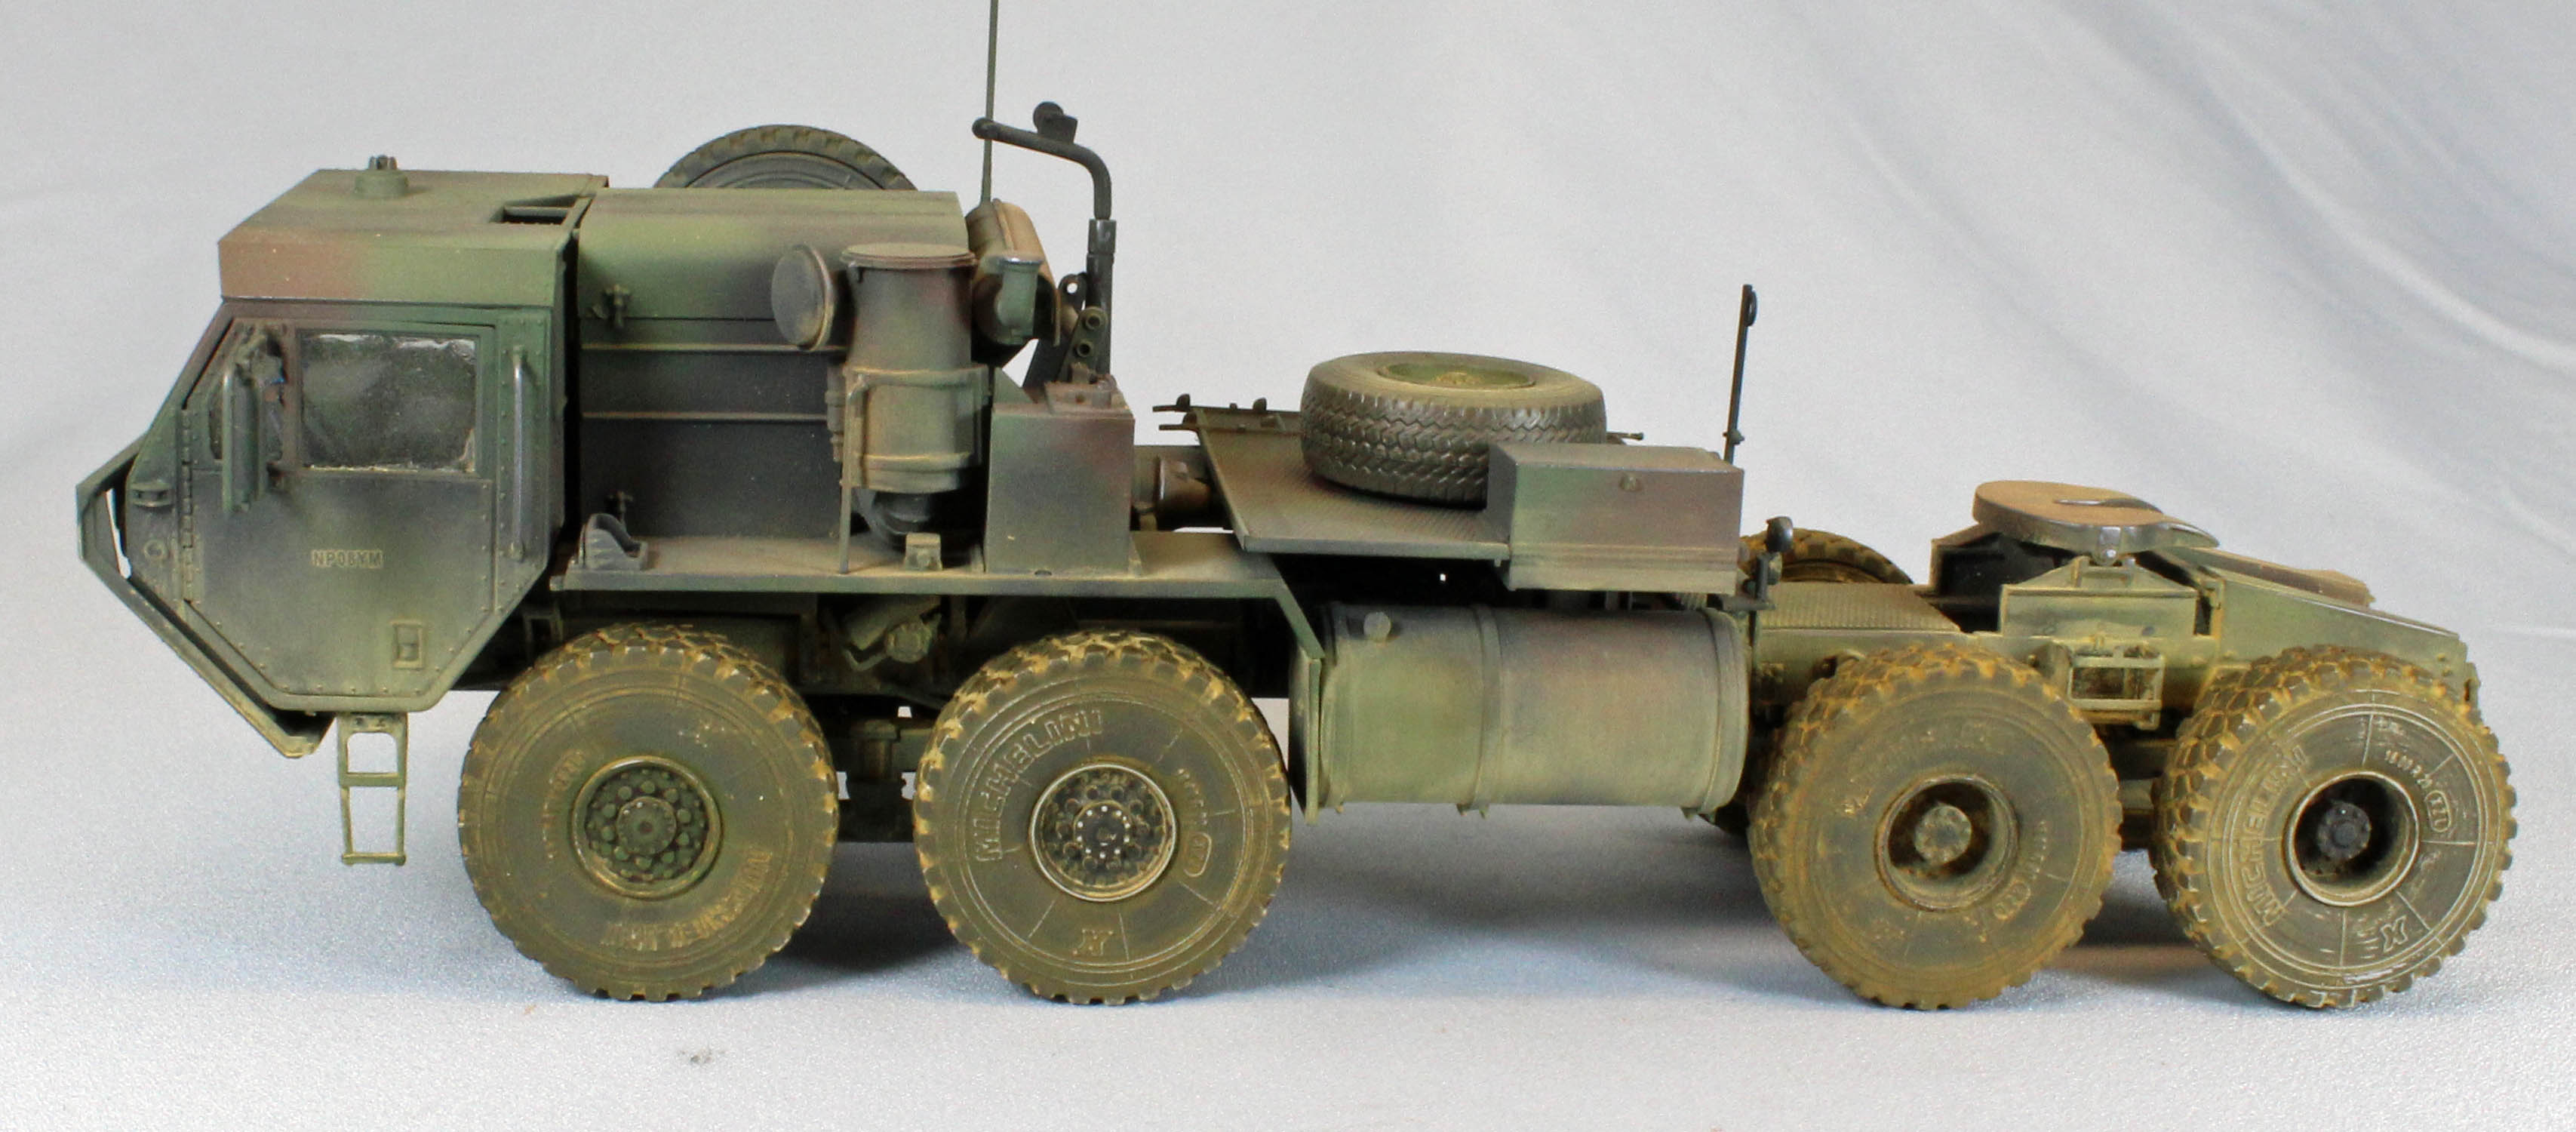
Exterior Camouflage
I started with an overall coat of Model Air 71.093 NATO Green (Aka Field Green), going easy in the crevices, on the edges and the undercarriage so some of the pre-shade black would show through. I followed this with a splotchy pattern using Model Air 71.251 NATO Black. I finished the camouflage adding spots here and there using Model Air 71.249 NATO Brown. A veteran and fellow modeler friend of mine provided me with a complete set of official (TB) painting guides for the HEMET and I (tried!) to follow that busy scheme as closely as possible.
Decals
For some reason, Dragon (or Cartograph) made the decision to place all the decals and stencils for this large, three part vehicle on a tiny 2x3 inch piece of decal paper. Decals were placed between others, aligned vertically and horizontally, and squeezed into places that would normally be available for holding them with tweezers. As a consequence, it was difficult to identify and remove the decals I needed, and, frustrated, I ended up leaving many of the stencils off. There are no stencils for the four Patriot missiles included in the kit.
With painting finished, I hand-brushed the surface areas that would be receiving decals with a coat of Future floor polish to give the decals a smooth surface to slide on to.
Once the Future was dry I went about applying the decals using the Red and Blue MicroSol and MicroSet products without any problems. Once the decals were dry, I gave the decaled areas, as well as all the places I wanted to add a pin wash to a good coat of Future to set everything up for washes and streaking. I skipped applying filters this time around since I felt that the European scheme was dark enough. Once the Future coat was dry to the touch, I went to work adding a pin wash using Mig Dark Wash thinned with Mona Lisa. Once satisfied, I knocked down any remaining shiny areas using Vallejo Flat Varnish to prepare the surfaces for pigments.
With such a dark vehicle, I felt it was necessary to lighten everything up, especially since the vehicle would have been bleached to some extent by the intense Persian Gulf sun. I started applying pigments, working from dark to light until I had what I was after. The pigments included (Mig) European Dust, Gulf War Sand, Light Dust and Concrete.
I created a slurry of Gulf War Sand and Mona Lisa thinner, and brushed that on the 12 ‘working’ DS wheels, and, once dry, rubbed most of the pigment off until they looked appropriately ‘dusty’. Once I was satisfied with everything, I attached the wheels, the two antennas, headlight and siren lenses, and this big boy was off to the photo booth.
Conclusion
Despite spending a full week of modeling sessions cleaning the parts that make up the four missile pods (!), and having some difficulty fitting the HEMET wheels on to their axles, this kit was a lot of fun to build. (Most) of the parts (and there aren’t that many of them) fit perfectly, the design of several assembles (wheels, stabilizer arms, launcher) is brilliant, and the instructions are mostly accurate and clear. I felt that Dragon did a good job providing this complicated missile system in a box aimed at less-experienced modelers.
Some modelers will want to trick out the rear of the launcher and perhaps the interior of the cab, but for me, this kit was good to go as is. This is my sixth Black Label build, and I think Dragon did a pretty good job here. I recommend this kit for all modelers and all skill levels.
I would like to thank Dragon Models and Dragon USA for providing this kit for review, and to IPMS USA for giving me the opportunity to build it.