Reviews
Armor
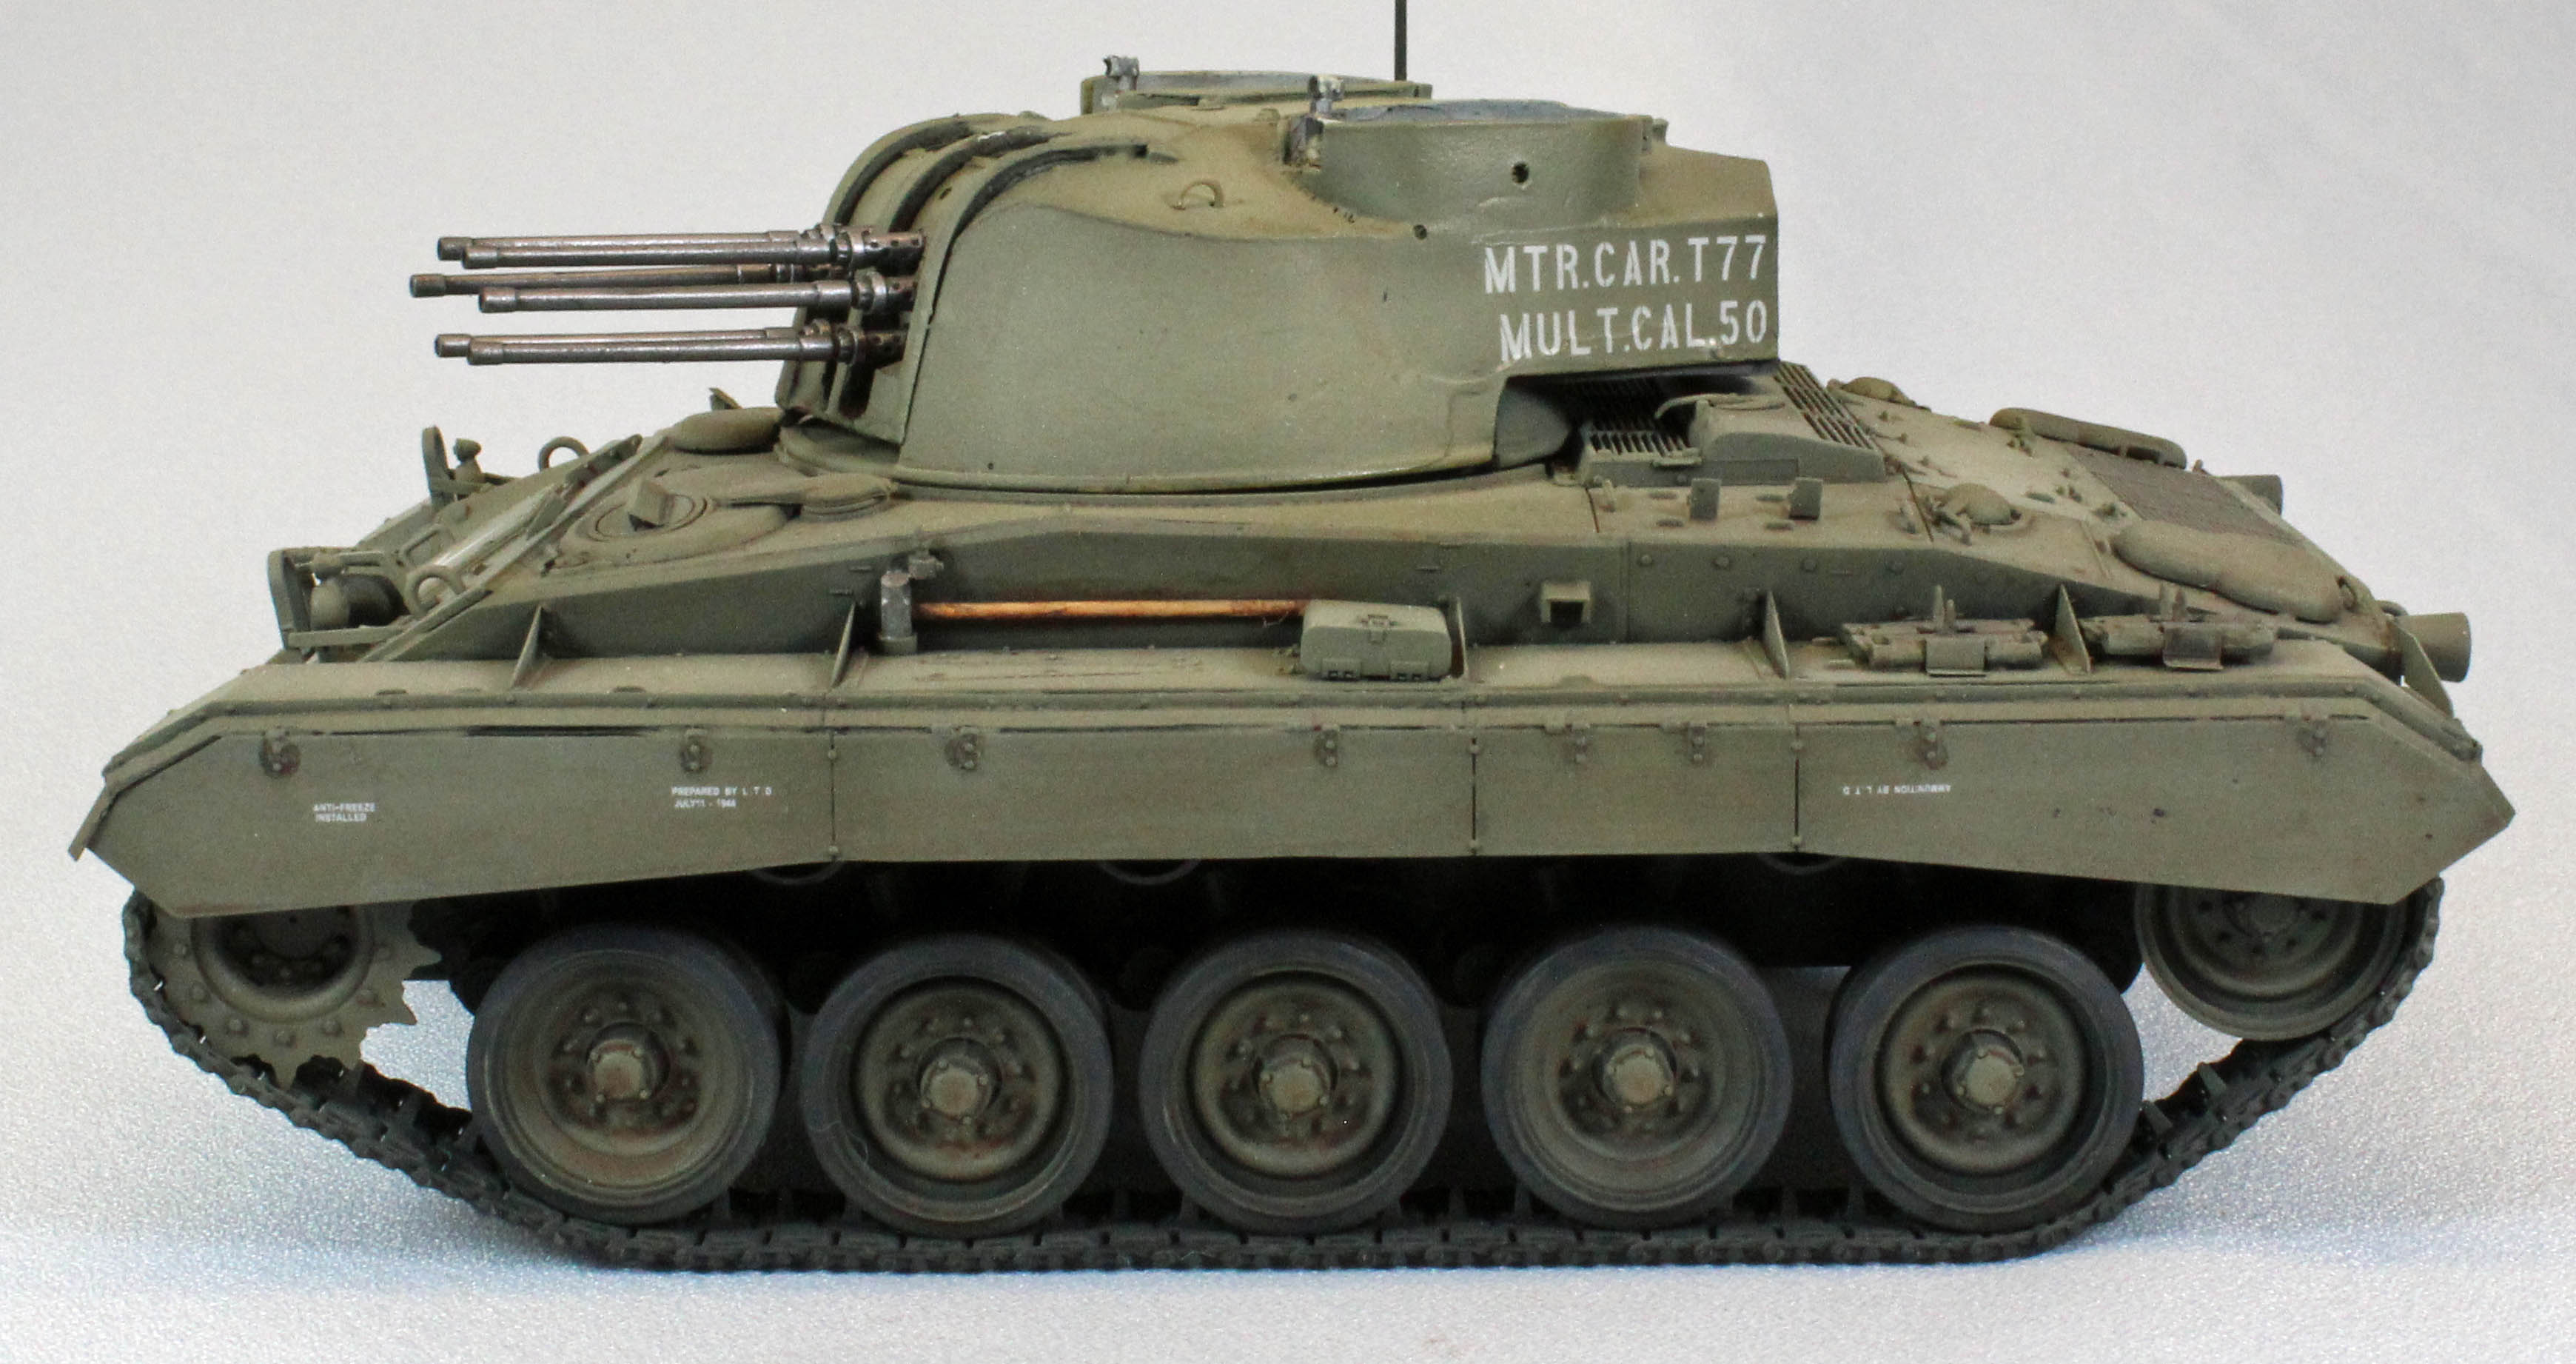
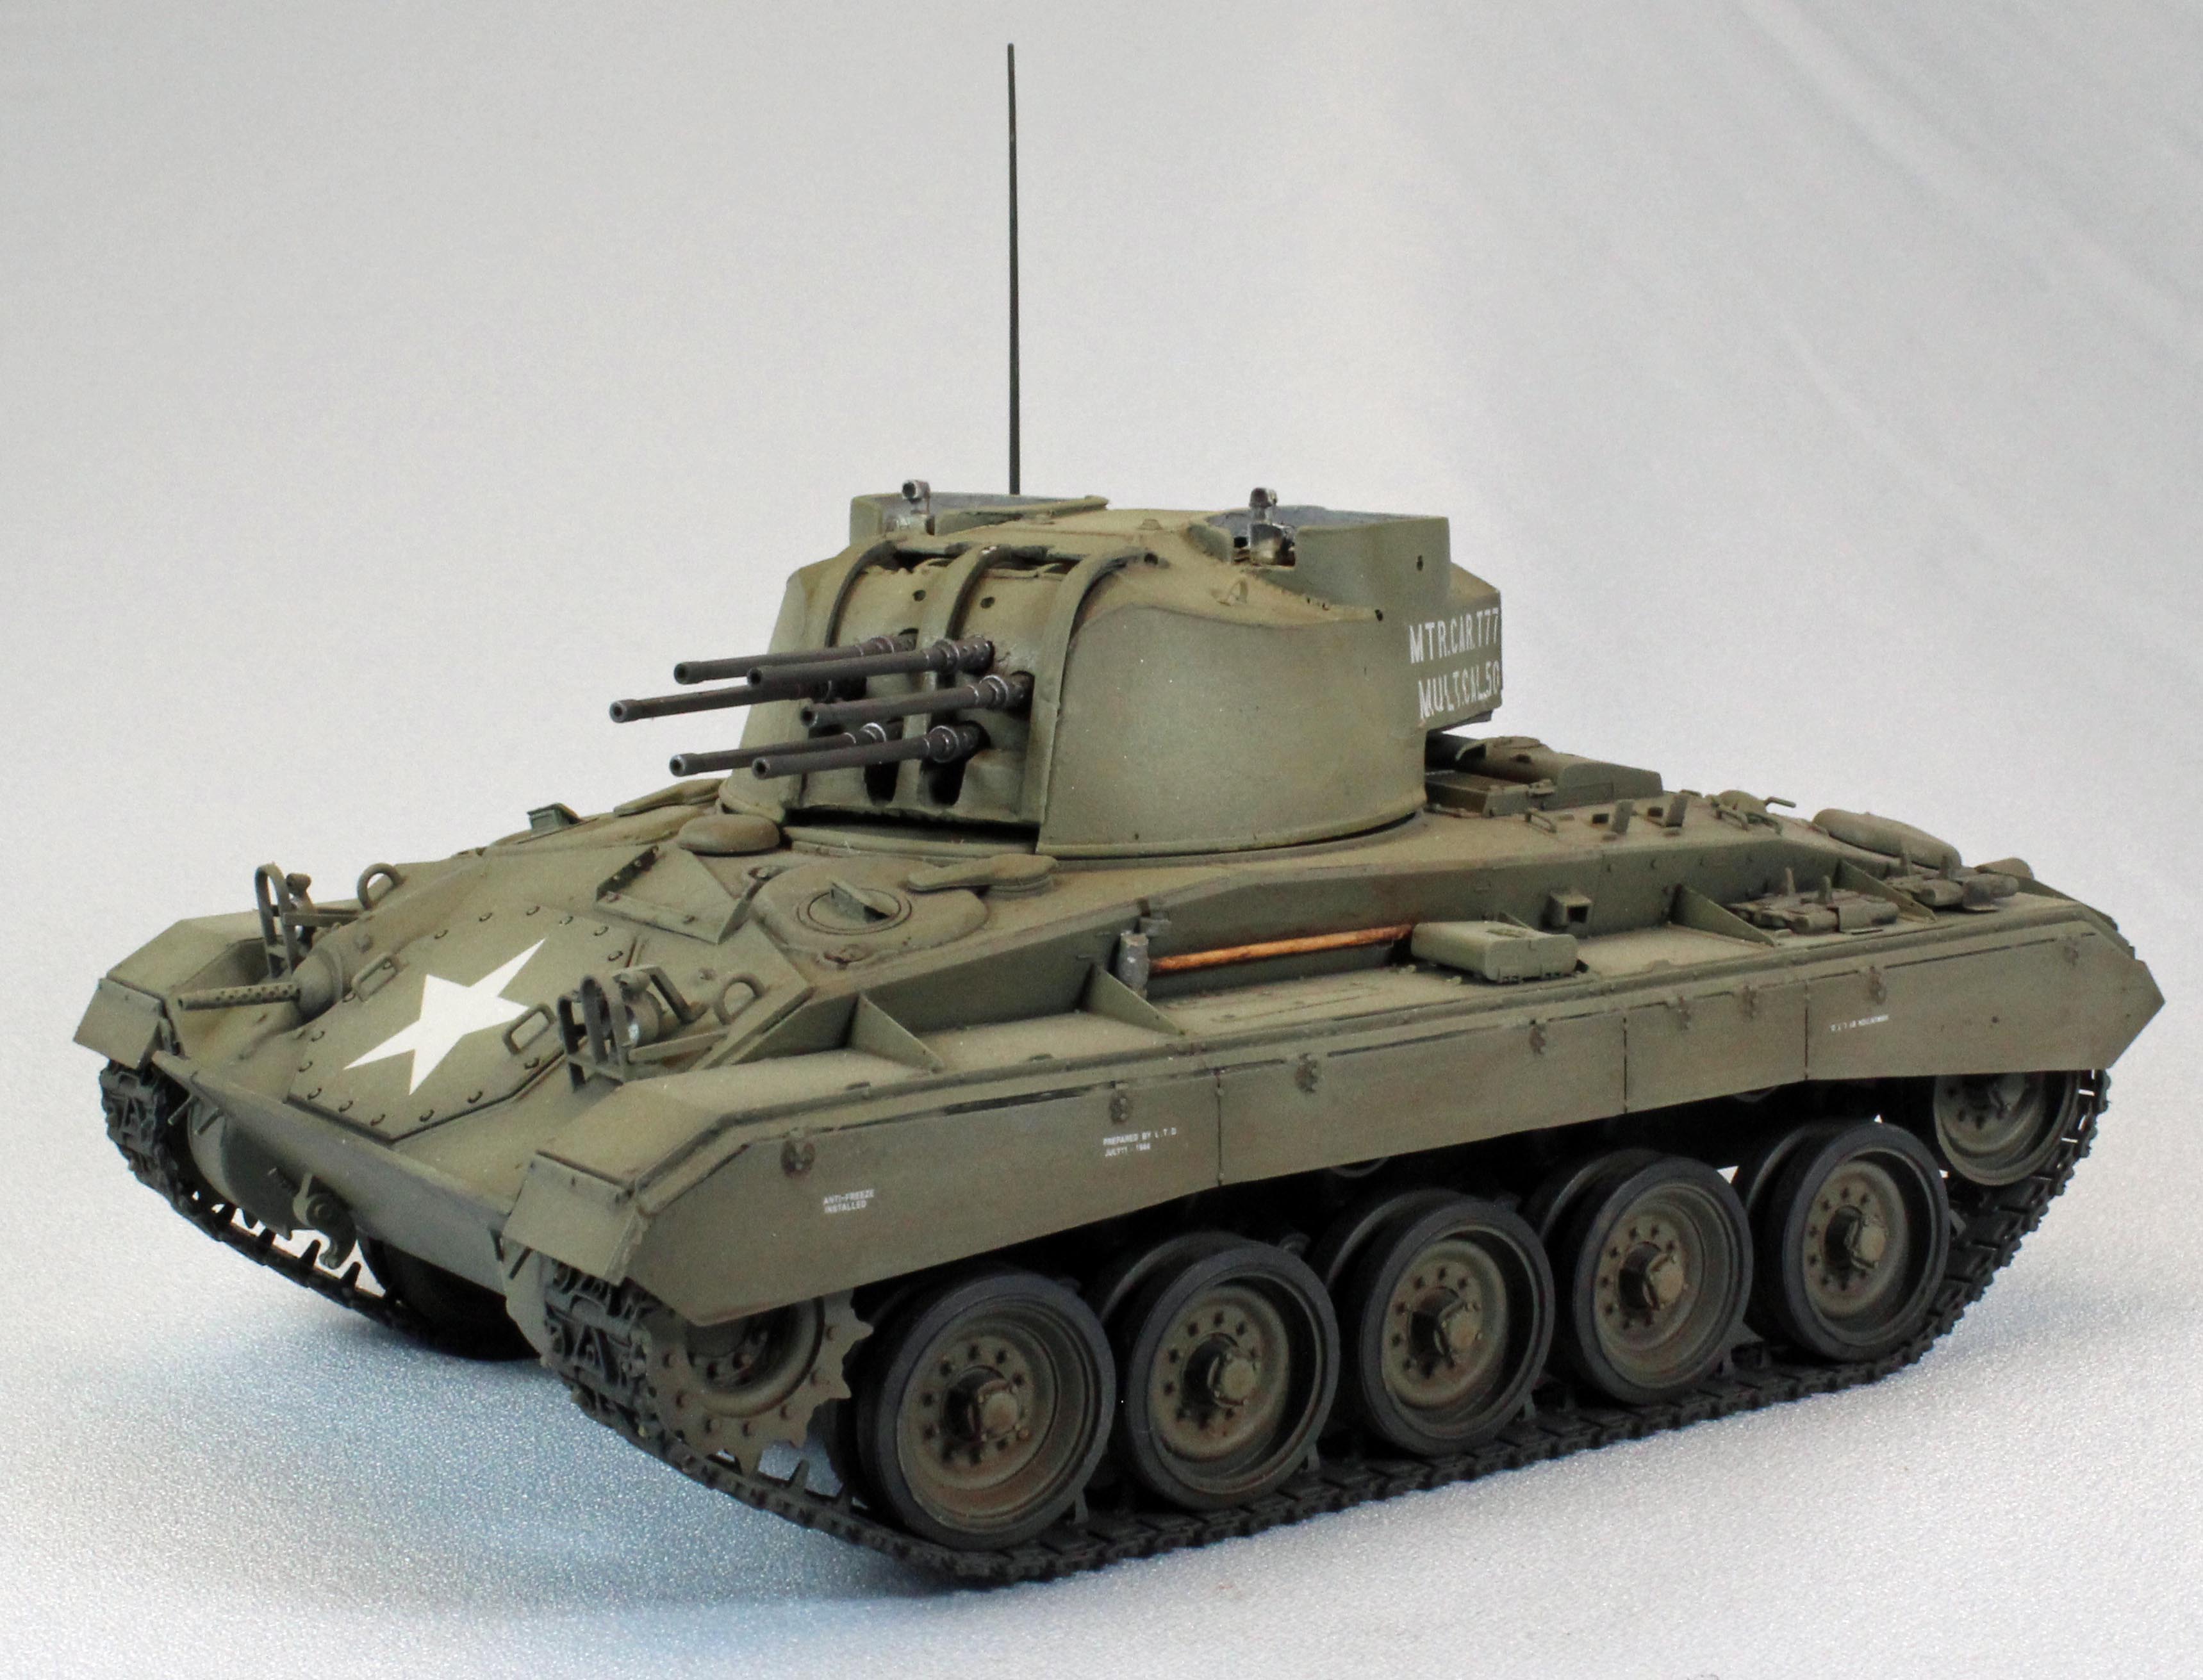
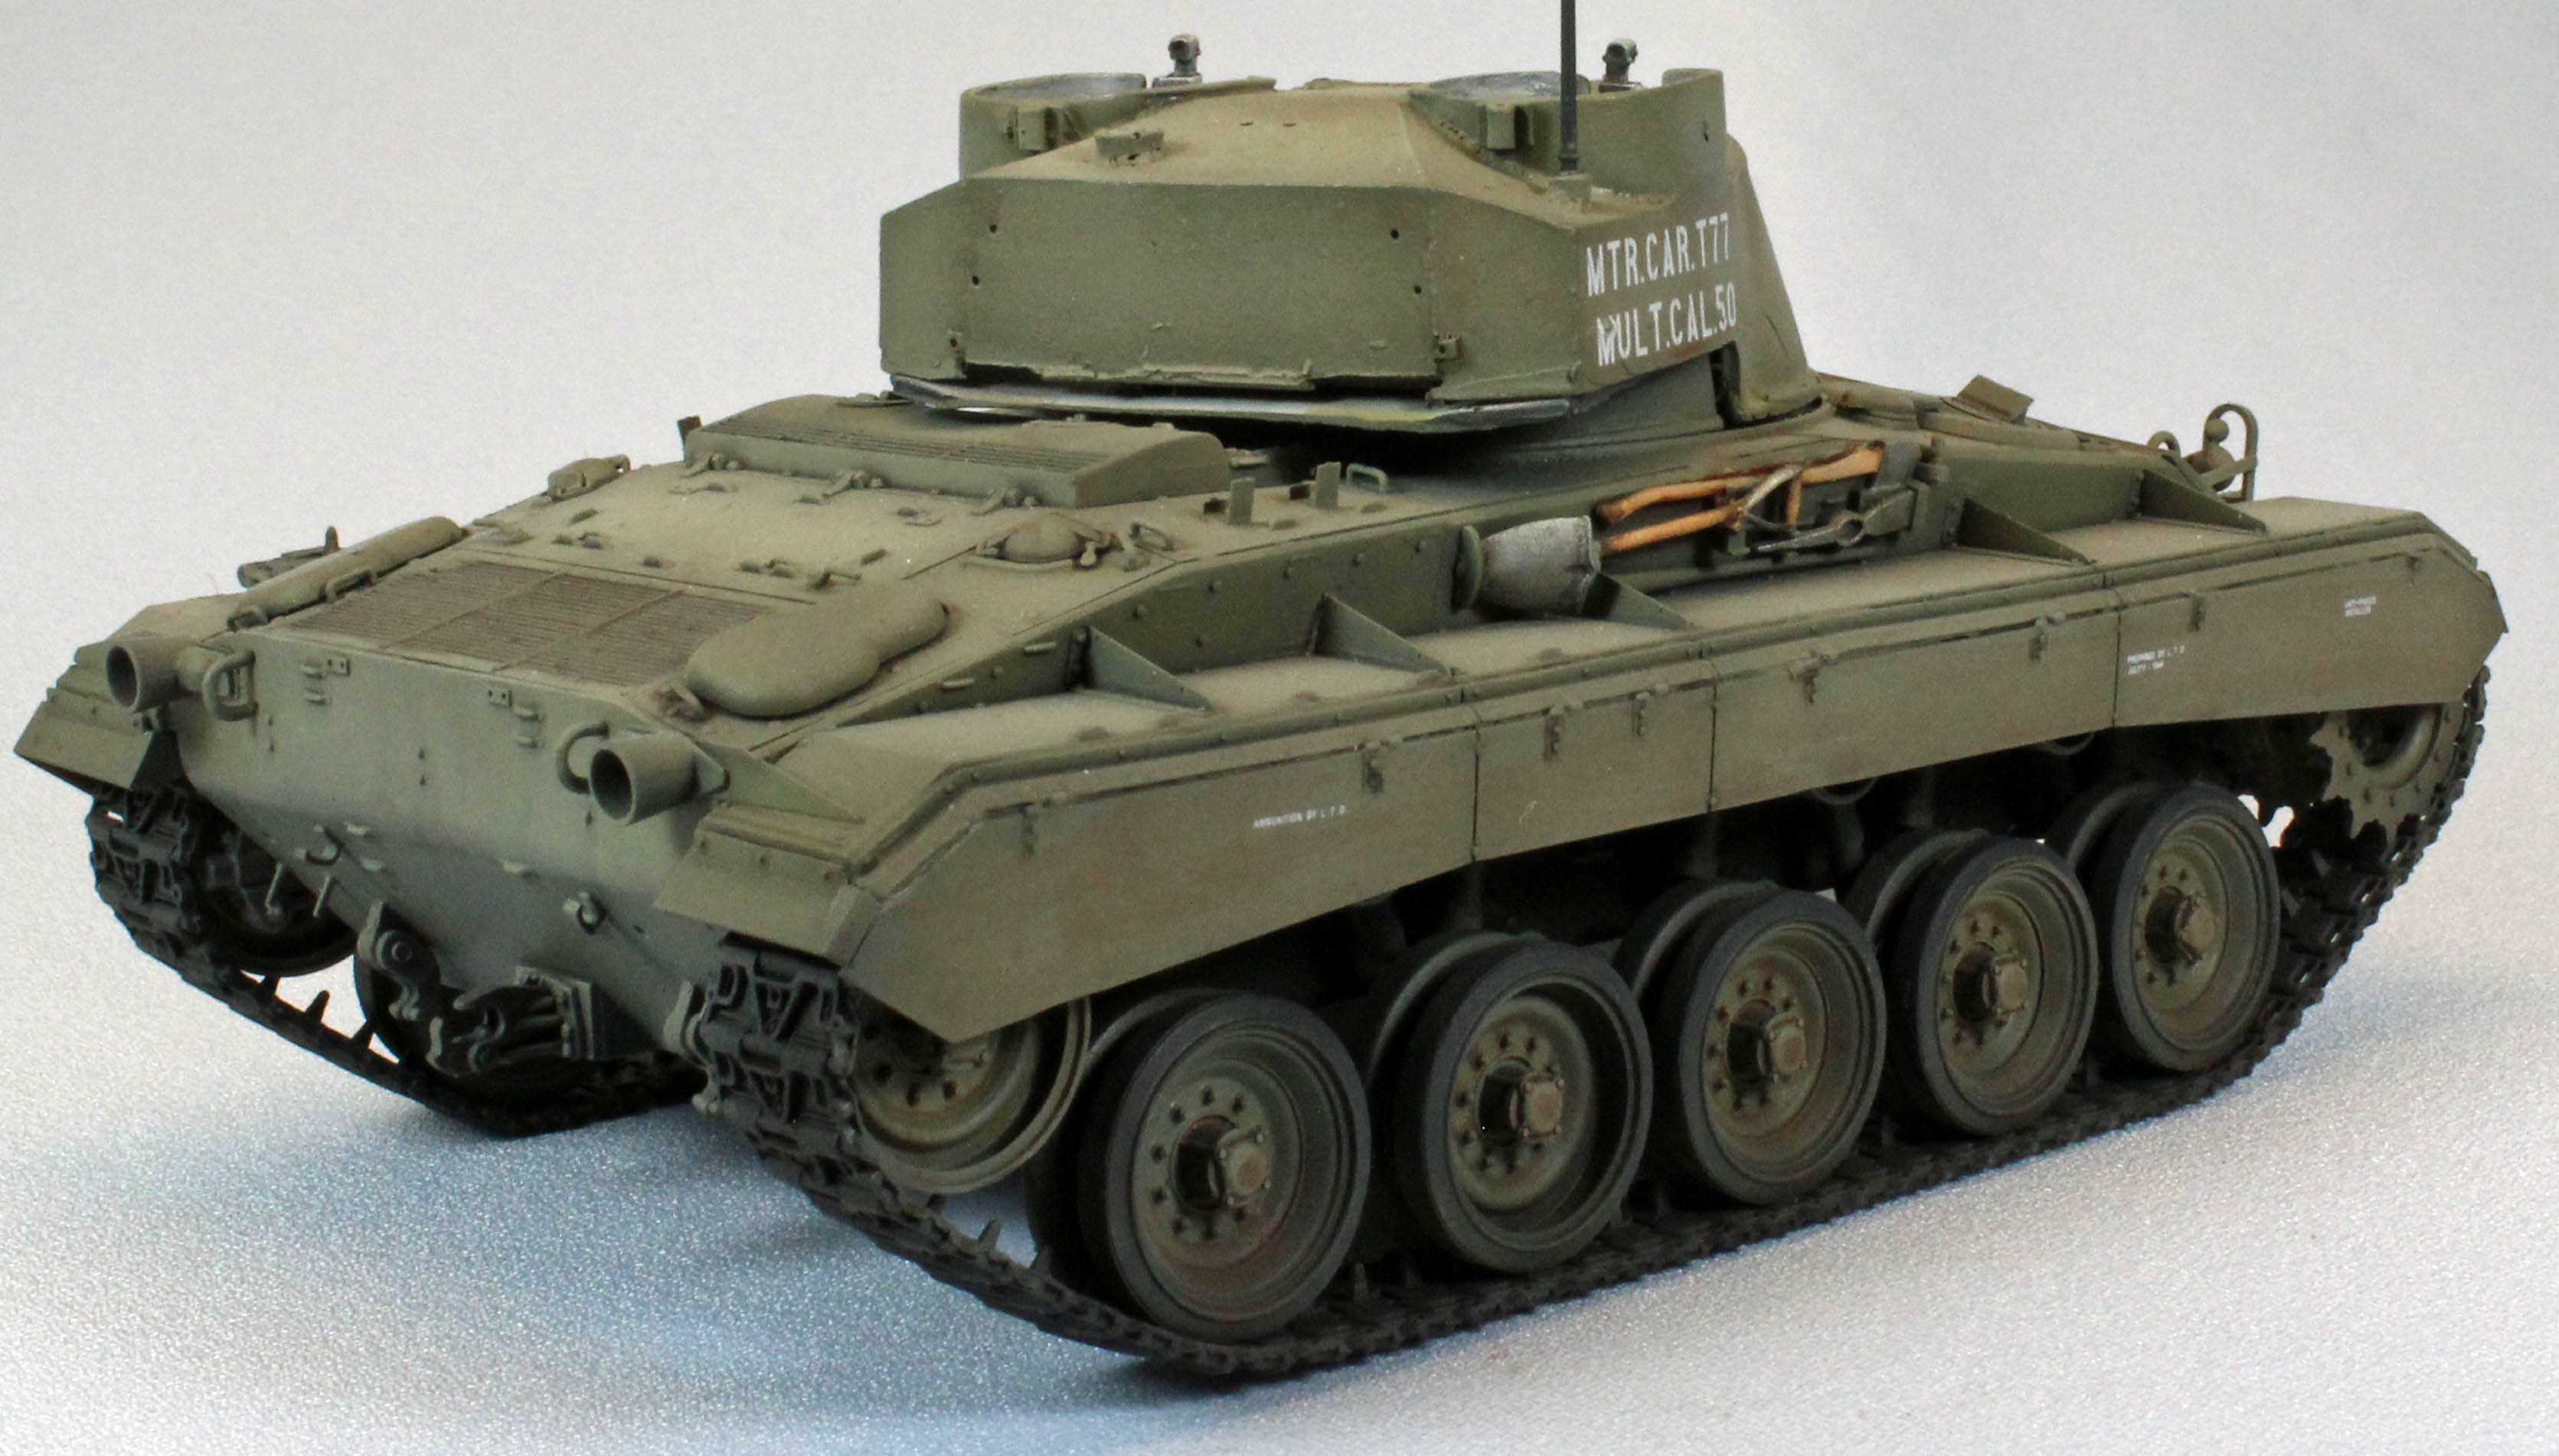
T77 Multiple Gun Motor Carriage
by Eric Christianson
 Model: T77 Multiple Gun Motor Carriage
Reviewed by: Eric Christianson, IPMS # 42218
Scale: 1/35
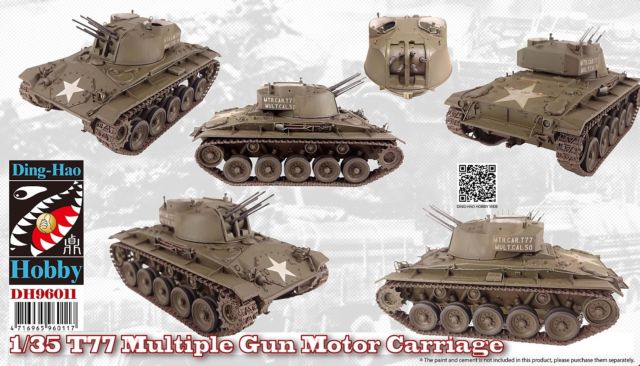
Company: Ding-Hao Hobby
Price: $64.75
Product/Stock #: 96011
Website: Ding-Hao Hobby
Product Web Page: View
Product provided by: Ding-Hao Hobby
Gaining momentum on this side of the pond is a model company out of Taiwan called Ding-Hao Hobby, a sister company to AFV Club, that specializes in subjects not well covered (or not covered at all) in injection molded plastic. Their kits are short-run, multi-media affairs mostly aimed at advanced modelers. I first came across Ding-Hao Hobby from a pilot friend of mine who brought me a German Büssing Nag L4500S truck sporting dual MG151 triple machine gun mounts (DH96003). I have since purchased several more DH kits before deciding to review their U.S. Army T77 Multiple Gun Motor Carriage.
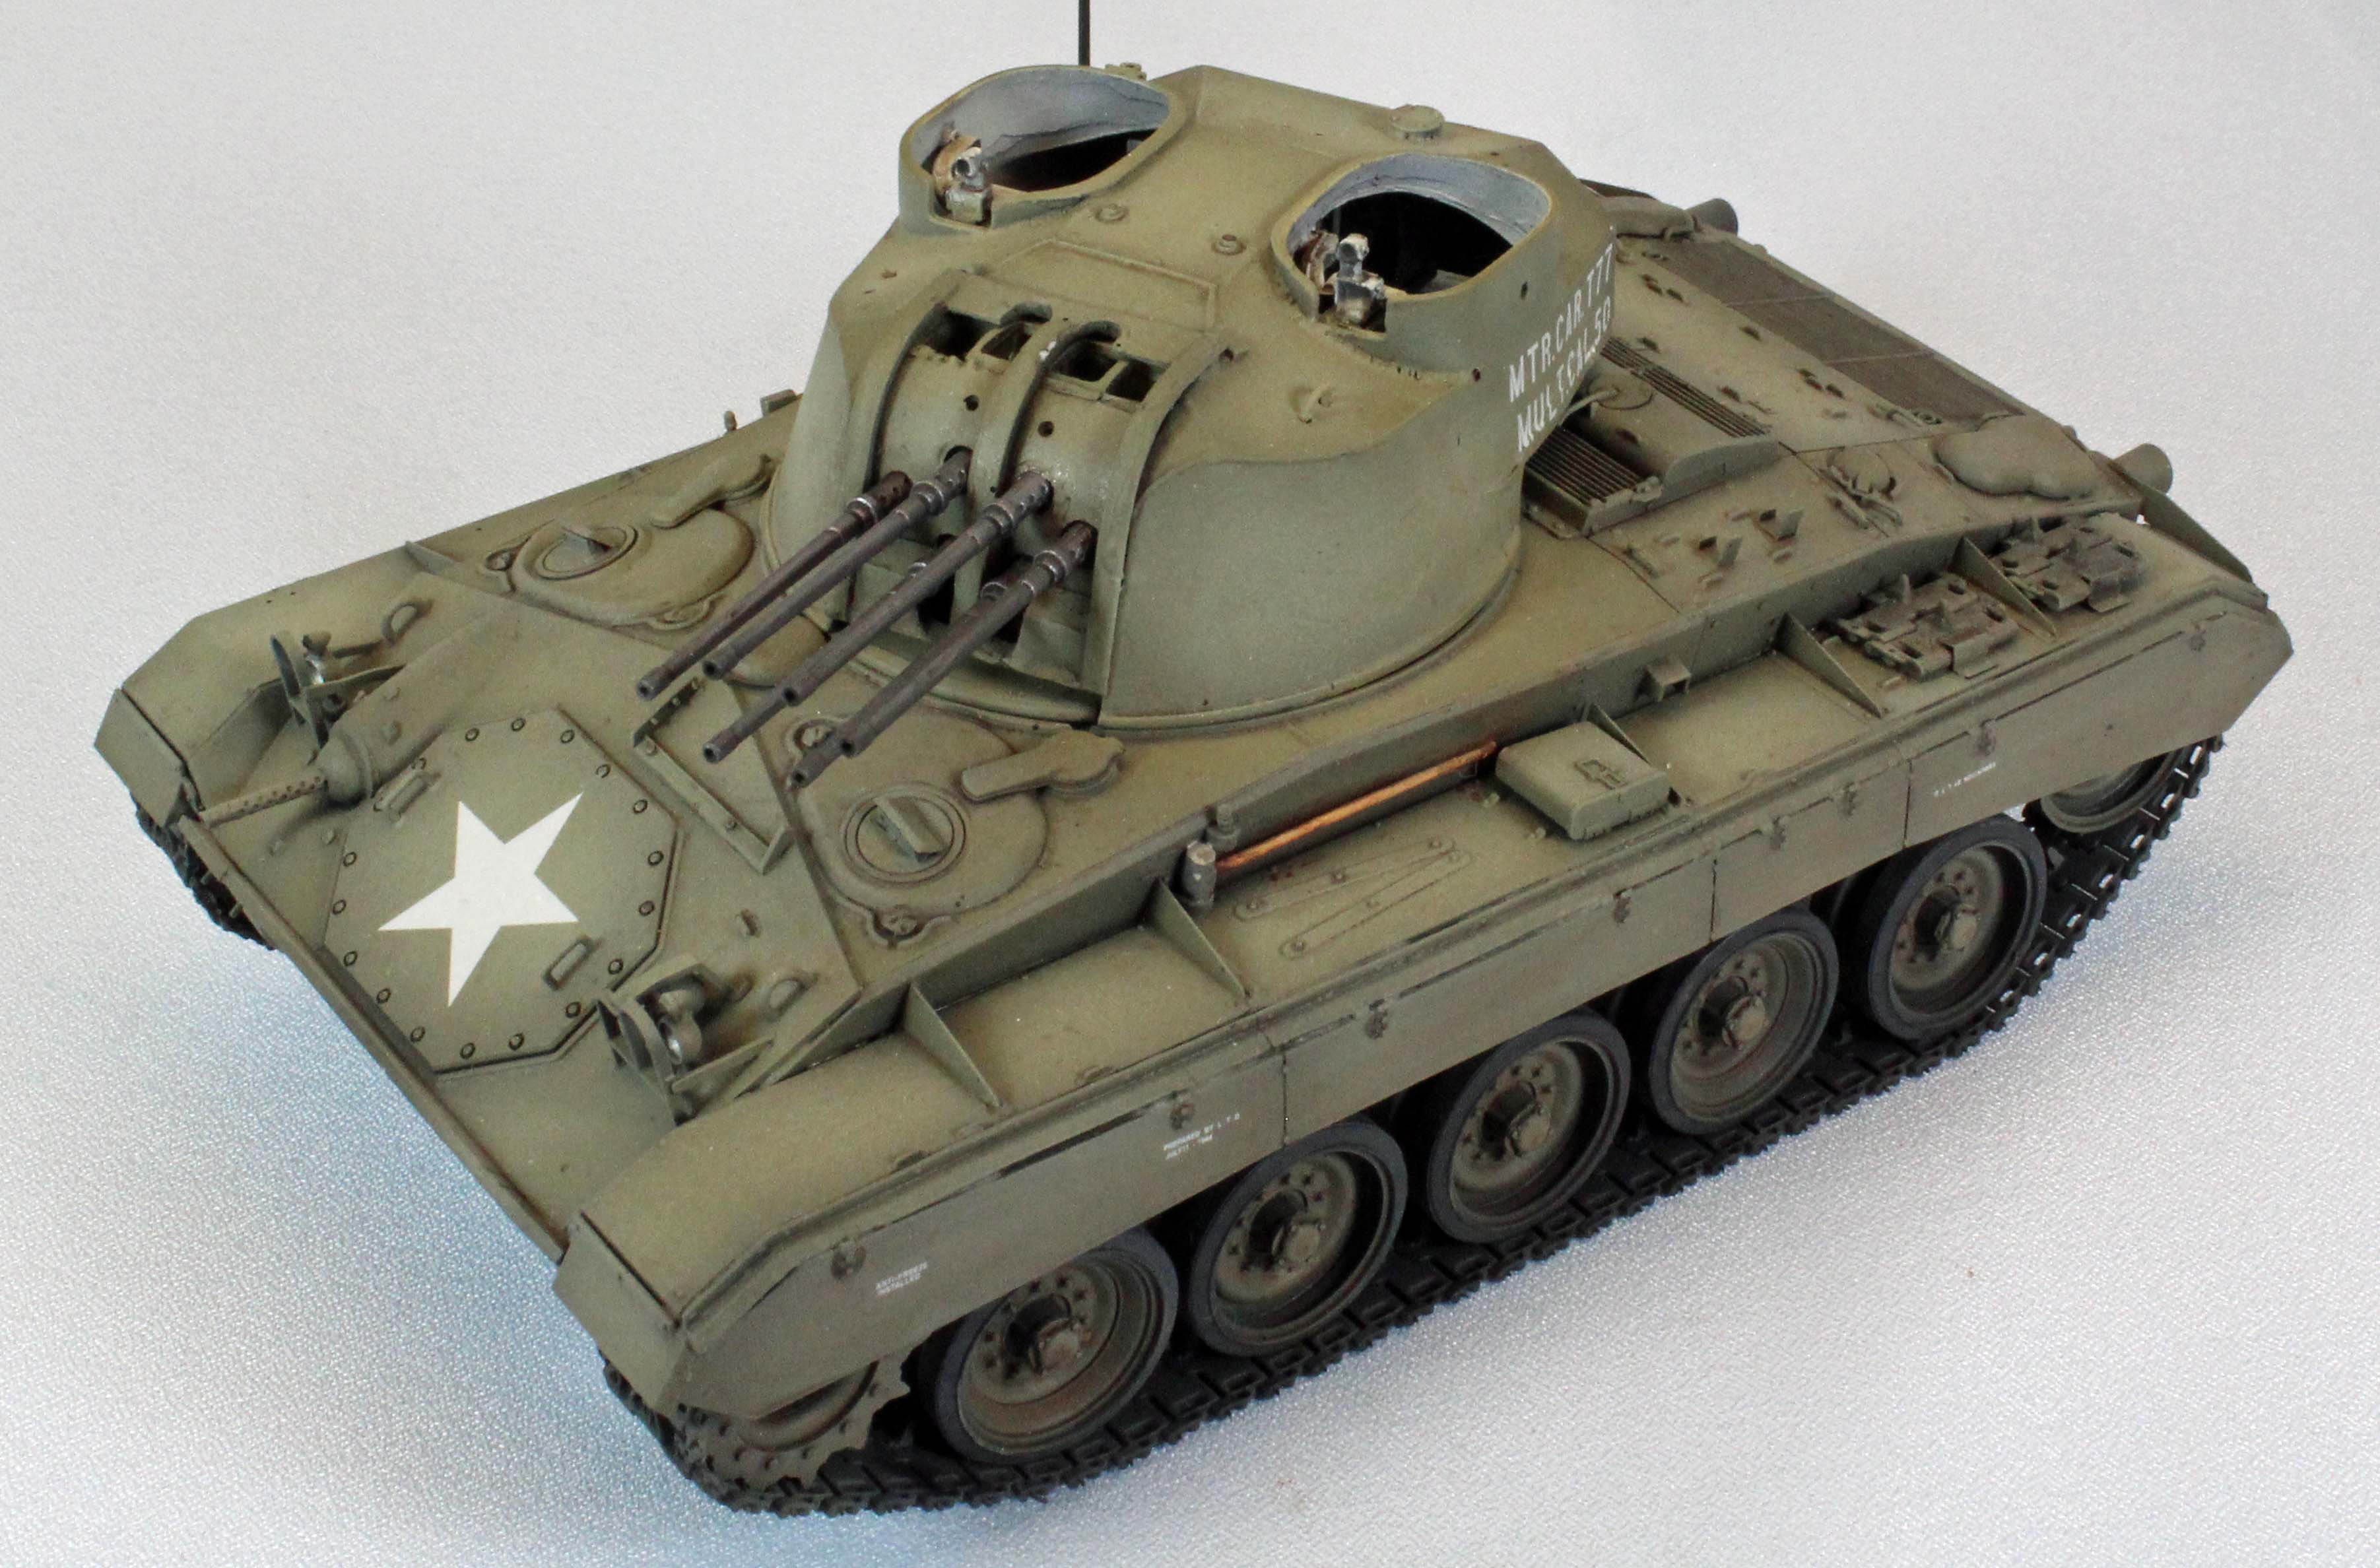
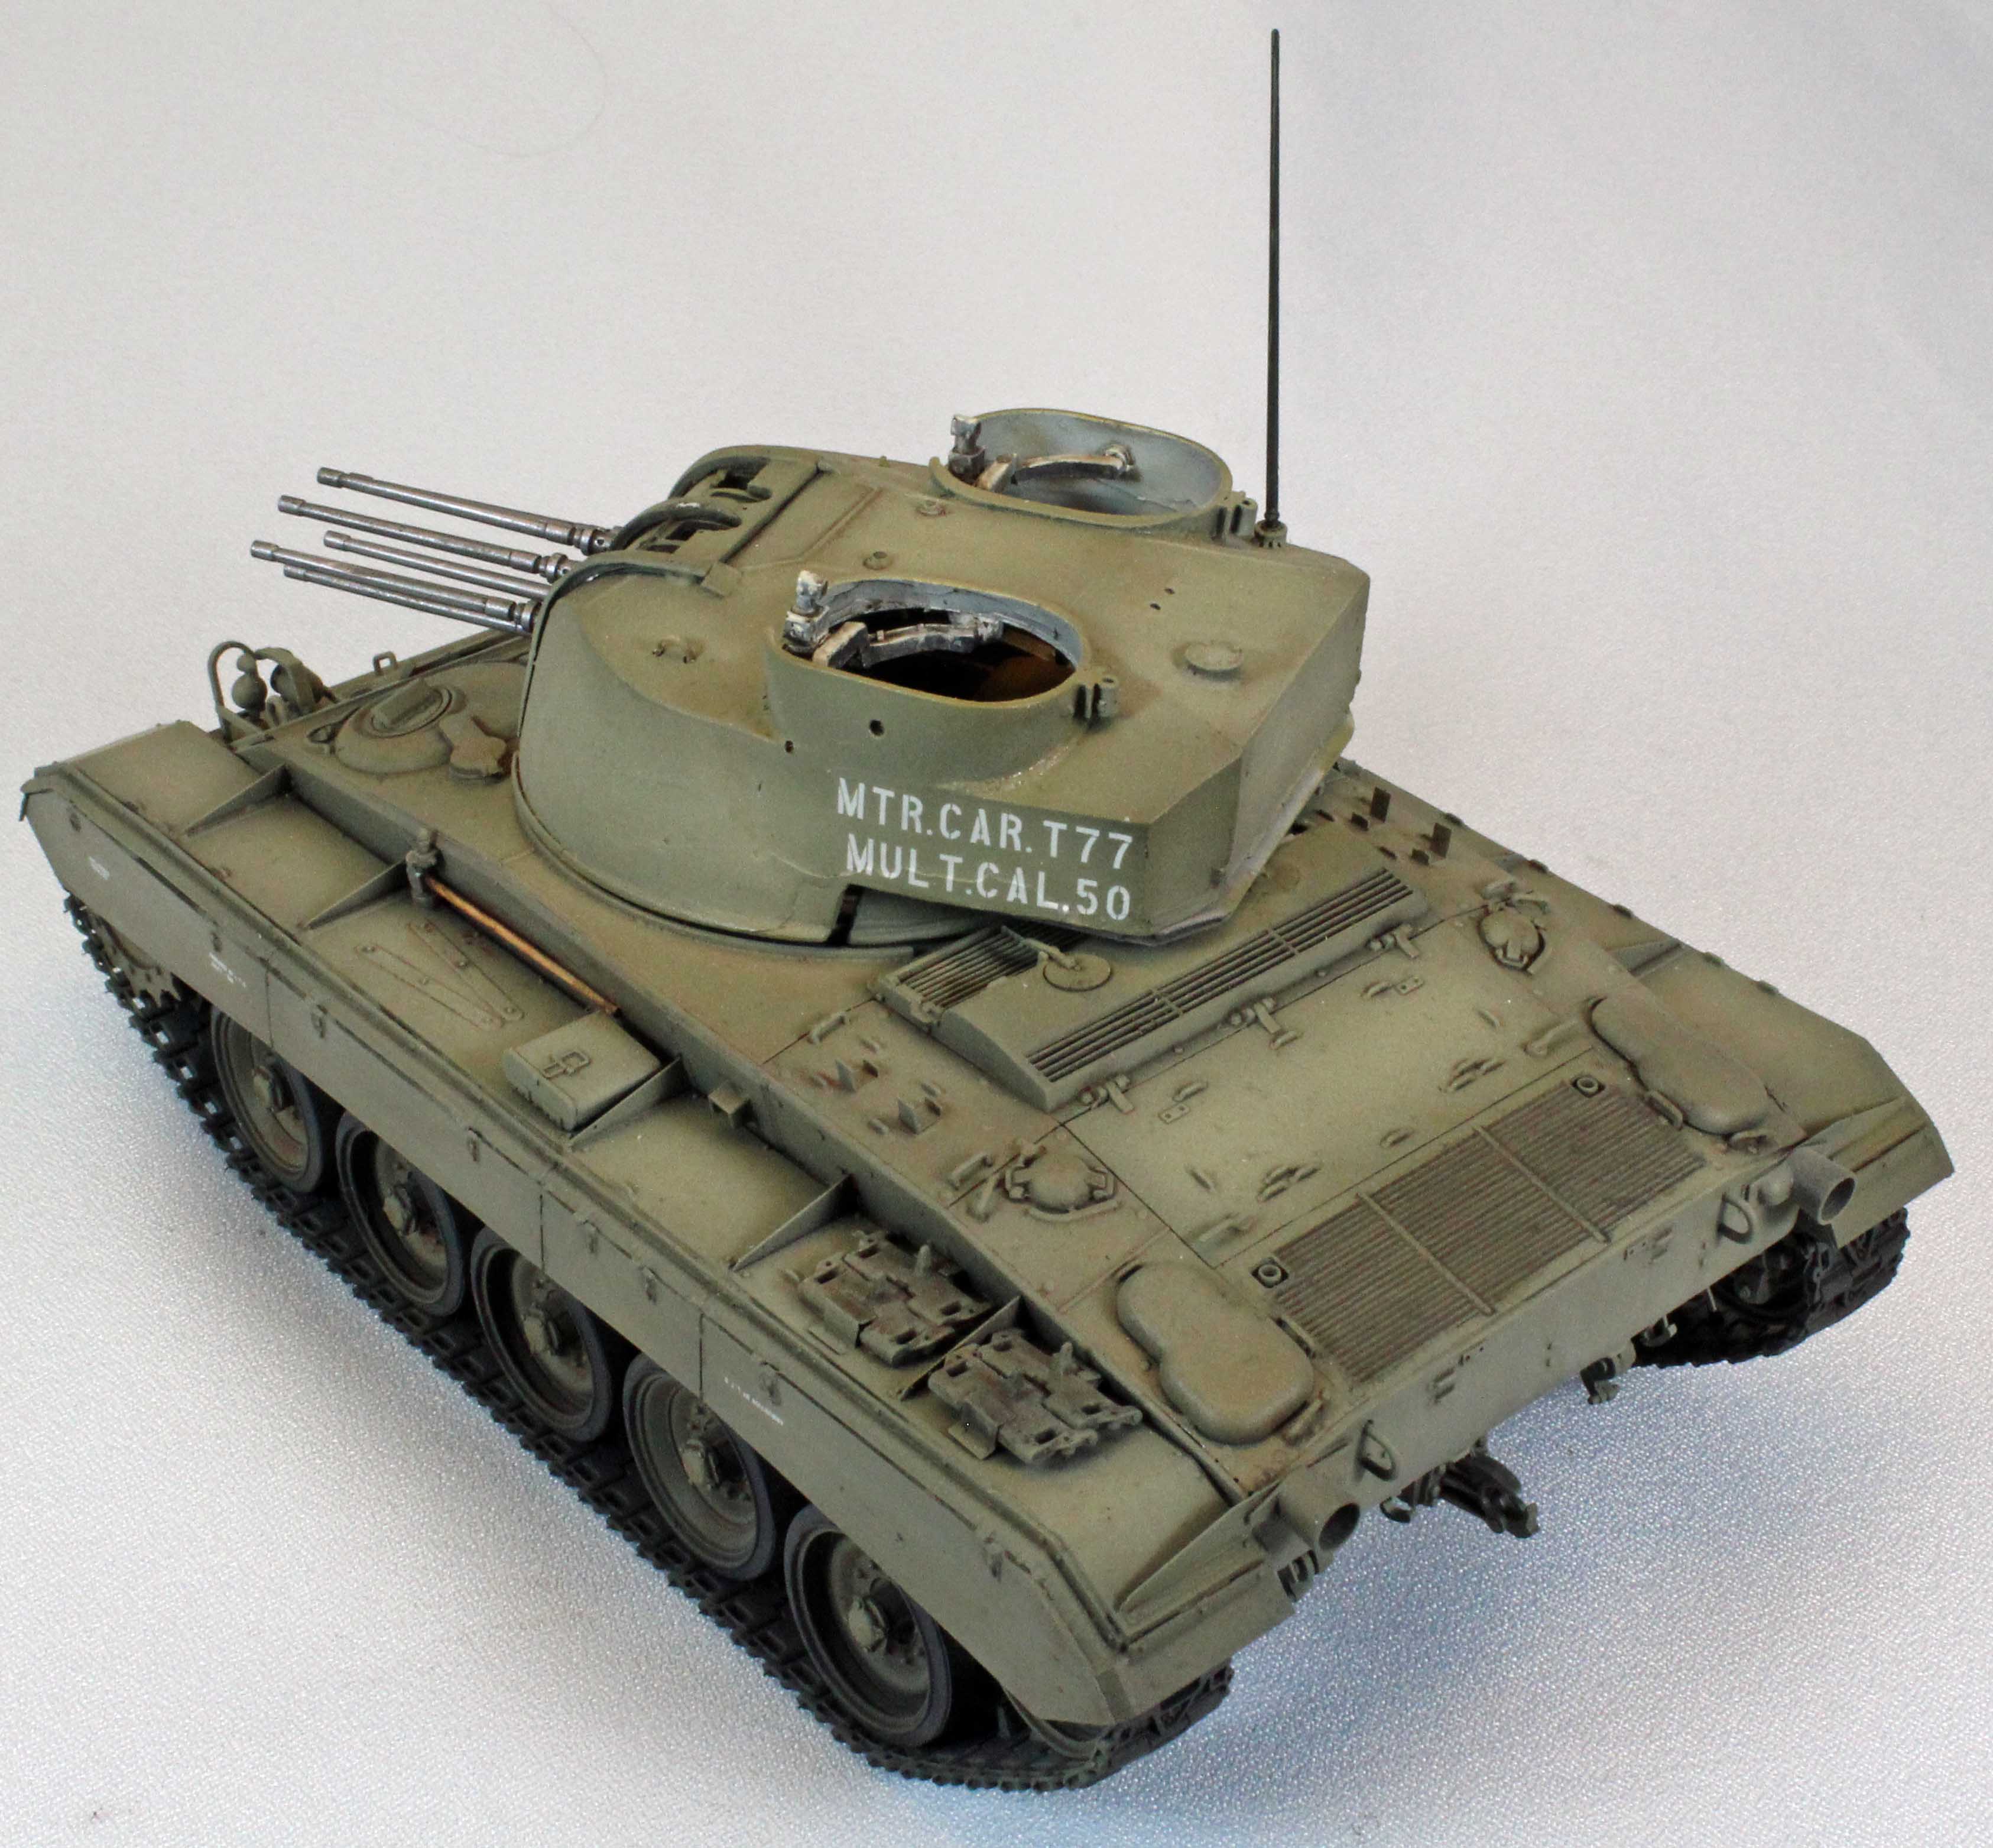
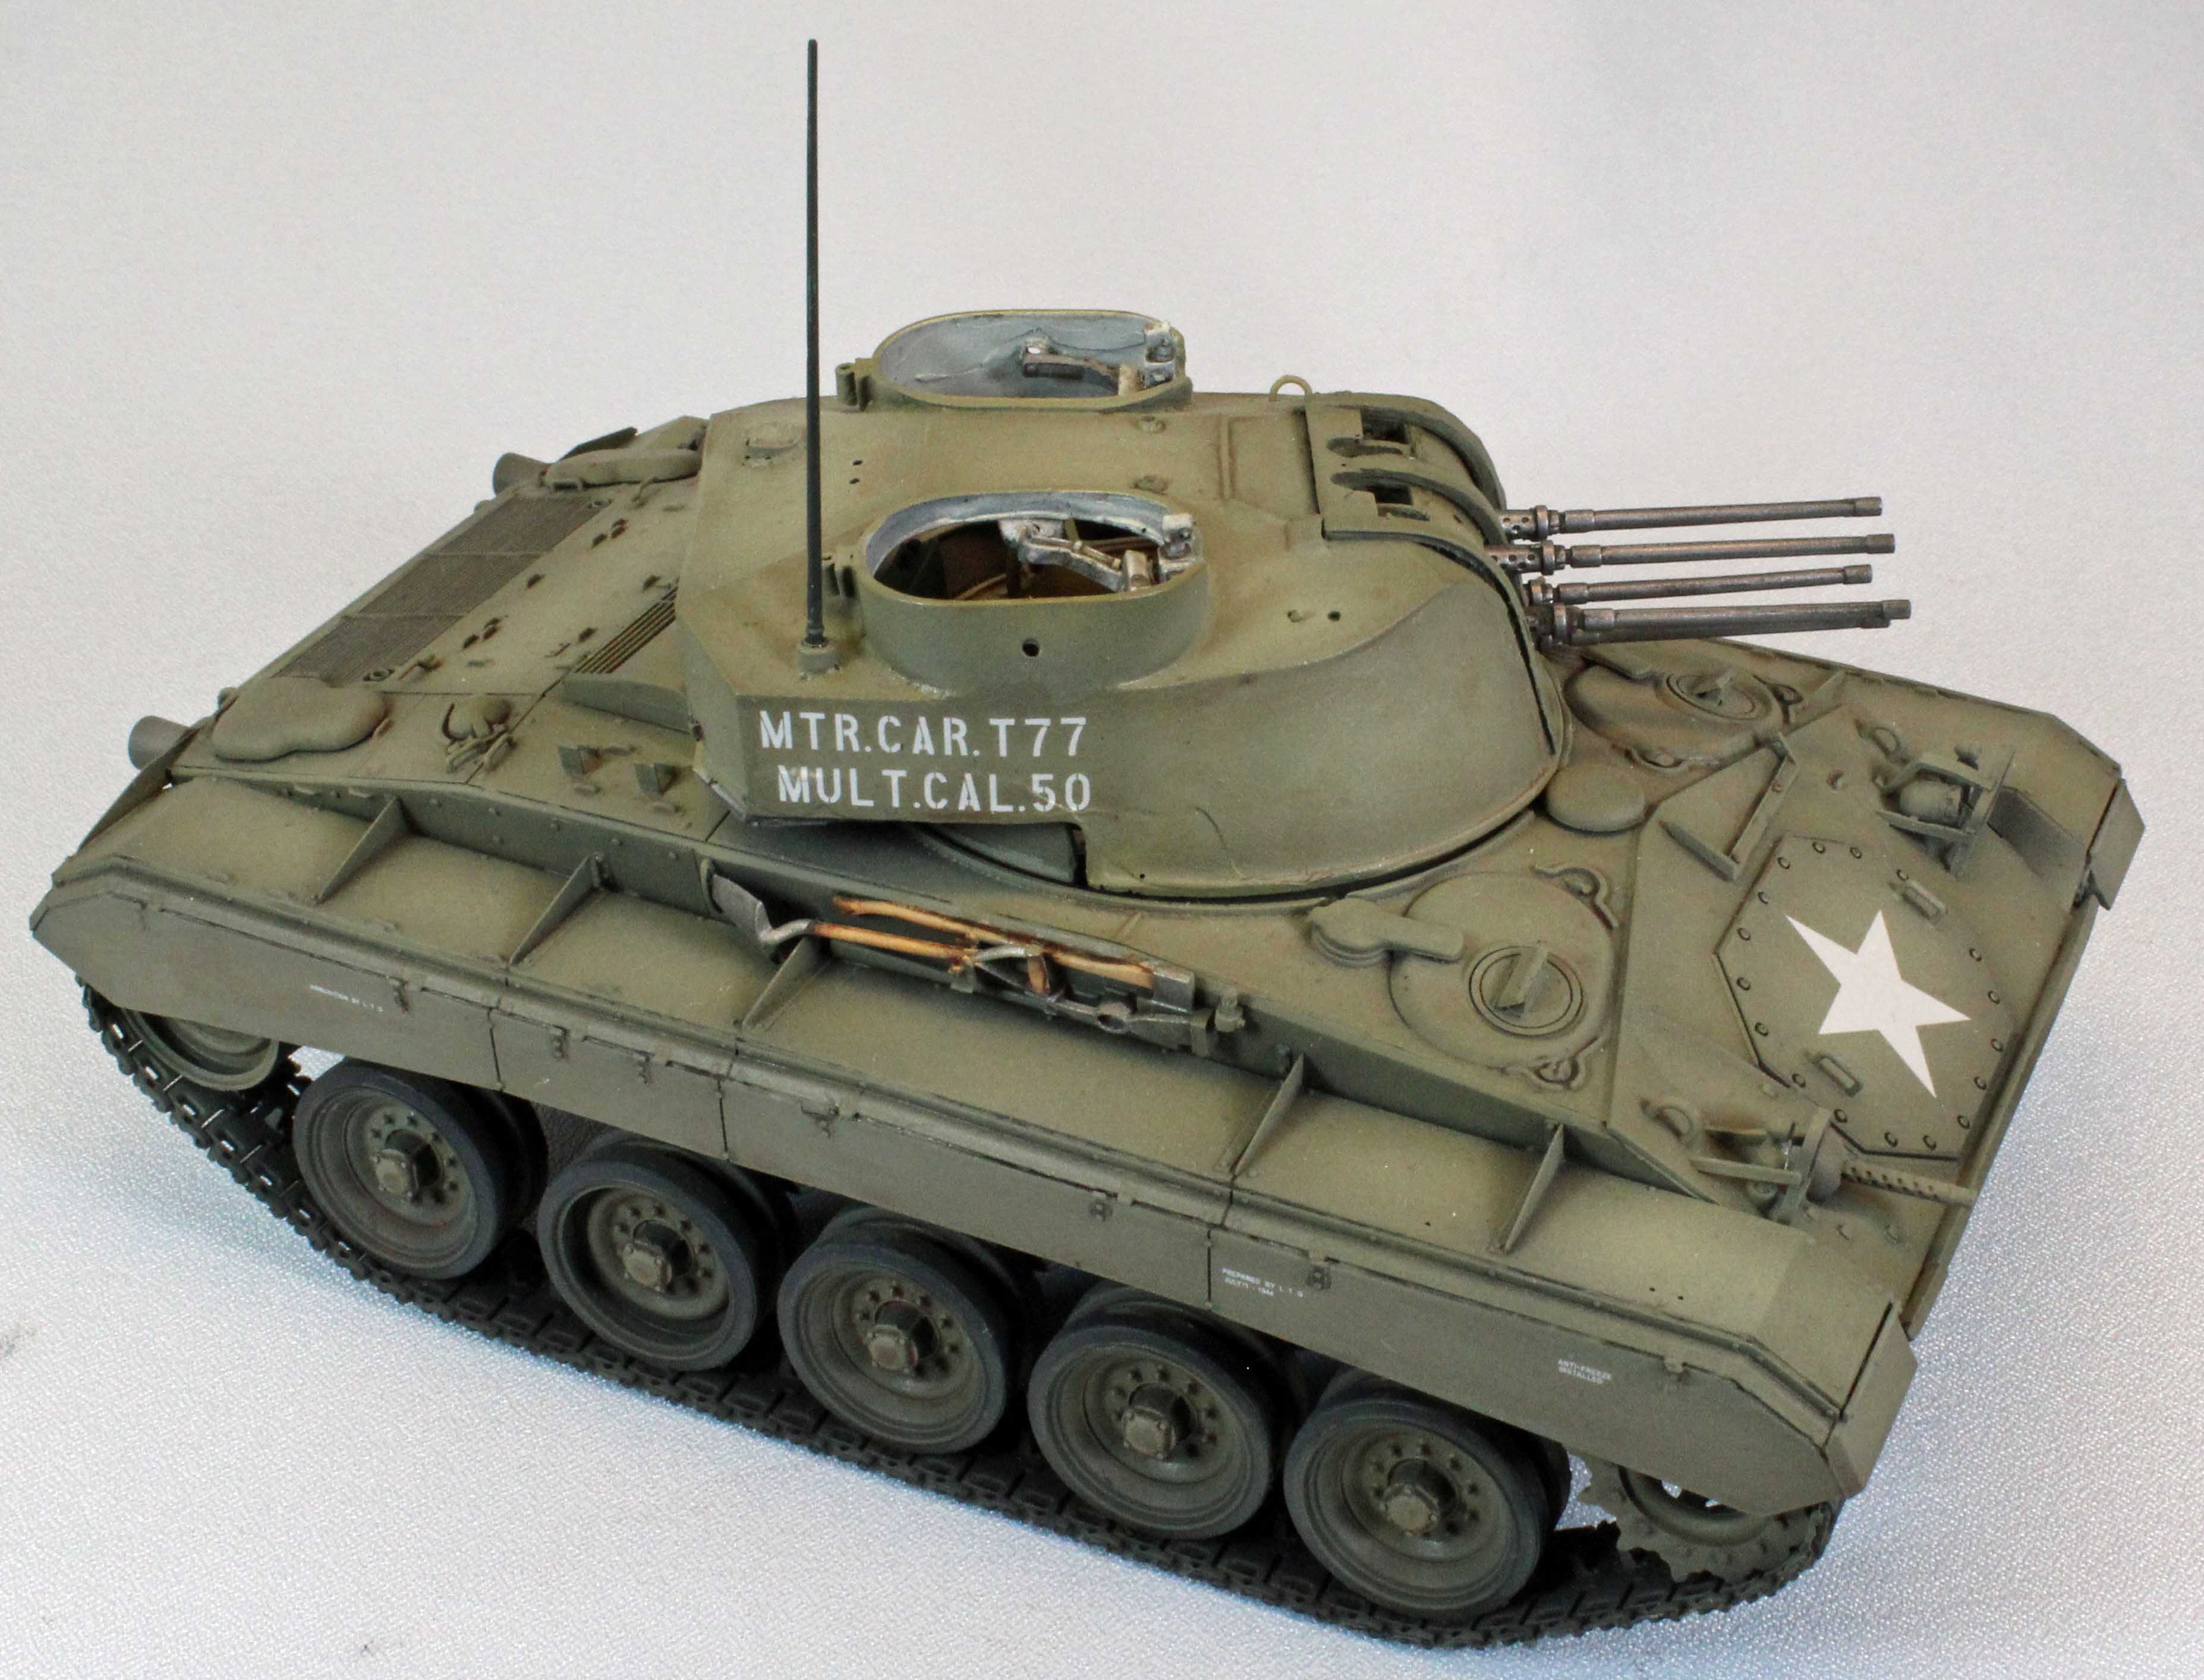
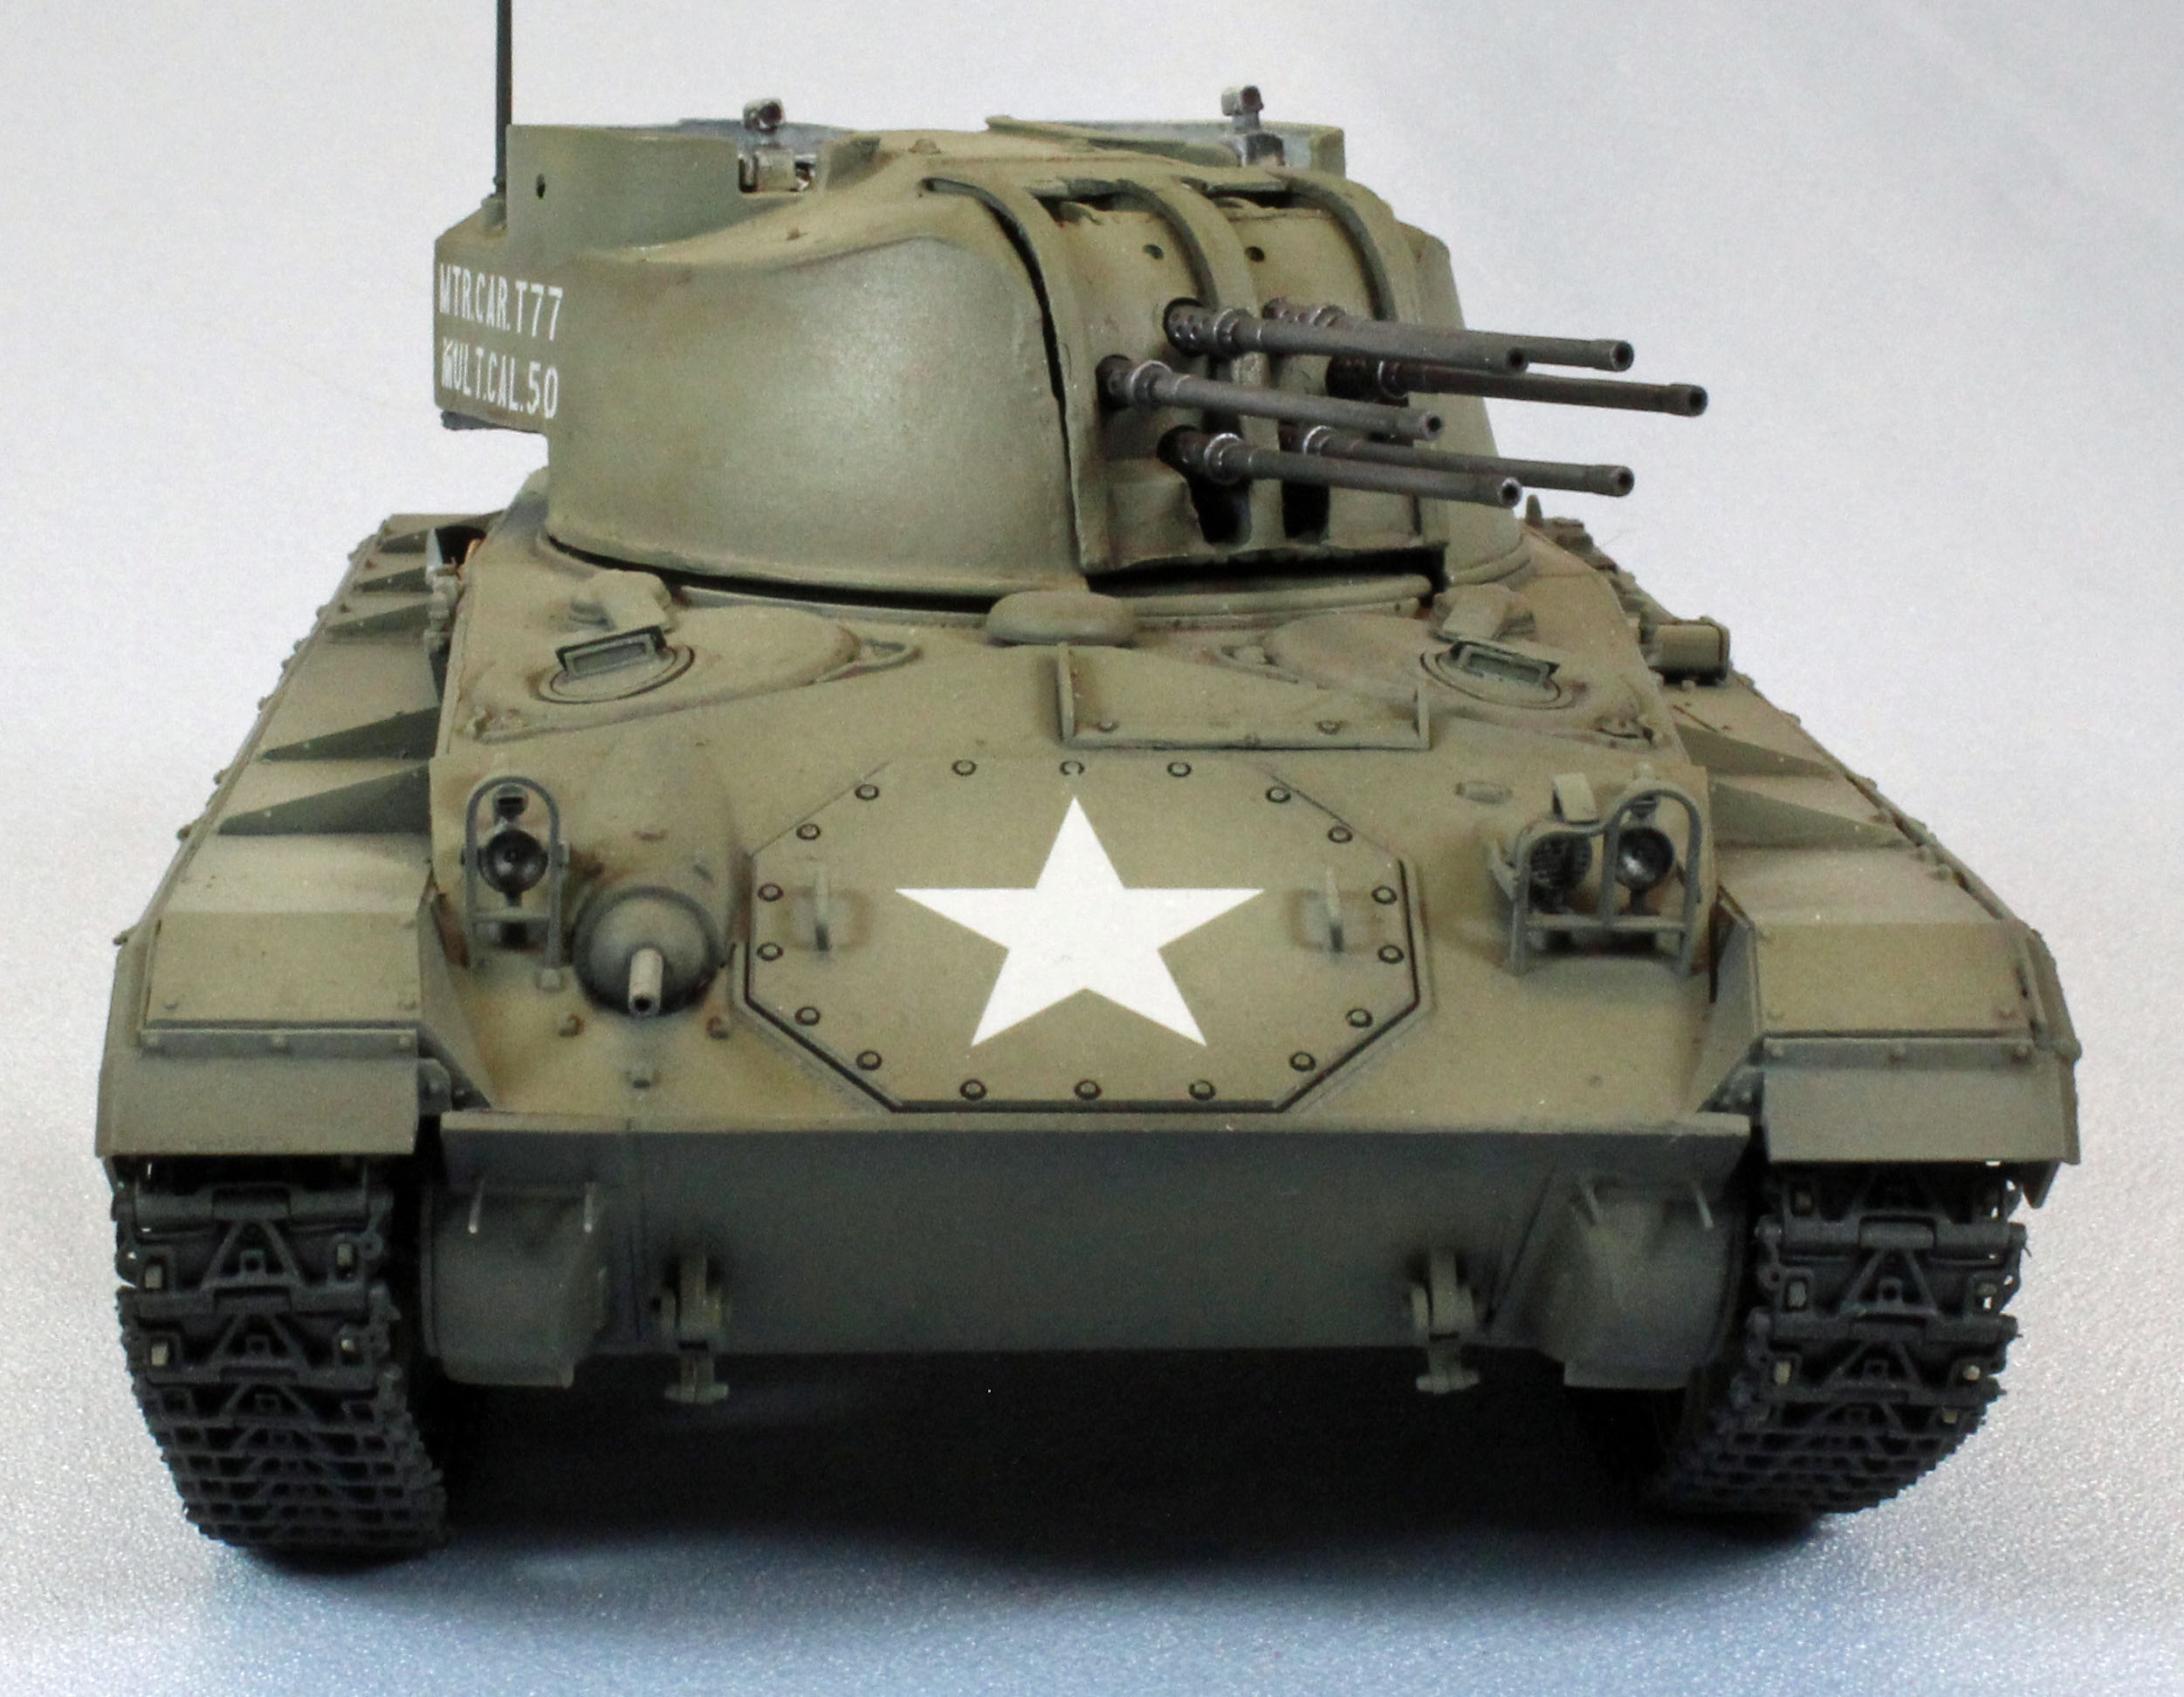
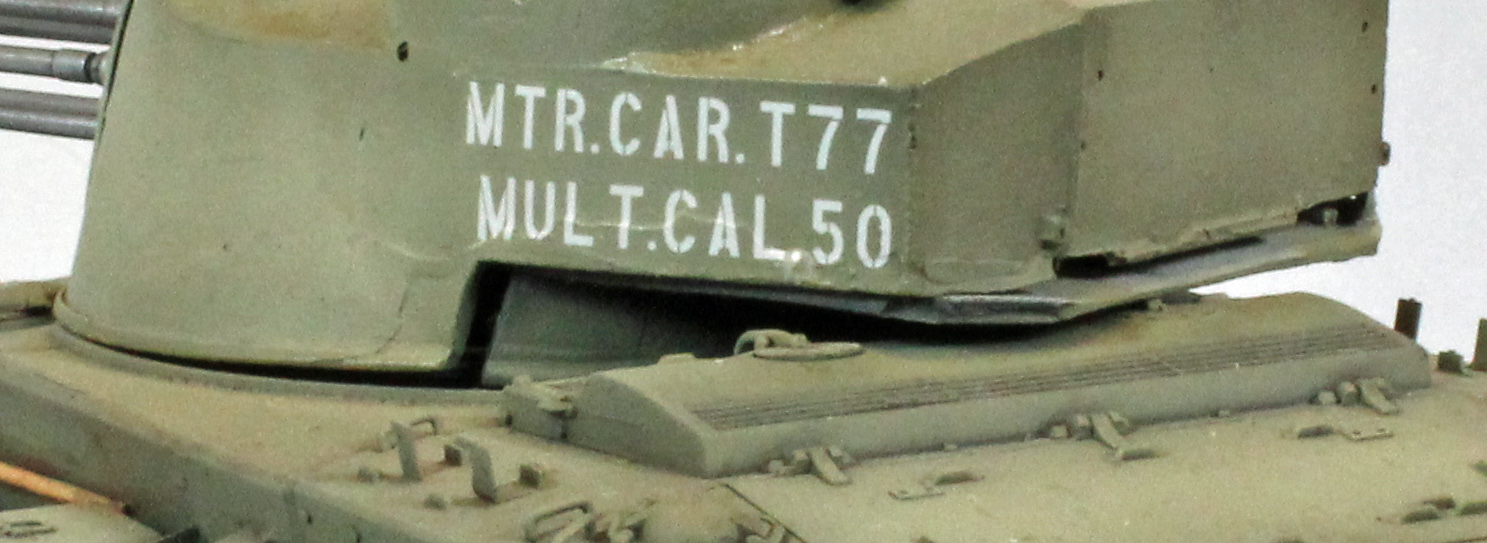
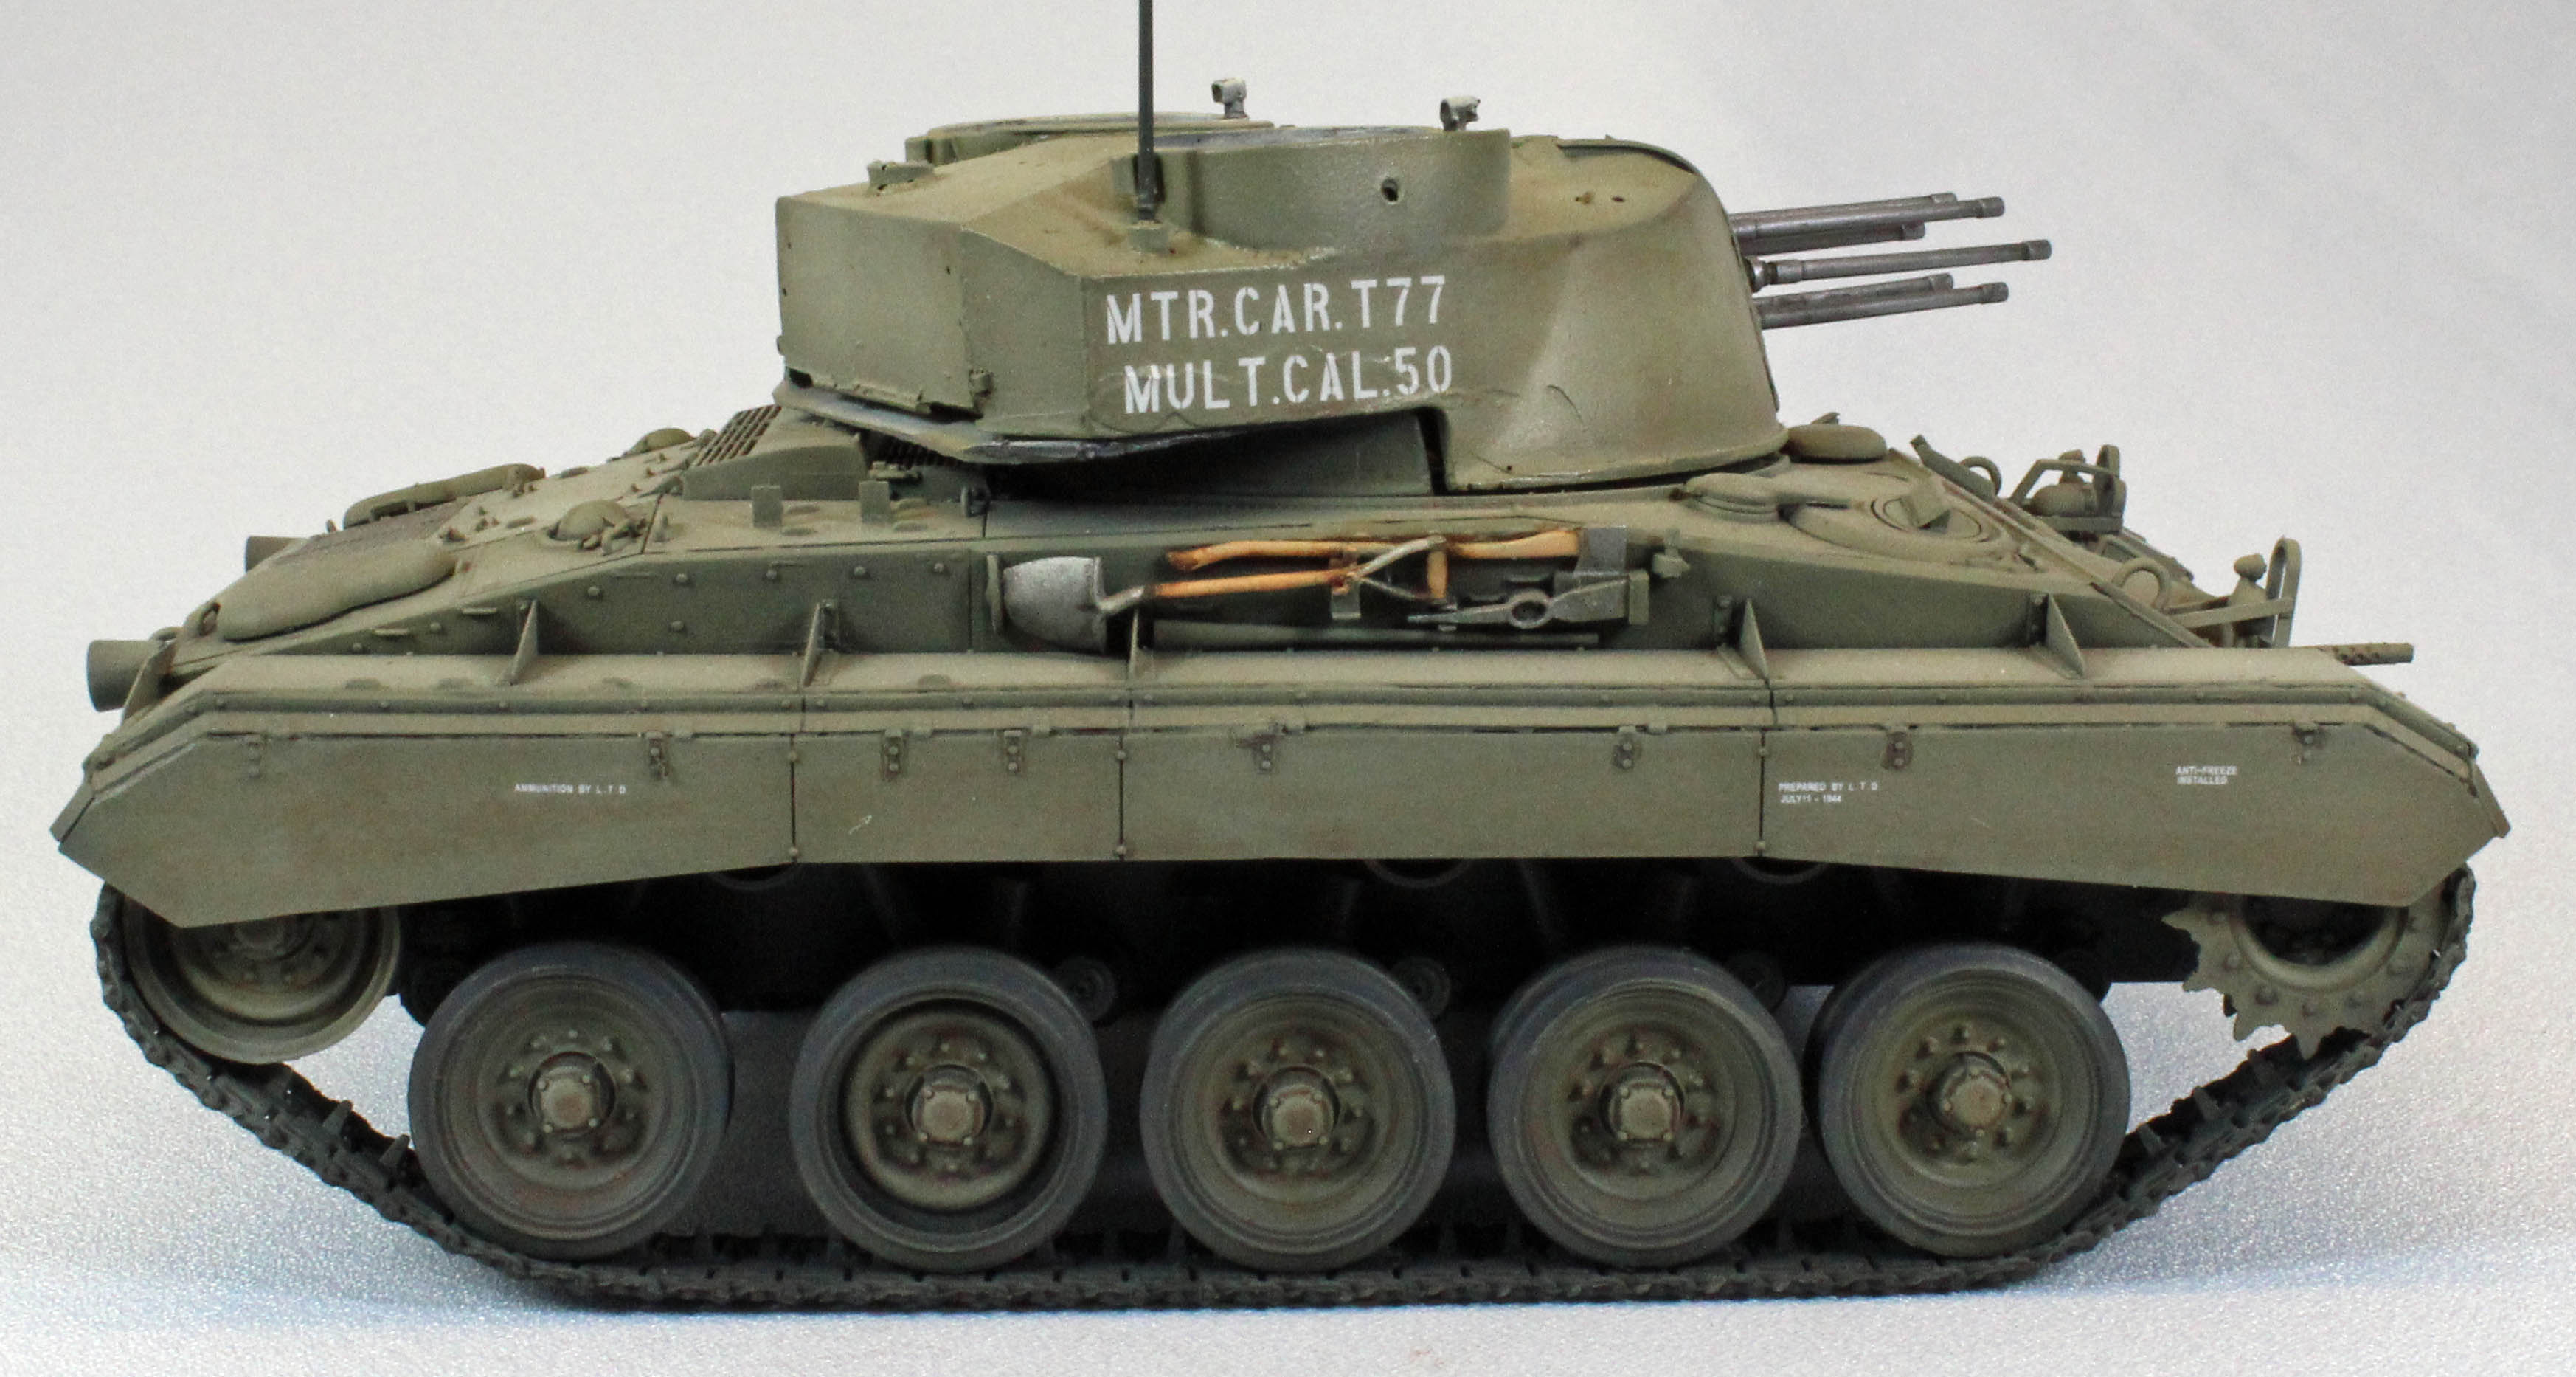
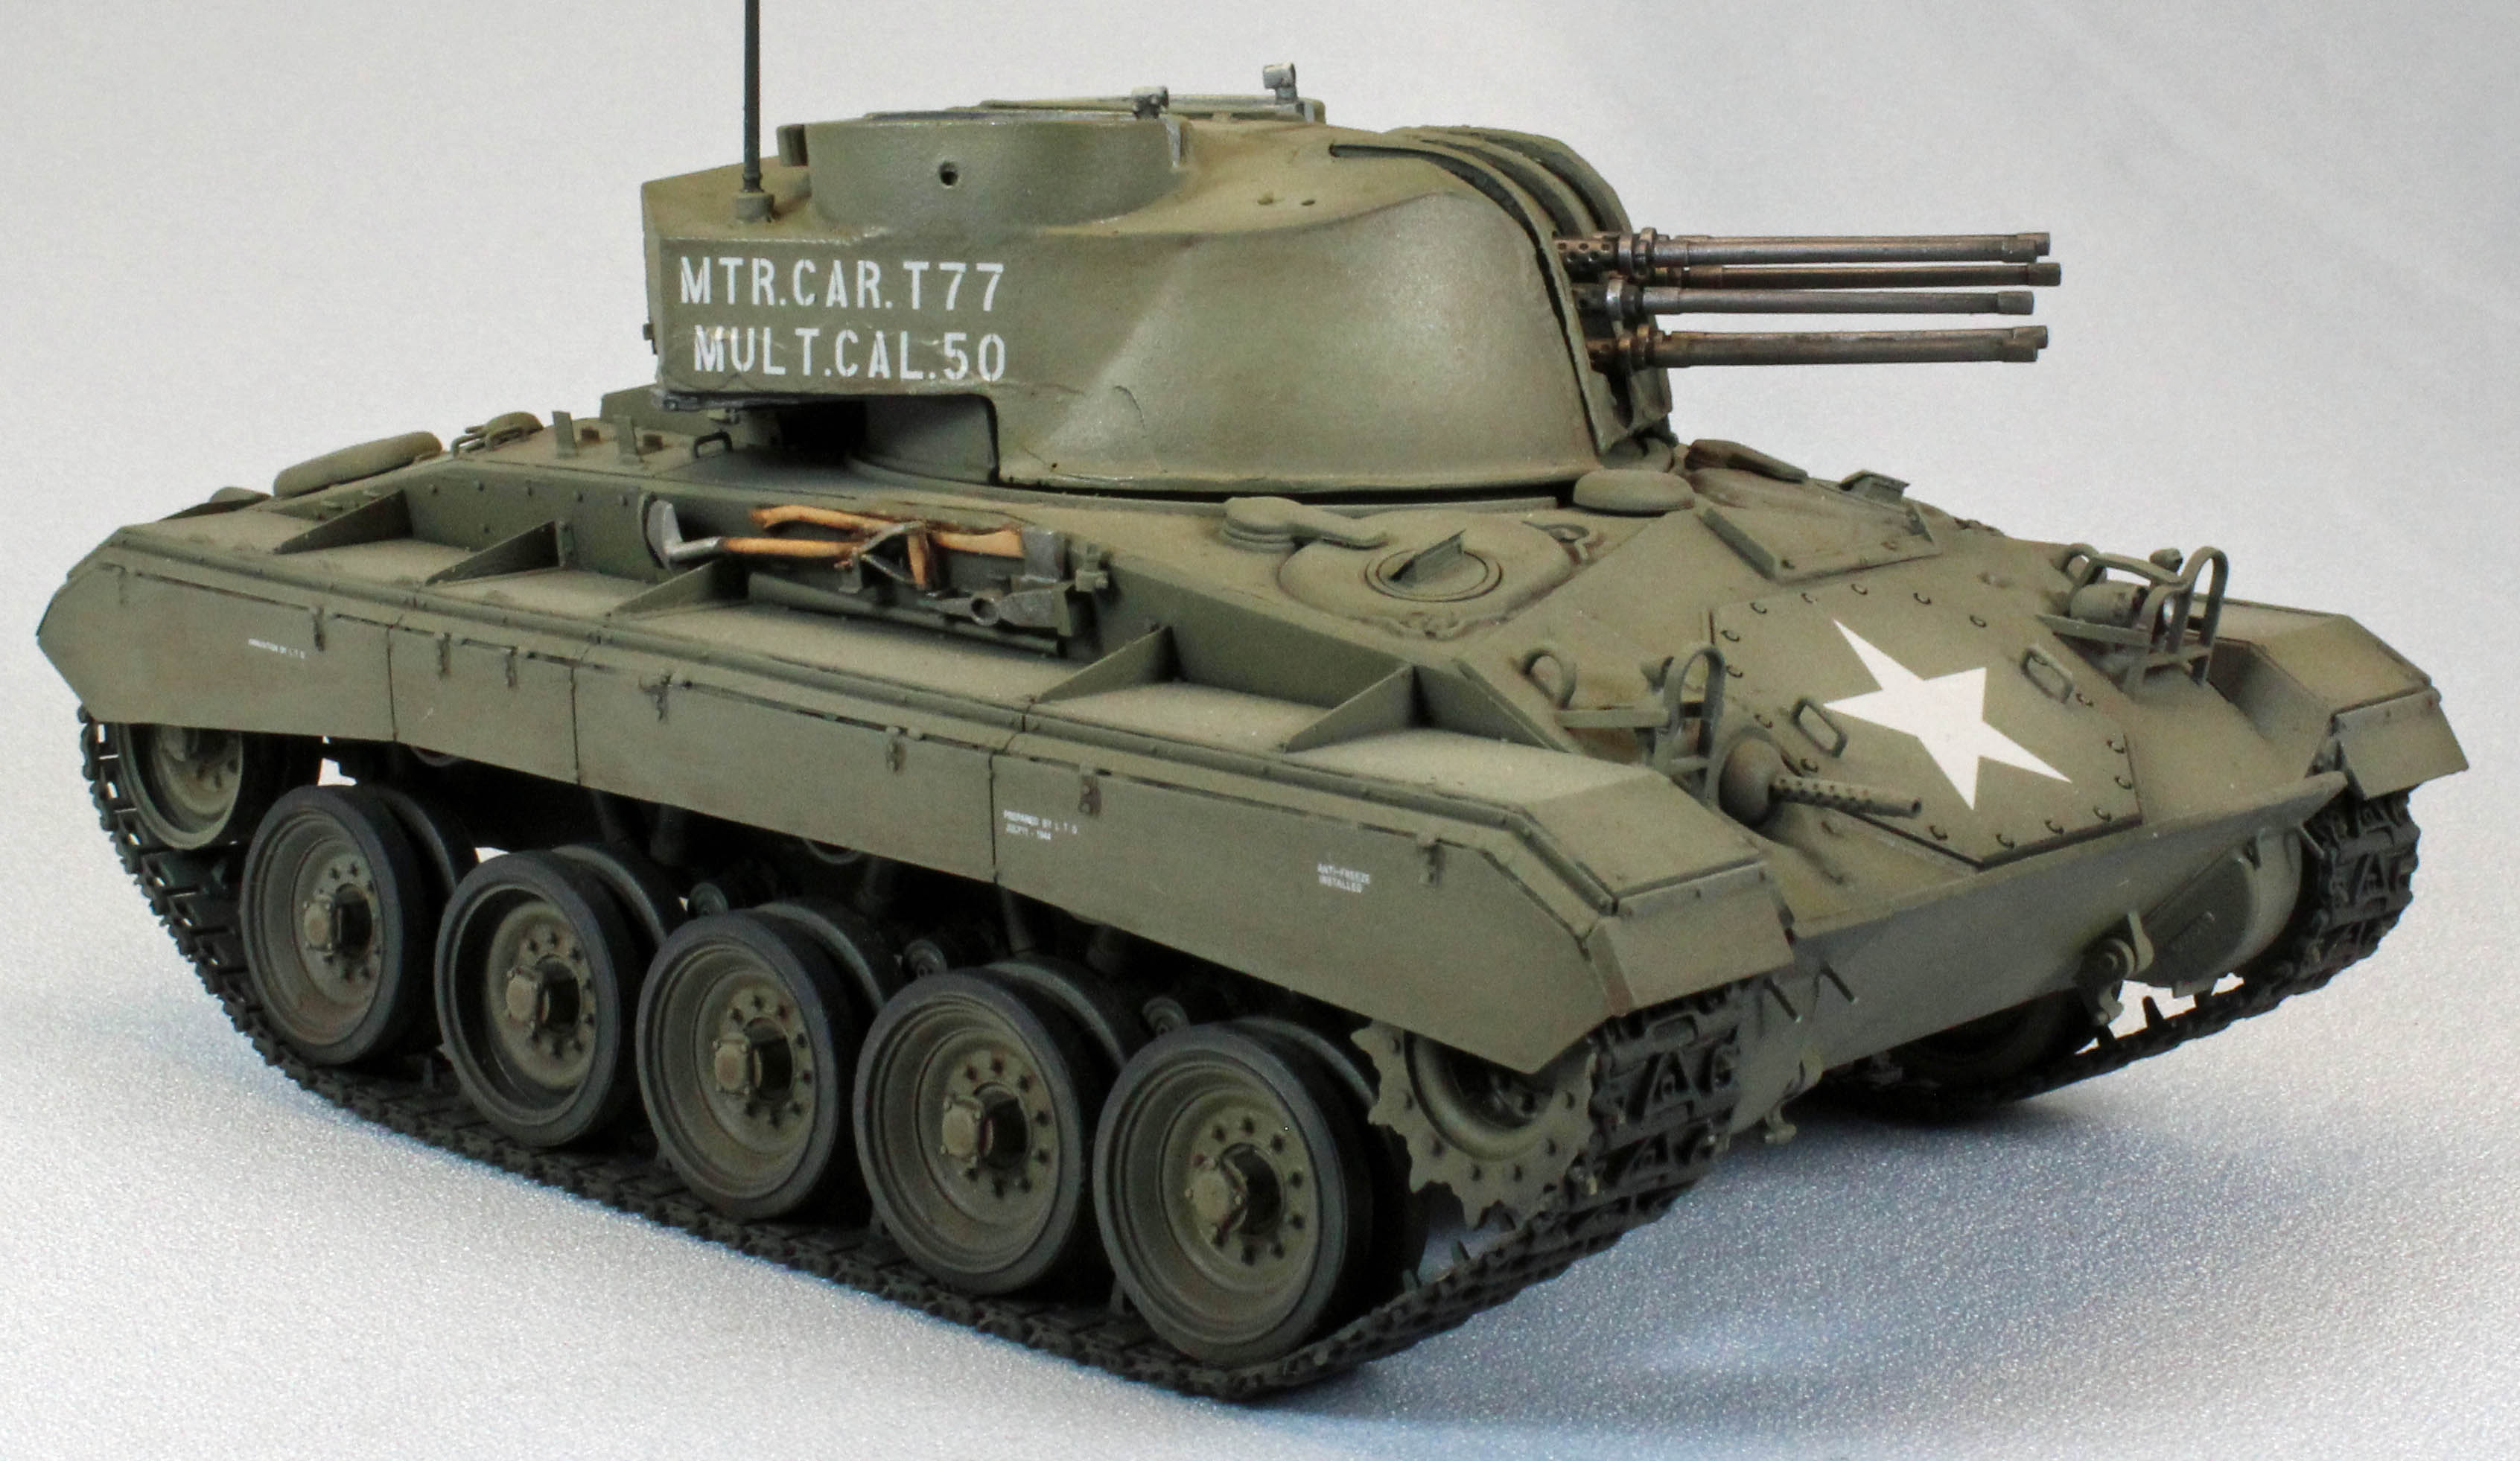
The T77 is based on a modified M-24 Chaffee chassis with a specialized turret studded with no less than six U.S. M2 Browning 50cal machine guns – a frightening prospect for anything that would have the bad luck of straying into its line of fire.
The T77, however, never left the experimental phase with only two prototypes built and tested at the Aberdeen Proving Grounds in Maryland through 1945. The project was cancelled after the end of the Second World War, partly because it was clear that the platform wouldn’t be able to cope with fast attack jets.
Opening the box
The first thing you notice when you open a DH box, is how it opens. The sturdy, cardboard box has a printed color paper cover taped to the outside, and a front-opening clamshell design which takes a little getting used to, but works fine when pushed to the back of your workbench. Once you have the box open, you’ll find a variety of different modeling mediums, and this is the same with all the DH kits I own. The majority of the kit is injection molded plastic, but there will also be parts made of resin, rubber/poly, photoetch, stainless steel, twisted-thread, even brass in some kits – a veritable modeling smorgasbord.
The quality of the plastic molding is absolutely stunning, with hairline weld-seams and whisper-thin grab handles and foot ladders. That said, the resin and plastic parts are extremely thin, and look, at first, like they are warped beyond use. In some cases, however, the thinness uncovers their greatest strength; since some of the plastic can be pushed into place and glued, ending up straight and true.
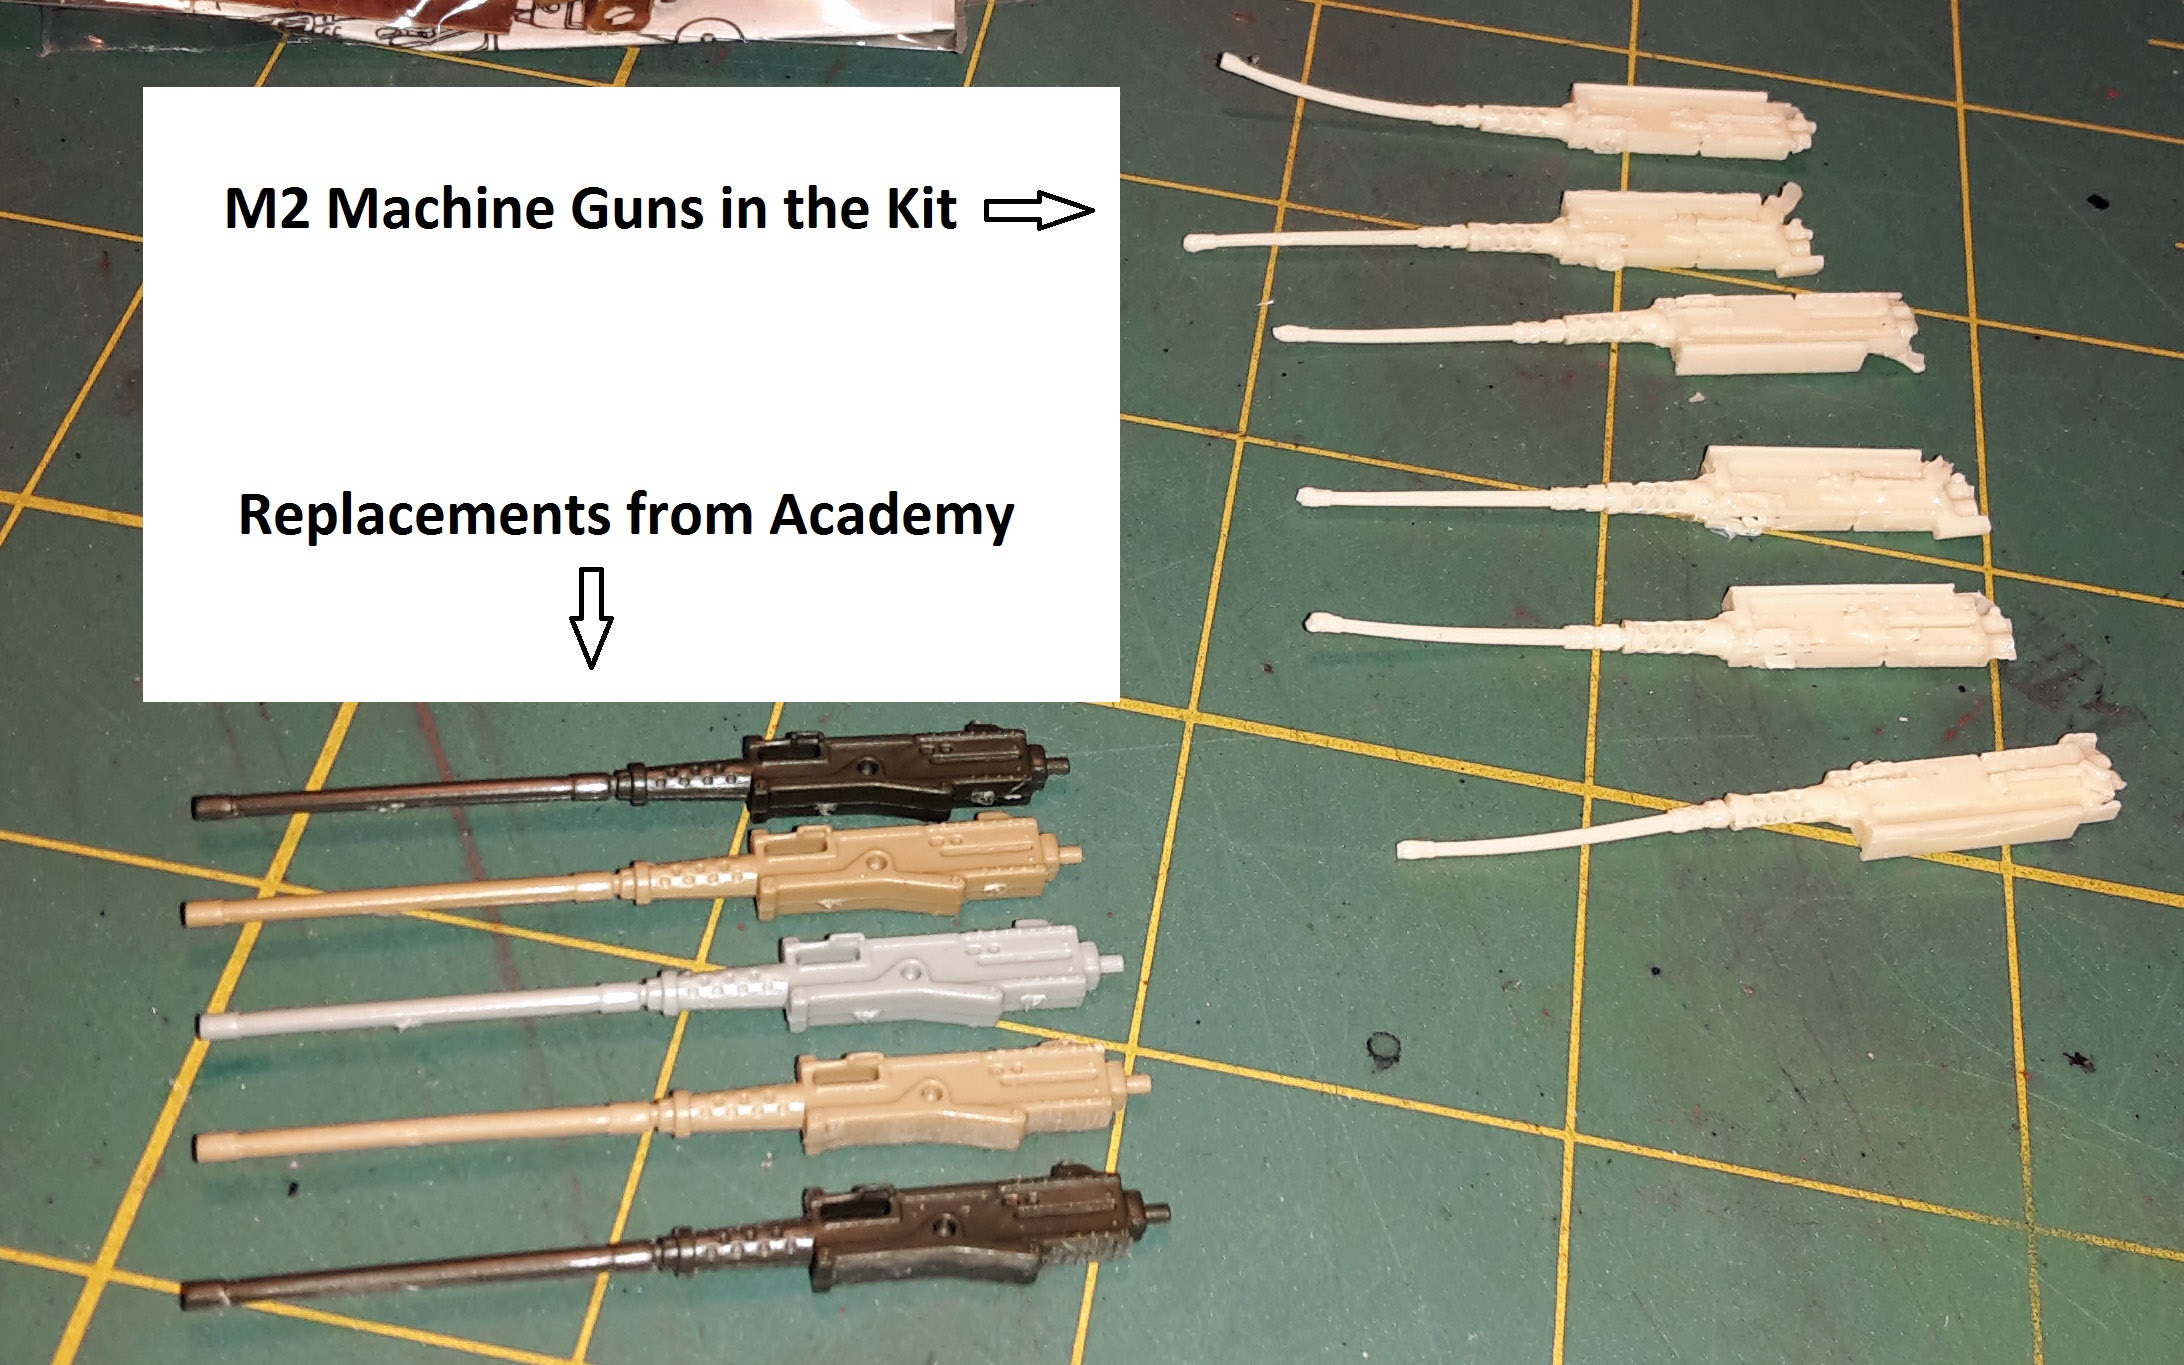
On the other hand, the entire turret assembly is made of an unusual kind of resin; very, very thin and malleable – not a single part is rigid like normal after-market resin. The quality of the resin moldings is rough – not nearly as good as the plastic. Finally, to my disappointment, the six-gun mount in the turret had a number of flaws that had to be addressed, including the six M2 machine guns which were badly warped and under-scale. Since all eyes will be focused on this particular area of the vehicle, I had to replace the guns with spares from other kits.
The two rubber-band style track runs come together in an interesting and novel way – Ding-Hao provides a steel pin that slides through rubber ‘eyelets’ in the ends. We’ll see if this approach holds up over time… and being stretched over the running gear.
The contents of the box include:
- Lower hull, packaged separately. 6 sprues in very soft and thin Olive Drab plastic, packaged separately.
- 1 clear plastic sprue
- 2 small photo-etch sheets, one with engine exhaust mesh, one with ‘reasonably’ small parts
- 2 runs of black poly or rubber track
- 1 8-inch length of black twisted thread – rope or cable in 1/35th scale
- Separate bag containing all the parts necessary to build the turret and main weapon, molded in very thin and warped resin – some of it significant. Soft – not rigid – even the resin blocks that get removed are soft and bendable.
- 1 16-page black and white instruction booklet with 28 steps
- 1 small but perfectly registered sheet of decals, printed in Taiwan
The Instructions
The first three pages of the instruction booklet contain a brief history of the vehicle, followed by color callouts for Gunze Hobby Color, Mr. Color and Mr. Color Spray, Humbrol, Revell and Lifecolor paints, and sketched images of nine other offerings by the company based on the M-24 lower chassis. Clearly, if you are a Chaffee-nut, Ding-Hao should be your go-to source for unusual short-run vehicles.
The instructions themselves utilize sharp, black and white CAD-like images to walk the builder through the 28-step assembly.
Assembly sequence varies by modeler but the general flow of things go pretty much as Ding-Hao intended. The exceptions I made are identified in the text, below.
Things to consider before starting:
Right up front, let me say that this is not a kit for beginners; it will be a challenge – as most short-run, multi-media kits are. If you accept that up front, things will go a lot smoother. The Chaffee is a straight-forward tank. Chassis, fenders, main deck, turret, gun, hatches – it’s all there. There are no build options offered, so you will have a lot of extra parts for your spare parts box since you will only use the lower half of the M-24. The track is obstructed if you choose to add the fenders (like I did) so you’ll need to put the track runs on early in the build. The two top hatches are large and uncovered, and reveal a pretty good view of the interior, so you’ll need to finish that out before attaching the upper turret.
The Build
The Lower Chassis, Running Gear
The build starts with the lower chassis and running gear. Right off the bat, the fit of the final drive casings on each side (Parts B50/C11/C12) is poor, which is unusual for this important part of the vehicle that functions to hold one end of the rubber-band track tight. Later, one of these housings would separate, well after drying, requiring some minor surgery – more on that later.
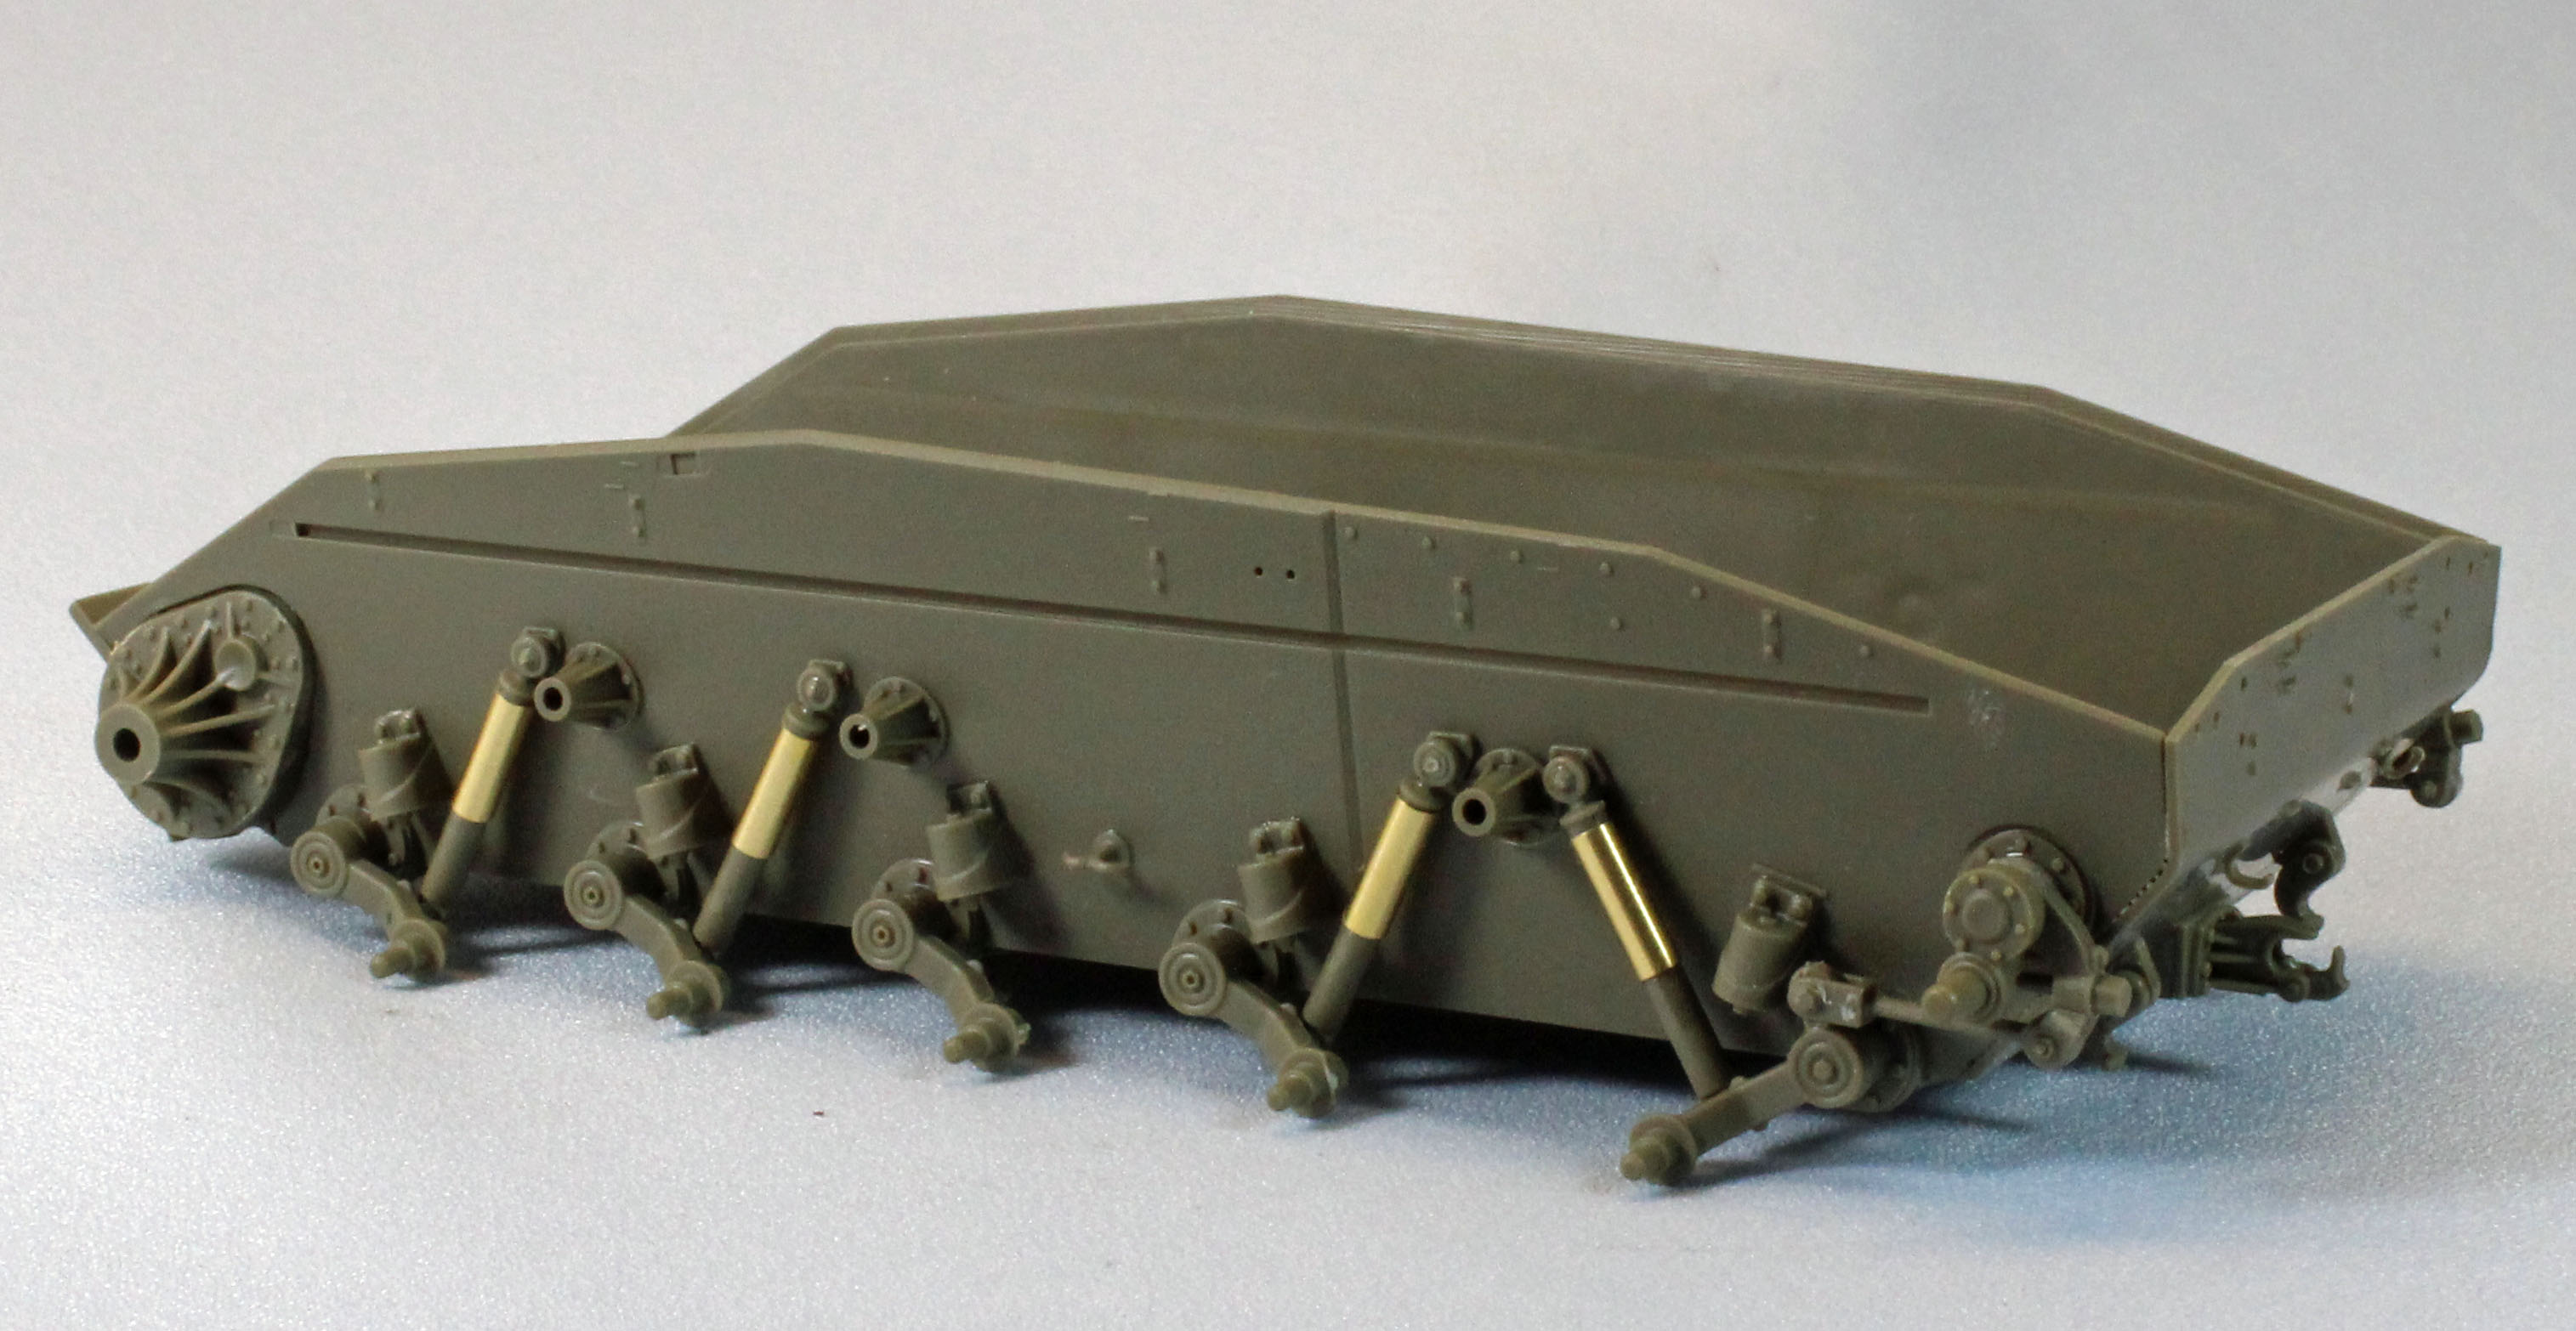
Four of the five axles on each side are multi-part affairs that allow some leeway in positioning them the way you wish. A problem arises, however, if you want to guarantee that all five wheels lay even on a flat surface: the instructions will have you assemble the outer two axles first, and then the inner three. I suggest instead that you attach all five main axle parts (B3x4 + B7 port side, B4x4 + B8 starboard side) first, line up the ends so that they are all even and let them dry. Then, assemble and attach all the accompanying parts that make up the linkage and shock absorbers.
Each wheel bogey is made up of several parts; I suggest that you use the following procedure to get things where they need to be:
- Attach (first) B6 to B15
- Attach B15 to the Hull
- Attach (second) B6 to B39
- Attach B39 to B3
- Attach B3 assembly to the Hull
- Swing B39 and B13 up so they paint at each other, slip on the brass collar, and glue.
- Repeat the above, nine more times.
Except for axle pairs (which can’t be seen), the design and fit of the running gear is surprisingly good and comes together quite well. The wheels ‘chunked’ on, and were simple to line up. I weighted the lower hull during drying so that the wheels would all line up evenly with the table top.
What I didn’t realize until it came time to attach the rear hull plate (Step 3), was that the lower hull in my sample kit was badly warped, essentially ‘square’ upon arrival (when it was supposed to hold a pronounced ’V’ shape. When the rear hull plate is attached to the lower hull, the sides of the hull had to be bent outward significantly. Since the parts were not able to be clamped, I had to hold the hull together for about 15 minutes to let the glue set up. With the newly-shaped lower hull, all the bogeys were now pointing downward at nearly a 45 degree angle. I had to push everything upward until they aligned again with the new horizontal plane. Not great.
The Main Deck
The main deck in my sample copy did not fit in the lower hull. The hull comes as a single piece that is roughly ‘V’ shaped, spreading apart to accept the main deck and rear hull plate. After spreading the hull apart to accept the rear plate, I could see that there could be a problem later, attaching the main deck and I was right. The only way to accomplish this was to glue one side of the deck to the hull and then, the next day, attach the other side while forcing the V-shape apart. Somewhere along the line while this was drying, the front of the hull split apart at the port side final drive housing, right where I thought it would back in Step 1, the point of its weakest attachment. I had no choice but to fill the quarter-inch wide, V-shaped split with a piece of fitted styrene and sand the area smooth. Later I adjusted the angle of the port side fender to compensate as best as I could.
I found the best way to attach the headlight protection brackets was to glue the bracket face to the hull, and then later, the supporting arms to the face.
In Step 10, Ding-Hao provides PE mesh covers that go over the engine intake/exhaust vents. The mesh, however, is very dense and completely hides the nice louvered look of the vents, so I left the PE off.
The Track
The two runs of stiff rubber track are held together in a novel way – Ding-Hao incorporates the use of a steel pin inserted into the ends, which actually works very well. Unfortunately, for whatever reason, one track was too loose, while the other was just right. It’s hard to imagine an assembly error that would cause this since none of the axles are configurable – all lining up in the same place on each side. So, while this ‘pin inserted in the rubber track’ approach worked well for one side, I had to staple the other track together after removing two full links. Fortunately, the side skirts covered the staple.
The Fenders and Side Skirts
The fenders in my sample copy were significantly warped and really didn’t want to slip into the long horizontal slots made for them in the sides in the lower hull. I used slow-drying Testor’s cement and held each one in place, bending and pushing until they were true and horizontal. The more time spent here, the less time you’ll need with the side skirts and brackets coming next.
The T77 comes with beautifully rendered bolt detail on both the sides of the main hull and is duplicated along the optional side brackets for the skirts. If you choose to add the skirts like I did, there is a slim gap along the inside of each skirt bracket, presumably to allow room for the hidden bolts along the fenders underneath, I suggest you carefully remove the bolt detail on the hull before attaching the brackets – the brackets came warped in the box, and fighting that, as well as the protruding bolt heads made things harder than they needed to be. The bolts are beautifully reproduced on the outside of the brackets.
That said, I came across a perplexing design issue: the bolt patterns on the brackets did not line up with their counterparts on the skirts below, no matter which way or which side of the vehicle I placed them. The first few vertical sets of bolts lined up but then would spread apart as you went along the length of the skirts. Unfortunately, I discovered this AFTER the brackets were solidly affixed to the hull.
To fix the problem would have meant removing all of the bolts and accompanying detail on all four pieces (2 brackets and two skirts) and replacing them with some kind of after-market or scratch alternative, which, considering all the issues I had with the turret coming up, would have taken too long for this review. I’ll bet this is why there are no images I could find of the completed Ding-Hao T77 with side skirts.
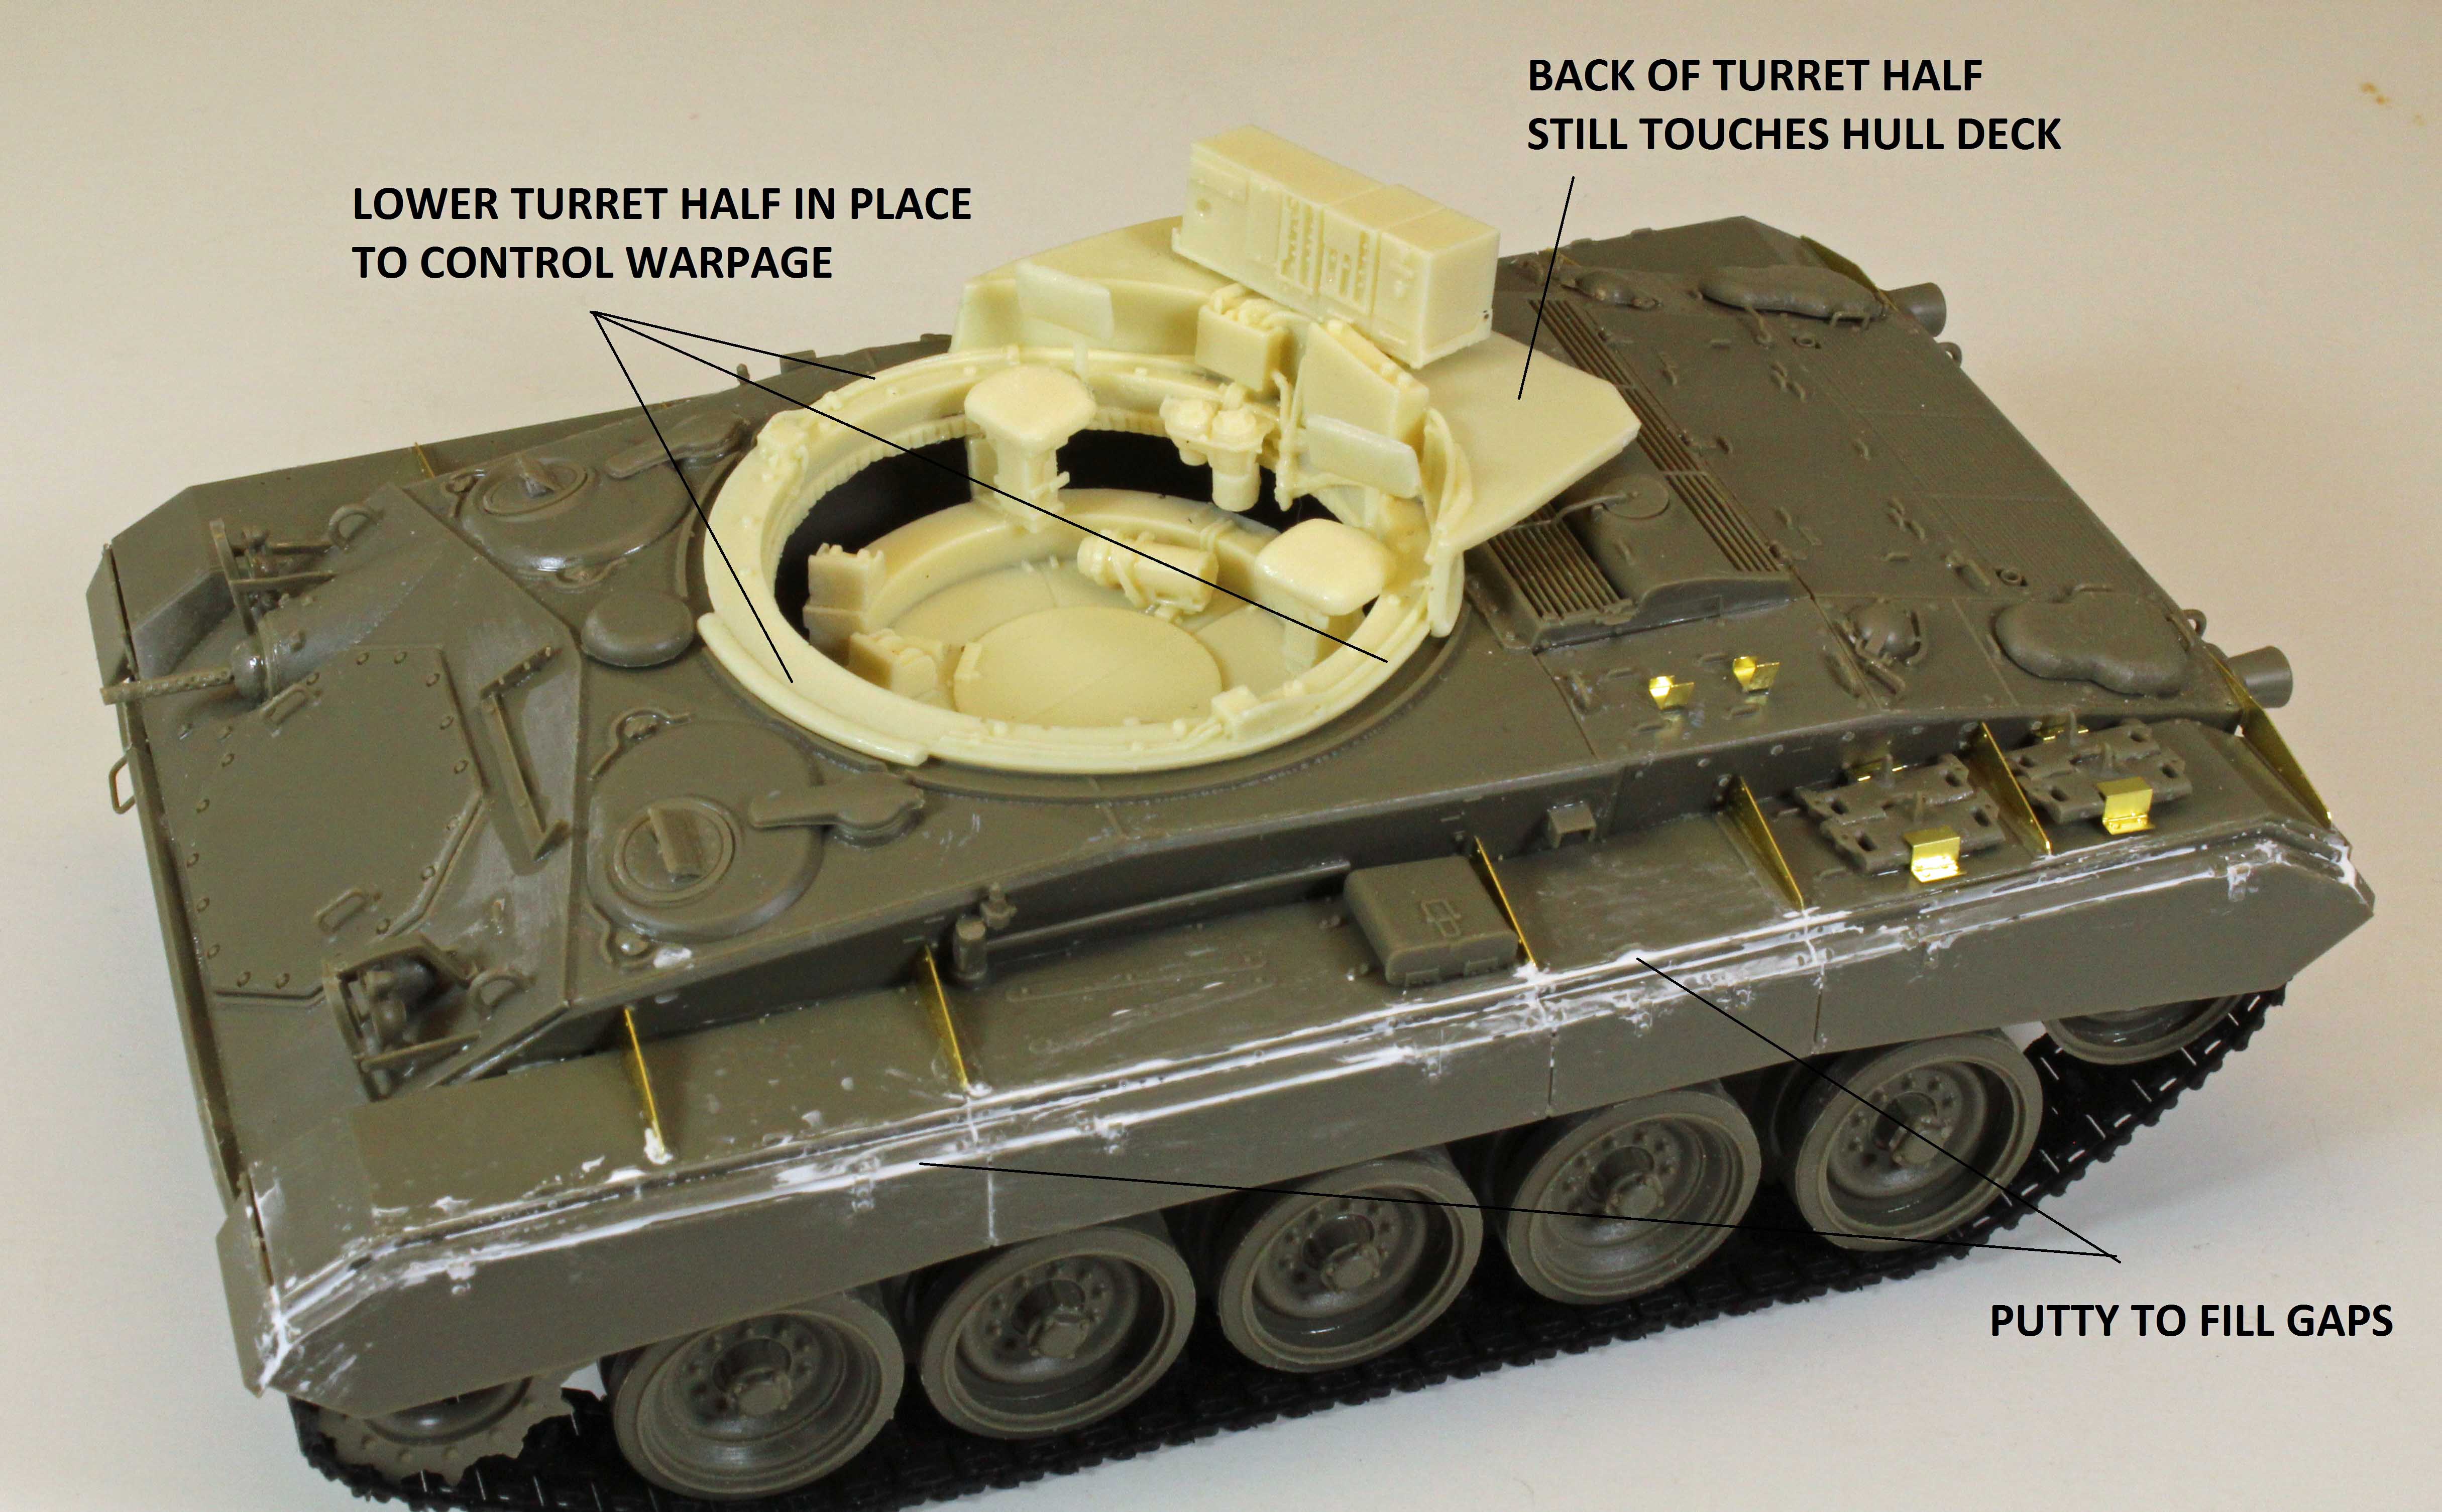
Once the brackets and side skirts were in place, I filled the gaps between the brackets and the hull, and between the skirts and the brackets with Perfect Plastic Putty. While there are small, even gaps on the real vehicle, the warpage of both the brackets and the skirts in my sample copy caused these gaps to appear inconsistent, so I decided to fill them.
In Step 20, Ding-Hao provides a nice photoetch bustle that hangs off the rear of the tank, but the PE is so thin that it won’t survive more than one fold before separating. Since there are no instructions on how to fold the complicated bustle, any wrong fold dooms the piece to the scrapheap - and leave it to me to fold it wrong. Note: the delicate bustle is different than what is shown on the box art, which is clearly made of plastic and looks far more robust.
The Turret and Main Weapon
The resin parts in my sample copy of the T77 contained many manufacturing and casting issues, some of which could be resolved, some could not. First the turret itself has ragged mold markings along each side, near the back that could not be safely sanded off or otherwise dealt with without causing more cracks in the super thin and bendable resin material. Unfortunately, primer and paint didn’t have much effect on the issue either, so the fault lines remain on the finished model (under the decals on each side).
Next, the cylinder that houses the six guns (Part R7) came with a small blob of resin completely covering one of the gun holes. Once the blob was removed, I had to reshape the hole back to its original form. I placed a piece of scotch tape around the outside of the cylinder and inserted a lump of slow-drying superglue into the cavity from behind. Once dry, I drilled out the hole and modified one of the guns to fit into the new space.
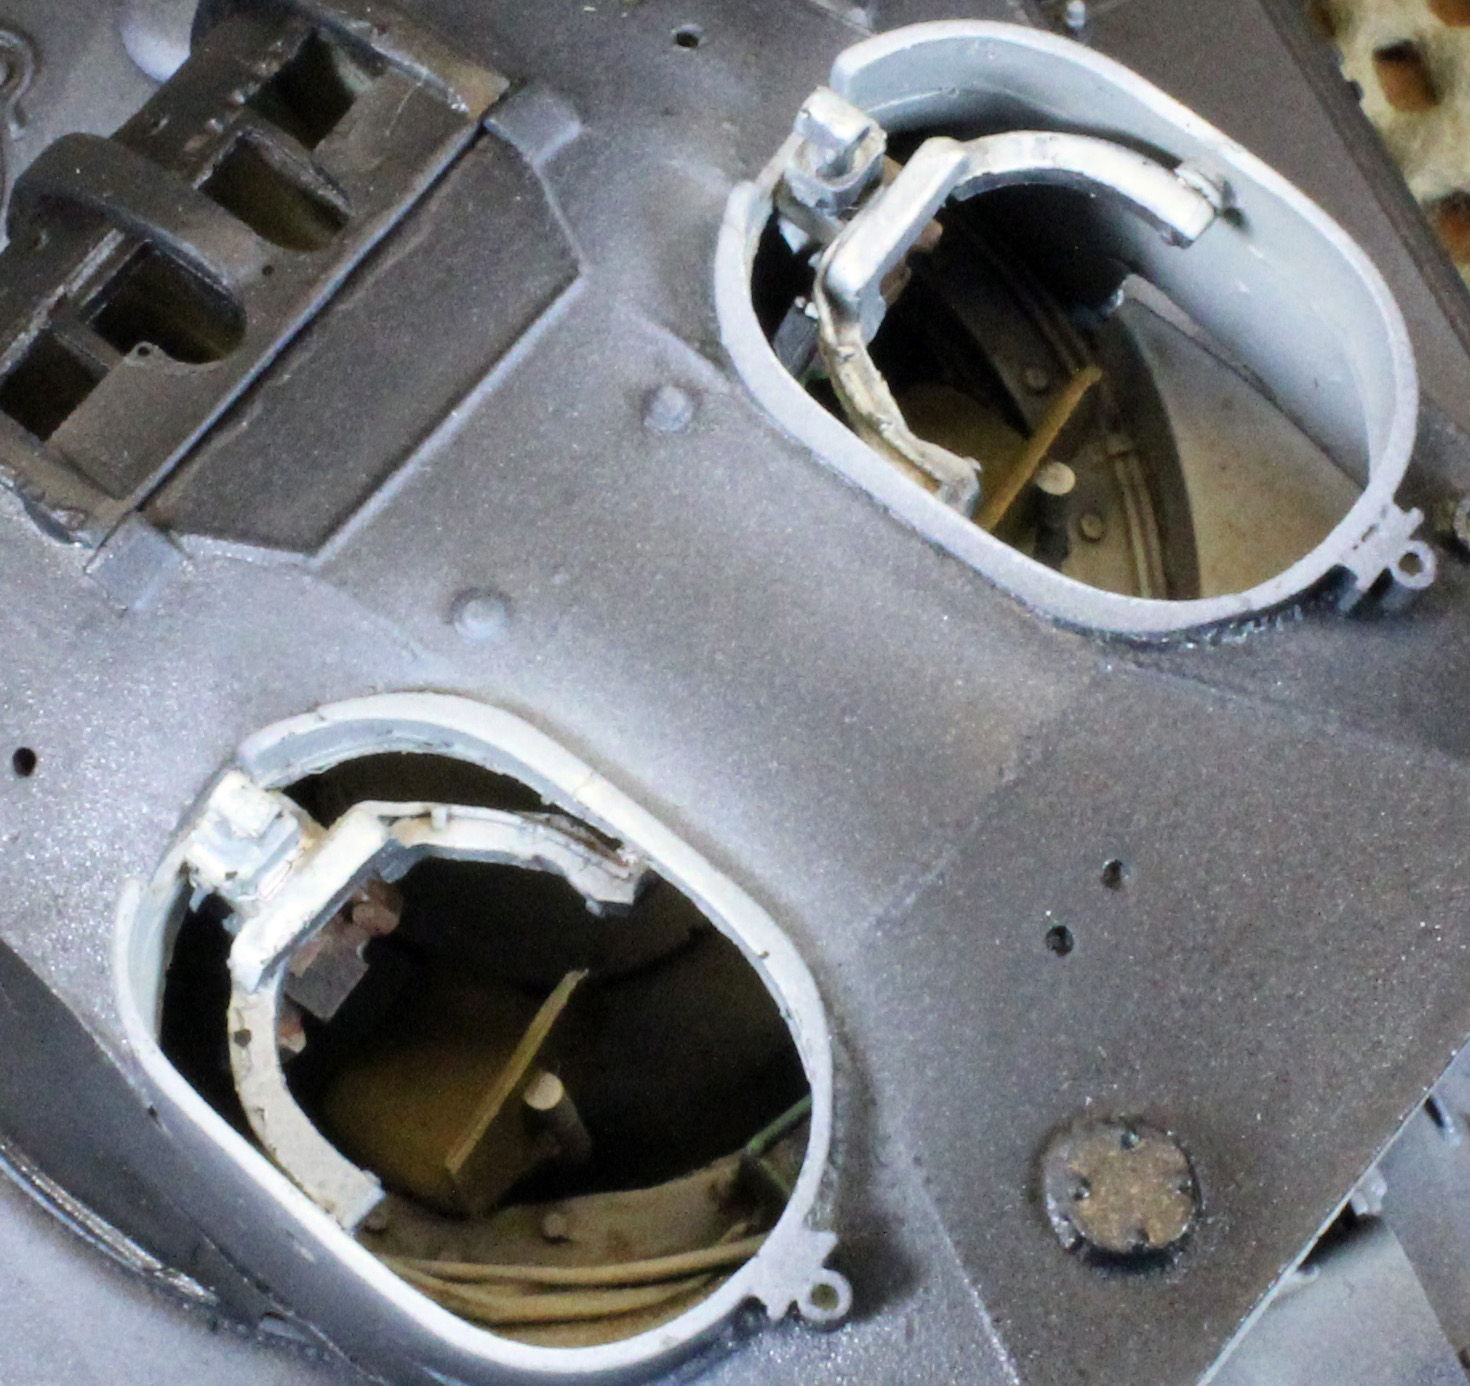
Next, the cylinder itself is not wide enough to fit between the two brackets, one on each side of the turret opening, easily falling free when inserted. Squeezing the turret together so it would stay put simply shrunk the turret opening, preventing the outer casing from fitting in place over the cylinder. (See image entitled “Turret Issues”) I sliced off several appropriately-sized discs from a scrap plastic tube to build up each post on the cylinder to allow it to snug into the opening.
Now that the cylinder was in place, I discovered that the outer casing stood just proud of the turret surface when in place, prevented from seating correctly by the relatively thick sides of the casing which bumped up against the cylinder – not at the top or bottom, but just the middle of the sides (see image). I used a wooden dowel wrapped in 220 grit sandpaper to thin the sides of the outer casing – being careful not to snap the fragile casing into pieces while doing so. I also had to take care NOT to thin the top and bottom of the sides, which would result in having to start all over again.
Next, the bottom portion of the turret itself was so warped in three dimensions that it did not fit either in the hull, or to the top of the turret. Bending it to fit simply caused the detail inside of both halves of the turret to pop off, and the thinness of the resin prevented me from dipping it in boiling water to straighten things out – a sample test caused the resin to literally melt in a Dali-esque fashion. I solved this issue by gluing the base of the turret into the Chaffee hull and placing a large steel block on top to insure a solid, even seating (which, unfortunately caused one of the wheel axles down below to snap off under the tremendous (scale) weight).
Once the lower portion of the turret was stable, I re-attached all the broken detail to both halves and turned my attention back to the gun cylinder. The six M2 guns supplied in the kit were badly warped and under-scale. Even if I was to straighten out the barrels, the ends themselves were too small to hollow out and resembled small blobs. I felt it was imperative that these guns were well represented and hollowed out, since, with the T77, all eyes would be focused on the turret and guns. Consequently I looked across my stash and found five Academy M2 main bodies that matched, and was lucky enough to be able to receive the sixth identical Academy M2 from a good friend.
Unfortunately, regardless of whose guns I used, the design of the cylinder did not have any solid way of holding the guns parallel, or even in place forward or aft. Fiddling with the pieces I realized that I could still slip each gun into the cylinder even after it was in place in the turret. Accordingly, I departed from the instructions and glued the modified cylinder to the brackets in the turret, and the outer casing over the cylinder to the upper turret half. Once this assembly was solid and dry, I glued each gun into the cylinder, one at a time, over the next few days so that they would be lined up as well as possible.
I then carefully set the upper portion of the turret down on to the lower portion (no glue since the fit, as it is, won’t allow it), added an antenna from the spares box, and called it… done.
Painting and Finish
As a U.S Army prototype, the T77 is going to be U.S. Army green, period, so my challenge would be to try and put as much life as I could into all that monochromatic finish. I thought that I would take this opportunity to try the new Mission Models acrylic paints instead of my normal go-to choice of Vallejo or Model Master drabs for American armor.
Mission Models Paints (MMP) don’t perform like any other acrylic paints I have ever used. (You can purchase the paints and watch a tutorial on how to use them here: https://modelpaintsol.com/model-painting/mission-models-paint).
This new paint is pretty amazing – I have yet to experience any clogging whatsoever when I use the following mixing ratio: Six parts MMP paint + four parts MMP thinner, with the thinner made up of ten parts thinner to one part retarder (that goes by the catchy name of MMP ‘Polyurethane Mix Additive’). I spray this paint out of my Grex TG at about 12lbs for detail and post-shading work, and up to 20lbs for opaque coverage.
Primer, Pre-Shade and Hairspray
Even though MMP has their own line of excellent primers, I remain a stalwart believer in using rattlecan primers when I can, especially when the subject has a variety of modeling mediums involved like the T77. Accordingly, I started by applying a primer coat using Krylon Color Master with Durable ColorMax Technology rattlecan (Flat Black) enamel paint. This is the third rattlecan primer I’ve tried, and I’m glad I kept going because this stuff is a superior product, drying super thin and very, very tough - not to mention cheap and quick.
Once the hot enamel had a chance to de-gas overnight, I toned down the ‘very black’ wheels with (MMP035) NATO Black. I then waited 20 minutes and shot the lower chassis with hairspray to make it easier to clean up any overspray later when I applied the olive drab.
The primer/pre-shade coat gives the plastic and PE some grip for the following coats, and fills in the recesses, creating a shadow effect near the flat surface edges. This will add depth for the subsequent coats to come. I let that dry and then laid down a base coat of (MMP025) Olive Drab, followed by a post-shade coat using 10 drops of MMP Thinner Mix + 2 drops of MMP020 Olive Drab Faded + 1 Drop of MMP001 White. Working from the center of each panel outwards, I left some of the darker shades to show through around the edges.
The MMP paint is opaque but can be sprayed in such a way to let the color underneath affect the final tone and depth. Keep the pressure around 12lbs and you’ll have the control you need.
Interior
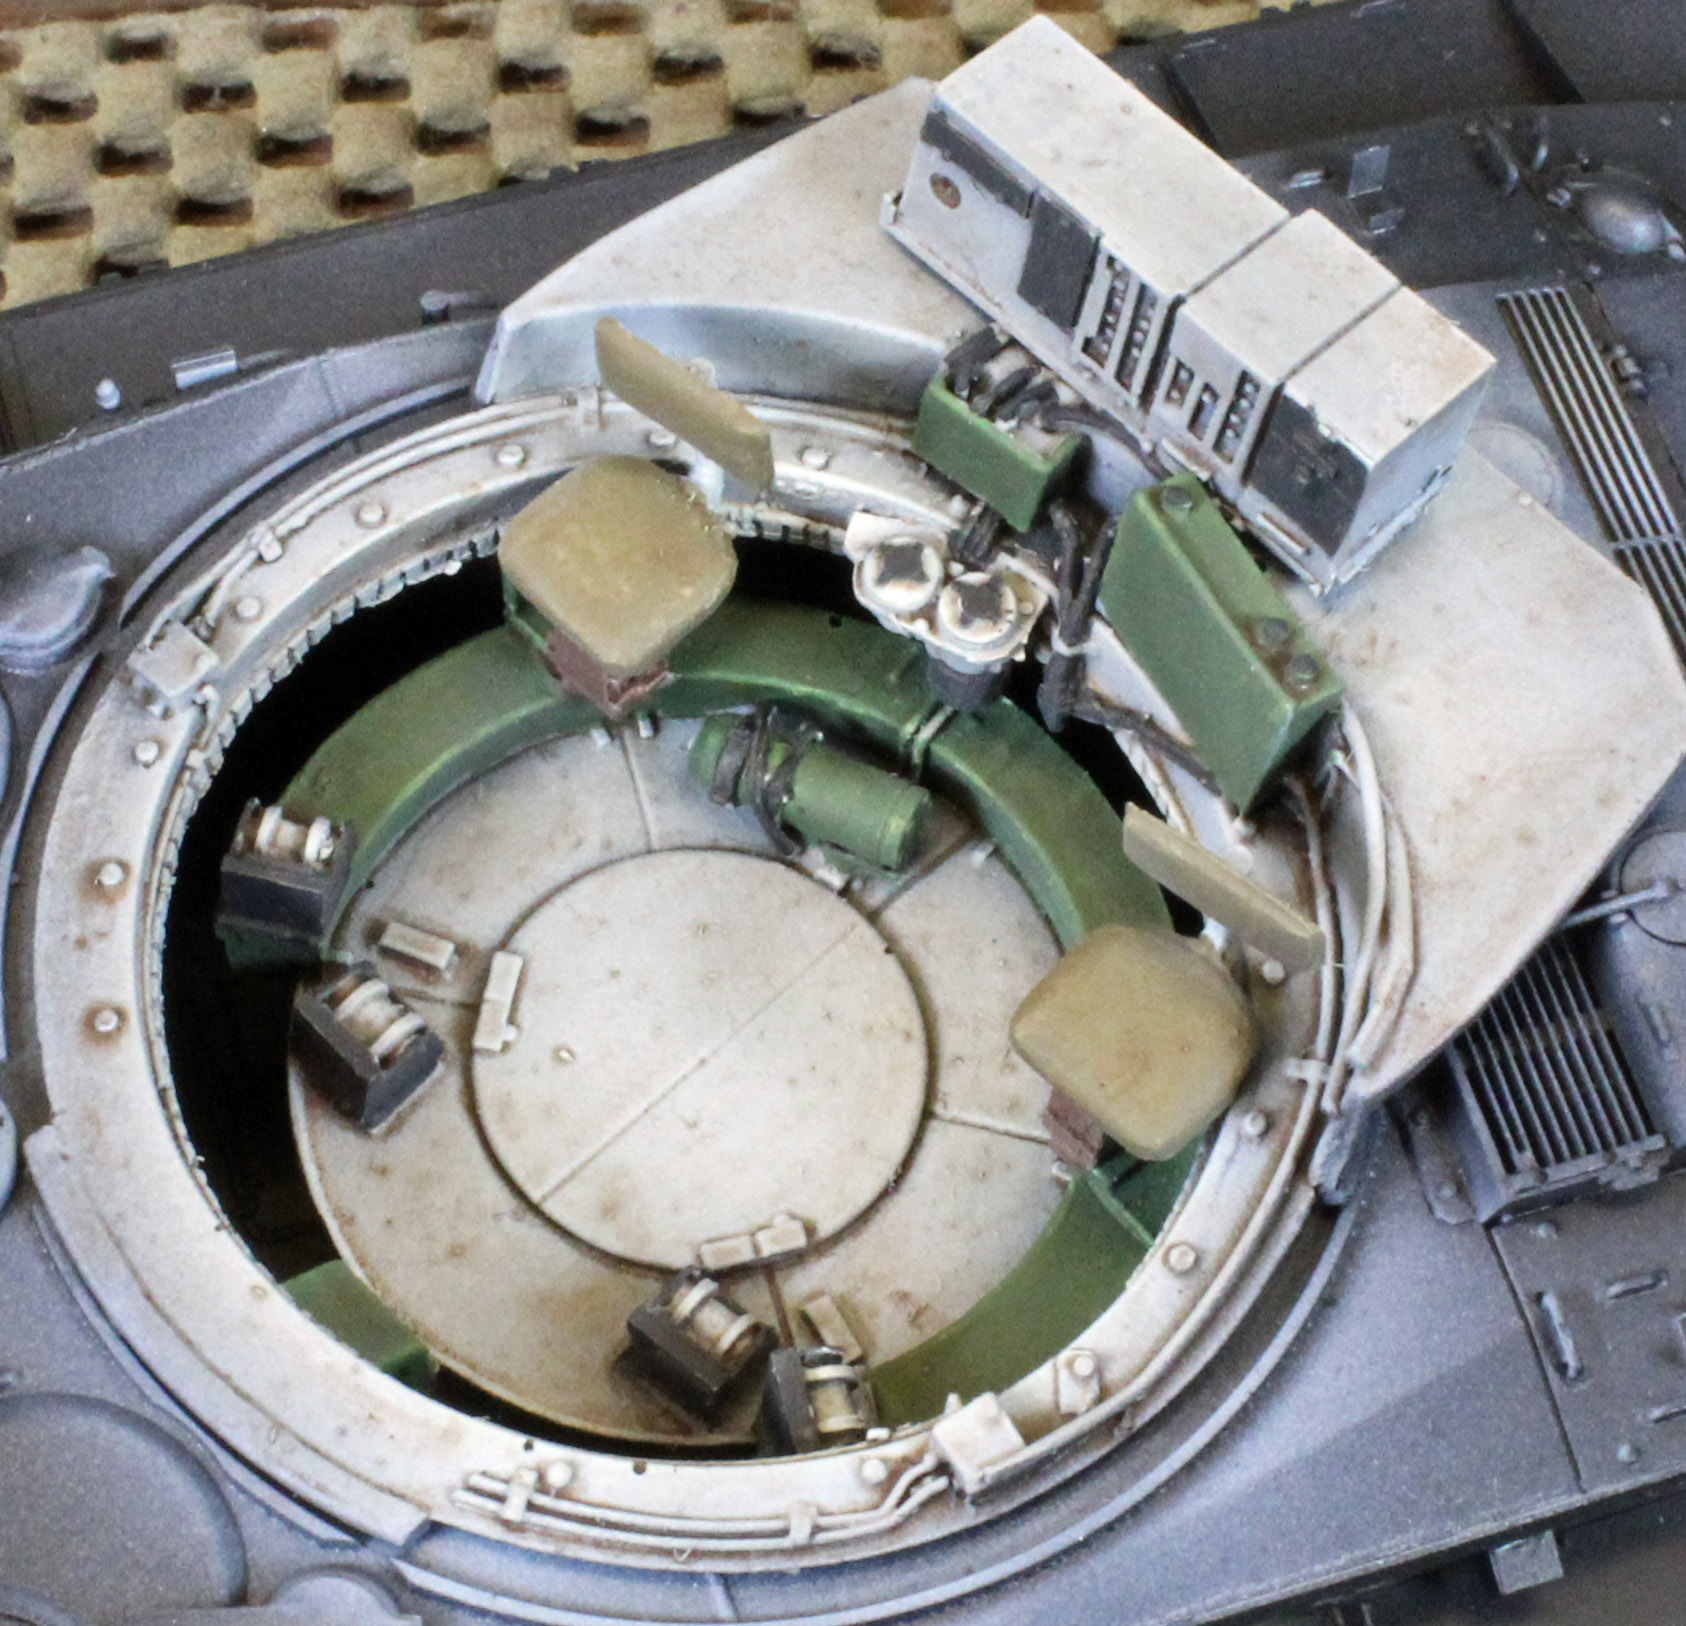
Since I wouldn’t be attaching the upper turret to the lower section (due to fit issues), I decided to finish the interior – some of which is visible through the two large crew hatches in the top.
I started with the same primer as the rest of the vehicle, followed by a coat of Vallejo (Model Air) 71.132 Aged White. Once dry to the touch, I hand painted the various interior parts using Vallejo Panzer Aces and Model Color paints (including 314 Canvas for the seats, and 312 Leather for the seat posts).
Decals
Once the paint was dry, I airbrushed the areas that would receive decals with Future acrylic to give the decals a smooth surface to work with.
I applied the decals using the Red and Blue Micro Sol/Set system. The decals supplied in the kit are very, very thin (but strong) and tended to fold up immediately when slid off the backing paper. With enough (blue) solution (and water) however, I was able to get them to straighten out. I then airbrushed Future over the entire vehicle to seal the decals and to prepare the surfaces for washes.
On-Board Tools
While the Future was drying, I painted the wooden portions of the pioneer tools with a Vallejo Flat Flesh and the steel parts with Vallejo Oily Steel. For hand-brushing Vallejo paints I mix a tiny bit of Vallejo Slow Dry and water with each color until it flows smoothly off a red sable brush.
To give the wooden parts of the tools more depth, I brushed on a little Mig Wash Brown oil paint straight from the tube and let that set overnight. Since the surfaces were covered beforehand with Future, the oil paint will be easy to work with. In the morning I carefully removed most of the oil paint using a Q-tip, leaving the areas near the latches and metal parts darker than the center of the wooden shafts. I then let a little black wash puddle up on the horizontal surfaces of the metal axe and shovel heads. When dry, I think this gives them a convincing look of used steel.
Once satisfied, I gave the entire model a coat of Vallejo Matt Varnish, mixed 50/50 with Vallejo thinner and a couple drops of Liquitex Flow-Aid.
Filters and Pin Wash
With a flat coat on the model, I applied several filters to enhance the monotone areas of the vehicle. I heavily thin all of my washes and filters with Mona Lisa Paint Thinner. This odorless white spirit is very mild and will not react with the paint underneath.
I applied an overall filter of Mig Wash Brown to the entire vehicle, inside and out, and a filter of Mig Black over the air intakes and spare track.
I applied a pin wash to highlight the detail all over the vehicle using Mig Dark Wash (aka Raw Umber) mixed 10:2 (Mona Lisa to Wash) using a small red sable brush, concentrating on the panel lines, recesses, buckles, pioneer tools, etc. Off to the photobooth!
Conclusion
The T77 from Ding-Hao Hobby was a challenge to build, mainly due to the issues I encountered with the resin turret and main weapon. The M-24 chassis also presented challenges, as did the condition of many of the plastic and resin parts in my sample copy. Any one of these issues alone could have been resolved with just a little ‘modeling’, but all of them together resulted in a tough build to get through.
That said, there were bright spots to be found as well; a novel method of attaching the track using metal pins (that worked!), extremely fine molding detail on all of the plastic parts, some of it as fine as I’ve ever seen. Such great work on parts that were so warped seemed to me a real shame. More care in packaging and certainly a different approach to the resin parts would have produced such a nice kit, and an equally rewarding modeling experience. Still, I find each challenge is a learning experience that improves my skillset, and that’s a good takeaway no matter how you look at it.
I can recommend this kit only to advanced modelers who are up to the challenges commonly found in short-run armor kits. Once built, however, this interesting and unusual subject sitting on a display table will certainly turn heads!
I would sincerely like to thank Ding-Hao Hobby and AFV Club for graciously providing this kit for review, and to IPMS USA for giving me the opportunity to review it.