Reviews
Aircraft
Lancaster Mk.1B – Part 2 of 3
by Eric Christianson
 Model: Lancaster Mk.1B
Reviewed by: Eric Christianson, IPMS # 42218
Scale: 1/32
Company: Hong Kong Models (HKM)
Price: $349.99
Product/Stock #: 01E010
Website: Hong Kong Models
Product Web Page: View
Product provided by: Hong Kong Model (HKM)
[This review is the second installment of a three-part series on building and finishing this impressive kit.]
Part One of this review can be found here:
[http://ipms-seattle.org/reviews/aircraft/2019-EC-HKM-01E010/]
Part Three of this review can be found here:
[http://ipms-seattle.org/reviews/aircraft/2019-EC-HKM-01E010-Part3/]
Welcome back! Last time we had just completed the interior and internal framework, front end and cockpit of the big 1/32nd Scale HKM Lancaster Mk.IB. This second installment will bring the engines, wings, fuselage, bomb bay and wheel-wells together, leaving the final assembly and finish for the last segment of this three-part review. Work is going along smoothly, with just a few exceptions here and there. While I had a few problems here and there, the overall build is simple and straightforward, and the fit is excellent. Let’s get back to work!
Things to consider before you start
This is a big model. Accordingly, I had to build some jigs to hold components while they were being assembled and finished. Working with ½” Gator Board and HoldTheFoam adhesive, I constructed three jigs that held each wing and the fuselage in such a way as to allow the assemblies to be flipped upside down so I could work on both sides (top and bottom). The three jigs were also designed to fit together into the original box, for transport to and from shows.
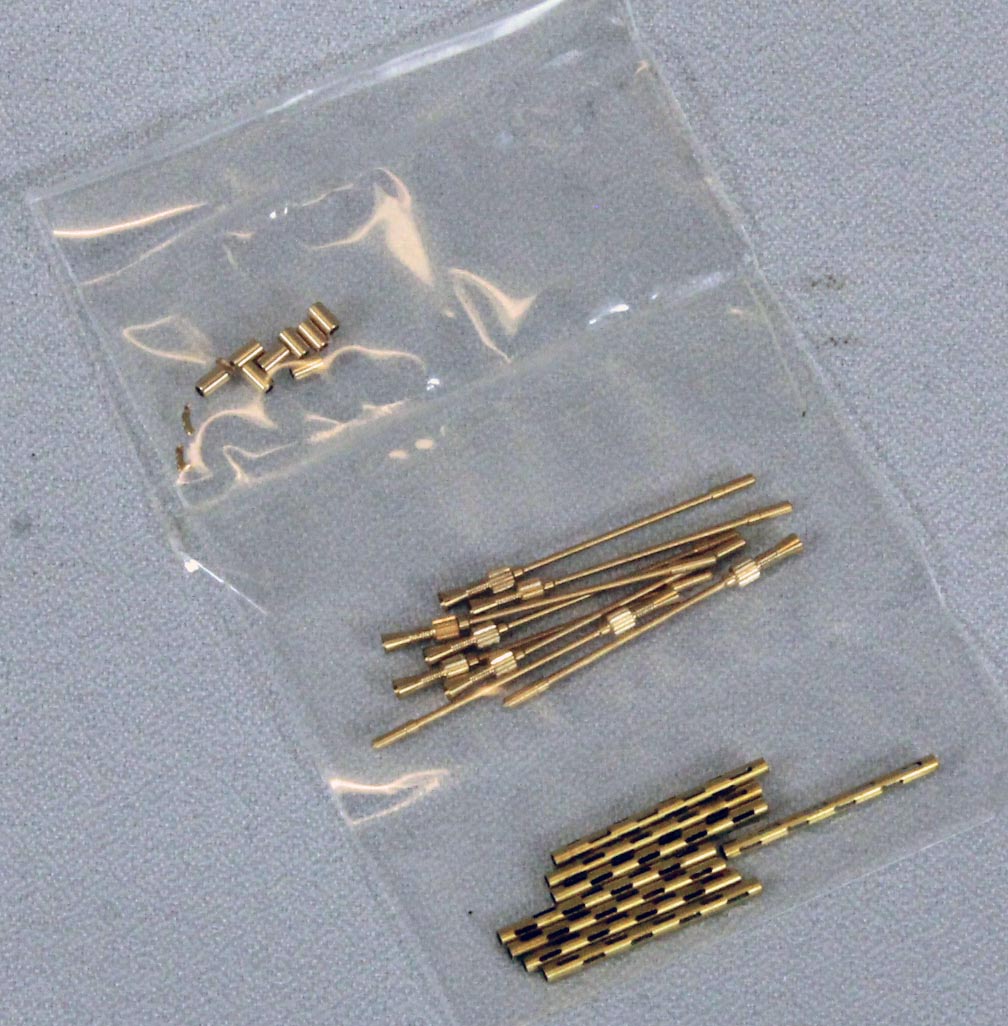
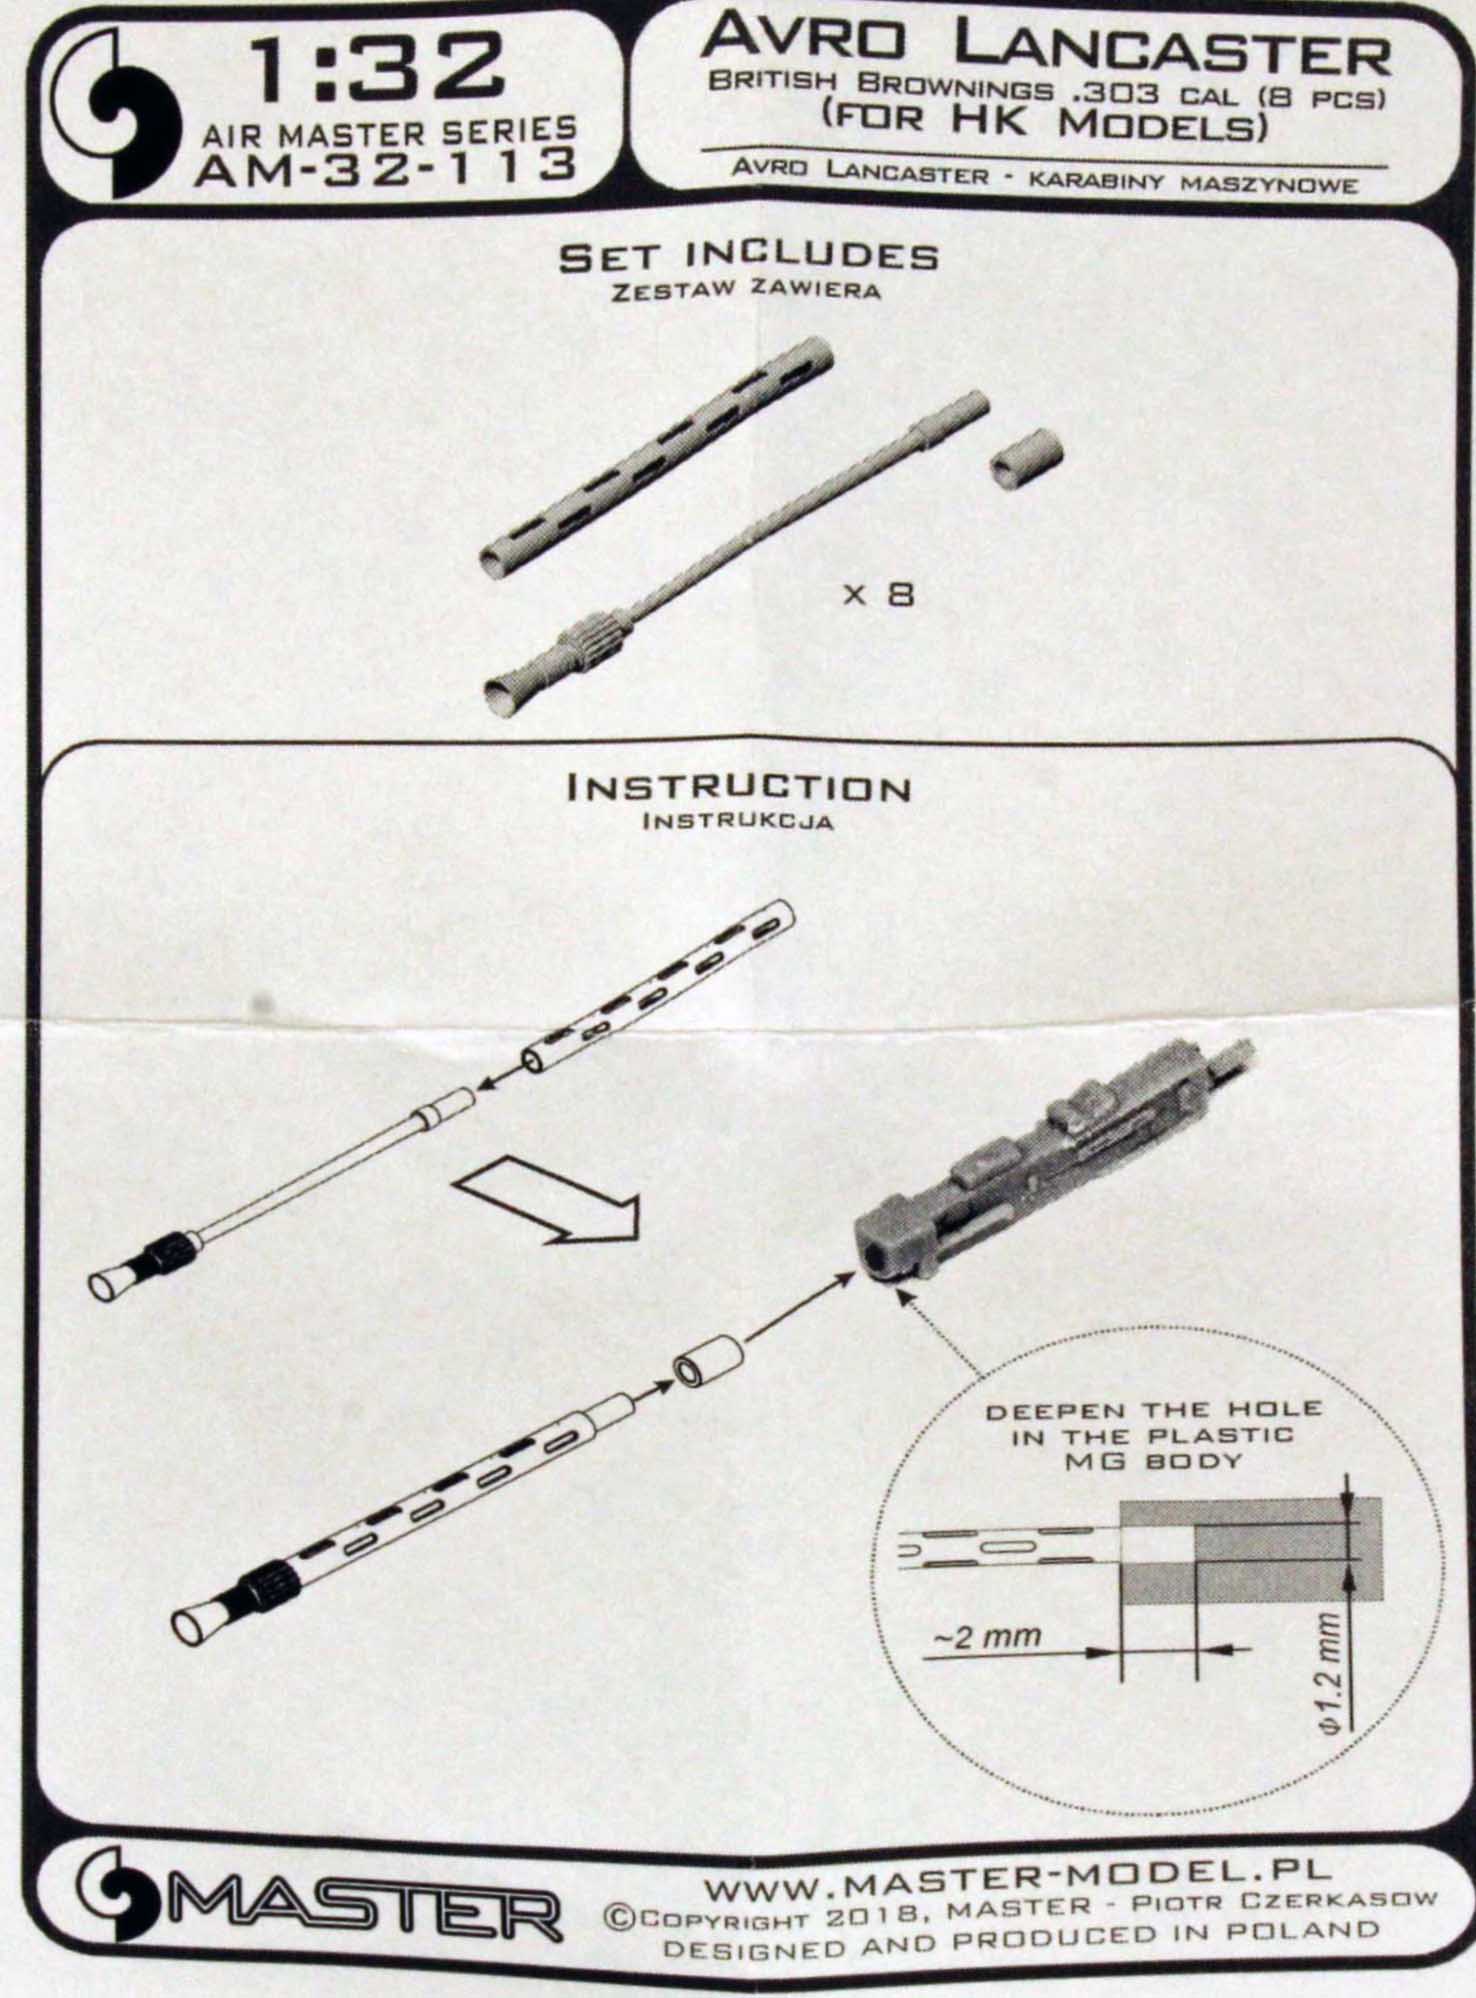
HKM has designed the kit so that the gun turrets, canopies, wings, tail section, engine nacelles and all the gear and bomb bay doors can be built, painted, and weathered separately from the main fuselage before final assembly. This is important since the model takes on a whole new persona once these parts start coming together – this guy is HUGE, and cumbersome – even on a large workbench. Fortunately, the wings, after a little refining, are engineered to be removable for travel and/or storage. While the solid plastic .303 in (7.7 mm) guns included in the kit were decent enough, I was lucky to score a brass replacement set produced by Air Master for my Lancaster. This product will be reviewed for IPMS here shortly.
Finally, unless you have amazingly long and skinny fingers, there are two wing spacers (Parts K47/L47) that fit underneath the outboard engines in Step 56 that need to be inserted BEFORE Parts K17/L17 in Step 54. Otherwise you risk splitting the wing trailing edge if you’ve left the previous work to dry.
Bringing the Fuselage Together
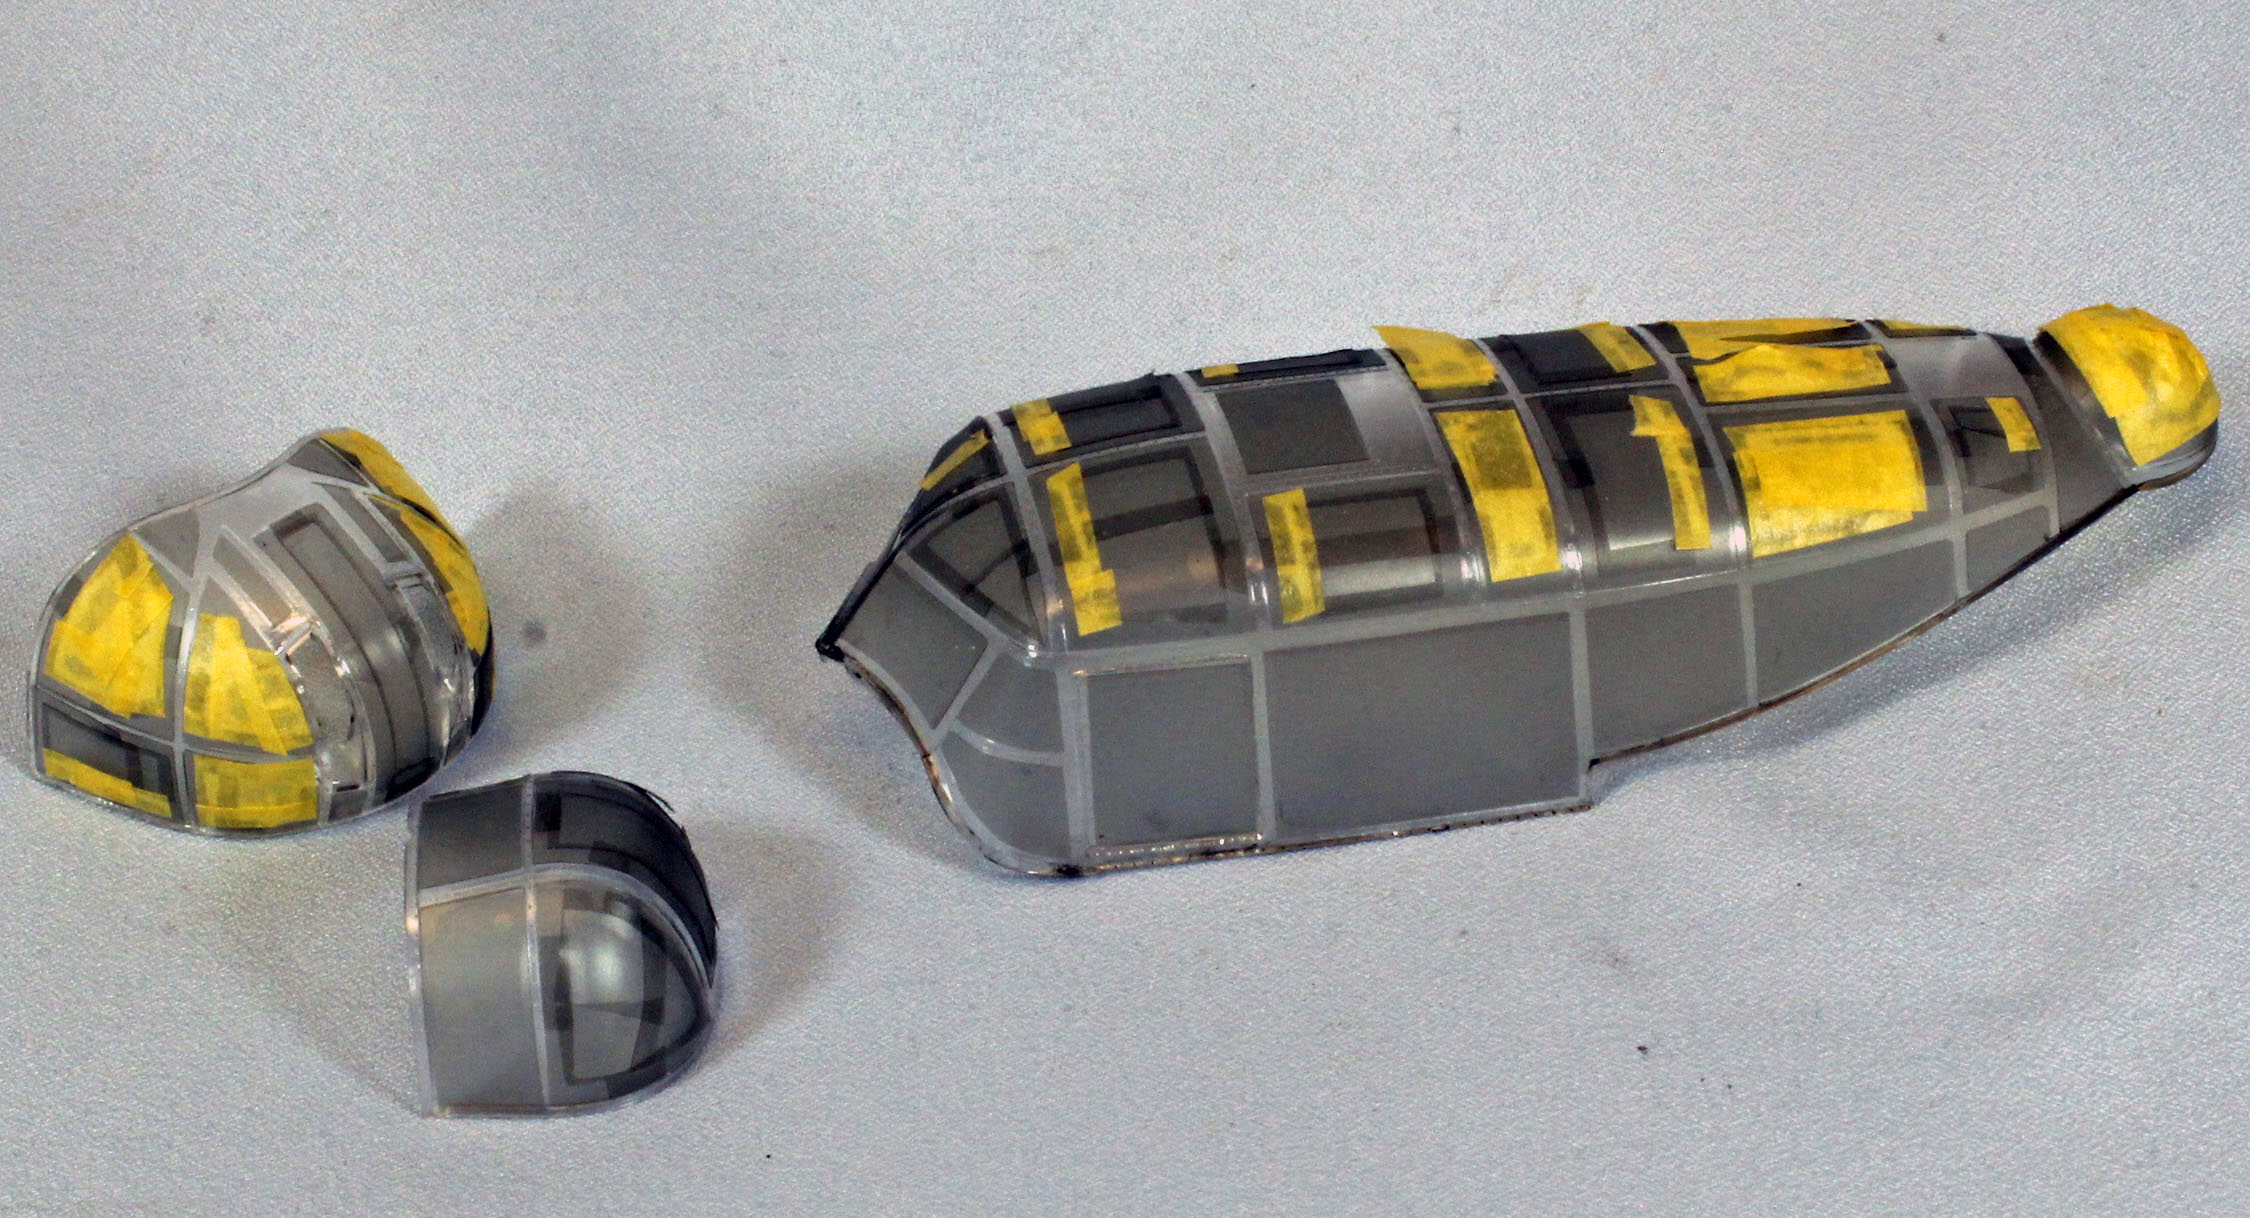
Windows, Turrets and Canopy A model this size cries out for a masking set for the clear parts, and I had to wait for something to be produced by the industry for this purpose, which is why I had to wait to close the fuselage as part of this second review installment. And the wait was worth it. I went with an excellent new approach for masking, using a product produced by DNModels, found here: https://dnmodels.com/product/avro-lancaster-canopy-hk-models-01e010/. These masks differ from the standard yellow-tape variety as they made from nearly-translucent film that can easily be pulled up and adjusted before being burnished down into the framing. For the larger windows with compound curves, the set provides the outer edges only, having the modeler ‘fill-in’ the interior portions – a smart solution for this tricky task.
I dipped all the clear parts in Future and allowed them to completely dry before applying the masking set – which for this size of a build, took a considerable amount of time. Still – I can’t imagine doing the same with tiny bits of masking tape or liquid mask. There’s just too much to do!
One last note: for whatever reason, those crazy Brits saw a need to include no less than thirty fuselage side-windows of at least a half-dozen sizes in the combat aircraft. Many of these windows have a dubious use at best – placed high up in the long, empty fuselage where they would offer questionable views to anyone using them, at night, when the aircraft usually operated. Luckily, DNModels faithfully duplicated all the various sizes in their set. Crazy. Note that some windows get painted over before applying decals.
Mating the halves
Once everything was masked and set, bringing the two fuselage halves together went smoother than I expected. I had to do some minor surgery and sanding to minimize the gaps around the main bulkheads. Even then I had to use a dozen clamps to hold things tight – the halves really wanted to spread apart. I ended up with only a small gap to fill just forward of the cockpit on top and forward of the bomb bay on the bottom. For a project of this size, I considered myself lucky – good job here, HKM.
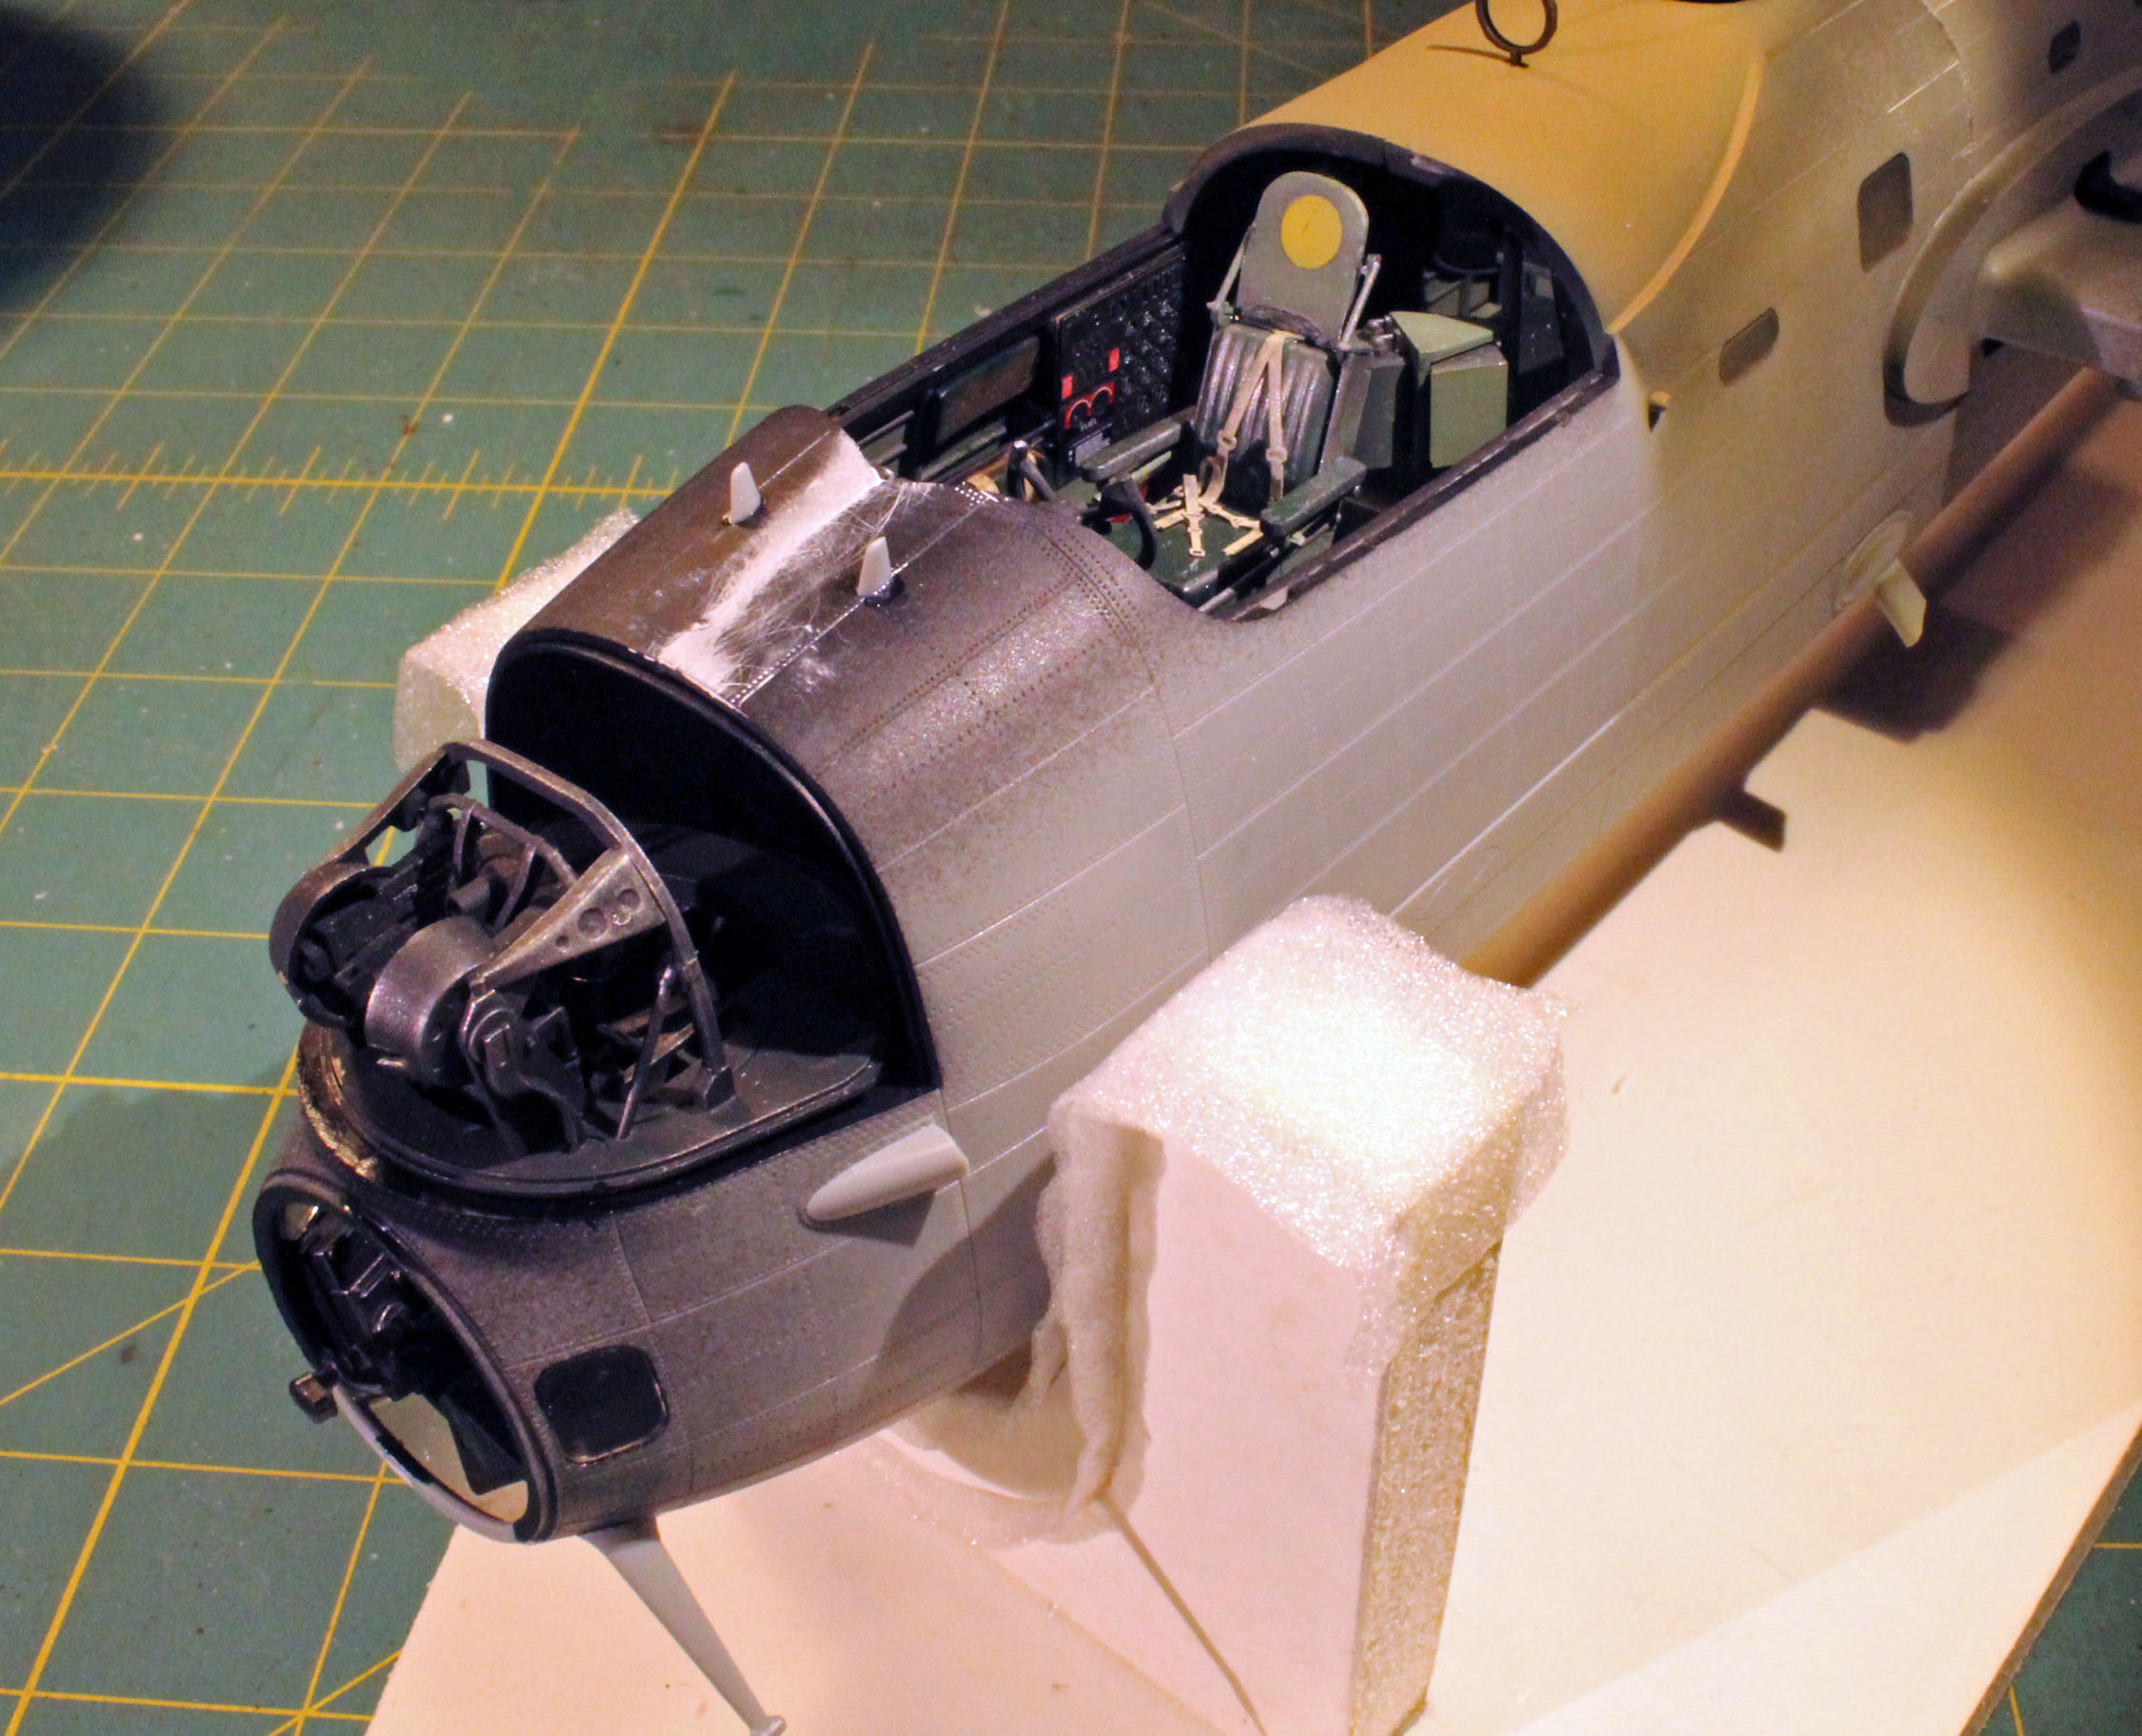
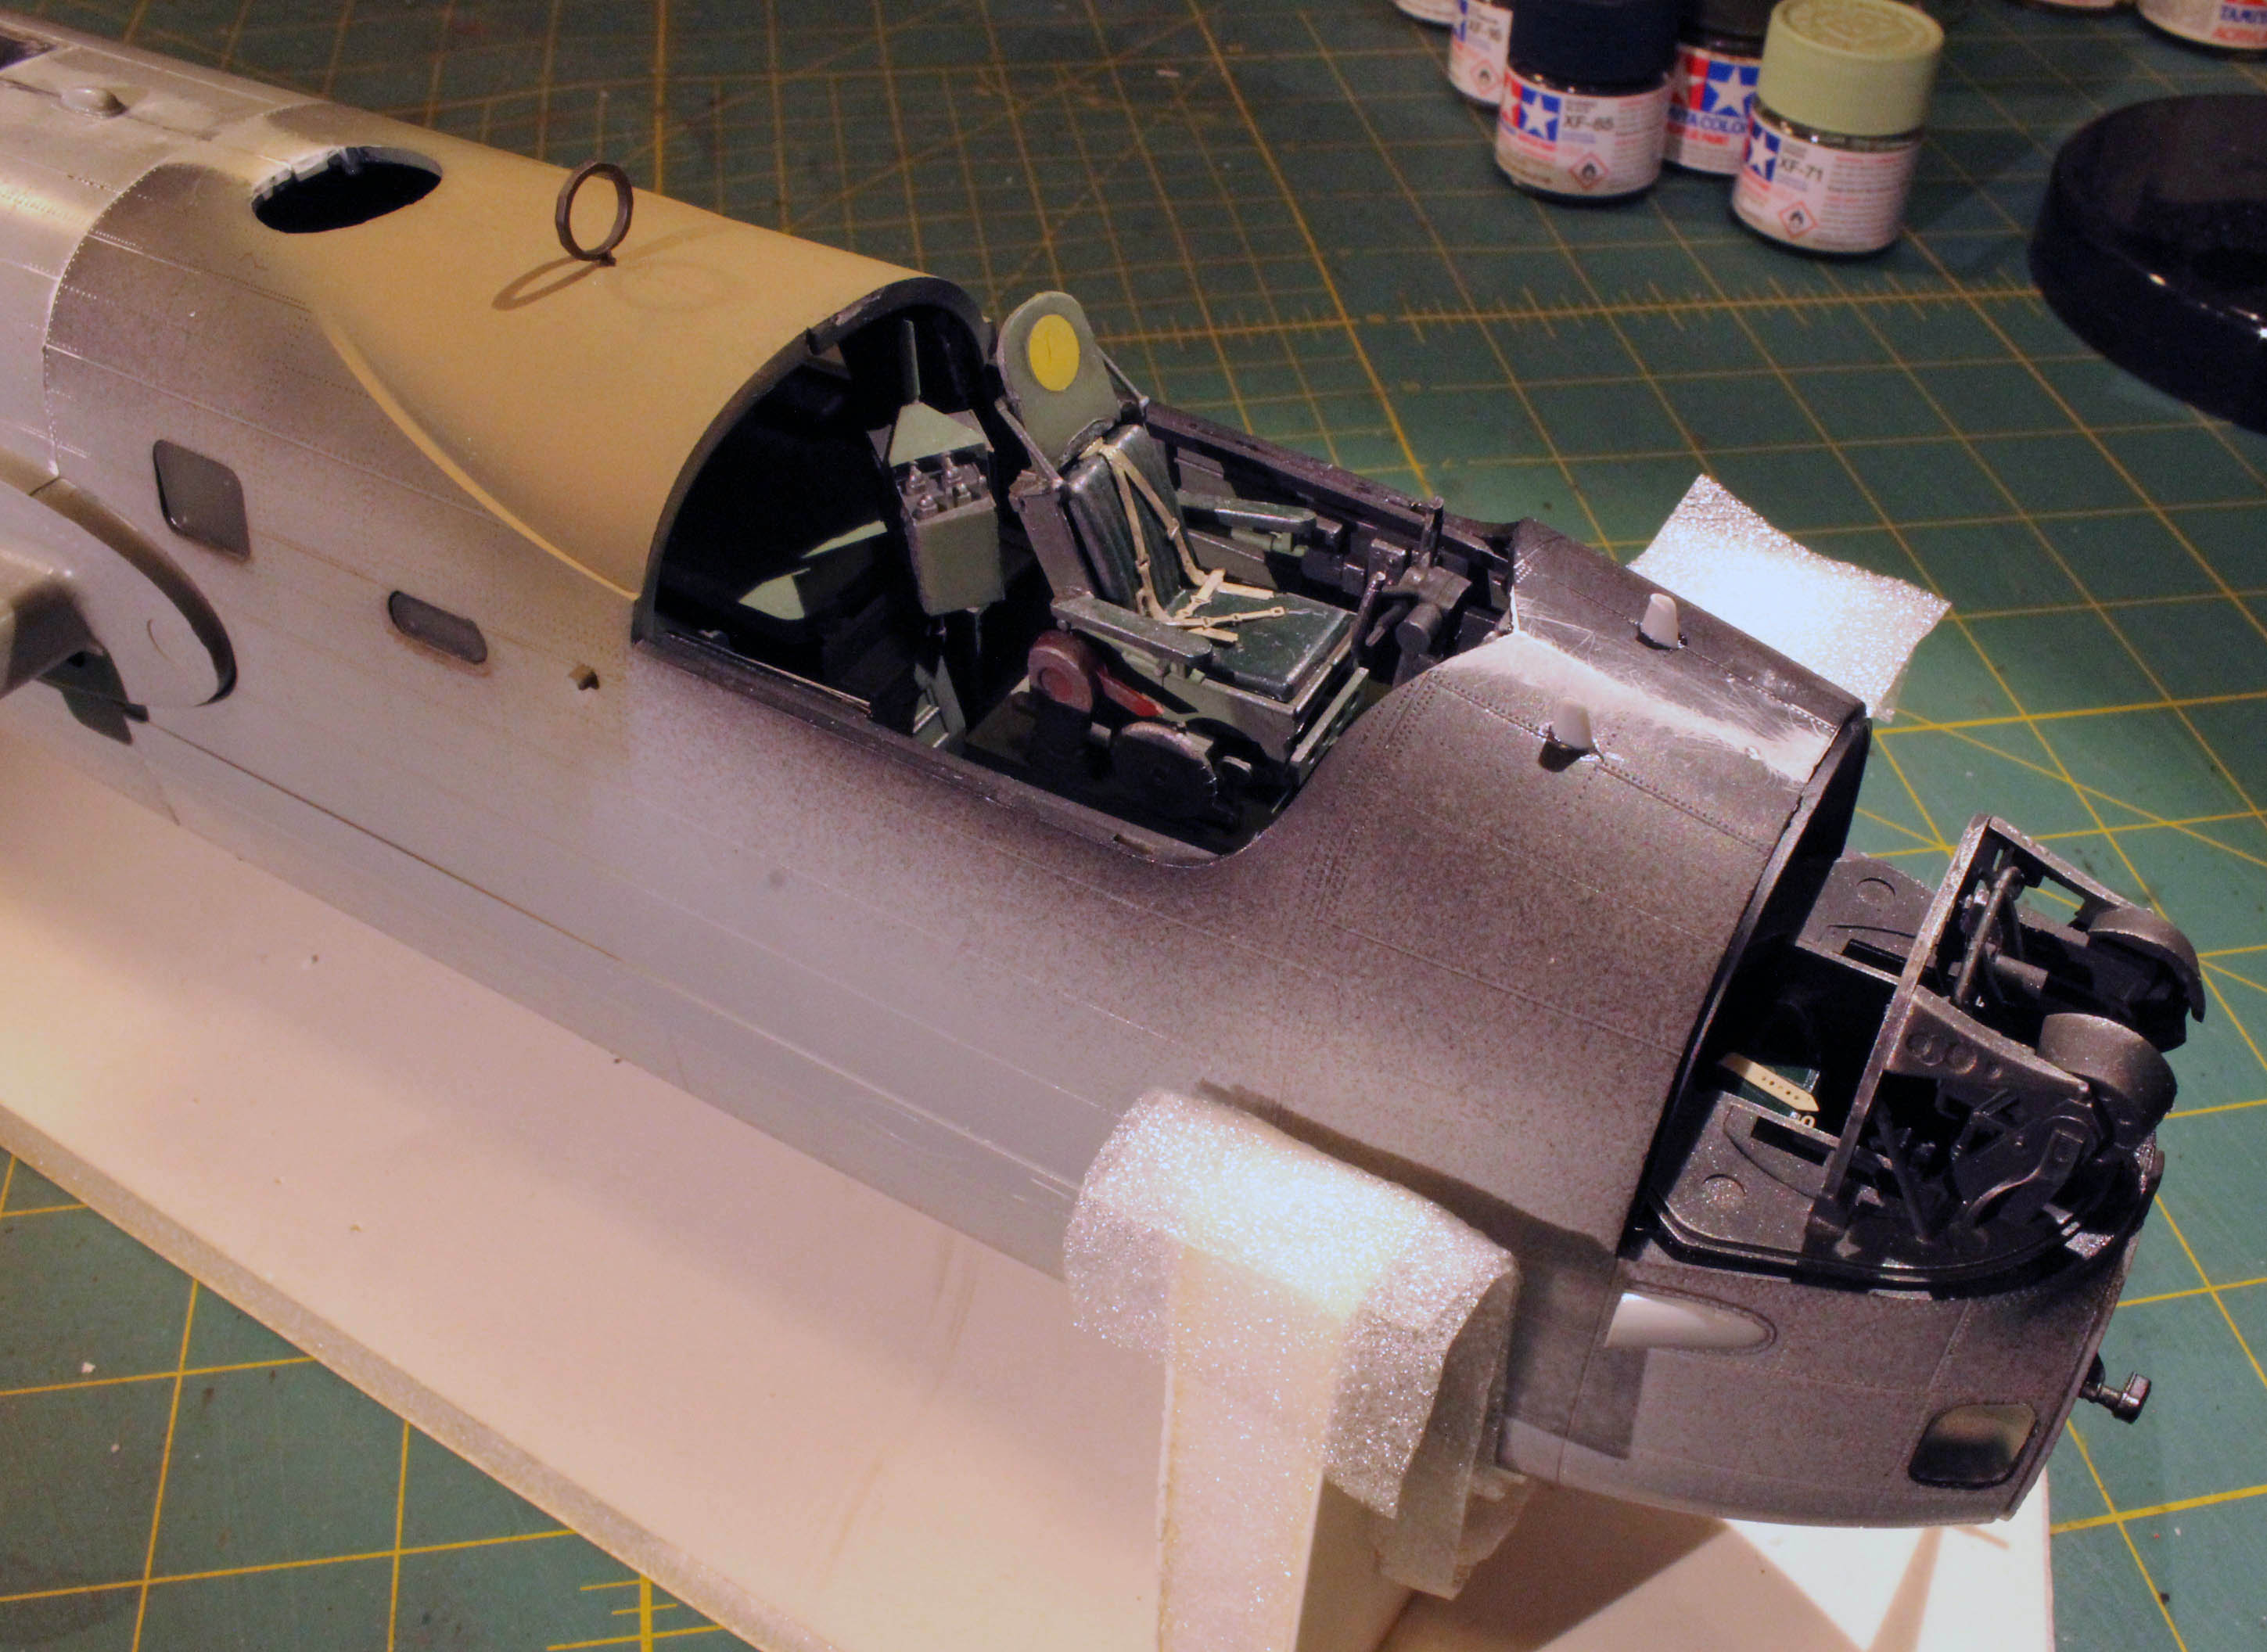
Once the halves were together, I went about adding all the accoutrement that adorns the outside of the fuselage, before masking up all the openings in preparation for painting so bits of dust and airbrushed paint would not make it into the interior to fog up all those windows! I would be attaching only the cockpit canopy before airbrushing, and that was only to protect the fragile pilot’s seat. Everything else, including the gun turrets, were left off until final assembly after painting.
I then sat back to look at my creation. The brutish front-end of this big guy was starting to look like a Lancaster. Very cool.
The Bomb Bay
HKM provides an option to close the cavernous bomb bay, or to leave the huge doors dropped down, exposing all the stores. The kit coms with twenty 1,000lb conventional bombs and a large cylindrical 4,000lb HC ‘Cookie’ bomb. If you choose to include the latter, you can only use eighteen of the bombs. Each of the stores attach via two male posts that fit snugly into female counterparts in the bay. That said, I had a lot of trouble keeping things in place. Bombs kept falling out of the bay during handling of the fuselage. Make sure to scrape away paint from the mating surfaces and perhaps open the female holes a little so there is more surface area for the glue.
I gave the stores a primer coat of NATO Black, followed by a base coat of Mission Models Olive Drab – Faded, and then highlighted the areas between detail with the same drab mixed with some Mission Models Yellow. Finally, I received a matching set of decal striping from a friend and used that to create the yellow stripes on the bombs. Once installed, I gave everything a filter using Mig Dark Wash (AKA Burnt Sienna).
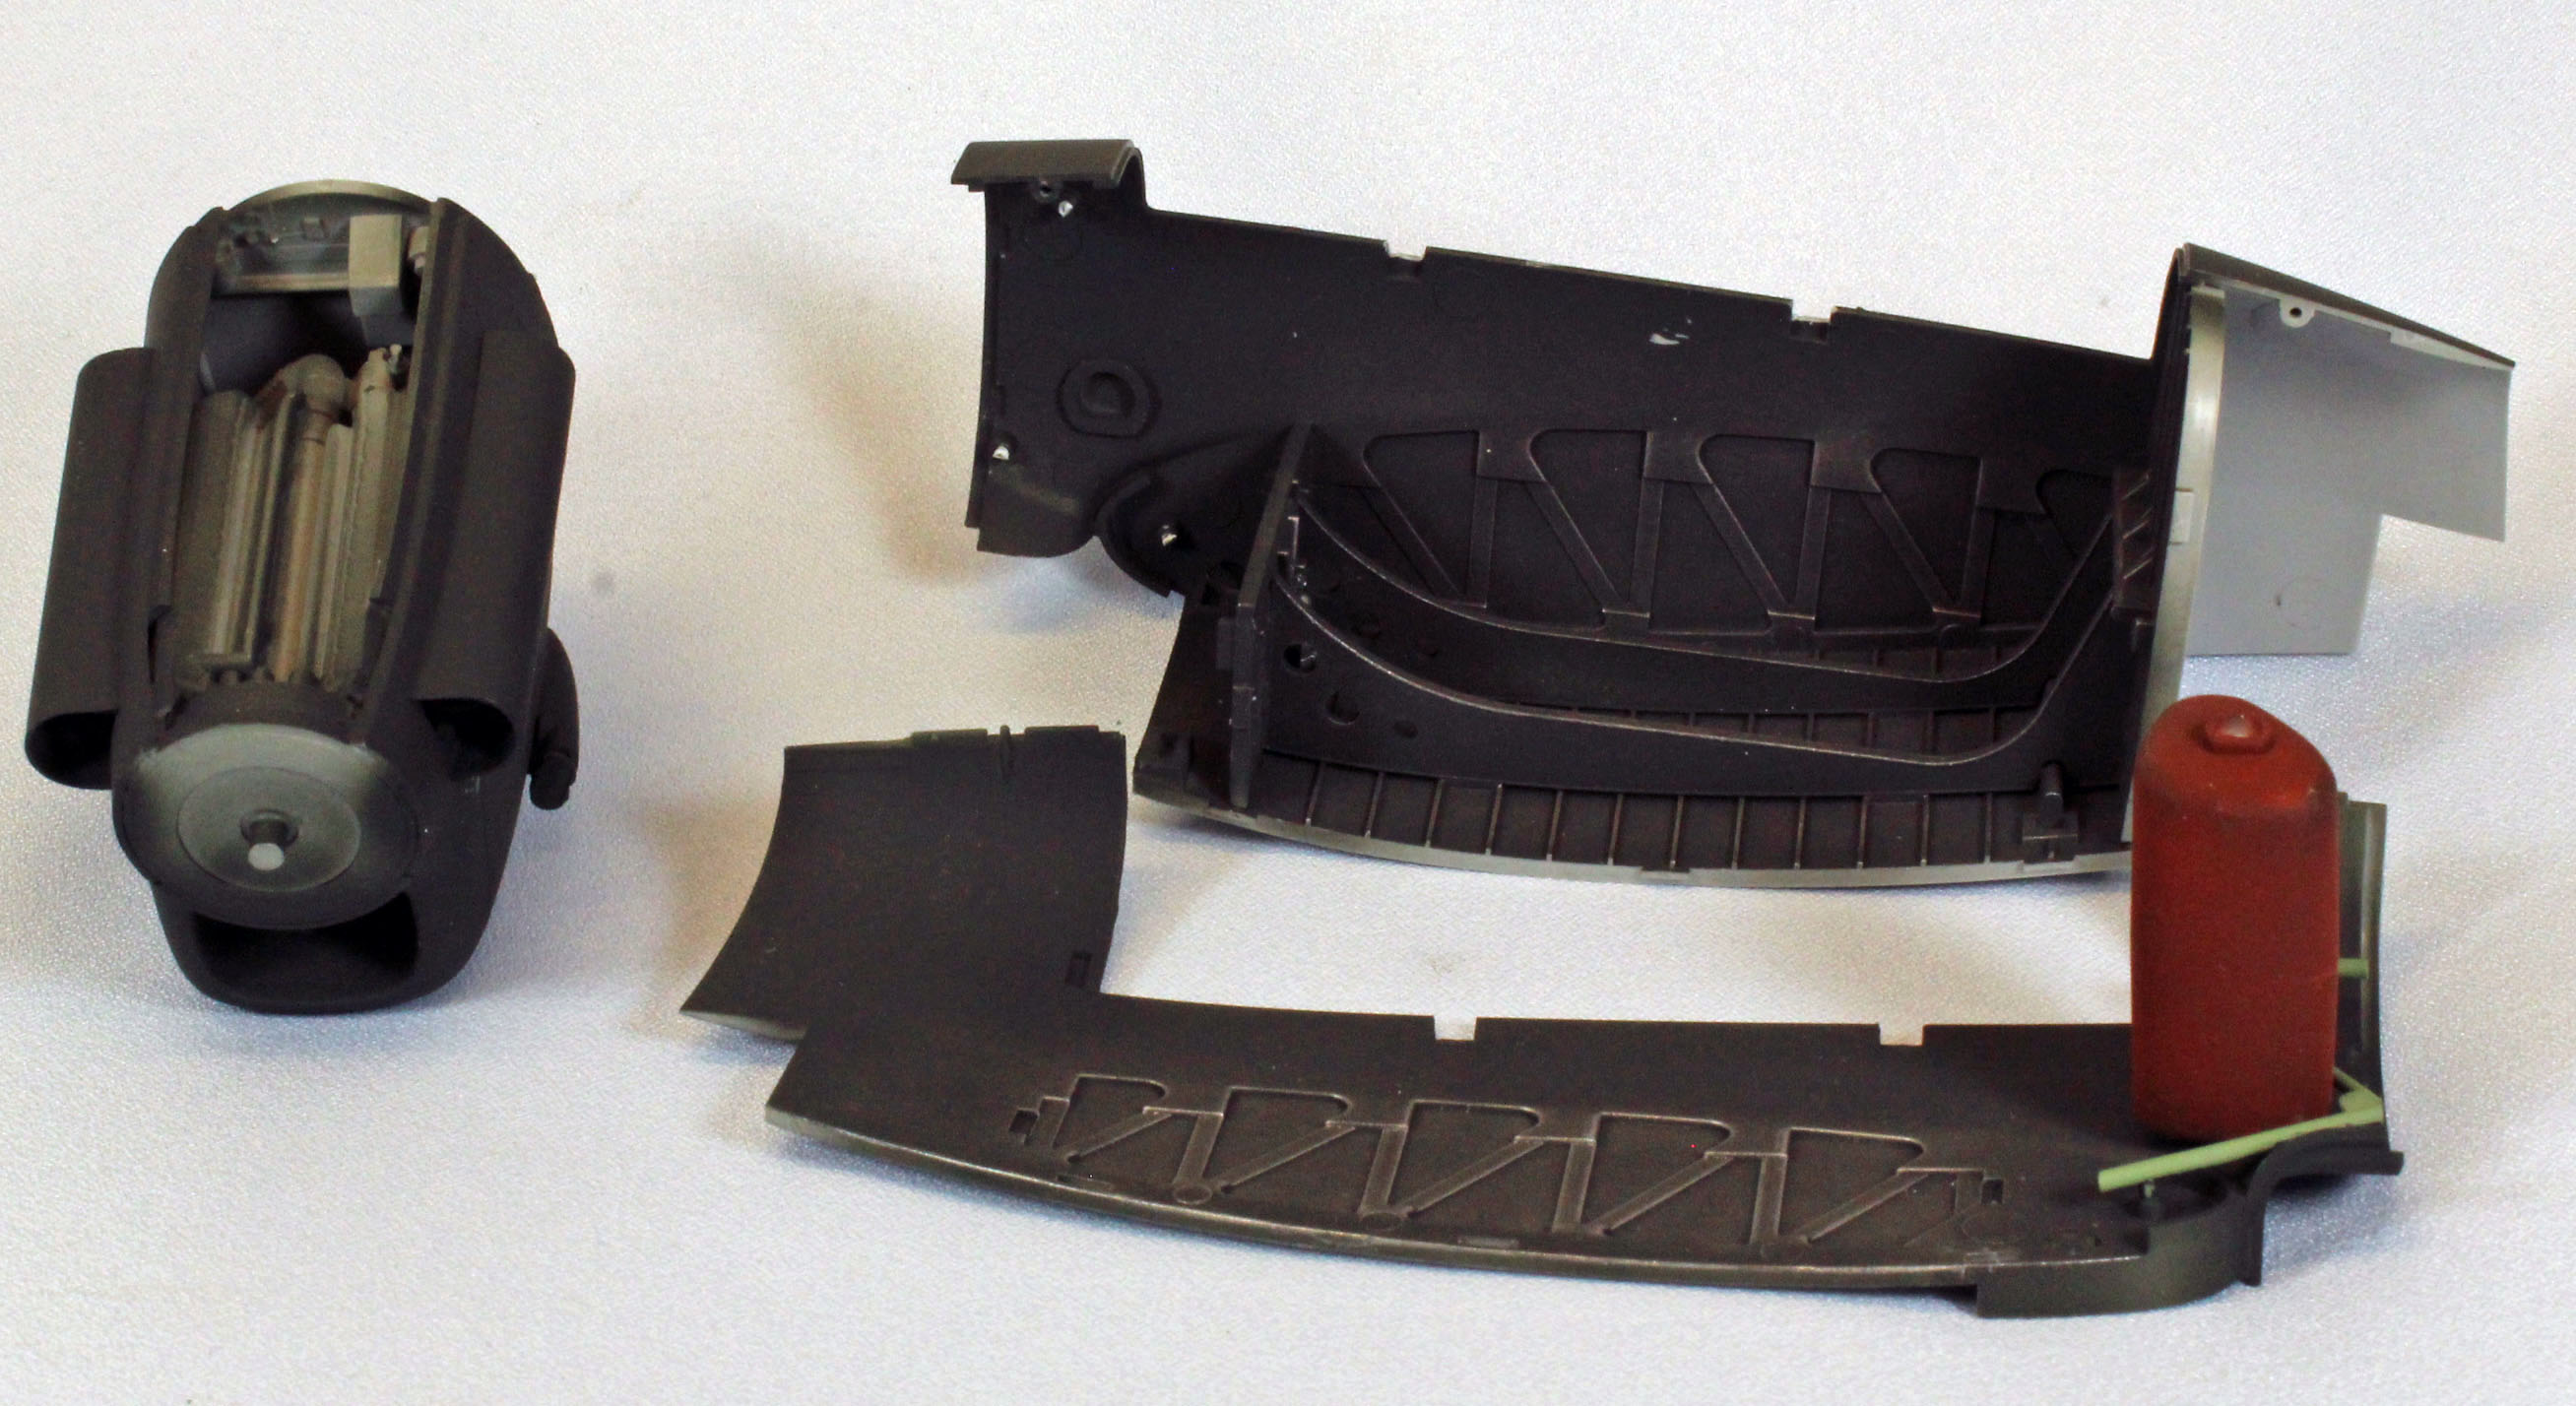
The Engines, Engine Nacelles, Landing Gear and Propellers
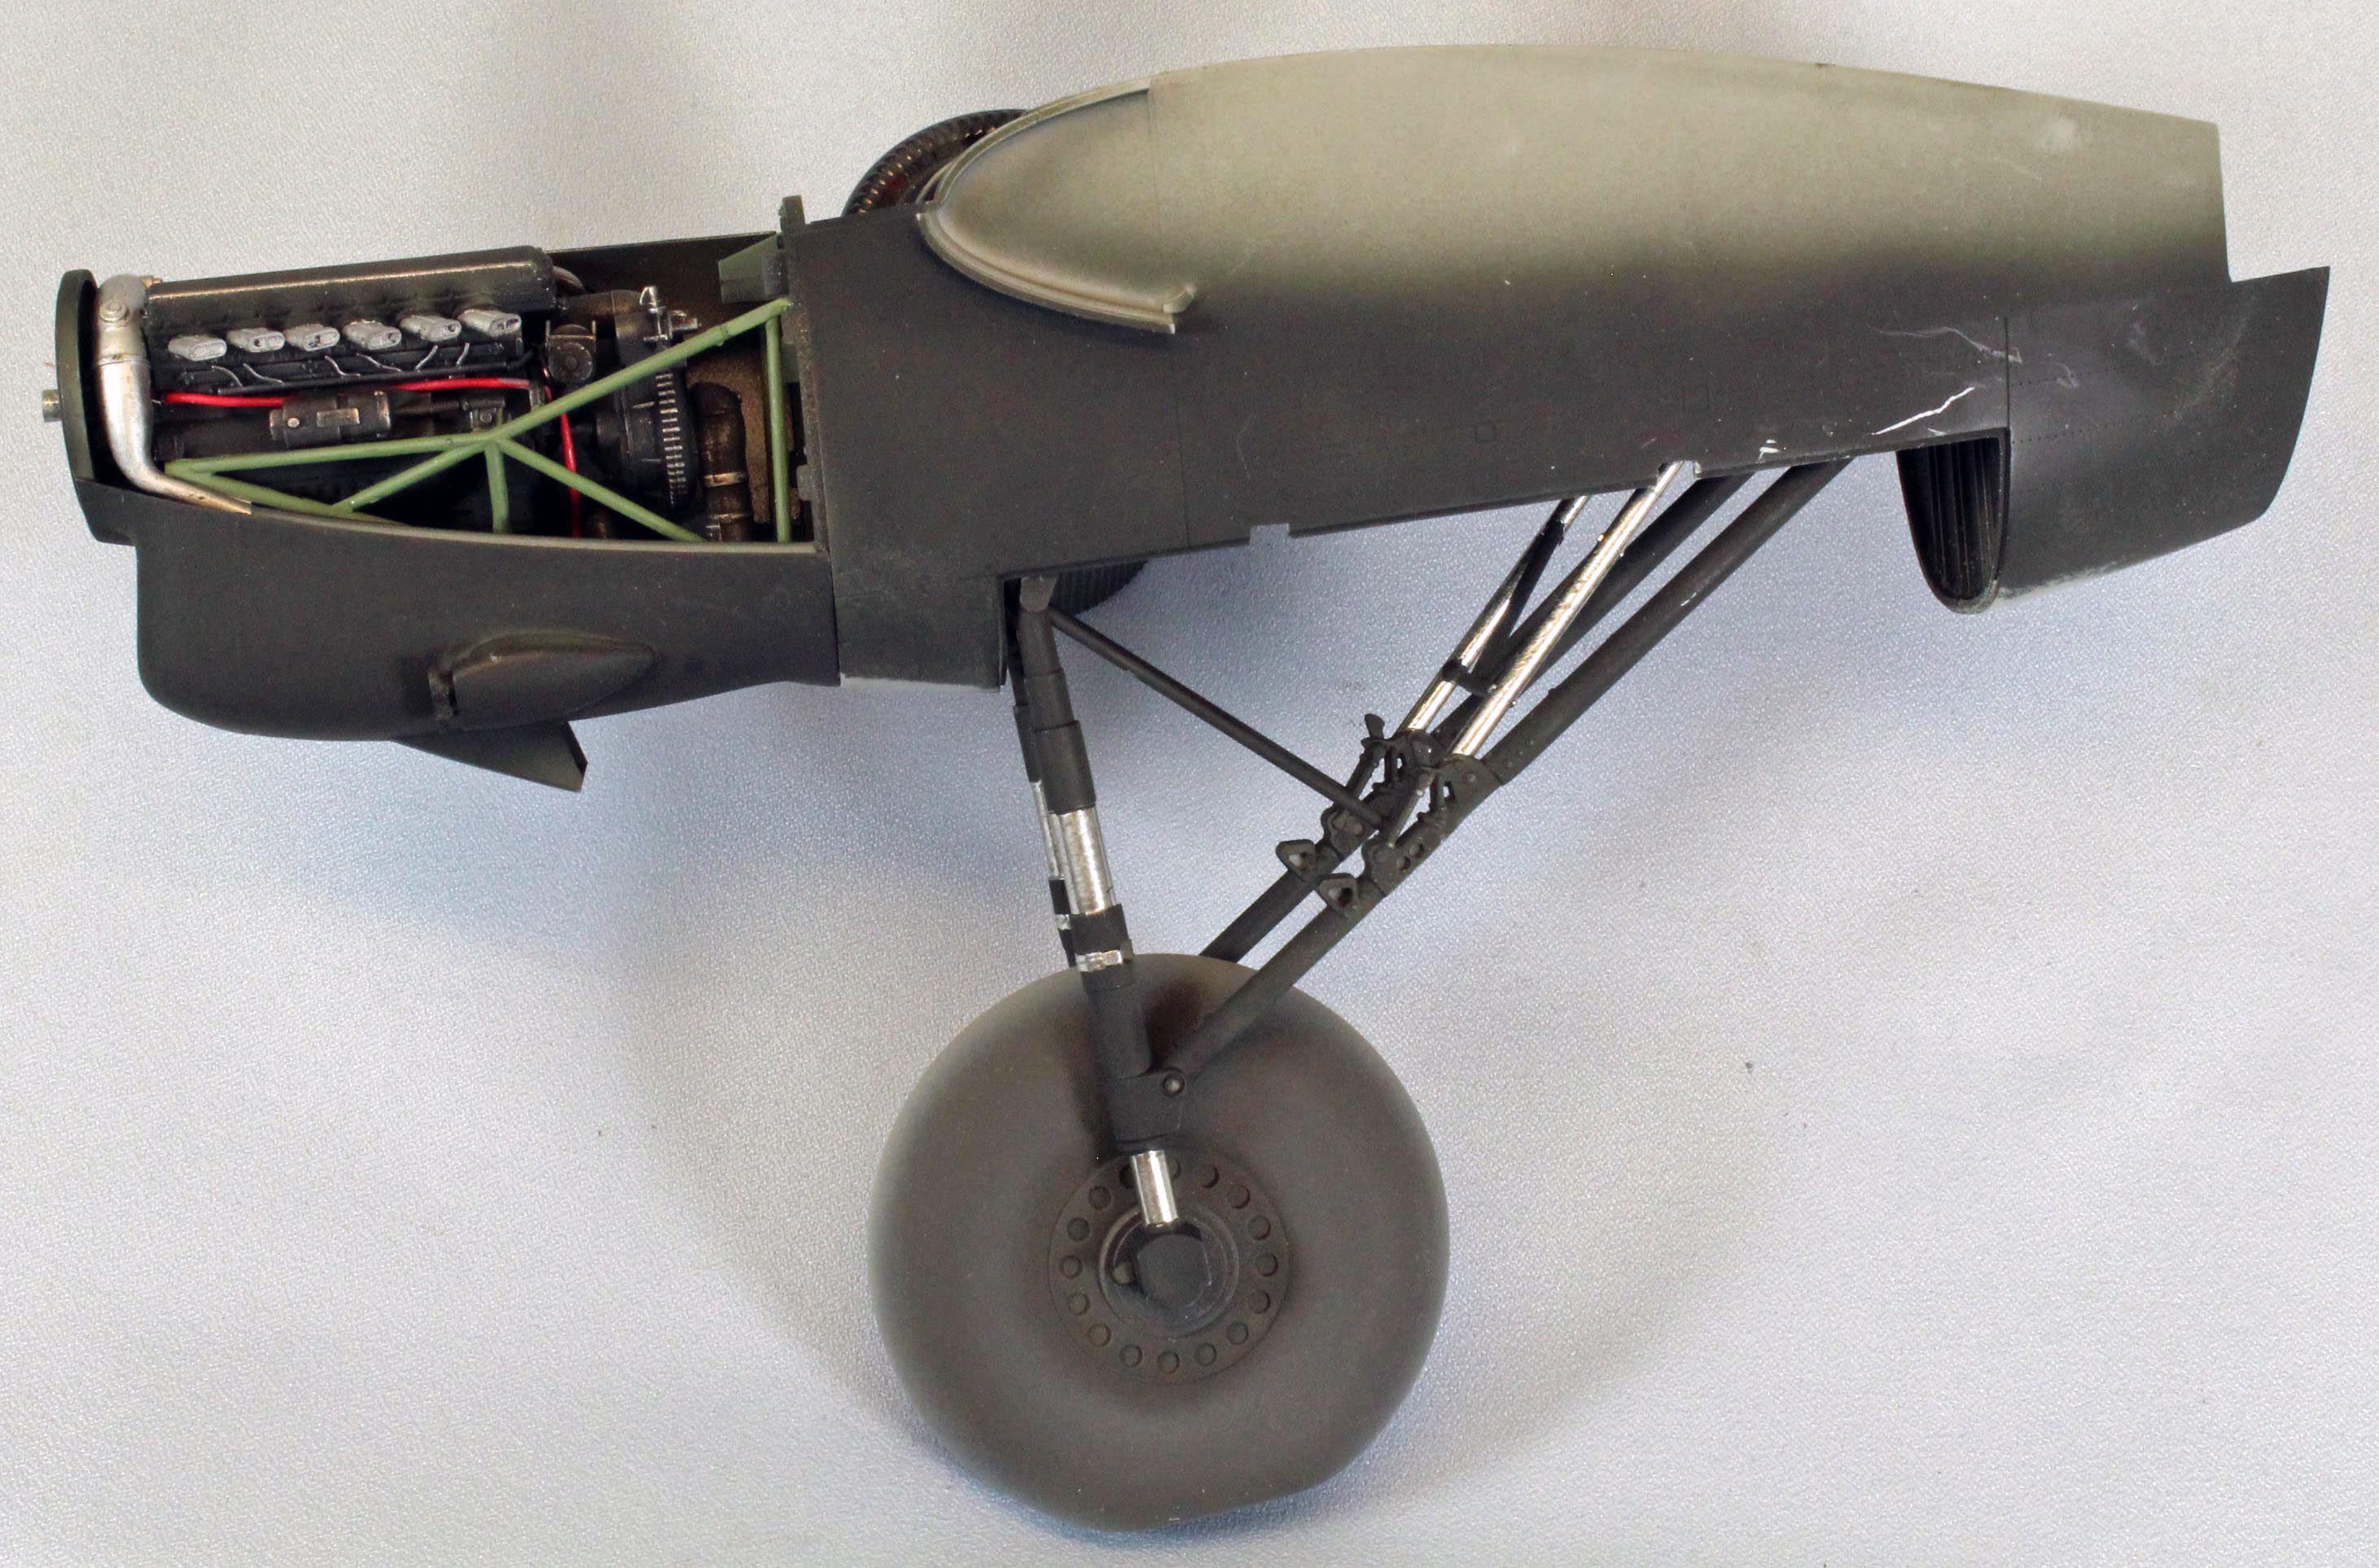
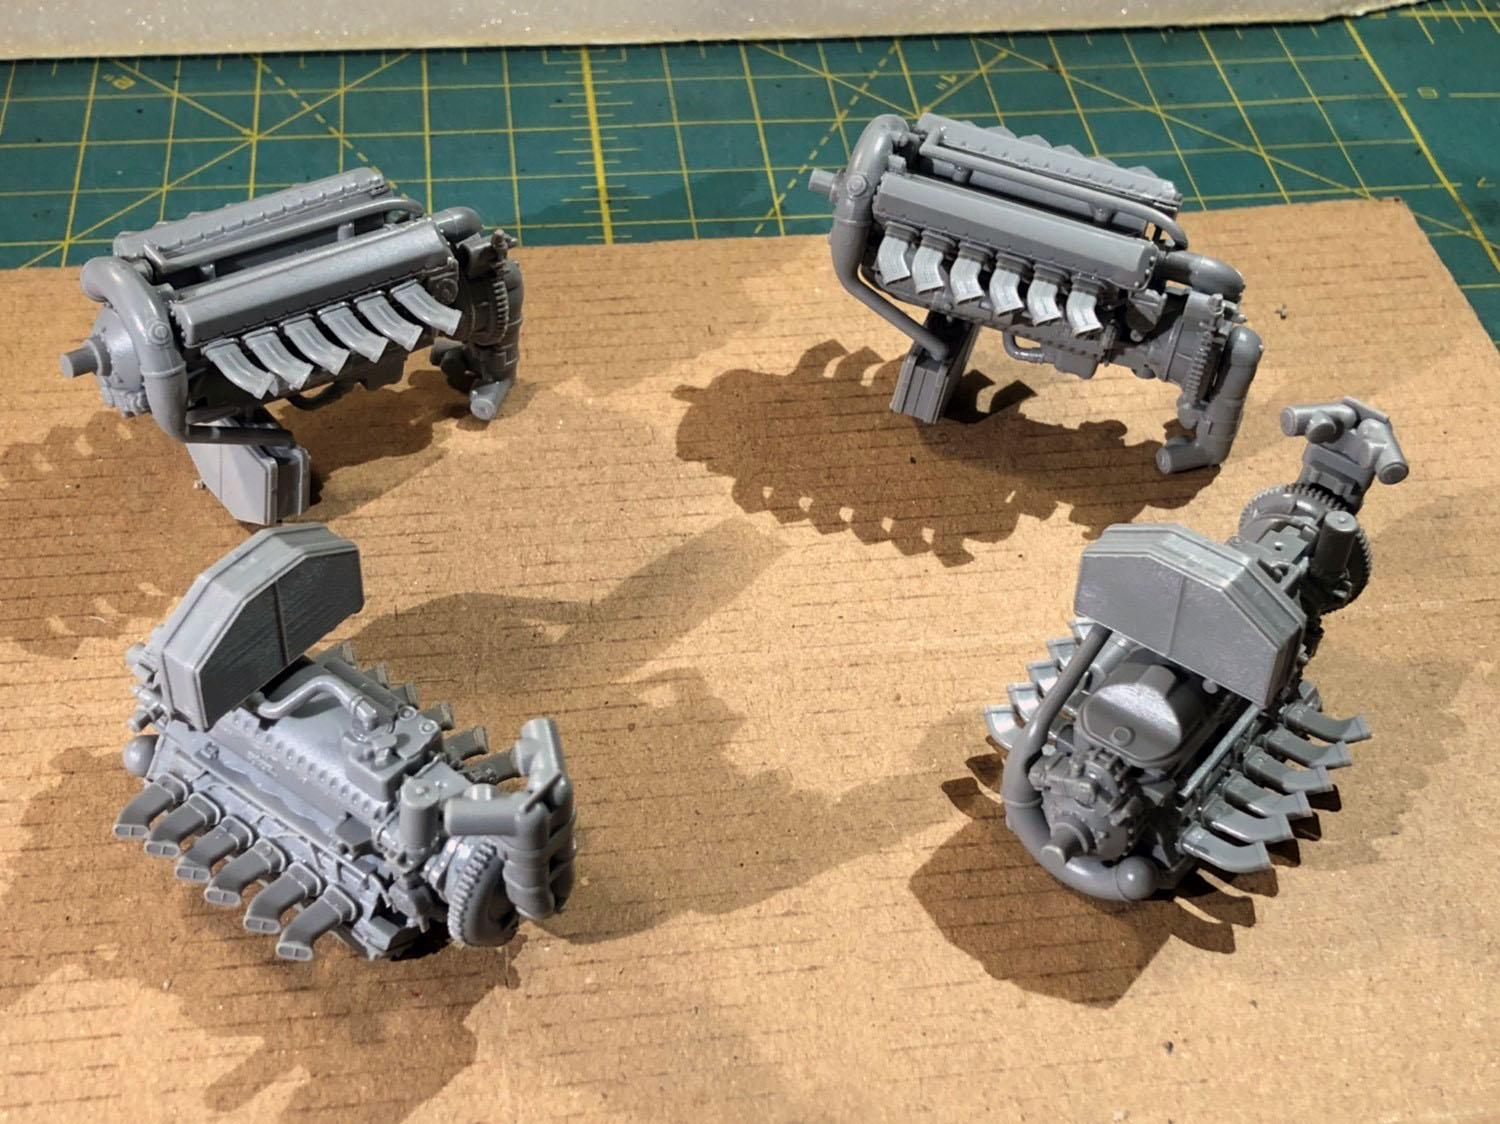
With the fuselage complete, I turned to the next task in the instructions – the engines, engine nacelles, and landing gear.. Regardless of where each engine assembly appears in the instructions, all four engines are identical, differing only with the structure that holds them in place in the inner and outer nacelles. If you choose not to expose the engines by leaving off the nacelle cover, almost everything will be completely out of sight, with only a tiny bit of the first, forward exhaust pipe visible behind the covers.
Throughout the kit, HKM has taken care to place sprue attachment points in places that make sense. One example is with the exhaust manifold of each engine. Extruding from each manifold of the engine are six exhaust pipes that are attached to the sprue by their (female) tabs. Doing the math – that’s 6x2x4 or 48 pipes that will not need any clean-up whatsoever. Thank you HKM! The ends of the pipes are slightly hollowed out, but some modelers may want to open these areas a little deeper. Once the covers are added, however, that work will disappear.
The engines and engine nacelles are stepped in the instructions for ease of assembly but not necessarily for painting. To ease things, I labeled each of the four nacelles with a specific color (Red, Blue, Green and Black) markers. I then used the same colors to make an ‘X’ where each nacelle would end up. This helped me keep track of all the parts, and of the engine I wanted to open up (as well as which engines (and related framing) I could fast-track).
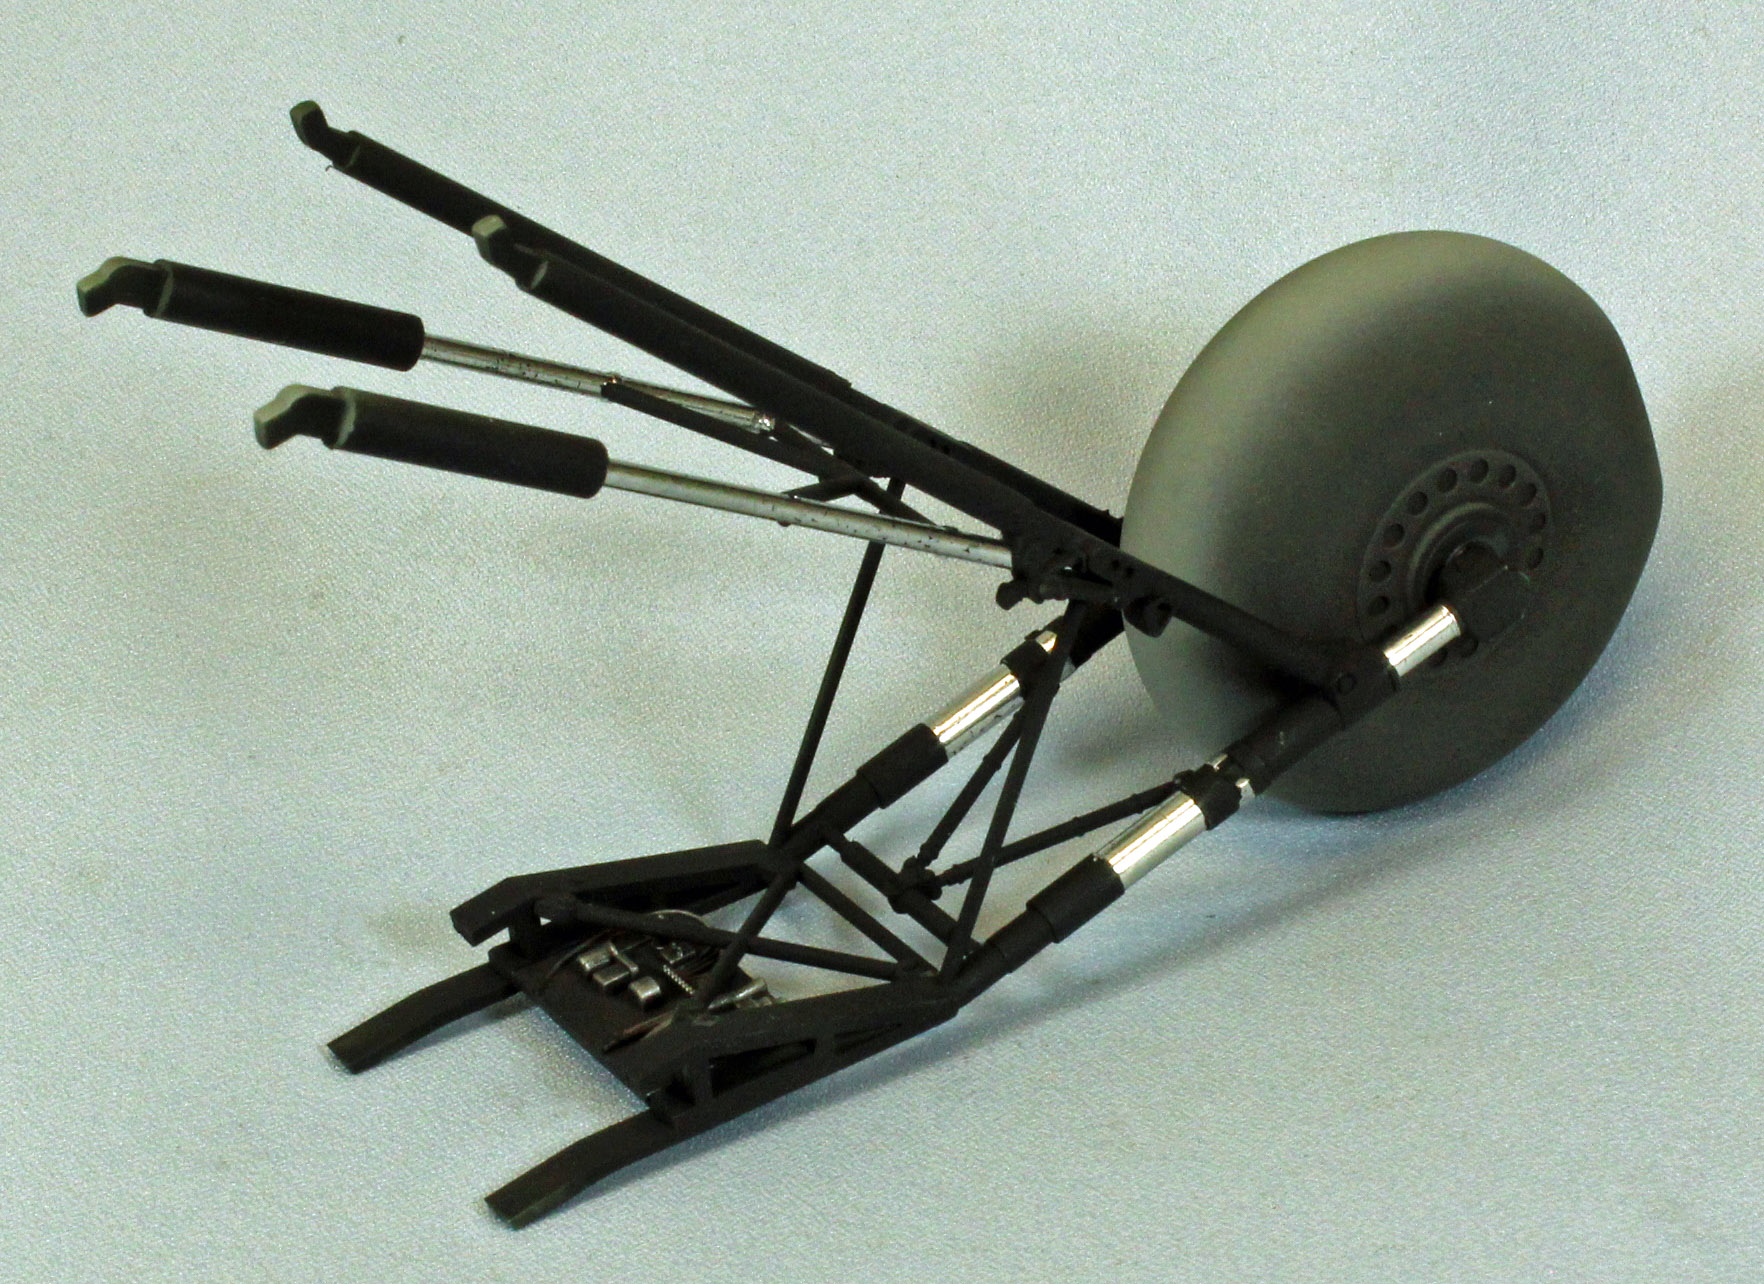
Two of the nacelles house the landing gear, if you choose that option, which are more robust assembled than they appear as parts. The only way to fit the struts into the base of the nacelle is to do so with the outer side of the nacelle off, attaching it only after the wheel/strut assembles are in-place and dry. This complicates painting a little, but these parts are so big that thy are easy to mask out of the away before the black paint is applied.
HKM provides two types of propellers, the flat-ended, paddle type and the round-tipped type. The latter are the proper type for this version of the aircraft. Each blade is separate, well-formed, and fits only one way under the hub, making assembly a snap.
The fit of all the parts was superb, including the complex looking framing that held each engine in place. The mating points are all well-defined and solid. The landing gear after assembly looks firm and sturdy – we’ll see how each of them hold up once this aircraft is sitting on its wheels!
The Wings
The wings of the HKM Lancaster are substantial, and a marvel of engineering. Each wing is a single (main) piece, solid in the front, and open in the back. The wing tips are also a single piece, hollowed out to fit over the main wing, as is an inner strip that attaches the wing to the fuselage by pushing on and sliding forward. Together, these three pieces form a solid, easy to build and clean wing that is removable for transportation and storage, although I had to sand the connecting parts a little to get them to slide easily.
The Lancaster has quite a few control surfaces, and HKM gives the builder a variety of options to pick from. All control surfaces can be built in open/closed, left/right configurations. While the control surfaces are movable, I suggest that you check your references for the proper placement and glue everything to hold fast. If you plan to detach the wings a lot (as I do), the fewer parts that move around, the better, in my opinion.
Prepping for paint
With everything completed, I kept the following parts/assembles separate for painting:
- Main fuselage with the main canopy and nose glass attached.
- Two wings, with the outer ailerons only.
- Four nacelles, two with gear, but no gear doors.
- Four gear door flaps.
- Four propellers.
- Two inner wing flaps in the ‘down’ position.
- Three turrets with careful masking applied.
- Bomb bay doors.
- Horizontal and vertical tail surfaces, separated (three pieces).
Conclusion
I am well into this project now and one thing I have learned is that this kit is pretty simple to build, and mistakes are easy to spot and fix. HKM has put a lot of effort into making sure the parts fit, and if they don’t, there is a good chance that you’ve got something wrong. I only had a few fit problems, and these were easy to remedy.
The sheer size of the model, and the brutish, masculine lines of the Lancaster beats any problems I’ve encountered. This will be one great looking aircraft in my model case, and HKM has done a superb job getting me there. As I said in Part 1 of this review, this has been a thoroughly enjoyable modeling experience.
I recommend this kit to all modelers who are up to the small challenges that a kit with so many parts and options will offer. I suggest that you make your big decisions up front, spend the time to carefully clean the parts thoroughly once separated from the sprues, and dry-fit everything. Slow down, use your references, and enjoy the ride!
First segment: Internal fuselage and wing structure, cockpit, engine and front end. Second segment: (this one): Wing, gun bays, wheel wells, fuselage and tail. Last Segment: Final assembly and finish.
I would like to thank HK Models for providing this kit for review, and to IPMS USA for giving me the opportunity to review it.