
Reviews
Armor
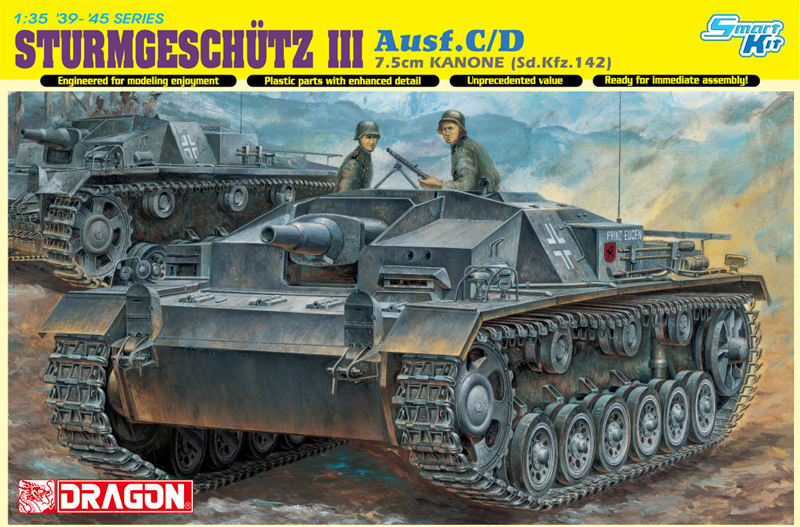
142 Sturmgeschütz III Ausf. C/D
by Eric Christianson
 Model: 142 Sturmgeschütz III Ausf. C/D
Reviewed by: Eric Christianson, IPMS # 42218
Scale: 1/35
Company: Dragon Models
Price: $63.79
Product/Stock #: 06851
Website: Dragon Models
Product Web Page: View
Product provided by: Dragon Models
Dragon Models offers a complete lineup of the Sd.Kfz.142 Sturmgeschütz family tree in 1/35 scale. The subject of this review is the Sd.Kfz. 142 III Ausf, C/D, an upgraded offering from their ‘Smart Kit’ series.
The ‘Sd.Kfz.’ in the name, short for ‘Sonderkraftfahrzeug’, identifies the vehicle as a ‘special purpose vehicle’, and the Sturmgeschütz (StuG) was Germany's most-produced armored fighting vehicle during World War II.
The StuG was built on the chassis of the proven Panzer III tank, replacing the turret with a fixed superstructure mounting a more powerful gun. Initially intended as a mobile, armored light gun for direct-fire support for infantry, the StuG III was continually modified, and widely employed as an assault gun as well as a tank destroyer.
The Sturmgeschütz originated from German experiences in World War I when it was discovered that, during the offensives on the Western Front, the infantry lacked the means to effectively engage fortifications. The artillery of the time was heavy and not mobile enough to keep up with the advancing infantry to destroy bunkers, pillboxes, and other minor fortifications with direct fire. Although the problem was well known in the German army, it was General Erich von Manstein who proposed Sturmartillerie units be created and used in a direct-fire support role for infantry divisions.
Overall, the Sturmgeschütz III series proved very successful and served on all fronts of the war. Because of their low silhouette, the StuG III was easy to camouflage and made for a difficult target. As of 10 April 1945, there were still 1,053 StuG IIIs and 277 StuH 42s in service.
Opening the box
All of Dragon’s StuG’s come with enough parts to completely fill a sturdy box and then some. There are extra parts on nearly every sprue for your spares box, including pioneer tools, antenna, bolted armor, fire extinguishers, tow ropes, road lights, etc, etc..
The contents of the box include:
- Lower hull, packaged separately.
- 17 sprues in soft, light grey plastic, packaged separately.
- 1 clear plastic sprue
- 1 photo-etch sheet, including engine exhaust mesh
- 2 runs of yellow-tan DS track
- 1 small sprue of DS Crew Clothing (Boots, blouse, jacket)
- 1 8-page blue and white instruction sheet with 19 steps
The kit comes with three color schemes represented (all German Grey), using blue-and-white ink three-view drawings; and a small (but perfectly registered) sheet of decals from Cartograph of Italy. All three schemes represent the following unit: StuG.Abt. 177, Russia 1941.
The Instructions
This is a ‘fortified re-box’, containing sprues from several different Dragon kits, which sometimes leads to inaccuracies in the instructions. The issues are minor, however, and have been noted below. Dragon has thoughtfully provided nice overhead views of several of the assemblies in addition to the standard angled images to assist the modeler with parts placement. Assembly sequence varies by modeler but the general flow of things go pretty much as Dragon intended. The exceptions I made are identified in the text below.
Things to consider before starting:
The StuG is a pretty straight-forward build. Chassis, fenders, main deck, gun, hatches – nothing unusual. The absence of a turret simplifies things somewhat, but there is enough detail in the fighting compartment to provide a challenge regardless. Dragon provides more interior that I had expected, so if you plan to leave hatches open, you will need finish what’s inside to boot.
Some up-front time should be spent wading through a number of build options offered by Dragon to smooth the assembly and painting process. The area beneath the fenders is un-obstructed so the DS track can be attached at the end of the build without any problems. You can build the entire vehicle before painting, with the only exceptions being the interior visible under open hatches.
One annoyance – in various places in the instructions you are told to remove plastic from areas that (apparently) were not accurate for the version. Later on, however, as you attach parts, you will be looking for just the kind of plastic ‘male’ stumps that you had previously removed. I suggest that you leave the protrusions on until you’re sure you won’t need them.
The Build
The Lower Chassis, Running Gear and Rear Hull
The assembly of the lower chassis went together relatively well. In Step 2, the instructions reference six axles (Part A1) for the port side of the chassis. What they don’t mention is anything about the other side, which takes six axles with a different Part number (Part A2). It matters, since the slot at the outside end of the axles will dictate the angle of each suspension arm.
While Steps 1-3 are pretty busy, the fit of everything is flawless. The wheels have that great ‘chunk’ feel as they go on, making lining everything up a snap. Dragon provides two-part photoetch inserts (MA3) between the return rollers that are a little too fiddley for me so I left them out. These are provided as single PE parts in other Dragon Mk III kits, so I don’t quite understand the upgrade here.
In Step 4 there is a centrically located assembly that appears in the image superimposed on Part V29. Don’t bother looking for it in the box – the image is from some other kit. The exact placement of the PE shield (MA4) can be seen in other images in the instructions and/or online. It has to fit over an assembly being added in the next Step (5).
Speaking of which, the (V41) assembly that slips under the PE shield is itself a little fiddley. I suggest using slow drying glue – place the larger pieces first and the correct placement of the smaller ones will become apparent.
The Fenders, Upper Hull Interior and Rear Deck
Steps 7 and 8 bring the busy fenders together. On this early version of the StuG, the jack block (Part D2) is buried underneath a utility box and stand (Parts D14/D19), so I attached the utility box after painting and weathering, allowing me access to the block for painting.
Likewise, I waited to attach the barrel reamer (Part C12) so I could see exactly where it would sit once the fenders were attached in Step 18.
The jack itself is comprised of eleven parts – do yourself a favor and glue the bottoms of the two brackets (Parts G54/G56) to the fender, and then the rest of the jack to those two parts.
If you choose to leave the hatches open, you will find that Dragon has provided a wealth of visible detail inside. Against the rear of the upper fighting compartment, you hang two submachine guns, one on each side of a double set of radios. To the side of that, the StuG has a pannier on the side of the hull that holds an additional radio set in a neat little bracket that snugs into place.
Up front, the commander’s periscope can be installed in a lowered ‘stowed’ or protruding ‘combat’ position. Like all Dragon Mk. III’s, the rear deck is littered with hatches and engine access panels that can be modeled either open or closed, although no detail is provided underneath.
The Main Weapon and Lower Hull Interior
I was surprised at the amount of detail Dragon chose to stuff into the diminutive little StuG interior. Once I installed the (perfectly fitting) 7.5cm gun assembly in place among all the other assorted machinery, I was amazed how little room there was left for the crew!
Take care in Step 16 – study the three images as a set, since placement of the various subassemblies here is vague at best. Doing something wrong here may have led to a fit problem I encountered in Step 18.
Dragon has you shorten the one-piece barrel by cutting a piece out of it, specifying the proper length in millimeters. I don’t know about you, but there is no way in the world that my various rulers and spanners, not to mention my old eyes, can work at that level. It would be better if Dragon simply included a 1:1 size image of the barrel, with an arrow stating ‘Cut Here’.
The Track
The two runs of DS track in this kit are very, very thin and beautifully detailed. Tamiya ‘green top’ thin cement works well for attaching the ends, and after waiting a few hours I easily attached them over the wheels and sprockets. I really like DS track - they look great and accept any and all type of paint, although it might be prudent to first put on a coat of primer. Unfortunately, Dragon did not leave enough slack in the DS track to adequately reproduce the sag common to the Mk. III, so it looks pretty tight once installed. (With a little slack, I have found on other builds using DS track that I could use glue to attach it to certain parts of the wheels and return rollers, thereby forcing a very realistic track-sag.)
Bringing it All Together
The final two Steps bring the fenders, main hull, front and rear decks, and chassis together, before installing the track. The order this is done is important for the best results; Install the interior fighting compartment section, then the front and rear decks, then the left and right fenders, finishing with the upper superstructure.
This Step is where I ran into the only fit problem I had with the build. The interior fighting compartment is inserted as a single piece, and relies on four, small male/female connections that are not visible when set in place. I could not get the section to seat correctly – whether this was due to missing these connection points, or some misalignment from a previous step, I don’t know. I resolved the issue with a little surgery here and there until everything seated correctly.
The final step is to attach the antenna rail with three very delicate PE parts. Unfortunately, Dragon does not provide any plastic alternative parts for this tricky job.
Painting and Finish
The early-war Sturmgeschütz comes in two colors; Early war German Grey and German Yellow over German Grey (as a desert scheme). With several other Stugs in my collection, I decided to stick with one of the overall grey schemes. My challenge was to break up the monotone finish so that the model would still be interesting to look at.
I painted the antenna, track and a small storage box separately, and attached them after painting the rest of the vehicle, but before weathering. Otherwise, the kit can be completely assembled before painting. I decided to paint the little Stug using a new line of acrylic paint called Mission Models Paint (MMP). This new paint is pretty amazing – I have yet to experience any clogging whatsoever when I use the following mixing ratio: Six parts MMP paint + four parts MMP thinner, with the thinner made up of ten parts thinner to one part retarder (that goes by the catchy name of MMP Polyurethane Mix Additive). I sprayed this paint at about 12lbs for detail work and up to 20lbs for coverage.
Primer and Pre-Shade
I started by applying a primer coat using Krylon Color Master with Durable ColorMax Technology rattlecan (Flat Black) enamel paint. This is the third rattlecan primer I’ve tried, and I’m glad I kept going because this stuff is a superior product, drying super thin and very tough - not to mention cheap and quick.
Once the enamel had a chance to de-gas overnight, I toned down the ‘very black’ wheels with (MMP035) NATO Black. I waited 20 minutes and then shot the lower chassis with hairspray to make it easier to clean up any overspray later.
The primer/pre-shade coat gives the plastic and PE some grip for the following coats, and fills in the recesses, creating a shadow effect near the flat surface edges. This will add depth for the subsequent coats to come.
I let that dry and then laid down a base coat of (MMP014) Panzergrau RAL 7021, working from the center of each panel outwards, leaving some of the darker shades to show through around the edges. This paint was very dark out of the bottle, with a deep bluish-purple tone to it.
The MMP paint is opaque but can be sprayed in such a way to let the color underneath affect the final tone and depth. Keep the pressure around 12lbs and you’ll have the control you need.
I then mixed up a batch of post-shade color using (MMP045) British Slate Grey and sprayed that for about 20 minutes. I thinned this much more, using 15 drops of the Thinner Mix and just four drops of paint. This thinner concoction works more like traditional acrylics, absorbing into the background paint until the color builds up slowly, with one major difference – it just doesn’t clog or dry at the tip. Did I mention these are acrylics?
I waited about 10 minutes and laid down my final post-shade coat of RLM-76 using just 2 drops (!) of paint and 8 drops of Thinner Mix since I didn’t need very much to do the job.
Decals
I waited about two hours and then applied the decals. These are the plain white, early-war, Balkenkreuz outline-crosses without fill – a perfect test to see if these paints do indeed allow you to skip the ‘gloss coat’ prior to decaling.
My results were mixed – some of the decals showed no signs of silvering, but both crosses ‘silvered up’, unfortunately. Until I figure what I did wrong, I will continue to lay down a gloss coat under and over decals.
Painting and Finishing the Track
I painted the bright yellow/tan DS tracks with rattle-can Rustoleum Flat Black Primer (enamel). Rattlecan paint is just about the only paint that will cover DS track initially, in my opinion. I could have used model paint and my airbrush but that just takes too much paint and too much time. I really wish these DS tracks came in a different, darker color.
Once the primer was dry and did not exhibit any more ‘tack’, I applied AK Interactive Track Wash with a brush to give the track an overall look of wear. I then applied Gamblin Silver Artist Oil Color to the tread plates and outer edges using my finger. Once satisfied, I added various earth-tone Vallejo Thick Mud products (European Mud, Brown Mud, Crushed Grass) to both sides of the track and lower chasses of the AFV, and dusted Mig pigments here and there to break up things up a little more. I waited until after I sprayed a Glosscoat before attaching the track to the tank.
On-Board Tools
Before sealing the decals with a gloss coat, I painted the wooden portions of some of the pioneer tools with Vallejo Model Color (70.955) Flat Flesh, others with Panzer Aces New Wood (311). I painted all the steel parts Vallejo Model Color (70.865) Oily Steel. For hand-brushing Vallejo paints I mix a tiny bit of Vallejo Slow Dry and water with each color until it flows smoothly off a red sable brush.
Filters
With the flat coat still on the model, I applied several filters to enhance the monotone areas of the vehicle. I heavily thin all of my washes and filters with Mona Lisa Paint Thinner. This odorless white spirit is very mild and will not react with the paint underneath.
I applied an overall filter of AK Interactive Brown Blue for German Grey Vehicles to the fenders, and a filter of Mig Black over the jack and air intakes.
Now that painting was complete, and the surface had received filters, I gave the model a good coat of Future to set everything up for washes and streaking.
Washes and Streaking
Once the Future was dry, I returned to the pioneer tools and other deck mounted hardware. To give the wooden parts of the tools more depth, I brushed on a little Mig Wash Brown oil paint straight from the tube and let that set overnight. Don’t let this paint leach out its oil beforehand like you would when you are using oils for dry-brushing - the oil helps it stay workable. In the morning I carefully removed most of the oil paint using a brush dampened with Mona Lisa Paint Thinner, leaving the areas near the latches and metal parts darker than the center of the wooden shafts. The brown oil paint stays workable due to the linseed oil and the fact that it was brushed on a glossy, acrylic surface. I then let a little black wash puddle up on the horizontal surfaces of the metal axe and shovel heads. When dry, I think this gives them a convincing look of used steel.
I then mixed up an overall pin-wash using a 10:2 ratio of Mona Lisa thinner to AK Interactive Brown Blue for German Grey Vehicles. I focused on the wheels and panel lines, as well as the busy back end. I find this mixture perfect when applied to a glossy surface – the detail pops and the wash leaves no smudges. Next, I used full-strength AK Interactive Streaking Grime for Panzer Grey to break up some of the panels. The secret to using this product it to apply it in spots, let it dry completely, and then work it off with a soft brush ever-so-slightly dampened with thinner.
Road Dust and Final Assembly
Finally, I applied a ‘road-dusting’ coat of Vallejo Model Air Light Brown (71.027) and then shot the whole vehicle with Vallejo Flat Varnish to kill any shiny spots still remaining. I cut each of these 50/50 with Vallejo Airbrush Thinner to improve flow. After touching up the rear exhaust manifold with Mig Dark Rust pigment, I attached the utility box and antenna and this little guy was done!
Conclusion
The Sturmgeschütz III is one of the iconic tanks of World War II, and it is no wonder that Dragon has taken on this family of AFV’s to produce some of the very best models on the market. Like most of their other recent kits, the parts fit and are beautifully detailed; together making them a lot of fun to build. The design of the some of the parts such as the main weapon, running gear and opening hatch hardware is simply brilliant, and in my opinion, the very best available; Dragon sets the bar here. The thin DS track has evolved into an excellent alternative to the Magic Track, which itself was a solid product (and still is).
The slide molding, included in all Dragon kits now, has really improved the detail and build-ability of their kits. This is nowhere more apparent than with their tank barrels which are, in my opinion, a vast improvement over the ill-fitting and hard-to-paint aluminum versions. And last but not least, Dragon thoughtfully designs their models so that every hatch, door or access panel can be built in the open position, with more than enough interior detail to get you started.
I heartily recommend this kit to all modelers who are up to the small challenges that a kit with so many parts and options will offer. If you mark up the instructions beforehand as suggested, and go slow, you shouldn’t have any problems.
I would like to thank Dragon Models for providing this kit for review, and to IPMS USA for giving me the opportunity to review it.


