Reviews
Armor
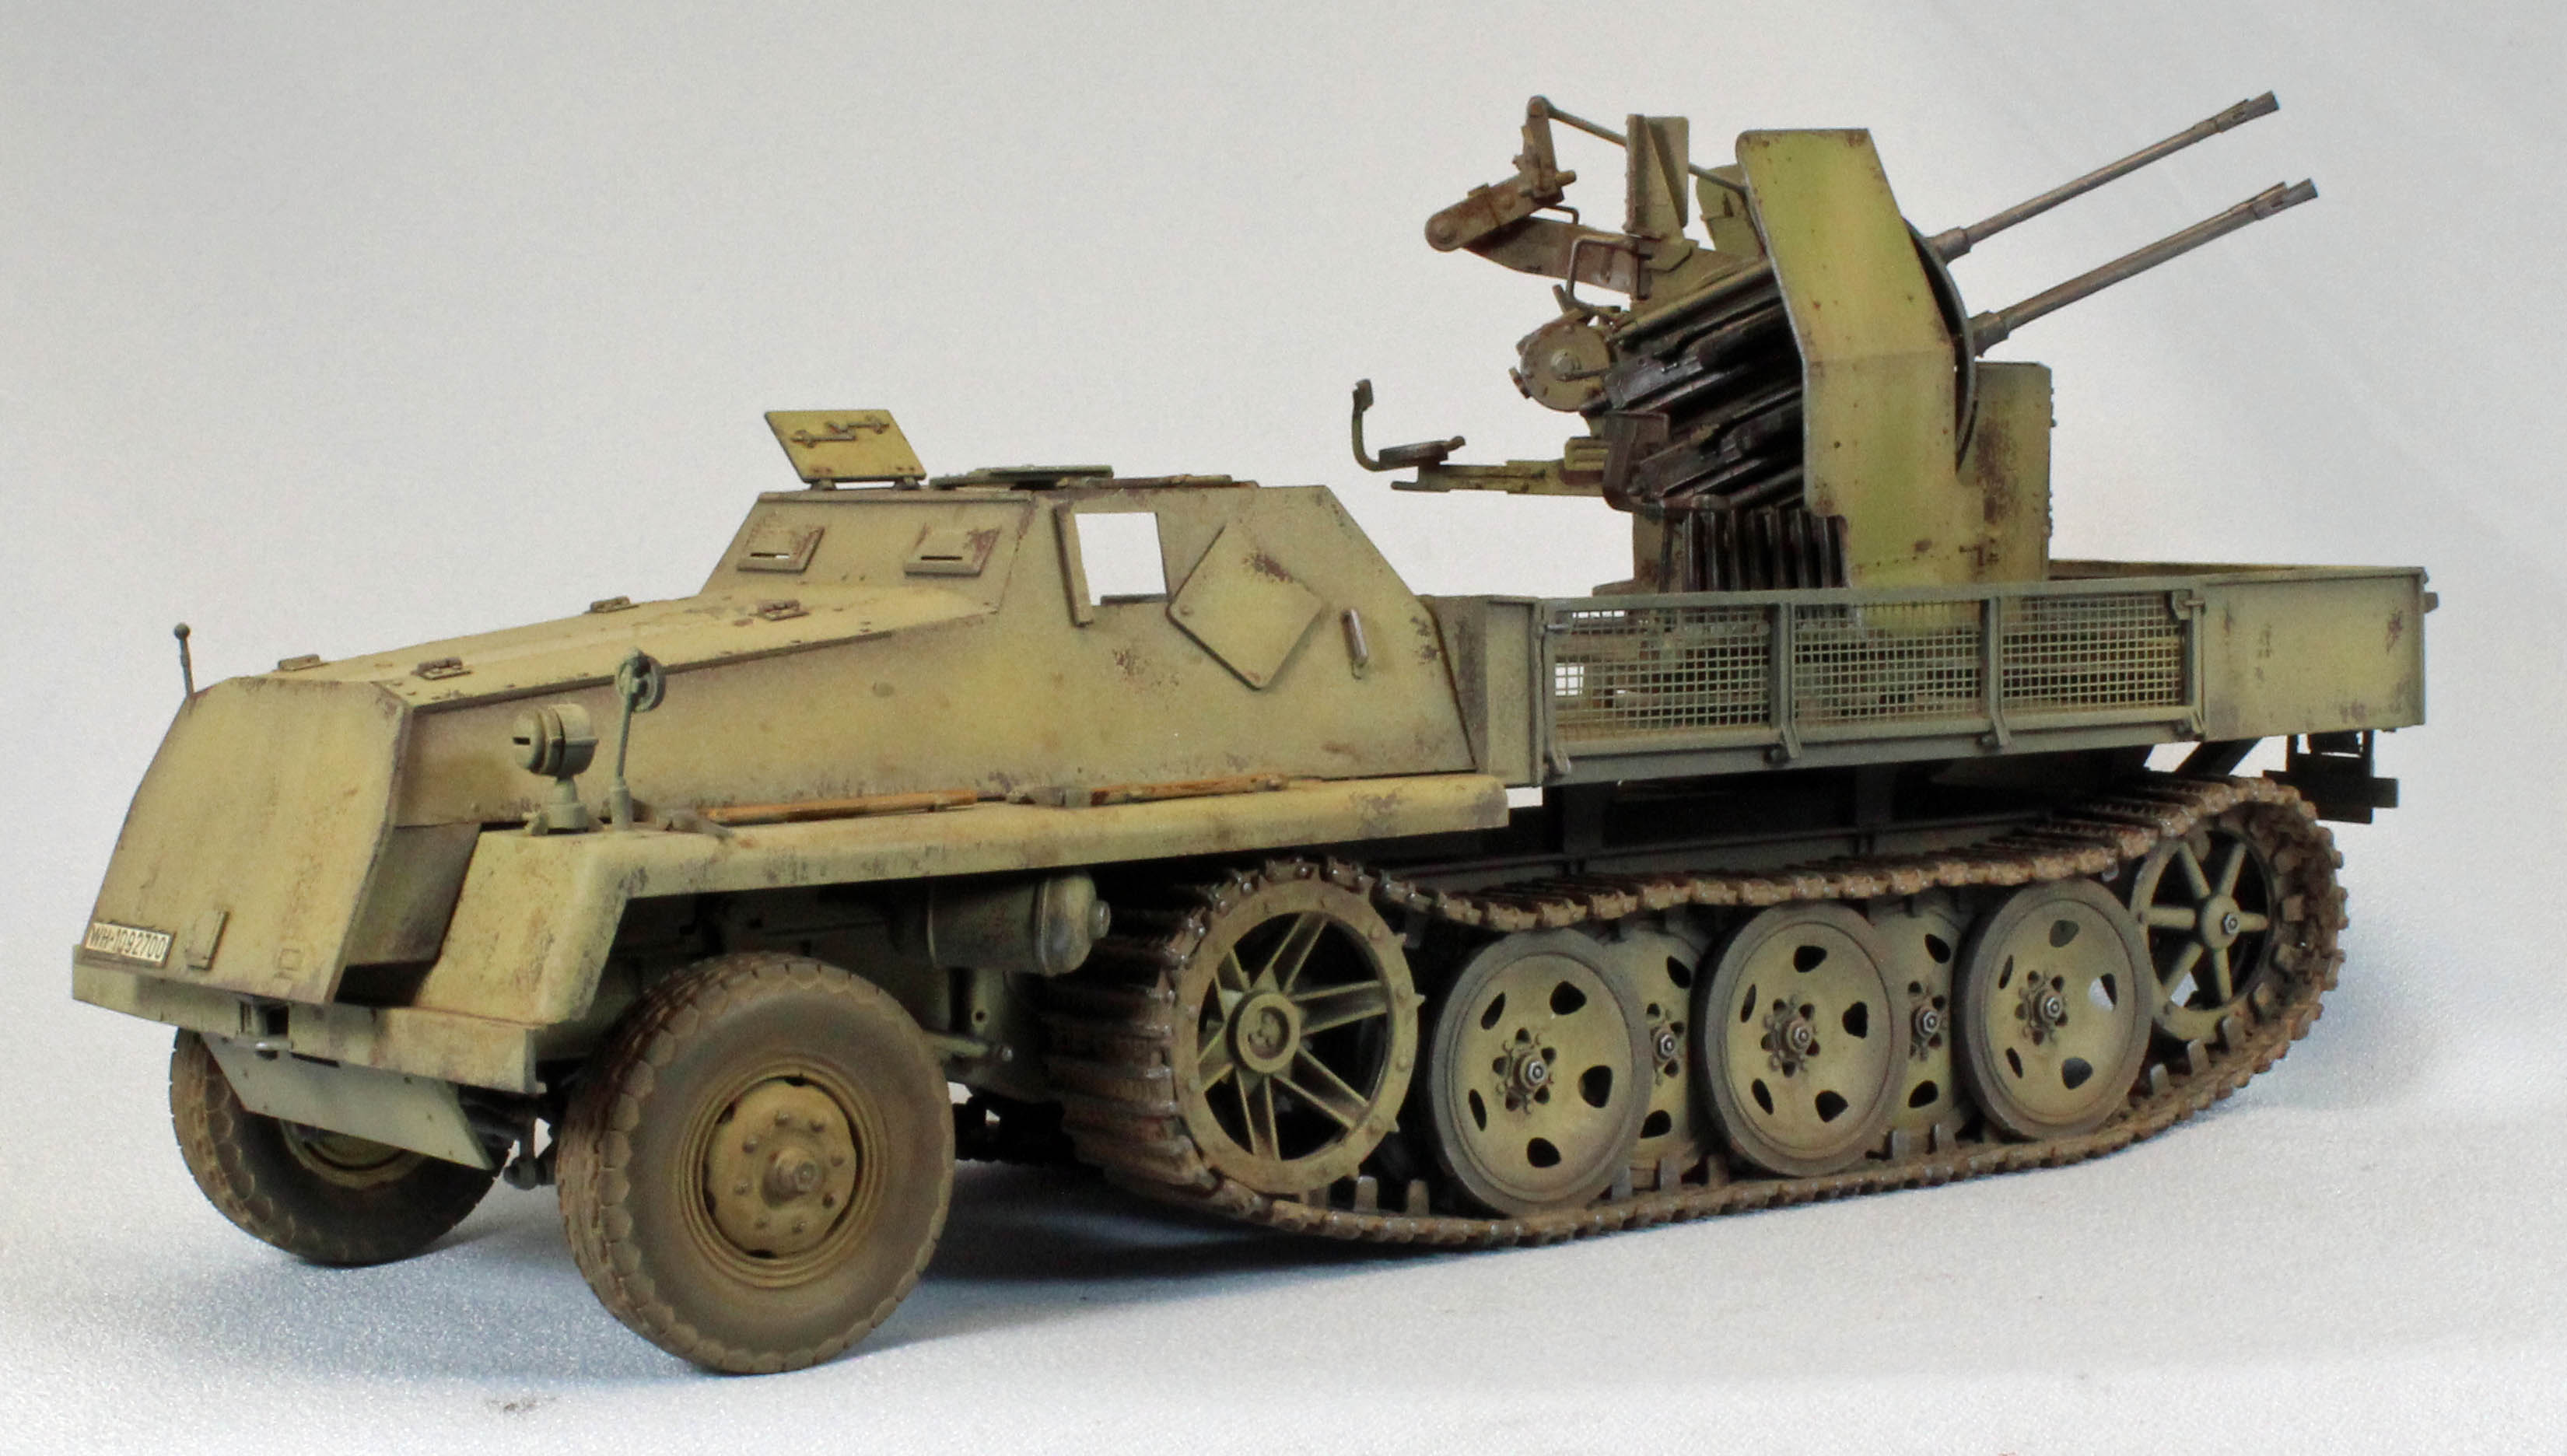
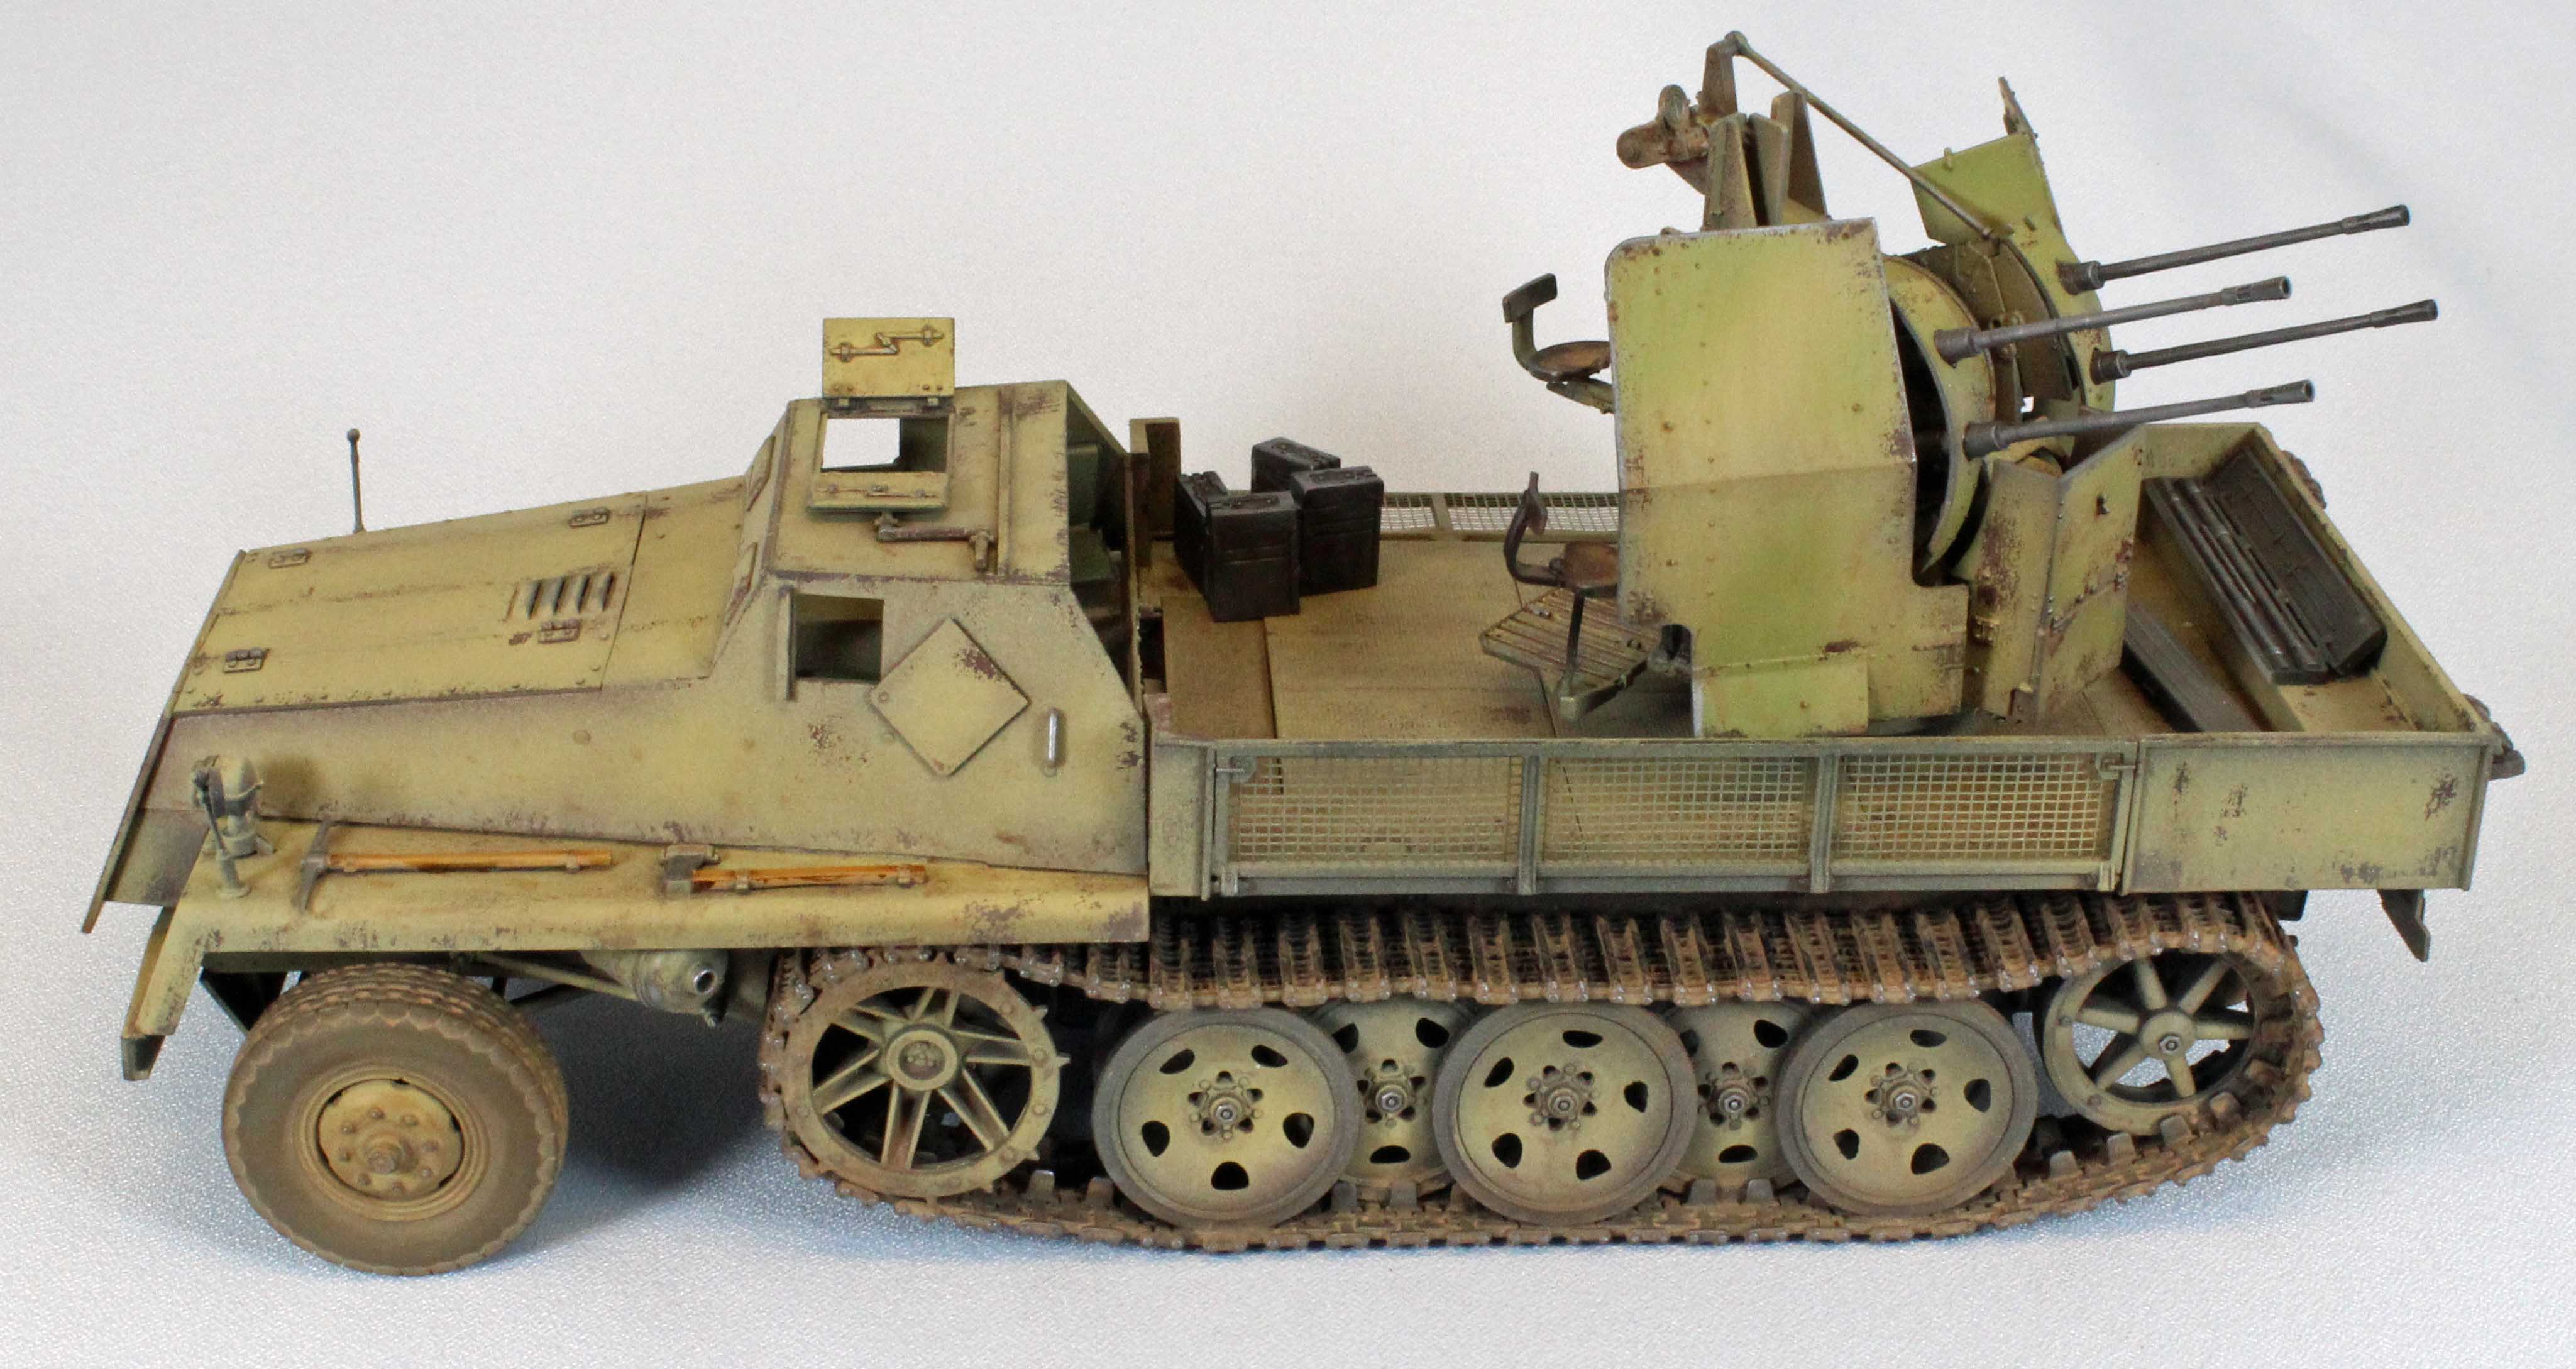
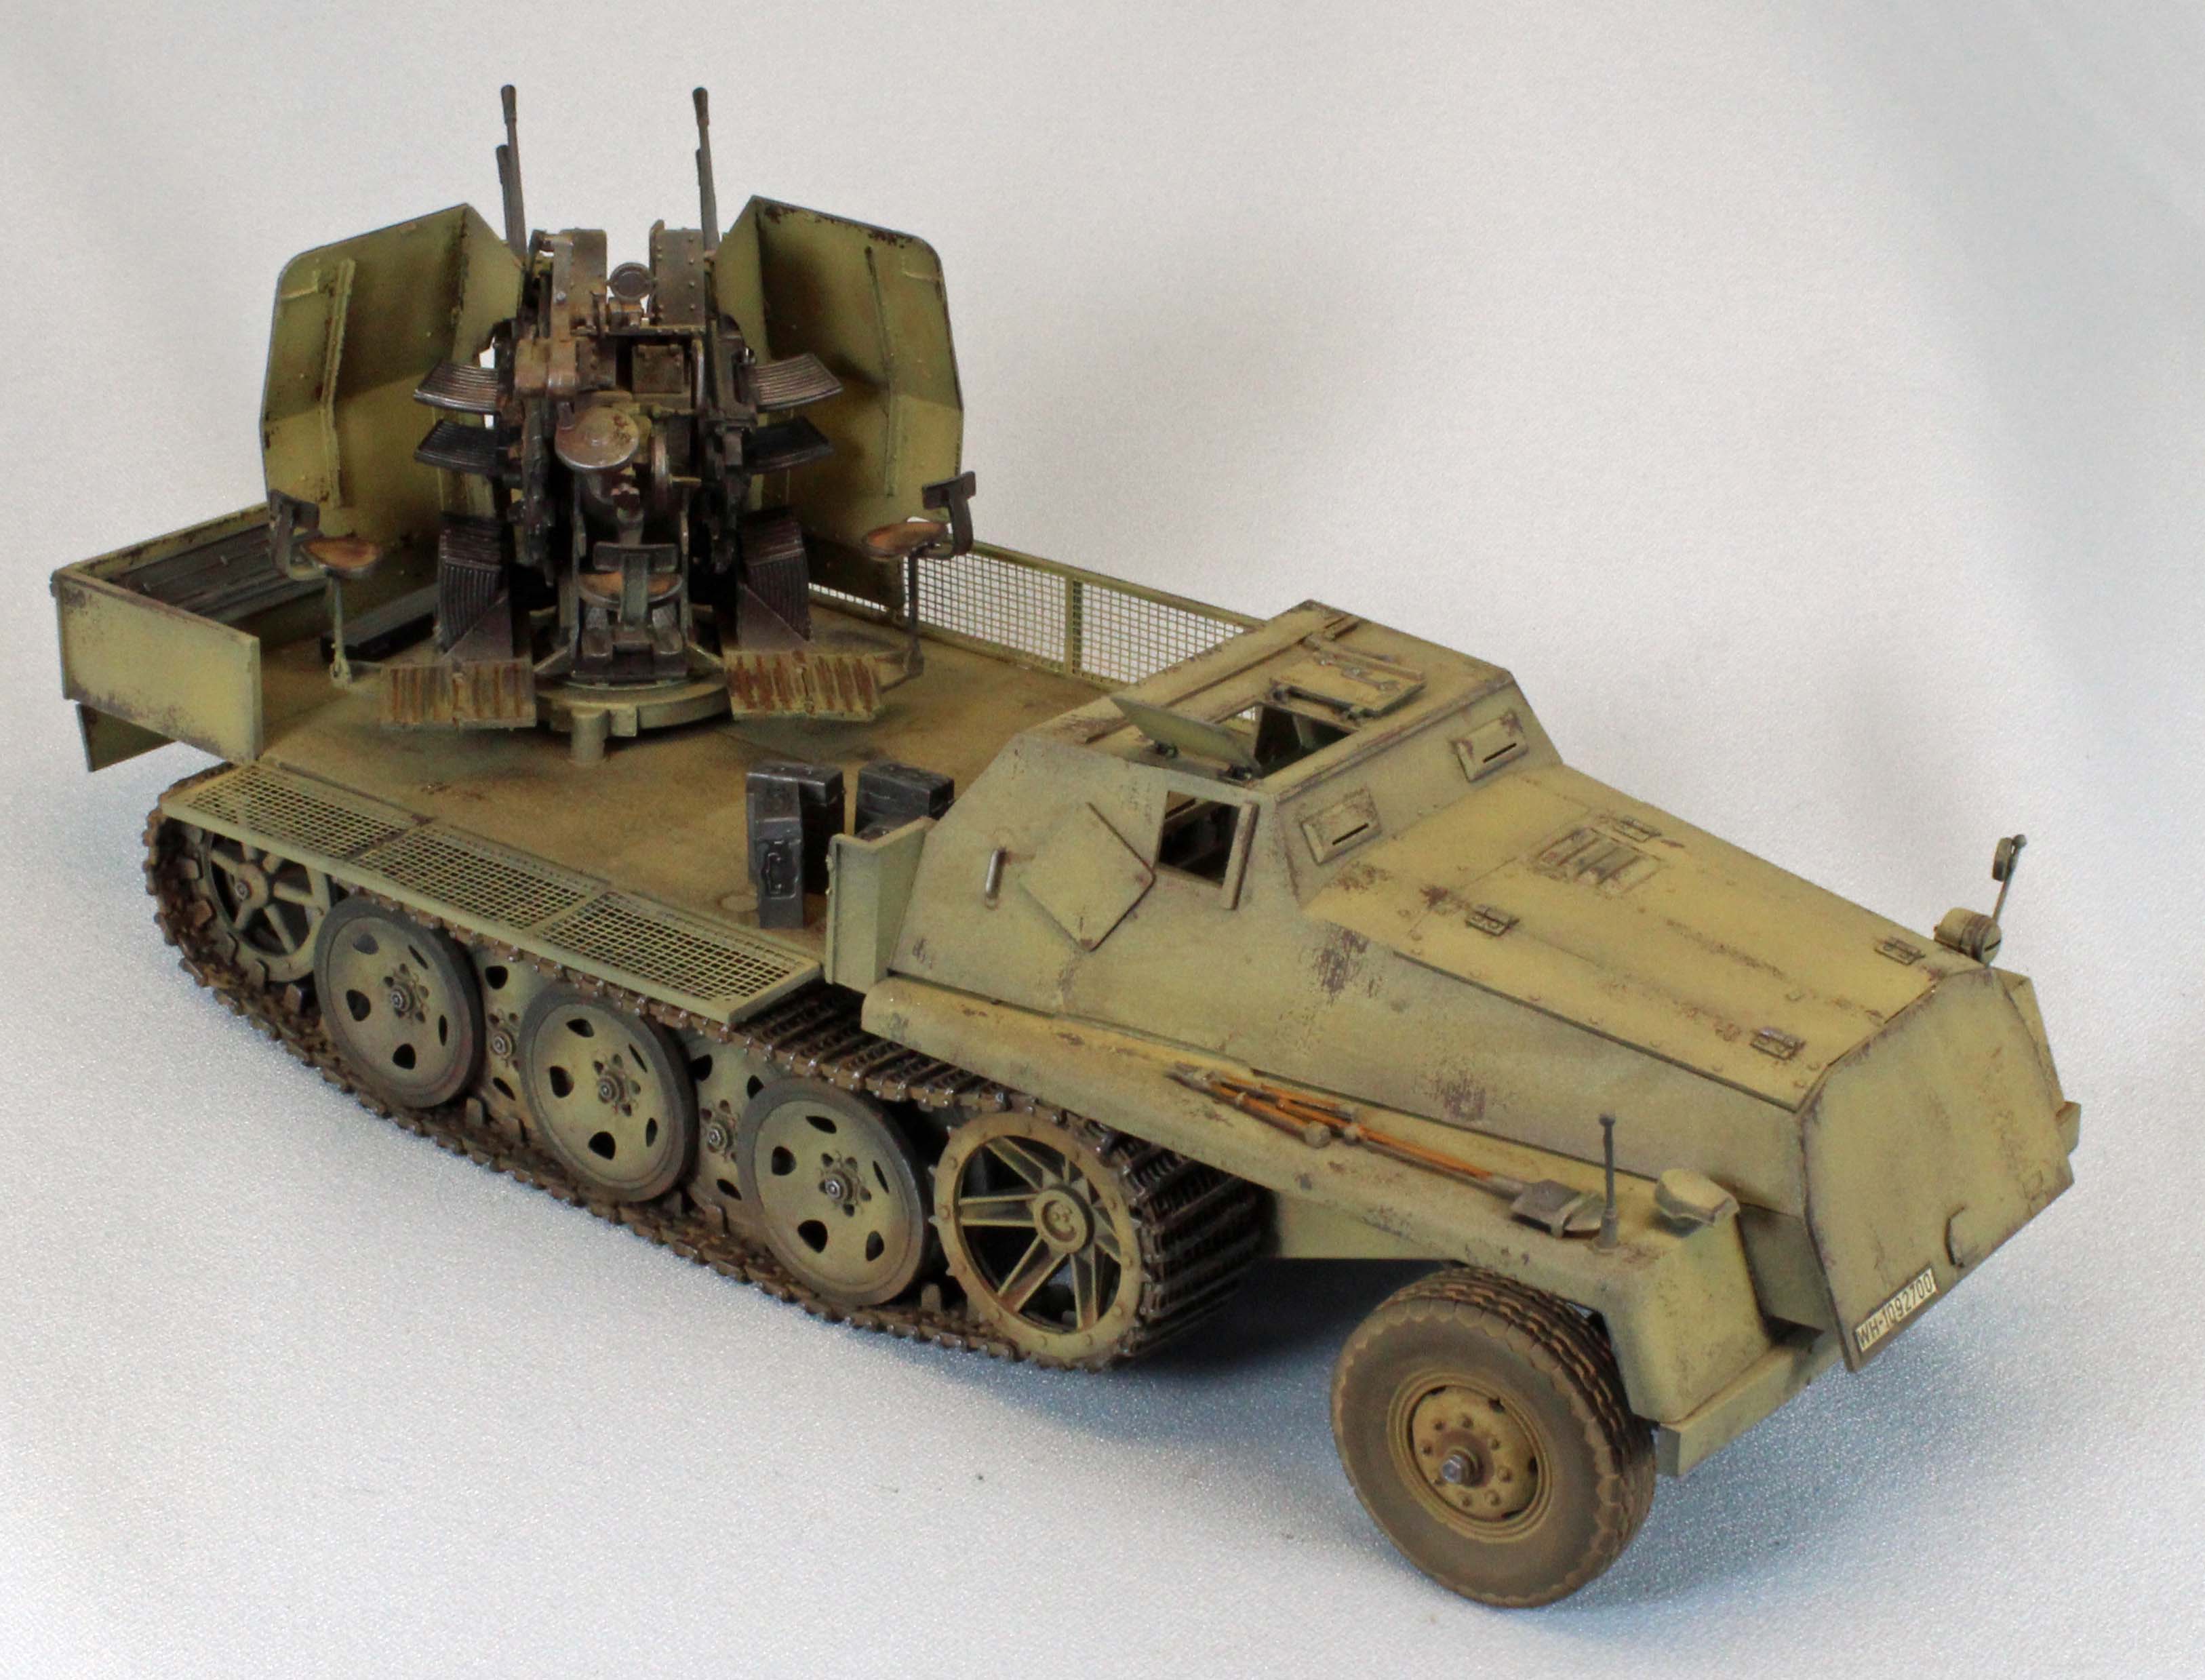
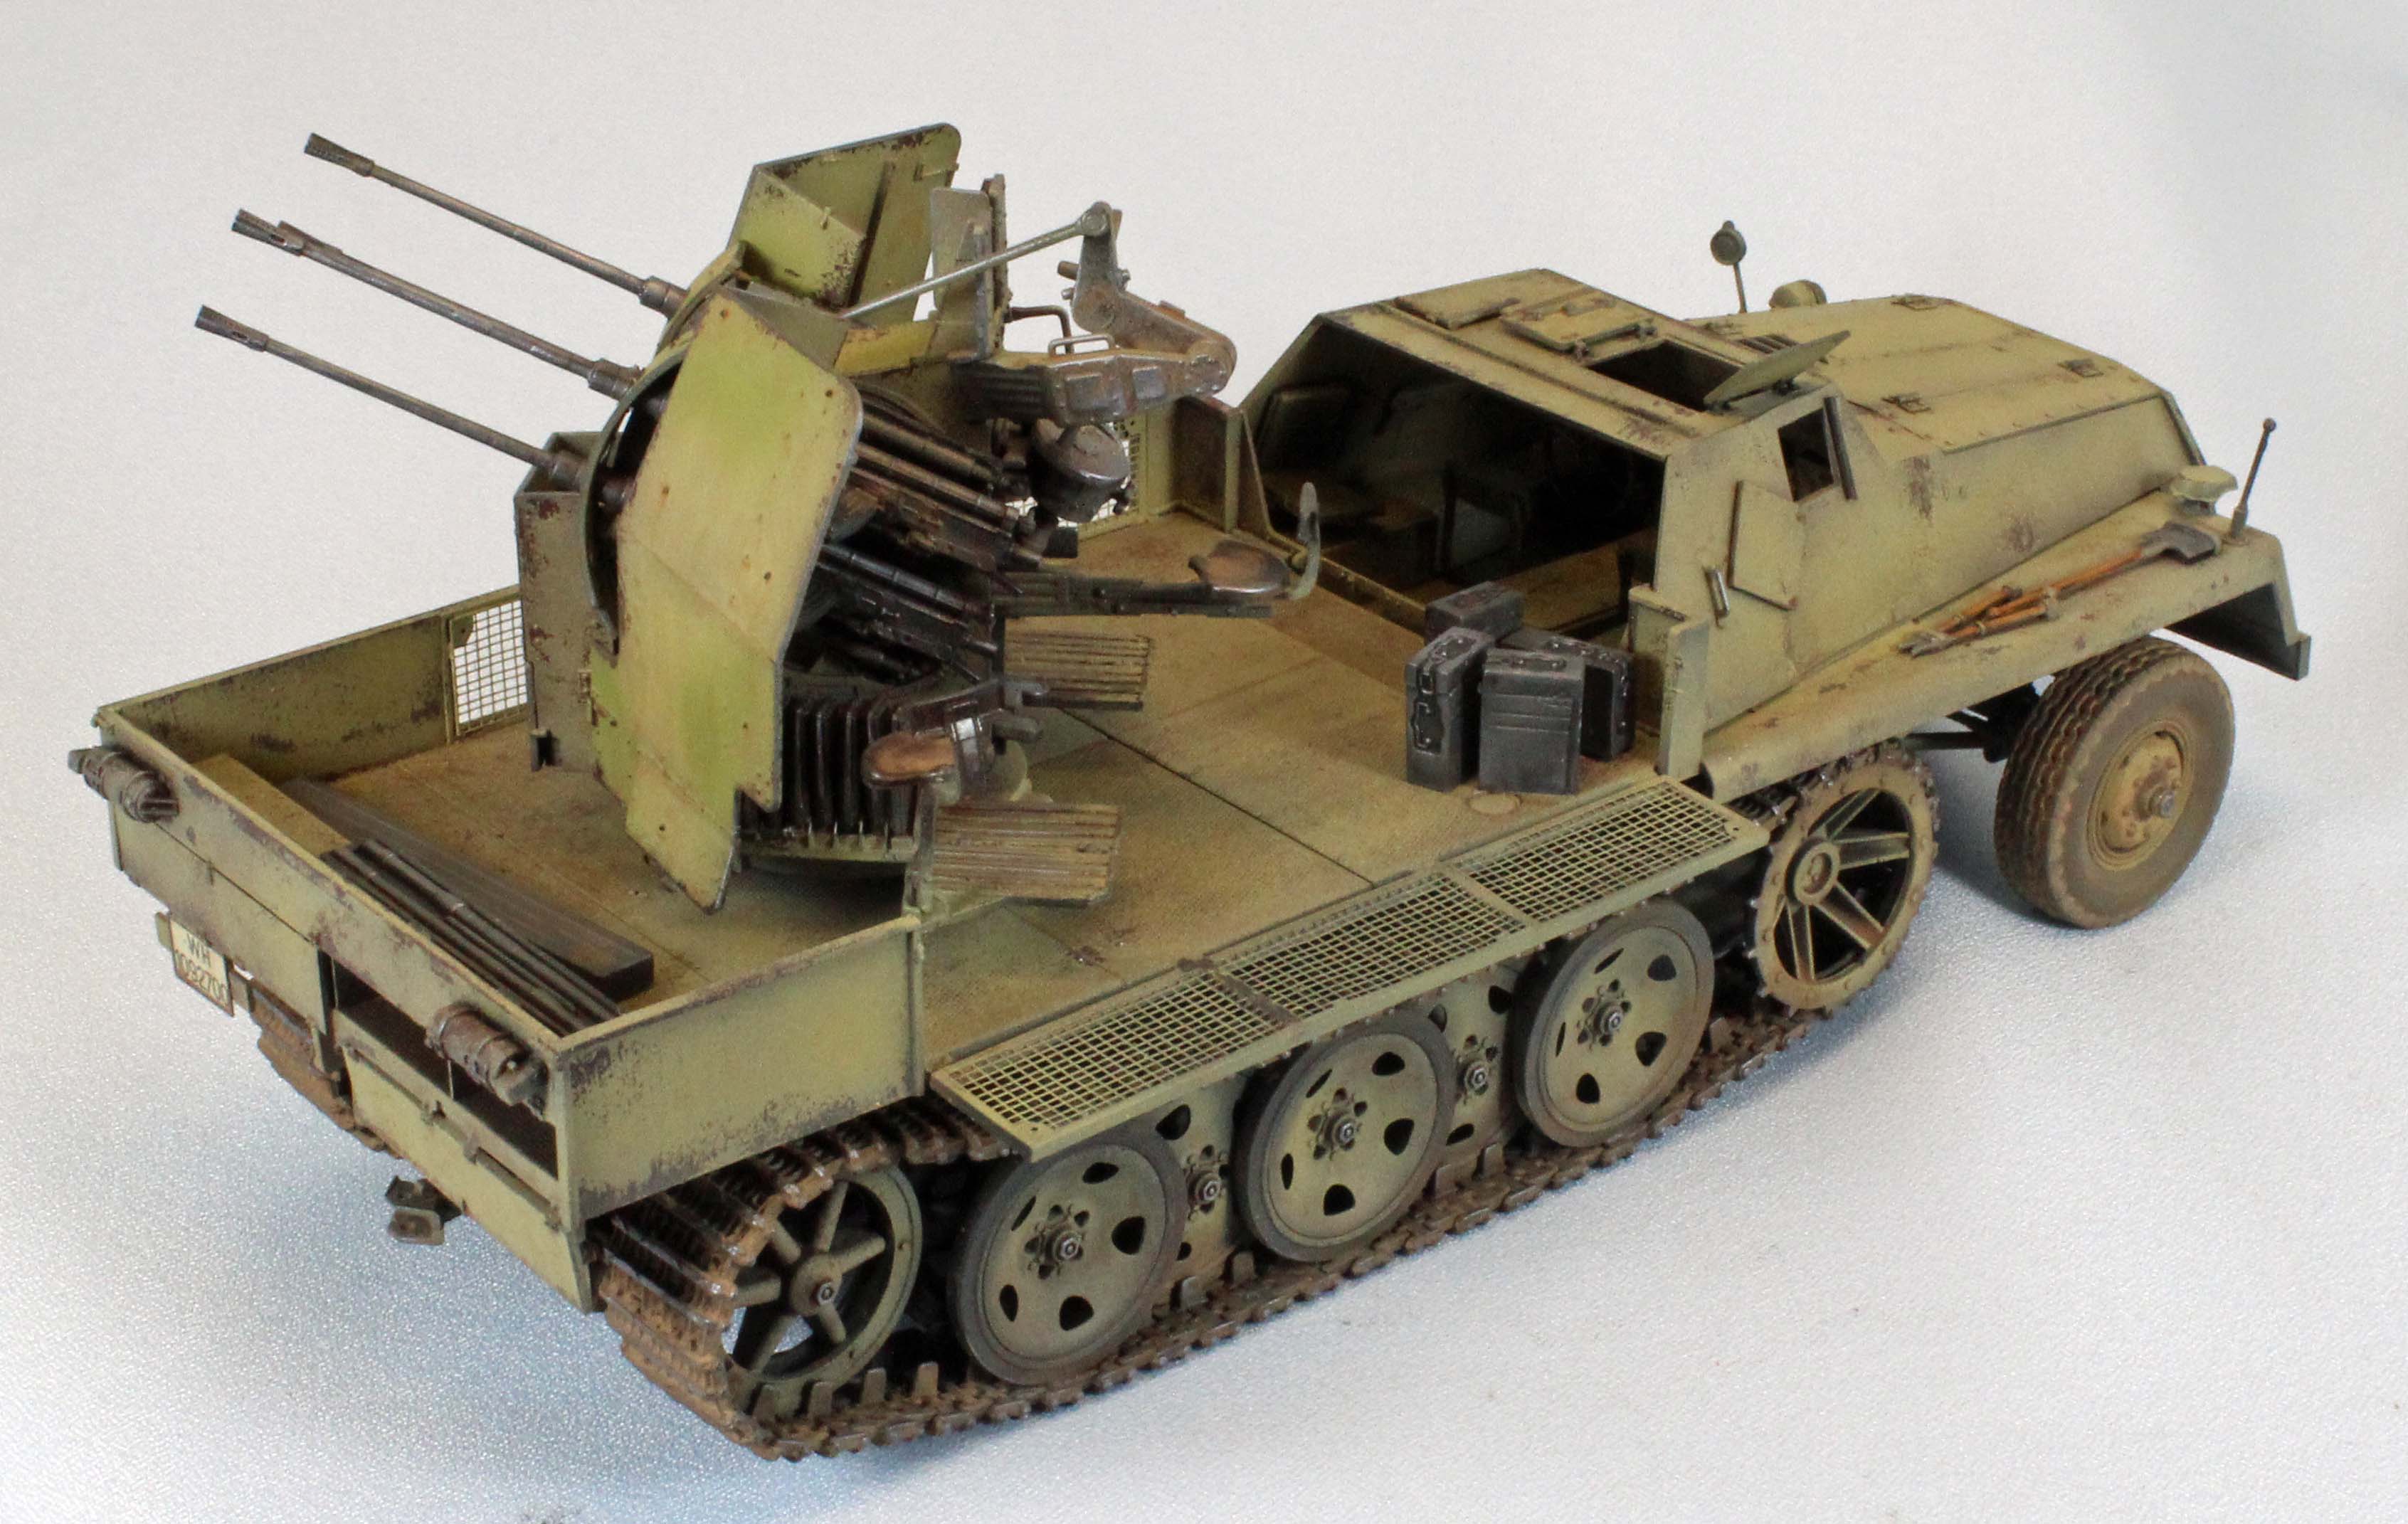
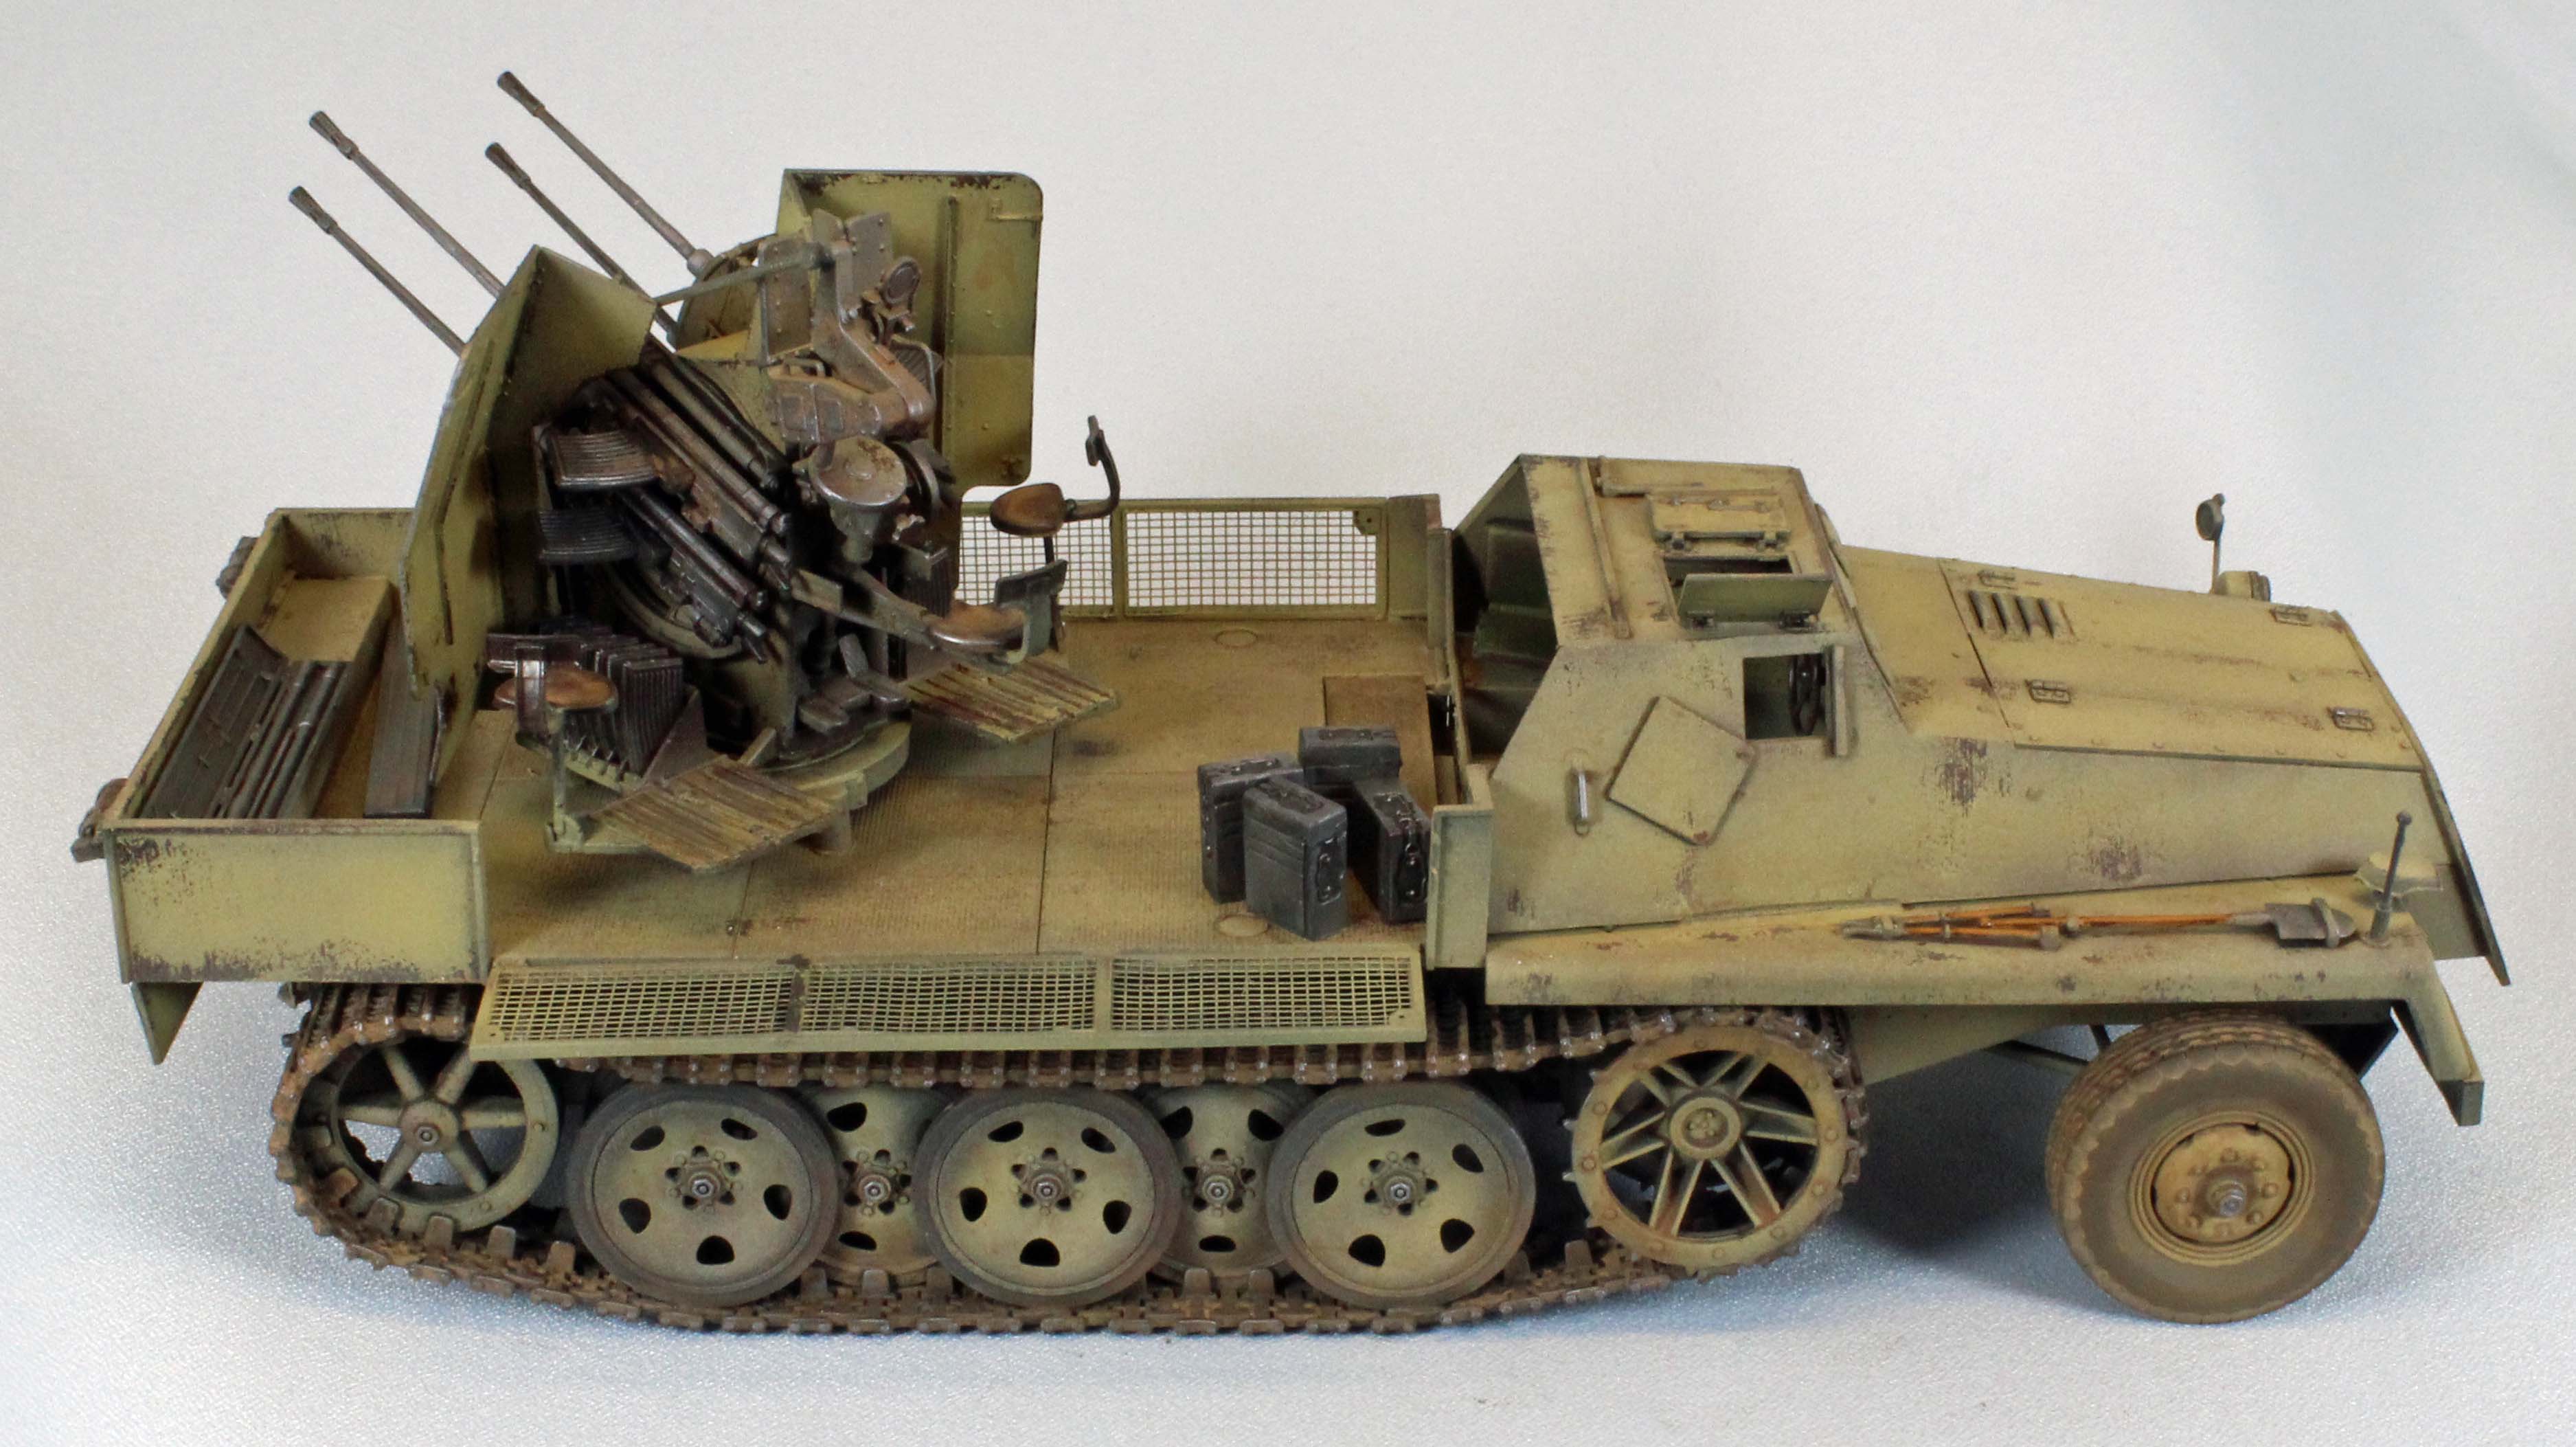
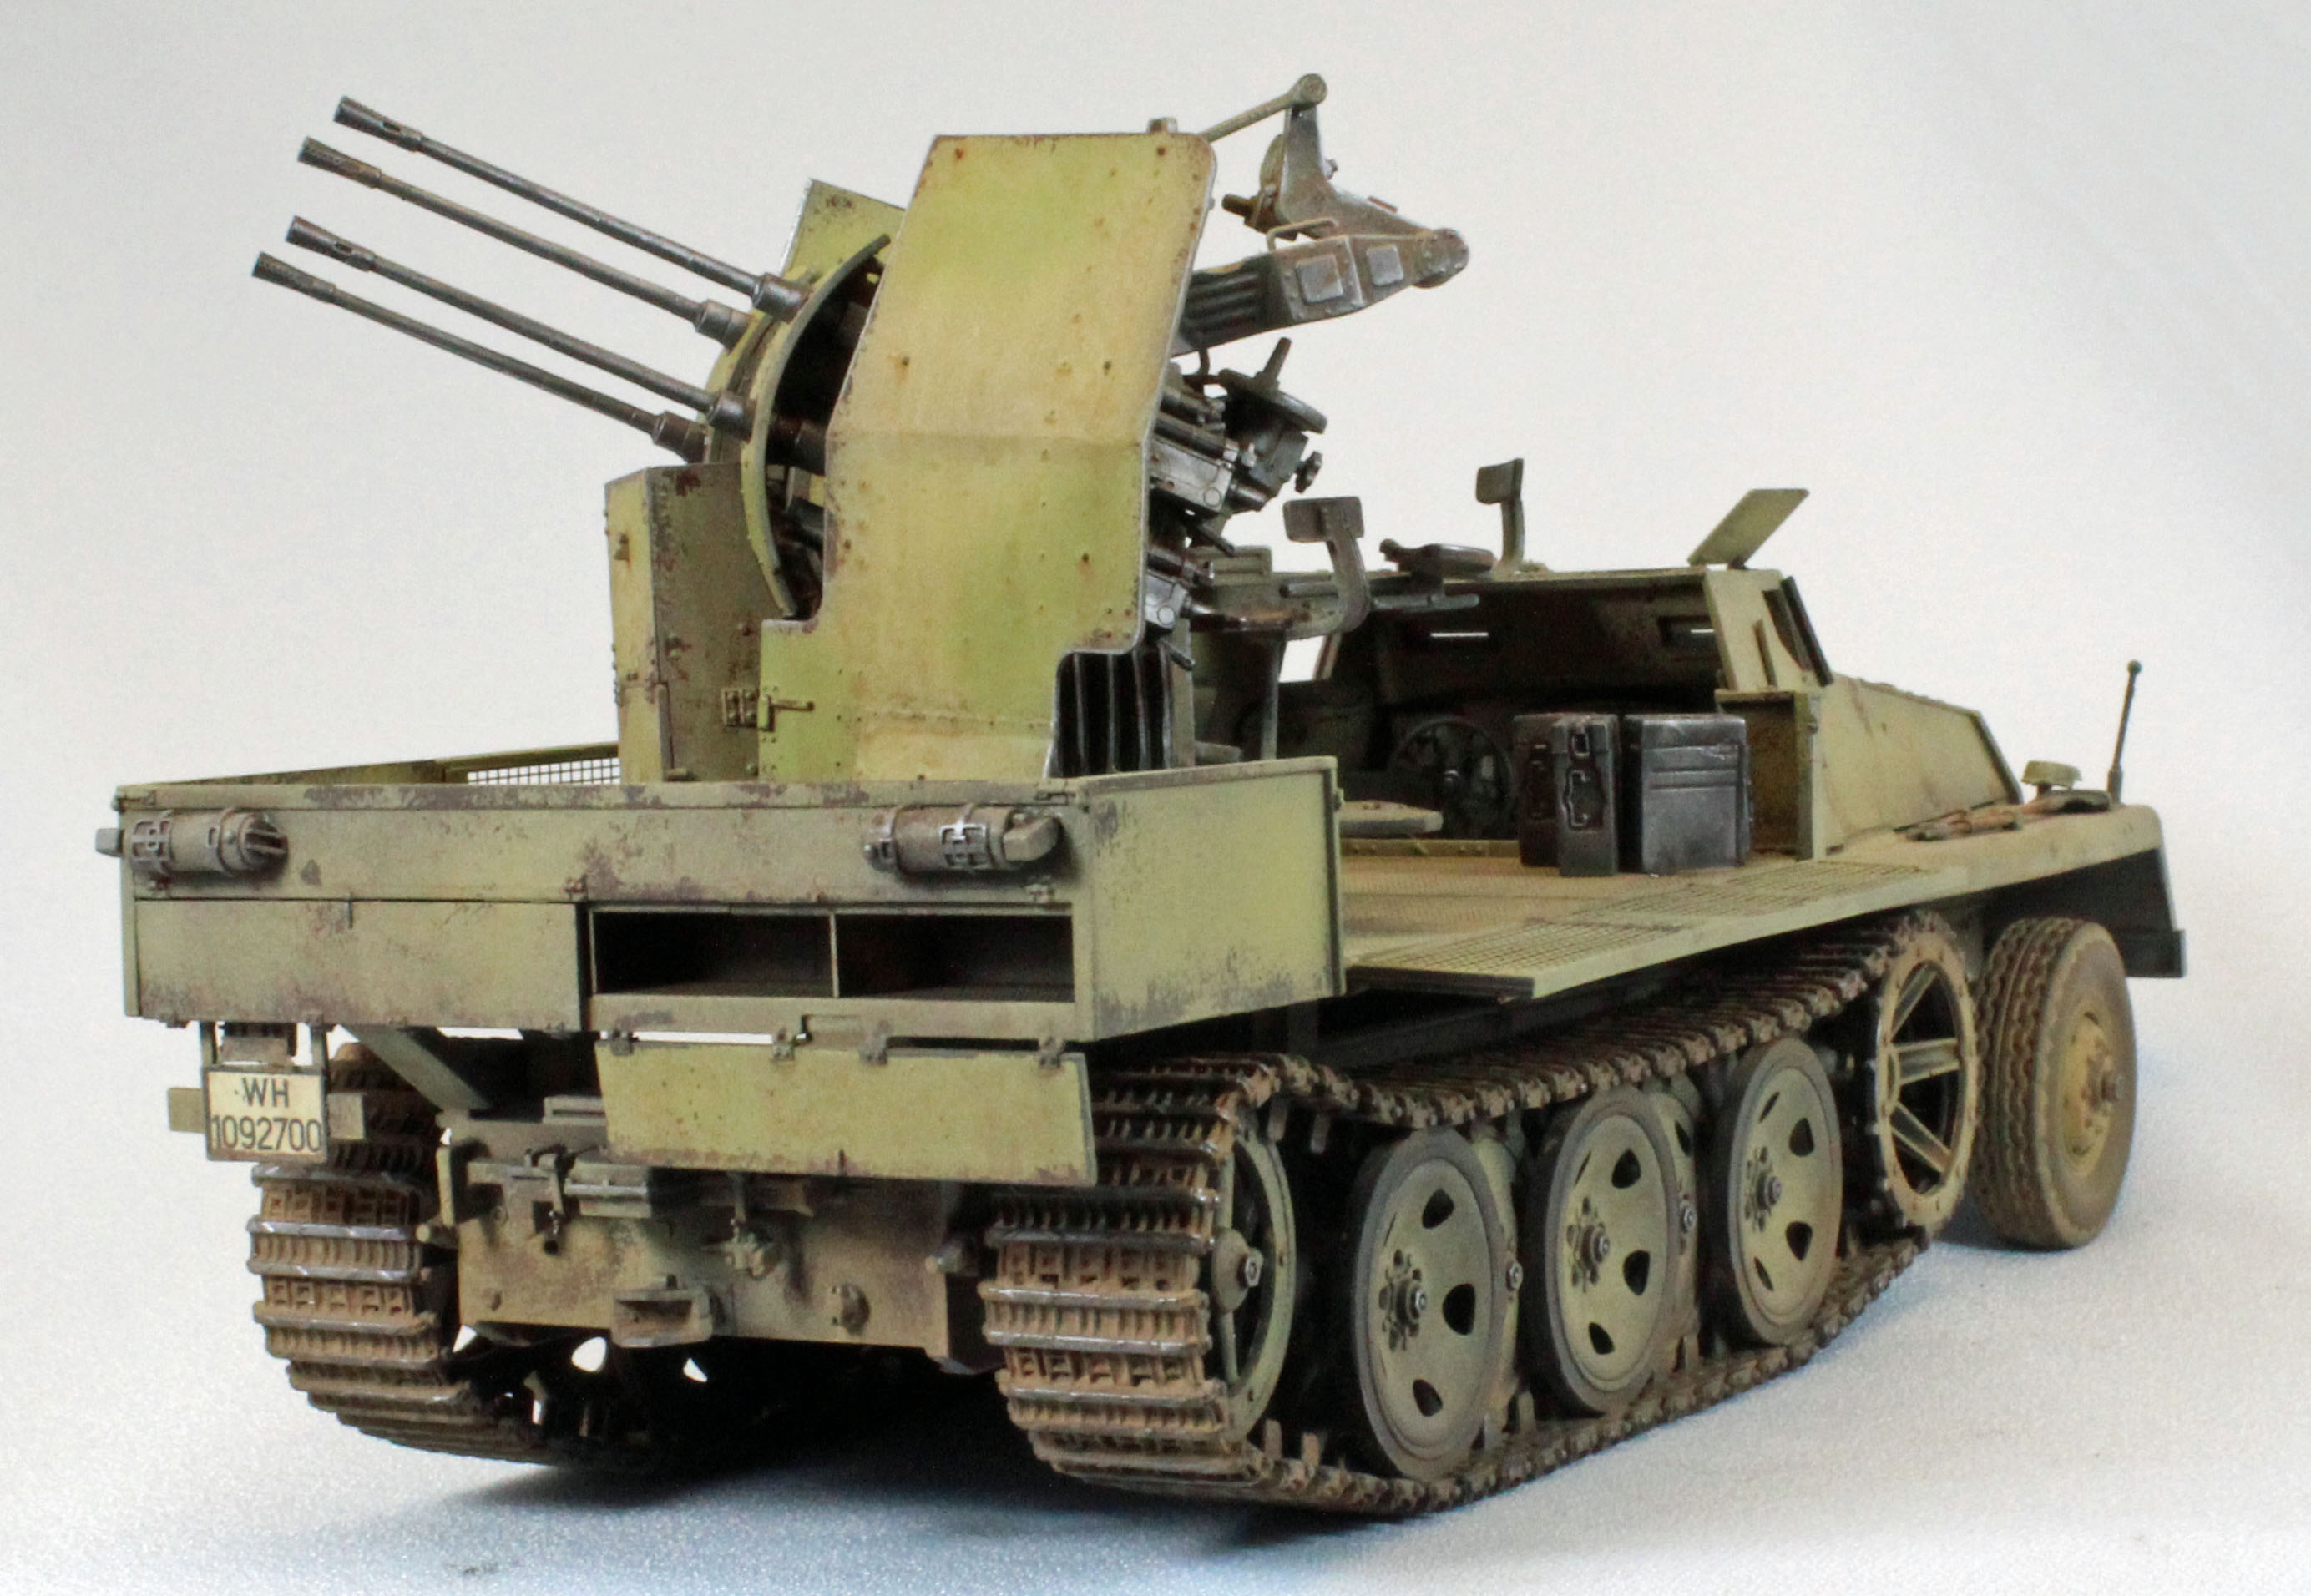
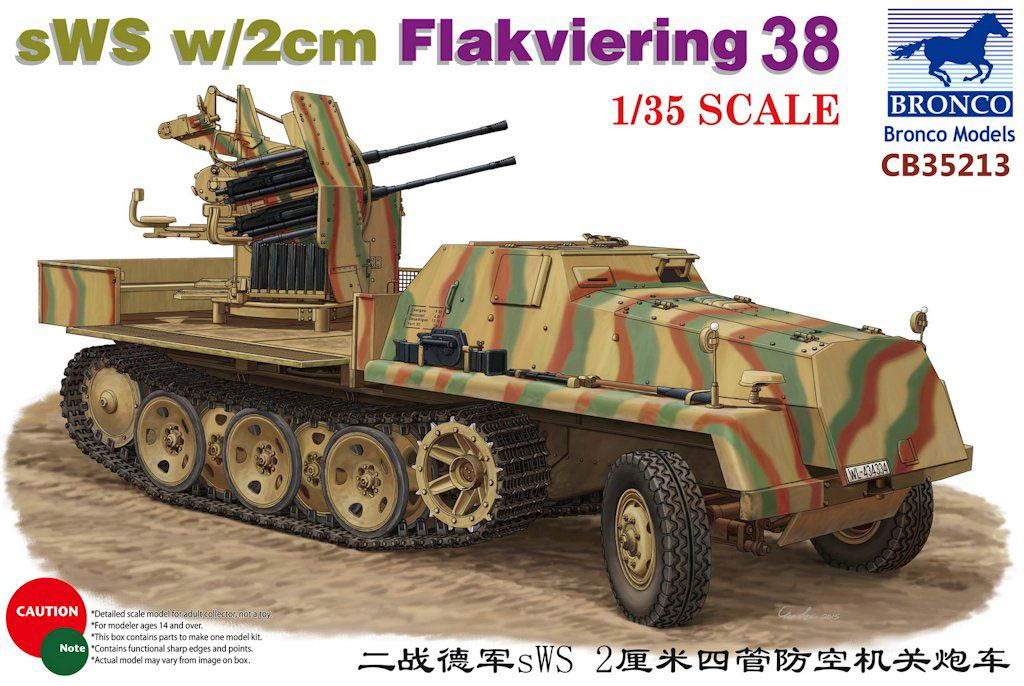
sWS w/2cm Flakvierling 38 Halftrack
by Eric Christianson
 Model: sWS w/2cm Flakvierling 38 Halftrack
Reviewed by: Eric Christianson, IPMS # 42218
Scale: 1/35
Company: Bronco Models
Price: $69.99
Product/Stock #: 35213
Website: Bronco Models
Product Web Page: View
Product provided by: Bronco Models
Summary
Following right on the heels of their Schwere Wehrmachtschlepper (sWS) IR-Searchlight halftrack, Bronco Models has now offered the same wide-tracked vehicle sporting a four-barreled 2cm Flakvierling anti-aircraft gun.
Like the one before, this ‘new’ kit is actually a reissue of the high-quality Great Wall (Lion Roar) kit from a few years back. Aside from the box art and the color of the plastic, the main difference between the two kits is that Bronco includes a complete engine assembly. At some point GW introduced these parts as an aftermarket set you had to purchase separately for their sWS kits. Bronco brings everything together into another solid offering, with more to come.
Background
Unlike the 'Uhu' searchlight version, the subject of this kit was actually produced and served in combat late in the war. A simple 5 ton, low-speed, half-track designed to replace the Sd.Kfz 6 and Sd.Kfz 1 prime movers, the sWS was used primarily for cargo transport. The initial, un-armored cargo version was produced by Büssing-NAG from December 1943 till the end of the war with a total of 825 produced. There is no information on the number of these vehicles fitted with the Flakvierling weapon, but photographs do exist.
What's in the box?
- 17 sprues of soft, light grey plastic
- 2 sprues of soft, light brown plastic (track links)
- 1 lower hull, packaged separately
- 1 small sheet of decals, thin, but in perfect register
- 1 sheet of photo-etch
- 1 color print of the box art suitable for framing.
- 1 large instruction booklet, totaling 19 pages with 40 steps, printed in color
The Instructions
As with many other Bronco kits, the instructions come in a beautifully rendered, fully illustrated, color 8.5x11 booklet. The CAD images are sharp and show the assembly from a variety of different angles to help the modeler throughout the build. That said, this is a complex kit due to the fact that is has a lot if interior detail, including a reasonably complete engine. It is relatively easy to have things go sideways unless you pay very close attention to what you are doing.
The instructions come with specific paint call-outs for Mr. Hobby, Hobby Color, Humbrol and Tamiya paints to help with painting.
Assembly sequence varies by modeler but the general flow of things go pretty much as Bronco intended. The exceptions I made are identified in the text, below.
A single, unidentified German tri-color scheme is included.
Unfortunately, the instructions from the ‘Uhu’ searchlight version appear to have been used as a basis for this kit, since some parts illustrated in the images are not in the kit or on the parts map (all parts on Sprues K and D, for example). What was particularly frustrating is that Bronco has a solid reputation for accurate instructions so I found myself going through the sprues over and over and over, convinced that I was just missing something.
Things to consider before starting
The kit contains many parts that have (male) connection tabs, but their (female) counterparts are not as much holes as they are very small indentations in the surface receiving the part - if they exist at all. As a consequence, more often than not the part doesn’t seat correctly and/or stands just proud of the surface. To resolve this you can either deepen the indentations or sand down the tabs to fit. Either way, test fit everything before applying glue.
All eight doors to the six hatches can be modeled open or closed, so some up-front work is in order to figure out what you want to show and what you want to hide. There is significant detail exposed under open hatches, including the engine and driving compartments.
It’s always important to keep in mind that Bronco kits are not for the faint of heart. That said, the parts fit, they are well-engineered, and with a little patience, will build into a great model.
Construction
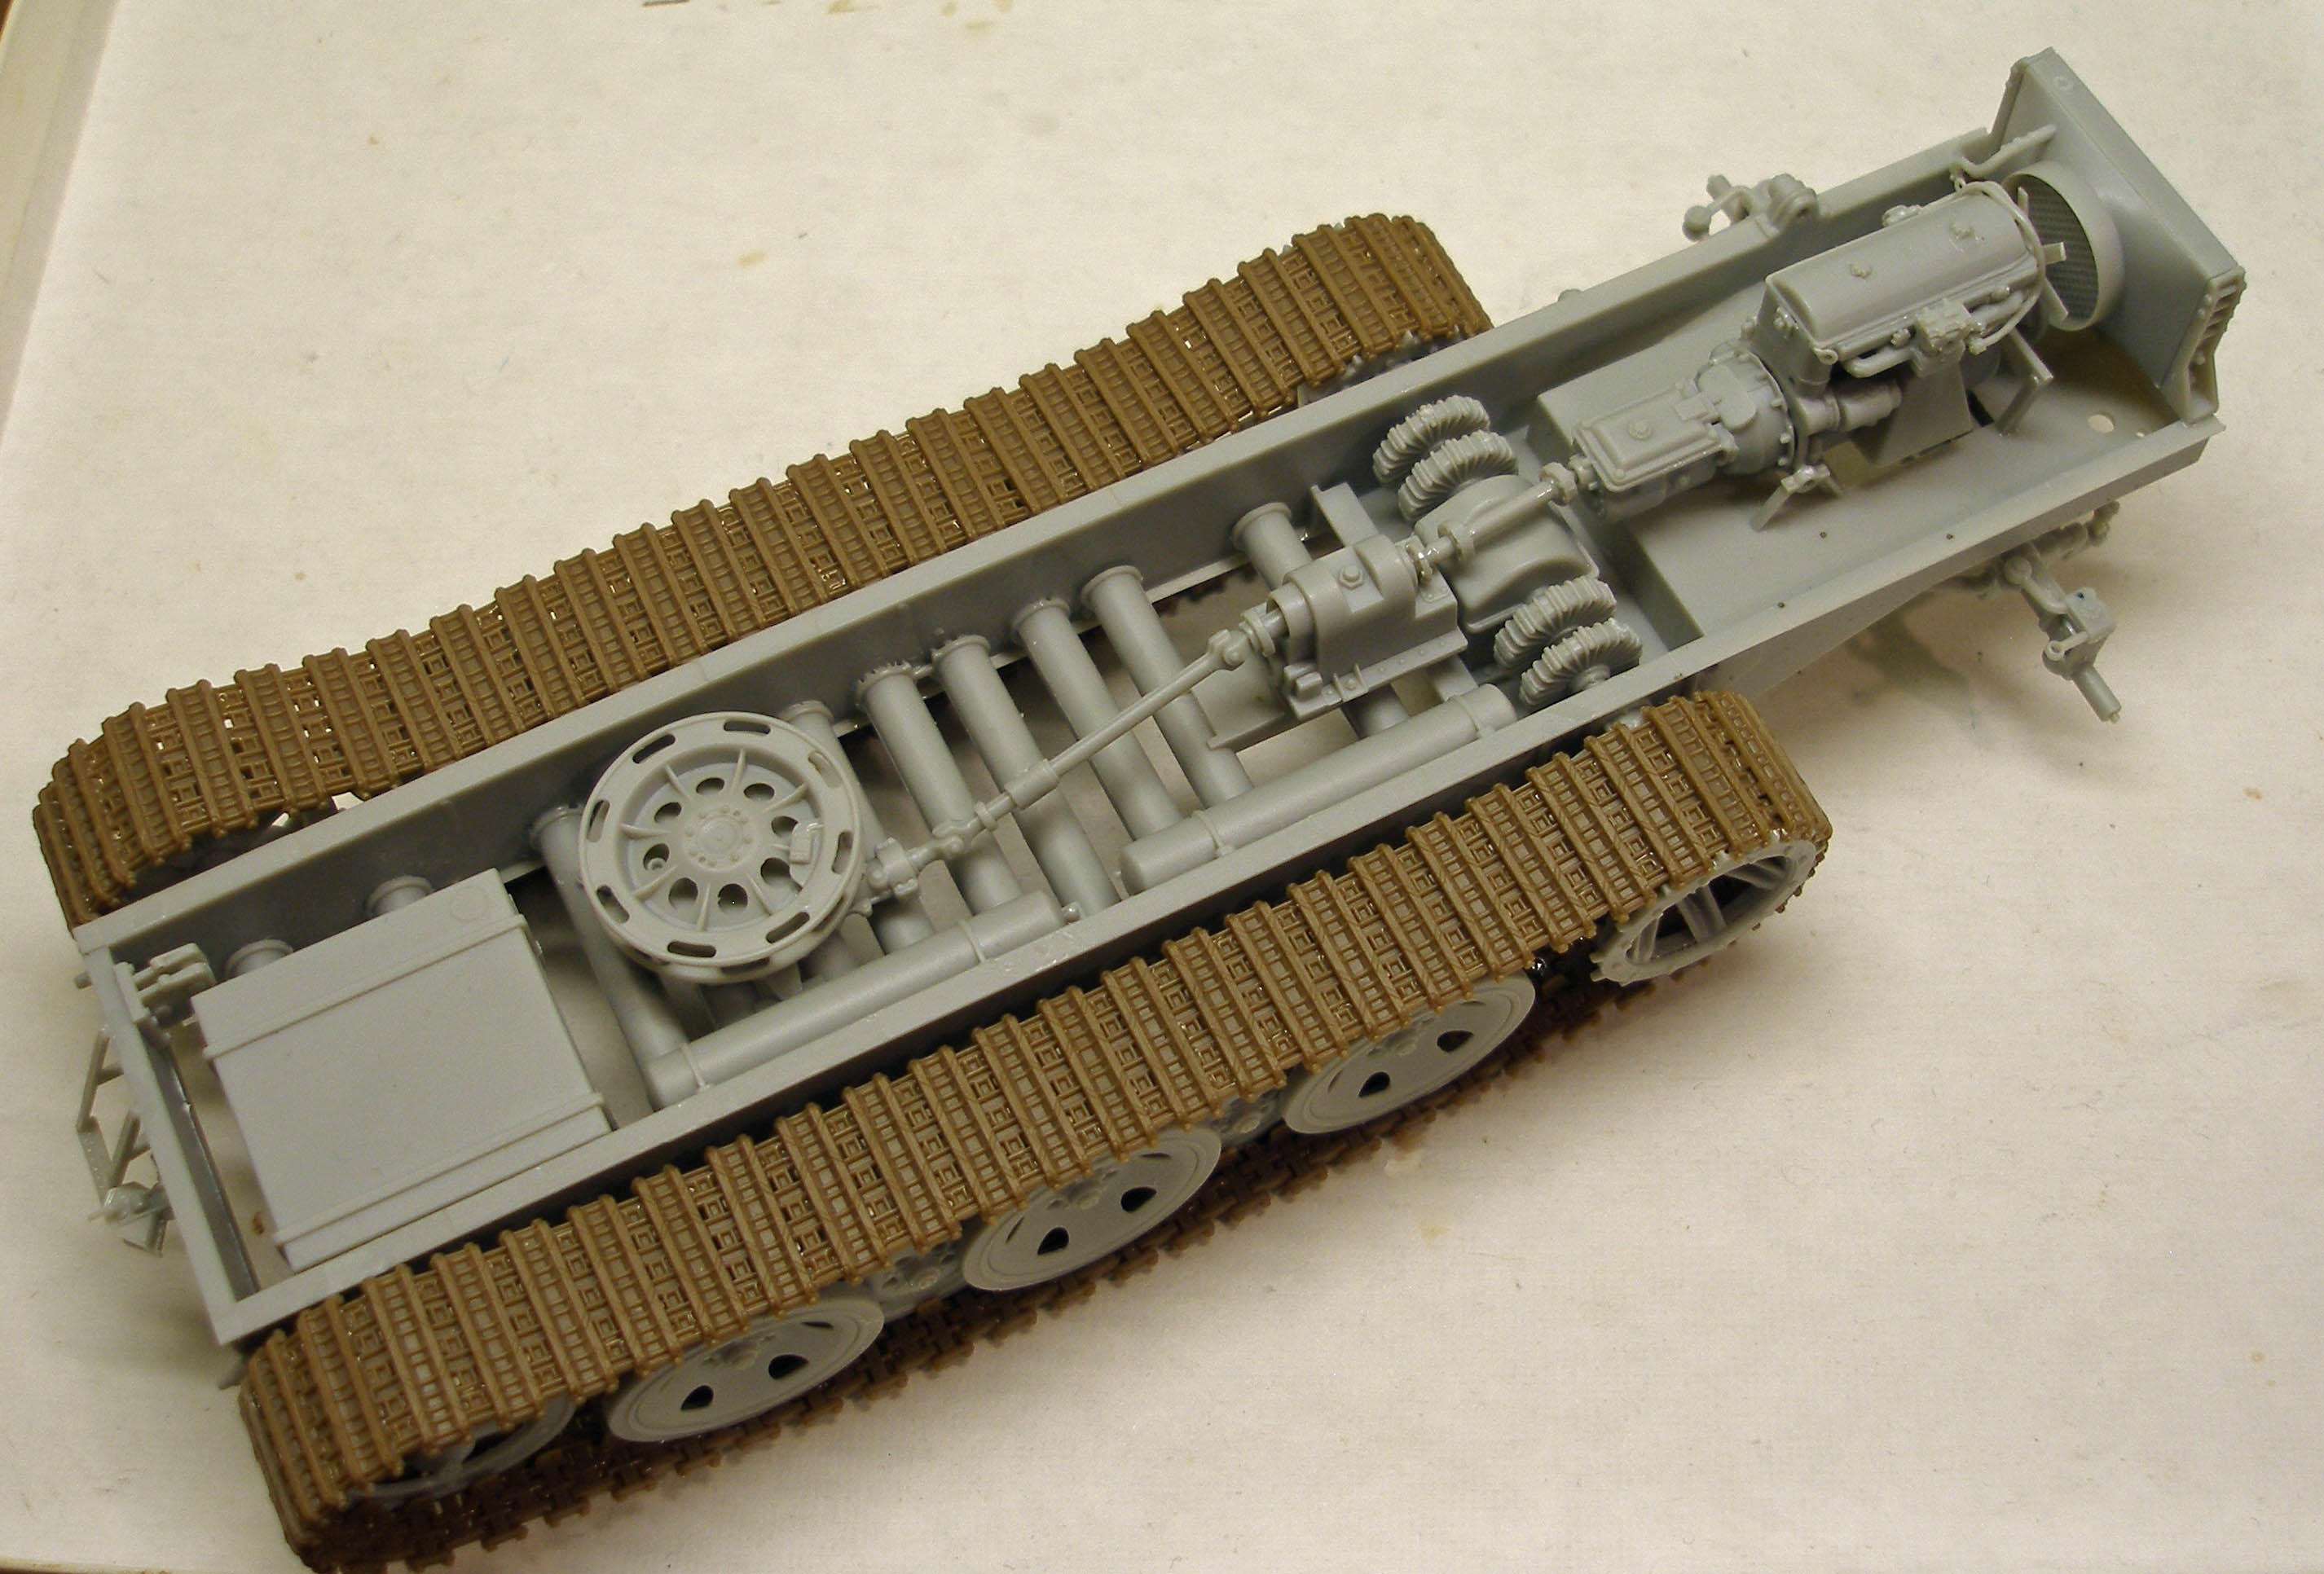
Lower Hull and suspension
Construction begins with the lower hull and suspension. There are ten ‘tubes’ spanning the lower chassis frame, that, when inserted, (could) spread the frame slightly. This caused other parts to be loose (specifically Parts A40 in Step 7). This was entirely self-induced, but the connection points on either end of the tubes are vague and easy to miss-align. Having encountered this issue with the last build, I left the tubes off this time – they are only visible on the final product if you turn the model upside down.
Otherwise, everything came together well, including the slightly complicated front steering linkage (Step 4) that, once assembled, fit perfectly on the chassis.
I first encountered the sandwich-style design of the front tires with a MiniArt kit years ago, and I must say this design sets the bar for ease of assembly while providing the most authentic representation available. I simply love them. They only assemble one way, and the tread is beautifully reproduced and preserved since there are no center mold lines to remove.
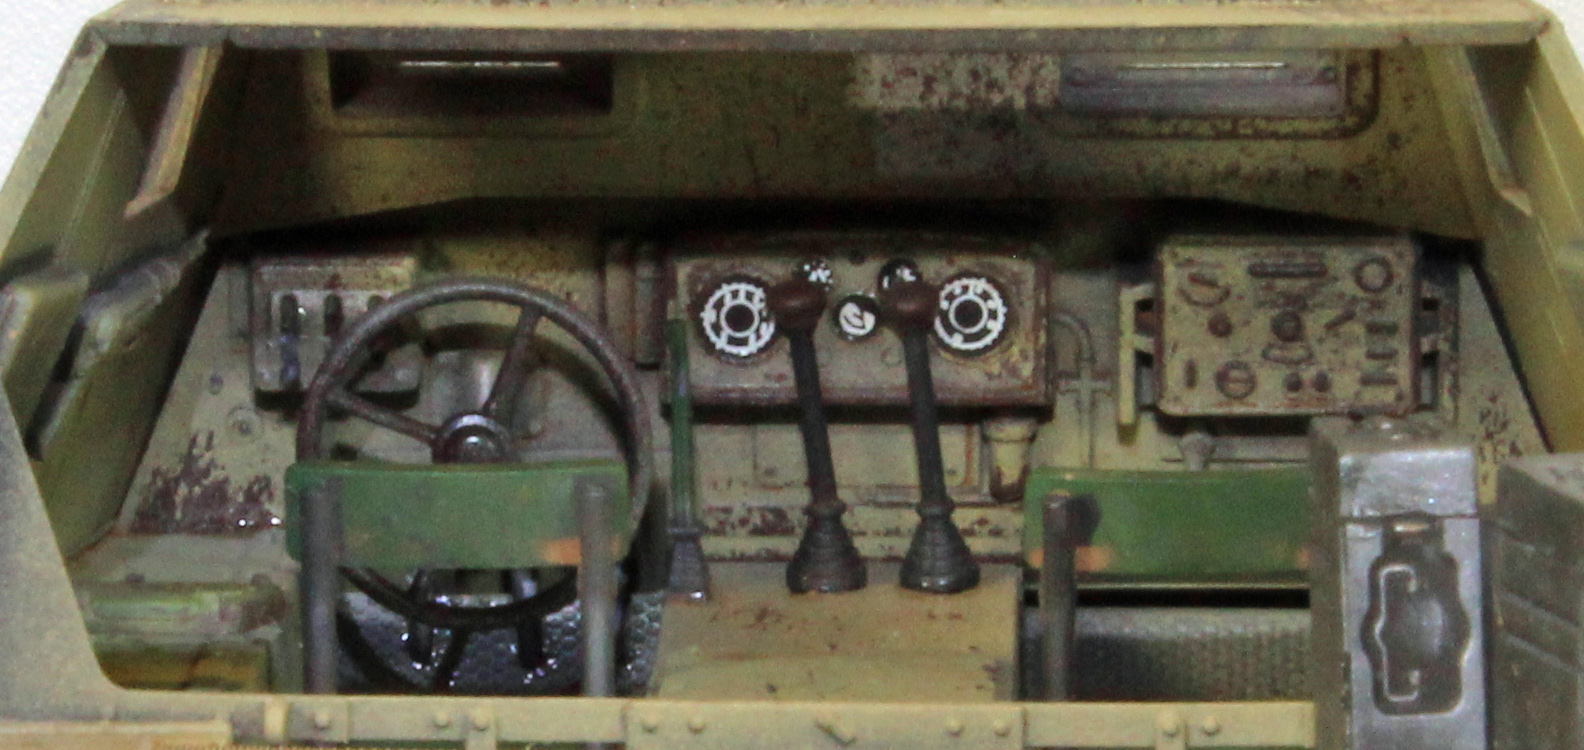
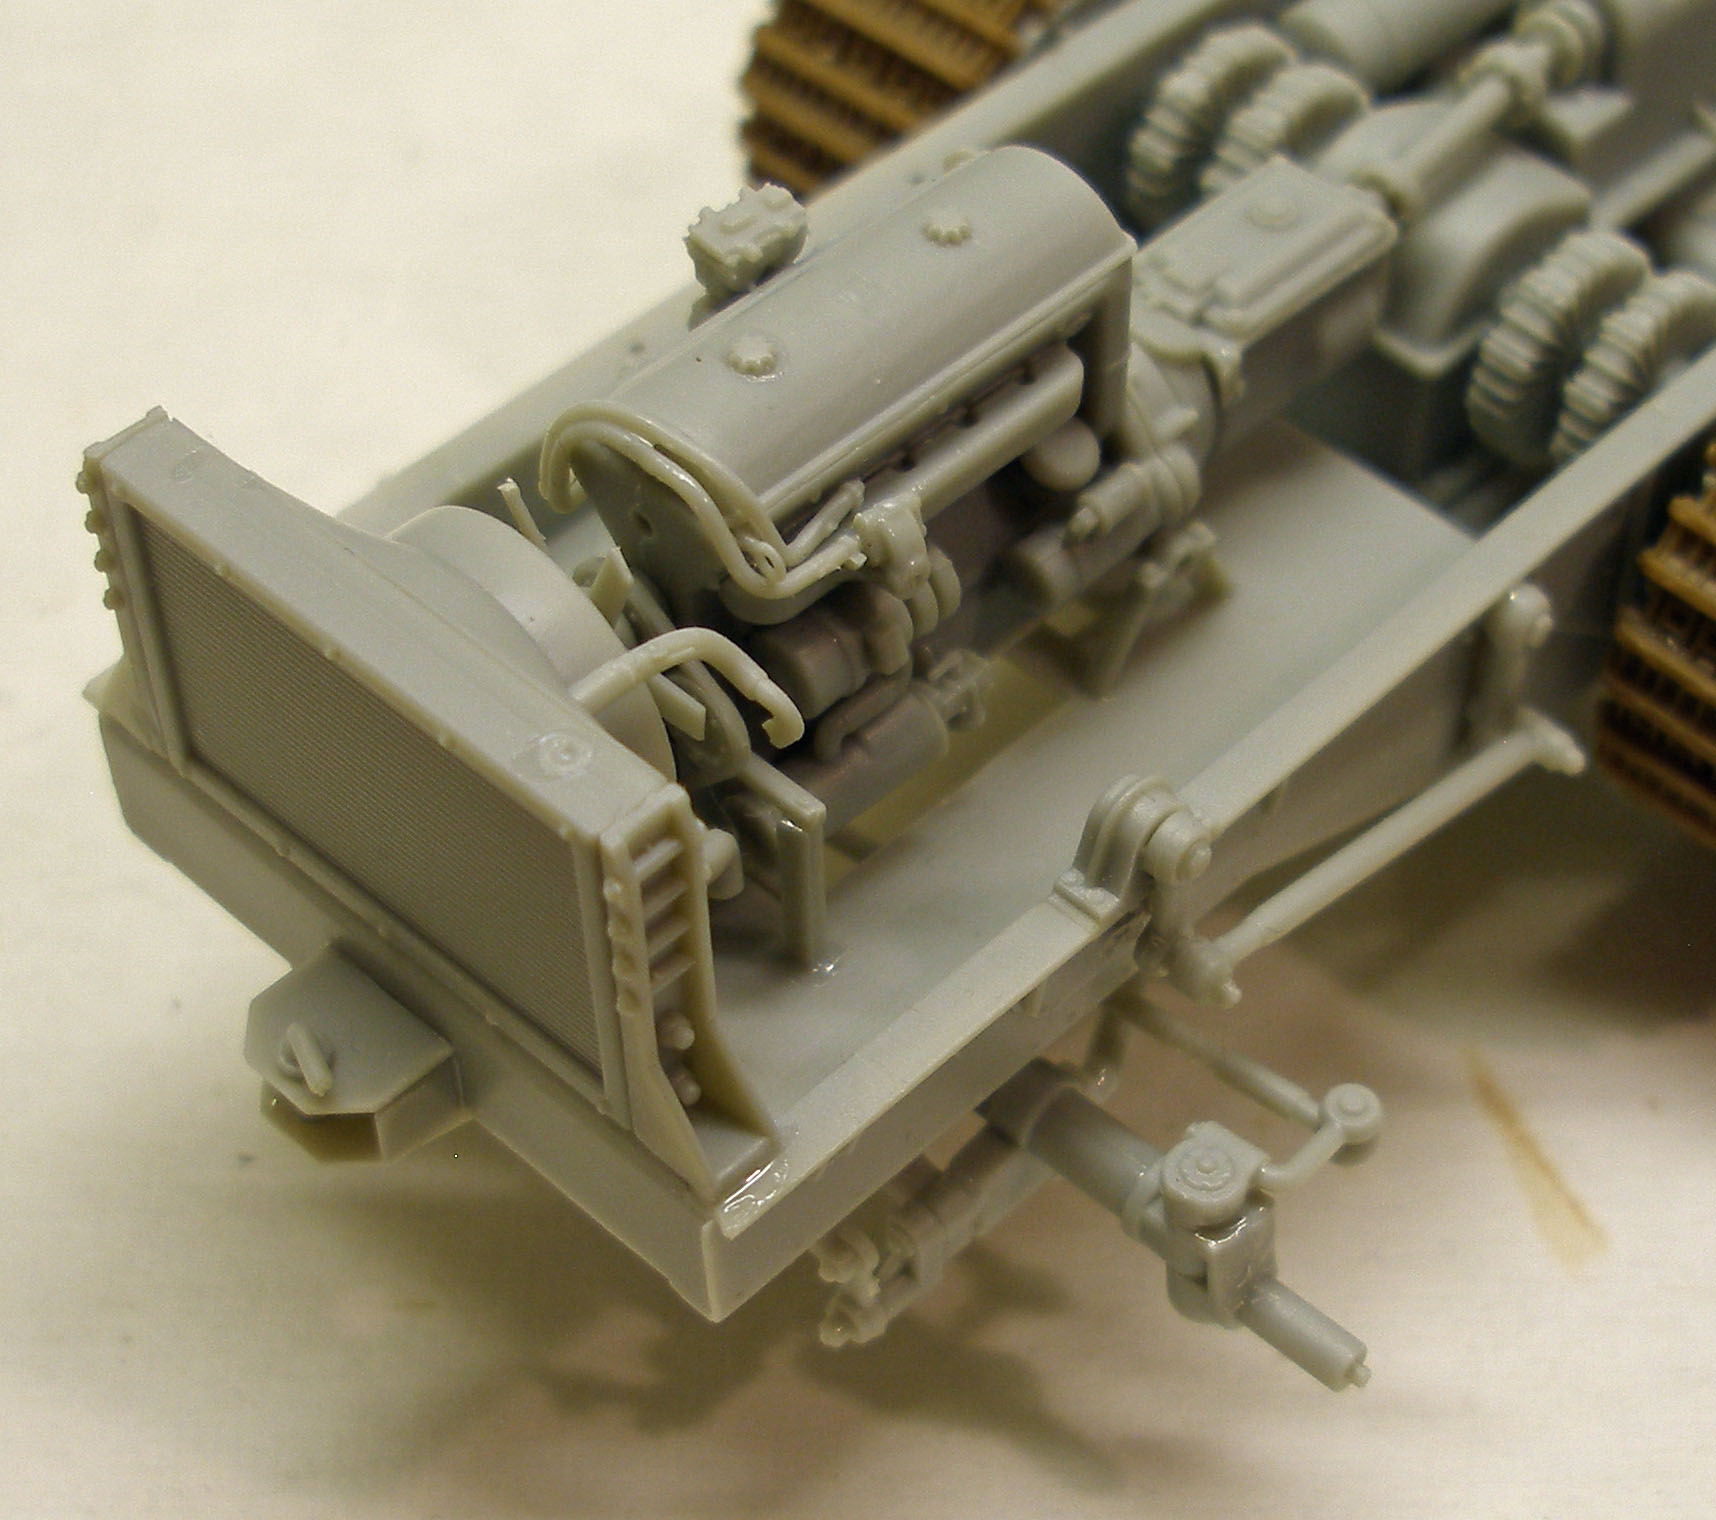
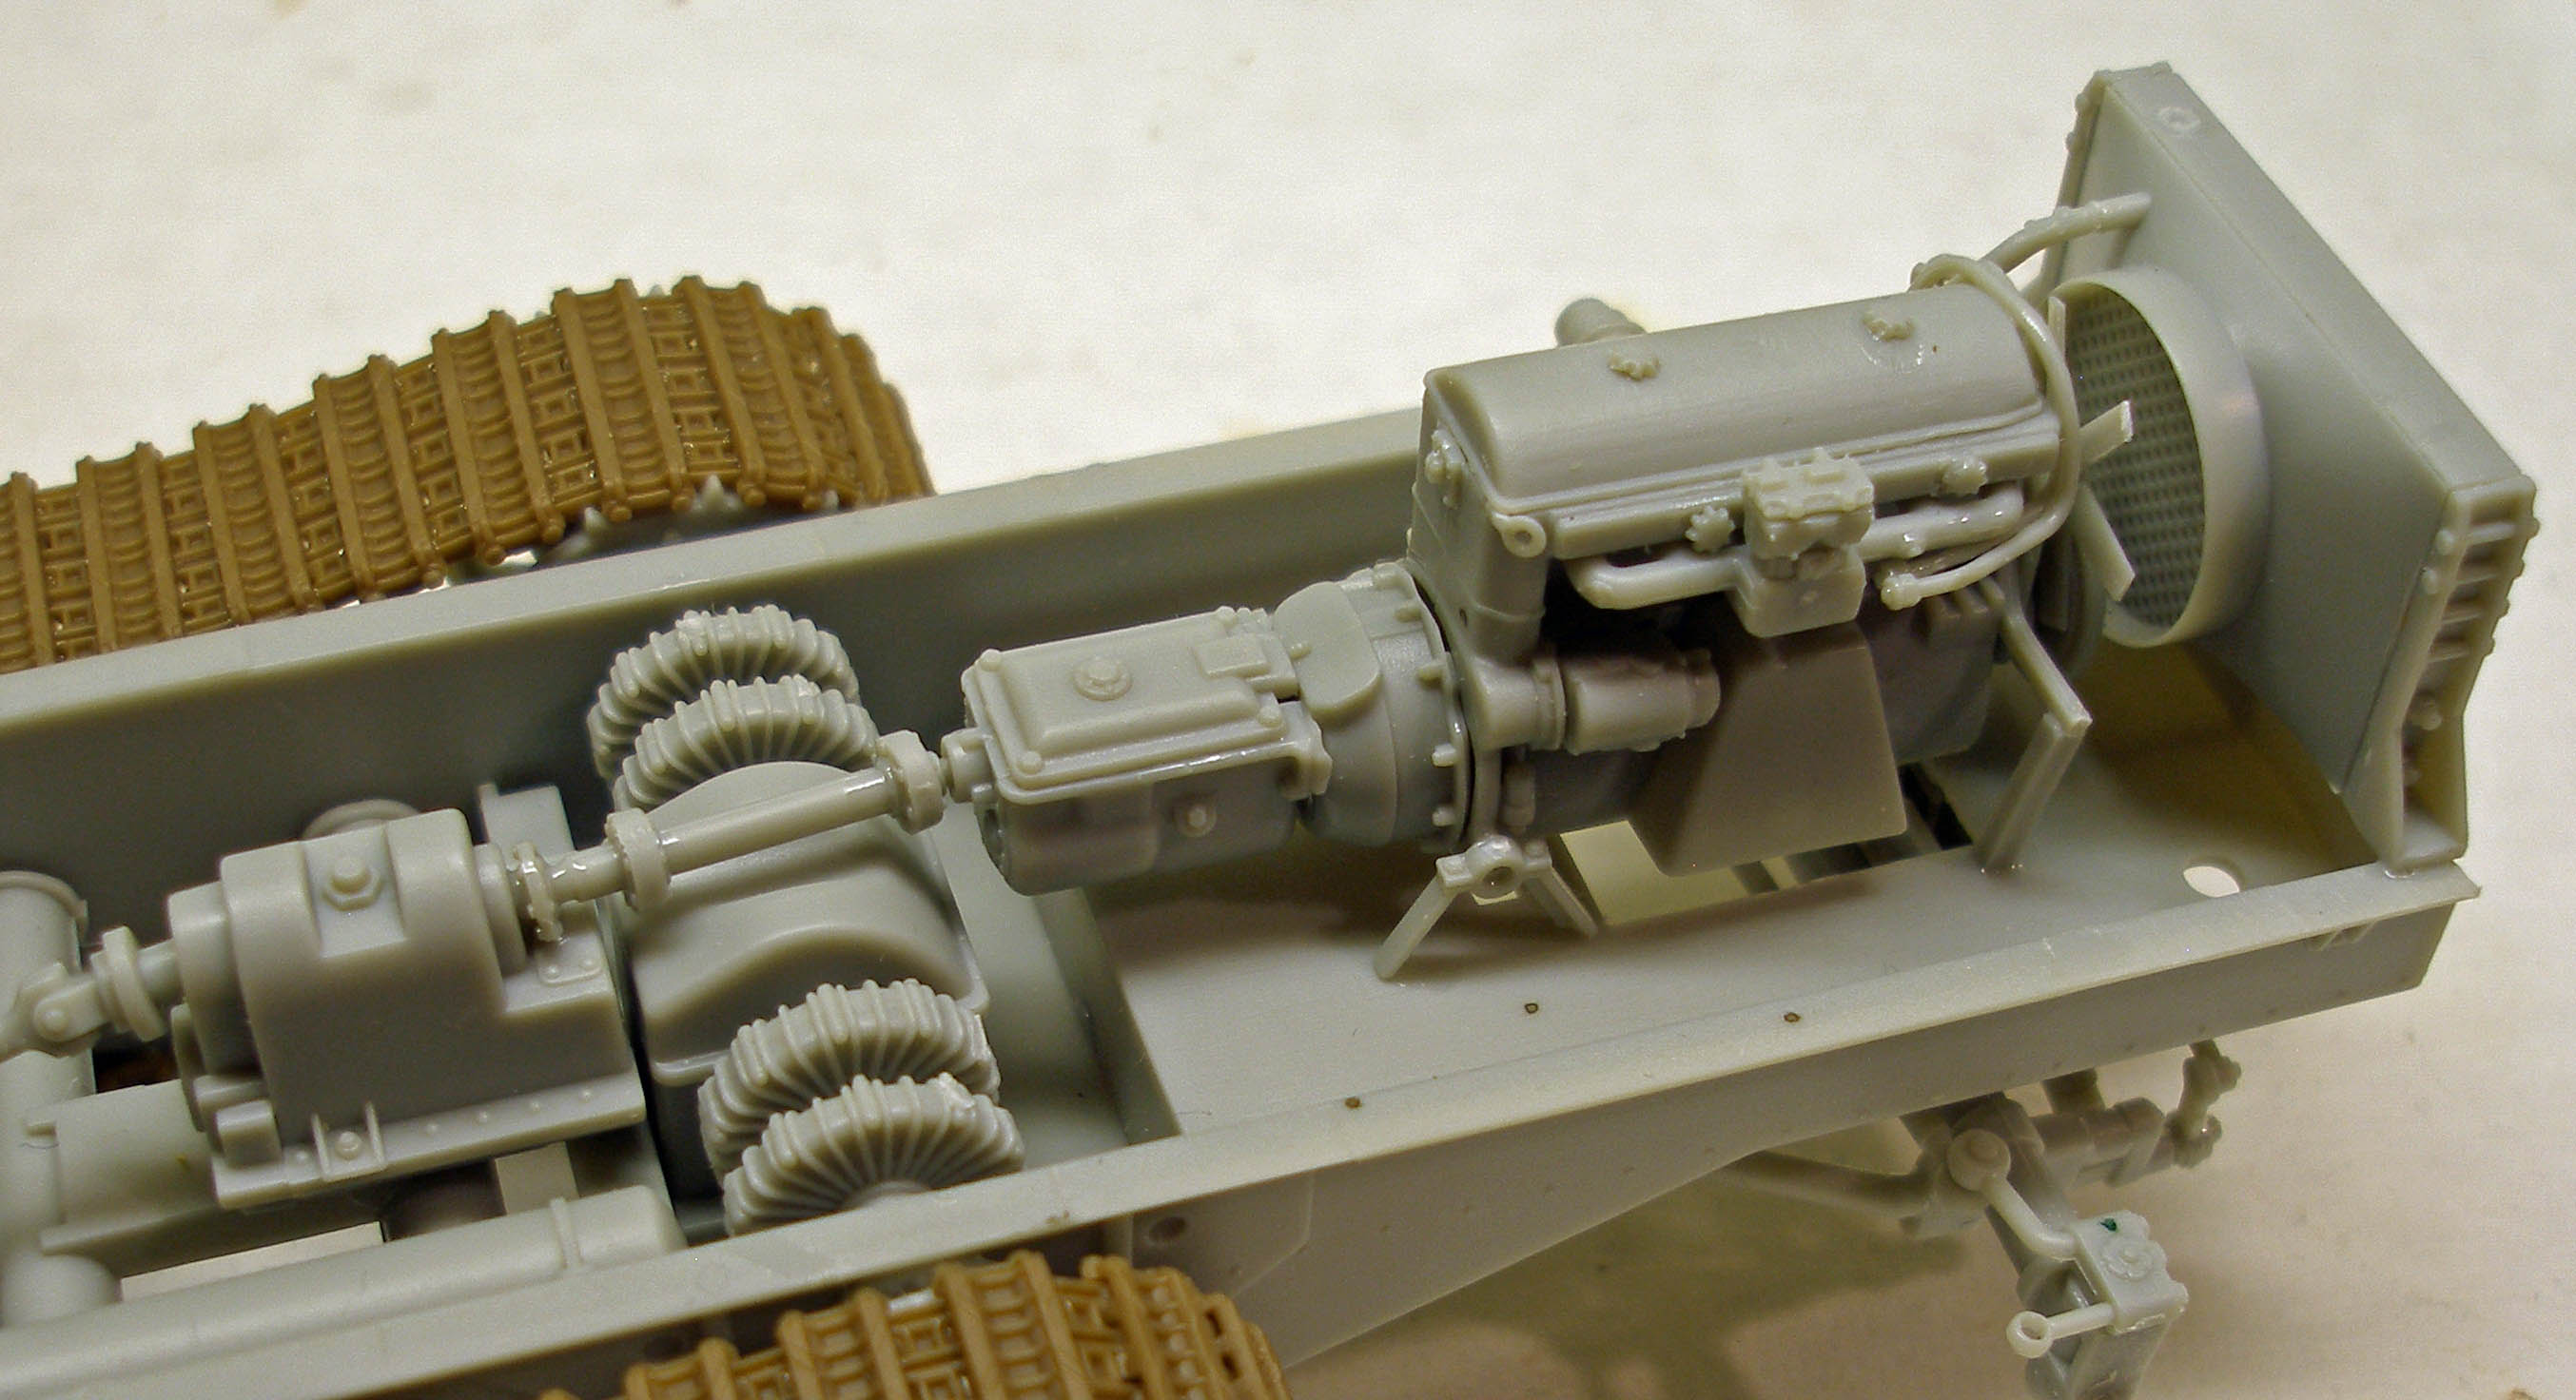
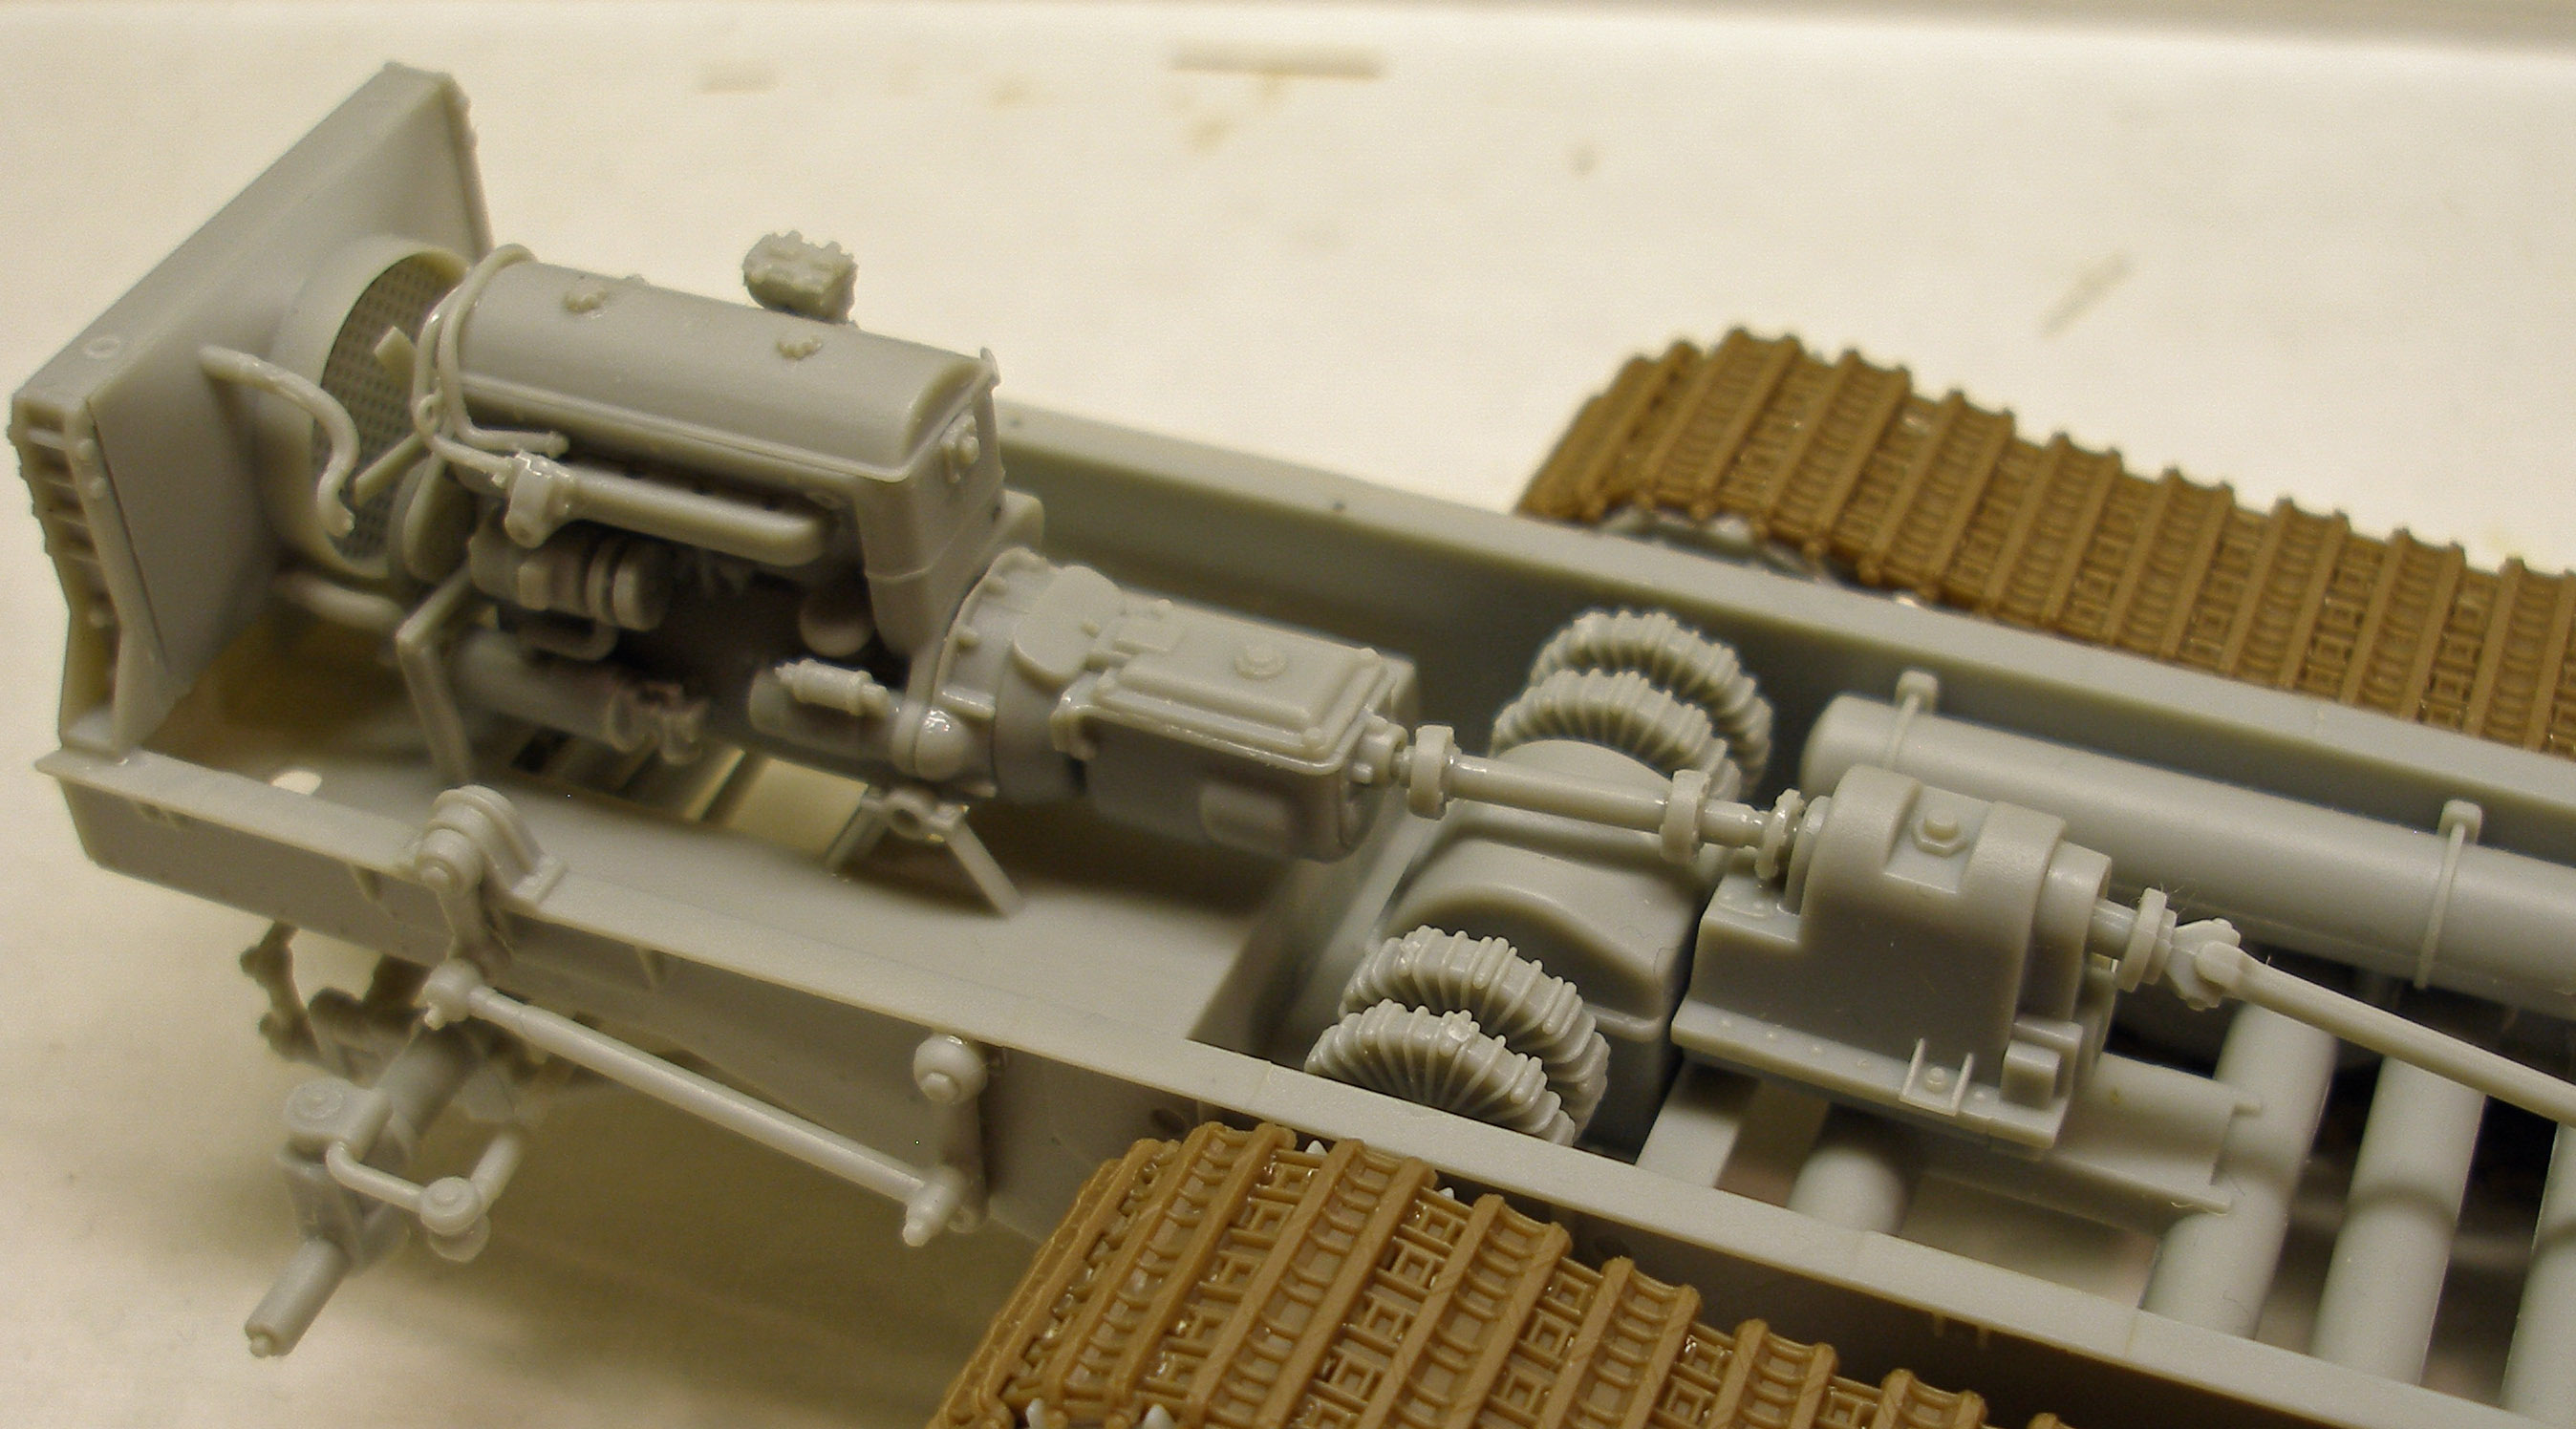
The Engine and Interior
Bronco has included a relatively complete engine and an impressive amount of detail in the driver’s compartment, most of which is visible from the cargo deck as well as through open hatches. The engine and drive train is made up of no less than 61 parts that fit relatively well.
The grab handle (Part C42) in Step 12 attaches to the rear dash board, not to the console with the dials – the illustration in the instructions here is misleading.
There is a ladder illustrated in Step 11 (Parts D17, D18 and D19), and three boxes of some type in Step 17 (Parts K6, K7 and K21) that, unfortunately, are not in the kit or on the Parts map. Oops.
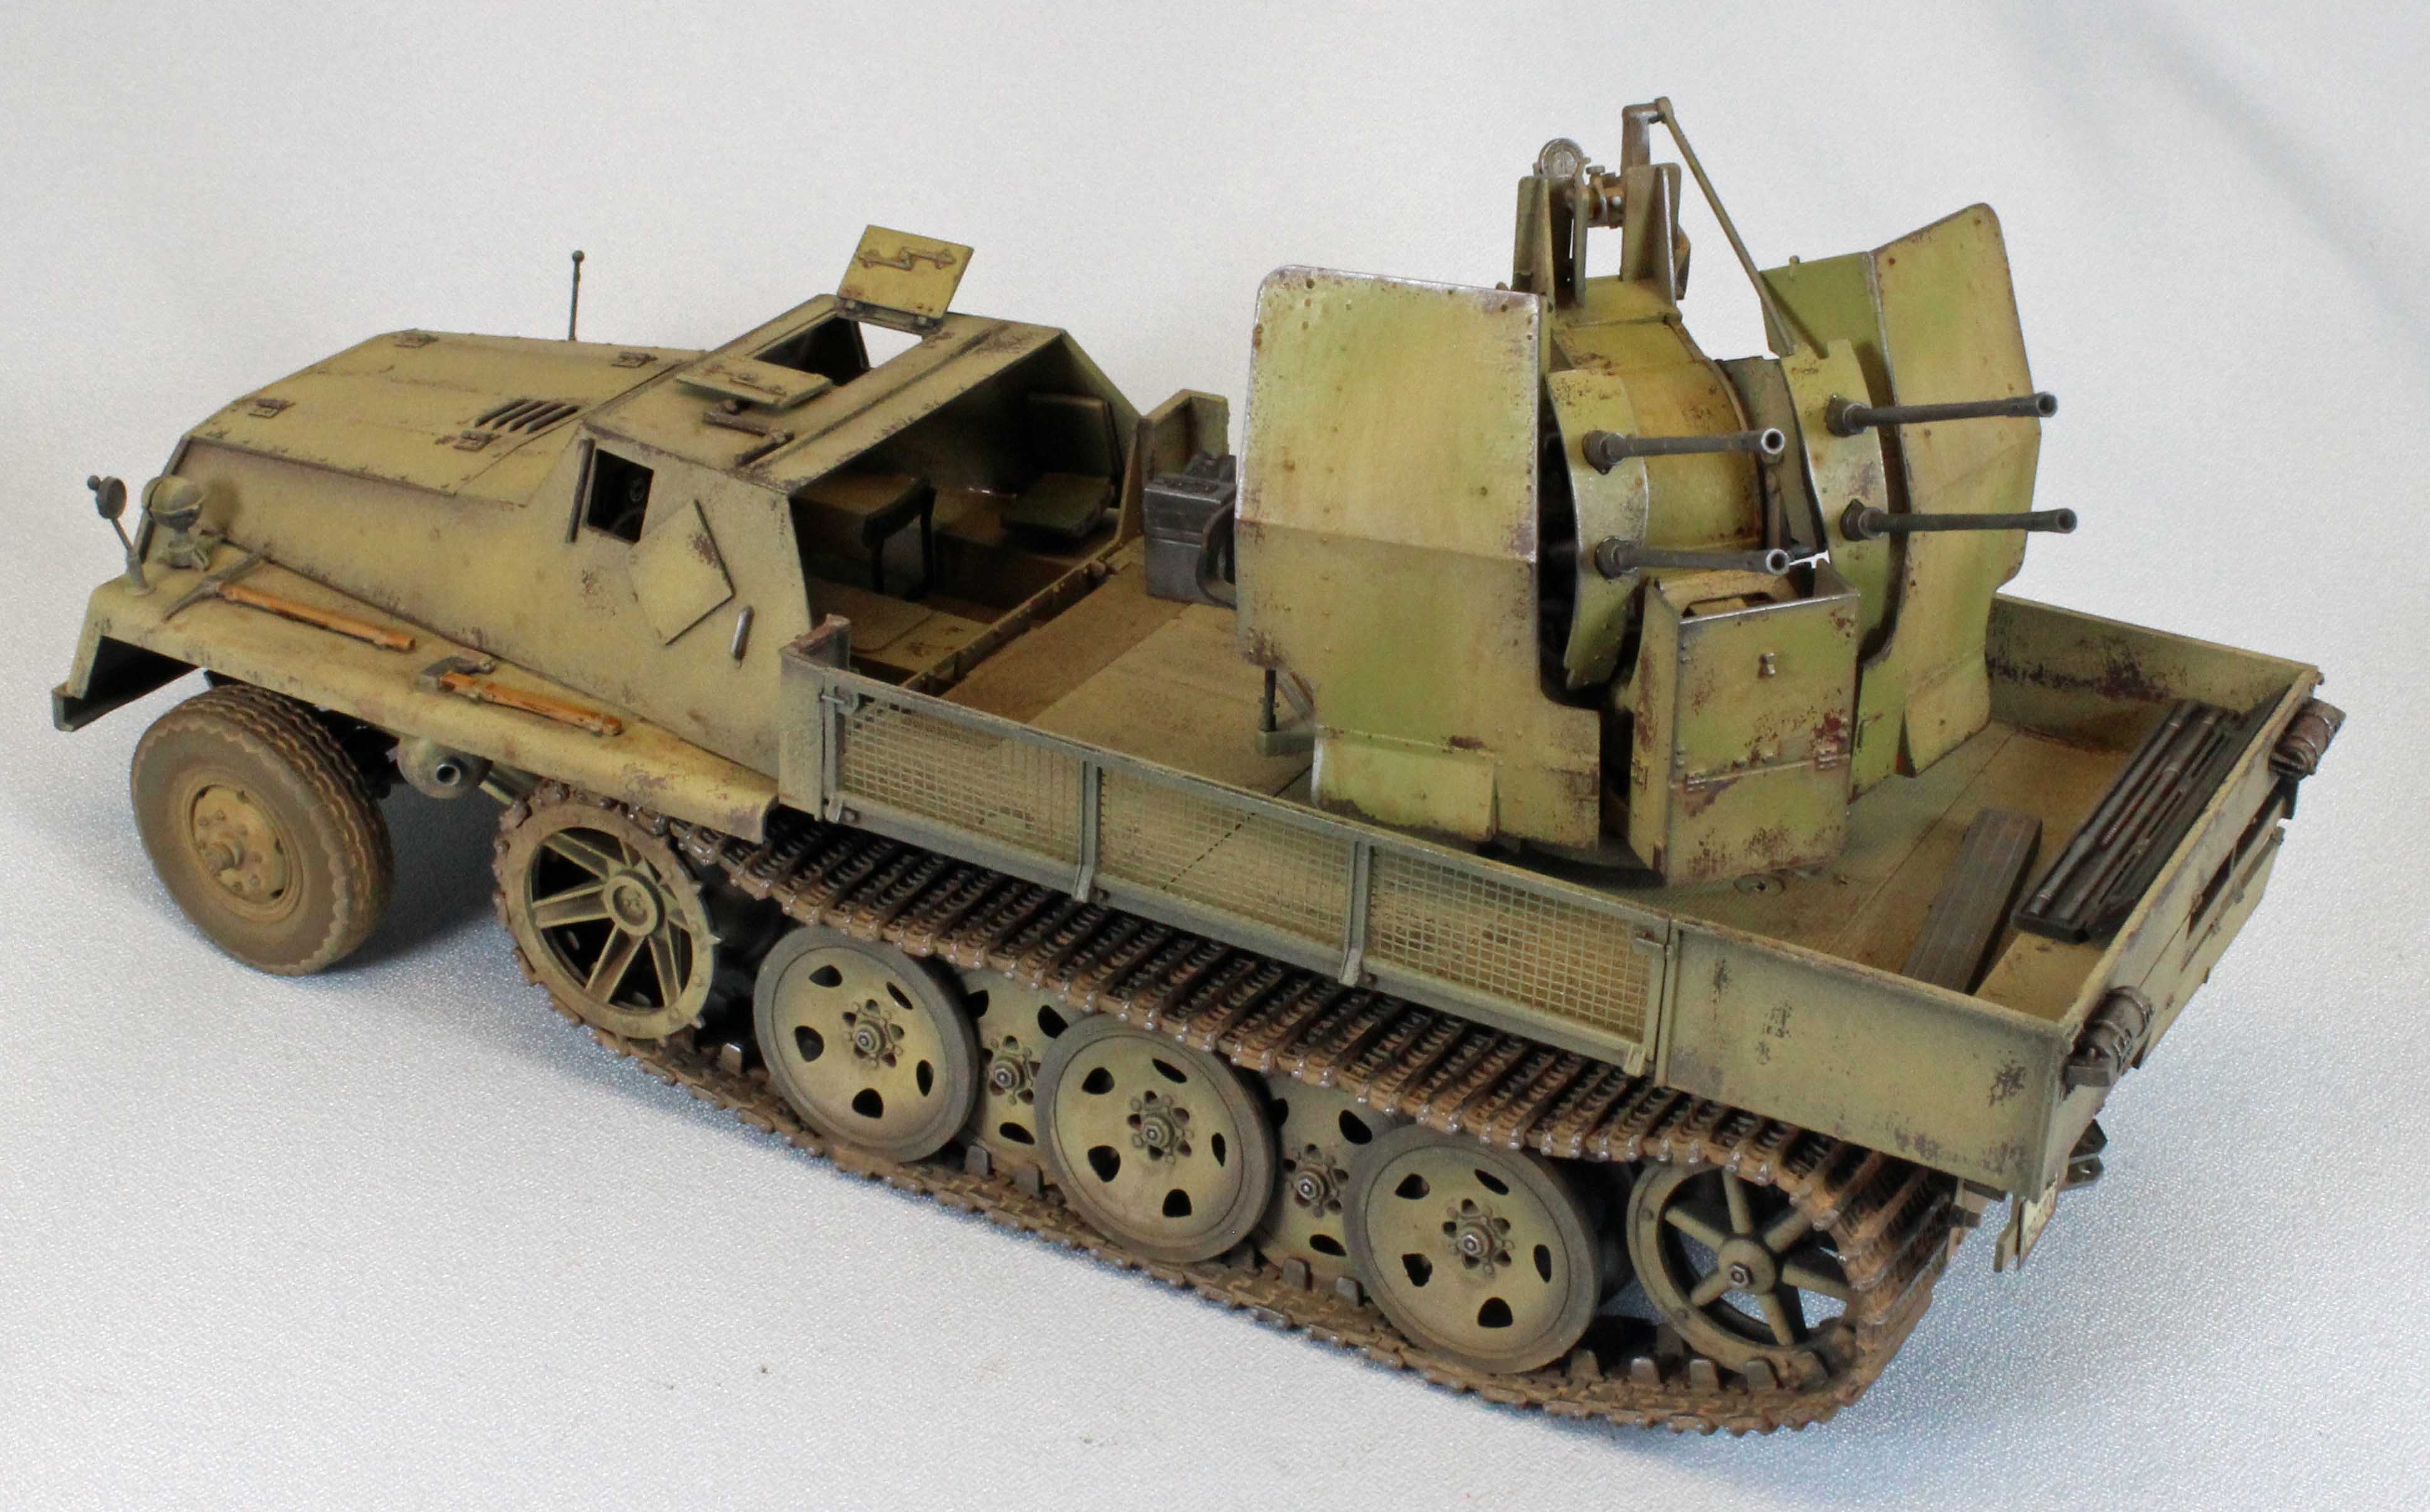
Upper Hull and Main Deck
The upper hull (cab) section is made up of a number of flat panels that come together along beveled edges. I used Testor’s (black bottle) liquid cement here since it has a longer drying time. The panels slide around but come together nicely in the end to produce a solid top and rear compartment. The pioneer tools come with molded-on clasps, which can be removed and replaced with photo etch alternatives provided in the kit.
Once Step 20 was completed I stopped and painted everything I had done so far so I could drop the cab assembly onto the main hull later without worrying about the interior finish.
Moving on to the back deck in Steps 21-25, the only issue I had was that the license place holder interfered with the fit of the vehicle distance indicator (Part M17), requiring some minor surgery. Otherwise the deck is a solid chunk of plastic when completed, sporting a lot of nice PE, some of it optional around the storage compartments in the rear. Both compartments can be modeled open or closed.
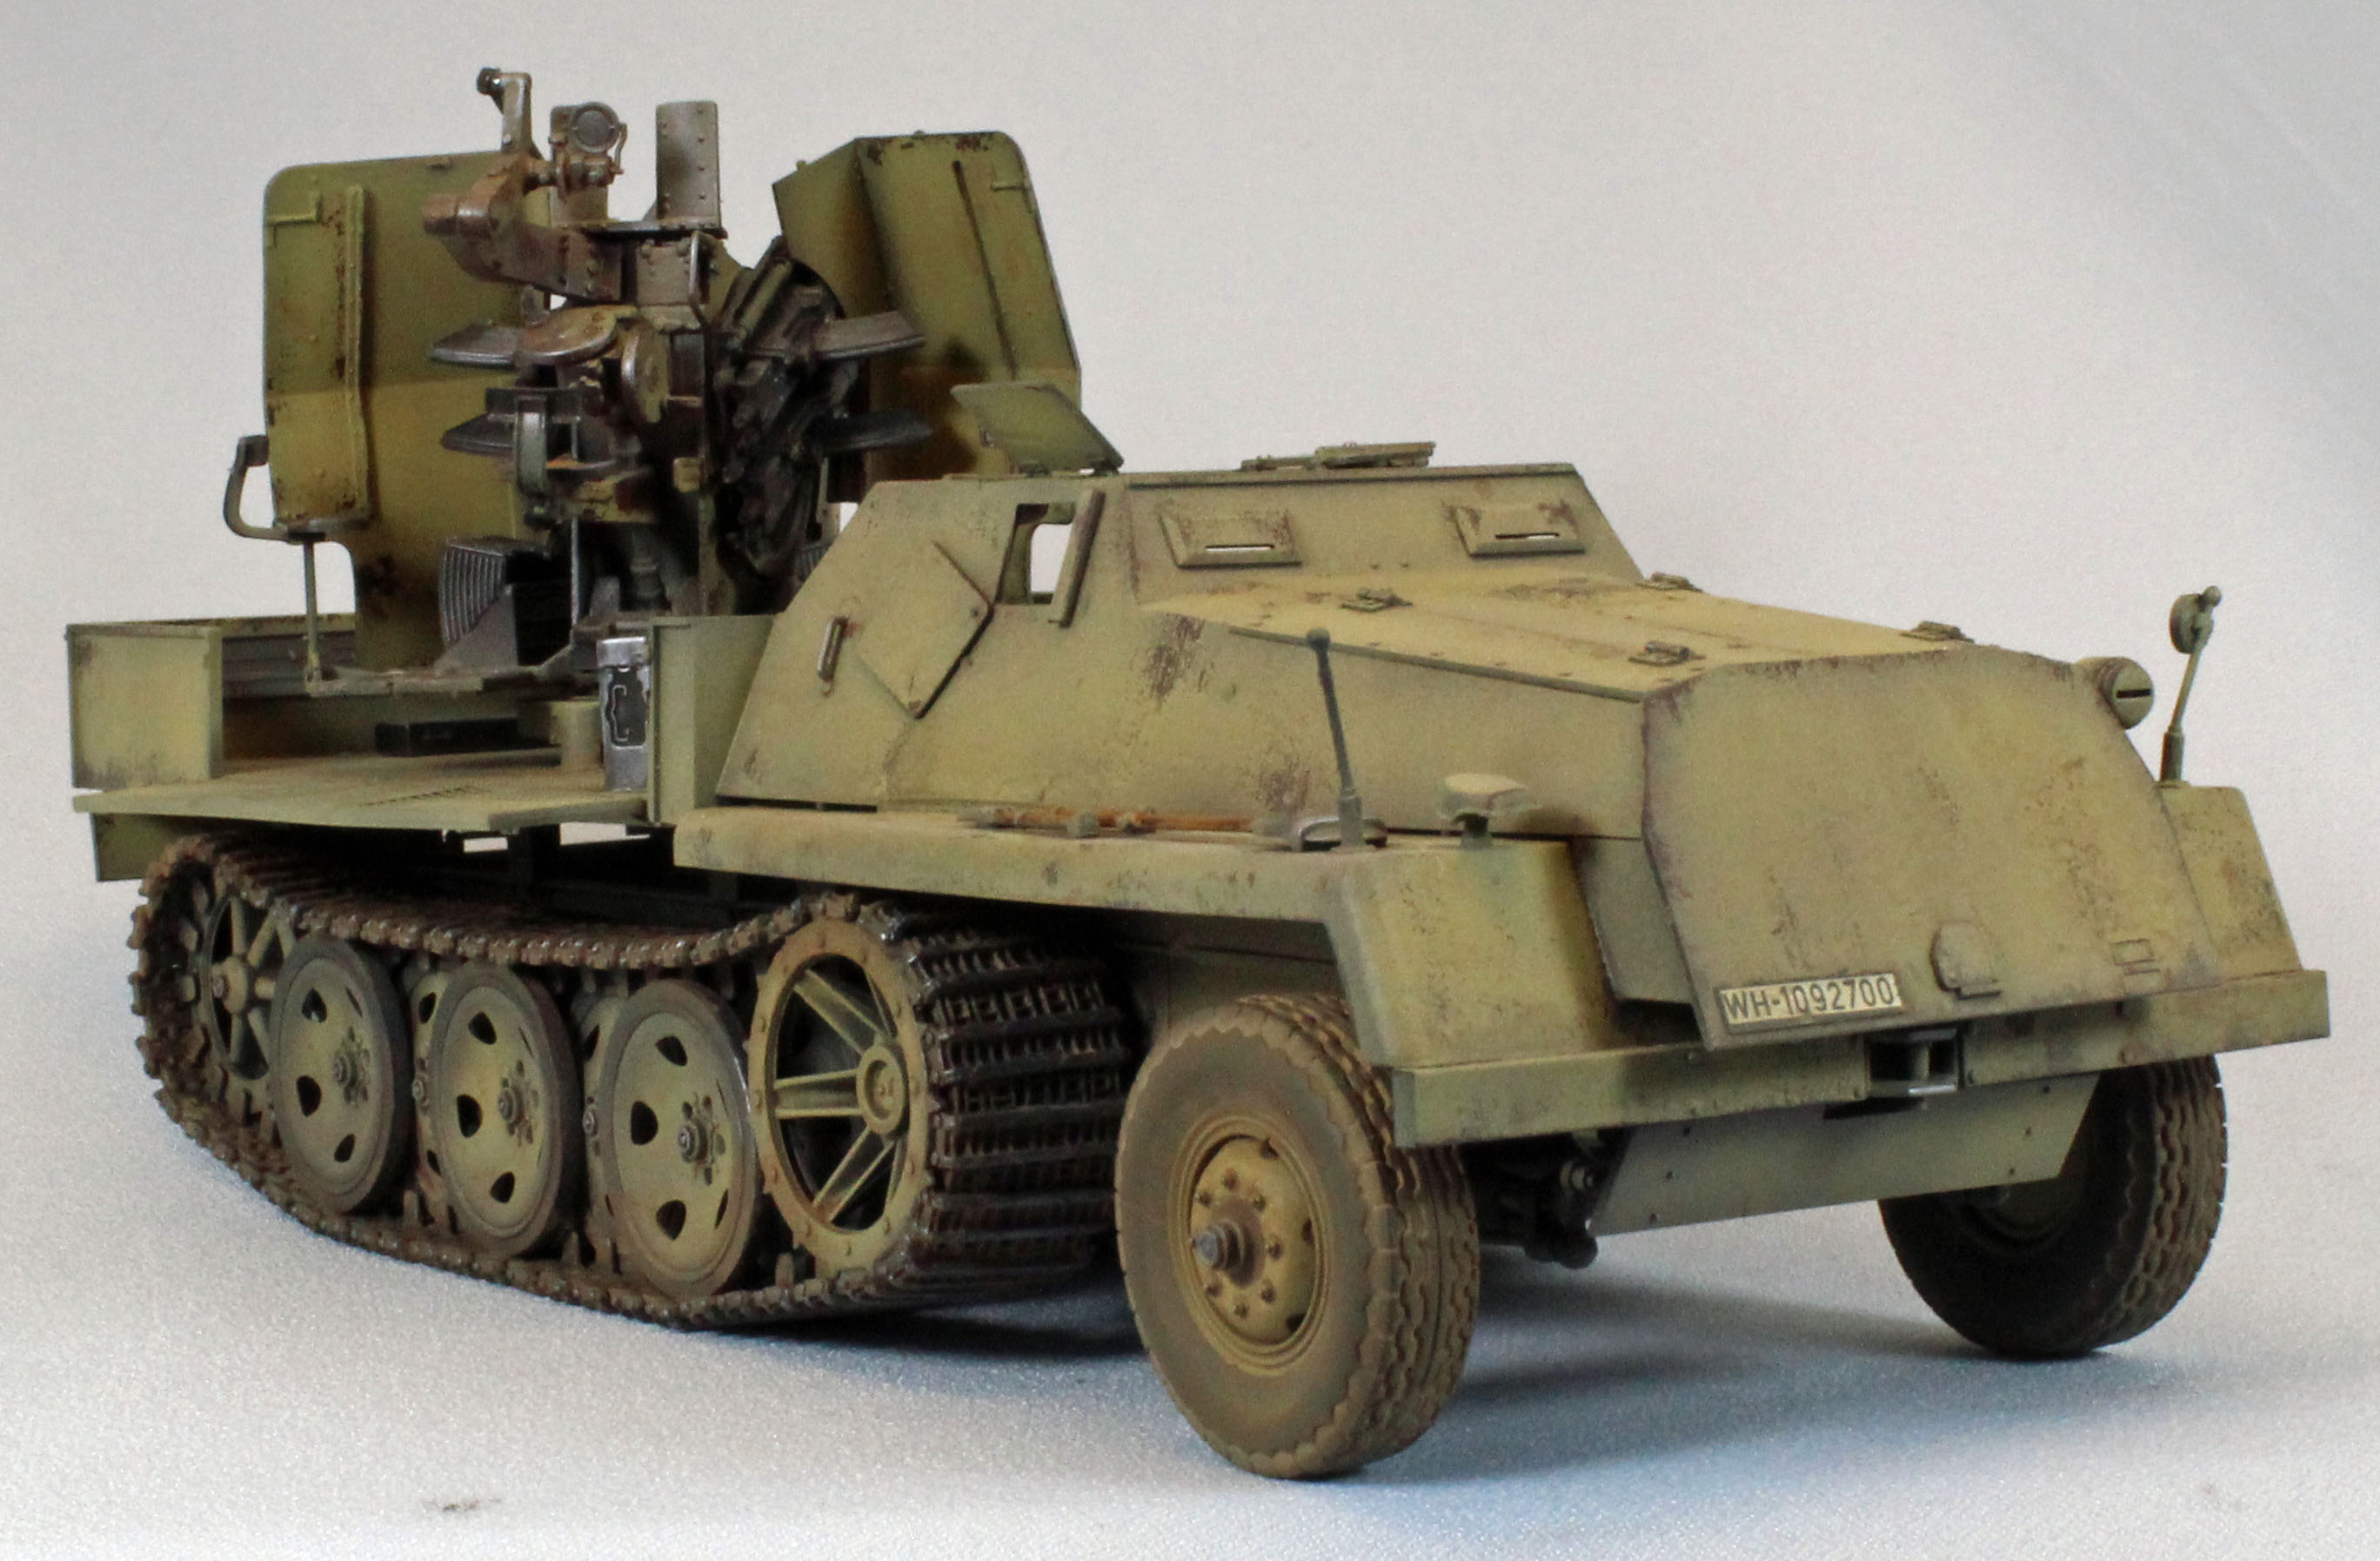
The Flakvierling
Steps 26 through 38 work through the assembly of the four-barrel AA gun. I’ve built this particular assembly from Tamiya, Trumpeter and Dragon, and, in my opinion, Bronco’s version is the best fitting and most hassle-free experience I’ve encountered yet. The fit is perfect, and the design exceptional, with both painting and ease of assembly in mind. There are four holes (two each in Parts P40/P41) that need to be drilled out before assembly – this is not in the instructions. I chose to add Parts P3/P4 in Step 29 instead of Step 33, allowing me to align things easier in Step 29. I loved using the (very thin) plastic gun shields provided by Bronco instead of over-designed PE versions found in other kits. Really – this gun was a pleasure to build and paint. Good Job Bronco!
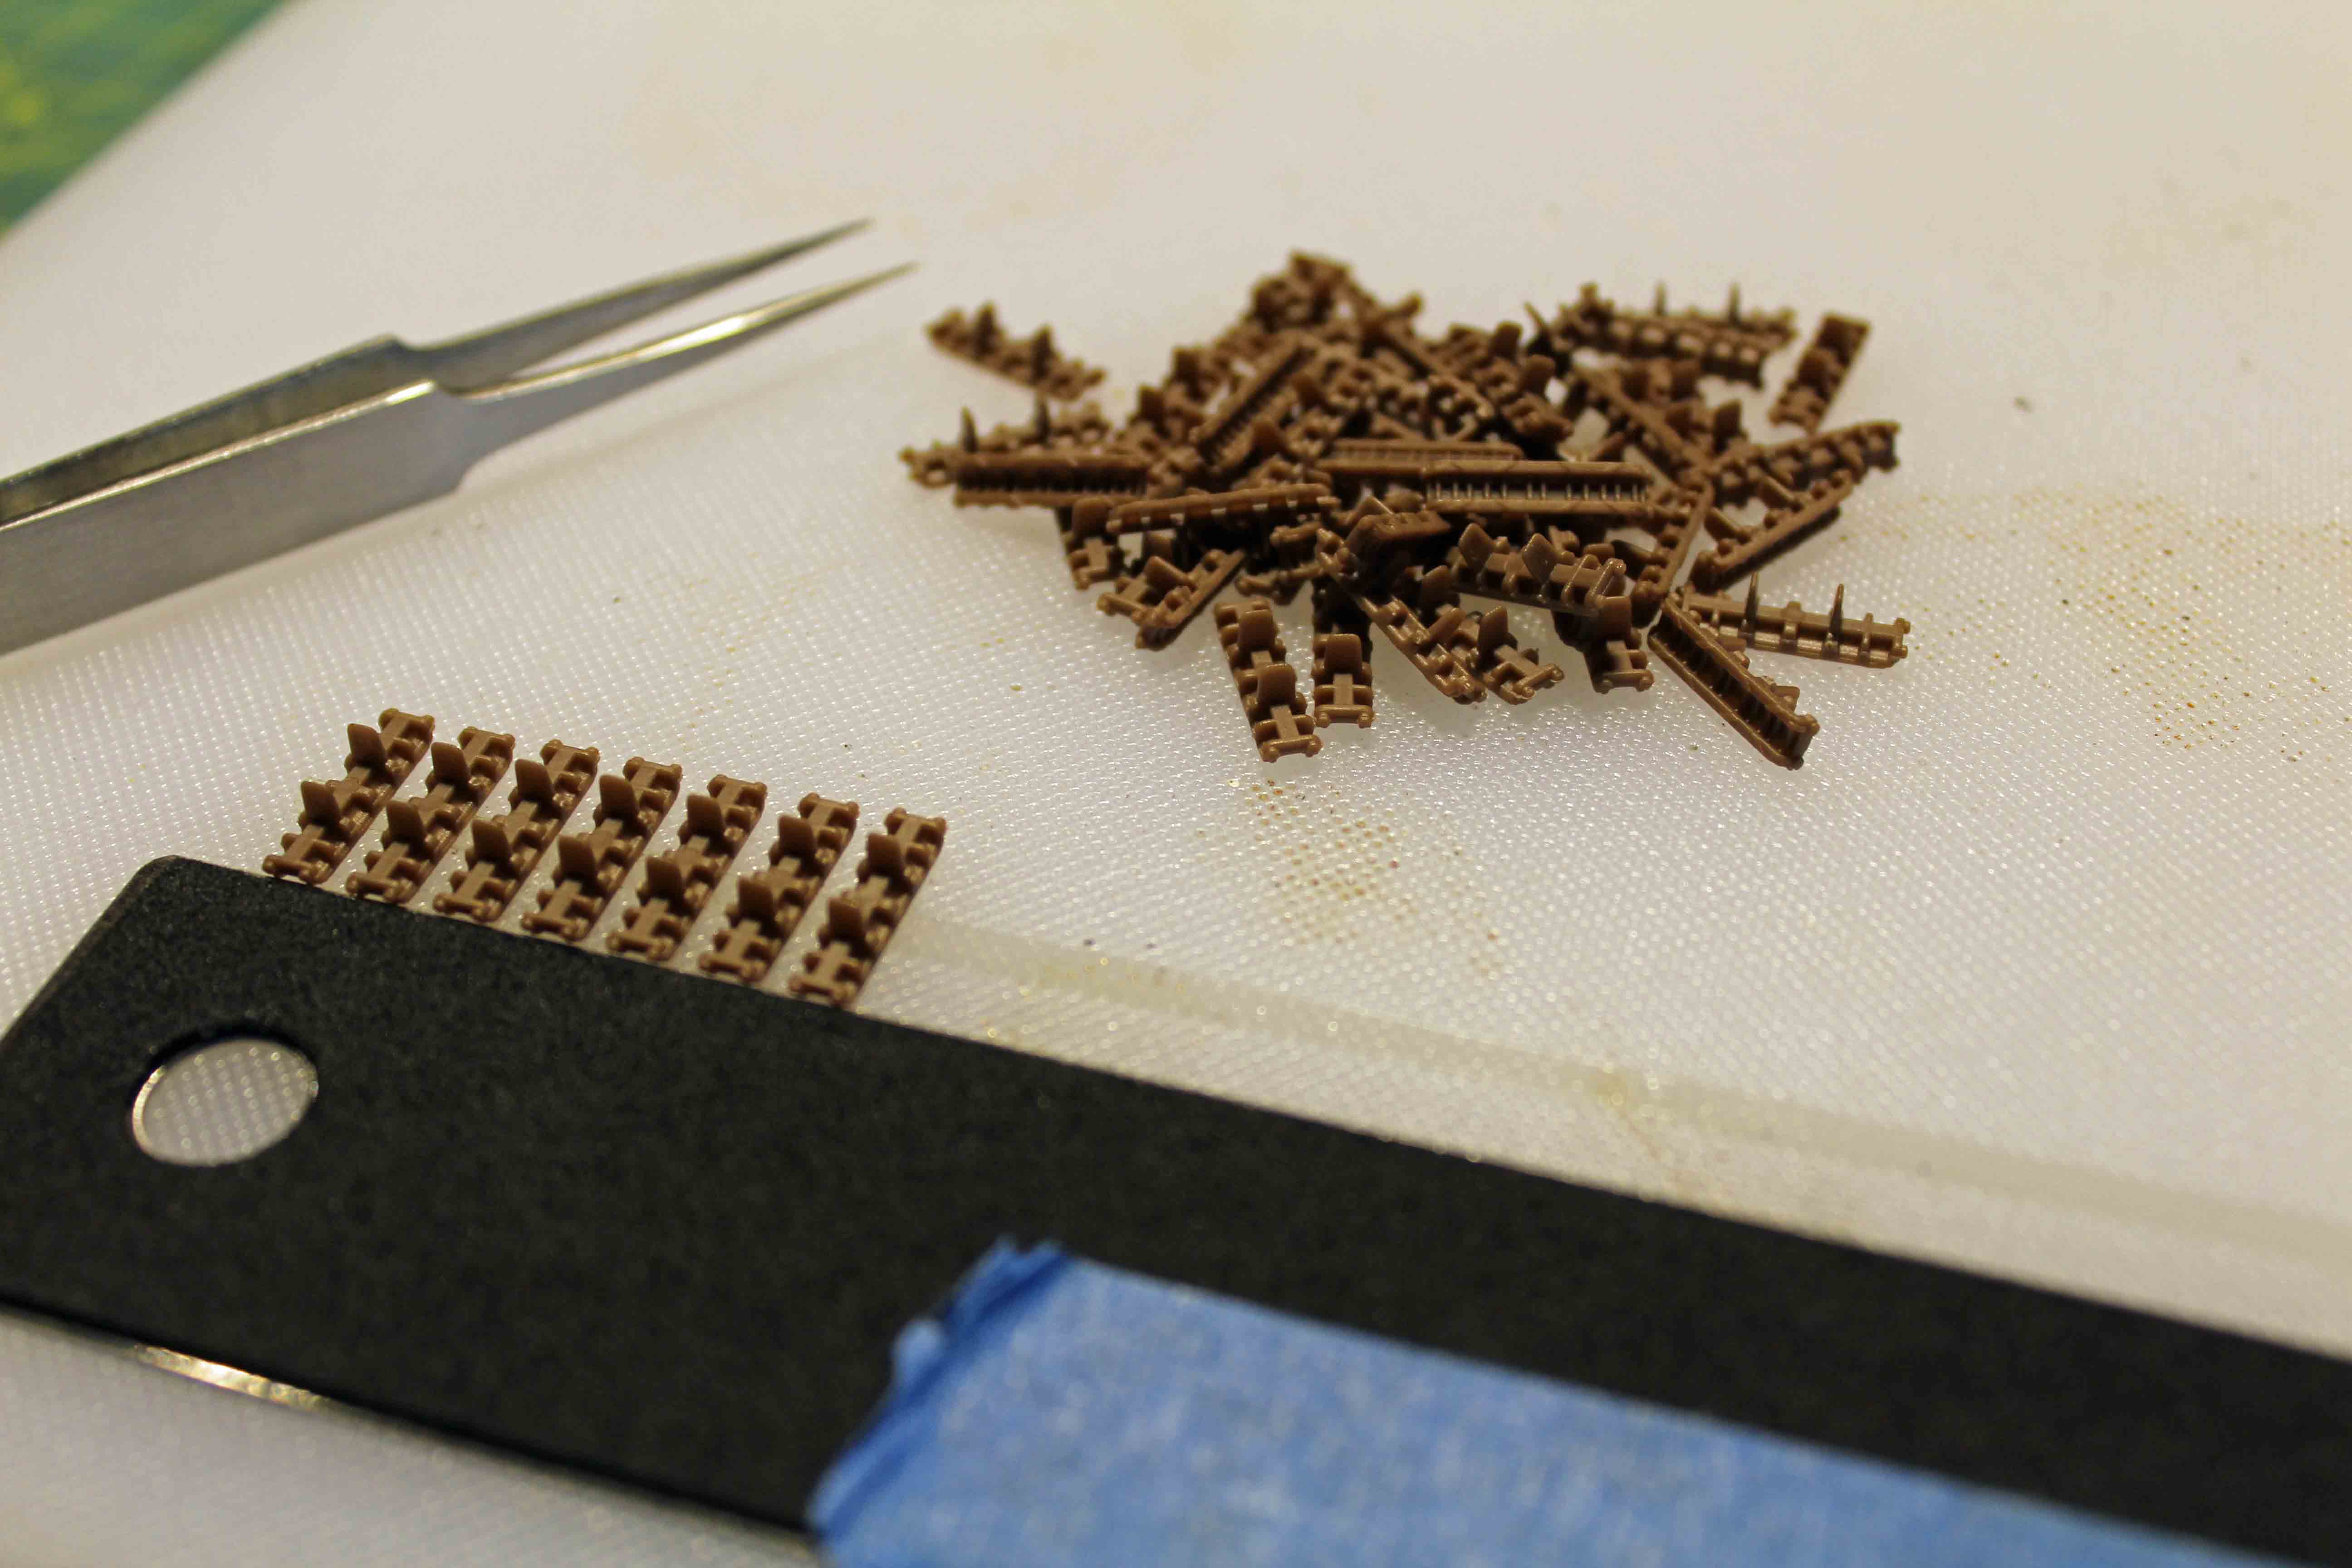
The Track and Wheels
I attached the track early, after Step 11, instead of waiting until the end of the build, per the instructions. I wasn’t going to paint them separately, and waiting until the end risked breaking delicate parts added later in the process.
The individual track links are of two sizes; the larger part that contains the guide posts and the small part that links the larger parts together. Both come on sprues and have four attachment points each, and are not sided. Thanks to very small and easily accessible attachment points, I did not feel I had to do any clean-up whatsoever after removing them from the sprues. That said, there is a prominent ejection mark on the inside of each of the larger parts, and the small parts contain detail on only one side (the outside). Purists may want to replace them with aftermarket track, or spend a lot of time cleaning the track up before assembly – certainly more time than I have!
Bronco’s instructions say to use 112 pieces per side, which I assume to mean 56 of each kind of part to equal 112, total. Counting out the links, that leaves an extra 12 parts of each type in the box – enough for a spare track run to place somewhere. I found I had 4 big parts and 3 little parts extra, per side, even with sag, making mine 105 per side, 53 ‘large’ links and 52 ‘small’. Assembly is tricky; the smaller segments drop into place between two of the larger segments, which would seem simple to accomplish if not for the fact that the larger parts want to move around while you are creating each run.
I solved the problem by using a scrapbooking product called Wonder Tape, which is a slightly tacky, two-sided, spongy tape that has just enough push in it to hold on to the links while you work. You can find Wonder Tape at any well-stocked craft store. I stuck the 1/8th inch-wide strip of tape on a glue-proof surface, about ¼ inch above and along a 15-inch ruler. After laying out the larger links about 1/8th of an inch apart from each other, I went back and dropped the smaller parts into place. I then added two drops of Model Master slow-drying cement (the black bottled variety) to the connection points between the links and let that sit for about 30 minutes. I then lifted up the run and carefully removed the Wonder Tape, and draped the run on to the vehicle. One more session for the other side and I was finished. Nice.
As far as the wheels go, as I said before, the sandwich-style design can only fit one way, and removes the need to address centerline and inner seams found in so many other kits. This is simply the best way to go with these.
Final Assembly
The last two steps bring the four main chunks of the superstructure down on to the chassis. This is where I had the most fit problems, and because there is so much breakable detail involved, the use of clamps is limited.
(My) cab section refused to seat firmly on the lower hull. I ended up gluing portions of the cab section, front to back, using simple homemade weights added to the top of the cab to assist in holding things down. The weights I use for this type of work are made up of different amounts of lead shot sewn into small cloth bags – perfect for when you need heft without sharp edges.
The nicely fitting jack assembly ended up stuck to the rear of the hull – there was no room for it up next to the pioneer tools (where the instructions tell you to place it) once the front upper hull is in place.
Painting and Finish
I wanted to use the hairspray technique to show iron-red primer peeking through late war German Yellow, so I used Tamiya paints which are ideally suited for this technique.
(Note: I thin all Tamiya paints 50/50 with Gunze Leveling Thinner. I thin all Vallejo paints with 10 drops of their airbrush thinner and a single drop of Liquitex Flow Aid per 10 drops of Vallejo paint. I mix the paint in a plastic disposable cup, swish that around until it is mixed, and then pour it into the color cup on my Pasche-H Single-Action airbrush, Number #3 tip, set at 20 lbs. pressure.
Primer, Base Coat and Camouflage Coats:
I started by airbrushing a dark primer/pre-shade coat of (90% Alclad Black Primer + 10% Alclad Grey Primer) to give the plastic and PE some grip for the following coats, and to fill in the recesses and create a shadow effect near the flat surface edges, adding depth for the subsequent coats to come. Once that had a chance to dry and de-gas overnight, I gave everything a base coat of Vallejo German Brown Primer which blended nicely with the black undercoat. Next I gave everything a good coat of hairspray from an aerosol can. I use Tre-Semme, but I don’t think it matters – a thick coat still dries thin and doesn’t leave any tide marks.
I let that air-dry and then carefully sprayed a mix of Tamiya XF-60 Dark Yellow and Tamiya XF-55 Deck Tan, allowing some of what’s underneath to show through along the edges and in recesses. For the gun shield I added a little Tamiya XF-67 NATO Green and sprayed an easy wave pattern to hint that the gun came from another vehicle.
I let the Tamiya paint dry for several hours and then using a short-bristled paintbrush, a small cup of water, and a paper towel to rub the yellow paint off here and there until I had what I was after.
Pioneer Tools, Deck Equipment and other Details:
I hand-painted the two front tires using Model Master US Army Helo Drab enamel. I painted the four interior seats using Tamiya XF-5 Flat Green and the assorted shift levers and foot pedals Tamiya XF-10 Flat Brown.
I used a mix of Vallejo New Wood and Vallejo Sand Ivory for the wooden portions of the pioneer tools.
Decals:
With painting finished, I hand-brushed the surface areas that would be receiving decals with a coat of Future floor polish to give the decals a smooth surface to slide on.
Once the Future was dry, I used the Red and Blue MicroSol/MicroSet products to apply the decals without any problems. Once dry, I gave the entire vehicle a good coat of Future to seal the decals and prepare the surfaces for washes and streaking.
Washes and Filters:
Before applying a wash on the glossy surface, I brushed on a coat of Mig Wash Brown oil paint on all the wooden parts of the pioneer tools, and then rubbed it off with a Q-tip later, leaving it darker near the edges along the clasps. I used AK Interactive Track Wash for the track and Dark Wash diluted with Mona Lisa White Spirit for an overall wash. Once dry, I went over the entire vehicle with diluted Mig Brown Wash as a filter.
Finishing Up:
I airbrushed Vallejo Light Brown along the bottom of the vehicle to simulate road dust, and shot a little Vallejo Matt Varnish on any remaining shiny spots. I then used Uschi Chrome Pigment applied with a rubber-tipped Colour Shaper for steel detail here and there.
Finally, I added a slurry of Mig European Dust pigment and Mona Lisa White Spirit to the front wheel tread, brushing off most of it off after it dried. Done and done.
Conclusion
Having so recently built Bronco’s sWS ‘Uhu’ halftrack, this build was a breeze. I knew where the (minor) issues were, and what order to do things in. If I had come at this without that experience, however, I would have slowed down and taken my time. Bronco kits take patience and a little skill.
Sometimes there are no easily-defined connection points between parts, or they are absent altogether. I think this is a result of Bronco prioritizing accuracy over build-ability, which is fine, but anyone planning to build this kit needs to understand that. Dry fitting and methodical inspection is ‘de rigueur’ for a project like this.
In the end, however, extra effort brings satisfying results. The finished product is unique and I was able to experience a real sense of accomplishment with this challenging and interesting build.
The superb design of the front tires and the 2cm Flakvierling gun were a blessing, and the (optional) PE parts provided as an alternative to plastic parts most welcome. The plastic gun shields are very thin and delicate, and I prefer these to PE versions found in other kits.
I recommend this kit for all modelers with the understanding that some of the assemblies will require experience to get right. All things considered, the build went relatively smoothly and the result is worth the effort. My hat is off to Bronco for providing yet another ambitious and interesting project.
I would like to thank Bronco Models for providing this kit for review, and to IPMS USA for giving me the opportunity to build it.