Reviews
Aircraft
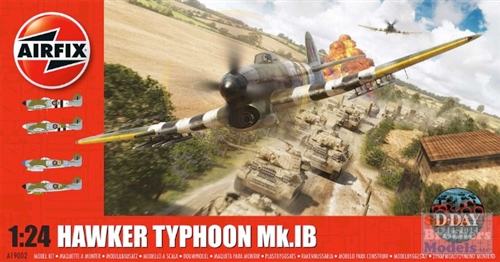
Hawker Typhoon Mk.IB
by Eric Christianson
 Model: Hawker Typhoon Mk.IB - Part 3
Reviewed by: Eric Christianson, IPMS # 42218
Scale: 1/24
Company: Hornby Airfix
Price: $149.99
Product/Stock #: A19002
Website: Airfix
Product Web Page: View
Product provided by: Airfix
Part One of this review can be found here:
http://ipms-seattle.org/reviews/aircraft/2015-EC-Airfix-19002-Part1/
Part Two of this review can be found here:
http://ipms-seattle.org/reviews/aircraft/2015-EC-Airfix-19002-Part2/
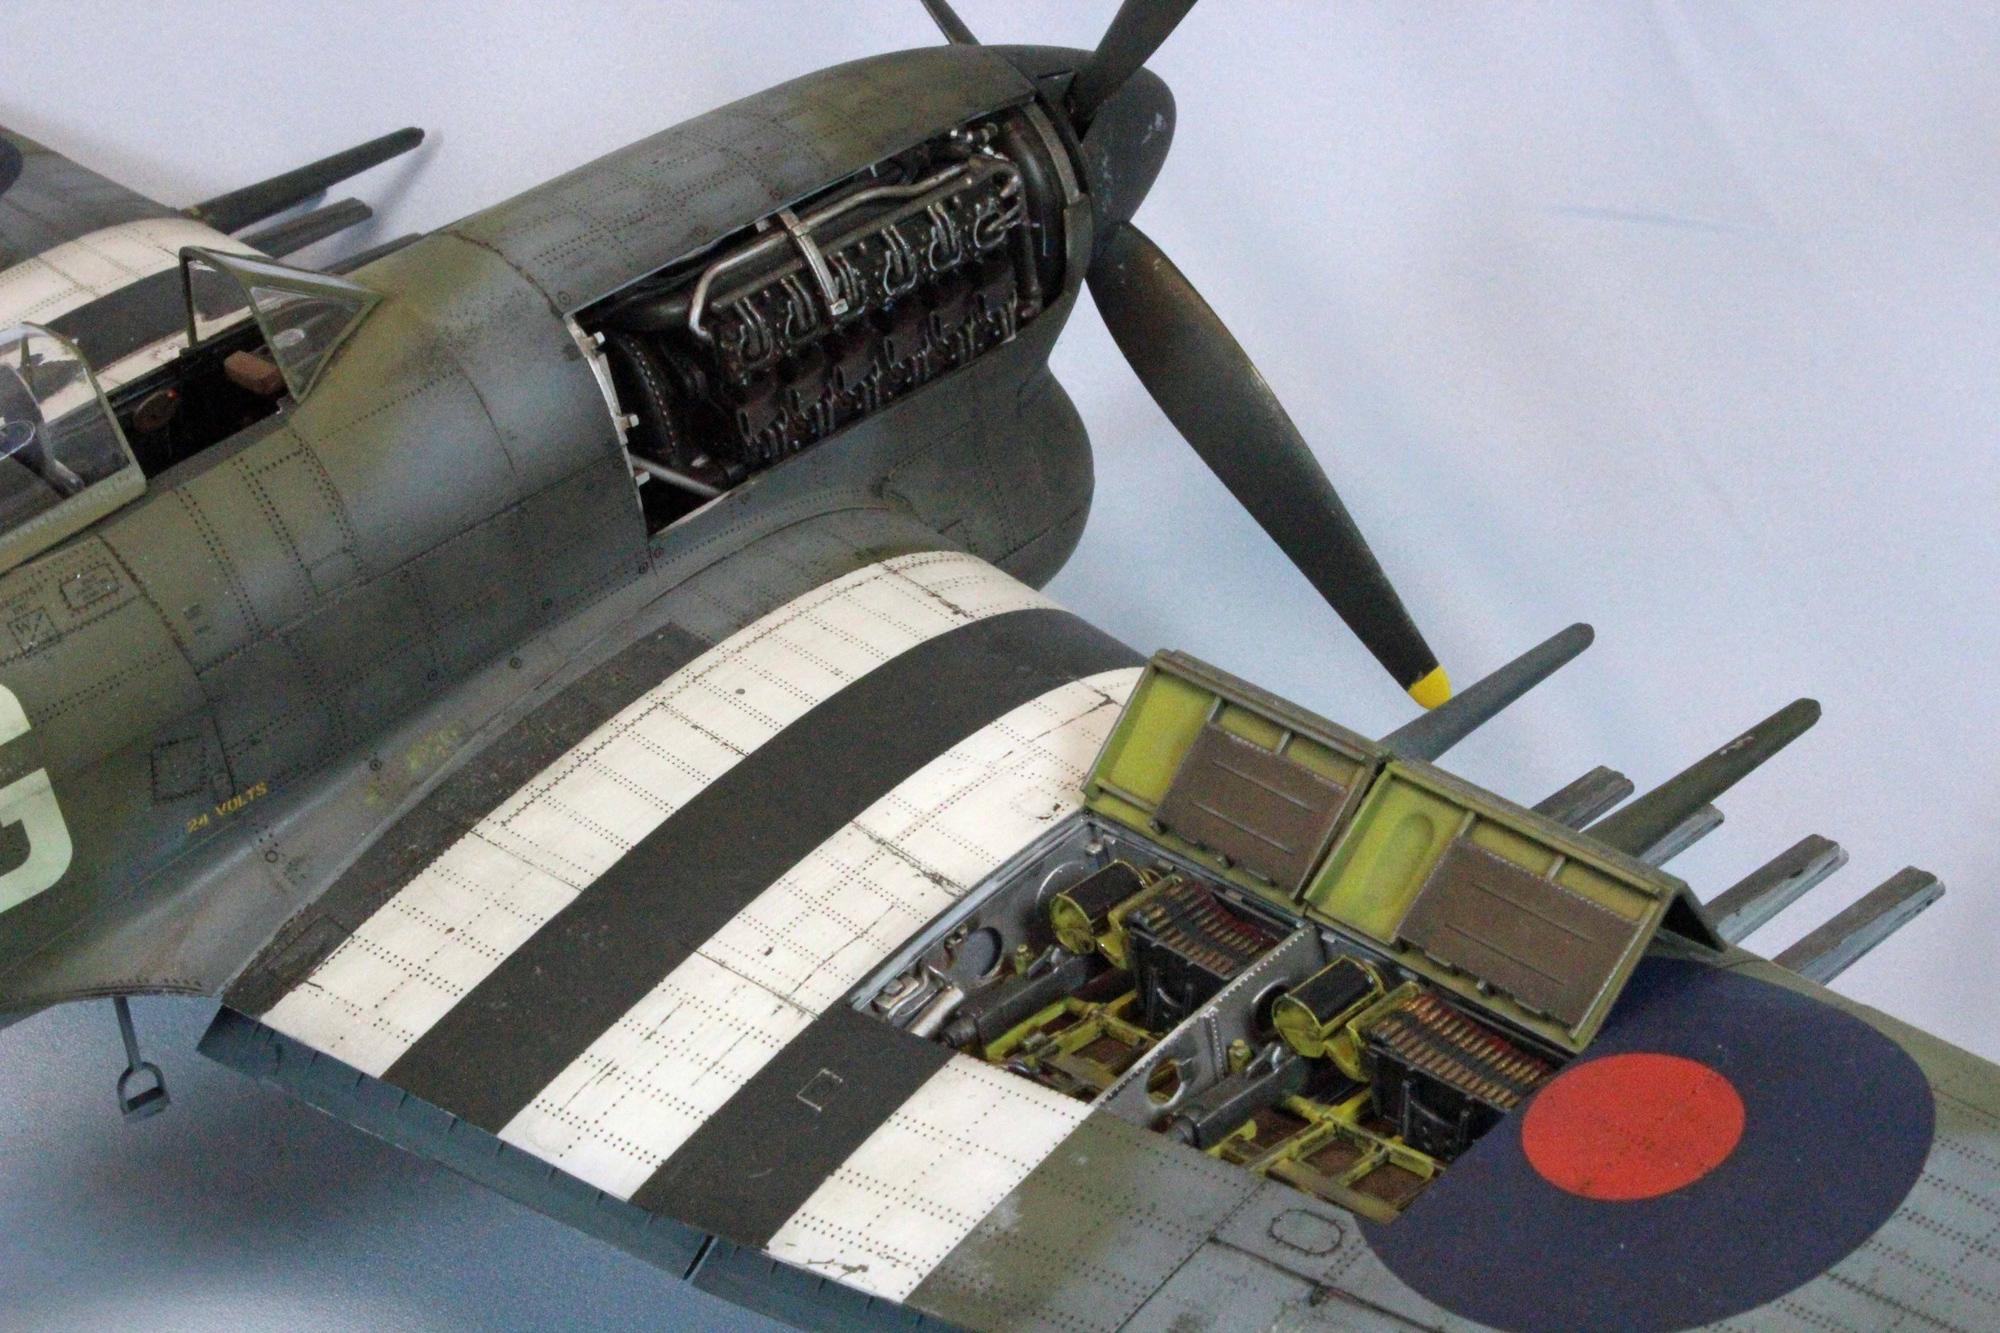
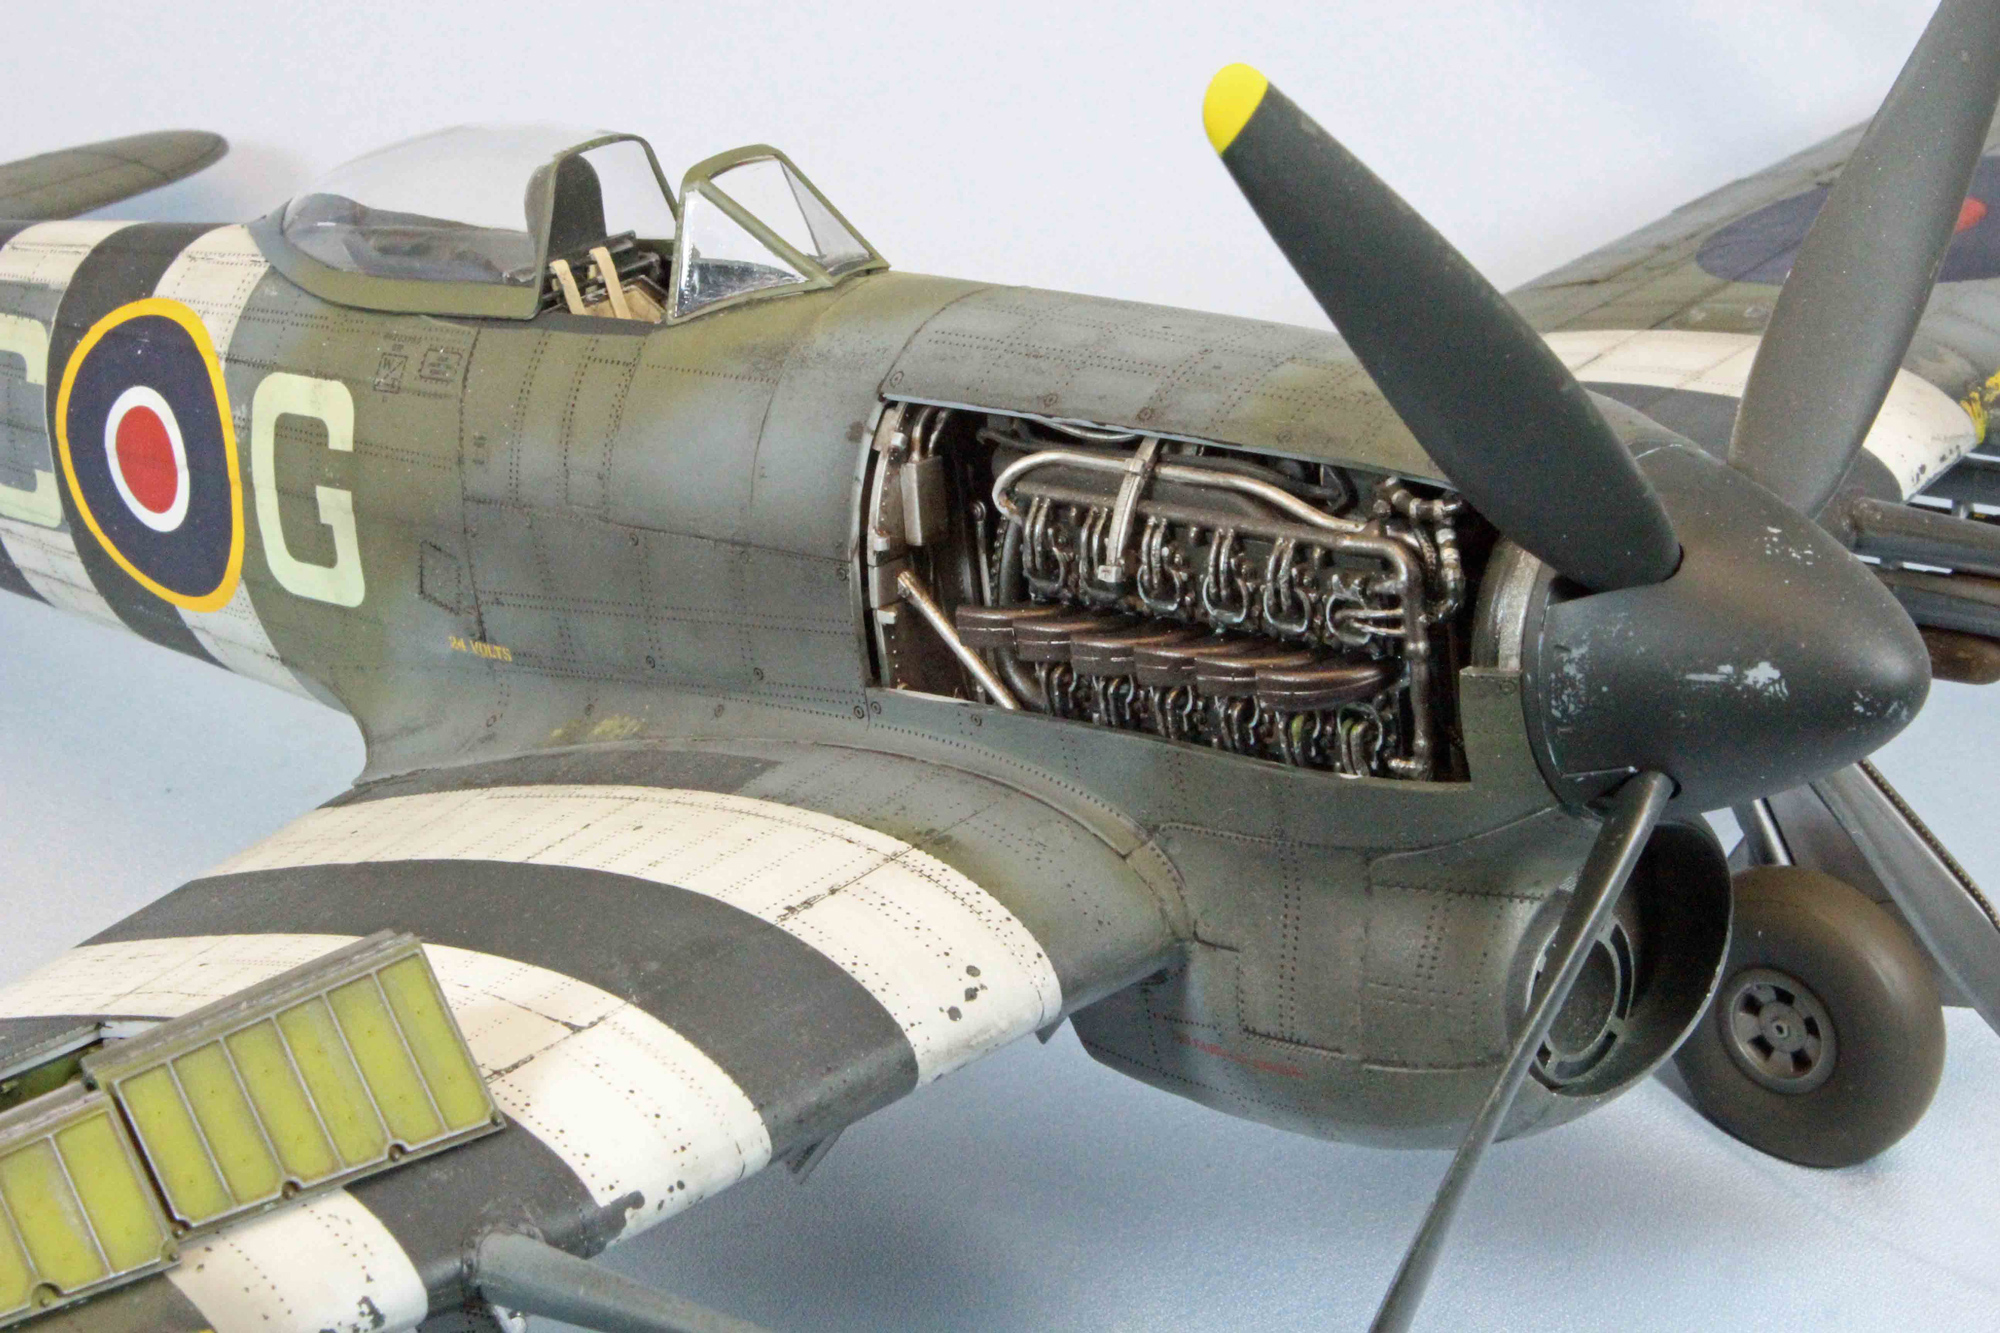
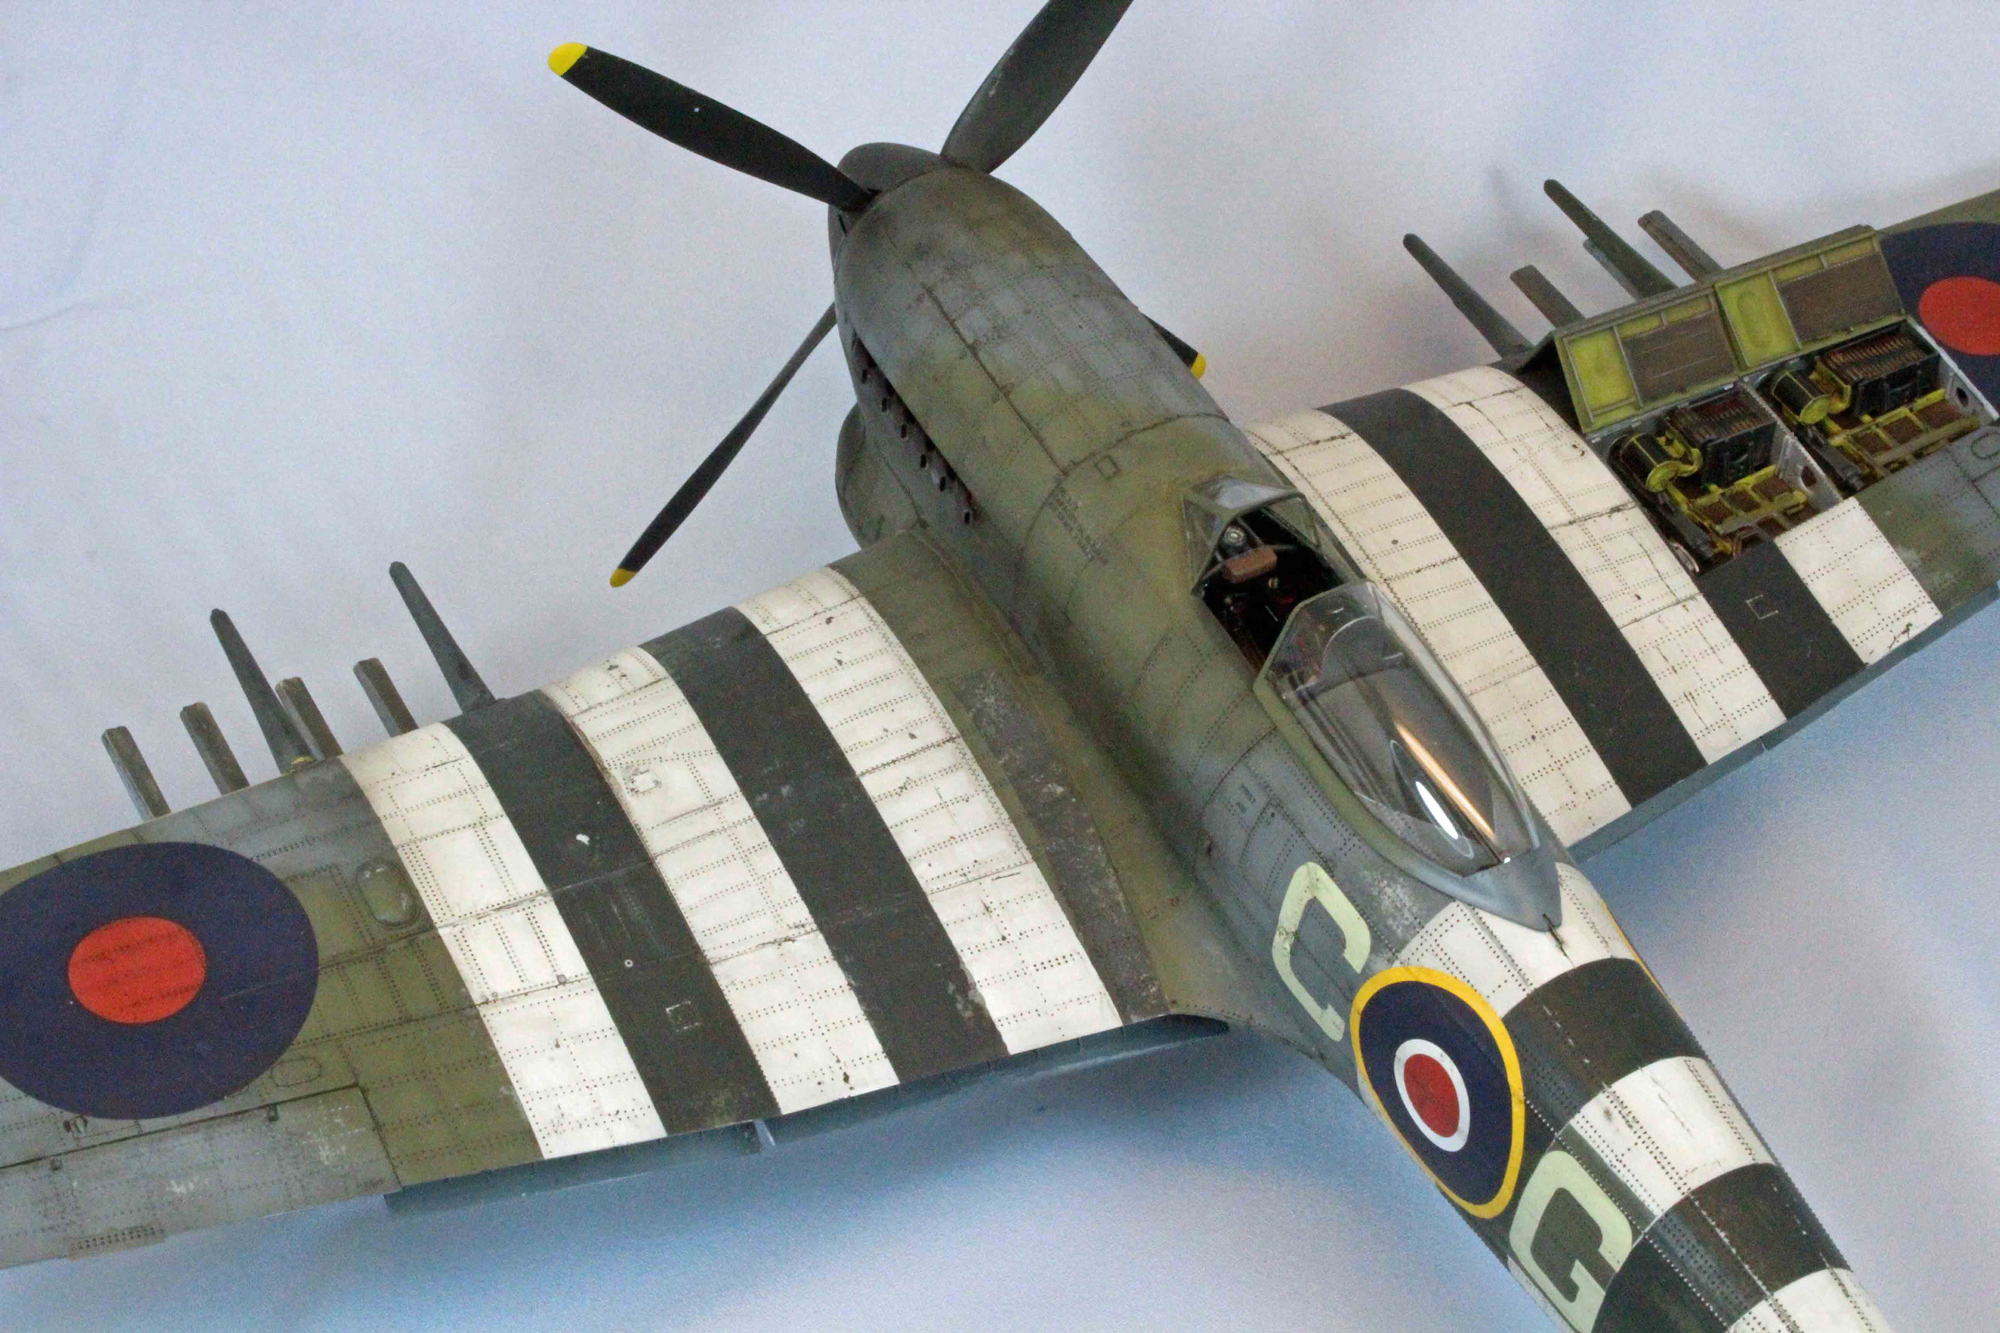
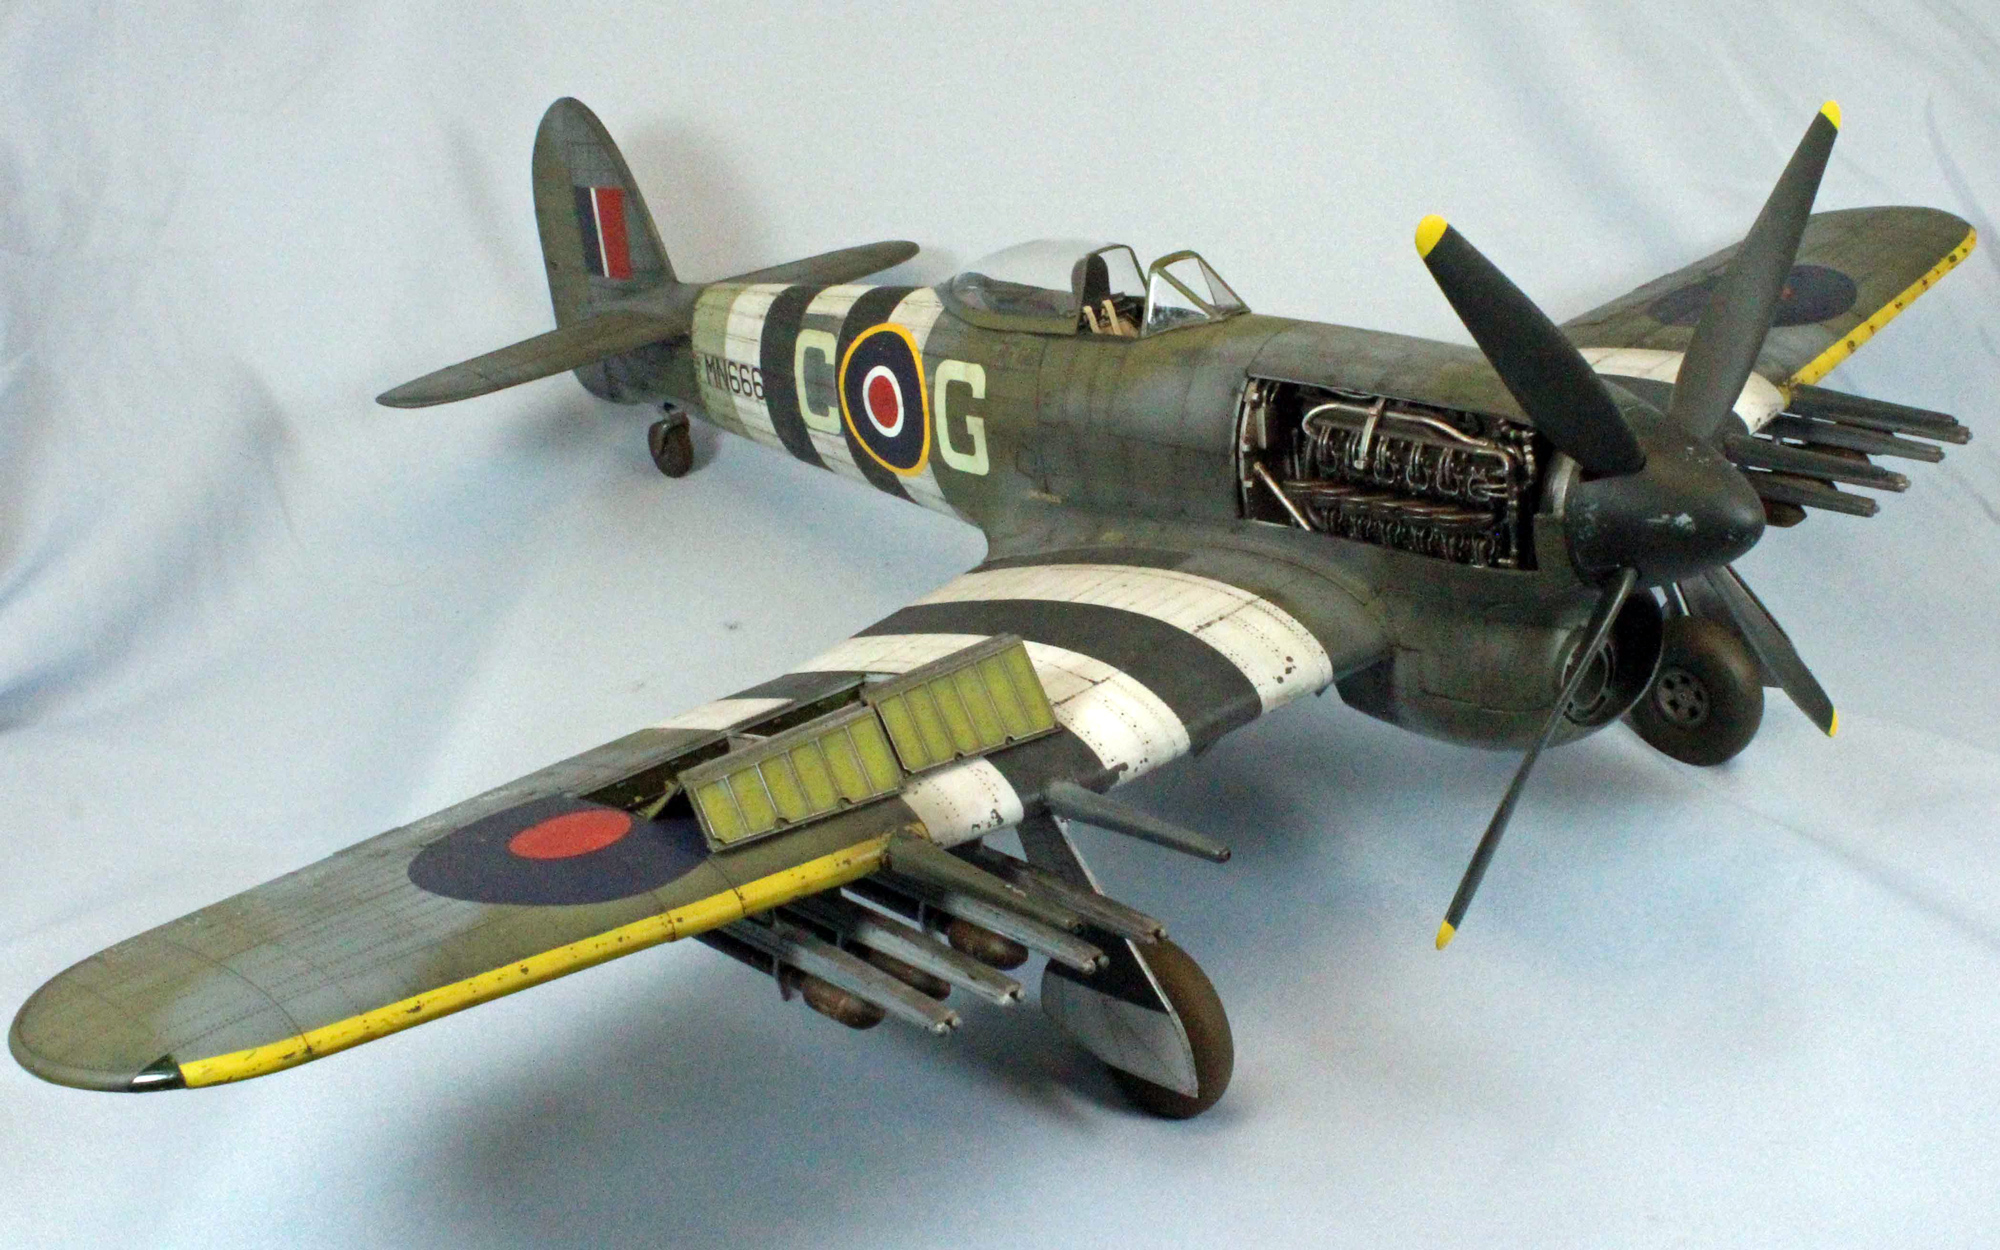
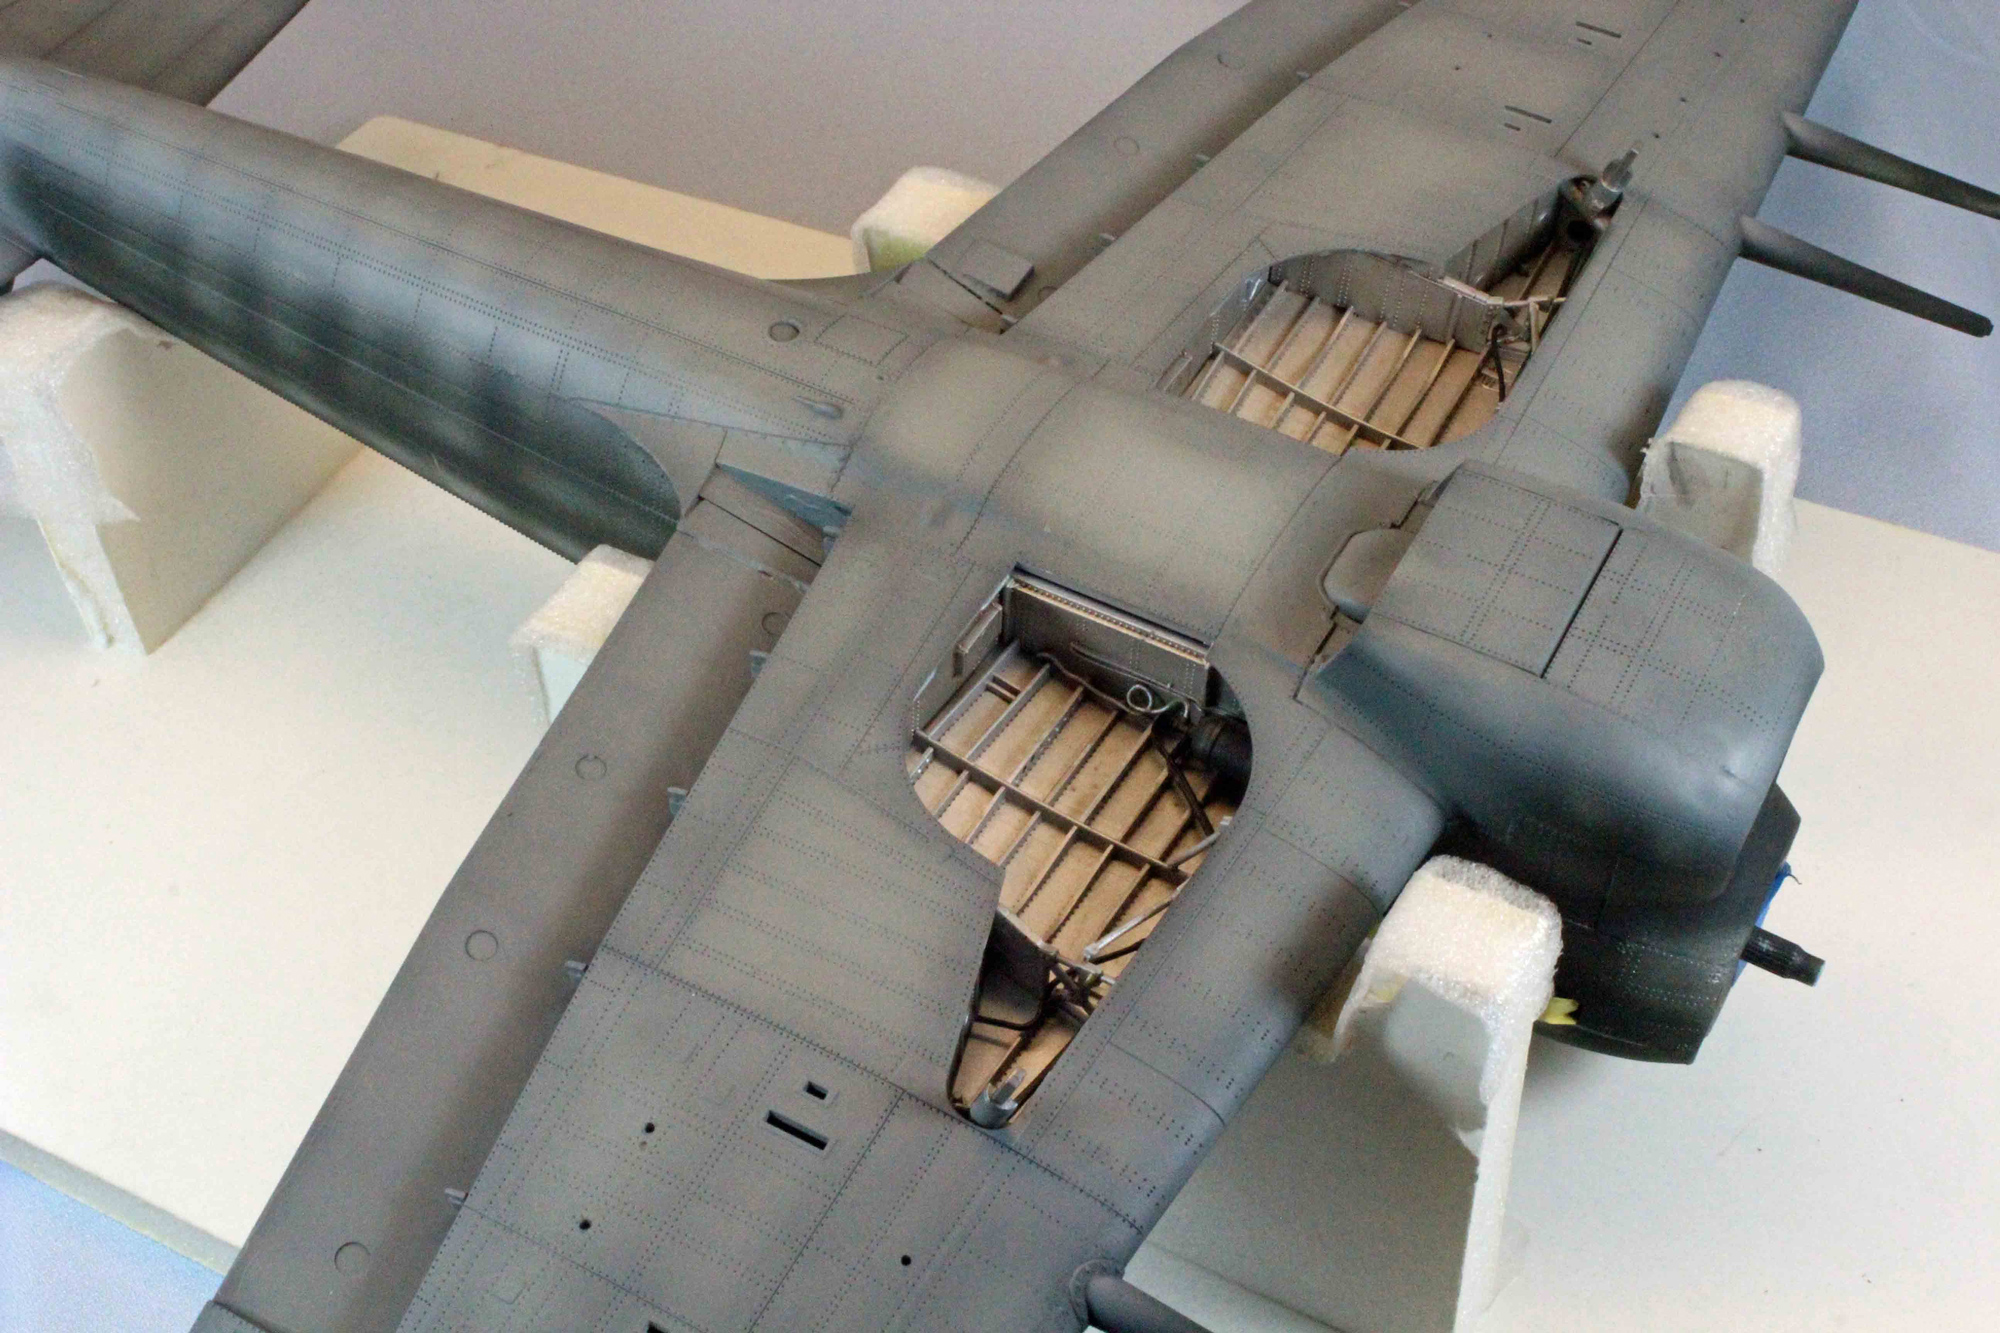
Down the home stretch! Last time we had just completed the wings, fuselage, nose and wheel-wells, leaving just the final assembly and finish for this last segment of this three-part review. To recall: I chose to display only the starboard wing’s gun bay and starboard engine detail, and to cover up the lower front end encompassing the oil cooler/air intake.
Continuing with Assembly
Before painting commenced I had some loose ends that needed tying off, starting with…
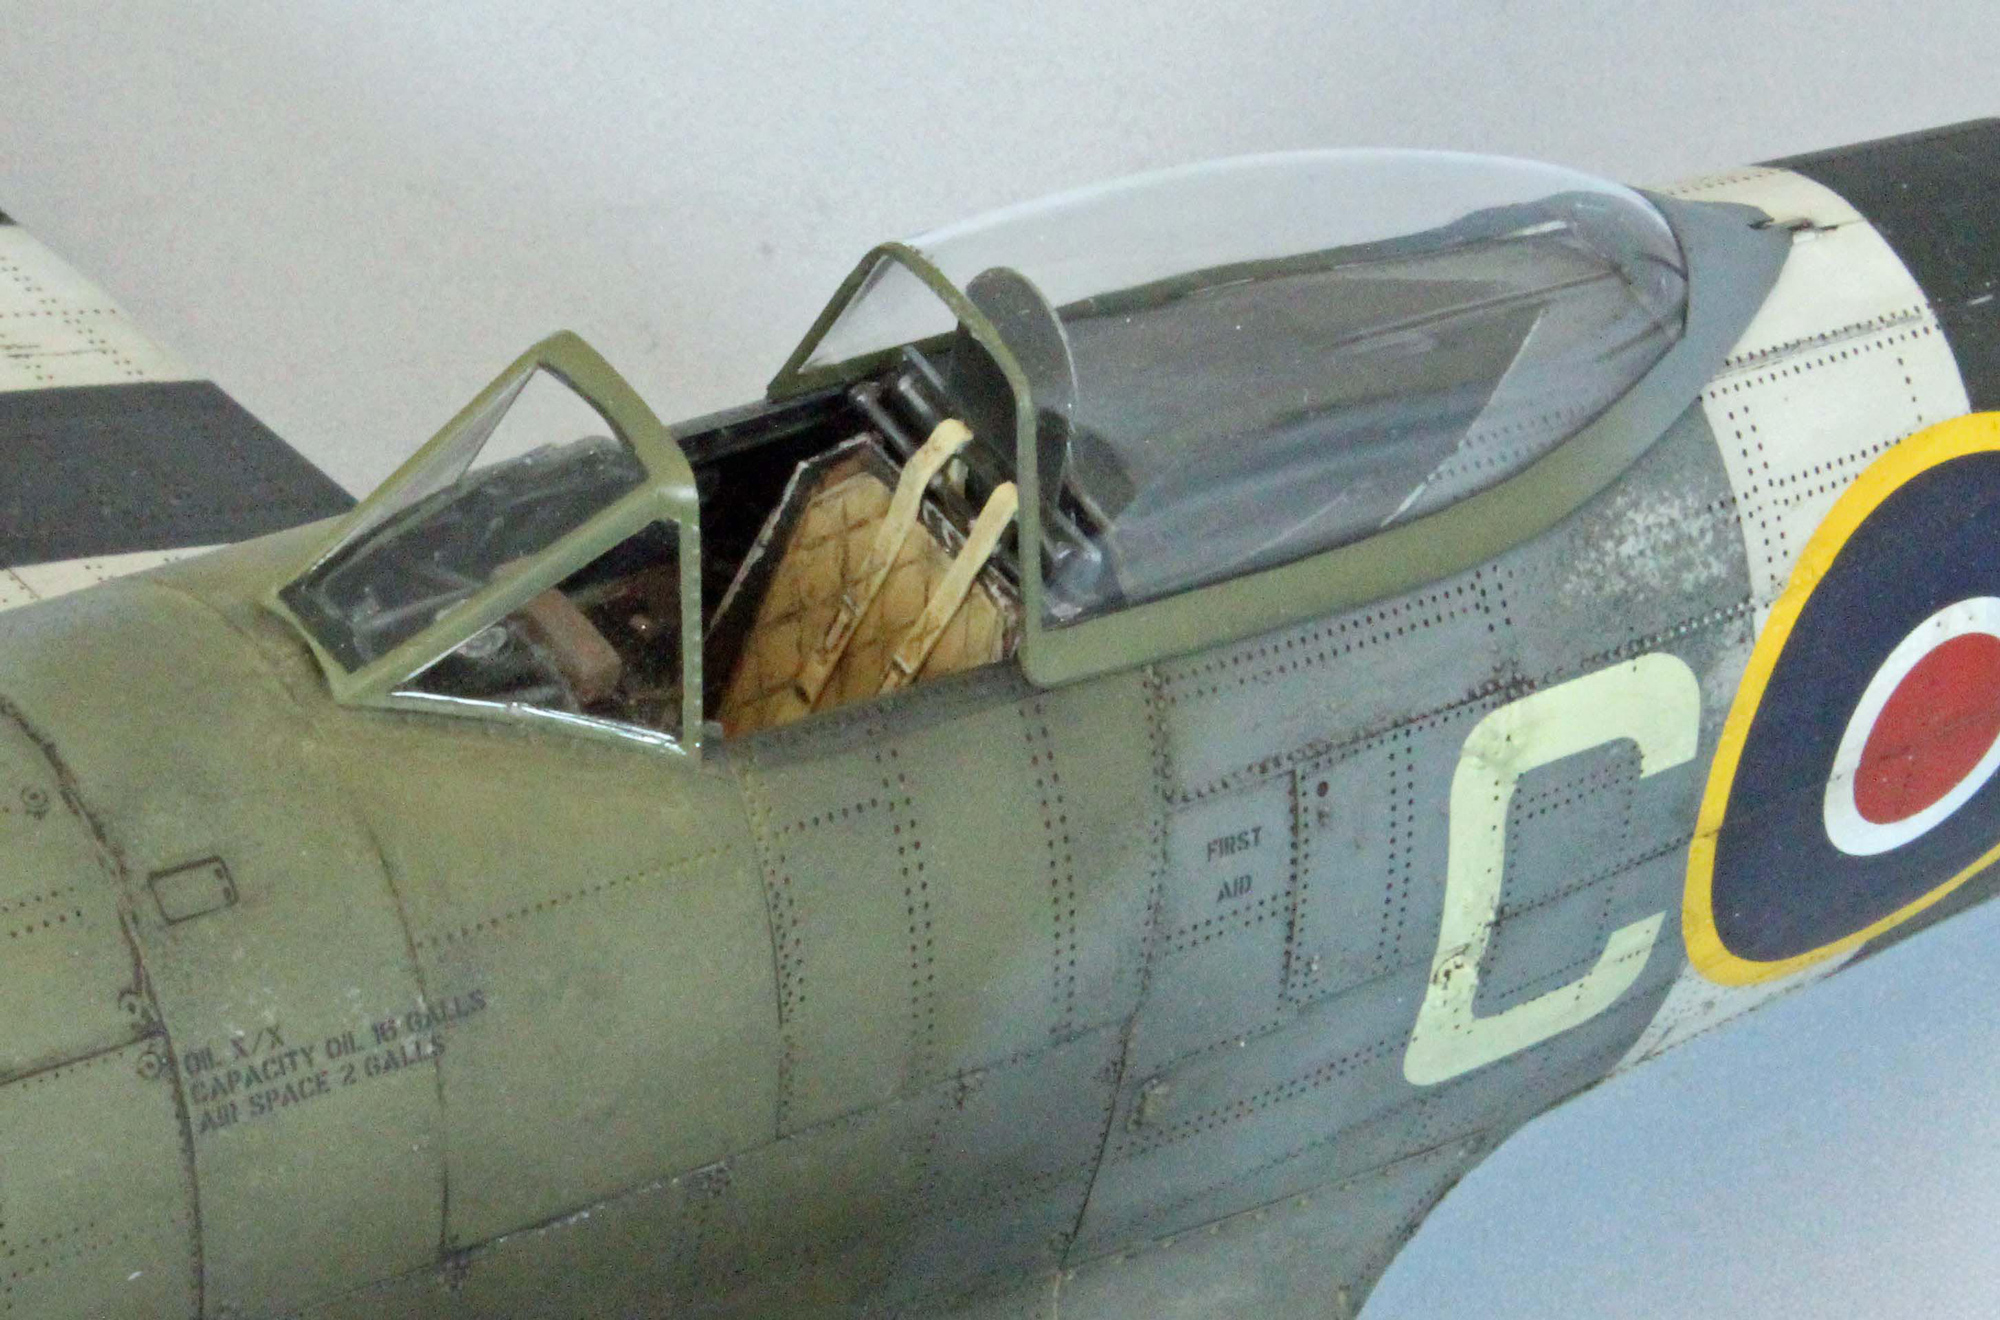
Cockpit and Canopy – (Step 211) There was a prominent sink hole on the top of the small dash board under the rear of the canopy (Part L19) that I filled with Perfect Plastic Putty before painting it Tamiya XF-69 NATO Black.
(Step 205) I painted the trim wheel and bump cushion Vallejo Panzer Aces 312 Leather Belt, and then drybrushed it with Mig P023 Black Smoke. I then drybrushed both internal structures with Uschi 4008 Chrome.
(Steps 207/209) Both cockpit side sections stood just a bit proud of the fuselage sides, so I snipped about a 1/16th of an inch from the ends of the internal structure so they would fit around the pilot’s seat.
Fuselage and Wing Steps – (Steps 140 and 210) Airfix offers the option to model the hand-holds and boost step open or closed. I wanted a streamlined fuselage so I glued everything closed to match the step (I also closed) at the base of the starboard wing. If you choose to leave these open, keep in mind that the starboard wing step is right in the middle of a wing walk, and may be problematic if you use decals there.
Propeller – (Step 223) I attached the propeller blades to the two-part inner hub. There are prominent gaps here but the whole assembly will be covered by the outer propeller hub and backing plate, so I left them alone. The way Airfix designed the entire propeller/hub assembly really helps in painting and finishing.
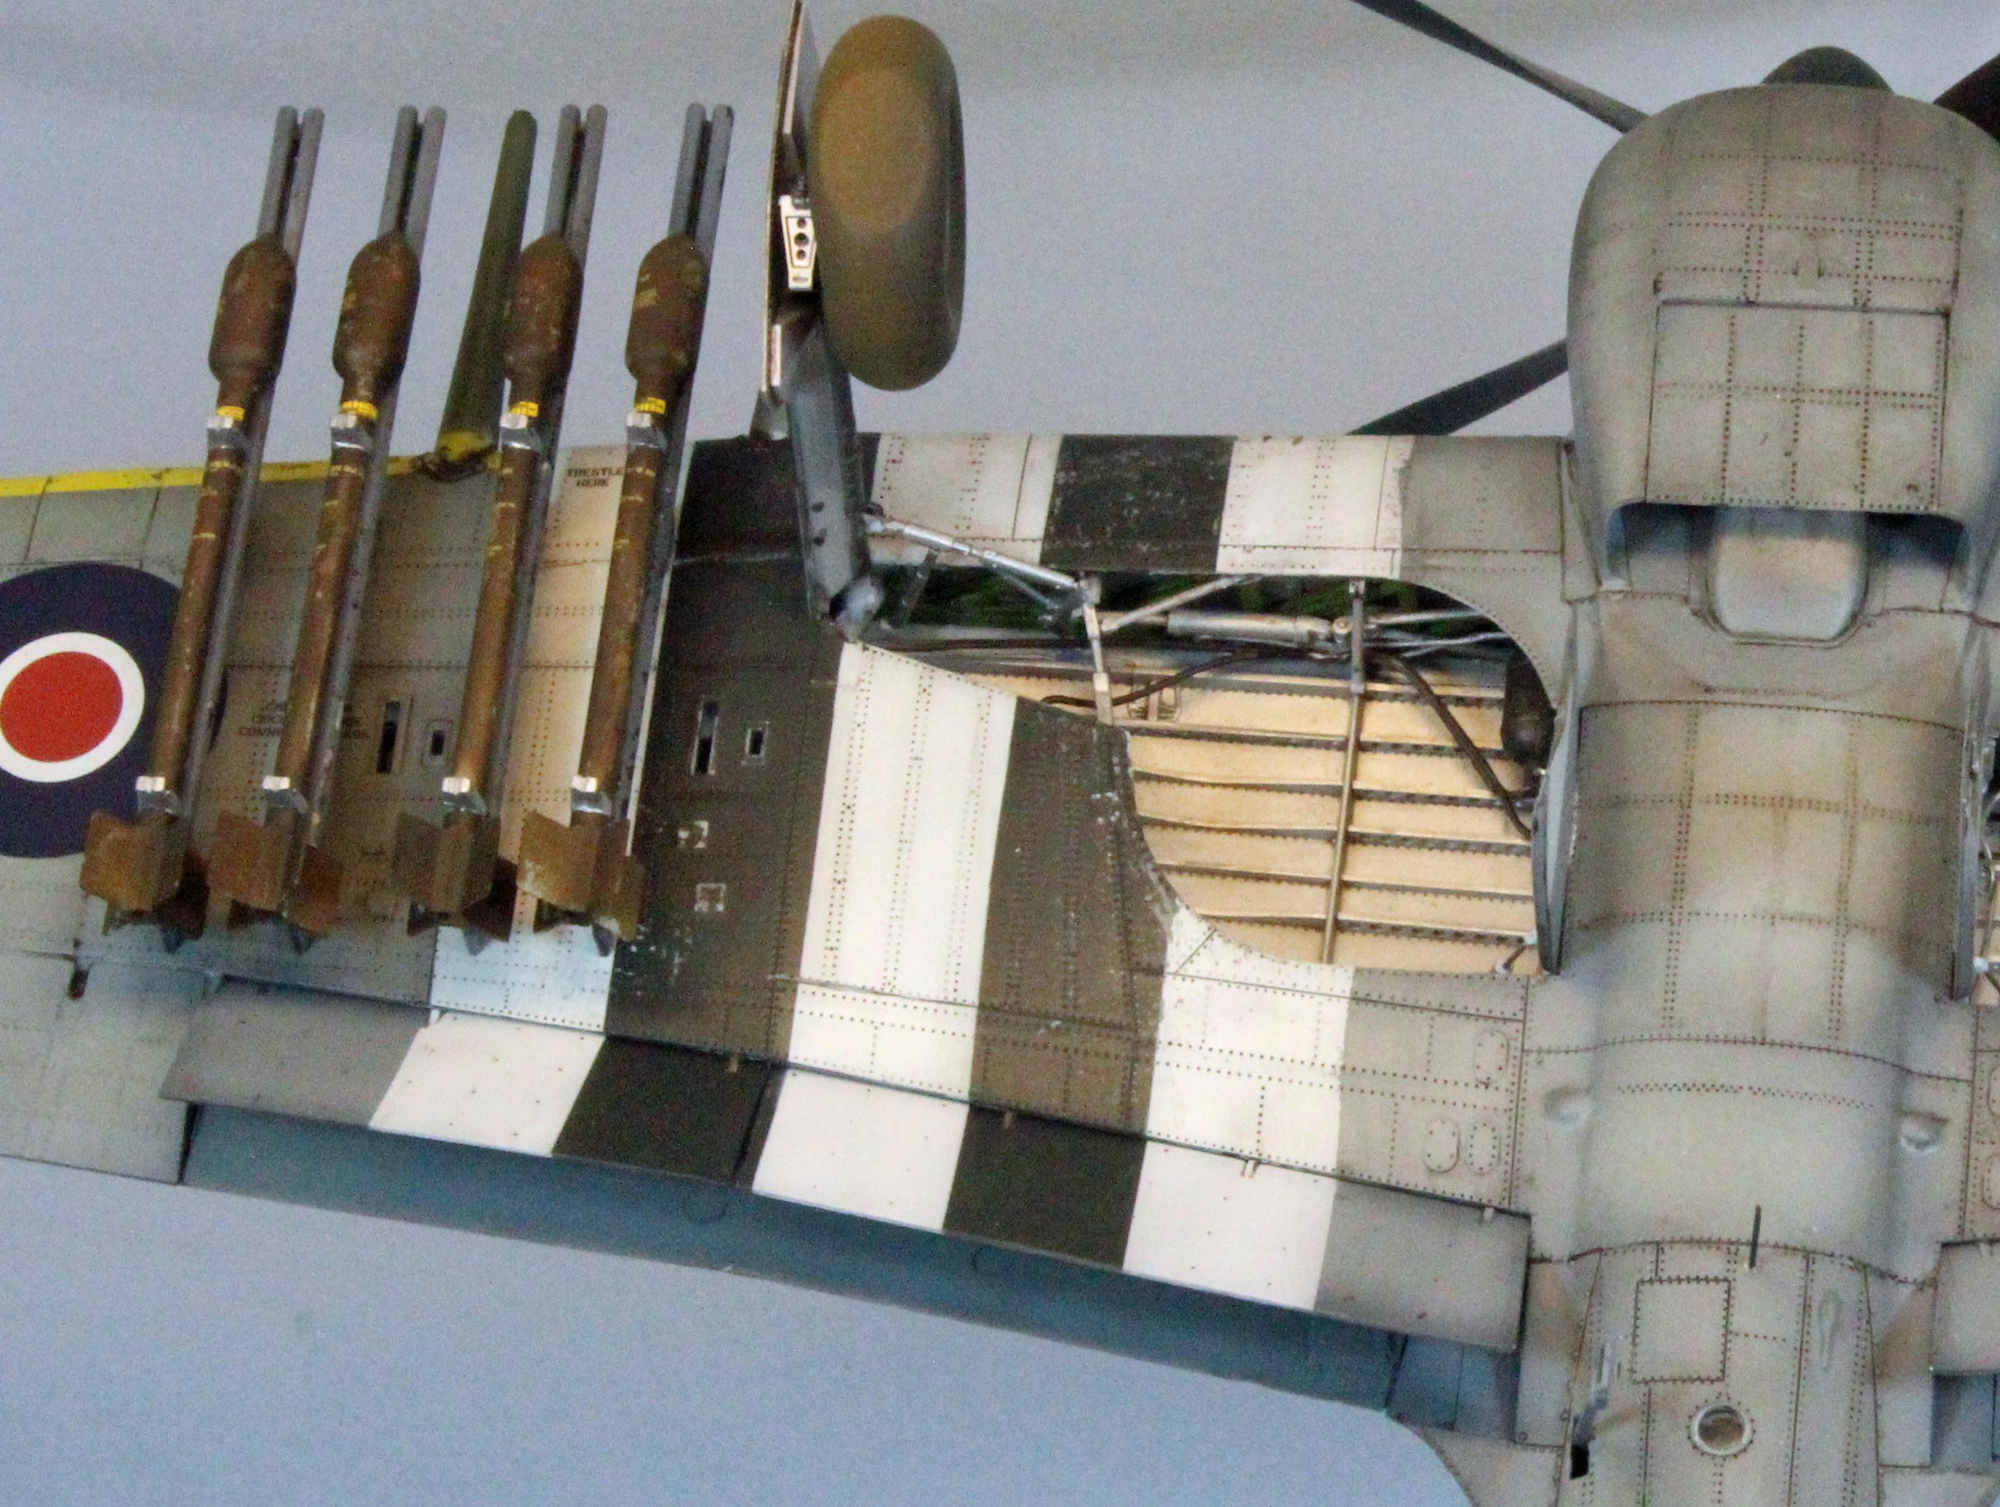
Rocket Rails – (Step 231a) Airfix provides two types of rockets as well as other underwing stores. The rockets I chose have two-part rails that, when mated, expose a significant seam along the top-front, which also happens to be the most visible part of the rail. I discovered these seams too late – at the very end of the build - and had to fill them and repaint the rails.
The rest of the parts that needed assembly had to wait for specific times during painting and finishing.
Painting
Painting this aircraft is a complex task, and you will need a plan to suit. Fortunately for me, writing this review gave me the opportunity to plan each and every step before I hit the paint booth – and I strongly suggest you do the same. I think I fell asleep each night for a week working through all the steps required.
My first big decision was what type of paint to use. I wanted to employ the ‘hairspray technique’ for chipping and wear since this model is unlike any other aircraft model I’ve ever seen, sporting a dizzying array of raised and recessed panel lines and rivets that scream for using this particular technique. Fortunately, Tamiya paint, an acrylic-lacquer, is perfect for the job and Tamiya offers all the colors I need without mixing.
I also wanted to provide depth to the finish, so I used a dark pre-shade color throughout, meaning that every single painted part had to start with a pre-shade color if the final result was to look reasonably consistent. Things got particularly crazy with areas like the invasion stripes and the canopy – distinguishing between what was needed as a pre-shade color and what was going to be uncovered with the chipping technique became quite a puzzle! Painting the Typhoon was going to be a lot bigger job than it seemed at first.
A silver lining to mention… Airfix provides optional parts for closing the gun bays and landing gear doors, as well as parts to cover the engine and air intake. While some of these parts won’t exactly fit once the detail is added, they fit close enough to act as plastic ‘masks’ – very handy. Instead of masking the wheel wells, for example, I just pushed on the wheel-well covers. Bang, done. I also stuffed the cockpit opening (Egads! - so small now!) with tissue paper that I moistened with water so I could form it along the irregular shapes found there.
Note: I thin Tamiya paints about 50/50 with Gunze Leveling Thinner, or until I can see light through it when I draw it up the side of a 1-oz plastic fast-food sauce container. I use a Grex TG airbrush for detail work and my trusty Pasche H airbrush (#3 tip) for coverage, both set at about 20 lbs. pressure.
The Hairspray Technique for chipping, explained…
I use this technique because I feel it gives me more control than using salt, and it is far easier than painting chips by hand – especially on a model of this size.
The idea is to add a layer of hairspray between the base coat (of any kind of paint) and the top, camouflage coat that must be an acrylic. The hairspray causes the top acrylic coat to dissolves in a very particular way when it comes in contact with water. Even though Tamiya paint is not a true acrylic, it seems to work perfectly, and is my go-to choice for this technique.
As far as the hairspray, I think any kind will do. I use TRESemme’ #4 Extra Hold because it has never let me down AND... it comes in a cool little black can. You can buy hairspray in a pump bottle which will allow you to airbrush it on without decanting, or you can buy it is an aerosol in a can. I prefer the ease of use of the aerosol, and, more importantly, I don’t want to run hairspray through my airbrushes! Yuck! Keep in mind that your results might differ since there are several variables that ‘affect the effect’; thickness of paint, amount of hairspray used, amount of elapsed drying time, materials used to rub the paint off, etc. There are several approaches that work, but the following is how I do it:
- Once I am sure the base coat has dried and cured, I spray on a healthy coat of hairspray. I make sure the areas I want to chip are well covered but not so much as to produce drips or runs. I either wait for that to dry or move things along with the help of a blast of air - it doesn’t matter, so long as it’s dry to the touch before I move on.
- I then load up the camouflage colors and spray that on. The more paint I use, the harder it is to rub it off, so I take it easy. I’ve got some working time so I don’t need to rush.
- About two hours after I finish painting, I wet a small area of the model with some water using a soft brush. The water will bead up at first, so I just keep at it and soon the water starts to spread out as it gets absorbed by the paint. I let the water set for about a minute or so.
- I then take a stiff, flat, squared-end paint brush, dip it in water, and start to rub the areas where I want to expose the underlying (base-coat) paint. I work in one small (wet) patch at a time. The process takes some patience, but eventually some foam will appear and then tiny flecks of the top coat will start to come off. I keep wiping the brush off on a paper towel and re-moistening it with water before continuing. If large flakes or sections of paint come off, I stop immediately - the water has soaked the paint too much and completely removed the adhesion to the coat of hairspray. This is why I work in small patches at a time. On the other hand, If the paint just won’t rub off, I either missed a spot with the hairspray, put too thick of a coat of paint on in the first place, or I waited too long, letting the top coat cure.
The first time I tried using this technique was like the first time I tried using a pressure washer – I just blasted away at everything. This method works best with a subtle hand, so stop often and review your work. Less is better.
Back to the Typhoon -
I started with dipping the two canopy parts in Future and letting them dry in a dust-free container that I made. The thick acrylic coat takes a while to cure, so I like to start there.
I set the canopy ‘dust-box’ aside, and sprayed a base coat of Tamiya XF-16 Flat Aluminum on the wing walks and the four propeller blades. This color will be exposed when I ‘chip’ off the coat on top of it. I didn’t care about overspray on the inner propeller hub, since the whole area will be covered by the outer hub.
Next I made a sticky board for the parts that would receive a pre-shade coat of NATO Black, including the eight rocket rails, four drop flaps, the rear canopy interior part, four gun bay doors, pitot tube, pilot’s step, the belly antenna, and the four landing gear doors. Once the Flat Aluminum paint had dried, I sprayed a coat of hairspray on the wing walks and the propeller blades.
While the hairspray was drying, I mixed up a big batch of NATO Black and laid down a primer/pre-shade coat, first hitting the sticky boards (flipping the drop flaps over to get both sides), and then the main model. After a couple of hours I rubbed a little NATO Black off the wing walk areas and the leading edge of each propeller blade. After the paint had fully cured, I hand-brushed Future over the wing walks so when I mask them off later the lines will be crisp for the next color.
I made a new sticky board for the parts that would receive a coat of Tamiya XF-83 RAF Medium Sea Gray 2, including the four drop flaps (both sides), the pitot tube, pilot’s step, and the four landing gear doors. I then mixed up a batch of the Sea Grey and airbrushed the sticky board (including both sides of the drop flaps) and the bottom of the main aircraft. I started in the middle the large panels and worked my way outward, leaving just enough shadow from the pre-shade coat visible, creating a nice ‘depth’ effect. I moved on to the rocket rails, which at this point had a cured, pre-shade coat of black, and the eight rockets, which were still unpainted plastic. I laid down a coat of hairspray to the rails and, once dry, airbrushed a coat of Sea Grey on both the rails and the rockets. After a couple of hours, I chipped the rails up using a brush and water. The rockets were left alone – the grey is the base coat for these.
The tires and wheels were started in the second part of this review - I had pre-shaded the main strut assemblies in Steps 183 and 184, the tail wheel strut parts, the wheels and the tires with Alclad Black Primer & Microfiller. I had then over-sprayed the outer portions of the main tires with a pre-shade coat of NATO Black to produce a little differentiation between the sides and outer portions of the huge Typhoon tires.
I then sprayed the struts and wheels with a light coat of Alclad Duralumin, making sure to avoid the tires. I then loaded up Model Master 2024 U.S. Army Helo Drab and dusted the three tires until they took on the look of hard, worn rubber. Over that I dusted a coat of Vallejo Model Color 70826 German Cam. Medium Brown.
Moving back to the rockets, I sprayed on a coat of hairspray, followed by a coat of Tamiya XF-62 Olive Drab. I waited a couple of hours and went to work with water and a brush, uncovering some of that Sea Grey base coat. Once dry, I sprayed them with a coat of Future to prepare them for decals.
Before moving on to the main camouflage coats, I took the (now dry) rear canopy section, placed it over the cockpit as if it were closed, and lightly traced the area underneath it with a black coloring pencil. I then put it back into the dust-free box it was in. I carefully masked off the area inside the traced line, so it will remain NATO Black after I spray the main camouflage colors.
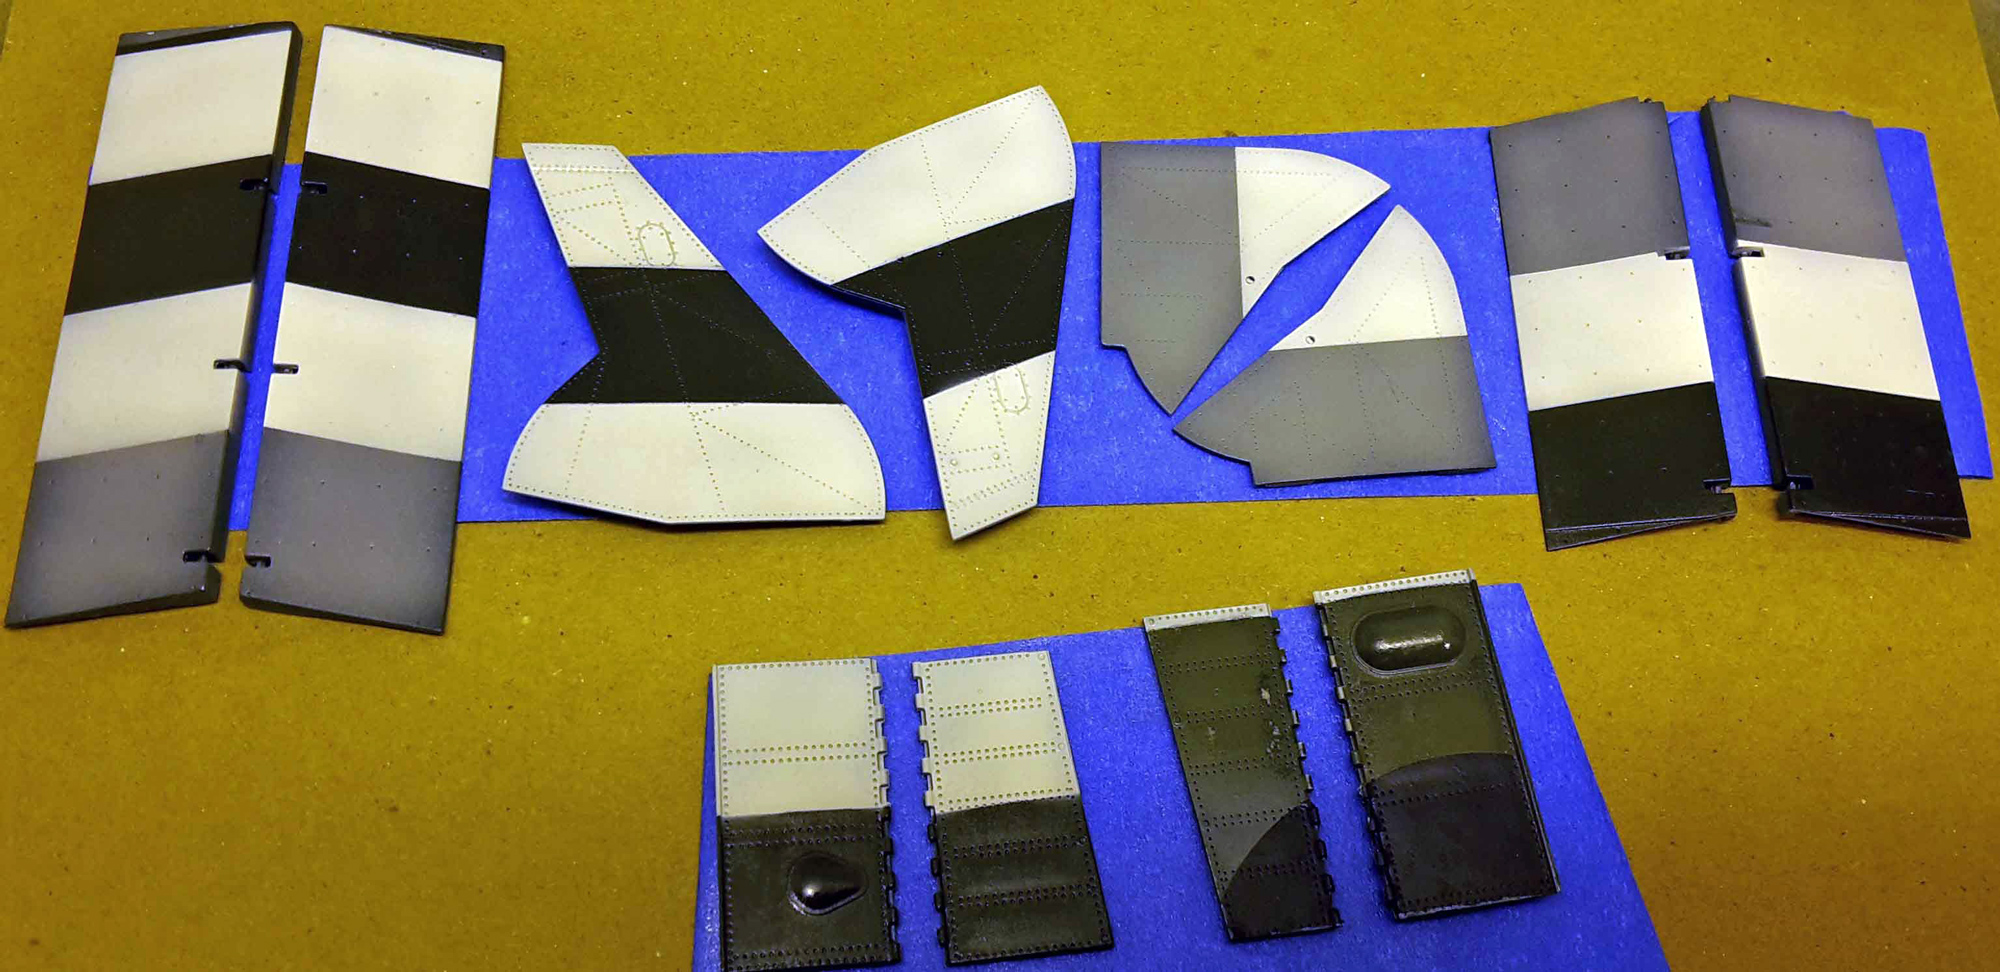
I made a new sticky board for the four gun bay doors that would receive a coat of either Tamiya XF-82 RAF Ocean Grey 2 or Tamiya XF-81 RAF Dark Green 2 (depending on the camouflage pattern). See image labeled ‘Ready For Camouflage’.
It was time to take out the masking tape. I used the two wing walk decals to trace replicas onto Tamiya tape before cutting out the patterns and laying them down over the appropriate areas I had already painted and chipped before. I then masked the demarcation line along the lower fuselage around the entire aircraft. Next, I used some blue painters tape to mask any areas on the lower fuselage that might catch overspray.
I then masked the interior and exterior of both canopy parts, exposing just the exterior frames. I attached them to the sticky board as well.
With everything masked and ready for paint, I shook up my can of TRESemme’ and gave everything a healthy coat of hairspray (except the canopy parts).
Setting aside a block of time and using the excellent Airfix color shots of the scheme I was using as a guide, I sprayed (first) the Ocean Grey and (second) the Dark Green colors where appropriate on the main aircraft. I also sprayed the gun bay doors, and the canopy parts roughly matching the camouflage pattern of the main aircraft. The outer propeller hub and the propeller backing plate were painted Ocean Grey (as a base coat). The colors on the canopy would be those that are visible from the inside of the canopy – the outside colors come later. With each color, I laid out the overall pattern and then filled each in, again, starting in the center of the bigger panels working outward. I wanted a suggestion of that dark pre-shade color to show through.
After I cleaned up the airbrush, I removed the masking tape from the aircraft, but left it on the canopy for the time being.
After a couple hours I turned on the TV and started to rub off some of the paint using a paint brush and water. I did not rub any paint off the canopy parts.
Next I Ioaded up just a touch of NATO Black and hit the two canopy parts again, laying down the pre-shade coat for the outer coat of paint to come.
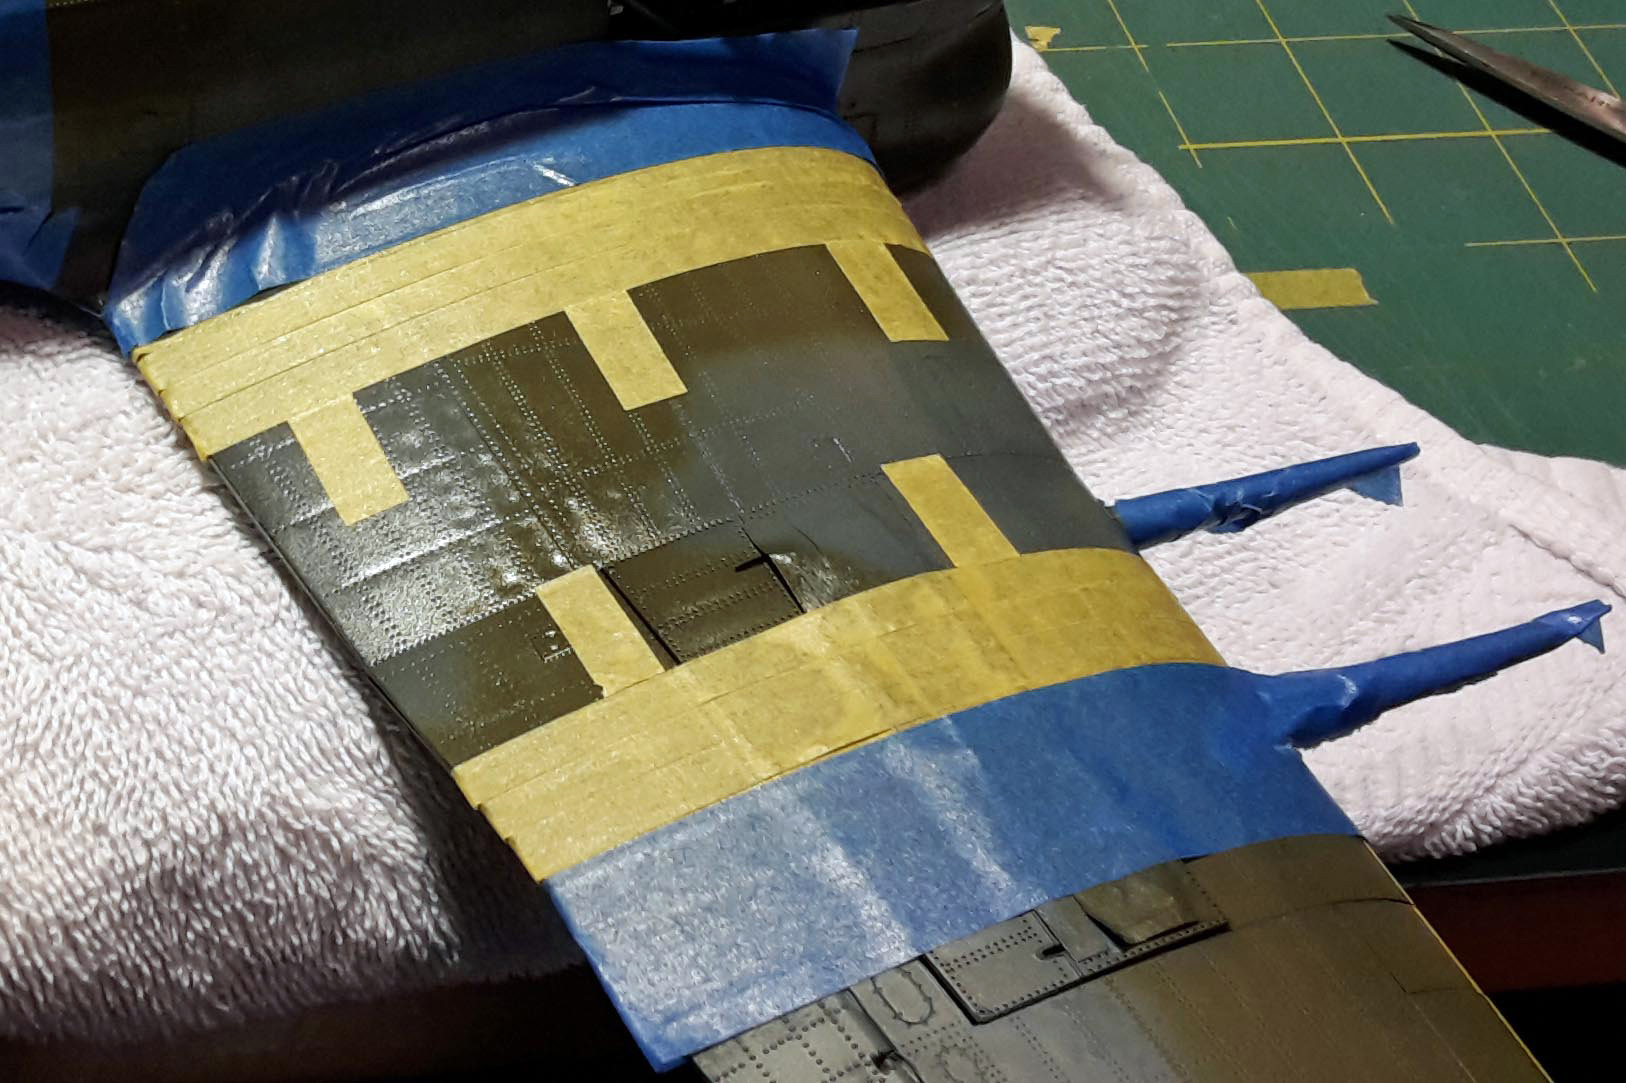
I then sprayed a coat of hairspray where the vertical fuselage band would go near the tail, as well as on the propeller hub/backing plate, and on the front of the wings where the yellow recognition striping is. Once the hairspray was dry, I masked the borders around the rear fuselage band area, the propeller tips, and the recognition stripe areas on the leading edges of the wing. I sprayed the fuselage band with Tamiya XF-21 Sky and the propeller tips and leading edges of the wings with Tamiya XF-3 Flat Yellow. Once that was allowed to dry for a while, I rubbed off some of the color from these parts to uncover the paint underneath, paying particular attention to the front of the wings where the invasion stripes were NOT going to be.
Returning to the canopy, I noted where the grey and green camouflage pattern fell across the canopy if it was closed, and sprayed the appropriate color (Ocean Grey or Dark Green) to match. Once dry I removed the masking tape and carefully hand-painted the bottom surfaces of the canopy parts that would touch the airframe NATO Black to match the airframe. This would prevent light from being trapped between the canopy and the surface of the aircraft. I then attached the rear part (# L19) to the interior of the rear canopy and back into the dust free box it went.
Back to the rockets – always back to the rockets. Airfix chose to mold the rockets to their own release hardware, which were a real chore to paint. I used Vallejo 71.062 Silver for the task which worked out well. Vallejo makes such great paint. All that was left on the rockets now were the decals… all 32 of them!
The invasion stripes were next. You’ll need to decide if you want to use full stripes, or half-height stripes on the fuselage, or if your unit markings will require an adjustment in how the stripes appear. Airfix suggests that you make the stripes 19mm wide and 95mm across all five stripes. A quick measurement would prove, however, that 95mm is too wide if you want to use their 4-view color paint diagrams as a guide. 18mm, however, juuuust fits between the outer gun and the wing walks as shown in the diagrams. And it just so happens that Tamiya offers that same width in their excellent line of masking tape, so 18mm it is. Since the stripes were hastily applied in the field, I couldn’t get too worked up about it either way. Unfortunately, in 1/24th scale, I still couldn’t use that tape as is – wide, straight tape and curvy surfaces don’t make a good match. I ended up cutting each 18mm-wide strip of tape into three smaller strips that I knew, once laid next to each other, would add up to 18mm. The thinner strips went on quickly and conformed to the surface easily. This approach worked out very well and saved me a lot of time since I didn’t have to measure anything.
There are several approaches to painting invasion stripes, but only one that lends itself to using the hairspray technique. Some folks will paint the whole striping area white, and then mask the white stripes off and paint the remaining areas black. Doing so however makes removing paint over hairspray problematic – rubbing off the black exposes White first, and then Green/Grey. My approach adds only one more taping step.
Before taping, I attached the temporary covers to the wheel wells and the exposed gun bay, using them as masks to keep paint out. I then slid the four dropped flaps into place (laying even with the wing for now) – they would need invasion stripes as well. The actual wheel well covers were painted separately.
I started by spraying all the areas that would receive the stripes with hairspray. This included the wings (upper and lower), the fuselage (all the way around), and the outer skin of the four gear doors and gun bay covers. While the hairspray was drying I started pre-cutting 10-inch long 18mm strips of Tamiya tape. A lot of them.
Taping commenced with defining the outer lines of the areas to be striped with a thin piece of Tamiya tape. Using that as a guide, I used (the much cheaper) blue painters tape to mask off everything that might be hit with overspray. I then taped up the gear doors and gun bay covers and set them aside on a sticky board.
After some analysis it occurred to me that if I painted the black stripes first, things would go a little faster, and, more importantly, I wouldn’t have to lay tape down on top of white paint. Accordingly, I carefully masked off the inner and outer white stripes on the wings and fuselage. Using tape ‘spacers’ to pinpoint the location of the center white stripe, I (first) placed a block of tape in the appropriate spot on each side of the fuselage for the squadron symbol, and then laid down tape for all three the center white lines (see image labeled ‘Center WhiteStripe Placement’).
Once all the tape was down, I painted the six exposed stripes using NATO Black and left them to dry at least 3 hours so I could safely mask over them.
I came back and tested the black areas with some tape to see if any paint came up. Satisfied, I removed the tape from the areas to be painted white and laid tape down over the just finished black areas. I used Tamiya X2 Flat White for the 21 white stripes. Once completed, I removed all the tape from the entire aircraft and, for the first time, gazed upon my Typhoon in full dress. Wow.
Later, I went over the entire aircraft and rubbed paint off using a brush and water to reveal the colors underneath. Done and done.
Decals
The decals provided by Airfix come on a large, separately-bagged sheet and are in perfect register. The yellows and the reds are not too bright and look right. The decals are thick which, in this scale, is a good thing. The huge wing roundels are easy to handle, and the yellow areas completely cover the invasion stripes underneath with no bleed-through. There is a good amount of stenciling provided, and wing walks are included if you choose not to paint them.
After shooting the aircraft and the rockets with a healthy coat of Future, I used the Blue and Red Microsol/Microset system without any problems. I sweated out the fact that the large roundel on the starboard wing partially covered the two (removed) gun bay doors. After I applied the decal and let it dry, I carefully cut off the portion overhanging the gun. I then temporarily attached the two gun bay doors together and applied the decal piece to them, using a lot of Micro Set solution. I then carefully separated the doors again with a knife and they looked great. I was very proud of myself until I realized that you can’t see any of this since the doors would be attached decal-side down, on the wings. Sigh.
The decal thickness required repeated applications of (Red) MicroSet over some of the more prominent detail, but soon relaxed and snuggled down just fine. Once dry, I gave everything a second coat of Future to seal the decals and prepare the surfaces for a wash.
Weathering
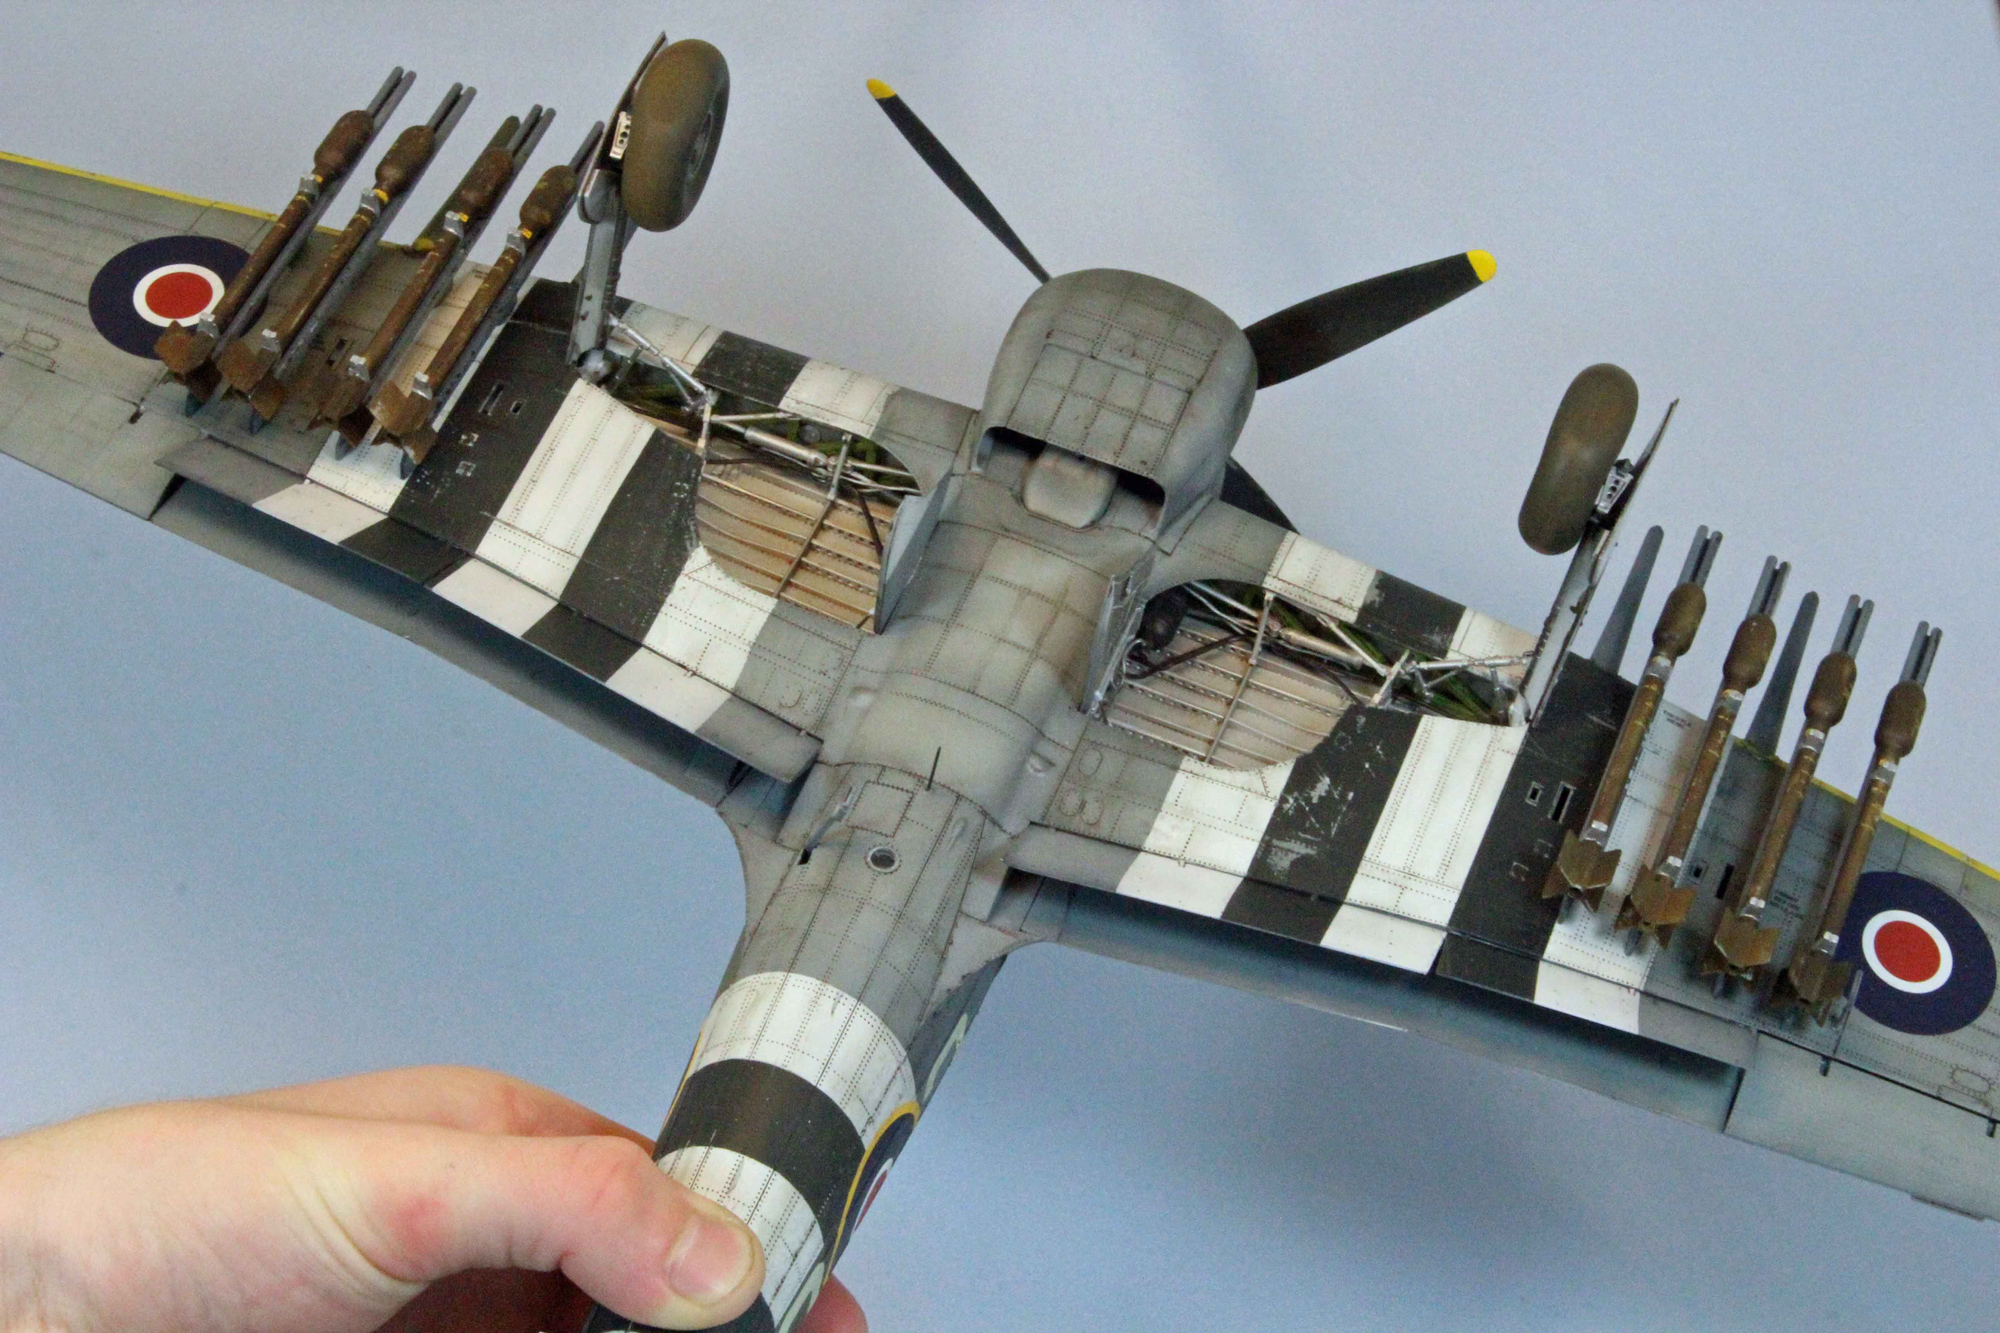
With the decals on, this model was itching to be finished. That said, every picture I’ve seen of a Typhoon in combat is a mess, and I wanted to convey that weary look in my build, which is why I spent so much time and effort using the hairspray technique for chipping. All that was remaining to do was to dirty things up a little.
With the model still sporting a glossy Future finish, I started with a ‘sludge’ wash using Mig Dark Brown enamel, straight from the bottle. Working in sections, I ‘painted’ the wash over every panel line and rivet head. It’s ok to be a little sloppy - 99% of it will be removed. I let the wash dry for about 20 minutes and then I used a soft cotton cloth to rub the wash off in the direction of the air flow. A tiny amount of wash was left behind in the panel lines and such, really ‘popping’ the detail. And on a 1/24th scale Typhoon, there’s a lot of detail, so this step was worth the time and effort. I made sure not to forget the 12 detached flaps, wheel covers and cannon-bay covers.
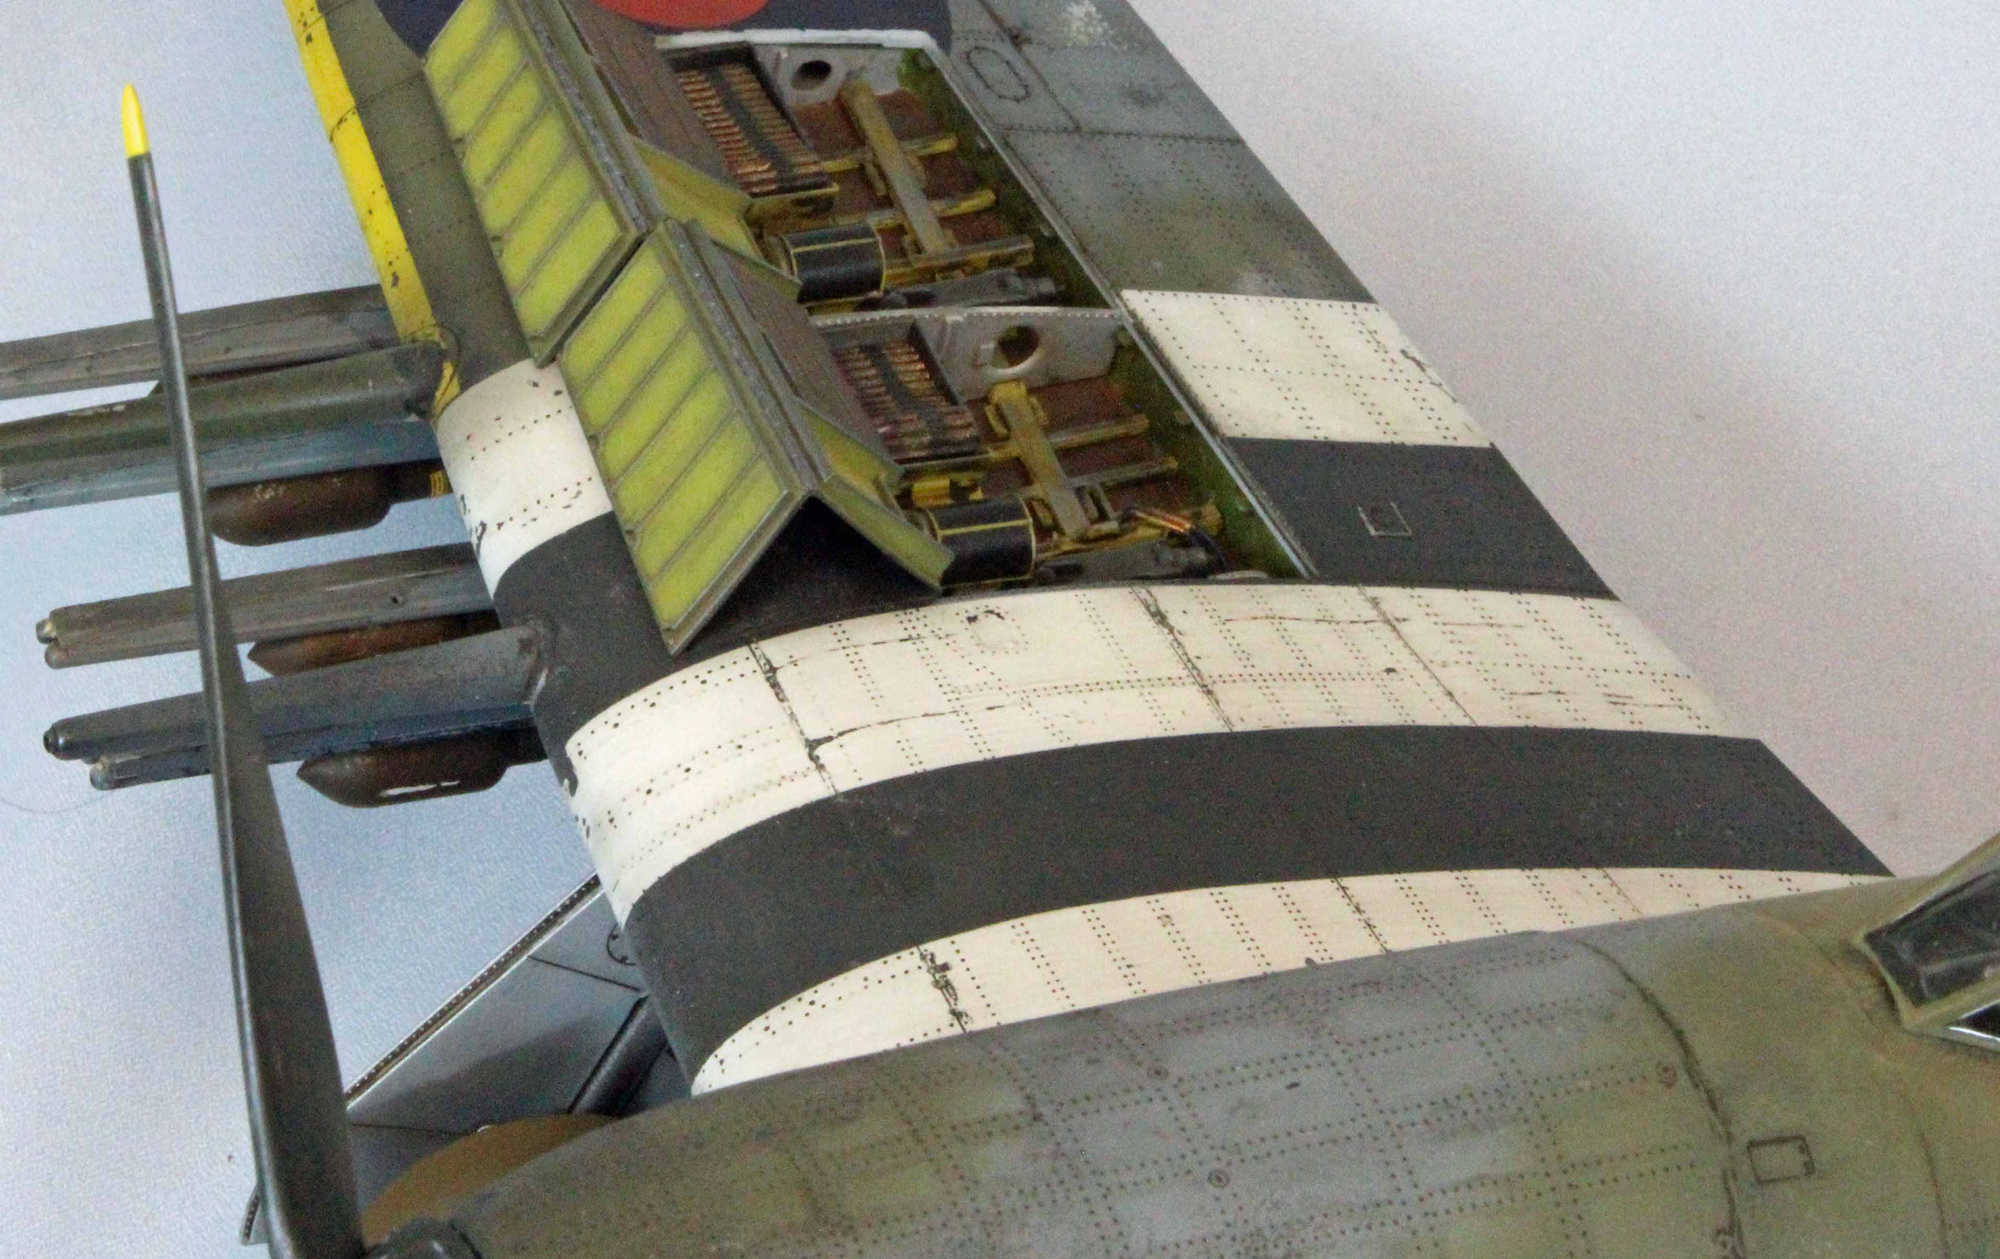
Back in the paint booth, I loaded up some Tamiya X19 Smoke, thinned 50/50 with Mona Lisa Paint Thinner, and went over the areas around the engine, behind the cannons, behind the shell-ejection ports underneath the wings, and in the open cannon bay. Not too much, just a hint.
Final Assembly
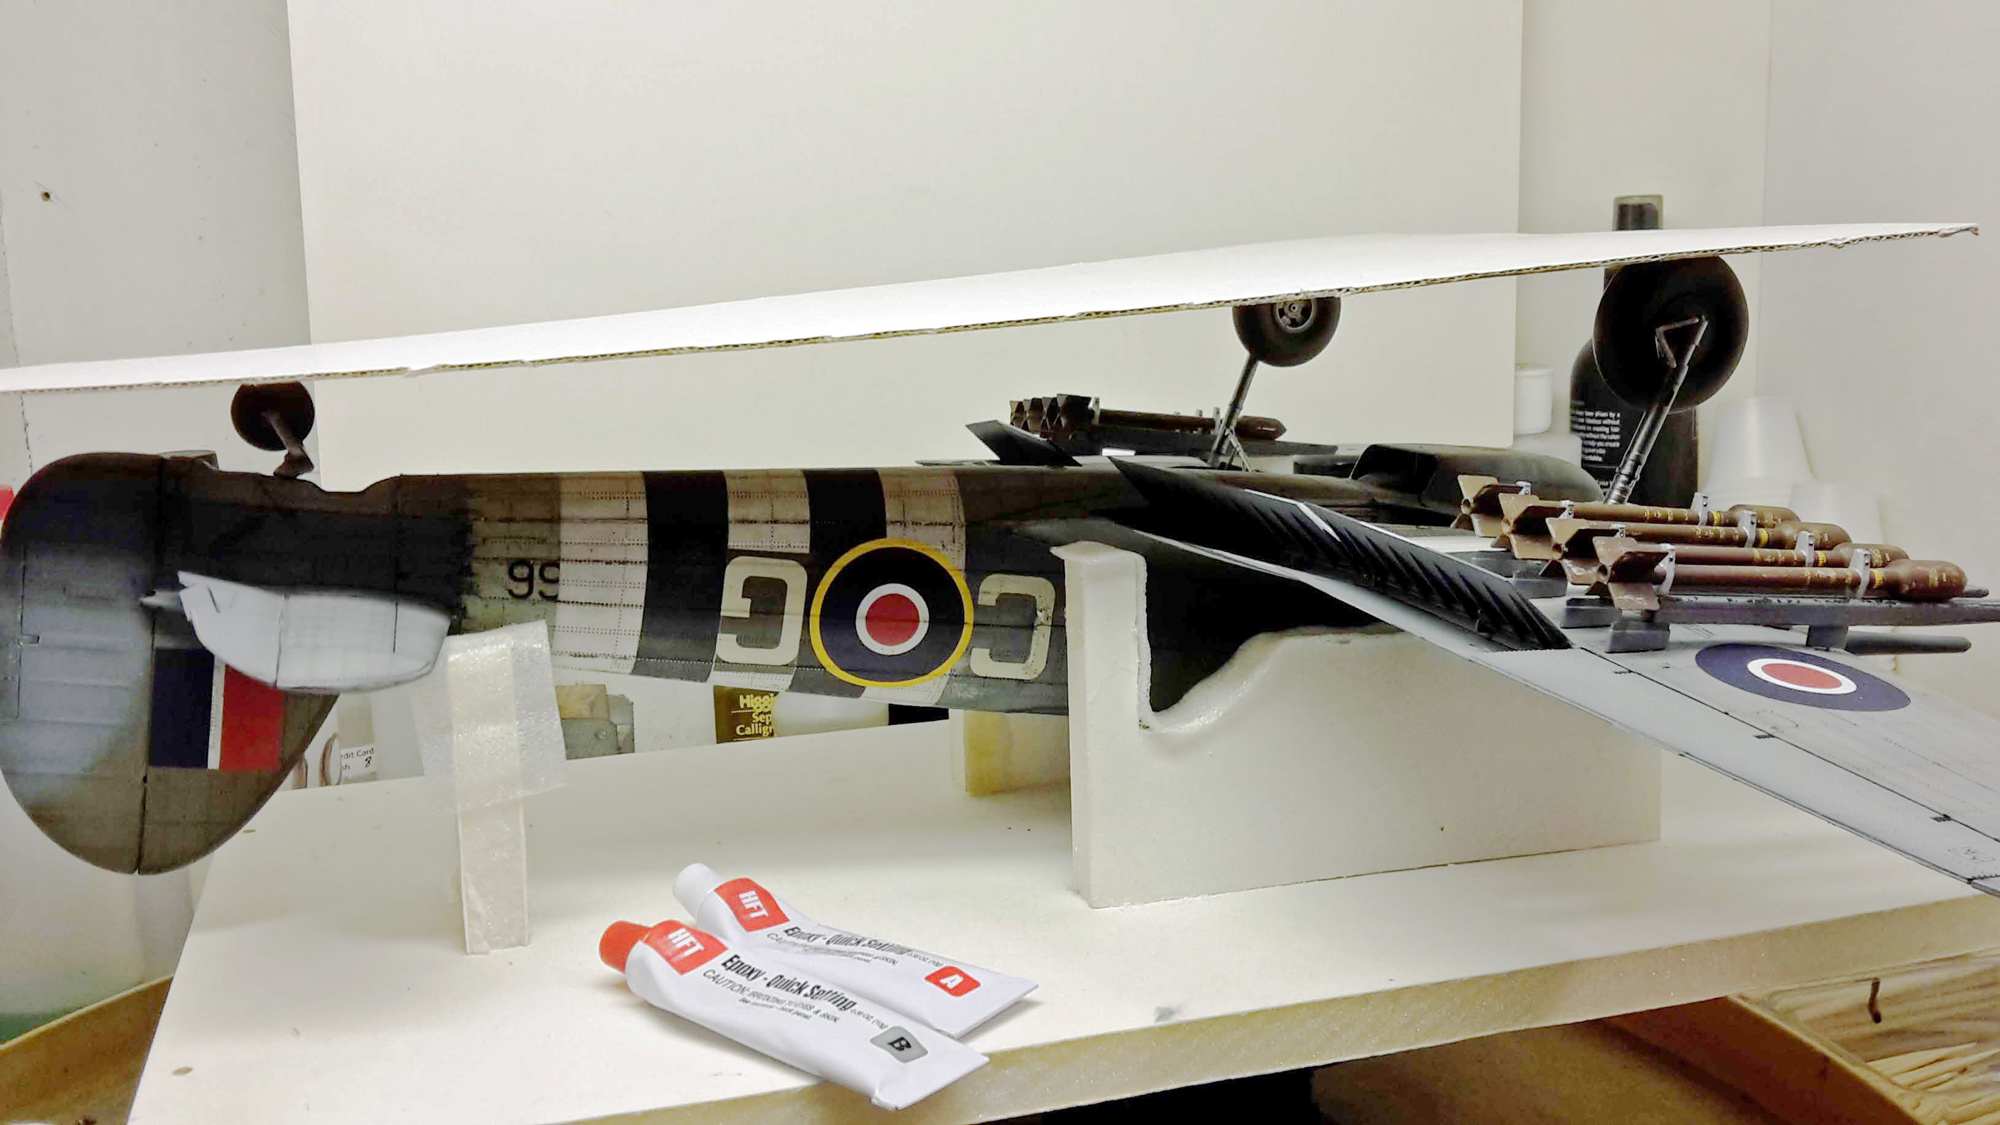
Once satisfied with the weathering, I prepared the model for its final flat coat. I first reworked my jig so the Typhoon could sit comfortably with lowered flaps and extended gear, then flipped the model over on its back and went to work. I started by attaching the four drop flaps and tail wheel hardware, followed by the rocket rails and rockets, pitot tube, pilot’s step, belly antenna, and then I got to the wheels….
The Wheels
To my dismay, the wheels provided in the kit have holes that are too small for the axles provided in the kit. No matter what combination I tried, the result is the same. What’s more – if you whittle down the main strut so that it fits in the hole in the wheel, and align the two-step ‘male’ end with the two-step female receptacle, the ‘flat’ portion of (one) wheel does not meet up with the table top. It’s not even close.
Perplexed, I typed ‘1/24 Typhoon fit problems wheels axles’ into Google and received a list of hits describing the problem in detail; some even with art, such as here: http://cs.finescale.com/fsm/modeling_subjects/f/2/t/161294.aspx
I sent two emails to Airfix; one to Airfix UK and one to Airfix USA, asking if there was some solution or new part available. After waiting three weeks with no response, I called Airfix USA and spoke with their representative who was unaware of the problem. He asked me to document the issue and send it to him, which I did, and he would forward the issue to Airfix UK. That was two weeks ago. Boo.
I had no choice but to move on. I drilled out the holes in the wheels, slipped the wheels on and filled the spaces with 2-part epoxy. While the epoxy was drying, I balanced a piece of flat cardboard on all three wheels to assist in lining up the ‘flat’ spots so they would sit properly on a table top when the model was set on its wheels.
Once the epoxy had time to cure, I carefully drilled holes in the wheel/strut/epoxy ‘blocks’ and inserted a small section of a steel hypodermic needle in each, fixing them with super glue. What a mess. Moving on.
Once the wheels were firmly set, I flipped the model over and attached the cannon bay doors, and the propeller and hub. With everything on except the canopy and wing lights, I gave the entire model a thorough coat of Vallejo Matt Varnish. I painted the inside of the wing lights Tamiya Clear Green (starboard side) and Tamiya Clear Red (port side) and put them on using Gator’s Grip Hobby Glue, described as a ‘white glue on steroids’. I then attached the canopy sections, touched up the shiny glue spots with a little Matt Varnish and poured myself a tall, cool drink. The Typhoon was done.
Conclusion
Looking at my hand-written notes across the 47 pages of instructions, I remember now what a considerable project this was, start to finish. Airfix did a great job with the instructions – I never once felt lost or overwhelmed. With a few exceptions, the fit was flawless and the assembly and finish brought forth all the positive energy I look for when I build a model – the big Airfix Typhoon was never once a chore.
That said, I had two significant problems; the first was with the fit where the parts came together under the nose of the aircraft, but I acknowledge this problem may have been self-inflicted.
The second problem was with the fit of the axles and main wheels, which can definitely be attributed to a problem with the kit I received. This issue’s significance lies in the fact that this is a relatively heavy airplane, and sturdy landing gear is absolutely essential. Equally as perplexing, I waited five weeks for Airfix to respond (in any way) to this well-documented issue before completing this review. Since it is not practical to add a third-party gear solution once the wings are assembled, I strongly recommend that modelers purchase an after-market set of landing gear and wheels to replace those in the kit before you start. As it is, my Typhoon sits unsteadily on wheels slapped together with epoxy and steel pins – not an ideal solution for a $149 kit.
On the other hand, if you are able to get through these two issues, a novice could build the rest of the kit. Assembly is straight forward, the plastic is workable and forgiving, there is no photo-etch or other quasi-exotic materials used, and as I said, the instructions and images are simply brilliant. What’s more, the decals are high-quality, thick, and go on with ease.
Finishing the Typhoon is another matter, especially if you choose a scheme with invasion stripes. Fortunately, every modeler is different and can take that part of the project as far as they want to go with it. The sheer size and weight of the model takes some getting used to - a properly built jig is a must-have. The other key to a nice finish is planning. I suggest you do as I did – write out all the steps required in detail, starting with dipping the canopy in Future though to attaching the pilot’s stirrup at the end, moving steps around as you go. The extra work will really pay off in the saved time and effort.
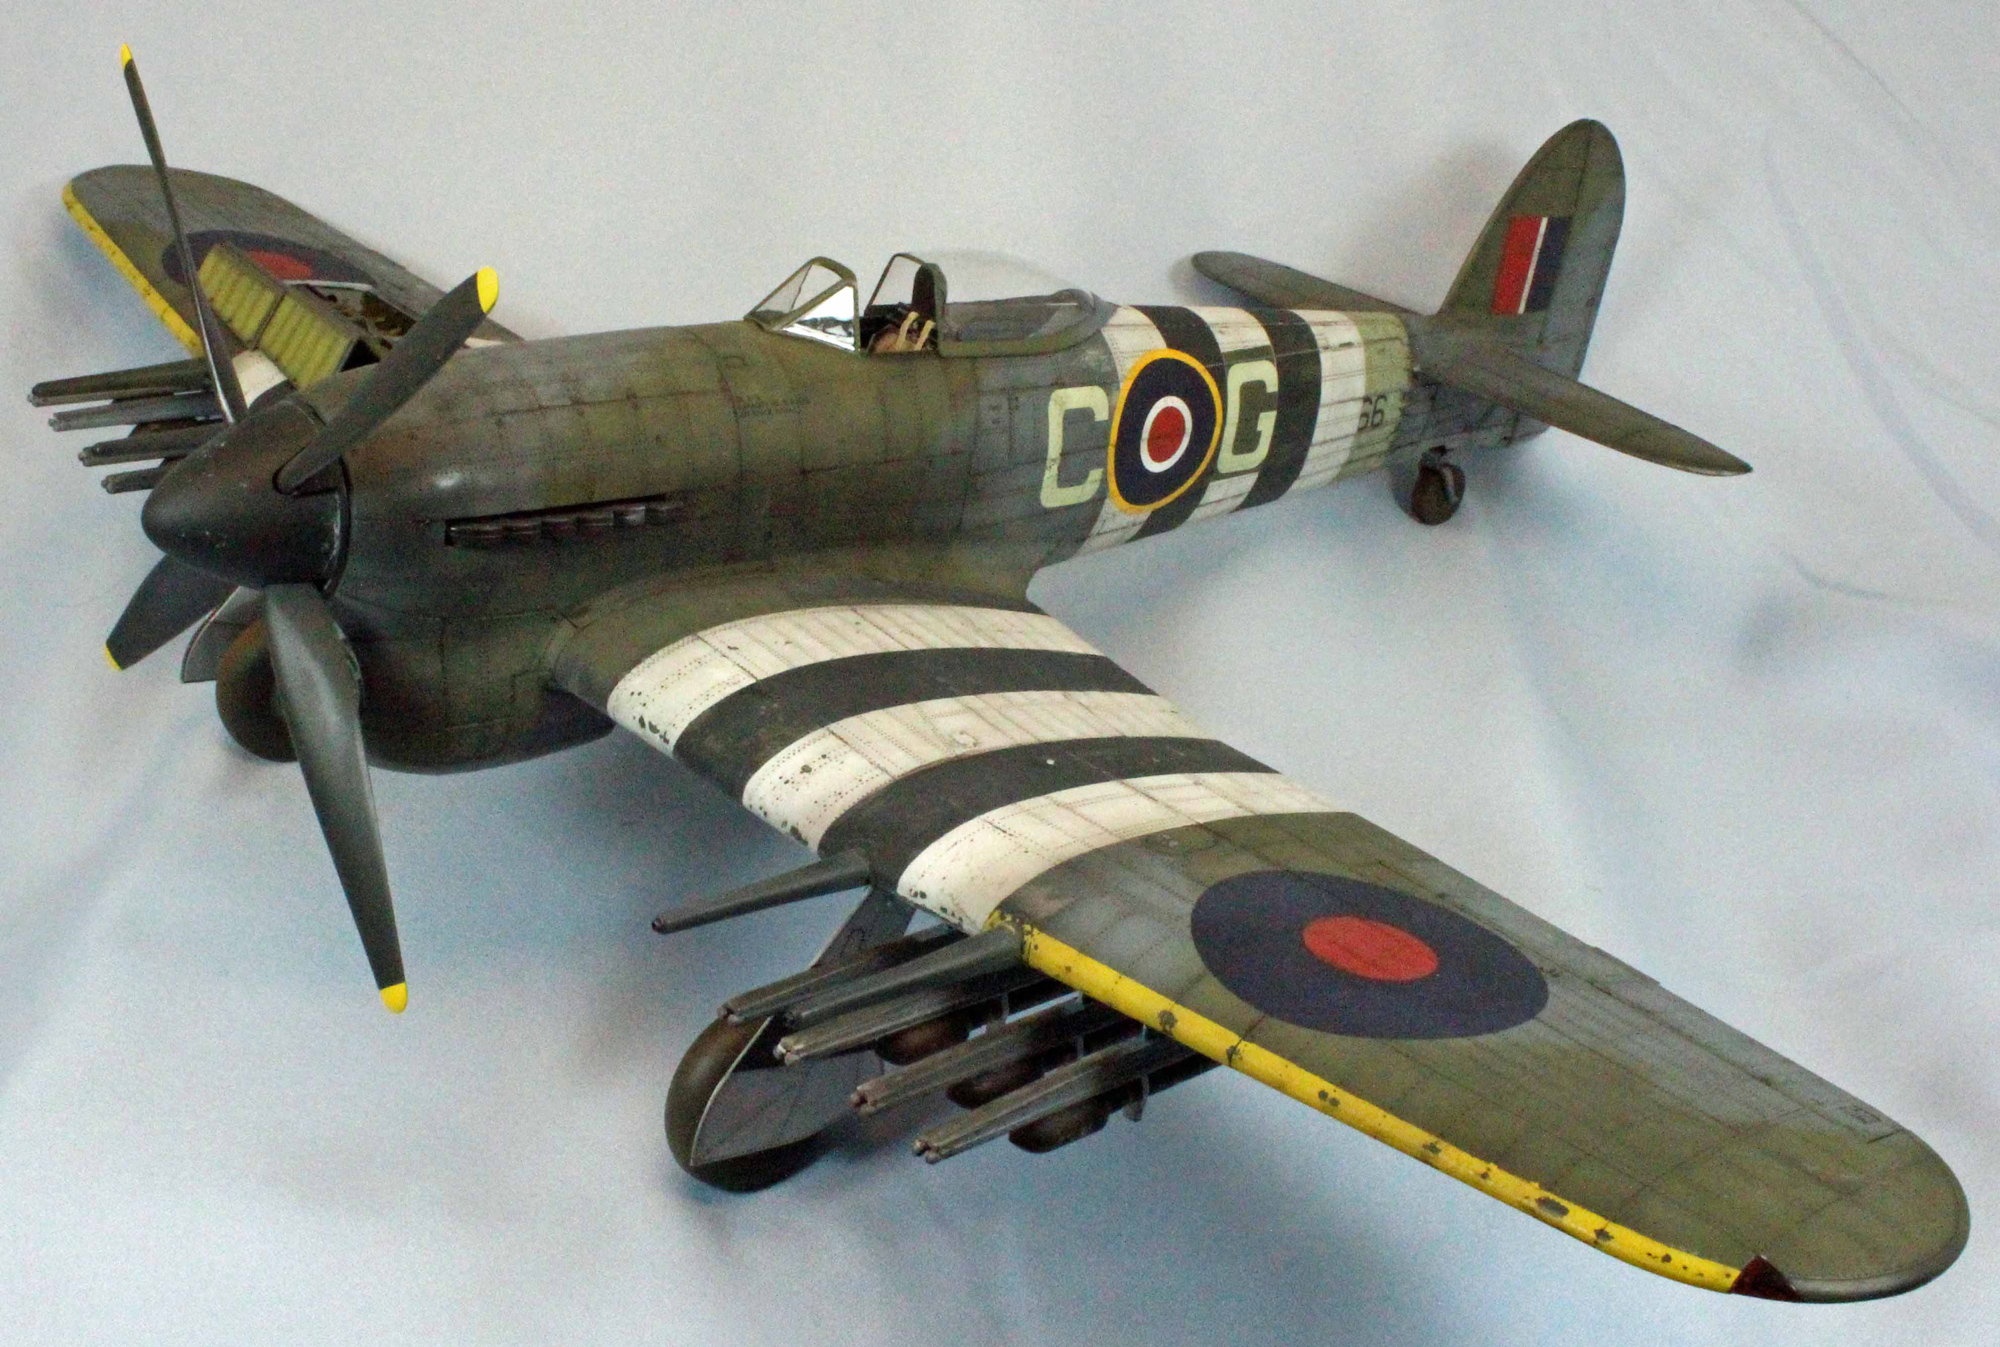
One thing is certain - when you are finished you will have an awesome model of an awesome airplane on your hands, combined with a huge sense of accomplishment.
I recommend this kit to experienced modelers only if they stick with the landing gear that comes in the kit. On the other hand, if an after-market product for the landing gear is used, then I feel just about any modeler who is up to the small challenges that a kit with so many parts and options offers will do fine. As always, I suggest that you make your big decisions up front. Build a nice jig, spend the time to carefully clean the parts thoroughly once separated from the sprues, and dry-fit everything. Try to remember to slow down, use your references, and by all means enjoy yourself. This is a great kit, and a great hobby!
First segment: Internal fuselage and wing structure, cockpit, engine and front end.
Second segment: Wing, gun bays, wheel wells, fuselage and tail.
Last Segment (this one): Weapon stores, final assembly and finish.
I would like to heartily thank Hornby Airfix for providing this kit for review, and to IPMS USA for giving me the opportunity to review it.